Bubbles – OOP assignment

Ideation

For this assignment, I wanted to create something that was colorful and dynamic. My immediate thoughts went to something that would grow on the screen and somehow interact with other objects.

First iteration – without OOP

First, I just wanted to draw a circle on the screen at a fixed position and have it grow in size.
Once I finished this, I worked on creating an object for the circles so that I can have multiple of them on the screen using an array.

Second Iteration – OOP

I also wanted to add some randomness to the way the bubbles change, so I used random for creating a different starting position, radius, color, and growth rate. I removed the stroke because it looks neater.

Bubbles pop!

To make the bubbles pop, I did something similar to a coin flip but with tighter constraints so that they pop slower.

Pop them yourself

Click on the bubbles to pop them.

Find the code here and below:

let bubbles = [];

function setup() {
  createCanvas(800, 800);

  for (let i = 0; i < 100; i++) {
    let colorVals = color(
      random(255),
      random(255),
      random(255),
      random(100, 150)
    );
    let growth = random(1.5);
    let diameter = random(5);
    let timer = random(20);
    let x = random(diameter, height - diameter);
    let y = random(diameter, width - diameter);
    bubbles.push(new Bubble(x, y, diameter, timer, growth, colorVals));
  }
}

function draw() {
  background(220);

  for (let i = 0; i < bubbles.length; i++) {
    bubbles[i].run();
  }
}

function mousePressed() {
  for (let i = bubbles.length - 1; i >= 0; i--) {
    let popped = bubbles[i].pop();
    if (popped) {
      bubbles.splice(i, 1);
      break;
    }
  }
}

class Bubble {
  constructor(posX, posY, diameter, timer, growth, colorValues) {
    this.color = color(colorValues);
    this.size = diameter;
    this.timer = timer;
    this.growth = growth;
    this.x = posX;
    this.y = posY;
    this.radius = this.size / 2;
  }

  run() {
    this.draw();
    this.update();
  }

  draw() {
    noStroke();
    fill(this.color);
    circle(this.x, this.y, this.size);
  }

  update() {
    this.size += this.growth;
    this.radius = this.size / 2;
  }

  pop() {
    let d = dist(mouseX, mouseY, this.x, this.y);
    if (d < this.radius) {
      return true;
    }
  }
}


Assignment 3: OOP

Inspiration

For this assignment, I was inspired by the  Tron movies.  While I was too young to watch the originals, I loved how cool the light cycles were and wanted to make a piece of art that was based on collections of lines moving independently.

The idea I had was to have a collection of random lines bounce off of the walls and off of each other. For added effect, I wanted the lines that bounced off of each other to swap colors, and the background of the piece was to be the color of the line with most bounces.

Implementation

I began writing the class for the Lines. Each had to have a stroke weight, initial X&Y position, a current X&Y position, a dy and dx, a current color, and a list of past colors and X&Y positions. Here’s the code for the constructor I used.

class BouncyLine{
  constructor(dx, dy, radius, posX, posY){
    this.color = color(random(255), random(255), random(255));
    this.dx = dx;
    this.dy = dy;
    this.radius = radius;
    this.posX = posX;
    this.posY = posY;
    this.initposX = posX;
    this.initposY = posY;
    this.numcollisions = 0;
    this.pastlist = [];
  }
}

I would have to update the current posX and posY based on dx and dy, and account for collisions along the wall. I would also have to push a previous line with the current initposX and initposY to the array I had, and then update initposX and Y to the current posX and posY.

updateList(){
  this.pastlist.push([this.initposX, this.initposY, this.posX, this.posY, this.color]);
    this.initposX = this.posX;
    this.initposY = this.posY
}
update(){
  this.posX += this.dx;
  this.posY += this.dy;
  if(this.posX > width-this.radius || this.posX<this.radius){
    this.dx*=-1;
    this.updateList();
  }
  if(this.posY > height-this.radius || this.posY<this.radius){
    this.dy*=-1
    this.updateList();
  }
}

Then, to draw the line, I would have to take the strokeWeight of the line, draw each line in the array, then draw the current one.

draw(){
    strokeWeight(this.radius*2);
    for(let i=0; i<this.pastlist.length; i++){
      stroke(this.pastlist[i][4])
      line(this.pastlist[i][0],this.pastlist[i][1],this.pastlist[i][2],this.pastlist[i][3]);
    }
    stroke(this.color);
    line(this.initposX, this.initposY, this.posX, this.posY);
  }

To simplify, I created a run() method that ran both draw() and update():

//method to draw the circle and update its position
run(){
  this.draw();
  this.update();
}

For the setup() function, I had to initialize all of the lines in an array, making sure that none of them started inside of each other.

let randradius;
let linelist = [];
let maxradius;
let xoffset;
let maxdx;
let maxdy;
let bg;

function setup() {
  createCanvas(500, 500);
  bg = color(220,220,220)
  xoffset = 30;
  maxradius = 3;
  maxdx = 3;
  maxdy = 3;
  for(let i=0; i<width/(xoffset+maxradius)-1; i++){
    randradius = random(maxradius);
    linelist.push(new BouncyLine(
      random(maxdx),
      random(maxdy),
      randradius,
      (i+1)*xoffset,
      random(randradius,height-randradius),
    ));
  }
}

I then had to account for collisions, which was done by checking the Euclidean distance between 2 lines. If a collision was detected, I would find the opposite of the dx and dy for both, and swap their colors after updating the lists for both lines. I would also note the number of collisions they have with each other by incrementing numcollisions for both.

checkCollision(otherHead){
    if(sqrt((otherHead.posX-this.posX)**2+(otherHead.posY-this.posY)**2)<(this.radius+otherHead.radius)){
      this.dx*=-1;
      this.dy*=-1;
      this.updateList();
      otherHead.updateList();
      otherHead.dx*=-1;
      otherHead.dy*=-1;
      let otherColor = otherHead.color;
      otherHead.color = this.color;
      this.color = otherColor;
      this.numcollisions +=1;
      otherHead.numcollisions+=1;
    }
  }

To draw them, I ran the run() method for everything in the linelist, and had a nested for loop to check each combination of lines if there was a collision.

function draw(){
  background(bg);
  for(let i=0; i < linelist.length; i++){
    linelist[i].run();
  }
  for(let i=0; i < linelist.length-1; i++){
    for(let j=i+1; j < linelist.length; j++){
      linelist[i].checkCollision(linelist[j])
    }
  }

Finally, I added a global function that compared the number of collisions, and extracted the color of the line with most collisions. I then set this to the bg variable, which updated each time.

function getMostCollisions(linelist){
  let maxcollisions = 0;
  let maxcollisioncolor;
  for(let i=0; i < linelist.length; i++){
    if(linelist[i].numcollisions>maxcollisions){
      maxcollisions = linelist[i].numcollisions;
      maxcollisioncolor = linelist[i].color;
    }
  }
  return maxcollisioncolor||bg;
}

My piece was complete, and looks like this:

Reflection

I really liked how OOP modularized everything and added to reusability. I would like to keep thinking about how I can best format my code for readability, as the page was pretty cluttered by the end. I would also like to think about expanding my class to handle a list of lines, so that the code would be even more organized.

Kashyapa Generative Artwork

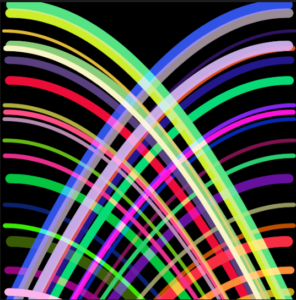
I started by looking at images of other generative artwork on Google images but I found nothing really interesting so I brainstormed and played around with different functions and shapes on P5Js until I decided to incorporate a ball with trails to create some form of design.

Of course, I looked at Professor Aaron’s trailing ball example from class to do this by replacing the background with a black rectangle instead. I also used the blend mode LIGHTEST to make the ball trails look better when they are blended together. Also I made an array to hold all the objects to be used and used a for loop in the draw function to continuously draw all the balls.

Then I wanted to incorporate some interactive elements into the art so I used the mouseClicked() function to initialize two objects of the Ball class with random radii on each side of the canvas each time a mouse button is pressed.

The Ball class consisted of a few variables to determine the features of each ball generated, and two functions, one to draw the balls and one to update their location, using the X speed and Y speed variables. I used the millis() function to record the timestamp when each ball was created and find the difference with the current time to cause the balls to accelerate downwards to make it look like they are falling.

In the end, repeatedly clicking at different heights on the canvas creates a pattern on the screen which is somewhat symmetrical.

Symmetry? (Assignment 2)

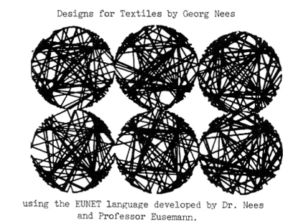
After browsing endlessly through the magazines and articles, I decided I was going to build a piece that resembled the following design by Georg Nees. I thought that using six different items in my work with different patterns would allow me to play arround with the functions we learned in class and further grasp the concept of randomness and noise.

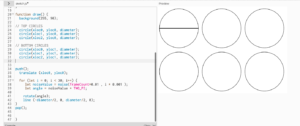
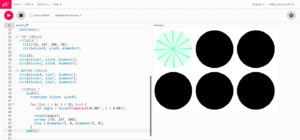
My first order of business was to draw the six circles on screen. Unlike the original piece, I decided it would look better if I prevented them from touching each other. This, because I wanted to use different colors on each. Below are some pictures of the initial code and experimentation. 

As soon as I set up everything I began to play arround with lines. I realized that, in order to build something to resemble the picture I was basing myself on, I would need lines with different lengths, and thus decided to play a little with the shapes I knew. I did this because I wanted my focus to be on for() loops, noise and randomness. Hence, I created three pairs of patterns that would give my art a symmetrical and unique feeling.

The more I worked on the project, the more I made it my own. I changed a lot of components I was not expecting to, and the last few hours of work were spent making sure that all of the elements made sense together and that the piece was aesthetically pleasing. Overall I am very happy with the final product. In the future, I would like to spend some time figuring out how to randomize the beginning and endpoints of the lines to, perhaps, do something more similar to the original piece.

The final product is composed of:

  • Circles 1 & 6: for() function creating green lines rotating with a noise value  on opposite directions and different scaling.
  • Circle 2: for() function creating circles in a random pattern slowed down by an “if” statement.
  • Circle 5: Orange circles varying in size through a noise value.
  • Circles 3 & 4: Blue rectangles rotating on opposite directions and with slightly different scaling.

Throughout the process, I lost all my work once because my computer crashed when I used i+3 as opposed to i+=3 when writing a noise function. One of my biggest takeaways is to constantly save the code, and to document the process. Never losing anything again 🙂


assignment 2

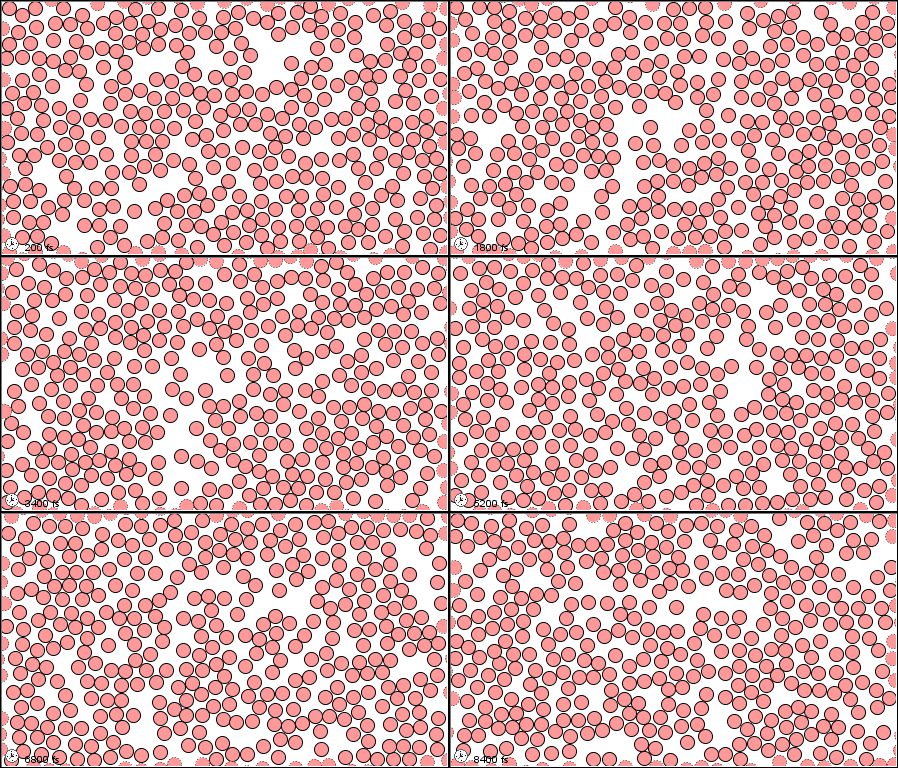
To be frank, I found this assignment much harder than the face portrait. While I tweaked my code for hours only to be rewared with incremental improvements, I wasnt able to achieve the art piece I envisioned with my current level of expertise. I wanted to model the haphazard, random and continues movement of air particles trapped in a container but I could only get to the particle part. Something like the gif below.

11.1: A Molecular Comparison of Gases, Liquids, and Solids - Chemistry LibreTexts

But I unfortunately couldn’t figure out how to move my many “air particles” once they had spawned in at random locations. Even with adjusting the circleX and circleY components the particels did not move. I will continue practicing p5.js and search up more tutorials so I am better prepared for the next assignments.

Assignment 2

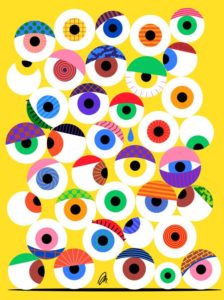
I had many ideas to do this assignment, yet I was stuck with a fixed idea of recreating this picture.(https://www.pinterest.com/pin/594827063294340838/)  and making it as if it was an animation. During the process, I was hoping to do a random change of pupil colours, I tried to play with the code many times yet I could not make the desired work. Apparently, I over-thought this assignment without considering that I do not have background knowledge. I used the “for” loop to generate many random eyeballs. Generally, I believe that I should have put more effort into making the assignment more complex in terms of coding rather than focusing on the superficial part, which took too much time. In the future, I will be more focused on understanding the basic concepts instead of being too concerned with the appearance of the project and just trust the process, but, at least, it was fun.

Assignment 2 – Cones and Colours

Initially, I wanted to replicate this artwork but with hands:

However, as I began this attempt, I realize that making hands from scratch is complicated and I did not yet know how to make this class of code (i.e. the several lines of code to create the hand in the first place) to be put into a for loop to print out several hands in random points across the canvas. So I decided to scrap that idea and move to using shapes already programmed within p5js. I again did not want to go with 2D shapes so I decided to play around with 3D and chose the cone.

It was pretty straightforward after, using the for loop to make the cone spiral and rotate throughout the canvas. But then I changed a few lines of code and the cone began to spiral inwards to the center and then back out again – I still do not understand how or why and I cannot get it to go back to the original rotation.

So here is the final product – that includes two versions and one slightly different one:
Version 1: with no Fade

Version 2: with Fade – I could not make it turn out the way I wanted it to. The fade worked separately, but once interacting with the rotating shape, it blocked out the background of dragging cones.

Version 3: something a little different