Assignment Number 3: Fractal Lightning/Tree

For this assignment, I wanted to create a Mandelbrot set initially. But after giving it some thought I realized simulating a 3-dimensional space with imaginary numbers on the z-axis may be a bit out of my current scope. Instead, I decided to investigate the techniques used to create simple versions of fractals. The initial version of the fractal tree was straightforward and made a beautiful pattern by using a simple if() loop to keep making branches until it reached a 1-pixel length.

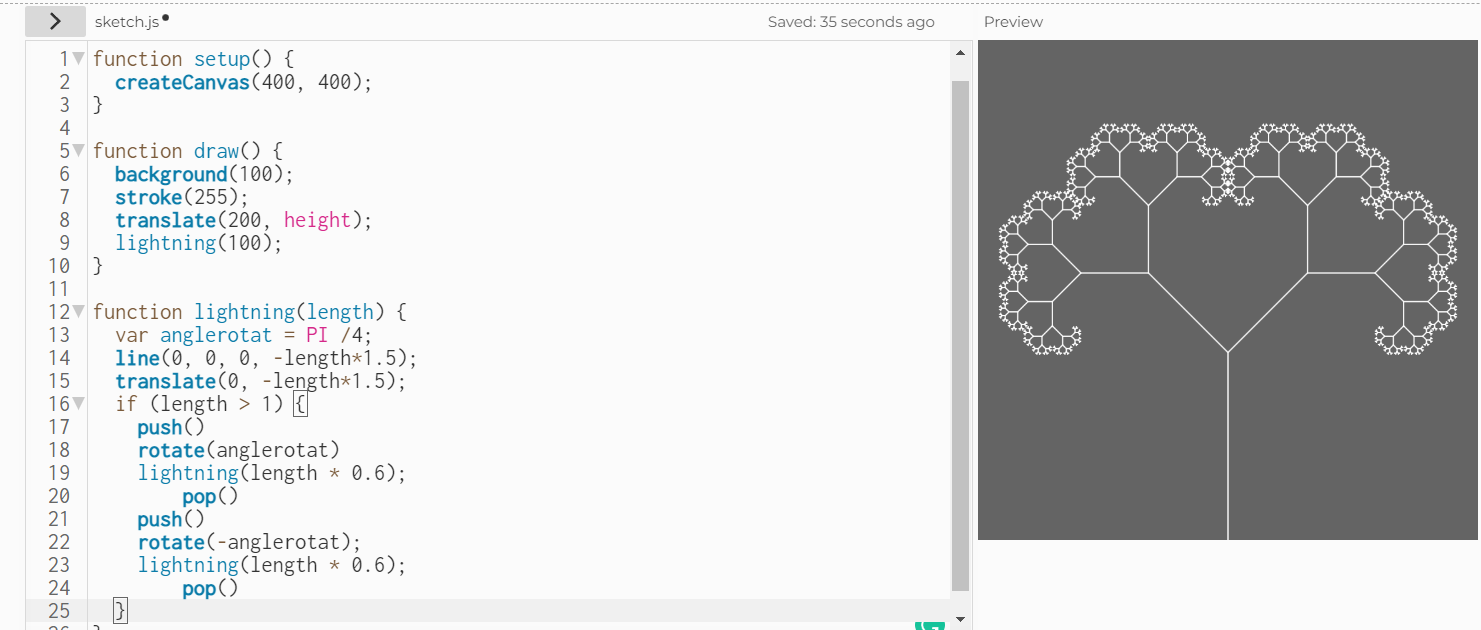
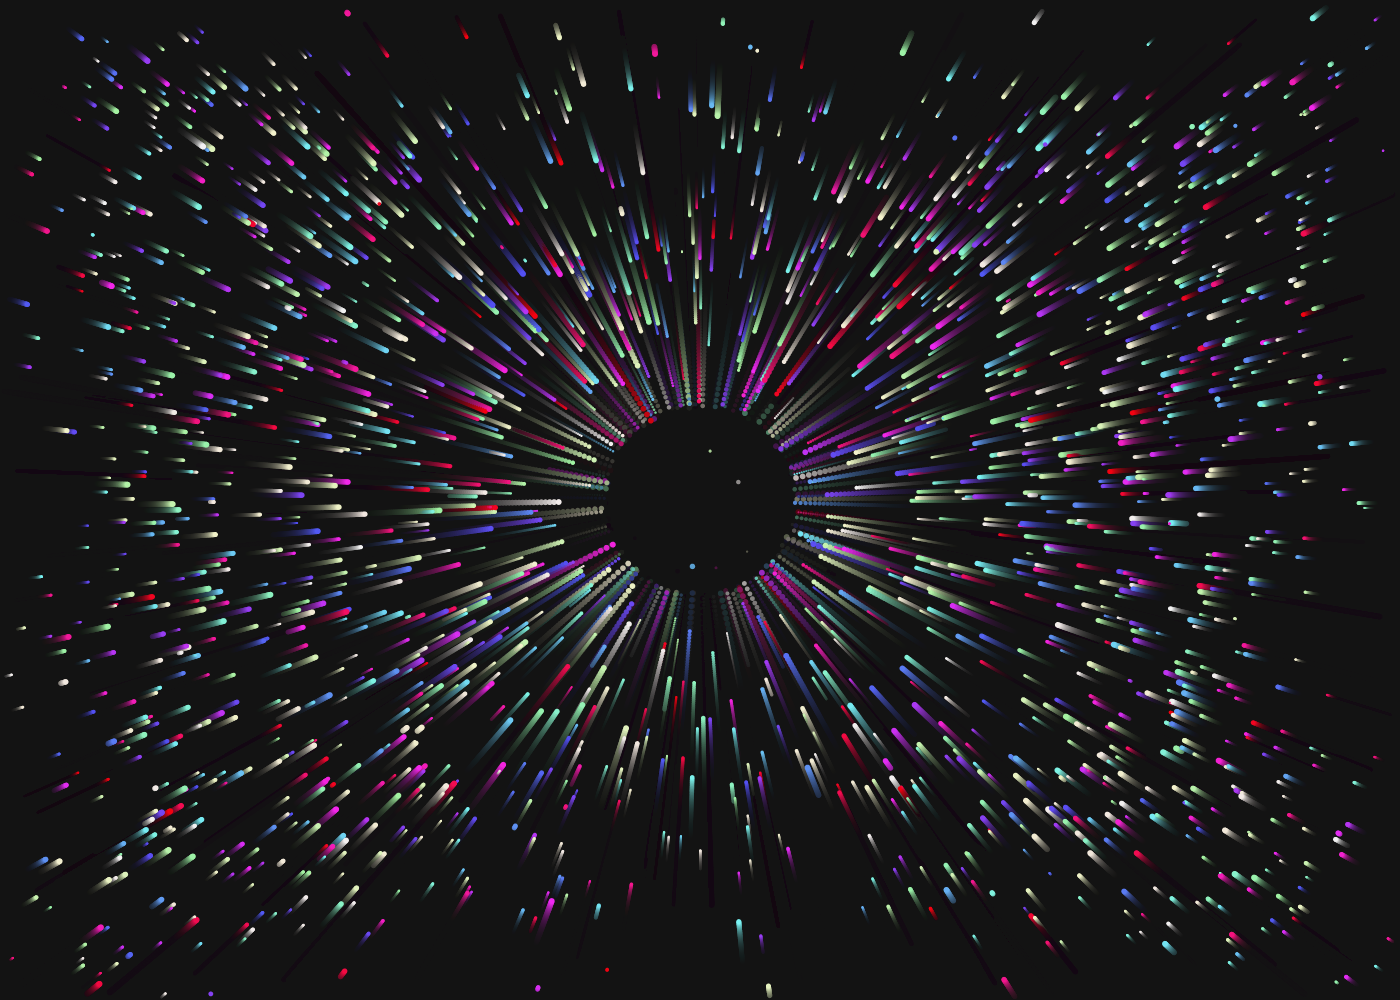
After this, I decided to randomize the variables controlling the color and the rotation coefficient of the fractal pattern. at this point, the pattern started reminding me of a lightning strike specifically one that you might see coming out of wizard wands in fiction works like Harry Potter.

function setup() {
  createCanvas(400, 400);
}

function draw() {
  background(100);
  stroke(random (0,255));
  translate(200, height);
  lightning(100);
}

function lightning(length) {
  var anglerotat = PI /random(4,5);
  line(0, 0, 0, -length*1.5);
  translate(0, -length*1.5);
  if (length > 1) {
    push()
    rotate(anglerotat)
    lightning(length * 0.6);
        pop()
    push()
    rotate(-anglerotat);
    lightning(length * 0.6);
        pop()
  }
}


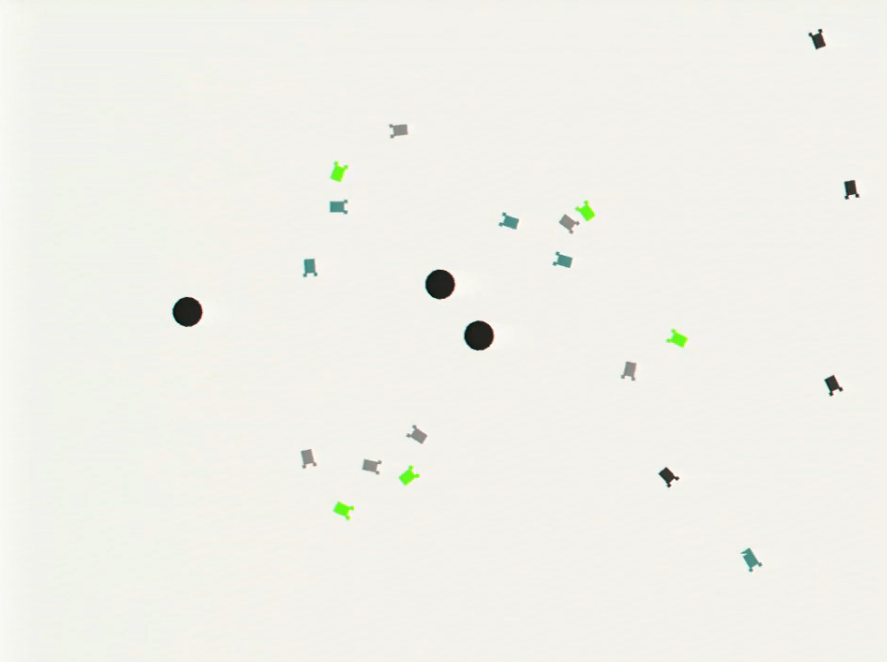
So, I decided to use the skills I learned while making this fractal tree to make another version that would use a conditional statement to create lightning when the mouse was pressed. Additionally, I wanted to add spark effects. The most efficient way to create multiple lightning effects, as well as sparks, is to create classes of the respective elements and use them later as pleases.

However, at this point, I ran into a problem.

// function setup() {
//   createCanvas(400, 400);
// }

// function draw() {
//   background(100);
//   stroke(255);
//   translate(200, height);
//   lightning(100);
// }

// function lightning(length) {
//   var anglerotat = PI /3;
//   line(0, 0, 0, -length);
//   translate(0, -length);
//   if (length > 1) {
//     push()
//     rotate(anglerotat)
//     lightning(length * 0.6);
//         pop()
//     push()
//     rotate(-anglerotat);
//     lightning(length * 0.6);
//         pop()
//   }
// }
class fractalTree {
  draw() {
    function draw() {
      background(100);
      stroke(255);
      translate(200, height);
      lightning(100);
    }

    function lightning(length) {
      var anglerotat = PI / 3.5;
      line(0, 0, 0, -length * 1.5);
      translate(0, -length * 1.5);
      if (length > 1) {
        push();
        rotate(anglerotat);
        lightning(length * 0.6);
        pop();
        push();
        rotate(-anglerotat);
        lightning(length * 0.6);
        pop();
      }
    }
  }
}

let myfractalTree;

function setup() {
  createCanvas(400, 400);
  myfractalTree = new fractalTree();
}
function draw() {
  background(50);
  myfractalTree.draw();
}

As seen above, this code refuses to run and I have spent over 2 hours tweaking it to figure out why it won’t even display my magic lightning, let alone render according to conditional statements.

regardless, through this exercise, I learned about the rotate function and translate function which allows manipulating different objects on the canvas and is useful when creating artworks that require changing the origin or reference points for multiple assets.

Week 3-OOP

For this assignment I didn’t have any ideas or inspiration to create the artwork as such, everything happened more intuitively so that I could better understand the information covered in the lessons. I referred to images such as the starry sky or the summer garden, but did not attempt to recreate an exact copy. At this stage, dealing with arrays and classes was a priority for me. I worked a lot with velocity for the second work with triangles(garden). Thus, I determined the coordinates of triangles and their further movement.

stars

Useful links for me (there were a lot of them, but here are some of them):
https://happycoding.io/tutorials/p5js/, The Coding Train, https://openprocessing.org/class/57891/

Since this time I have been dealing with basics of OOP for a long time, I spent more time understanding how the new tools are interconnected with each other. For the next time I would like to make a more or less advanced version of my work, devote more time to the visual. For example, I’m confused about how to add a background image, next time I would like to learn this. Moreover, I would add a couple of shapes and make the triangles real butterflies and the circles stars. Also, I would like to add the effect of “shooting stars” to the stars, since I started to get acquainted with this function.

Assignment 3 – OOP

For this assignment, I decided to create a tree with flowers. I struggled a lot with what I wanted to do for this assignment. Since I didn’t have a starting point or any idea what I wanted to do, I spent a lot of time trying to figure out what I wanted to create. This also led to me changing my mind numerous times (there are 4 versions of this assignment, the first 3 are incomplete because I kept changing my mind with what I wanted to do).

Coding Process
show() {
    for(let i = 0; i < 3; i++) {
      ellipse(this.pointX[i], this.pointY[i], 10);
    }
    
    beginShape();
    vertex(this.vertexX, this.vertexY);
    for(let i = 0; i < 10; i++) {
      bezierVertex(this.pointX[i], this.pointY[i], this.pointX[i+1], this.pointY[i+1], this.pointX[i+2], this.pointY[i+2]);
    }
    endShape();
  }
}

The code above is part of the v1 of assignment 3. I wanted to tackle bezier curves, but it didn’t end up quite the way I wanted. I watched a few videos explaining how it worked, but I was still kind of confused so I decided to just experiment with it. I tried to shortcut my way around writing multiple points by using for loops, but when I wrote the code to create the shape, I got an error about the variable scope. Therefore, I decided to give up on this “shortcut” and try something else.

The ellipse placements reminded me of a galaxy, so my next version was an attempt to create galaxy art. I originally wanted the stars to twinkle by changing the alpha of the color and I also wanted to make the stars grow and shrink. I also wanted to create the galaxy cloud effect somehow and add some shooting stars. However, I realized that this idea was a bit too ambitious, and during the process of making the stars grow I had another idea.

The final idea was to create a tree with growing flowers. For some reason, as I was playing around with the “breeze” blowing the flowers, I started to make it flowers falling off a tree. Here is the code:

breeze() {
   if (this.pointX < this.pointX + 50) {
     this.pointX += random(-1, 1);
     this.pointY += 0.75;
   }
 }

But for the final version, I decided to make the flowers grow and shrink. I made the flowers arcs instead of ellipses because I felt like it was more interesting to see different compared to different sized ellipses.

The fractal tree I got from this example. I also watched The Coding Train video on fractal trees, but I mainly used the tree by Yuan Hau. I tried to experiment with the tree by changing the strokeWeight() and angle, but I didn’t keep those changes. This will be part of my future improvements and ideas.

Future Improvements and Ideas

One thing that I found interesting was changing the angle of one side of the branches. This created a bent tree, which I thought would have been cool to work with. However, I wasn’t sure how to bound the flowers to the shape of the tree. What I did was restrict it to a box by using random(), but it doesn’t fit the shape of the tree. For improvements, I want to figure out how to make the flowers follow the shape of the tree.

To add more improvements to the tree, I feel like it looks too mathematical and organized. So, for the future I want to make it have different thicknesses in the branches, different angles, and different lengths in the branches. I did try to experiment with these three things, but with the experiments I crashed my program several times…

One thing I had an issue on with all four versions was choosing a random color. For example, for v4 I wanted a random color for each individual flower, but my code randomly picks one color from the array once for all the flowers. The color will change every time you run the program though. Since I have a specific set of colors, I put it into an array:

flowerColors = ["#EC275F", "#F25477", "#E476A6", "#F3868C"];
let oneFlower = [];

function setup() {
  createCanvas(550, 550);

  pickAColor = floor(random(flowerColors.length));

The code above is the bit that creates a variable to pick a random element in the array. This is the link to the reference I used to figure out how to use floor() (actually I used a different reference, but my very first sketch crashed before I saved so I lost the reference).

show() {
   this.color.setAlpha(200);
   fill(this.color); //how to make each individual flower have a different, random color?
   arc(
     this.pointX,
     this.pointY,
     this.size,
     this.size,
     this.arcPt1,
     this.arcPt2
   );
 }

The code above is in my class Flowers, where I fill the color of the flower and change the alpha to be more transparent. I tried to use a loop, but that didn’t work. So this is another aspect that I want to improve in the future.

Finally, I want to work on is the breeze. Currently, it doesn’t look as smooth as I want it to look. I feel like to do this, I would need to incorporate some physics and more math.

Overall, while I’m not totally satisfied with how the final code ended up looking, I did try to experiment and take risks with this assignment, which is a win.

Assignment 3- Generative Artwork using arcs

Concept

In this assignment, I wanted to come up with something interactive that starts moving on the screen randomly and would make the viewer so confused about what the result could be, then after a while, the viewer would understand everything and see the beauty behind the chaos. Therefore, I decided to add multiple arcs to the screen that have an angle that is even less than a quarter of a circle. Each time an arc bumps into a wall, its stop angle is increased and gradually becomes closer to looking like a full circle. When an arc becomes a full circle, its position is transferred to the center of the screen and it freezes there. I designed the work in a way such that smaller arcs are slower than faster arcs, thus the biggest arcs will freeze earlier, and with time as the smaller arcs freeze they fill the whole screen with concentric circles that would look amazing. You can see this interactivity in the sketch below.

To be able to come up with this sketch on p5.js I used an object-oriented programming approach, in which I created a class called bumpingArc and added member functions to this class. I added a constructor where I initialized all necessary variables such as the xPosition and yPosition of the arcs, as well as the dimensions of the arc. I decided to add parameters to my constructor so that when I create various objects in my class, I would have the freedom to modify these variables. You can see the code for the class attached below.

class bumpingArc {
  //initialize important variables in the constructor
  constructor(speedX, speedY, diameter) {
    this.xPos = width / 2;
    this.yPos = height / 2;
    this.xSpeed = speedX;
    this.ySpeed = speedY;
    this.stopAngle = 60;
    this.arcDiameter = diameter;
    this.angleChange = 30;
    this.Rcolor = random(0, 255);
    this.Gcolor = random(0, 255);
    this.Bcolor = random(0, 255);
  }
  //change the position of the arc each frame by adding xSpeed and ySpeed to initial positions
  moveArc() {
    this.xPos += this.xSpeed;
    this.yPos += this.ySpeed;
  }
  //check if the arc hit the bound, if yes increase the angle of the arc and flip positions
  checkBounds() {
    if (this.xPos >= width || this.xPos <= 0) {
      this.xSpeed = -this.xSpeed;
      this.stopAngle += this.angleChange;
    }
    if (this.yPos >= height || this.yPos <= 0) {
      this.ySpeed = -this.ySpeed;
      this.stopAngle += this.angleChange;
    }
  }

  changeArcColor() {
    //check if the arc becomes a full circle if it becomes a full circle place it in the center and freeze it
    if (this.stopAngle % 360 == 0) {
      fill(this.Rcolor, this.Gcolor, this.Bcolor);
      this.xPos = width / 2;
      this.yPos = height / 2;
      this.xSpeed = 0;
      this.ySpeed = 0;
    }
  }
  //drawArc functions draws an arc using the variables defined in the constructor

  drawArc() {
    arc(this.xPos,this.yPos,this.arcDiameter, this.arcDiameter, radians(0), radians(this.stopAngle));
    
  }
}

In addition to this, I added some other member functions to the class to be able to move these arcs and increase their angle when they are bumped into the wall, and freeze them when they become full circles. Most importantly, I added a member function to draw these arcs. To be able to make use of this class, I created an array of objects of this class, and I passed different parameters to each object. After that, I created another for loop to call all the functions related to these objects so that I can draw them in the way I wanted You can see the code for the objects attached below

let newArc = []; //initializing newArc as array as we will define arc objects
function setup() {
  createCanvas(400, 400);
  let xSpeed = 5; //initializing some variables to be passed as parameters to the constructor
  let ySpeed = 3;
  let initialDiameter = 400;
  //creating an array of size 10 to create 10 objects of class bumpingArc
  for (let i = 0; i < 10; i++) {
    newArc[i] = new bumpingArc(xSpeed, ySpeed, initialDiameter);
    xSpeed = xSpeed - 0.35;
    ySpeed = ySpeed - 0.35;
    initialDiameter -= 35;
  }
}

function draw() {
  background(220);
  strokeWeight(5);

  fill(255, 255, 255); //create a for loop to call the functions of each object and draw 10 arcs
  for (let i = 0; i < 10; i++) {
    newArc[i].moveArc();
    newArc[i].checkBounds();
    newArc[i].changeArcColor();

    newArc[i].drawArc();
  }
}

I was so happy and excited to see how my initial idea grew and how I was able to come up with this nice generative artwork that is generated purely from arcs. I was not inspired by any other artwork during this assignment.  Initially, I was only trying to test out how to use arcs with classes and objects realized that arcs can be manipulated in many ways, and after testing out a couple of things I realized that so many different and amazing artworks can be generated from the movements of arcs. Then I came up with this idea which I enjoyed implementing.

Possible Improvements

I still believe that more work can be done to make this artwork more interesting and understandable to others. This is because I believe that any viewer will not understand anything when they first see tens of arcs bumping over each other. Therefore, to solve this issue I believe that the best thing would be to create a new arc object of smaller size only after the previous arc is positioned in the center and freezes over there. In addition to this, I realize that all arcs change color whenever one of them becomes a complete circle. I was not planning to do this initially, but it ended up being like this. Therefore I would like in the future to control the colors of these arcs in a better way and make my code even work in a great way for a higher number of arcs.


Assignment 3: Sudoku using OOP

Concept

For this assignment, I decided to generate one of my favorite games, Sudoku. The board is generated, styled, and displayed with the help of the ‘Cell’ class and using loops.

Code highlight

// %%%%%%%%%%%%%%%%%%%%%%%%%%%%%%%%%%%%%%%%%%%%%%%%%%%%%%%%%%%%%%%%%%%%%%%%%%%%%
function setup() {
  createCanvas(500, 500);

//populating the board
  board = [];
  
  grid = [ [3, '', 6, 5, '', 8, 4, '', ''], 
         [5, 2, '', '', '', '', '', '', ''], 
         ['', 8, 7, '', '', '', '', 3, 1], 
         ['', '', 3, '', 1, '', '', 8, ''], 
         [9, '', '', 8, 6, 3, '', '', 5], 
         ['', 5, '', '', 9, '', 6, '', ''], 
         [1, 3, '', '', '', '', 2, 5, ''], 
         ['', '', '', '', '', '', '', 7, 4], 
         ['', '', 5, 2, '', 6, 3, '', ''] ]


  for (let i = 0; i < 9; i++) {
    for (let j = 0; j < 9; j++) {
      board.push([]);
      board[i].push(new Cell(i, j, grid[i][j]));
    }
  }

// 9x9 board, text size, and text location
  scl = width / 9;
  textSize(30);
  textAlign(CENTER, CENTER);
}


function draw() {
  for (let i = 0; i < 9; i++) {
    for (let j = 0; j < 9; j++) {
      board[i][j].display();
    }
  }
}

//cell class and display options
class Cell {
  constructor(i, j, value) {
    this.i = i;
    this.j = j;
    this.value = value; //value will be taken later from the grid array
  }

  display() {
    stroke(0);
    fill("#f2eecb");
    rect(scl * this.i, scl * this.j, scl, scl); // dividing the grid 9x9     with rectangles
    fill(0);
    text(this.value, scl * this.i, scl * this.j, scl, scl);
  }
}
// %%%%%%%%%%%%%%%%%%%%%%%%%%%%%%%%%%%%%%%%%%%%%%%%%%%%%%%%%%%%%%%%%%%%%%%%%%%%%

Embedded sketch:

Reflection and ideas for future work or improvements:

The next step would be modifying the code such that it generates [solvable] Sudoku boards instead of manually placing numbers in the board matrix. And then the next step would be adding another button that actually solves the board. This might be what I’ll be working on for the midterm.

Assignment 3: OOP Generative Art

This assignment seemed similar to the previous one except how I approached the problem. The goal is to generate art Through Object Oriented Programming (OOP). After seeing an art in Eyeo2012 – Casey Reas video, I wanted to create something similar to the the below image:

9:17

Small, individual creature-like objects moving around black dots. This looked interesting to work on. So, initially, I thought about placing food, creatures, and their predators. But while simulating how my code will work, I realized that it will require a lot of resources(avoiding collisions, having a proper line of sight, etc.) to populate even hundreds of creatures. So, instead of having creature-like objects, I decided to make something simpler: objects that follow gravity.

The above is done as a class work. However, it does not seem like a generative art because it looks too vacant. Also, I do not want the center of gravity to shoot away objects. So I worked on details.

Better. There are 2 major changes other than fancy colors. First, there are tails to the moving objects. As objects move, they leave traces of their previous positions. This is done by a simple trick: instead of overwriting the board with a solid color, use a color with high transparency. The below is the code.

background('rgba(0,0,0, 0.08)');

Second, when particles move too close to the center (and therefore are at risk of being launched back in high velocity), they become reinitialized through init() function. The function is basically a constructor but has a callable name. The below shows how it is done.

constructor() {
  this.init();
}

init() {
  this.size = random(2,8); // random size
  this.vx = random(-3,3); // initial x velocity
  this.vy = random(-3,3); // initial y velocity
  this.x=this.size/2 + random(width-this.size); // initial x position
  this.y=this.size/2 + random(height-this.size); // initial y position
  this.px=this.x;
  this.py=this.y; // previous x and y (for smoothing shapes)
}

...
if (d<30) {this.init();}
...

While working on the above code, I worked on another branch of the project in parallel. Its features include mouse position being the center of gravity and changing the direction of gravity (positive and negative gravity). The sketch is created for the purpose of practice (thus labeled “PR”), so the code is a bit messy and commented not-so-greatly.

Wait… This reminds me of a firework… 

Inspired by what was seen in the above sketch, I created a firework as a side project (“PR”actice). In a big picture, it operates the same way as the gravity function. A circle (point of negative gravity) moves toward the center, and when it reaches its maximum height, 500 colorful circles get teleported around the circle and get pushed away. For more realistic visuals, particles follow gravity toward the floor and their size become smaller as they “burn” over time.

I know. There are too many sketches in one post. I promise to finish my post with one last thing, the generative art. Now that I think of it, it has much less code and complexity compared to the firework, but it does what it needs to do. It should be alright. It is very similar to the second sketch, with slight modifications such as smaller particles and having no velocity other than toward the center.

The biggest problem I encountered during this project was not the difficulties in coding, but headaches I got from my own artwork. Before realizing it was a terrible idea (I just realized as I write this post), I made my generative artwork colorful, which looked like the below.

Click the canvas to see colored version.

Imagine seeing thousands of these colorful moving dots and fine-tuning parameters and functions for hours. Definitely a terrible idea. Now I learned that more color does not mean a better art. It was a costly lesson. I hope other people to not make the same mistake as I did this time.


Assignment #2 – Disco Disc

Concept:

I didn’t have a clear image of what I wanted to produce when I first created the canvas, but I knew I wanted to incorporate the skill of randomly switching from one color to another. At the very beginning, I wanted to devise many small circles with switching colors, but after having problems duplicating the circles, I decided to just focus on creating one giant one, which inspired me to create a disc with flashing colors, like a disco-themed disc. I also added some repeating white circle outlines within the giant disc, so that it will create an effect of a record disc.

* duplicating many circles like this one to fill the entire screen was my original vision.

Process/Coding:

First, I created my background, which I made into a dark navy color. I wanted the background to be dark so that it will help the flashing colors pop out more, but I also didn’t want it to be completely black because that was too basic! As for creating the main “disc” as well as its details such as the switching colors, white outline strokes, etc., I consulted a YouTube video called “4.1: while and for Loops – p5.js tutorial” from a channel called “The Coding Train.” From this video, I was able to learn new skills such as how to use the “strokeWeight()” (which controls the thickness of a stroke) and “stroke()” (which controls the color of a stroke) function, which I used to outline my disc circle and to create smaller circles within it. This was a huge highlight of this project, and here’s the coding that I used for creating the white stroke around the entire disc:

// thick white stroke around the "disc"
function draw() {
  strokeWeight(7);
  stroke(255);

(original author of the code: Daniel Shiffman, link to the code: https://thecodingtrain.com/tracks/code-programming-with-p5-js/code/4-loops/1-while-for)

Here’s the gradual progress from the original one big circle to adding more white circle outlines within the disc:

As for the loop, which was the main technique that we had to use for this project, I set xPos, yPos, height, and width, and used “for” to create a condition in which the loop will continue to run. Because I was still unsure about how to create loops, I got help from Professor Shiloh’s example from the lecture notes. Here’s the code that I used to create the loop:

//loop
for (yPos = 300; yPos < height; yPos = yPos) {
  for (xPos = 300; xPos < width; xPos = xPos) {
}
}

(original author of the code: Professor Michael Shiloh, link to the code: https://github.com/michaelshiloh/IntroductionToInteractiveMedia/blob/master/lectureNotes.md)

Final Product:

It took a while to figure out how to switch colors in order to create the “flashing” effect, as well as layering the white circle outlines so that none of them overlap but decrease slowly in size, but eventually I was able to finalize my disco disc:

Reflection:

This project has taken significantly less time than my first one, although the skills that I’ve used were less “basic” and a little bit more “intricate,” which I found interesting. I’ve had a blast with this one because I’m slowly grasping the language of coding, and it’s so awesome to be able to conquer one skill at a time and use them to produce something that I’ve visualized in my head. I’m extremely happy with the switching of colors, and if I try something like this again next time, I’d like to figure out how to make the entire disc move around, because I still haven’t really figured out how to make mobile projects!

(a very rushed) self-portrait!

Concept:

To be frank, I didn’t have the luxury to be creative with my self-portrait because I was running dangerously low on time; actually, creating a mini version of me with my (very) limited knowledge of coding seemed almost impossible.
So in hopes of keeping the assignment as simple as possible, I focused on the main central characteristics of myself: the colors of my hair, skin, eyes, etc., my general build, and my most common facial expression. Although I initially hoped to focus on the details of my face specifically, I quickly realized the limits of my current coding experience, which mdae my drawing very basic.

Process/Coding:

Thankfully, I was able to gather bits of coding techniques from Professor Shiloh’s lecture notes, specifically on shapes, colors, and the background. Some struggles that I’ve faced during this project were: 1) figuring out the RGB color codes manually until I realized that I can use a tool called “color picker” to generate the codes without having to try out a bunch of different ones, 2) positioning the shapes in the desired spots, which also took a lot of trials and tribulations, and 3) creating arcs, which was honestly the hardest part of this project. Because the arc was the most challenging for me, it’s also the part of my project that I’m most proud of.
Here’s the code that I used for it:

fill(252, 28, 3);
arc(x, y, 70, 100, radians(30), radians(150), CHORD);

Despite the numerous complications (and the frustrated growls I’ve made while creating this), I did have some small wins as well, such as being able to master features such as “fill” and “function draw,” as well as learning how to create the general shapes such as a rectangle, ellipse, etc.

Here is my final product:

Reflection:
There are so many new skills that I want to try out for my upcoming projects that I didn’t quite have the time (and energy) to master yet. Although this one wasn’t exactly a satisfying end product, I’m compromising with myself by believing that given time, I’ll be able to come around to the world of coding and unlock all the cool, fun techniques that I can use to express my creativity! I’d like to make a non-stationary product next time, because I’d like to experiment with coding that generates movements, etc. But for now, I’m glad with this quirky little character that I’ve made. 🙂

instrumentalist with a hat

concept:

This week’s assignment required us to explore the shapes offered in the p5 coding program and make a self-portrait. The first thing I did was to draw a huge circle right in the middle of the canvas, and that was when I saw it… my face. I planned to draw a minimalistic cartoonish face that represents my hobby, playing the ukulele, and myself with a certain clothing item of some sort.

code:

function setup() {
  createCanvas(650, 450);
  
    //assign variables
  let midX = width/2;
  let midY = height/2;
    
    //blue background circles
  background(50, 80, 120);
  strokeWeight(0);
  fill(80, 115, 150);
  circle(midX, midY, 690);
  fill(105, 140, 180);
  circle(midX, midY, 590);
  fill(190, 210, 230);
  circle(midX, midY, 480);
    
    //head
  fill(230, 170, 140);
  strokeWeight(3);
  ellipse(midX, midY, 365, 390);

    //eyes
  fill(230);
  circle(midX -100, midY +45, 100);
  circle (midX +100, midY +45, 100);

    //iris
  fill(100, 55, 15);
  //stroke(80, 35, 0);
  ellipse(midX -95, midY +44, 80, 80);
  ellipse(midX +95, midY +44, 80, 80);

    //pupils
  fill(0);
  circle(midX -93, midY +44, 45);
  circle (midX +93, midY +44, 45);

    //glare
  noStroke();
  fill(235);
  circle(midX -75, midY +40, 20);
  circle (midX +125, midY +40, 20);
  
    //smile
  stroke(0);
  noFill();
  arc(midX, midY + 90, 50, 30, radians(0), radians(140));
  
    //hat
  fill(220);
  ellipse(midX - 180, midY - 65, 120, 90);
  fill(233);
  arc(midX, midY - 20, 365, 350, PI, TWO_PI, CHORD);
  
    //hat details
  fill(230, 170, 140);
  arc(midX, midY - 35, 90, 80, PI, TWO_PI, CHORD);
  line(midX, midY -195, midX, midY - 75);
  noFill();
  arc(midX, midY - 20, 280, 350, radians(270), radians(0));
  arc(midX, midY - 20, 280, 350, radians(180), radians(270));
  noFill();
  fill(200);
  rect(midX + 20, midY - 40, 15, 24, 5);
  
    //eyebrows
  stroke(0);
  strokeWeight(5);
  noFill();
  arc(midX -90, midY + 5, 115, 40, radians(190), radians(290));
  arc(midX +100, midY + 8, 110, 40, radians(220), radians(320));
  
    //instrument
  strokeWeight(3);
    //ukulele neck
  fill(60);
  rect(midX +232, midY -80, 35, 255);
  fill(180);
  rect(midX +232, midY -90, 35, 10);
    //ukulele frets
  fill(180);
  rect(midX +232, midY - 70, 35, 6);
  rect(midX +232, midY - 55, 35, 6);
  rect(midX +232, midY - 40, 35, 6);
  rect(midX +232, midY - 25, 35, 6);
  rect(midX +232, midY - 10, 35, 6);
  rect(midX +232, midY + 5, 35, 6);
  rect(midX +232, midY + 20, 35, 6);
    //ukulele head
  fill(150, 80, 40);
  rect(midX +229, midY -137, 40, 50);
  fill(200);
  circle(midX +238, midY -120, 8);
  circle(midX +260, midY -120, 8);
  circle(midX +240, midY -100, 8);
  circle(midX +256, midY -100, 8);
    //ukulele body
  fill(150, 80, 40);
  ellipse(midX +250, midY +130, 120, 100);
  ellipse(midX +250, midY +80, 105, 100);
  fill(35);
  circle(midX +250, midY +90, 45);
  fill(35);
  rect(midX +230, midY +142, 40, 12);
  stroke(150, 80, 40);
  strokeWeight(5);
  noFill();
  arc(midX +250, midY +80, 105, 100, radians(27), radians(153))
    //ukulele strings
  fill(235);
  stroke(0);
  strokeWeight(2);
  rect(midX +236.5, midY -117, 1, 270);
  rect(midX +259.5, midY -117, 1, 270);
  rect(midX +244.5, midY -100, 1, 253);
  rect(midX +251.5, midY -100, 1, 253);

}

function draw() {
  //print(mouseX, mouseY);
}


method:

Initially, I started the sketch by limiting myself to solely using the ‘circle’ and ‘ellipse’ functions. I successfully managed to fill that huge circle with glaring brown eyes, eyebrows, and a mouth. Then came the clothing aspect of the sketch. I wanted something that represented me, and the first item that came to mind was the hat I occasionally wear to class. This was somewhat challenging given that the hat is completely constructed using the ‘arc’ function. It was an extremely challenging yet rewarding addition to the sketch as I could add little details such as a metal strap using the ‘rect’ function. Finally, n instrumentalist would not be one without an instrument. Thus I added the ukulele, a combination of circles, rectangles, lines, and arcs.

sketch:

The following images preview how the portrait sketch came to life to become what it is!

future improvements:

Adding some sort of movement to the program that provides an animation aspect would be amusing. For instance, making the eyes move to look wherever the mouse is, or possibly even making the ukulele a playable instrument!

iconic scribbles

concept:

As soon as I was informed about the assignment being an art presentation, world-known art pieces immediately came to mind. Whether it’s the beautiful Mona Lisa, the alluring Great Wave of Kanagawa, or the charming Starry Nights, I knew that using such iconic art pieces would be my inspiration for this assignment. However, I did not want to approach it from an ordinary/cliche perspective. Instead, I intended to present art in its most crucial form… when it’s nothing lines, shapes, and scribbles during a quick sketch. This drawing stage is what shows the artist what path this art piece will eventually take. That being said, how would you imagine those incredible art pieces mentioned earlier in a form where it is composed of nothing but lines and shapes? How thick would the lines be? What shapes would be used? How far will the spacing between the shapes and lines be? Answering and exploring these questions will display the concept I have in mind.

code:

//indicate variables
let img;
let canvas;

//load image
function preload() {
  img = loadImage("assets/5.jpeg");
}

function setup() {
  //create canvas with image dimensions
  canvas = createCanvas(img.width, img.height);

  //update canvas
  let updatedCanvasX = (windowWidth - img.width) / 2;
  let updatedCanvasY = (windowHeight - img.height) / 2;
  canvas.position(updatedCanvasX, updatedCanvasY);

  //draw until canavs edge and set difference between curves
  for (let column = 0; column < img.width; column += 2) {
    for (let row = 0; row < img.height; row += 2) {
      let x = column;
      let y = row;

      //get image attributes
      let m = img.get(x, y);

      //strokes attributes
      push();
      translate(x, y);
      rotate(radians(random(360)));
      noFill();
      strokeWeight(random(1));
      stroke(color(m));

      //add random circles representing splash
      push();
      strokeWeight(random(3));
      point(x, y);
      pop();

      //draw curved lines
      curve(
        x,
        y,
        sin(x) * random(5),
        cos(x) * sin(x) * random(50),
        random(30),
        random(50),
        cos(y) * sin(y) * random(10),
        cos(x) * sin(x) * 20
      );
      pop();
    }
  }
}


method:

Starting off, to work with already-existing art pieces that I would have to import into my program, I initially had to research how images work in JavaSript. Understanding how a loaded image’s dimensions can work and be modified with a program’s attributes allowed me to link my image’s colors to the shape I would eventually choose. I started exploring numerous shapes to see what would be ideal for a ‘scribble’ theme and found the ‘curve’ ideal to my vision. After confirming the shapes used in the program, I started experimenting with the thickness, length, and spacing of the curves. Also, adding small circles of different sizes was revealed to be a convenient way to represent some form of splatter on the canvas. That being said, these experiments resulted in a vast range of incredible yet unique sketches.

sketch:

The following images are different runs on the program used on the NYUAD Logo where the ‘curve’ line attributes were modified:


^ stroke weight: 1 – 6 ; rotation: 360 ; circle radius: 1 – 4 ; spacing = 5


stroke weight: 1 – 4 ; rotation: 180 ; circle radius: 1 – 10 ; spacing = 12


stroke weight: 1 ; rotation: 120 ; circle radius: 1 – 2 ; spacing = 2


future improvements:

I initially had several ambitious plans that I, unfortunately, could not complete due to my limited knowledge of JavaScript. All of these ideas would have added a form of user interaction that would be great to have in such a program. First, allowing the user to change the image by pressing the keys ‘1’ through ‘5’, all of which display a different iconic art piece. The second would be a ‘save’ button allowing the user to save one’s own art piece, given that each run displays a completely new, never-seen-before illustration! Last but definitely not least would have been a functionality allowing the user to possibly upload their own picture/art piece and see how it would be if it were a ‘scribble!’

game:

Guess the following art pieces from the displayed program edited image: (answers below)


  1. The Great Wave of Kanagawa
  2. Starry Nights
  3. The Scream
  4. Mona Lisa