My Self Portrait…

…and I am perhaps two different beings altogether!

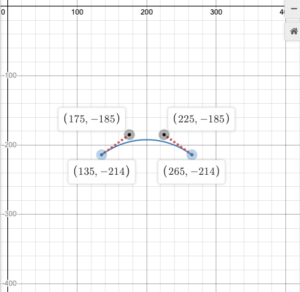
Trying processing for the first time was definitely a handful of a task. I mainly envisioned my portrait as an amalgamation of basic geometric shapes and structures. And even though the final result was not an exact mirror reflection, the playful bits that were coded together did seem to capture the essence of the assignment. 

In the process, I found the positioning of codes quite crucial. I had to move back and forth a few times to ensure that the right shape was being overlaid by another. Also, making sure that each side was symmetrical to the other was another important bit. The values had to be adjusted time and again through trial and error to find the exact coordinates. For example, the eyebrows were the hardest feature on the face and took quite some time to be shaped via curves. 

To highlight a bit of my artsy side through this digital mode of expression, I put a small rose in my hair wherein I primarily interacted with concentric circles and arcs. I  further hope to build upon such ideas through the usage of spiral and other animations in the upcoming tasks.

But the portion of the code that turned out to be surprisingly well was when I mapped the eyes to lend the pupils movement. It just seemed to be a clever take on a “typical eye-roll” that we do while putting a lot of effort into a new task for the first time.

I really hope to learn more about other coding functions and their implementation so that I can further sharpen my skills to more clearly express my ideas in the future. Nonetheless, I am surprised by the content I could put up in my initial take on coding and self-portraiture.

Here it is,


[Assignment 1] Self Portrait

Concept

For this assignment, I created a self-portrait using p5js. Various shapes (ellipses, triangles, arcs, and splines) were used to make a portrait of myself. This project contains a user interactive feature, in which the color wheel behind the portrait rotates as cursor moves. Not to mention, once the cursor rotates fast enough, color wheels will begin to randomly change for 2 seconds. Thick lines (strokes) and vibrant colors are used to make this portrait appear like a pop art piece.

Code

Writing codes for the hairs was the most challenging part of this project. To draw my hair, I had to read through the p5js reference page (https://p5js.org/learn/curves.html). In the end, I used spline lines to make custom shapes. A considerable amount of time was used to draw even a single spline line because it required coordinates of all points it passes through.

Code for hairs using spline lines:
//Left part of the hair
fill(0);
stroke(0);
beginShape();
curveVertex(314, 192);
curveVertex(302, 215);
curveVertex(292, 250);
curveVertex(222, 255);
curveVertex(227, 205);
curveVertex(247, 180);
curveVertex(277, 160);
curveVertex(307, 155);
curveVertex(327, 163);
curveVertex(327, 180);
curveVertex(324, 188);
curveVertex(314, 192);
endShape();
//Right part of the hair
beginShape();
curveVertex(324, 185);
curveVertex(326, 175);
curveVertex(337, 170);
curveVertex(366, 177);
curveVertex(374, 198);
curveVertex(375, 225);
curveVertex(372, 232);
curveVertex(362, 210);
curveVertex(347, 200);
curveVertex(324, 185);
endShape();

Another challenge I confronted while working on this project was the translation and rotation of reference points (axis). I translated the origin from the top-left corner to the center of my canvas because color wheels had to rotate around the portrait at the center. Yet, I noticed return values of mouseX and mouseY are not affected by the translation; therefore, I had to manually adjust cursor coordinates as shown below:

let mouseVecCurrent = createVector(mouseX - 300, mouseY - 300);

I expected rotate() to simply rotate objects without altering the axis, but p5js uses a rotation matrix, which means the whole axis will rotate with the object. For this reason, I had to reset the reference point before drawing any shapes:

rotate(radians(350)); //Reset the reference point

To create a responsive color wheel, I had to write several lines of code that calculate the position and rotational speed of the cursor. To do this, I compared current position and previous position of the cursor (pWinMouseX and pWinMouseY are functions that return cursor position in the previous frame). Then, I wrote some conditional statements to determine if the color should change based on the calculated rotational speed.

let mouseVecCurrent = createVector(mouseX - 300, mouseY - 300); //Vector holding current mouse position
let mouseVesPrev = createVector(pwinMouseX - 300, pwinMouseY - 300); //Vector holding previous mouse position

let mouseAngle = mouseVecCurrent.heading(); //Angle of mouse pointer relative to the origin
let mouseAngularV = 9 * abs(mouseAngle - mouseVesPrev.heading()); //Angular velocity of the cursor

//If cursor is rotating rapidly enough around the origin, set colorChange to true. OR, if colorChange is already and it has not been 2 seconds since the last rapid rotation, keep colorChange as true.
if (mouseAngularV > 53 || (colorChange && millis() - t < 2000)) {
if (!colorChange) { //If colorChange is false, set t to current millis time.
t = millis();
}
colorChange = true;
}else colorChange = false;

With the help of trigonometry and cursor information, I made color wheels that follow the cursor using triangles. The triangles were placed using for loop and their colors were randomly assigned using random()  function.

for (let i = 1; i <= divNum; i++) {
fill(i * 10 + 70, 3 * i + 125, 5 * i); //Default color regardless of the cursor movement.
if (colorChange) fill(random(255), random(255), random(255)); //If colorChange is true, wheel colors will totally be random for 2 seconds.
triangle(
0,
0,
700 * cos(((i - 1) * 2 * PI) / divNum + mouseAngle),
700 * sin(((i - 1) * 2 * PI) / divNum + mouseAngle),
700 * cos((i * 2 * PI) / divNum + mouseAngle),
700 * sin((i * 2 * PI) / divNum + mouseAngle)
);
}

Reflections / Future Improvements

Although I faced some challenges making this self-portrait, the project was very fun and exciting to work on. My portrait may not be perfect, but I am very satisfied with the project and willing to continue working on more intricate codes in this course.

In the future, I would like to write a piece of code that will open and close the mouth when the cursor is clicked. Adding a portion of my upper body that can interact with user input may also be interesting improvements to make in the future.

Self-Portrait

THE SKETCH
Shown below is my self-portrait coded with p5.js. The link to the code online can be found here.


INSPIRATION & DESIGN 

For this piece, I was inspired by the human face sketches that we are commonly taught in beginner art classes that are meant to teach us proportions/anatomy/ratios. The sketch is realistic in this sense, but it also purposefully lacks detail when it comes to the eyes, ears, and nose for example. The portrait has been drawn exclusively black and white, and the features consist of several of the same shape layered on top of each other. All of these aspects I chose intentionally to mimic real pencil strokes and the process of re-outlining and re-tracing that happens when sketching on paper. Finally, the sketch is dynamic in that the face shifts slightly and the eyes blink according to the frame count. This was a feature that was later added on because it reminded me of primitive 2D animations.


CODING SPECIFICS

The code itself is not particularly complex; I made separate functions to draw each of the features: face shape, eyebrows, eyes, nose, ears, and mouth. A method I found particularly helpful for this project was curveVertex(); I used this to create custom shapes for the chin, ears, and mouth. The eyes, eyebrows, and nose were drawn using simple lines and arcs. The “sketch” effect is created by layering shapes/line of different sizes and positions 6 times using a for loop, as shown in the code snippet below:

for (let i=0; i<=6; i++) {
  x = random(-8, 8); 
  y = random(-8, 8);
  b = random(-8, 8); 
  draw_face(x, y, b);
  draw_ears(x, y, b);

The variation of shapes is determined by variables x, y, and b that are passed through the functions draw_face(), draw_ears(), etc. The x and y variables were used mainly to shift the overall position of a shape, as it was used in the translate() function, and b was used as an additional variable to manipulate proportions such as an arc’s width or a line’s length or intensity of a curve.  For example, in the draw_ears, the x and y variables manipulate the position of  the ears on the canvas.

function draw_ears(x, y) { 
  push(); 
  translate(x, y); 
  scale(1.25);

  //right
  beginShape();
  curveVertex(140, -10);
  curveVertex(140,-10); 
  curveVertex(160,-20);
  curveVertex(170,10);
  curveVertex(155,53);
  curveVertex(140,50);
  curveVertex(140,50);
  endShape();

In the case of the eyebrows, b is used to draw eyebrows of varying “arched-ness”.

function draw_eyebrow(x, y, b) { 
  translate(x, y); 
  push(); 
  rotate(8); 
  arc(-90, 0, 90+b, 12+b, 180, 360); 
  pop(); 
  push()

The lines that bisect the center of the face, the mouth, and eyebrows were created in a separate for loop that executed only 4 times and calculated random x, y and b values from a smaller range (see below). The decision behind making a second for loop was for visual purposes only.

for (let i=0; i<=5; i++) {
  x = random(-3, 3); 
  y = random(-3, 3);
  buffer = random(-6, 6);
  draw_eyebrow(x, y, b); 
  // draw_mouth(x, y);
  draw_mouth(x, y, b); 
  draw_outlines(x, y); 
}


Using the two loops and the randomized variables allowed every line, curve, and shape on the face to be drawn differently with each frame, giving the face its movement.  While p5.js’ standard frame rate is 60, I also altered the frame rate to be slower so that the sketch would look like real hand drawn animation. Contrarily, I played around using randomSeed() to create a still image, but in the end I prefer the dynamic one.

My favorite feature of this sketch are the blinking eyes. This was achieved by having two functions draw_eyes() and draw_eyes_closed, which were called upon depending on an if block in the for loop:

if (frameCount%6==0) { 
  draw_eyes_closed(x,y); 
}
else { 
   draw_eyes(x,y);

In short, the if statement inside the for loop executes every 6 frames and calls draw_eyes_closed(); the shape of a closed eye was simply the bottom half of the parallelogram that is the open eye. Otherwise, draw_eyes() is called and thus shows its eyes open.

REFLECTIONS

Overall I am happy with this first sketch; I think I was able to explore my creativity and create something that was uniquely my style. Personally I do not enjoy drawing myself, but I think choosing this style allowed me to not be so focused on details and instead accentuate features on myself that I like, such as the eye shape and mouth. I challenged myself by making the sketch dynamic and including the blinking feature. One thing I wish I could have included is eyelashes and pupils that moved with each blink, and I would love to try to expand the sketch to a full body self-portrait.

How to use the class WordPress blog

Logging in

WordPress login page: https://intro.nyuadim.com/wp-admin

username:

  1. For Mang’s section your username is your NetID (e.g. ghl2001)
  2. For Michael’s section you have received email with your username

password:

  1. Mang’s section: check Brightspace -> Content -> Overview/Links
  2. Michael’s section: it was emailed to you

Embedding your P5js sketch directly into your post

Instructions: https://intro.nyuadim.com/2022/01/06/how-to-embed-a-p5js-sketch-in-your-blog-post/

Finishing your post

  1. Make sure you tag your post for the correct section (either “Fall 2022 – Mang” or “Fall 2022 – Shiloh”

After publishing your blog post it should appear in the post for your section linked from the main page.

Mang’s section: https://intro.nyuadim.com/category/fall-2022-mang/

Michael Shiloh’s section: https://intro.nyuadim.com/category/fall-2022-shiloh/

Assignment 1: Self Portrait

After the first session, I played around with p5.js and made this embarrassed-looking koala using shapes, lines, fills, and the mouseX and mouseY variables. Clicking the koala makes it blush, because why not?

Embarrassed Koala

I thought it was pretty cute, so I decided to use it as a template for my actual self-portrait. I wanted to make it funny and representative of my personality of not taking things too seriously, especially with a practice as playful as IM.

In the process, I found p5.js to be an interesting adjustment. Instead of seeing color or stroke width as a property of an object, I had to type them out as separate lines of code every time I wanted something to have a different property. I couldn’t just do leftEye.color = “black” – I had to first declare the fill, then draw the left eye.  This was rather tedious, so next time, I will probably plan ahead so that I can more effectively group colorways and avoid back-and-forth switching.

After drawing the basic shapes of my self-portrait, I accidentally wrote an infinitely calling while loop, which auto-ran (because auto-running was turned on) and immediately crashed and destroyed the entire self-portrait, which I thought was being auto-saved, but was actually not. I was very sad, but I soldiered on and started again from scratch, a little faster this time around. Advice to anyone else doing this: turn off auto-run when making risky decisions like while loops.

I eventually decided to have the character hover around (to somewhat reveal NYUAD! WOO on its shirt), the eyes follow the mouse, and the background color also respond to the user’s mouse.

Originally, I was going to use a slider for changing background color, but I found that it distracted from the user experience of moving your mouse around. I also added a little “click for awesome” so that they know something will happen (the character blushes and the background goes neon yellow) when they click.

Making the portrait was quite time consuming because I had to restart, do a lot of little tweaks to put my layers in the right order, and make everything more or less symmetrical. Nevertheless, I was able to use circles, ellipses, lines, rectangles, arcs, text, a rotating transform, and mouseX and mouseY to achieve this very memey final self portrait. I think I’m pretty proud of it!

Overall, the activity made me more excited to learn more time-efficient way of doing things on p5.js, as well as more advanced techniques in producing generative effects and interesting animations. I enjoyed the process and am looking forward to figuring out more complex interactions.

Final Self-Portrait


Self-portrait as a young robot

Concept

For my digital self-portrait I tried to represent my inner robot.

Code

The drawing consists of simple shapes that use a mix of manual and calculated coordinates.

The location of the mouth is automatically calculated to be horizontally centered and 3/4 of the way down the canvas. The code uses variables that allow the size of the mouth rectangle to be easily changed and the position will be automatically recalculated.

// Set the mouth width and height
let rectangleWidth = 150;
let rectangleHeight = 90;

{...}

// Draw a centered rectangle
rect((width / 2) - (rectangleWidth / 2), height * 0.75 - rectangleHeight / 2, rectangleWidth, rectangleHeight);

Completed self-portrait:

Reflection / Future Work

The robot expresses my inner coder. In future I would like to add animated laser beams shooting from the eyes that automatically track the mouse cursor.