Musical instrument

coNCEPT

Our initial idea was to create a piano using the ultrasonic sensor. However, after realising this idea was too mainstream and simple, we decided to create an instrument that can be fully played by 2 people since it involves using 3 hands.

Process

void loop() {
  // read the input on analog pin 0:
  int sensorValue1 = analogRead(A1);
  int sensorValue2 = analogRead(A2);
  int sensorValue3 = analogRead(A3);
  
  switchState = digitalRead(switchPin);

  if (switchState ==1){
    //sensor 1
    if(sensorValue1 > 500){
      currentState+=100;
    }
    else if (sensorValue1>250 && sensorValue1 < 500) {
      currentState+=10;
    }

    else if (sensorValue1 < 250){
      currentState+=1;
    }

    //sensor 2
    if(sensorValue2 > 500){
      currentState+=100;

    }
    else if (sensorValue2>250 && sensorValue2 < 500) {
      currentState+=10;

    }

    else if (sensorValue2 < 250){
      currentState+=1;
    }

    //sensor 3
    if(sensorValue3 > 500){
      currentState+=100;

    }
    else if (sensorValue3>250 && sensorValue3 < 500) {
      currentState+=10;
    }

    else if (sensorValue3 < 250){
      currentState+=1;
    }

  }
  else{
    //sensor 1
    if(sensorValue1 > 500){
      currentState+=100;
    }
    else if (sensorValue1>250 && sensorValue1 < 500) {
      currentState+=10;
    }

    else if (sensorValue1 < 250){
      currentState+=1;
    }

    //sensor 2
    if(sensorValue2 > 500){
      currentState+=100;

    }
    else if (sensorValue2>250 && sensorValue2 < 500) {
      currentState+=10;
    }

    else if (sensorValue2 < 250){
      currentState+=1;
    }

    //sensor 3
    if(sensorValue3 > 500){
      currentState+=100;
    }
    else if (sensorValue3>250 && sensorValue3 < 500) {
      currentState+=10;
    }

    else if (sensorValue3 < 250){
      currentState+=1;
    }
  }

if(switchState == 0){
  switch(currentState){
    case 3: //3 low
      tone(8, NOTE_B3, 250);
      delay(250*1.30);
      break;
    case 12: //2 low 1 mid
      tone(8, NOTE_C4, 250);
      delay(250*1.30);
      break;
    case 21: //2 mid 1 low
    tone(8, NOTE_D4, 250);
      delay(250*1.30);
      break;
    case 30:
    tone(8, NOTE_E4, 250);
      delay(250*1.30);
      break;
    case 102: //1 high 2 low
    tone(8, NOTE_F4, 250);
      delay(250*1.30);
      break;
    case 111: //1 high 1 mid 1 low
    tone(8, NOTE_G4, 250);
      delay(250*1.30);
      break;
    case 120: //1 high 2 mid
    tone(8, NOTE_A4, 250);
      delay(250*1.30);
      break;
    case 201: //2 high 1 low
    tone(8, NOTE_B4, 250);
      delay(250*1.30);
      break;
    case 210: //2 high 1 mid
    tone(8, NOTE_C5, 250);
      delay(250*1.30);
      break;
    case 300: //3 high
    tone(8, NOTE_D5, 250);
      delay(250*1.30);
      break;
  }
}

We placed 3 photoresistors inside 3 cups and depending on the amount of light detected, we mapped specific musical notes to each cup. To avoid treating analog sensors as if they were digital, we implemented distinct categorizations for each cup. Specifically, we established three cases based on the amount of light detected: low (<250), mid (250-500), and high (>500). To introduce an element of digital control, we incorporated a slide switch.

Video demonstration:

REFLECTIONS

Working on this project was a fun experience. Initially considering a piano, we opted for a more unconventional approach, transforming ordinary cups into interactive controllers. One aspect that has become evident during this project is the potential for aesthetic enhancement. Observing other students’ projects, I realized the impact a well-designed aesthetic can have on the overall appeal of the final product. While our focus was primarily on functionality, witnessing the visual creativity in other projects has inspired me to explore the aesthetic dimension further in future endeavors.


Week 10: Team Project

<How To Make an Instrument>

My Arduino project combines an ultrasonic distance measurement sensor, a switch button, and a buzzer to create an interactive instrument. The ultrasonic sensor, consisting of a trig pin (connected to pin 10) and an echo pin (connected to pin 11), is utilized to measure the distance between the sensor and an object. The setup initializes the pins and sets up serial communication. In the loop function, the sensor is triggered to emit ultrasonic waves, and the duration of the wave’s round trip is measured. The distance is then calculated in centimeters based on the speed of sound. Additionally, a switch button connected to analog pin A0 turns on the music when I press the switch button.


int trig = 10;
int echo = 11;
long duration;
long distance;
int switch;

void setup() {
  pinMode(echo, INPUT);

  pinMode(trig, OUTPUT);

  Serial.begin(9600);
}

void loop() {
  digitalWrite(trig, LOW); //triggers on/off and then reads data
  delayMicroseconds(2);
  digitalWrite(trig, HIGH);
  delayMicroseconds(10);
  digitalWrite(trig, LOW);
  duration = pulseIn(echo, HIGH);
  distance = (duration / 2) * .0344;    //344 m/s = speed of sound. We're converting into cm


  int notes[7] = {261, 294, 329, 349, 392, 440, 494}; //Putting several notes in an array
  //          mid C  D   E   F   G   A   B

  switch = analogRead(A0); //defining switch as digital button


  if (distance < 0 || distance > 50 || force < 100) { //if not presed and not in front

    noTone(12); //dont play music

  }

  else if ((force > 100)) {  //if pressed

    int sound = map(distance, 0, 50, 0, 6);  //map distance to the array of notes
    tone(12, notes[sound]);  //call a certain note depending on distance

  }


}


The musical aspect of the project involves an array of seven notes, representing the musical scale from mid-C to B. When the conditions are met (distance within a certain range and sufficient force applied), the distance is mapped to an index in the notes array. The corresponding note is then played using the tone function on pin 12. The project incorporates conditional statements to determine when to play a note and when to remain silent, providing an interactive experience where the user can generate musical tones by manipulating the distance and switch parameters.


I used this video to learn about the distance sensor and the tips to make a code for the music notes. To enhance my project, consider implementing error handling for the distance measurements, such as checking for valid sensor readings or outliers. I believe that adding comments to clarify the purpose of specific code sections can improve code readability, making it easier for others to understand the logic behind each step. Additionally, I want to incorporate debounce mechanisms for the switch button to prevent false triggers. Experimenting with different musical scales or incorporating dynamic melodies based on changing sensor inputs could add depth and creativity to the musical aspect of my project.

Week 10 – Musical instrument

Concept: We created a basic radio that switched between two channels, each playing different songs, by adjusting a potentiometer. Inspired by the upcoming festive season, even though it is too early, we decided to integrate the beloved tune “Jingle Bells” into our project.

Video Demonstration: musical instrument

Implementation:

We used a switch, a potentiometer, and a buzzer in our setup. The switch turns on and off the radio, and the potentiometer switches between channels. Initially, we planned to include two songs: “Jingle Bells” and “Let It Be.” However, converting “Jingle Bells” into playable chords was a bit of a challenge. Consequently, the potentiometer plays “Jingle Bells” when set in the first half and stays silent in the second half.

To achieve the authentic “Jingle Bells” melody, we discovered the chords and their timing online. These chords, when played together, compose a recognizable tune. We organized this chord information into an array named “melody” in our code. Each chord in this array was linked to a specific frequency, dictating the notes played. Assigning these frequencies to each chord enabled us to establish a precise sequence of notes within the melody array, ultimately generating the iconic “Jingle Bells” tune. Later in the loop, it iterates through the melody array. Within the loop, it retrieves each note’s frequency and plays it for a specified duration using the buzzer.

const int POTENTIOMETER_PIN = A0;
const int BUZZER_PIN = 3;
const int threshold = 512;

// Define each chord's frequency
#define C 261
#define D 294
#define E 329
#define F 349
#define G 392
#define A 440
#define B 493
#define REST 0

void setup() {
  pinMode(BUZZER_PIN, OUTPUT);
  Serial.begin(9600);
}

void loop() {
  int analogValue = analogRead(POTENTIOMETER_PIN);
  Serial.println(analogValue);

  if (analogValue > threshold) {
    playJingleBells();
  } else {
    noTone(BUZZER_PIN);
    delay(100); // Delay to reduce loop frequency
  }
}

void playJingleBells() {
  // Melody and Timing
  int melody[] = {
    E, E, E, REST,
    E, E, E, REST, E, G, C, D, E, REST,
    F, F, F, F, F, E, E, E, E, D, D, E, D, REST, G, REST,
    E, E, E, REST,
    E, E, E, REST, E, G, C, D, E, REST,
    F, F, F, F, F, E, E, E, G, G, F, D, C, REST
  };
  int noteDurations[] = {
    4, 4, 4, 4,
    4, 4, 4, 4, 4, 4, 4, 4, 4, 4,
    4, 4, 4, 4, 4, 4, 4, 4, 4, 4, 4, 4, 4, 4, 4, 4,
    4, 4, 4, 4,
    4, 4, 4, 4, 4, 4, 4, 4, 4, 4,
    4, 4, 4, 4, 4, 4, 4
  };

  int melodySize = sizeof(melody) / sizeof(melody[0]);

  for (int i = 0; i < melodySize; ++i) {
    int noteDuration = 1000 / noteDurations[i];

    if (melody[i] != REST) {
      tone(BUZZER_PIN, melody[i], noteDuration);
      delay(noteDuration); // Let the note play for its duration
    } else {
      delay(noteDuration); // If it's a rest, delay without tone
    }
    
    noTone(BUZZER_PIN); // Stop the note
    delay(50); // Delay between notes for spacing
  }
}

Reflection & Future Improvements: As it was mentioned before, we wanted to create a radio with two channels, playing two different songs such as “Jingle Bells” and “Let It Be”, depending on the resistance of the potentiometer: the first half plays one song, and the second half another. However, we spent a lot of time working on our beloved Christmas song, finding the right chords, and frequencies, and figuring out the logic of making it play, so we didn’t have much time left to work on the second song. Because of this, we decided to make another channel of our radio empty for now, so we could add the song in the future. In addition to that, we would like to work on the aesthetics in the future by creating the painted cardboard in the form of the radio to create a more realistic experience.

Week 10 – Reading Reflection

When I started reading the text “Hands”, I felt like the author was telling the obvious things. However, recalling how my little sister was born during the pandemic time with an iPad and iPhone at home, his words have value. My sister knows everything about the screens and how to manipulate them, but she might not know the basic things such as how to tie the shoes, hold the pen properly, etc. Because of this, I understand that pictures under glass are affecting the skills and reducing the capabilities of the hands, thus, reducing the real-life experience. What I mean by experience is that we are replacing the papers with screens, or table games such as chess and ping-pong with screen ‘dynamics’, but they don’t create the same tactile feeling… it is just a screen. 

Furthermore, the picture in the glass puts a huge emphasis on the vision, assuming that it might compensate for the tactile feelings. However, I think that this might be not the best inclusive solution for people with visual impairments. Hands give enough intuitive information for us to understand the material we are touching, how thick it is, how to manipulate it, etc, which cannot be replaced by the glass screen unless we look at it. As the author said, this is a good temporary solution, but not in the long term. So, he gave good ideas about the issues we have and now it is time to start thinking about the solutions for this issue. 

Overall, I think that our desire to touch, feel, and move cannot be replaced with visual aesthetics. 

Week 10 – Musical Instrument

For this assignment, we wanted to make a hovering keyboard. We used the ultrasonic distance measuring sensor to set specific distance ranges to specific notes. As the user would move their hand through different ranges, different notes would play. We also added a button to turn off the instrument completely in addition to implementing a maximum range beyond which the instrument doesn’t produce any sound.

Video:

#include "pitches.h"
// defines pins numbers
const int trigPin = A0;
const int echoPin = A1;
const int speakerPin = 8;
const int pushButton = A2;
// defines variables
long duration;
int distance;
void setup() {
  pinMode(trigPin, OUTPUT);  // Sets the trigPin as an Output
  pinMode(echoPin, INPUT);   // Sets the echoPin as an Input
  pinMode()
  Serial.begin(9600);  // Starts the serial communication
  
}
void loop() {
  int buttonState = digitalRead(pushButton);
  // print out the state of the button:
  Serial.println(buttonState);
  delay(1);  // delay in between reads for stability
  // Clears the trigPin
  digitalWrite(trigPin, LOW);
  delayMicroseconds(2);
  // Sets the trigPin on HIGH state for 10 micro seconds
  digitalWrite(trigPin, HIGH);
  delayMicroseconds(10);
  digitalWrite(trigPin, LOW);
  // Reads the echoPin, returns the sound wave travel time in microseconds
  duration = pulseIn(echoPin, HIGH);
  // Calculating the distance
  distance = duration * 0.034 / 2;
  // Prints the distance on the Serial Monitor
  Serial.print("Distance: ");
  Serial.println(distance);
  // Playing outside distance range or the instrument is turned off
  if (distance >= 40 || buttonState == 1) {
    noTone(speakerPin);
  }
  // Play C4 in first 10cm
  else if (distance >= 0 && distance <= 10) {
    tone(speakerPin, NOTE_C4, 1000 / 4);
  }
  // Play G4 in next 10cm
  else if (distance >= 11 && distance <= 20) {
    tone(speakerPin, NOTE_G4, 1000 / 4);
  }
  // Play A4 in next 10cm
  else if (distance >= 21 && distance <= 30) {
    tone(speakerPin, NOTE_A4, 1000 / 4);
  }
  // Play F4 in next 10cm
  else if (distance >= 31 && distance <= 40) {
    tone(speakerPin, NOTE_F4, 1000 / 4);
  }
}

Future Applications:

I think for future applications, the number of keys could be expanded to have 12 keys, and buttons to move up or down an octave so it could be a complete hovering piano with all possible keys present on a keyboard.

The Future of Interaction Design and Responses: A Brief Rant on the Future of Interaction Design

In this reading, Bret Victor’s critique of the mainstream vision for future technological advancements in interactive design sheds light on the limitations of current technologies in fostering genuine interaction. Victor challenges the prevailing emphasis on touch-screen efficiency and advocates for a more hands-on approach, rooted in his perspective shaped by a different technological era. He questions the seamless integration of physical and digital experiences, emphasizing the importance of tactile engagement. Victor also expresses concerns about children’s overreliance on digital devices, foreseeing potential risks to their healthy development. Together, these perspectives, juxtaposed in order, highlight the collective call for a more thoughtful and inclusive approach in shaping the future landscape of interaction design.

The author underscores the duty of interactive designers to prioritize accessibility, especially for those lacking specific capabilities. While admiring the remarkable potential of human abilities, the author confronts the difficulty of finding equilibrium between harnessing these capabilities and rectifying inherent inequalities. The imperative for continuous research, particularly in domains such as tangible interfaces, is highlighted.

Week 10 | Creative Reading Reflection: A Brief Rant on the Future of Interaction Design

Creative Reading Reflection – A Brief Rant on the Future of Interaction Design :

Bret Victor critiques current interactive design limitations and promotes a more unique and intuitive approach for future projects. He underscores the significance of human capabilities, especially touch and hand abilities, in tool and technology design. Victor criticizes the common use of “Pictures Under Glass” interfaces, favoring visual over tactile feedback, and advocates for a more dynamic and immersive medium that involves multiple senses. He urges readers to draw inspiration from untapped human potential and pursue ambitious, long-term visions in interaction design.

What I find compelling in this passage is the push to rethink how we design interactions. The comparison of making a sandwich and the intricate movements of our hands and bodies highlights the richness of human abilities. It can inspire us to move beyond current technology limits and explore the untapped potential of our hands and bodies in shaping the future of how we interact with computers.

Week9: Mini DJ Player

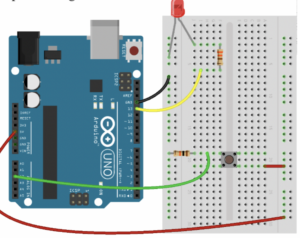
My Arduino code simulates a mini DJ player by incorporating a potentiometer and a switch. The potentiometer, connected to analog input pin A1, emulates a DJ slider or knob, allowing you to control the brightness of an LED connected to PWM pin 11. This provides a visual representation of adjustments such as volume or fading effects.

Meanwhile, the switch, connected to digital input pin A2, mimics a button on the DJ player. When the button is pressed, a yellow light connected to pin 13 is activated briefly, creating a visual cue for a button press or an effect. The code establishes a loop that continuously reads the analog sensor value, and button state, and adjusts LED brightness accordingly, producing a dynamic and interactive simulation of a basic DJ player interface.

It does not look like DJ player in the bright light, and it was hard for me to take a video with one hand and simultaneously press the button with another hand.

int led = 11; //the PMW pin the LED is attached to

void setup(){
  Serial.begin(9600);
  //declare pin 11 to be output:
  pinMode(led,OUTPUT);
  pinMode(13, OUTPUT); //yellow light
  pinMode(A2, INPUT); //button
}
  // put your setup code here, to run once:


void loop() {
  // put your main code here, to run repeatedly:
  int sensorValue = analogRead(A1);
  //Serial.println(sensorValue);

  int buttonState = digitalRead(A2); //button

  Serial.println(buttonState);
  if (buttonState == 1) {
    digitalWrite(13, HIGH);
    delay(100);

  } else {
    digitalWrite(13, LOW);
    //delay(300);
  }


  //set the brightness of pin 11 according to the sensor value/4)
  analogWrite(led, sensorValue/4);

  //wait for 30 milliseconds to see the diming effect
  delay(30);
}

One particularly interesting aspect of the code is the use of the analog input from a potentiometer to control the brightness of an LED. The line int sensorValue = analogRead(A1); reads the analog input from pin A1, representing a DJ slider or knob. The subsequent analogWrite(led, sensorValue/4); adjusts the brightness of an LED on pin 11 based on this input, creating a dynamic and interactive simulation of volume or fade control. This part of the code adds a tangible and intuitive user interface element to the mini DJ player simulation.

(I also refer to the slides from Professor!)

Week 9: Reading Response

“Physical Computing’s Greatest Hits and Misses”

In this article, the author talks about things that often show up in projects using physical computing. They say we should see these things as a kind of creative playground, not as limits. It’s like having a favorite game on the playground – it’s familiar, but the real fun starts when you add your special twist. The article mentions the Mattel/Nintendo Power Glove from 1989, adding a bit of nostalgia. Despite being old, it shows how simple ideas, like tapping, can become exciting. This glove, though basic, laid the foundation for the fun interactions we see in drum gloves today. The Power Glove reminds us that even simple ideas can turn into cool and unique things with time.

The article rightly says that gloves, especially drum gloves, are almost as popular as theremin instruments. Drum gloves are fun because they connect to something everyone understands – tapping to make a rhythm. Unlike the abstract theremin, drum gloves have a familiar way of making sounds. Tapping gives a structured way to create notes, making it easy for people to use. This fits well with the idea in the article that common themes in physical computing can be a starting point for creative expression, not a block.

The Power Glove from 1989 is a great example. It’s simple but directly connects with gestures, like tapping, which laid the groundwork for the engaging drum gloves we have today. The Power Glove and drum gloves show a balance between what’s familiar and what’s new, making physical computing a creative playground where each new version adds to the story of interactive art.

“Making Interactive Art: Set the Stage, Then Shut Up and Listen”

In “Making Interactive Art: Set the Stage, Then Shut Up and Listen,” the writer offers valuable insights into interactive art, likening it to a performance rather than a finished painting or sculpture. This perspective aligns seamlessly with the encouragement from the first reading to see physical computing as a creative playground, where established themes act as a starting point rather than a constraint.

The advice that the author suggests to the audience what their course of action could be resonates deeply. It encourages artists to think beyond creating a static piece and consider how they can guide the audience to uncover their own stories and emotional interpretations. This aligns with the idea that the stage is set not just by the artist but evolves with the contributions of the audience. It’s a beautiful way of framing interactive art as a collaborative journey where the artist provides the stage, and the audience brings the performance to life.

In my opinion, this approach to interactive art introduces a refreshing shift from the traditional view of art as a one-way communication. It empowers the audience to be co-creators, transforming the artistic experience into a shared exploration. The emphasis on suggesting rather than dictating allows for a more organic and diverse range of interpretations, enriching the overall impact of the artwork. It reinforces the notion that true interactivity lies not just in the technology but in the dialogue between the artist, the work, and the audience.

Week 9: Physical Computing Reading Assignment

I’m really into a band called Arcade Fire. They have a lyric that goes: “My body is a cage that keeps me from dancing with the one I love, but my mind holds the key…” This is how I view Interactive Media. Humans have always felt stunted by the limitations of themselves and their realities. I hold the metaphor of the Garden of Eden very closely. Adam and Eve were forced out of their original home and they have been lost ever since, wandering back. I believe we all have the Garden of Eden in our hearts, and everything we do is an attempt at finding home, at freeing the Garden of Eden within us. Our bodies house souls that are profoundly larger than our bodies themselves. So we all struggle with the cognitive dissonance of having a body. We want our spirits to be free. Interactive Media artists do this by creating different experiences and worlds with the technology at their disposal.

That’s why I wholeheartedly agree with Tigoe’s assertion that Interactive Media artists should allow their audiences to interact with their installations freely, without being bounded by rules and guidelines. Or else you risk negating the entire point of the practice–to help people confront and explore their hidden internal realities. That’s why I also agree with the Tigoe’s comment: “I think physical computing should ideally foreground the person’s input.”

Take, for example, the “Fields of Grass” archetype Tigoe mentioned. I thought it was funny when Tigoe said, “Why would you want to make a field of grass that you run your hand over? Because the idea of responsive texture is magical, I guess.” And it is. I think again of the movie Avatar, where, when Jake Sully entered the new world, the first thing he did was touch the glowing trees and grass in awe. I also recalled The Gladiator, where Maximus let his hand flow through the silver grass of the Fields of Elysium. One of my favorite Rumi quotes goes, “There is a field between right and wrong. I’ll meet you there.” Fields are windy and otherworldly and beautiful. If I were to start on a project, out of everything Tigoe said, I would start with this one, because it’s through creating magical fields that I feel like I’m closer to the Garden of Eden. It boggles me that I could make something that allows me to actually stand in something close to what the Garden of Eden looks like in my head.

But that’s my world and my interpretation. It would all be ruined if the I instructed other people on how to walk through the grass, or what to think when they did. Because then I’m imposing my internal world on them rather than allowing them to explore their own.

I also really liked Tigoe’s comment: “The limitation of this is that the gesture of moving your hand over a sensor has little meaning by itself. The challenge here is to come up with a physical form and context for the sensors that afford a meaningful gesture.” With every form of art, there comes a necessary suspension of disbelief. So naturally, when we’re interacting with an installation that allows us to leave our reality behind, we want to interact with it the way we can in the real world. That way, we can truly forget about reality for the one that is in front of us, and really believe it. That’s an obstacle that continues to stump Interactive Media artists to this day.

But I really loved Tigoe’s “heart beats faster when your loved one’s cell phone is detected in a cell that’s closer to you” example as well. Once, a visiting author named Fransisco Goldman said the point of art is to leave you saying, “And isn’t life just like that.” And that’s what I thought reading about that particular example–”isn’t life just like that.” That’s good interactive art.