For this week’s assignment, I was not sure about what I wanted to accomplish or work on. Therefore, I just searched online for some image manipulation examples and tried to recreate some of the ones that I thought was interesting or cool, or in this case makes me go “wow”. I stumbled upon this video that demonstrated changing the pixels of an original image in whatever way the person wanted, and that made me go “wow”, so I decided to try to recreate it.
Not only did I learn how to manipulate with the colors of each pixel, but I also learned a tiny tip from the video of how to make a “replica” or “copy” of the original image in order to guarantee that the original image is going to be the way it is while tampering with the replica whatever way we wanted to.
I mainly wanted to try out to two different image manipulation effects: The first one being able to manipulate the pixel colors and create an image filter. The second one being able to control the different grey scaled color gradients in accordance to my position values of my mouse.
Initially, of course, I had no idea how to create it from scratch. But, after looking through many videos and class examples, I learned different functions such as the brightness function from online and also several other techniques from the class. I mainly struggled with understanding the logic behind the codes (since like day one) due to my inexperience in coding, but I realized I am slowly understanding it, and emphasis on the “slow”.
PImage froggie;

void setup() {
  size(940, 412);
  //load image into sketch
  froggie= loadImage("colorful frog.jpg");
}

void draw() {
  displayfrog();
  changefrogcolor();
  changebwfrog();
  updatePixels();
}

void displayfrog() {
  //display image
  image(froggie, 0, 0);
  //loads the pixel data of the picture into the pixel [] array
  loadPixels();
  //might not be necessary to load pixels, but better to load it.
  froggie.loadPixels();
}

void changefrogcolor() {
  if (mousePressed) {
    for (int x=0; x<width; x++) {
      for (int y=0; y<height; y++) {
        int loc = x+y*width;
        //this gets the pixels from the desert image and puts it on the screen at the same location, like making a replica of the original image to mess with the pixels
        //gets the red part of the pixels
        float r = red(froggie.pixels[loc]);
        //gets the green part of the pixels
        float g = green(froggie.pixels[loc]);
        //gets the blue part of the pixels
        float b=blue(froggie.pixels[loc]);
        //places these new colors into the window
        pushMatrix();
        //float factor=random(0,20);
        pixels[loc]=color(random(g), random(b), random(r));
        popMatrix();
      }
    }
  }
}
//the interaction between the black and white color pixels of the frog image
void changebwfrog() {
  if (keyPressed) {
    for (int x=0; x<width; x++) {
      for (int y=0; y<height; y++) {
        int loc = x+y*width;
        //extracts the brightness value from each color of each pixel of the image
        float b=brightness(froggie.pixels[loc]);
        //if the brightness of each pixel is greater than mouse X and less than mouse Y, it'll change a random grey scale color, or else it'll turn into black color
        if (b>mouseX && b<mouseY ) {
          //turns the color that are not greater than mouse X or less than mouse Y into a random grey scale
          pixels[loc]=color(random(255));
        } else {
          //turns the pixels that are not greater than mouse X or less than mouse Y into black
          pixels[loc]=color(0);
        }
      }
    }
  }
}
I’ve been a Kobe fan for forever and a Lakers fan since 2012, and it’s been a hard decade for the team. hard. So, in light of the Lakers winning the 2020 NBA championship today, I wanted to do something with image manipulation that was related to the lakers.
My idea is to fill the screen with the laker logo, and every time I draw on the screen via my mouse, another image would appear with tints and effects. This way I can draw stuff like “2020 champs” etc etc.
I do feel kind of weird about the project, I felt like to do what I was doing, there were more object-oriented programming than image manipulation. Perhaps next time it might be better to focus on one image and changing its properties than to change a whole bunch of images.
PImage img, lebron;
float unit = 30;    //unit of each picture
int count;          //how many pictures are there in a certain sized frame
Ring[] ring;

void setup(){
  size(1500, 900);
  img = loadImage("lakers.png");
  lebron = loadImage("lebron.png");
  int wideCount = width / int(unit);
  int highCount = height / int(unit);
  count = wideCount * highCount;

  //calling an array of image objects with the width and height counts
  ring = new Ring[count];
  int index = 0;
  for (int y = 0; y < highCount; y++) {
    for (int x = 0; x < wideCount; x++) {
      ring[index++] = new Ring(x * unit, y * unit, width/unit, width/unit);
    }
  }

}

void draw(){
  //running the functions for every image
  for (Ring ring : ring) {
    ring.display();
    ring.update();

  }

}
class Ring {
  float x;
  float y;
  float w;
  float h;

  //for images that have been hovered over
  boolean changed = false;

  Ring(float tempX, float tempY, float tempW, float tempH) {
    x = tempX;
    y = tempY;
    w = tempW;
    h = tempH;
  }

  void display() {
    //original image
    if (changed == false){
      noTint();
      image(img, x , y, w, h);
    }
    //changed images
    if (changed == true){
      tint(165, 111, 124, 50);
      image(lebron, x, y, w, h);
    }
  }

  void update() {
    //checking if an image is clicked on
    if (mousePressed){
      if (x < mouseX && mouseX < x+unit && mouseY > y && mouseY < y + unit){
        changed = true;
      }
    }
  }
}
Last week was quite a reflective week for me. I spent a lot of time thinking about how 2020 has been so far. Sure, it kind of sucks for almost all of us, but what I didn’t realize is that it’s going much faster than I ever anticipated and that there’s so much I’m grateful for this year. So, in some way, looking back feels like a blur…I remember everything and nothing at once, and I wanted to use this week’s assignment to communicate that state of mind.
Concept
The analogy I made in my brain was: looking back at the year is like watching my memories through a glitchy old TV, and so that’s exactly what I went for!
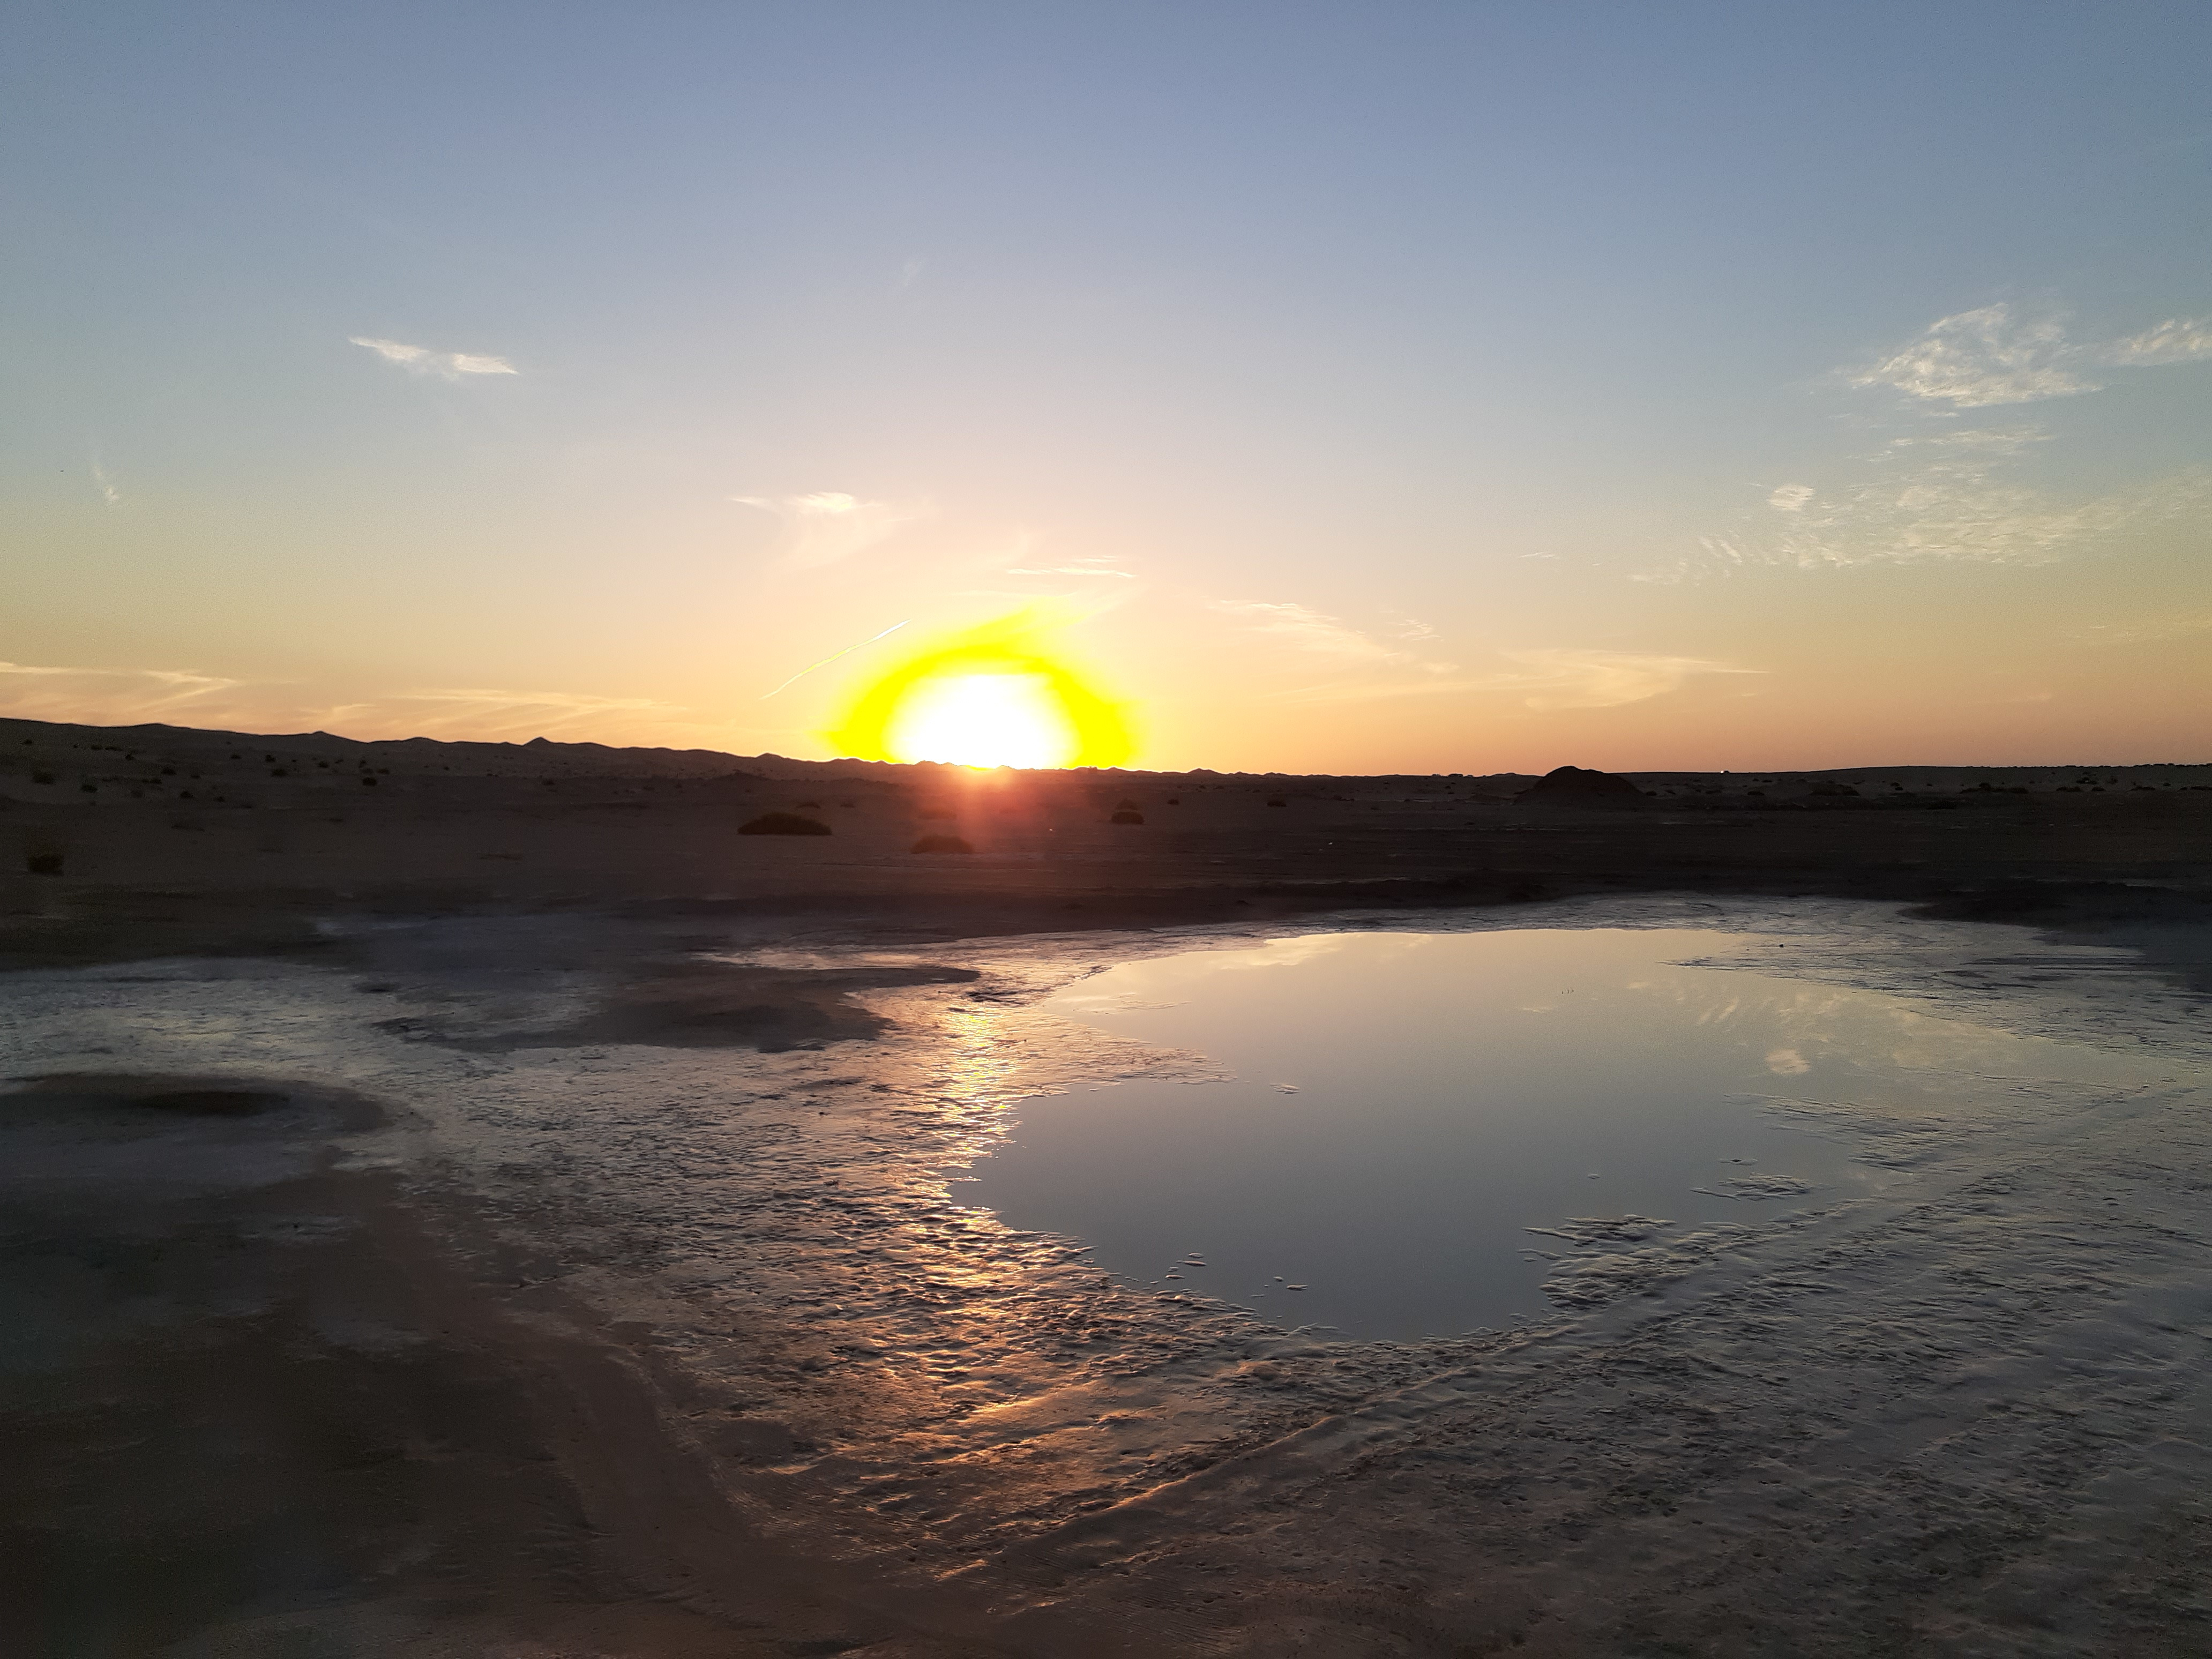
I usually create collections of 10-20 photos that represent every month for me, so I picked one picture from each month of 2020 so far to be displayed through the old tv.
Process
For starters, my first step was collecting my pictures and editing them all to be of the same dimensions and making sure these dimensions go well with the TV frame I had loaded onto my program.
Then, I started putting my images in a “slideshow’ that updates as the program is running. So, I created an array of Images and variables for slide number, Time, and slide duration and looped through my images in the draw() loop.
Afterward, I started experimenting with possible glitches. I looked at the Processing reference and examples online to come up with interesting glitches that simulate a broken TV. I placed each glitch in its own function and used a random variable to call a different glitch each run to give the sketch a more authentic feel.
Glitch 1
by r00t-b33r on DeviantArt
I loaded a no signal image into the sketch and wanted to overlay it onto the pictures I was loading, but I didn’t want it to be too overpowering. So, I explored the blend() function and used the MULTIPLY filter which gave me a realistic result.
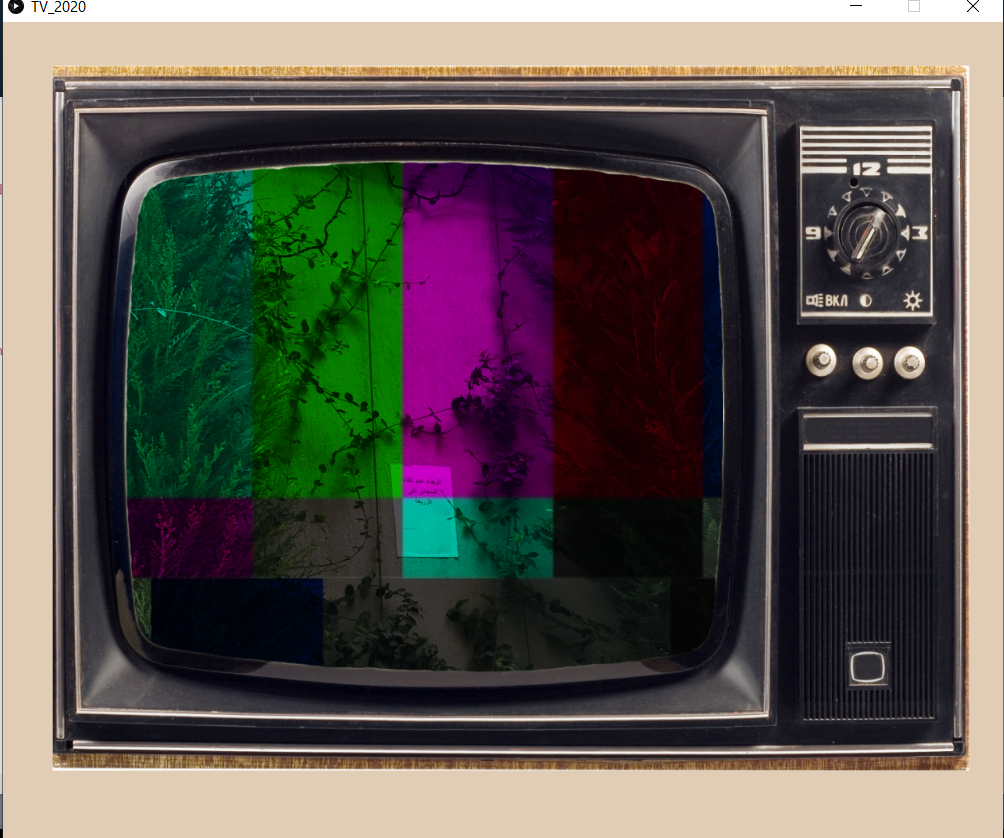
Glitch1
Here’s an example of what the function produces when the program runs.
My second glitch made use of the pixel array. I loaded the pixels for each image I used and set the color for each. For the Y value, I used a random function to create a bleeding effect so it doesn’t cover the whole TV when it alternates glitches, I also felt like it looked more interesting.
Glitch 2 – Bleeding Pixels
void glitch2() {
  months[currentSlide].loadPixels();
  for (int x = 0; x < months[currentSlide].width; x++) {
    for (int y = 0; y < random(months[currentSlide].height-400, months[currentSlide].height); y++) {
      float pix = random(255);
      months[currentSlide].pixels[x+y*months[currentSlide].width] = color(pix);
    }
  }

  updatePixels();


}
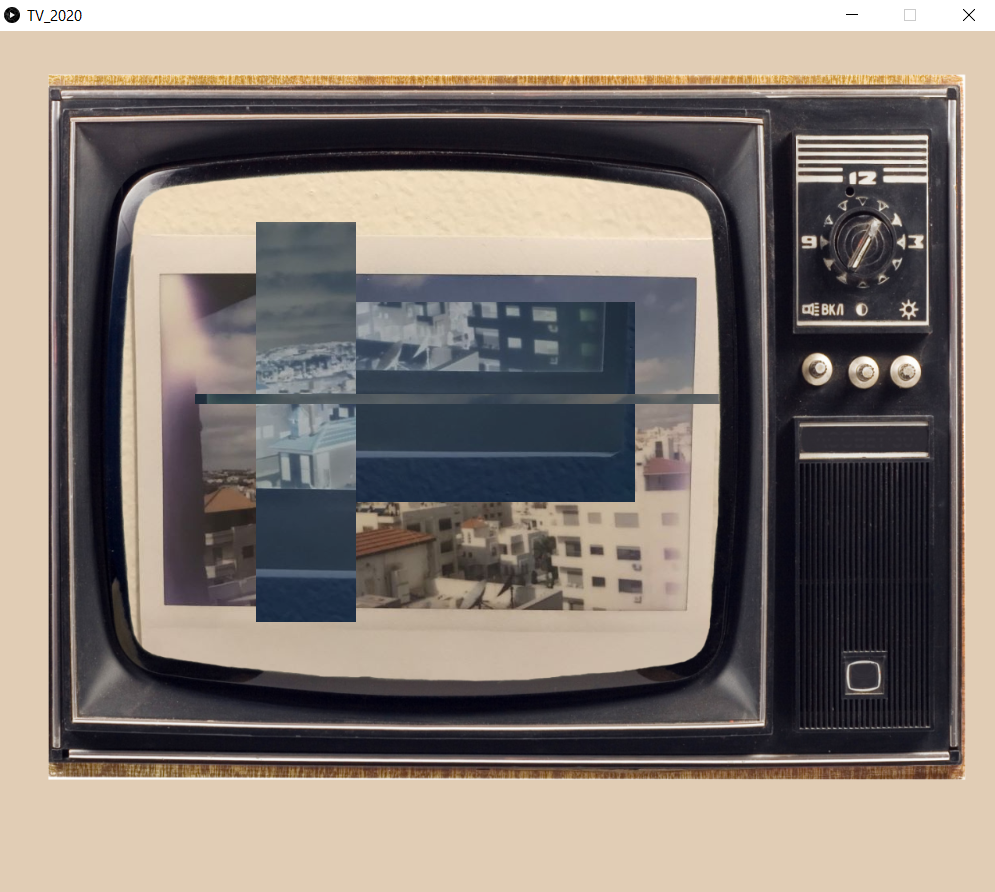
Glitch 3
Here, I used the logic of getting subsections from the main image. I grabbed one fixed subsection (of the middle part always to keep the most important parts of the picture, the center, visible), and two random subsections. I placed these subsections at a random location and used the INVERT filter to create something more visually appealing. I used a modulus loop to slow down this movement. Otherwise, the program would run too fast making the glitch barely visible.
Glitch 4 isn’t really a glitch, I just included a function that loads the image normally as I do at the beginning of the program to maintain some balance in the animation.
Finally, I thought I’d give the images some context. So I created a string array that contains one thing I’m grateful for each month, and the program uses the slide number to load the matching array.
Final Product
What I was prioritizing this week, is approaching the assignment systematically and in an organized manner. I often feel like I am overwhelmed with ideas and don’t know where to start, I decided to take it step by step this week and did my assignment in separate programs that I put together in the end. This made me feel productive and made the process much more enjoyable. This is one of the reasons this has been my favorite assignment so far, but I think it’s also because I enjoy working with visuals and mixing effects to achieve a specific aesthetic!
For further development, I want to familiarize myself more with the pixel array and explore the possibilities of using it. I would also be interested to see if I can generate pixels for a text if I used the geomerative library to get the points of my string.
Mona Lisa is one of my favorite paintings. So I decided to use it for this week’s image manipulation assignment. The product of my image manipulation was not entirely my initial intention, because I arrived at the current outcome upon various trials and failures. First, I manipulated the painting in a way that the image is transformed to a black&white image and disintegrated into small ellipses when the cursor is moved. Following the X and Y axis, the gap and the number of ellipses change, creating a sort of 3D-animated effect (?) from my perspective. Another aspect I decided to add was a certain change when the mouse is pressed. When the mouse is pressed, the cursor turns into a spotlight. I feel that this adds to the somewhat eerie and mysterious atmosphere of my creation. You can find my attempts and addition of different aspect in the videos below.
Here is the code:
//image manipulation assignment

PImage photo;

void setup(){
  size(800,650);
  photo = loadImage("/Users/sangjinlee/Desktop/monalisa.jpg");
  //Using the width and height of the photo for the screen size
  photo.resize(width,height);
}

void draw(){
  if (mousePressed){
    loadPixels();
    photo.loadPixels();
    for(int x= 0; x<width; x++){
      for(int y=0; y<height; y++){
        //location in the pixel array
        int loc = x+y*width;
        float r = red(photo.pixels[loc]);
        float g = green(photo.pixels[loc]);
        float b = blue(photo.pixels[loc]);
        //get distance between the cursor and the pixel
        float d = dist(mouseX,mouseY,x,y);
        float mult = map(d,0,120,1.5,0);
        //the closer the distance, the brighter.
        pixels[loc] = color(r*mult,g*mult,b*mult);
      }
    }
    updatePixels();
  } else{
    background(255);
    fill(0);
    noStroke();

    //Max val for mouseX is 800. So reduce it.
    float ellipseNumber = mouseX / 5;
    //Distance between the ellipses
    float ellipseGap = width / ellipseNumber;

    translate(ellipseGap/2, ellipseGap/2);

    for (int i=0; i<ellipseNumber; i++){
      for (int j=0; j<ellipseNumber; j++){
        //get pixel color corresponding to the changing x and y-axis
        color c = photo.get(int(i*ellipseGap), int(j*ellipseGap));
        //Extract size corresponding to the brightness (0~255) of c we got.
        //Because size is too big, we use map to set the darkest 0 to size 10
        //and to set the brightest 255 to size 0.5.
        float size = map(brightness(c), 0, 255, 10, 0.5);

        ellipse(i*ellipseGap, j*ellipseGap, size, size);
      }
    }
  }
}
In this weeks work I tried to experiment with live video input.
I decided to distort it by creating a particle class. The video is basically drawn by a collection of particles.
By doing that I tried to achieve a sense of anonymity. Many hackers nowadays can access our laptop cameras easily. Thinking about blurring them out with an external program may be useful and definitely not that hard to code.
For this week assignment I was completely out of ideas. So I decided to manipulate the pixel of an image. I load the picture and then in different functions I manipulate each individual pixel of the image.
There are five different manipulations that can take place:
Inverting the RGB values of each pixel
Inverting the R values of each pixel
Inverting the G values of each pixel
Inverting the B values of each pixel
Swapping the pixels in the array
Exagerating the each RGB value with the same random number
Each of the different functions are mapped to keys 1-6 on the keyboard and pressing any other key would reload the original image.
Original Image- Sweihan
Pressing different keys in different combinations will yield different outcomes.
Advanced Implementation
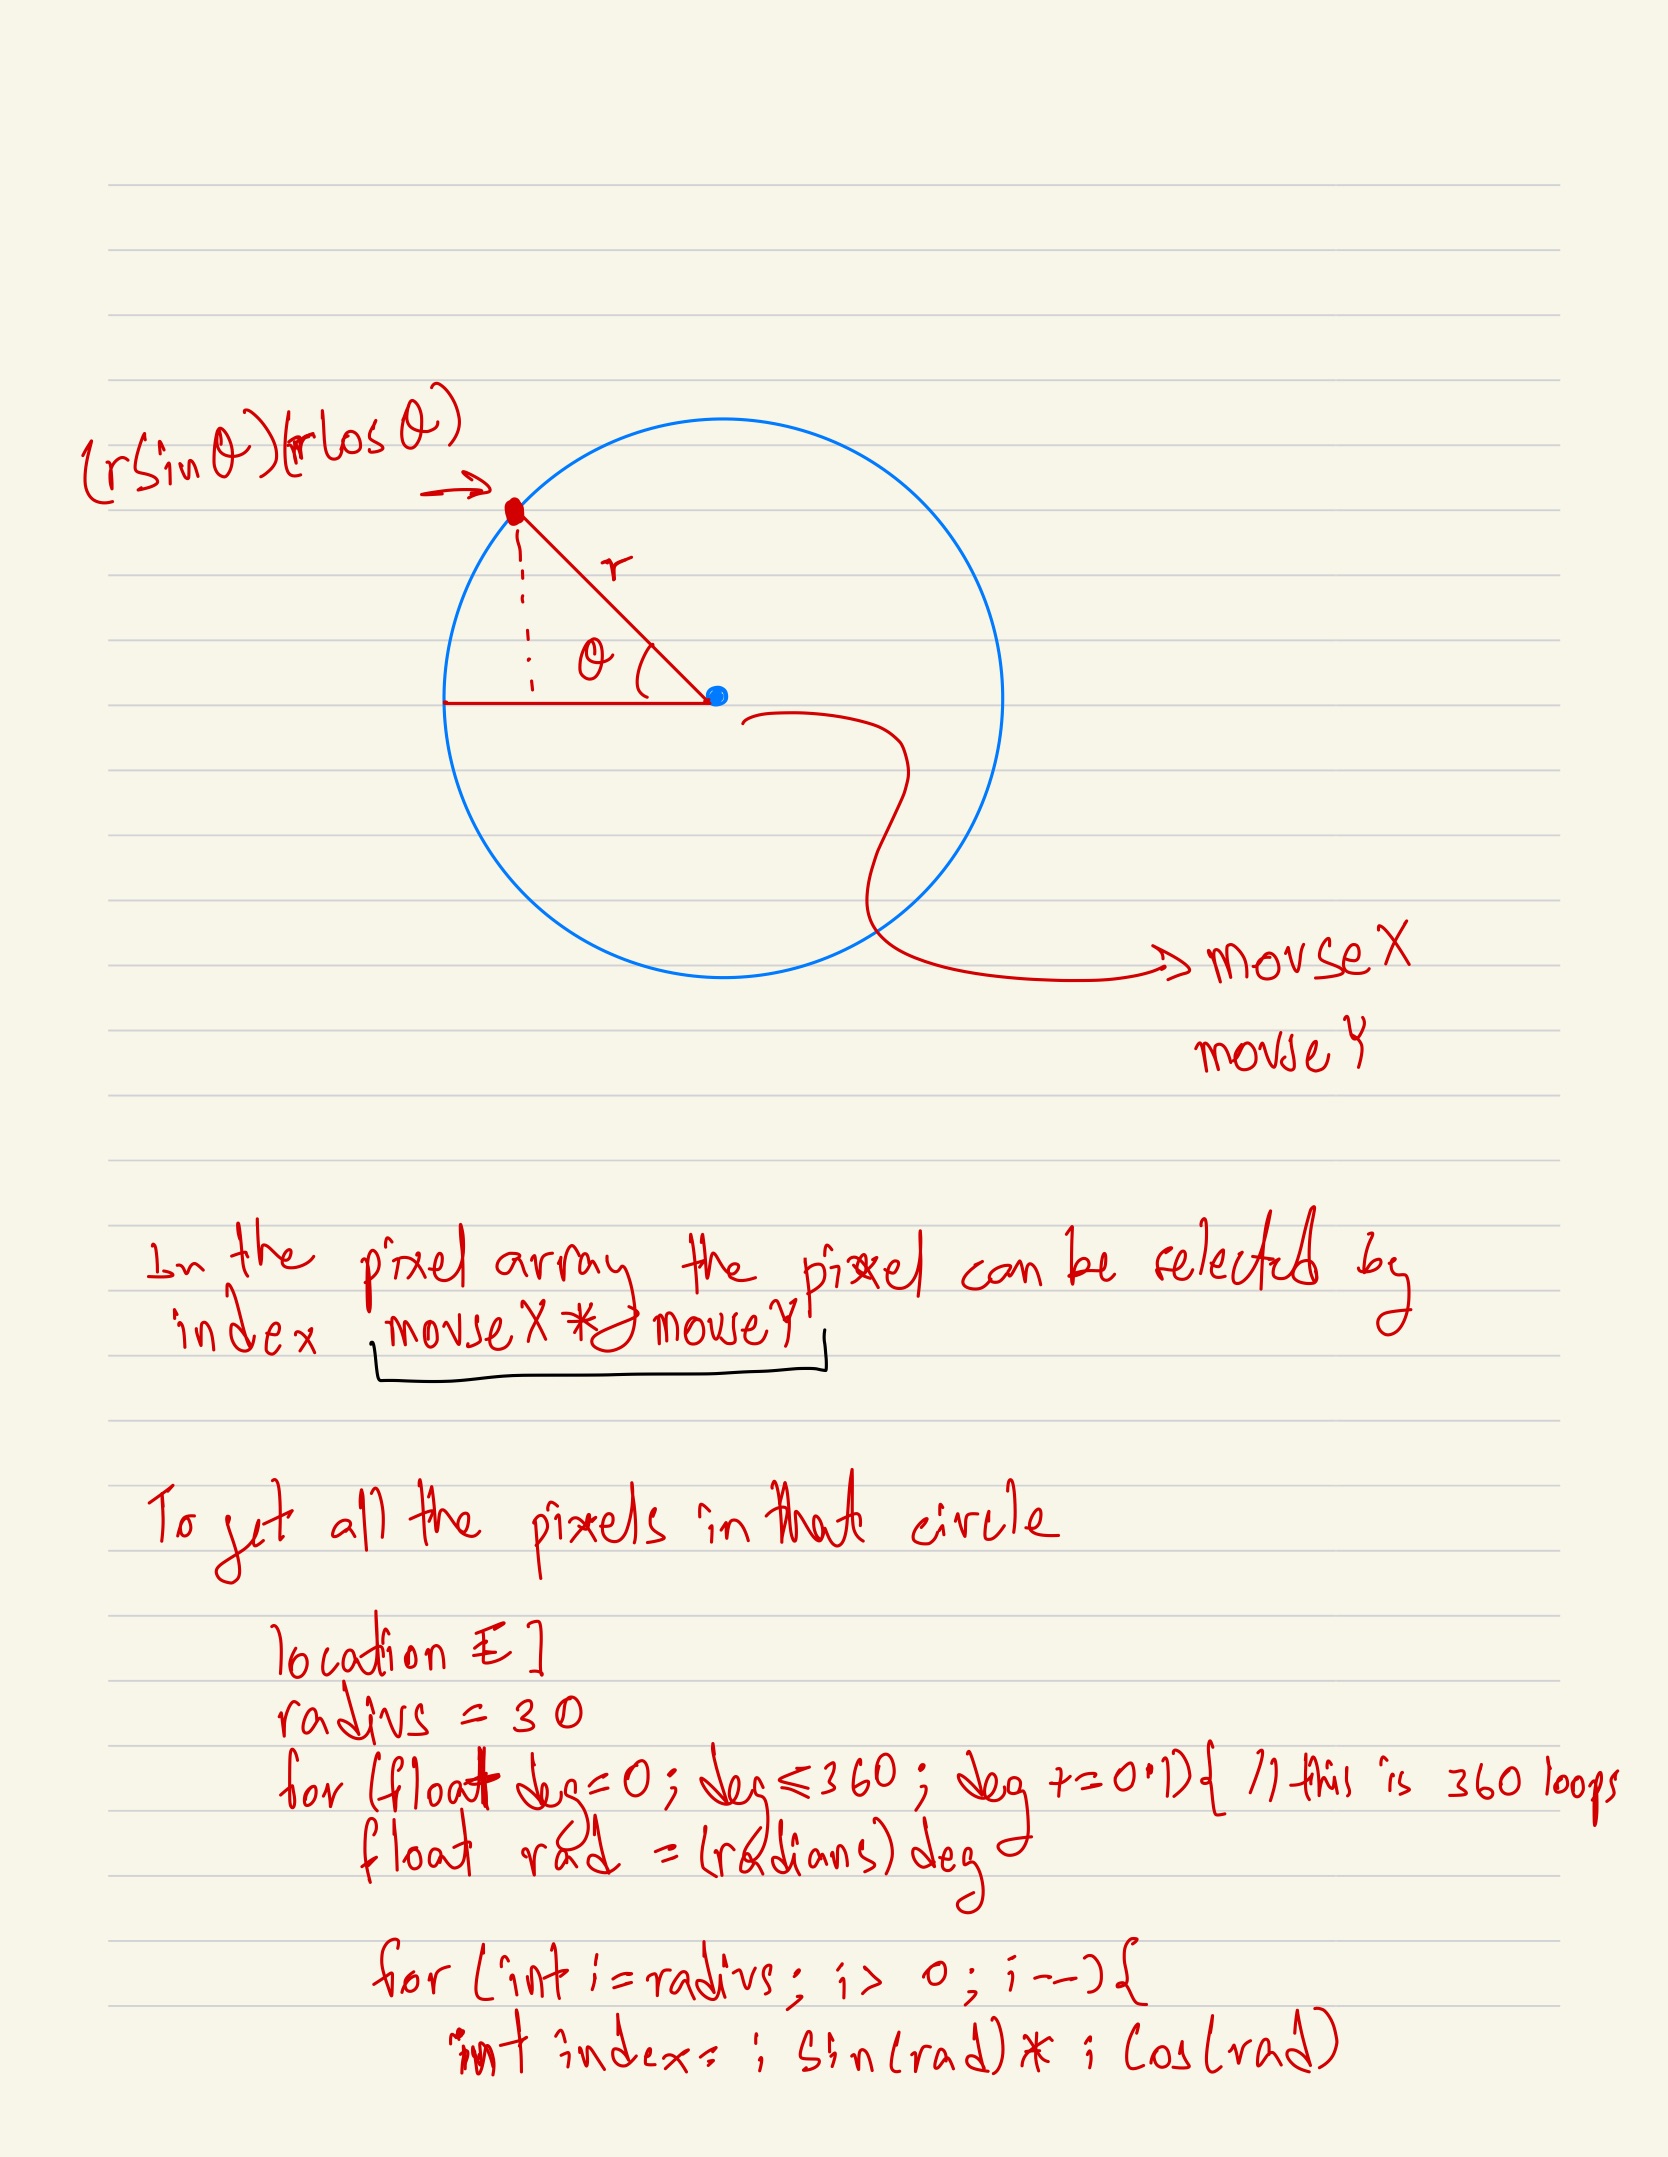
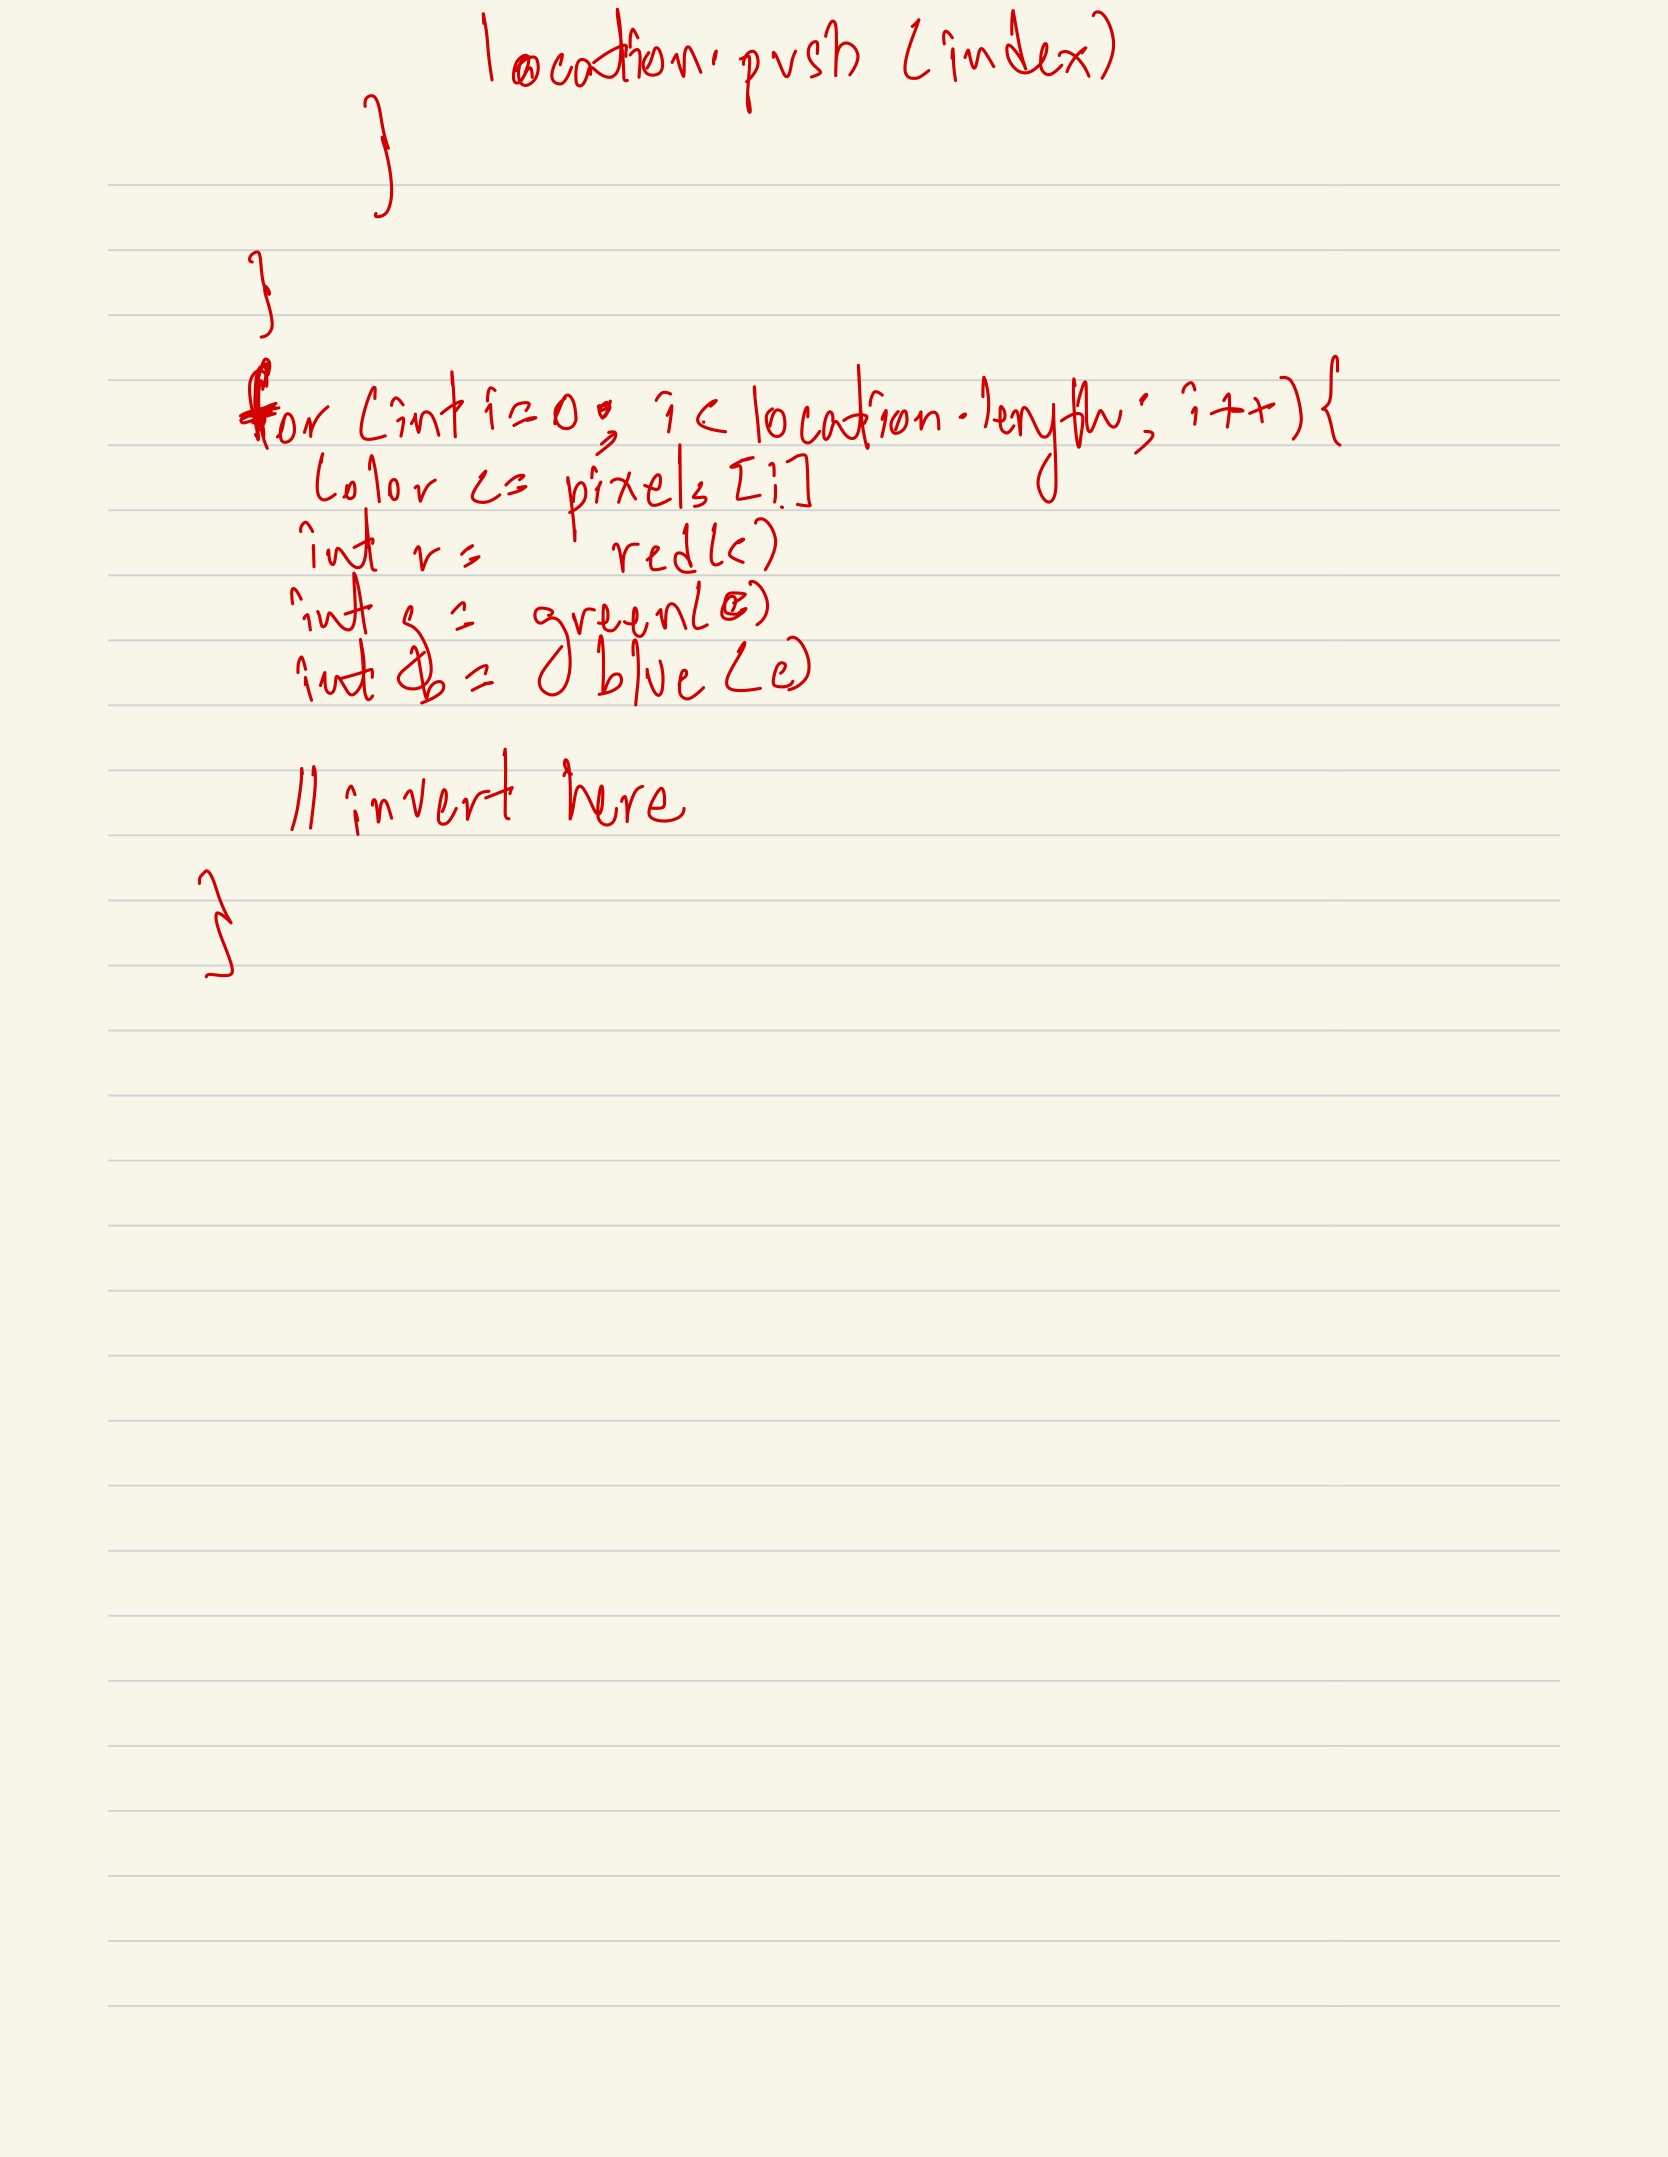
I tried to add another level of complexity to the sketch by inverting the pixels which in a circular distance of the mouse cursor.
I was able to figure the logic on paper but the logic when translated to code was not.
Logic Page 1Logic Page Two
I would like to pursue this further and implement this logic
PImage img;
int counter = 0;
int KeyCode = -1;

void setup() {
  size(1280, 720);
  img = loadImage("scene.jpg");
  image(img, 0, 0, width, height);
  //noLoop();
}

void draw() {
  //if (mouseX>0 && mouseX<width && mouseY>0 && mouseY<height) {
  //  negativeMousePosition();
  //}
}

void keyPressed() {
  float sinVal = radians(180);
  println(sin(sinVal),cos(radians(180)));
  if (keyCode==49) { //1
    invertRGB();
    KeyCode = 49;
  } else if (keyCode==50) { //2
    invertR();
    KeyCode = 50;
  } else if (keyCode==51) { //3
    invertG();
    KeyCode = 51;
  } else if (keyCode==52) { //4
    invertB();
    KeyCode = 52;
  } else if (keyCode==53) { //5
    swapPixels();
    KeyCode = 53;
  } else if (keyCode == 54) { //6
    exagerate();
    KeyCode = 54;
  } else { //anything else
    drawOriginal();
    KeyCode = -1;
  }
}

//void mouseDragged(){
//  negativeMousePosition();
//}

void invertRGB() {
  //img = loadImage("scene.jpg");
  //image(img, 0, 0, width, height);
  loadPixels();
  for (int i=0; i<width*height; i++) {
    int r = (int)red(pixels[i]); //get red value
    int g = (int) green(pixels[i]); // get green value
    int b = (int) blue(pixels[i]); //get blue value
    color c = color(255-r, 255-g, 255-b); // take the complement of the rgb values
    pixels[i] = c; //set the new color value
  }
  updatePixels(); //update the pixels on screen
}

void invertR() {
  //img = loadImage("scene.jpg");
  //image(img, 0, 0, width, height);
  loadPixels();
  for (int i=0; i<width*height; i++) {
    int r = (int)red(pixels[i]); //get red value
    int g = (int) green(pixels[i]); // get green value
    int b = (int) blue(pixels[i]); //get blue value
    color c = color(255-r, g, b); // take the complement of the rgb values
    pixels[i] = c; //set the new color value
  }
  updatePixels(); //update the pixels on screen
}

void invertG() {
  //img = loadImage("scene.jpg");
  //image(img, 0, 0, width, height);
  loadPixels();
  for (int i=0; i<width*height; i++) {
    int r = (int)red(pixels[i]); //get red value
    int g = (int) green(pixels[i]); // get green value
    int b = (int) blue(pixels[i]); //get blue value
    color c = color(r, 255-g, b); // take the complement of the rgb values
    pixels[i] = c; //set the new color value
  }
  updatePixels(); //update the pixels on screen
}

void invertB() {
  //img = loadImage("scene.jpg");
  //image(img, 0, 0, width, height);
  loadPixels();
  for (int i=0; i<width*height; i++) {
    int r = (int)red(pixels[i]); //get red value
    int g = (int) green(pixels[i]); // get green value
    int b = (int) blue(pixels[i]); //get blue value
    color c = color(r, g, 255-b); // take the complement of the rgb values
    pixels[i] = c; //set the new color value
  }
  updatePixels(); //update the pixels on screen
}

void drawOriginal() {
  image(img, 0, 0, width, height);
}

void swapPixels() {
  //img = loadImage("scene.jpg");
  //image(img, 0, 0, width, height);
  loadPixels();
  //println(pixels[1]);
  //println(pixels[width*height-2]);

  for (int i=0; i<(width*height)/2; i++) {
    int temp;
    temp = pixels[i];
    pixels[i] = pixels[width*height-1-i];
    pixels[width*height-1-i] = temp;
  }

  updatePixels();
  //println(pixels[1]);
}

void exagerate() {
  //img = loadImage("scene.jpg");
  //image(img, 0, 0, width, height);
  loadPixels();
  for (int i=0; i<width*height; i++) {
    int r = (int)red(pixels[i]); //get red value
    int g = (int) green(pixels[i]); // get green value
    int b = (int) blue(pixels[i]); //get blue value
    int randomR = (int) random(255);
    int randomG = (int) random(255);
    int randomB = (int) random(255);
    color c = color((r+randomR), (g+randomG), (b+randomB)); // take the complement of the rgb values
    pixels[i] = c; //set the new color value
  }
  updatePixels(); //update the pixels on screen
}
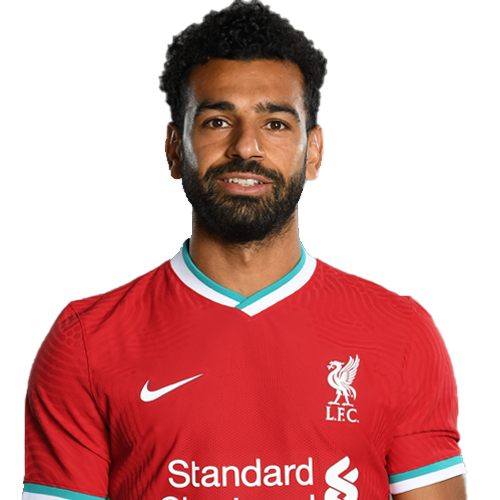
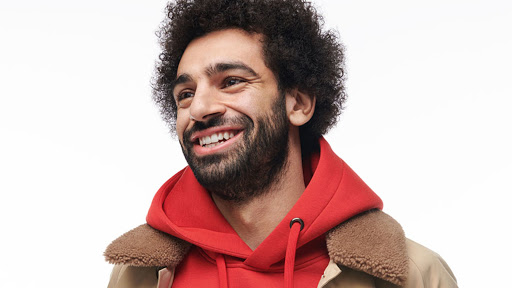
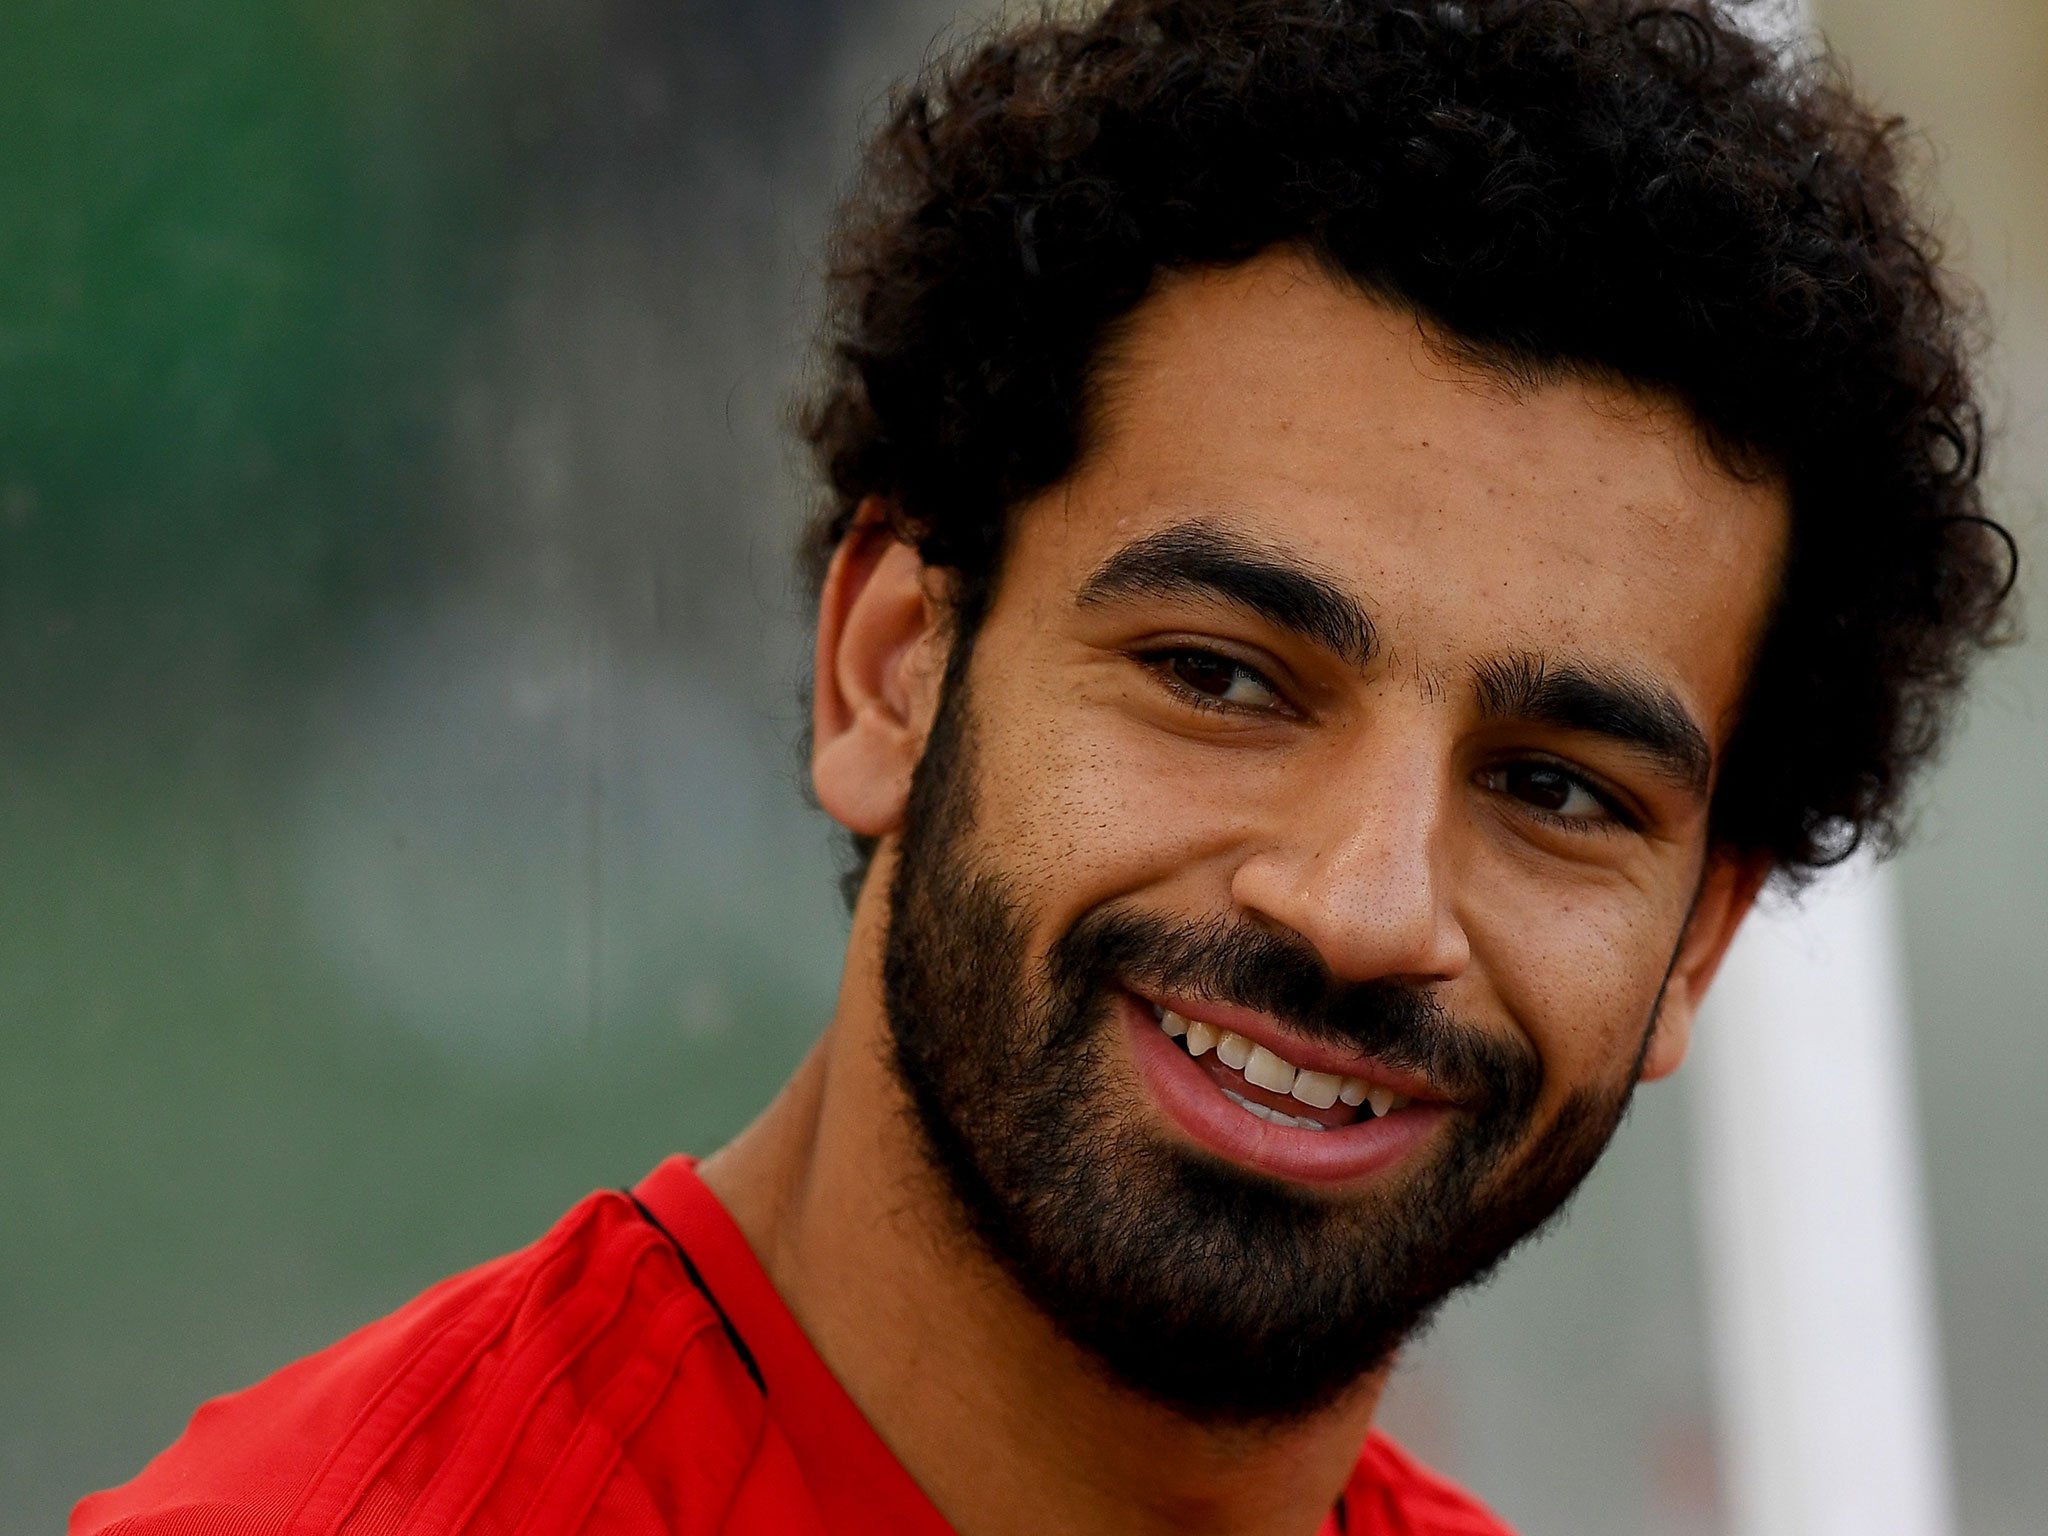
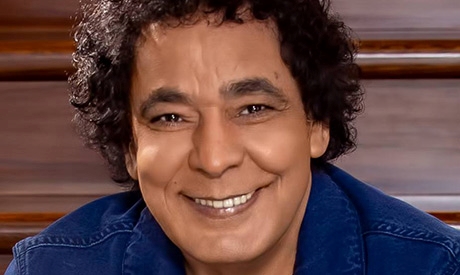
I am no different than any other Egyptian when it comes to loving the Liverpool forward Mohamed Salah who is known as “The Egyptian King”. This man has done so much for Egypt and the world and I am proud to say he is a role model for me. Nevertheless, another more original “Egyptian King” is very close to my heart, the timeless singer Mohamed Mounir. Seeing that they are both always smiling and have distinctive curly black hair, I decided to manipulate images of them as my assignment for this week.
The most difficult part for starting was actually choosing the images from the internet. I tried very high quality pictures but they had too many pixels in them. I tried very small ones but they were too tiny to be able to deal with them. When I got PNG images with transparent backgrounds the effects I had did not work as intended because of the limited space used. Even after finding proper pictures I had to find ones for both Salah and Mounir which are similar in posture, size, and quality. These are some images which I tried but did not work for me:
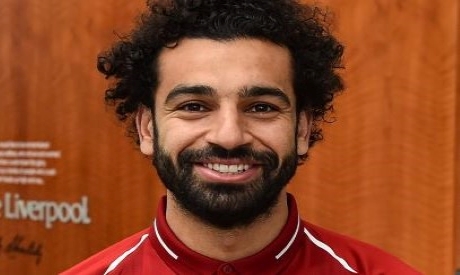
After several trials and errors, I decided to use these two images after I cropped them to be exactly the same size.
Then I decided to get the best out of some code found on the Pixels tutorial page on Processing.org and the past geomerative class. I used the idea of getting the colors of the image and filling some rectangles with them as if they were large pixels. I then made on of the images the background (Mounir) which is hidden under the image on top (Salah) and tried the idea of making use of distance to significantly change the z-dimension of the squares as if they were flying away with the movement of the mouse as if the user was using a magnifying glass to have a look at the background. I made sure the picture returns to its original state as soon as the mouse leaves the plane so that the image doesn’t remain distorted afterwards.
This is the code I used for the interactive image manipulation.
//inspired from the pixels tutorial on teh processing website

PImage mounir;
PImage salah;       // The source image
int rectify = 4; // Dimensions of each cell in the grid
int cols, rows;   // Number of columns and rows in our system
int offset =255;

void setup() {
  size(460, 275, P3D);
  salah  = loadImage("salah2.jpeg"); // Load the image
  mounir = loadImage("mounir.jpg");
  cols = width/rectify;             // Calculate # of columns
  rows = height/rectify;            // Calculate # of rows
}

void draw() {

  background(mounir);
  loadPixels();
  // Begin loop for columns
  for ( int i = 0; i < cols;i++) {
    // Begin loop for rows
    for ( int j = 0; j < rows;j++) {
      int xS = i*rectify + rectify/2; // x position
      int yS = j*rectify + rectify/2; // y position
      int locS = xS + yS*width;       // Pixel array location
      float r = red(salah.pixels[locS]);
      float g = green(salah.pixels[locS]);
      float b = blue(salah.pixels[locS]);
     // Grab the color
      //color cM = mounir.pixels[locS];
      offset -= mouseX/500;
      constrain(offset,0,255);
      // Calculate a z position as a function of mouseX and pixel brightness
      float zS =(8000/dist(mouseX, mouseY, xS, yS)) ;
      if (mouseX > 450 || mouseX < 10 || mouseY > 266 || mouseY < 10) {
          zS =30;
      }
      // Translate to the location, set fill and stroke, and draw the rect
      pushMatrix();
      translate(xS,yS, zS);
      tint(255, offset);
      fill(r, g, b);
      noStroke();
      rectMode(CENTER);
      rect(0,0,rectify,rectify);
      popMatrix();
    }
  }
  updatePixels();
}
The logic itself is a bit simple but it conveys the message and the purpose directly and creatively, which is the most important thing for me. It represents who I am and that is why I personally like it and feel it is me.
Since the start of the class, I have been really struggling with practicing Processing consistently – I would usually start my homeworks 1-2 days in advance and not practice much outside of class hours. But this week is very special: I started working on the weekly assignment 4 days in advance and have even taken some time to practice geomerative* and come up with the midterm idea! 🥳 So here I am, typing this post on a Saturday afternoon (edit: publishing on Sunday though). Enjoy!
Introduction
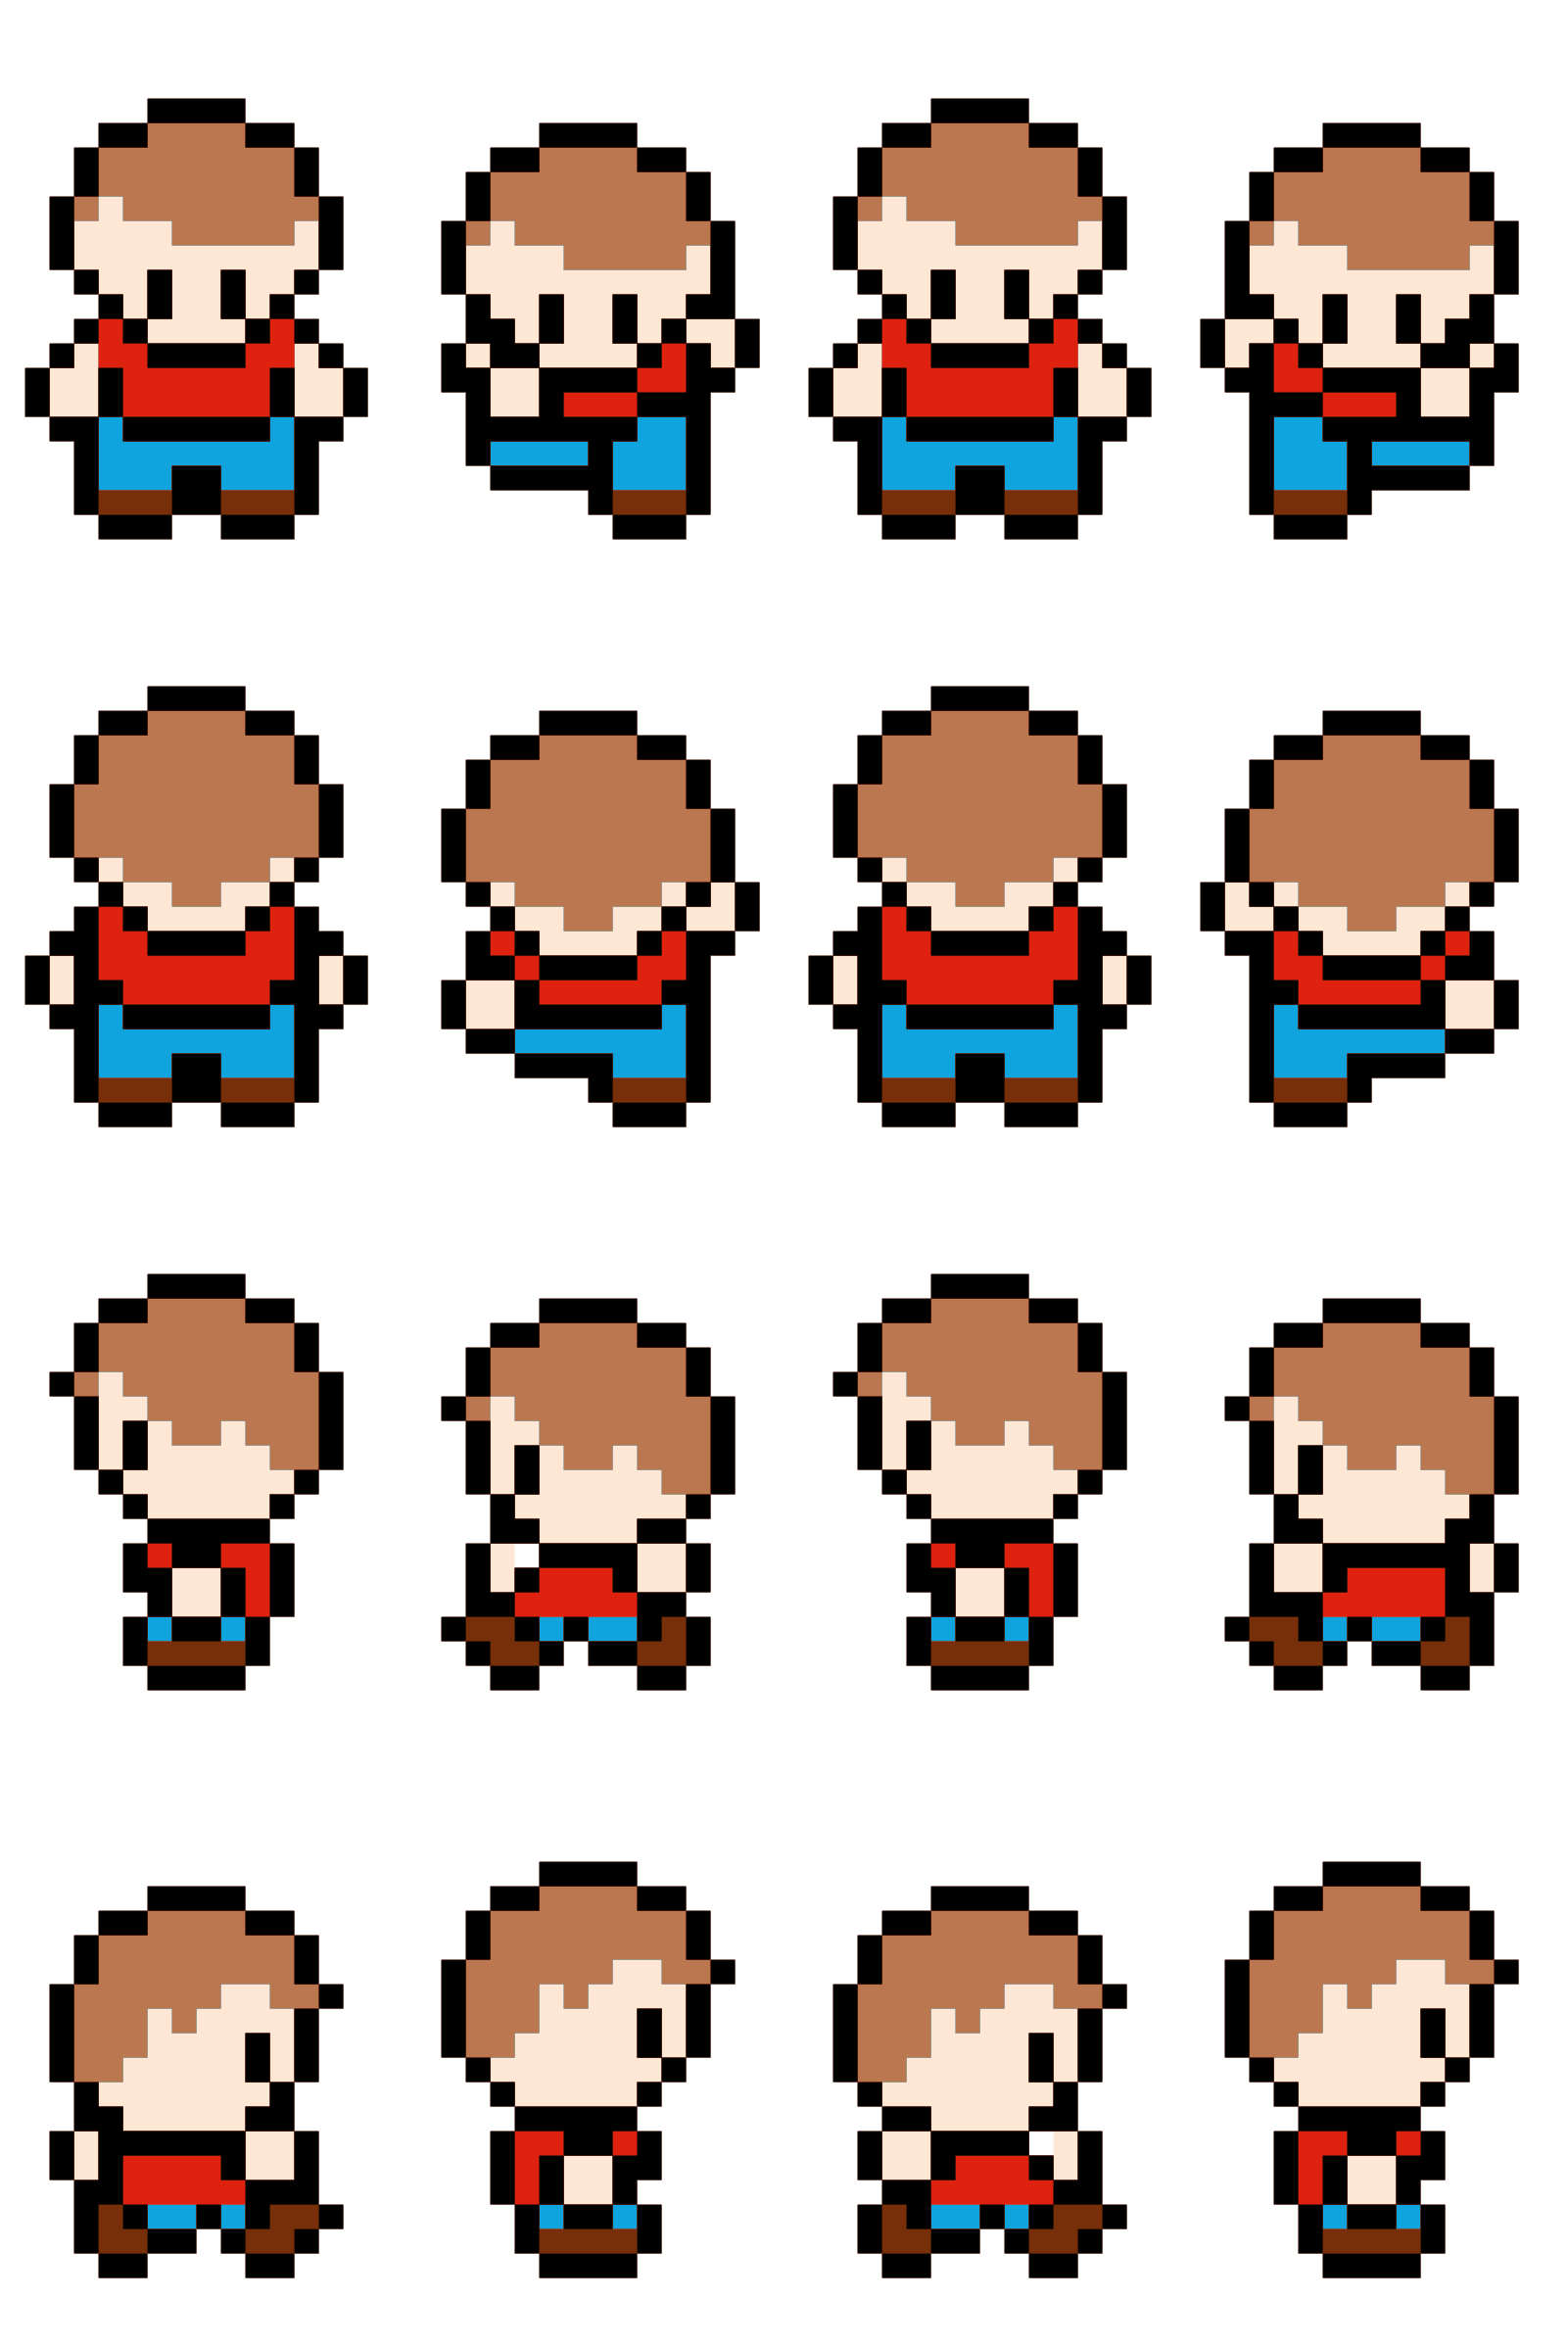
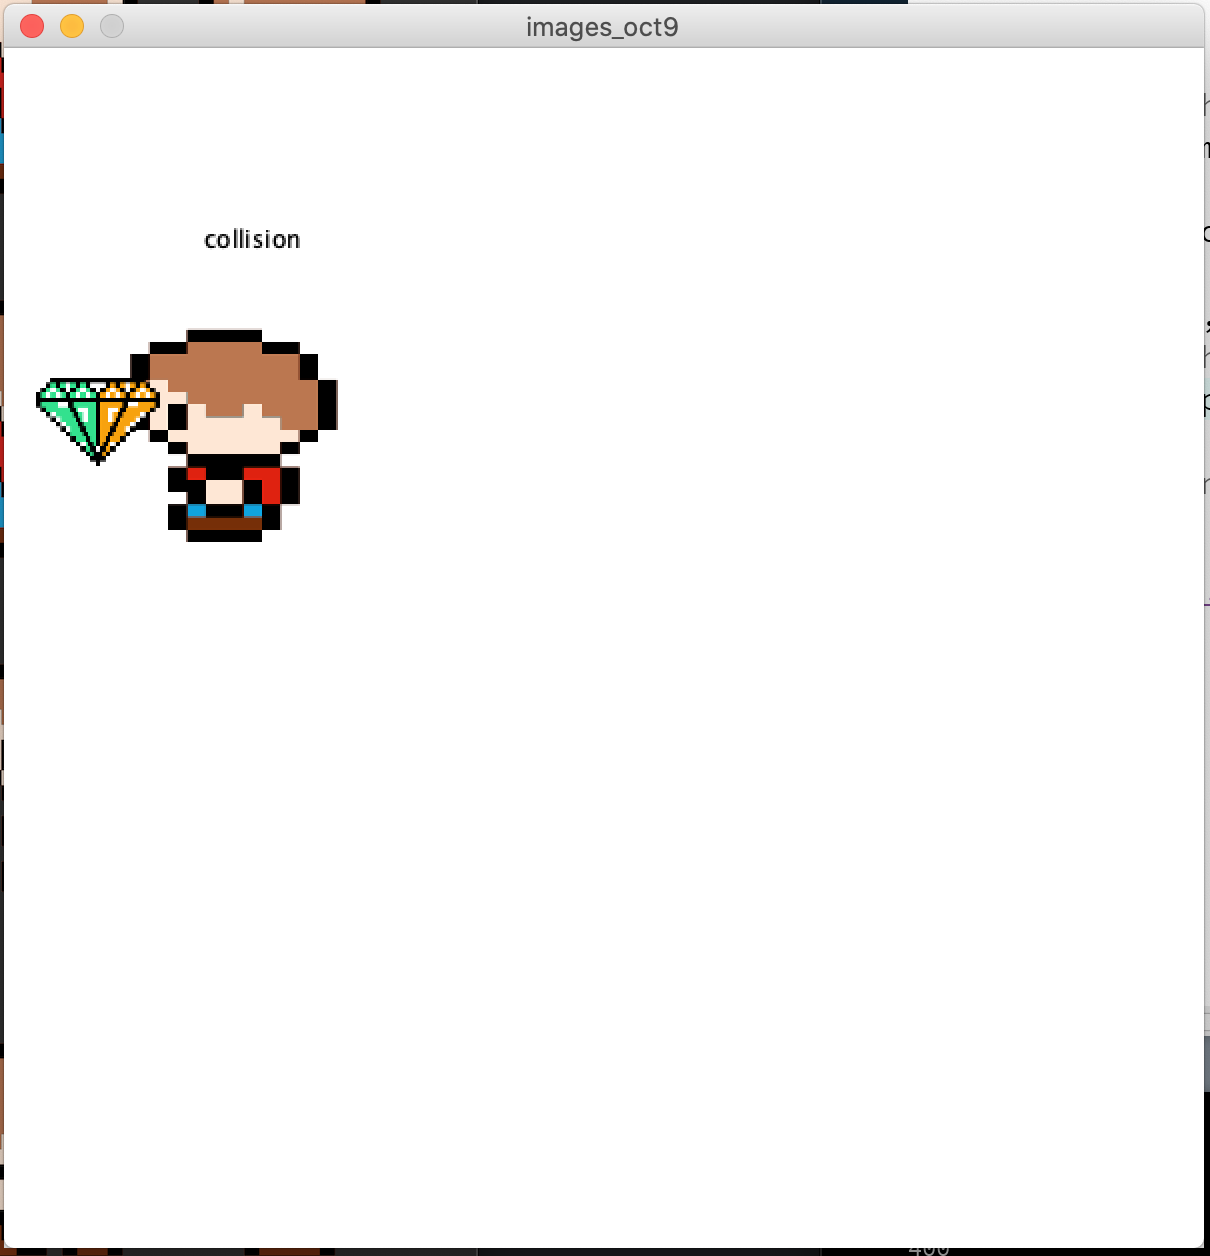
Fascinated by last week’s spritesheet example, I could not resist using this idea for my assignment. General idea was to make a small game with a moving character catching objects – diamonds in this case. After browsing the web, I have downloaded this pixelated Mario (?) image and cropped it in Photoshop as it wasn’t a PNG.
Mario Spritesheet
Process
Milestone 0: learning how to use the spritesheet. I have re-visited the class example and have carefully studied it to understand what is going on behind the code. And especially this – confusing at first – part:
// loops through each step and returns to image 0 after reaching image 3
    if(frameCount%speed==0){
      step = (step+1)%col;
    }
Milestone 1: placing the diamond and building a collision detection function. It took me a good day (coding on and off) to figure out what is going on wrong with my collision detection function. Oh, I have repeated the same mistake as I did when building the OOP assignment! 😅 Good thing now I finally know how to detect collision between two rectangular objects:
// Mario right corner > diamond left AND Mario left corner < diamond right
  if ((posX + person.width/16) > diamondX && posX < (diamondX + diamond.width/4) && (posY+person.height/16) > diamondY && posY < (diamondY + diamond.height/4)){
Milestone 2: collision detection debugging – spritesheet’s width and height. OK, the function was built, BUT it didn’t work out the way I wanted it to. I took all of the creative debugging ways I had in mind and just started printing out line by line what the function is doing…After a few coordinate manipulations, it FINALLY hit me that I am uploading my spritesheet in the original size and then I manually resize the image without providing the new size coordinates to my collision function. So, after fixing the sizes I thought that the problem was fixed…Not quite!
Milestone 3: The spritesheet’s dimensions aren’t perfect! 🤦♀️😅 After fixing the sizes in Processing I actually went to the original image to see what might be wrong – and there it was: there were a lot of blank spaces between spritesheet’s movements that counted towards the current image’s width and height. Yay, now I finally understand what is happening in my program!
Milestone 4: Beautifying the program. After the main logic of the program was done, I decided to add some functions, such as counting and displaying the score, checking for win, and checking borders for Mario’s movement around the screen.
Epilogue
I actually never thought that building small games can be this fun and … actually simple? Definitely am proud for working consistently on this throughout the week and can also see some room for improvement (see milestone 3 and demo – there is a moment when Mario catches a diamond despite being a few pixels away from it xD)
Result
Code:
PImage diamond;
PImage person;
PImage[][] movement;
PImage background;
PFont font;

int direction = 1;
int step, score = 0;
int posX, posY;
int diamondX, diamondY;
int speed = 5;
int row = 4;
int col = 4;
int currentWidth, currentHeight;
String textScore = "Score: ";

void setup(){

  // output window
  size (600, 600);

  // define font
  font = createFont("VT323-Regular", 40);
  textFont(font);

  // get images
  diamond = loadImage("diamond.png");
  person = loadImage("person.png");
  background = loadImage("background.png");

  // place each direction in 2-dimensional array
  movement = new PImage[row][col];

  // divide each step according to each step's dimenstions
  currentWidth = person.width/row;
  currentHeight = person.height/col;

  // place each step into the right location
  for(int posY = 0; posY < 4; posY++){
    for(int posX = 0; posX < 4; posX++){
      movement[posY][posX] = person.get(posX*currentWidth, posY*currentHeight, currentWidth, currentHeight);
    }
  }

  // always start with these coordinates
  posX = 0;
  posY = height-person.width/8+50;

  // dimanod location
  diamondX = (int)random(width-diamond.width-100);
  diamondY = (int)random(height-diamond.height-100);

}

void draw(){

  background(255);
  image(background, 0, 0, width, height);

  // place the character onto the board
  image(movement[direction][step], posX, posY, width/4, height/4);

  // move the character
  movePerson();
  checkBorder();

  // place the diamond
  image(diamond, diamondX, diamondY, diamond.width/4, diamond.height/4);

  // check for collision
  detectDiamond();

  // display score:
  displayScore();

  // check for win
  checkWin();
}

// move the character
void movePerson(){

  // activate if key is pressed
  if(keyPressed){

    // move DOWN
    if(keyCode == DOWN){
      // select the corresponding row
      direction = 0;
      // animate the steps to go DOWN in the y-dir (increase)
      posY+=speed;
    }

    // move UP
    if(keyCode == UP){
      // select the corresponding row
      direction = 1;
      // animate the steps to go UP in the y-dir (decrease)
      posY-=speed;
    }

    // move LEFT
    if(keyCode == LEFT){
      // select the corresponding row
      direction = 2;
      // animate the steps to go LEFT in the x-dir (decrease)
      posX-=speed;
    }

    // move RIGHT
    if(keyCode == RIGHT){
      // select the corresponding row
      direction = 3;
      // animate the steps to go RIGHT in the x-dir (increase)
      posX+=speed;
    }

    // loops through each step and returns to image 0 after reaching image 3
    if(frameCount%speed==0){
      step = (step+1)%col;
    }
  }
}

// needs some bug fixing
void checkBorder() {

  // return from the left
  if (posX >= width) {
    posX = -currentWidth;
  }

  // return from the right
  if (posX+currentWidth < 0) {
    posX = width;
  }

  // return from the bottom
  if (posY+currentHeight < 0) {
    posY = height;
  }

  // return from the top
  if (posY > height) {
    posY = -currentHeight;
  }
}

// check for the image collision (diamond collection)
void detectDiamond(){

  // Mario right corner > diamond left AND Mario left corner < diamond right
  if ((posX + person.width/16) > diamondX && posX < (diamondX + diamond.width/4) && (posY+person.height/16) > diamondY && posY < (diamondY + diamond.height/4)){

    // increment the score
    score++;

    // replace diamond
    diamondX = (int)random(width-diamond.width-100);
    diamondY = (int)random(height-diamond.height-100);
  }
}


// display the score
void displayScore(){
  push();
    fill(0);
    text("Score: " + score, width-180, 40);
  pop();
}

void checkWin(){
  if (score == 5) {
    background(103, 212, 239);
    push();
      textAlign(CENTER);
      fill(random(255), random(255), random(255));
      textSize(100);
      text("You WON!", width/2, height/2);
    pop();
  }
}
I’ve got to say, I was really disappointed when I was writing this title and I realized we were only on week 5 :/
I was really excited for this assignment, and the idea I wanted to create. I wanted to create a Mosaic Image. Unfortunately, because of time constraints and also << talent >> constraints, I decided to go for a more simple Interactive Image.
I had a few issues with creating the Mosaic image:
I could not find enough filler images on time – Especially ones that matched the final images
I had technical constraints, such as I didn’t know how to create a code that could go through several images and find a small (but not too small) section in one with an average RGB value to match the original image.
To accomplish this, it would have to be so many images that i would be able to zoom on each pixel and see the image, but when I zoom out I should still be able to make out what the original photo was
I had more, but these were some. I took a lot of time reading other codes online, but they were difficult to understand. I do still have it as a goal to accomplish a code like this, and hopefully, I’ll manage to do it.
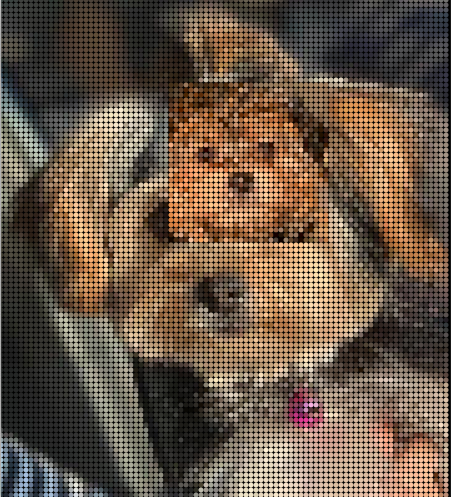
For my actual assignment, my main obstacle was trying to understand the mechanism of my idea: which was to change the image upon hover. After I figured it out it seemed so simple, but sometimes I overthink things.
I also added interactivity where you can change the size of the ‘window’ you are viewing from, using the right or left arrows, which I thought added a nice touch.
Special thanks for my dog Coco, for being this week’s Model:
The second image is when she was younger (and no doubt much cuter, sorry Coco). It was also nice to play around with either using pixels/ellipses, and this image looked very… classy?
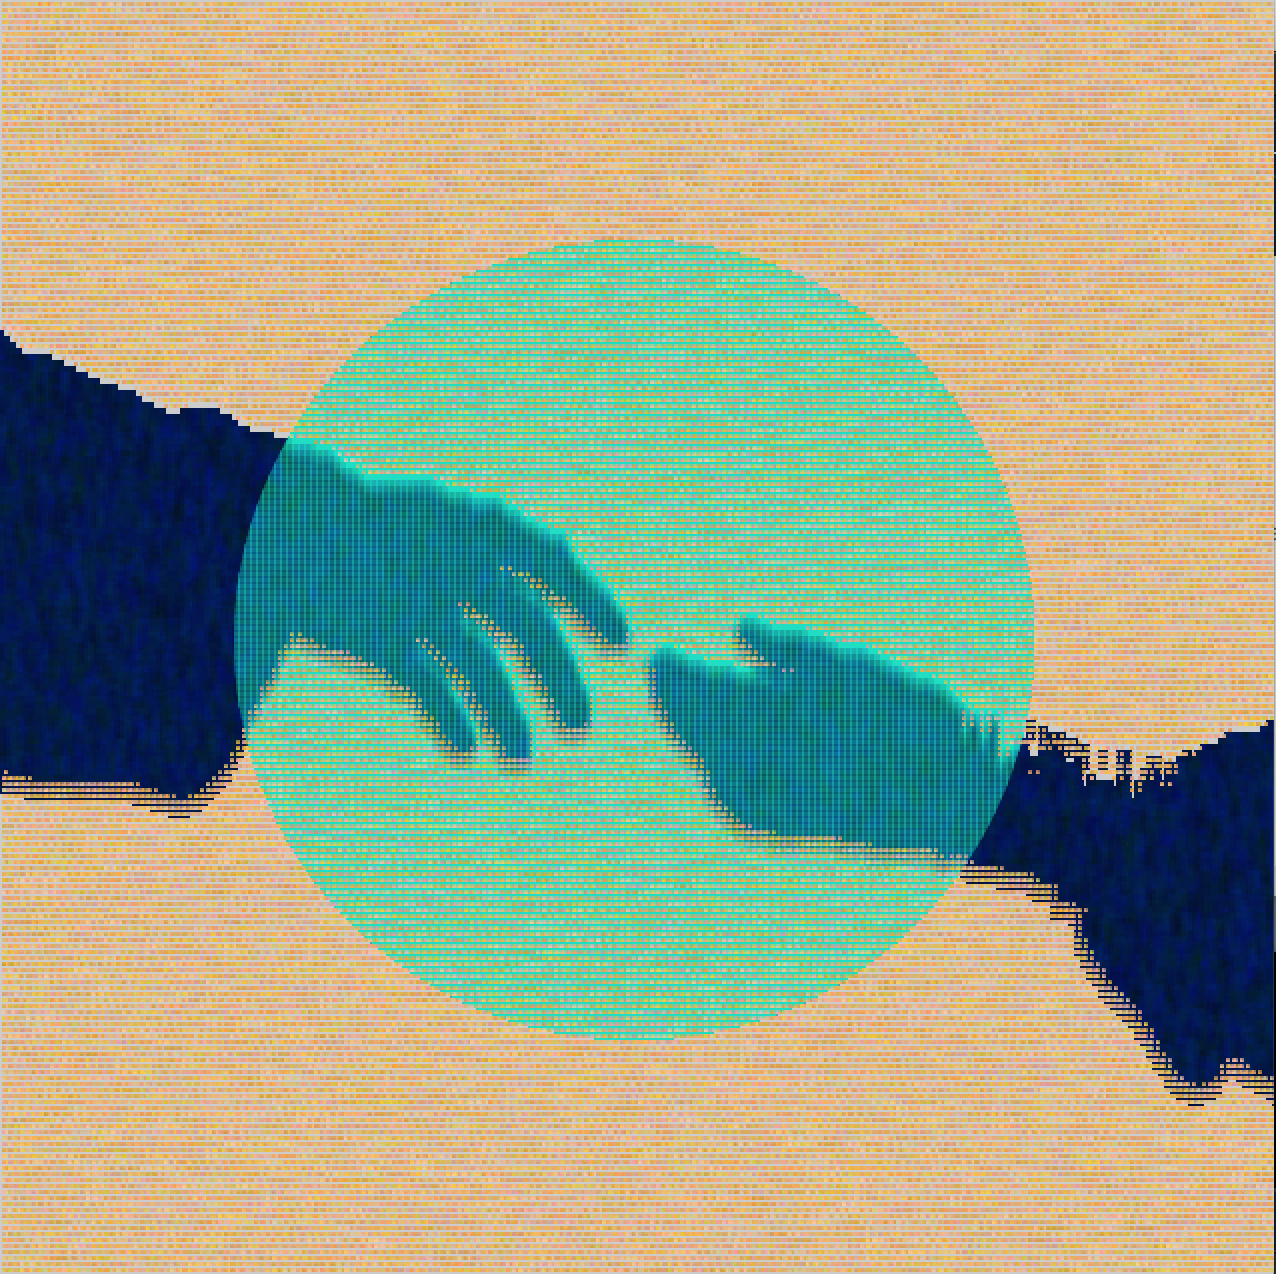
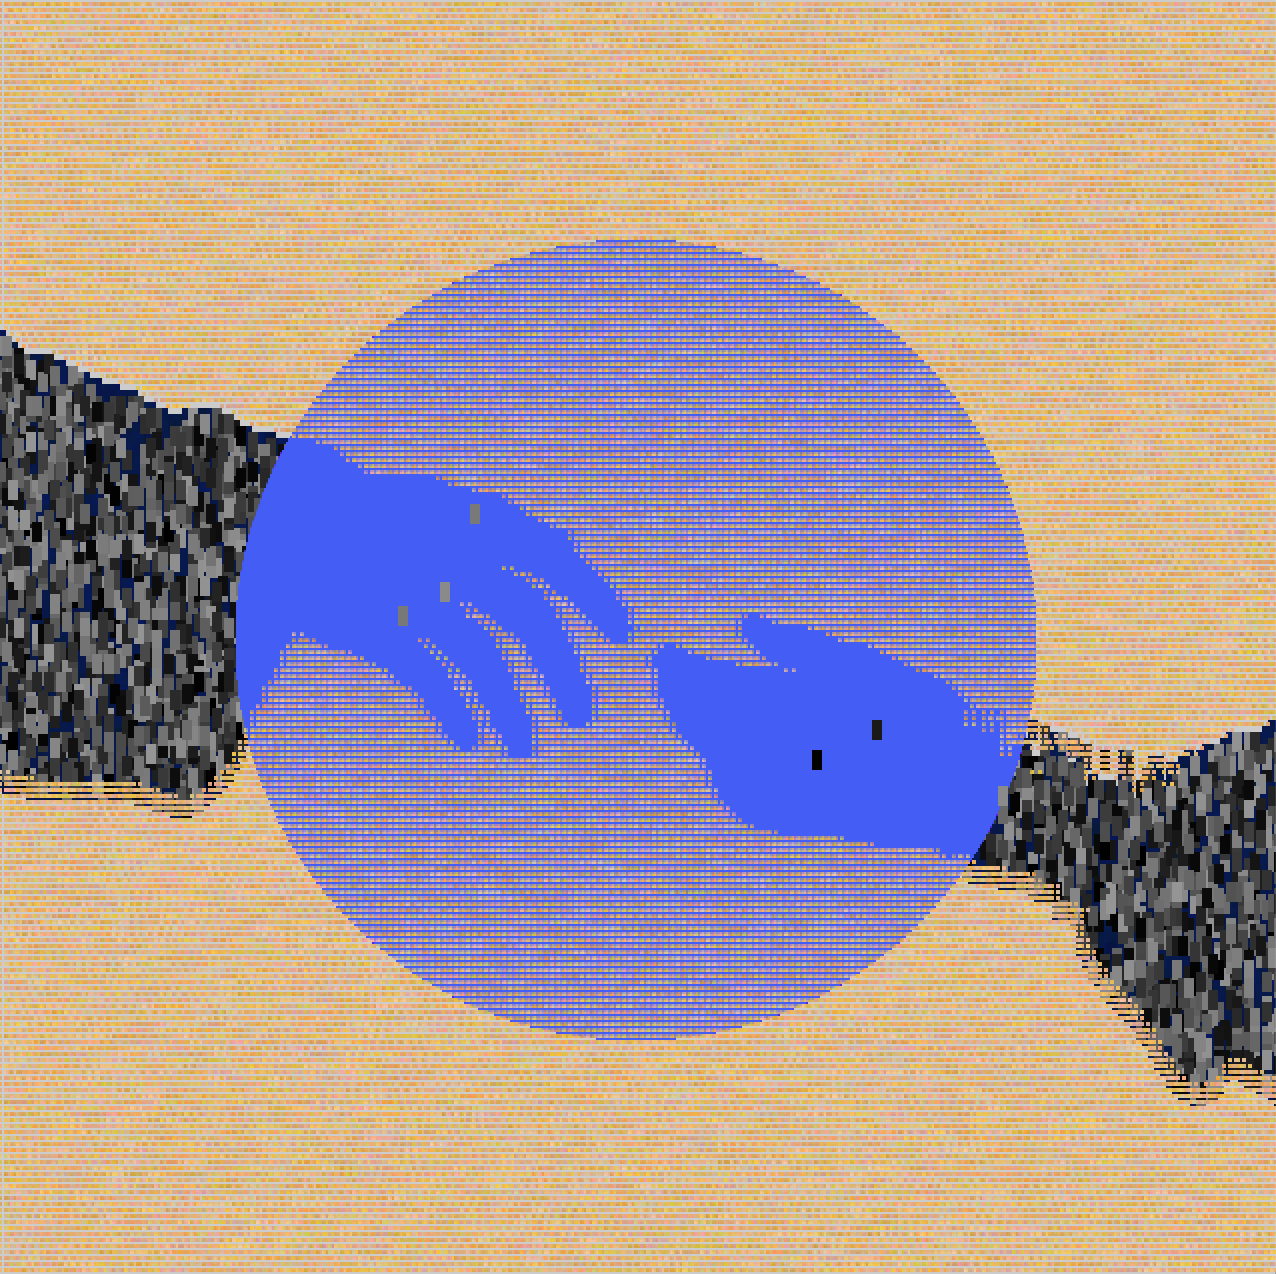
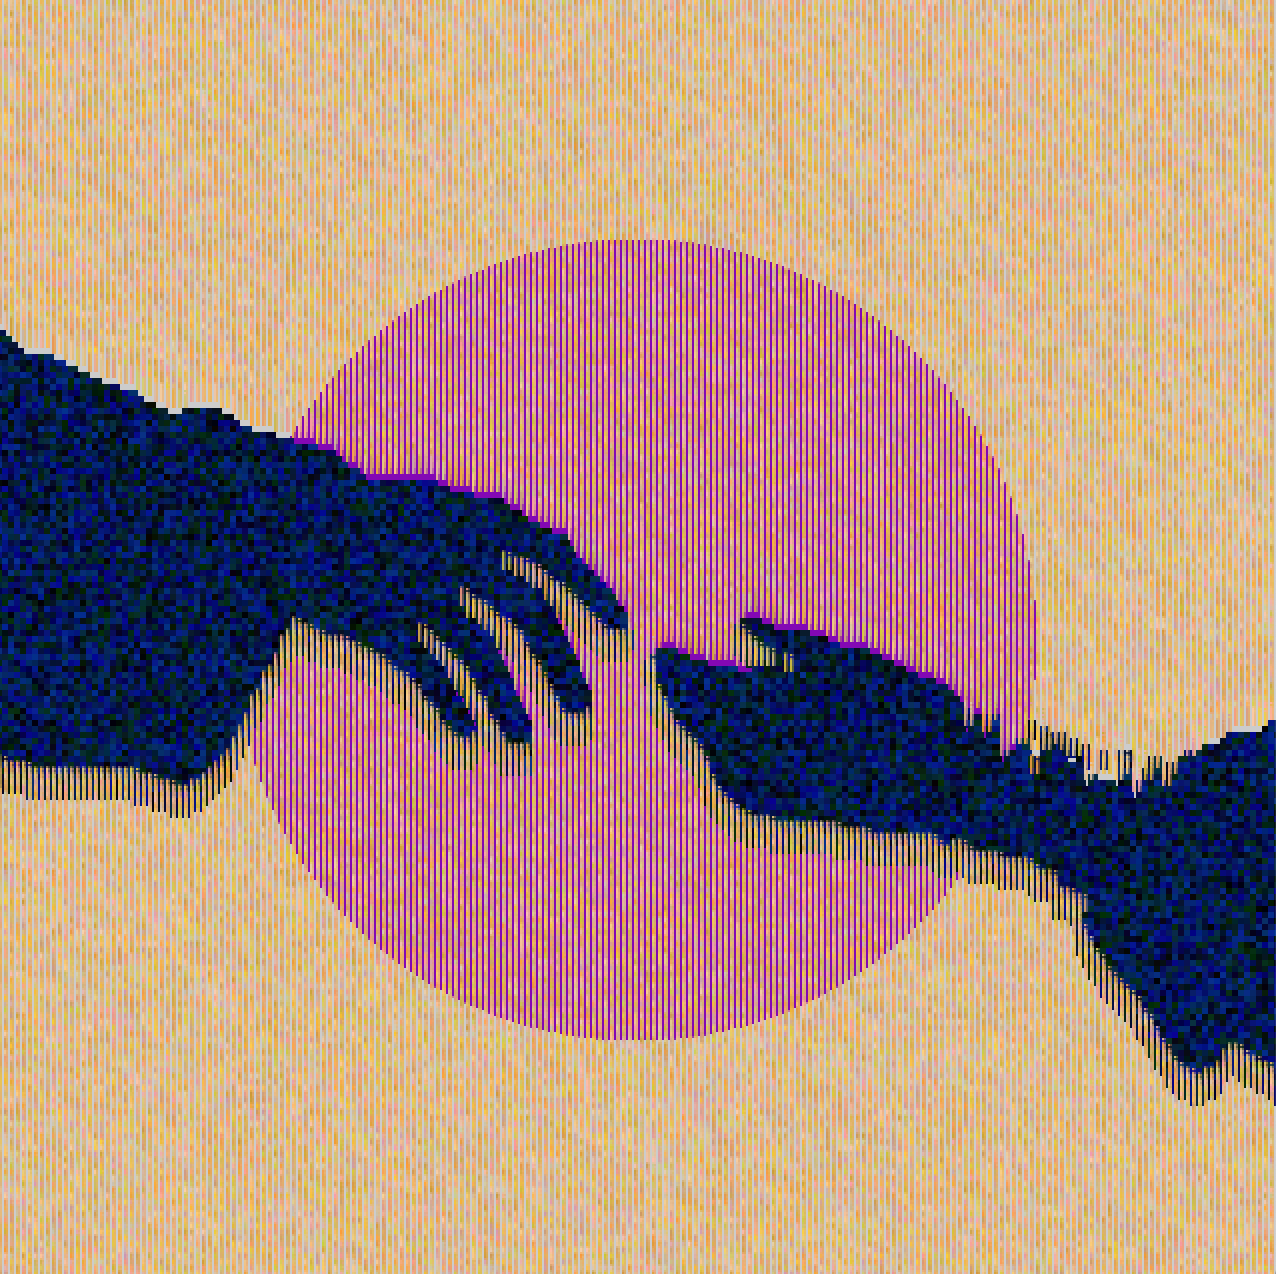
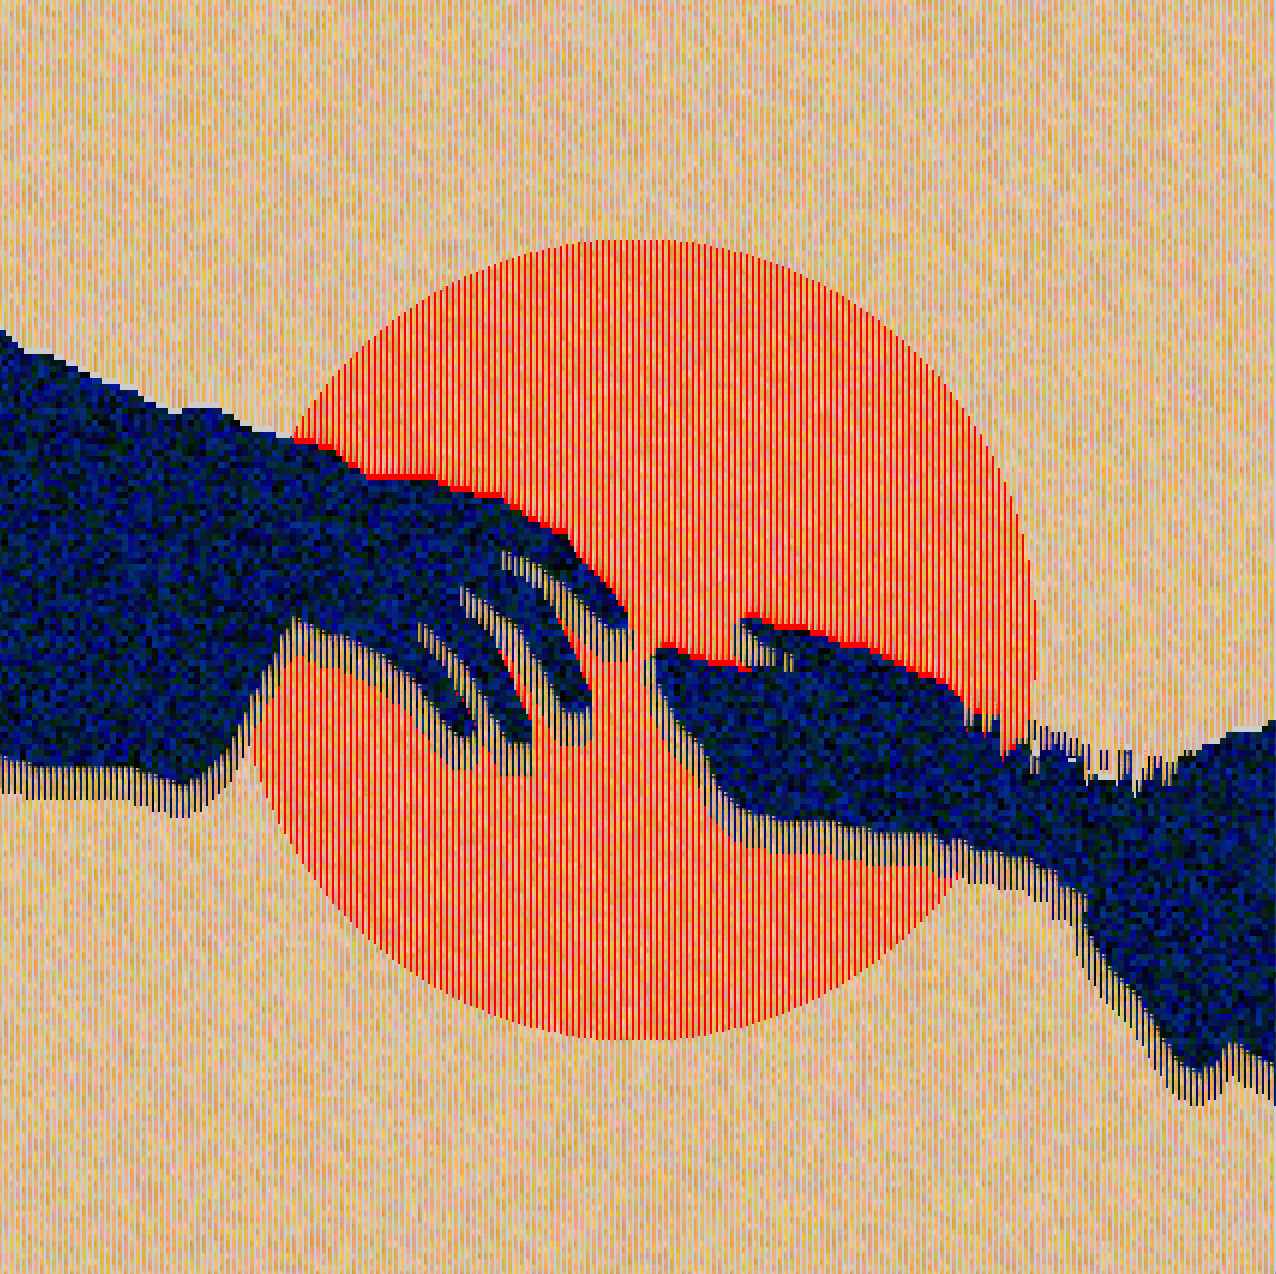
The more I learn about something, the more beauty I find in it. Learning more about images and pixel manipulation in processing allows me to incorporate processes I already enjoyed working with before which sparked my motivation to learn the code needed for what I want to do. This weeks work is inspired by a project of a friend who introduced me to the color fade timer. I incorporated random() and mapped mouseX and mouseY to use their values to manipulate color and opacity. This “filter” is good to use on images with high contrast between lighter and darker areas and the threshold would then need to be adjusted to the specific image. For this work I used an image with white background so I was able to use a relative high threshold to have clear shapes.
PImage hands;
int threshold = 230; //needed to apply different "filters" to fore- and background
color black = color(0, 0, 0);
FadeColorTimer fc;


void setup() {
  // basic settings
  fc = new FadeColorTimer( color(255, 255, 255), color(255, 0, 0), 4000, 1000); //start from white and fade to red
  size(640, 640);


  // load an image
  hands = loadImage("hands.png");
  // resize
  hands.resize(220, 220);
  // load pixels of source-image
  hands.loadPixels();
}

void draw() {
  //ellipse behind the hands
  fill(fc.c()); // use current color
  noStroke();
  ellipse(width/2, height/2, 400, 400);

  //two different "filters" for fore/backgroud determined by pixel brightness
  // iterate over image-pixels
  //code informed from https://processing.org/discourse/beta/num_1265567803.html
  for (int i=0; i<hands.pixels.length; i++ ) {
    // get the color
    int col = hands.pixels[i];
    //fill with different, randomly changing colors depending on brightness of the original pixels
    //darker foreground/hands
    if (brightness(col) < threshold) {
      int x = i%hands.width * 3;
      int y = i/hands.width * 3 +3;
      map(mouseX, 0, width, 0, 255);
      map(mouseY, 0, width, 0, 255);
      fill(color(random(0, mouseY), random(0, 50), random (0, 150), mouseX)); //mapping color/opacity to mouseX/mouseY creates different effects here
      rect(x, y, 5, 10); //bigger numbers draw longer "shadow" under hands
    }
    //lighter background
    else if (brightness(col) >=threshold) {
      int x = i%hands.width * 3;
      int y = i/hands.width * 3 +3;
      fill(color(random(200, 255), random(150, 210), random (50, 180)));
      text("..", x, y); //using differnt numbers/letters here will create a different pattern for the background
    }
  }
  hands.updatePixels();
}

void keyReleased() {
  color cr = color(random(255), random(255), random(255));
  // change the target color to a random color (and restart timer)
  fc.set(cr);
}

//this code is from https://forum.processing.org/two/discussion/20861/change-between-colors-over-time
class FadeColorTimer {
  color c1, c2, c;
  int start, duration;
  FadeColorTimer(color _c1, color _c2, int _start, int _duration) {
    c = _c1;
    c1 = _c1;
    c2 = _c2;
    start = _start;
    duration = _duration;
  }
  void set(color _c2) {
    set(c, _c2, millis(), duration);
  }
  void set(color _c2, int _duration) {
    set(c, _c2, millis(), _duration);
  }
  void set(color _c2, int _start, int _duration) {
    set(c, _c2, _start, _duration);
  }
  void set(color _c1, color _c2, int _start, int _duration) {
    c1 = _c1;
    c2 = _c2;
    start = _start;
    duration = _duration;
  }
  void update() {
    println(c1, c2, map(millis(), start, start+duration, 0.0, 1.0));
    c = lerpColor( c1, c2, map(millis(), start, start+duration, 0.0, 1.0));
  }
  color c() {
    this.update();
    return c;
  }
}