Week 8 Reading Response

Emotion and Design: Attractive Things Work Better

Don Norman’s essay, Attractive Things Work Better, focuses on clarifying and further elaborating on some ideas that came into conversation from his piece, The Design of Everyday Things. He works to identify a common ground between beauty and commenting on the importance of both of them. In Everyday Things he  focuses on how designer should prioritize usability, which gave users the impression that it should be prioritized at the sacrifice of aesthetics. However, in this piece Norman explores how the aesthetics of a design can also dictate it’s usability for an individual.

For example, he proposes the idea of walking across a 1 meter wide plank at different height intervals. As the plank gets higher and higher off the ground, the likelihood that an individual would be willing to cross it decreases each time, indicating how the external factors, or appearance, can play a part in whether or not an object is usable. This is important because it further instills how the design process has to be user oriented. Not only does the design of an object itself play a role, but the user’s emotions and the greater context of how an object will be used are extremely relevant. Although finding a happy medium between the two (like discussed in the 3 teapots) is far from easy, it also creates a space for unique design as different creations can adapt to the needs of different people.

Her Code Got Humans on the Moon—And Invented
Software Itself

Robert McMillan’s article, Her Code Got Humans on the Moon, discusses Margaret Hamilton’s career while programming the code that would be used to launch the Apollo. It started out as a discussion of her career progression how she got into this field, and then focuses on her pivotal role as an engineer working on the Apollo project. Hamilton’s story is particularly interesting not only because she was a woman working in tech in the 60s, but also because the work she developed has become part of the foundation for developing software today.

As a mother, she faced lots of doubt and criticism from people who did not understand the important work she was doing. However, in her field, she was respected and welcomed for her contributions to the project. Not only did she defy the societal expectations placed on her, but she excelled in every way. Scientists such as Hamilton are strong examples of how people can go against the odds and make great strides in their field.

Reading Response: Week 08

I began my reading with the piece about Margaret Hamilton, feeling a strong curiosity to learn more about her. It resonated deeply when she mentioned being “one of the guys,” as it reminded me of how, in many cultures, there is a stereotype that only men excel in mathematics, coding, and engineering. When a woman shows talent in these fields, it is often seen as “unusual.” Her story was truly inspiring, highlighting not only her achievements but also the consistency and persistence that made her a role model in engineering. Even though it’s not the first time I’ve encountered gender disparity in STEM, her approach to tackling “imposter syndrome”—which I believe many women in STEM have faced—was a particularly powerful lesson. It’s a reminder to everyone, regardless of gender, to stay focused on their goals and remain committed to what they want to achieve. Her story also brought to mind the movie *Hidden Figures*, which is a great watch for anyone interested in the experiences of women in STEM.

For the second reading, I’ve been brainstorming ideas related to cognitive science and human adaptability. This reading showed how design, when informed by cognitive science, can significantly impact our experiences. For instance, when I visit stores like Miniso, I often find myself drawn to items that are aesthetically pleasing and easy to use. Of course, the definition of “aesthetic” may vary from person to person; for me, it means a sleek, minimal design with soothing colors and user-friendly features. While aesthetic preferences differ, there must be some fundamental principles that apply to everyone. In this context, it’s important to explore the concept of affect and design to understand how we shape our environments and how these designs impact our daily lives. Striking a balance between beauty and usability is indeed the key factor in innovating effective designs and products.

Week 8 – Reading Response

Her Code Got Humans on the Moon

Margaret Hamilton’s story is incredibly inspiring and shows the power of resilience and innovation. She didn’t just contribute to the Apollo moon landing; she redefined what software could be, pioneering a field that would become the backbone of modern technology. Her work at MIT’s Instrumentation Lab, where she developed error-detecting and recovery software for the Apollo missions, was groundbreaking. During the Apollo 11 landing, her code prevented mission failure when the guidance computer overloaded, proving the essential role of well-designed software in complex systems.

What’s especially cool is that Hamilton saw the potential of software when others didn’t. She pushed to make it a core part of the mission’s success, even coining the term “software engineering.” Her success in a male-dominated field makes her story even more remarkable, showing how powerful one person’s vision can be. Hamilton’s legacy is a reminder of how perseverance and challenging norms can lead to innovations that change the world. Her work inspires me to approach challenges with the same confidence and creativity.

Norman,“Emotion & Design: Attractive things work better”

Donald A. Norman’s “Emotion & Design: Attractive Things Work Better” presents a fascinating perspective on the link between aesthetics and functionality. Norman argues that attractive designs aren’t just visually pleasing but also improve usability and user experience. He explains that beautiful, well-designed products trigger positive emotions, which, in turn, make users more open to exploring and interacting with them. This positive emotional state even enhances cognitive abilities, helping people think more creatively and handle challenges more effectively. Norman’s insights challenge the traditional view that function alone is enough, showing that emotional responses play a vital role in how we perceive and use everyday objects.

This idea is compelling because it suggests that design impacts not only a product’s usability but also its psychological effect on users. Norman’s argument that beauty can make products “work better” reveals how critical emotional connections are in design. His work is a powerful reminder for designers to consider aesthetics as an essential part of the user experience, not just an afterthought. It’s inspiring to think of design as a bridge between function and emotion, enhancing both user satisfaction and product effectiveness.

Week 8: Reading Response

Her Code Got Humans on the Moon

When people bring the Apollo project, my mind always goes to Margaret Hamilton because she does not get enough credit for the work she contributed to the success of the mission. As the work of women in male-dominate fields has been systematically forgotten in history, I feel her efforts towards the development of software engineering at NASA has gone unnoticed. Knowing that she had to balance childcare while pursuing her goals (and under considerable amount of pressure), Hamilton’s story is incredibly inspiring to me because it shows that woman have the capabilities to achieve the same academic rigorous fields as men and not limited to housekeeping task.

There’s also the famous photo of Hamiliton next to the code she wrote by hand for the project that makes me realize how far technology has advance within the past decade. Just in the past 60 years, computation has reverted from manually hand punched cards and written embedded design to a completely digitalized software system. As such, for me, the complexity of physical design and software applications has influenced my curiosity to understand how computerI architectural design effects digital computation. Knowing someone like me has been able to understand and develop software before it was mainstream has helped me continue to pursue my goals when times get difficult.

Norman,“Emotion & Design: Attractive things work better”

Norman’s writing talks about the aesthetic which a product embodies affects the way the user perceive it usability and effectiveness. Depending on the circumstances, the product may be more useful, while some not as much. With the three tea pots example, I agree with the theme and that people purchase certain items because of the way it may look and how’d present to other guests or fit in into the task at hand. If the circumstances call for quick/ stress solution, the usability of the product will weigh more than the design. Similarly, if a person has time to appreciate the process, then its design can be extended and shaped uniquely.

I feel all humans have a bias towards what design choice brings them joy, and so in feeling good about the product, the process of using that product would be more enjoyable and any cons are overshadowed by the joy. Whereas, if one is frustrated and disappointed with the product, it sets the expectation that the product would not work as well and one may not put as much effort to finding a solution. I think an interesting point Norman brings up is colored computer screens because if people didn’t like the colored screens modern computers would have remained black and white. Since our eyes perceive color in our everyday lives, it is unsettling to have a black and white scree. As such, I feel our experiences through our senses and experiences define the expectations we lay on the tools we use.


Midterm Project: The “SpectroLoom”

Concept

For my midterm project, I thought of making something unique, which seemed like art for the casual viewers, but on closer inspection would be seen as a form of data. For this, I decided to make a circular spectrogram, i.e, visualizing sound in circular patterns. That’s when I saw an artwork on Vimeo, which visualized sound in a unique way:

Using FFT analysis, and the concept of rotating layers, I decided to recreate this artwork in my own style, and go beyond this artwork, thus, creating the SpectroLoom. I also decided that since most people sing along or hum to their favourite tunes, why not include them in the loop too?

At its core, SpectroLoom offers two distinct modes: “Eye of the Sound” and “Black Hole and the Star.” The former focuses solely on the auditory journey, presenting a circular spectrogram that spins and morphs in harmony with the music. The latter introduces a dual-layered experience, allowing users to sing along via microphone input, effectively merging their voice with the pre-loaded tracks, thus creating a sense of closeness with the song.

The Code/Science

Apart from FFT analysis, the project surprisingly used a lot of concepts related to “Relative Angular Velocity”, so that I could make the sketch behave in the way I want it to be. Using FFT analysis, I was able to get the amplitude of every frequency at any given point of time. I used these values to make a linear visualizer on a layer. The background canvas is rotating at an angular velocity of one revolution for the song’s duration in anti-clockwise direction, and the visualizing layer is rotating in the opposite direction (clockwise), making it seem that the linear visualizer is stationary because the Relative Angular Velocity is “Zero”. The other user layer, which have the user’s waveform is also doing the same, but uses the mic input as the input source for the FFT Analysis (and is only in the second mode).

Also, once the user finishes the song, they can again left click for restarting the same music. This is done by resetting the angle rotated by the layer to “Zero” after a complete revolution and clearing both song visualization layer and the User input layer.

// Visualizer screen drawing function for "Black Hole and the Star" mode
function drawBlackHoleAndStar() {
  if (song.isPlaying()) {
    background(0);

    // Get the frequency spectrum for the song
    let spectrumA = fft.analyze();
    let spectrumB = spectrumA.slice().reverse();
    spectrumB.splice(0, 40);

    blendAmount += colorBlendSpeed;
    if (blendAmount >= 1) {
      currentColor = targetColor;
      targetColor = color(random(255), random(255), random(255));
      blendAmount = 0;
    }

    let blendedColor = lerpColor(currentColor, targetColor, blendAmount);

    // Draw song visualizer
    push();
    translate(windowWidth / 2, windowHeight / 2);
    noFill();
    stroke(blendedColor);
    beginShape();
    for (let i = 0; i < spectrumB.length; i++) {
      let amp = spectrumB[i];
      let x = map(amp, 0, 256, -2, 2);
      let y = map(i, 0, spectrumB.length, 30, 215);
      vertex(x, y);
    }
    endShape();
    pop();

    layer.push();
    layer.translate(windowWidth / 2, windowHeight / 2);
    layer.rotate(radians(-currentAngle));
    layer.noFill();
    layer.colorMode(RGB);

    for (let i = 0; i < spectrumB.length; i++) {
      let amp = spectrumB[i];
      layer.strokeWeight(0.02 * amp);
      layer.stroke(amp, amp, 255 - amp, amp / 40);
      layer.line(0, i, 0, i);
    }
    layer.pop();
    
    var userSpectrum = micFFT.analyze()

    userLayer.push();
    userLayer.translate(windowWidth / 2, windowHeight / 2);
    userLayer.rotate(radians(-currentAngle));
    userLayer.noFill();
    userLayer.colorMode(RGB);

    for (let i = 0; i < userSpectrum.length; i++) {
      let amp = userSpectrum[i];
      userLayer.strokeWeight(0.02 * amp);
      userLayer.stroke(255 - amp, 100, 138, amp / 40);
      userLayer.line(0, i + 250, 0, i + 250); // Place the user imprint after the song imprint
    }

    userLayer.pop();

    push();
    translate(windowWidth / 2, windowHeight / 2);
    rotate(radians(currentAngle));
    imageMode(CENTER);
    image(layer, 0, 0);
    image(userLayer, 0, 0);
    pop();
  
    currentAngle += angularVelocity * deltaTime / 1000;

    if (currentAngle >= 360) {
      currentAngle = 0;
      
      userLayer.clear();
      layer.clear();
    }

    let level = amplitude.getLevel();
    createSparkles(level);

    drawSparkles();
  }
}

Also, there is the functionality for the user to restart too. The functionality was added via the back function. This brings the user back to the instruction screen.

function setup(){
...
  // Create back button
  backButton = createButton('Back');
  backButton.position(10, 10);
  backButton.mousePressed(goBackToInstruction);
  backButton.hide(); // Hide the button initially
...
}

// Function to handle returning to the instruction screen
function goBackToInstruction() {
  // Stop the song if it's playing
  if (song.isPlaying()) {
    song.stop();
  }
  
  // Reset the song to the beginning
  song.stop();
  
  // Clear all layers
  layer.clear();
  userLayer.clear();

  // Reset mode to instruction
  mode = "instruction";
  countdown = 4; // Reset countdown
  countdownStarted = false;

  // Show Go button again
  goButton.show();
  blackHoleButton.show();
  songSelect.show();
}

The user also has the option to save the imprint of their song via the “Save Canvas” button.

// Save canvas action
function saveCanvasAction() {
  if (mode === "visualizer") {
    saveCanvas('rotating_visualizer', 'png');    
  }
  if (mode === "blackhole") {
    saveCanvas('user_rotating_visualizer', 'png')
  }
}

Sketch

Full Screen Link: https://editor.p5js.org/adit_chopra_18/full/v5S-7c7sj

Problems Faced

Synchronizing Audio with Visualization:
    • Challenge: Ensuring that the visual elements accurately and responsively mirror the nuances of the audio was paramount. Variations in song durations and frequencies posed synchronization issues, especially when dynamically loading different tracks.
    • Solution: Implementing a flexible angular velocity calculation based on the song’s duration helped maintain synchronization. However, achieving perfect alignment across all tracks remains an area for refinement, potentially through more sophisticated time-frequency analysis techniques.
Handling Multiple Layers and Performance:
      • Challenge: Managing multiple graphics layers (layer, userLayer, tempLayer, etc.) while maintaining optimal performance was intricate. Rendering complex visualizations alongside real-time audio analysis strained computational resources, leading to potential lag or frame drops.
      • Solution: Optimizing the rendering pipeline by minimizing unnecessary redraws and leveraging efficient data structures can enhance performance. Additionally, exploring GPU acceleration or WebGL-based rendering might offer smoother visualizations.
Responsive Resizing with Layer Preservation:
    • Challenge: Preserving the state and content of various layers during window resizing was complex. Ensuring that visual elements scaled proportionally without distortion required meticulous calculations and adjustments.
    • Solution: The current approach of copying and scaling layers using temporary buffers serves as a workaround. However, implementing vector-based graphics or adaptive scaling algorithms could provide more seamless and distortion-free resizing.

Week 6: Midterm Project – Superimpose

# Jump To:


Update: Fixed the link, as it turns out, it was broken this entire time!
(wait, so you’re telling me that no one got to play my game? 🙁)


# Introduction & Project Concept

Hey everyone, welcome back! 👋

In this blog, I’ll be talking a little bit about my midterm project. Unfortunately (or fortunately, depending on how much you want them), this blog post isn’t going to be as detailed as my usual ones. Instead, it’ll just be a very cursory overview of a few parts of the project.

So, what is my project? Well, it’s a game where you control a character using your own body (pose detection), and you have to try to fit through the target pose cutouts, similar to the ones you see in cartoons when a character goes through a wall.

Human shaped hole in wall

Though, since the poses are detected using a webcam, it can be hard to get the distance and space required to detect the whole body (and also still clearly see the screen), so instead the cutouts are only for the upper body, which should make it accessible to and playable by more people.


# Implementation Details

## How it Works (in a Nutshell)

The core mechanic of the game is the player’s pose. Thankfully, this can be detected relatively easily with the help of ml5.js’s BodyPose, which after integrating, lets you know the locations of each of the keypoints. From the 2 models available (Movenet and BlazePose), I choose Movenet, and you can see the the keypoints it detects below.


MoveNet keypoint diagram


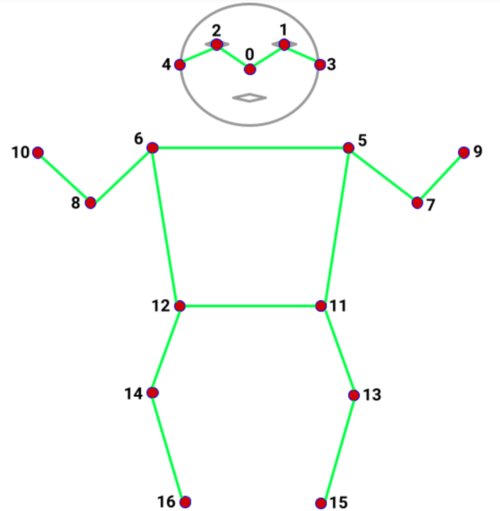
Obviously, the keypoints the camera can’t see won’t be very accurate at all, but the model will still report them. Thankfully, it also reports its confidence, and so you can easily filter out the keypoints which don’t have a certain threshold confidence.

In terms of why I choose MoveNet, it’s because it is the newer model, and was built for faster recognition, which is important in a game like mine (you obviously don’t want players to notice or feel a lag in their movements, which makes it harder to control and less enjoyable) (though to be honest, BlazePose would work fine here too, it would just be a bit slower and laggier). Also, another one of the parameters I specified was the type (SINGLEPOSE_THUNDER), which means that it should only track 1 person, and with slightly higher accuracy.

Anyways, so we got our pose, and I drew it on the screen. Then, the player sees a target pose cutout (which was generated by creating a random pose, and erasing those pixels from the surface), and tries to match it (hopefully, you don’t wanna crash into it!). Once the target is close enough, we check if the player’s pose matches the target cutout’s pose. Now, since it’s nearly (or literally) impossible to match it exactly to the subpixel (in this case, 13 decimal places smaller than a pixel!), especially for every point, we just check whether the pose’s are close enough, by adding a bit of margin to point and checking if the keypoints are within that margin. If it matches, hurray! The player scores a point and the target disappears (only for another one to come out later… 😈, ahem 😇). Otherwise, the target still disappears, but instead of scoring a point, they lose a heart/life. If they’ve lost too many, the game ends.

That basically sums up the main game loop.

Now, this is all implemented in an OOP manner, so there are classes for each scene, and for any objects that would benefit from being a class. So, for scene management, I have an object/dictionary containing a reference to all the scene objects instantiated from their respective classes, and field that holds a reference to the current scene (or alternatively a variable that keeps track of the current scene’s name).

Similarly, I also have an object/dictionary containing all the sounds and images to be used (which get loaded in preload, like the pose detection model). Other than that, the rest is mostly similar to other p5.js projects.


## Some Stuff I Liked

This may seem small, but one of the parts I like is my random pose generation. Since it is, you know, a core part of the gameplay (the pose for the target cutouts), I had to get this done fairly well. While I initially thought of using random offsets from a set pose, or even a set of custom poses I did (which would save a lot of time), I knew this solution wouldn’t be the best, and would have several issues (for example, others will likely have a different height and body segment lengths, as well as from different distances and angles to the camera). Instead, my current solution accounts for most of that, and is made it from a system of constraints.

Basically, I first measure some key lengths from the player (such as the distance between the wrist and the elbow, elbow to the shoulder, shoulder to the hip, original y-value of nose, etc). Then I first start by generating random coordinates for the nose, which are in the center 25% (horizontally) of the screen, and within 25px or so (vertically) of the player’s original nose height (btw, so instead of generating several points for the head (eyes, ears, & nose), like the model outputs, I can just treat the nose as the center of the head, which is much simpler and surprisingly doesn’t have almost any drawback for my usecase, so I do that). After this, I get a random angle between -30 to 30 degrees for the shoulder midpoint, and then calculate the shoulders from there (taking into account the player’s shoulder to shoulder length, and nose to shoulder midpoint length). Similarly, I also calculate a random angle in a certain acceptable range, and use the user’s segment length to calculate the exact position. Now, I also want to ensure that no part goes offscreen, or even within 10% of the edges, so I wrap the generation of each part in a do… while loop, which ensures that if a certain part does get generated too close to the edge, it tries again, calculating new positions from new random but constrained values. Additionally, I also don’t want any of the points to be too close to each other (which could especially be an issue with the wrists, both to each other and to the head).

But what if it is literally impossible to satisfy all these constraints for a certain part? Then the program will just keep trying and trying again, forever, which we obviously don’t want. So I keep a track of the number of current attempts, and if it goes above a certain threshold (say 10), then I start from scratch, and return a completely brand new random pose, using recursion (hoping that the new system won’t run into similar situations too many times, which thankfully is the case, as it’s quite rare for it to retry). I also keep a track of the number of attempts for the completely new pose, and if it gets too high, then I just return the default pose (this is more so just to be extra safe, since thankfully, this is almost never going to happen, as there is an extreeeemeeellyyyy small chance that it bails out and fails trying to return a completely new pose, that many times).

So, that’s it! Despite being really quite simple, it’s pretty effective. You can see the code for it, and try it out in the sketch, below (it’s actually a bit unnerving and intriguing how we can associate actions and feelings, just by looking at random poses made with simple rules).


// Initialised with some default values (roughly my measurements)
let playerBodyInfo = {
	"nose y-value": 165,
	"nose-shoulder midpoint length": 50,
	"shoulder midpoint-hip midpoint length": 150,
	"shoulder-shoulder length": 90,
	"shoulder-elbow length": 70,
	"elbow-wrist length": 60
}

// lots of other code ... (not relevant for this)

// method within Game class
generateRandomPose(attempts = 0) {
	// Constraints / Ideas / Assumptions:
	//	- Nose should be in the middle 25% (horizontally) of the screen, and near the height of the player's nose originally (similar y-value)
	//	- 0 deg <= midpoint-shoulder-elbow angle (inside one) <= 180 deg (basically, the elbow should be outside the body, extending upwards)
	//	- 45 deg <= shoulder-elbow-wrist angle (inside one) <= 180 deg
	//	- All parts should be within the center 80% (the nose and shoulders don't need to be tested, since they can't reach there anyways)
	//	- Also, parts shouldn't be too close to each other (realistically the thing we need to check for is wrists to each other and the nose)
	//	- First generate nose position (center of head), then shoulders, then so on.

	let outerMargin = 0.1; // 10%, so points should be in the middle 80% of the detection area (webcam feed)
	let minX = webcamVideo.width * outerMargin
	let maxX = webcamVideo.width * (1 - outerMargin)
	let minY = webcamVideo.height * outerMargin
	let maxY = webcamVideo.height * (1 - outerMargin)
	let partAttempts, leftShoulderToElbowAngle, rightShoulderToElbowAngle, leftElbowToWristAngle, rightElbowToWristAngle

	// Initialised with some default values (roughly my measurements)
	let pose = {
		nose: {x: 320, y: 165},
		left_shoulder: {x: 275, y: 215},
		right_shoulder: {x: 365, y: 215},
		left_hip: {x: 295, y: 365},
		right_hip: {x: 345, y: 365},
		left_elbow: {x: 220, y: 255},
		right_elbow: {x: 420, y: 255},
		left_wrist: {x: 200, y: 200},
		right_wrist: {x: 440, y: 200}
	}

	// If it takes too many attempts to generate a pose, just give up and output the default pose
	if (attempts > 100) {
		print('Pose generation took too many attempts, returning default pose.')
		return pose
	}


	// Nose

	pose.nose.x = random(0.375, 0.625) * webcamVideo.width // center 25%
	pose.nose.y = random(-25, 25) + playerBodyInfo["nose y-value"] // y-value +- 25px of player's nose height


	// Shoulders

	let shoulderAngle = random(-PI/6, PI/6) // The angle from the nose to the shoulder's midpoint with origin below (think of a unit circle, but rotated clockwise 90 deg) (also equivalently, the angle from the left to right shoulder, on a normal unit circle). From -30 to 30 degrees
	let shoulderMidpoint = {
		x: pose.nose.x + sin(shoulderAngle) * playerBodyInfo["nose-shoulder midpoint length"],
		y: pose.nose.y + cos(shoulderAngle) * playerBodyInfo["nose-shoulder midpoint length"]
	}
	
	pose.left_shoulder.x = shoulderMidpoint.x - cos(shoulderAngle) * 0.5 * playerBodyInfo["shoulder-shoulder length"]
	pose.left_shoulder.y = shoulderMidpoint.y + sin(shoulderAngle) * 0.5 * playerBodyInfo["shoulder-shoulder length"]
	
	pose.right_shoulder.x = shoulderMidpoint.x + cos(shoulderAngle) * 0.5 * playerBodyInfo["shoulder-shoulder length"]
	pose.right_shoulder.y = shoulderMidpoint.y - sin(shoulderAngle) * 0.5 * playerBodyInfo["shoulder-shoulder length"]
	

	// Hips

	let hipMidpoint = { // The hip's midpoint is really just the shoulder's midpoint, but extended further, so we can calculate it in a similar fashion
		x: pose.nose.x + sin(shoulderAngle) * (playerBodyInfo["nose-shoulder midpoint length"] + playerBodyInfo["shoulder midpoint-hip midpoint length"] + 50*0), // [Nvm, disabled for now] Added 50 in the end, to ensure it's long enough (I'm not using the hips for accuracy or points, but rather just to draw the outline)
		y: pose.nose.y + cos(shoulderAngle) * (playerBodyInfo["nose-shoulder midpoint length"] + playerBodyInfo["shoulder midpoint-hip midpoint length"] + 50*0) // (as above ^)
	}
	
	pose.left_hip.x = hipMidpoint.x - cos(shoulderAngle) * 0.5 * playerBodyInfo["shoulder-shoulder length"]
	pose.left_hip.y = hipMidpoint.y + sin(shoulderAngle) * 0.5 * playerBodyInfo["shoulder-shoulder length"]
	
	pose.right_hip.x = hipMidpoint.x + cos(shoulderAngle) * 0.5 * playerBodyInfo["shoulder-shoulder length"]
	pose.right_hip.y = hipMidpoint.y - sin(shoulderAngle) * 0.5 * playerBodyInfo["shoulder-shoulder length"]
	

	// Elbows

	partAttempts = 0;
	do {
		if (++partAttempts > 10) return this.generateRandomPose(attempts + 1); // If it takes too many attempts to generate this part, just give up and start from scratch
		
		leftShoulderToElbowAngle = random(PI/2, 3 * PI/2) + shoulderAngle // From 90 to 270 (-90) degrees on a normal unit circle (basically 0 to 180 degrees, with the left half of a circle (imagine the unit circle rotated anticlockwise 90 deg))
		
		pose.left_elbow.x = pose.left_shoulder.x + cos(leftShoulderToElbowAngle) * playerBodyInfo["shoulder-elbow length"]
		pose.left_elbow.y = pose.left_shoulder.y - sin(leftShoulderToElbowAngle) * playerBodyInfo["shoulder-elbow length"]
		
	} while (
		minX > pose.left_elbow.x || pose.left_elbow.x > maxX || // Check if it's within the acceptable horizontal range
		minY > pose.left_elbow.y || pose.left_elbow.y > maxY // Check if it's within the acceptable verticle range
	);
	
	partAttempts = 0;
	do {
		if (++partAttempts > 10) return this.generateRandomPose(attempts + 1); // If it takes too many attempts to generate this part, just give up and start from scratch
		
		rightShoulderToElbowAngle = random(-PI/2, PI/2) + shoulderAngle // From 270 (-90) to 90 degrees on a normal unit circle (basically 0 to 180 degrees, with the right half of a circle)
		
		pose.right_elbow.x = pose.right_shoulder.x + cos(rightShoulderToElbowAngle) * playerBodyInfo["shoulder-elbow length"]
		pose.right_elbow.y = pose.right_shoulder.y - sin(rightShoulderToElbowAngle) * playerBodyInfo["shoulder-elbow length"]
	
	} while (
		minX > pose.right_elbow.x || pose.right_elbow.x > maxX || // Check if it's within the acceptable horizontal range
		minY > pose.right_elbow.y || pose.right_elbow.y > maxY // Check if it's within the acceptable verticle range
	);


	// Wrists

	partAttempts = 0;
	do {
		if (++partAttempts > 10) return this.generateRandomPose(attempts + 1); // If it takes too many attempts to generate this part, just give up and start from scratch
		
		leftElbowToWristAngle = random(1.25*PI, 2*PI) + leftShoulderToElbowAngle // random(PI/4, PI) // From 45 to 180 degrees on a normal unit circle. Will be rotated to account for the elbow's existing rotation 
	
		pose.left_wrist.x = pose.left_elbow.x + cos(leftElbowToWristAngle) * playerBodyInfo["elbow-wrist length"]
		pose.left_wrist.y = pose.left_elbow.y - sin(leftElbowToWristAngle) * playerBodyInfo["elbow-wrist length"]

	} while (
		minX > pose.left_wrist.x || pose.left_wrist.x > maxX || // Check if it's within the acceptable horizontal range
		minY > pose.left_wrist.y || pose.left_wrist.y > maxY || // Check if it's within the acceptable verticle range
		dist(pose.nose.x, pose.nose.y, pose.left_wrist.x, pose.left_wrist.y) < 50 // Check if the wrist is too close to the nose ); partAttempts = 0; do { if (++partAttempts > 10) return this.generateRandomPose(attempts + 1); // If it takes too many attempts to generate this part, just give up and start from scratch
		
		rightElbowToWristAngle = random(0, 3/4 * PI) + rightShoulderToElbowAngle // From 270 (-90) to 90 degrees on a normal unit circle (basically 0 to 180 degrees, with the right half of a circle)
	
		pose.right_wrist.x = pose.right_elbow.x + cos(rightElbowToWristAngle) * playerBodyInfo["elbow-wrist length"]
		pose.right_wrist.y = pose.right_elbow.y - sin(rightElbowToWristAngle) * playerBodyInfo["elbow-wrist length"]

	} while (
		minX > pose.right_wrist.x || pose.right_wrist.x > maxX || // Check if it's within the acceptable horizontal range
		minY > pose.right_wrist.y || pose.right_wrist.y > maxY || // Check if it's within the acceptable verticle range
		dist(pose.nose.x, pose.nose.y, pose.right_wrist.x, pose.right_wrist.y) < 50 || // Check if the wrist is too close to the nose
		dist(pose.left_wrist.x, pose.left_wrist.y, pose.right_wrist.x, pose.right_wrist.y) < 50 // Check if the wrist is too close to the other wrist
	);

	return pose;
}
 

(Click inside the sketch, then press any key to generate a new random pose)


Another part I liked was the illusion of perspective. So basically, I had to rush this project, so I thought, “Fine, I’ll do it in 2D, that’s much simpler”, and it is, but I still wanted that 3D perspective effect 😅. After playing around for a bit in a new temporary sketch, I found out that if I scale everything from the center, then the 2D sketch appears to have (a very basic, rudimentary, and probably physically inaccurate, but nonetheless, visible) perspective! While the best and fully implemented version is in the final game, you can see that temporary sketch below.

(Click inside the sketch, then press r to restart, or any other key to toggle between the first and second test (now basically just uncoloured vs coloured)… oh also, please, you know what I mean by “any other key”, so don’t press the power button or something 😂)


## Some Issues I Encountered

Oh boy oh boy, did I face several issues (as expected). Now, I can’t go over every issue I faced, so I’ll just mention a couple.

First one I’ll mention, is actually the random pose generator mentioned above! Yep, while I did end up getting it working (and well enough that I liked it and included it in my good parts section), and while it is conceptually pretty simple, it still took a fair bit of time (wayy longer than I thought it would, or even still think it needs to), and was a bit tricky, particularly with working out the angles and correct sin and cos transformations (oh, I messed up the signs more than once 😅). In fact, I actually made the sketch above to quickly test out my pose generation! I had written it all “blind” (aka without testing in between), and since it was fairly straightforward, I was confident it would work, but something nagged me to just try it once before the seeing it in the main game, and… yep, it didn’t work. *sighs*. I had to meticulously comment out and retry each portion and work back to a full solution, bit by bit. Fortunately it wasn’t too conceptually difficult (more time consuming than hard, but even the basic trig was a little rough tough at 3 AM), so I succeeded.

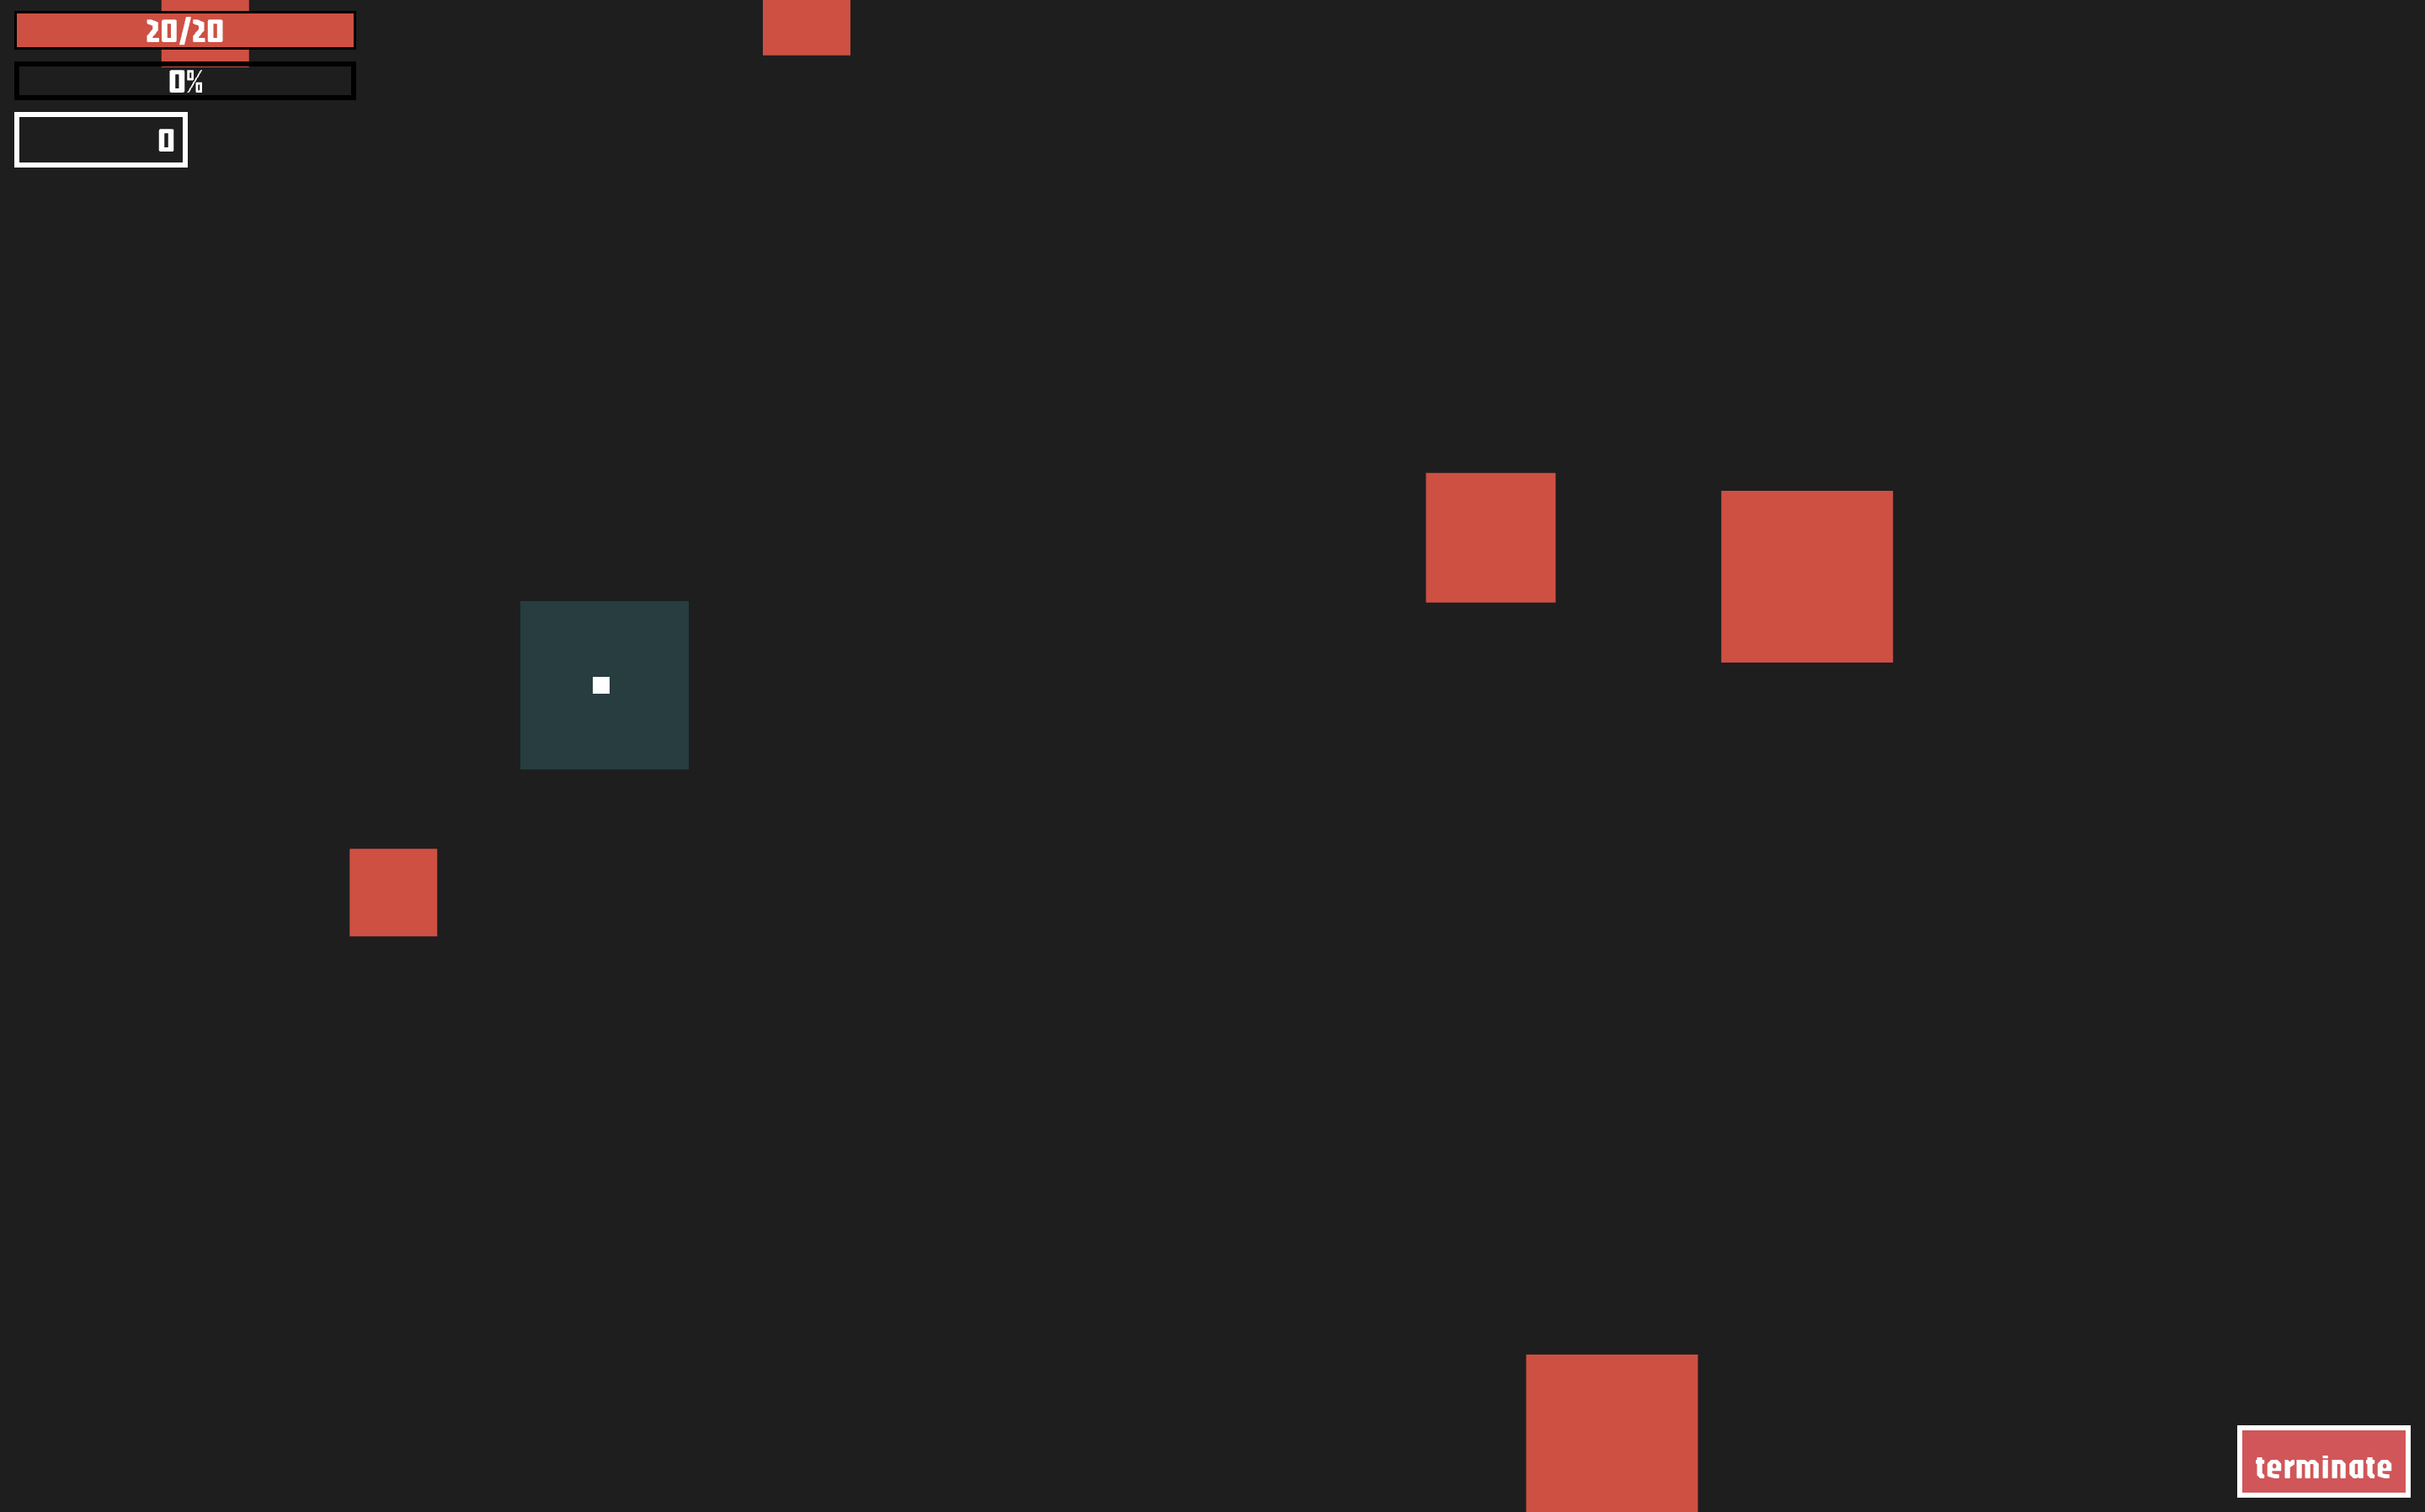
Another issue I faced was that the target cutouts, didn’t have any actual cutouts(!), which is, you know, a major issue. Again, I broke out a new temporary sketch to test out my logic, simplifying stuff and working things out. It turned out to be a simple issue of using the screen’s width instead of the webcam’s width, and a few other things. In case you’re wondering, yep, the screen and webcam not only have different resolutions, but also different aspect ratios! It was a bit of a pain initially to get it so they worked seamlessly together, but now I have. The reason behind this, is that some webcams (particularly those on laptops) give a 4:3 image for some reason, and since I need to run a machine learning model (MoveNet, for the poses), they usually reduce the resolution required (otherwise it would take a LOT longer to detect the pose, which would break the game). I wanted the game’s output on the other hand to be a crisp (scalable up or down but ideally) 1920×1080, 16:9 aspect ratio, hence the mismatch.

(It’s not really interactive (besides f for fullscreen), so don’t bother ;) )

Well anyways, that’s it for now (I think I might’ve made it a bit longer and more detailed than originally thought 😅), so without further ado, I present, my ✨midterm project✨! (I should really have a name for it, but I can’t decide 🤦‍♂️)

# Final Result – Midterm Project

While I would normally embed the sketch here, I think you should really open it full screen in a new tab, so follow this link.

# Additional Thoughts & Room for Improvement

With any project, there’s always room for improvement. But for this one specifically, there’s a huge room for improvement 😅 (mainly because I keep seeing new features to implement or ideas to improve it). As usual, there are a bunch of things I didn’t get time to implement or do, ranging from better graphics and polish, to levels and features. I particularly wanted to implement a character that actually goes ahead of you (that you are trying to catch) that “breaks” the walls (causes the cutouts), and also a level that took place in a top secret laboratory setting, where the character is actually stealing some top sneaky info, and so you have to stop them. I kind of really want to continue this and flesh it out (but I also know it’ll not be of much use, and besides, p5 isn’t the best platform to implement this idea, so why waste time here… so anyways *cuts to me working on this months into the future* 😅).   Well, I’m really glad you went through the entire post (and definitely didn’t skip till the final result), but regardless, thanks a lot for reading it (does anyone even read these, or am I just talking to myself? ._. ). Unfortunately, that’s all I’ve got time for, so we’ll have to end it here. Until next time, and enjoy your break!   https://media2.giphy.com/media/v1.Y2lkPTc5MGI3NjExd3B2ZGduZjBpYXNsa2F6bmxqZjg5dTFjbnE0bWR1czNiZ3FxYzc4OSZlcD12MV9pbnRlcm5hbF9naWZfYnlfaWQmY3Q9Zw/EbOLm8dEE2OrBh68H7/giphy.webp

(psst, do you know what time his watch shows? Ok, fine, it isn’t wearing one, but if it did, it would show) https://i.giphy.com/S8DcNuvt1FUy31LUH6.webp

Midterm Project

Concept and Inspiration:

I wanted to share the inspiration behind my game. It all started when I delved into the captivating world of folklore, specifically the stories of Sindbad the Sailor and Behula from Bangladeshi culture. Sindbad’s adventurous spirit, sailing through the vast oceans, I mean, who doesn’t love a good tale of adventure on the high seas?

Then there’s Behula, a fierce and determined woman who braves the ocean’s challenges to bring back her husband. Her journey is filled with trials and tribulations, showcasing strength, love, and resilience. These stories are so rich and deep, and I wanted to weave that essence into my game.

As I started to brainstorm, I thought, “Why not create a surfer game set against this backdrop?” The ocean is such a dynamic environment, and surfing adds an exciting twist. I wanted to capture the thrill of riding the waves while subtly nodding to these legendary tales.

Of course, I realized that not everyone might connect with the heavier themes of folklore, especially younger audiences. So, I decided to give the game a fun, cartoonish vibe. This way, it can appeal to all ages while still honoring those timeless stories. It’s all about adventure, overcoming challenges, and having a great time on the waves!

Code Explanation:

In my game, I’ve focused on creating an engaging surfing experience, and the wave mechanics play a crucial role in bringing that to life. There are some key elects that I would like to mention, especially how I generate those smooth, dynamic waves that define the gameplay.

1. Wave Creation

One of the standout features of my game is how I create the waves. I use a combination of beginShape() and endShape()to draw the wave’s outline:

beginShape();
let xOffset = waveXOffset;
for (let x = 0; x <= width; x += 10) {
    let y = map(noise(xOffset, yOffset), 0, 1, height / 2 - waveAmplitude, height / 2 + waveAmplitude);
    vertex(x, y);
    xOffset += waveFrequency;
}
endShape(CLOSE);
  • Creating Vertex Points: Inside this loop, I utilize the vertex() function to establish a series of points that define the wave’s shape. By iterating across the entire width of the canvas, I can create a flowing wave profile that enhances the surfing experience.
  • Using Perlin Noise: The magic happens with the noise() function. I chose Perlin noise because it generates smooth, natural variations, making the waves look more realistic. Unlike random values that can create jarring changes, Perlin noise ensures that the wave transitions are fluid, which adds to the game’s aesthetic appeal.
  • Mapping Values: I then use the map() function to rescale the noise output, allowing me to set the wave height within specific bounds. By centering the waves around the middle of the canvas (height / 2), I ensure they oscillate up and down, making the gameplay more visually engaging.2.

    2. Player Interaction with Waves

    The way the waves interact with the swimmer is equally important. I calculate the wave’s height and adjust the swimmer’s position accordingly:

    if (isJumping) {
        verticalVelocity += gravity;
        swimmerY += verticalVelocity;
        if (swimmerY >= waveY - swimmerHeight / 2) {
            swimmerY = waveY - swimmerHeight / 2;
            isJumping = false;
            verticalVelocity = 0;
        }
    } else {
        swimmerY = waveY - swimmerHeight / 2;
    }
    • Jump Mechanics: I implement a jumping mechanic where the swimmer’s vertical position changes based on gravity and jump forces. When the swimmer is in the air, I adjust their position based on the wave height, allowing them to ride the wave realistically.
    • Wave Height Adjustment: By ensuring the swimmer’s position is linked to the wave’s current height, I can create a seamless experience where the player feels like they are truly surfing on the waves.3. Window Resizing and Obstacles: 
      • The windowResized() function allows the canvas to resize dynamically if the window size changes, maintaining the game’s responsiveness.
        • Instantiation of Obstacles: Every time spawnObstacle() is called, a new instance of the Obstacle class is created and added to the obstacles array. This ensures that there are multiple obstacles on the screen for players to avoid, making the gameplay more challenging.
        • Continuous Challenge: By calling this function regularly within the main game loop (in the playGame function), I ensure that obstacles keep appearing as the player progresses. This continuous spawning simulates a moving ocean environment, where new challenges arise as players navigate the waves.
        • P5.js Sketch:

      Features  and Game Mechanics:

      • The game kicks off with an engaging start screen featuring the title “Surfer Game”, inviting players to click to begin their surfing.
      • Players control a lively surfer character using intuitive keyboard commands, specifically the spacebar to jump over incoming obstacles like sharks, enhancing the gameplay’s interactivity.
      • As players navigate through the waves, they encounter a dynamic wave system that adjusts in amplitude and frequency, creating a realistic surfing experience. This effect is achieved through Perlin noise, giving the waves a smooth, natural movement.
      • Collectible coins are scattered throughout the waves, adding an exciting layer of challenge. When the player collides with a coin, it disappears, contributing to the score, which is displayed on the screen.
      • The game includes a health mechanic where if the surfer collides with an obstacle, such as a shark, the game transitions to a “Game Over” state, prompting players to either restart or return to the main menu.
      • Upon reaching specific milestones, such as collecting a set number of coins, players are rewarded with a “Level Up” screen that highlights their achievements and encourages them to continue.
      • Players can easily restart the game after it ends by clicking anywhere on the screen, offering a seamless transition between attempts.

      Additional AudioVisual:

      • Sound effects enhance the immersive experience, with cheerful tunes playing when coins are collected and exciting sound bites when the surfer jumps over obstacles.
      • Background music plays continuously throughout the game, creating an engaging atmosphere. Players can enjoy a unique soundtrack that fits the theme of the game, enriching their adventure.
      • The graphics have a cartoonish style, making it appealing for all age groups while still paying homage to the folklore inspirations behind the game.

Reflection and Challenges

When I first set out to create a game, my vision was to develop something based on neuroscience, exploring complex concepts in an engaging way. However, as I delved deeper into that idea, I realized it was more challenging than I anticipated. I then pivoted to creating a 2048 game, but that also didn’t quite hit the mark for me. I felt it lacked the excitement needed to captivate players of all ages.

This experience taught me a valuable lesson: sometimes, taking a step back can provide clarity. Rather than getting bogged down in intricate designs, I opted for a simpler concept that would appeal to a wider audience. Thus, I decided to create an ocean-themed surfing game, inspired by folklore like Sindbad the Sailor and the tale of Behula from Bangladeshi culture.

I see a lot of potential for upgrading this game. Adding a storyline could further engage young players and introduce them to fascinating narratives from folklore. Additionally, I plan to enhance the wave mechanics by incorporating realistic gravity effects, making the surfing experience more immersive. These improvements could really elevate the gameplay and provide an enjoyable adventure for everyone.

Midterm Project: “Cubix”

Sketch
http://165.232.166.95:5500
Concept
I decided to implement a clicker/incremental game with a unique twist, combining elements from popular titles like To The Core, Cookie Clicker, and Adventure Capitalist. The game revolves around hunting flying shapes using a cursor with an attached box (scope/aim). Players damage enemy shapes when they’re inside this box, earning resources to upgrade skills in a talent tree. The game also features levels for long-term progression and bonuses.

Game Mechanics and Achievements
The core gameplay involves killing enemies that appear on the screen using an aiming device attached to the cursor. Each enemy defeated rewards the player with experience and money. Leveling up releases resources, while money allows for upgrades in the talent tree. One of the most challenging and rewarding aspects of development was balancing the game’s economy. After extensive experimentation and research, I developed formulas that strike a balance between challenge and progression, ensuring the game is neither too easy nor too difficult. Here is the mathematical framework for the economics of the “Cubix” game.

Core Mechanics

Player Progression
The player’s power increases through two main avenues:
1. Killing mobs to gain experience and resources
2. Upgrading skills to become more effective at killing

Experience and Leveling
XP_{gained} = Base_{XP}  *  (1 + Level_{mob} * 0.1)
Where Base_{XP} is a constant value for each mob type, and Level_{mob} is the level of the mob killed.

The experience required to level up follows an exponential curve:
XP_{required} = 100 * 1.1^{Level_{player}}

This ensures that leveling becomes progressively more challenging.

Resource Generation

Resources (e.g., gold) dropped by mobs calculated similarly:
Gold_{dropped} = Base_{gold} * (1 + Level_{mob} * 0.15)

Skill Upgrades

Each skill has multiple levels, with increasing costs and effects. The cost to upgrade a skill follows this formula:
Cost_{upgrade} = Base_{cost} * 1.5^{Level_{skill}}

The effect of the skill (e.g., damage increase) is:
Effect_{skill} = Base_{effect} * (1 + Level_{skill} * 0.2)

Mob Scaling

To keep the game challenging, mob health and damage can scale with the player’s level:
Health_{mob} = Base_{health} * 1.2^{Level_{player}}
Damage_{mob} = Base_{damage} * 1.15^{Level_{player}}

A significant technical achievement is the implementation of local progress saving using localStorage. This feature required considerable effort but greatly enhances the player experience by allowing seamless continuation of gameplay across sessions.

class Storage {
    constructor() {
        this.spawnRate = [1000, 2000];
        this.spawnChances = [0.5, 0.3, 0.1];
        this.maxEnemies = 100;

        this.balance = 0;

        this.level = 0;
        this.xp = 0;

        this.damage = 20;
        this.hp = 20;
        this.regen = 1;
        this.interval = 1000;
        this.crit = 10;
        this.critChance = 0.12;
        this.armor = 0;

        this.skills = defaultSkills;

        this.scopeSize = 100;
    }

    getSkillEffect(id) {
        let skill = this.skills.find(skill => skill.id === id);
        if (skill.level === 0) {
            return 0;
        }
        return int(skill.baseEffect * (1 + skill.level * 0.2))
    }

    reset() {
        this.spawnRate = [1000, 2000];
        this.spawnChances = [0.5, 0.3, 0.1];
        this.maxEnemies = 100;

        this.balance = 0;

        this.level = 0;
        this.xp = 0;

        this.damage = 20;
        this.hp = 20;
        this.regen = 1;
        this.interval = 1000;
        this.crit = 10;
        this.critChance = 0.12;
        this.armor = 0;

        this.skills = defaultSkills;

        this.scopeSize = 100;

        this.save();
    }

    load() {
        let save = localStorage.getItem("save");
        if (!save) {
            this.save();
        } else {
            let data = JSON.parse(save);
            this.spawnRate = data.spawnRate;
            this.spawnChances = data.spawnChances;
            this.maxEnemies = data.maxEnemies;
            this.balance = data.balance;
            this.damage = data.damage;
            this.hp = data.hp;
            this.level = data.level;
            this.xp = data.xp;
            this.regen = data.regen;
            this.interval = data.interval;
            this.crit = data.crit;
            this.critChance = data.critChance;
            this.armor = data.armor;
            this.skills = data.skills;
            this.scopeSize = data.scopeSize
        }
    }

    save() {
        localStorage.setItem("save", JSON.stringify(this));
    }
}

Additionally, the game’s performance has been optimized to handle multiple moving elements without significant FPS drops, with only minor issues arising when enemy rotation was introduced (disabled for the FPS sake).

Design

Areas for Improvement and Challenges
While the project has made significant progress, there are several areas for future improvement. The settings button on the home screen is currently non-functional and needs to be implemented. Expanding the variety of enemies and introducing the ability to prestige levels are also planned enhancements that will add depth to the gameplay.

Also I encountered a significant scaling challenge when testing the game on devices with different screen sizes and resolutions. The game elements, including flying shapes, cursor box, and UI components, were not displaying consistently across various machines. To resolve this, I implemented a scaling solution using scale factor based on canvas size and baseWidth with baseHeight, that ensures optimal display across different screen sizes.

Any way one of the main challenges encountered was optimizing performance, particularly when adding rotation to the enemies. This issue highlighted the need for careful consideration of graphical elements and their impact on game performance. Moving forward, further optimization and potentially exploring alternative rendering techniques could help address these performance concerns and allow for more complex visual elements in the game.

Midterm: 5R Photo Lab!

Final product 

Make sure to open on the P5 web editor for sound and press f for full screen please!

Concept

My main concept for my midterm was based on the photo lab that I work at in New York. I wanted to create an interactive lab experience in which the user could go through some of the steps of developing/processing film while also hopefully learning a bit more about film in the process. My main goal when designing the program was to make something that was useful to the lab and could be used by my customers.  Therefore, I ended up creating a ‘behind the curtain’ experience for customers to see what developing film is like and get small experiences in the different activities.

How it works

My program functions solely on mouse interaction and features 2 mini-games and 2.5 ‘resource tabs. The first mini-game is what I’ve considered as stage 1 of the development process, making the chemistry. Users are able to reveal the recipe card and then have to memorize the ratios for each chemical in order to make the chemistry needed for the development process. They have only 2 chances to refresh their memory but if they over pour it at all they immediately lose (because in the real world we’d have to throw the chemistry out). The second mini game is the fourth station where they are editing scans. Basically users have 15 seconds to edit 10 randomly generated pieces of ‘dust’ from the scans to prepare them to be sent off to the customer.

The two middle stations, splicing and feeding the machine do not have any major interactive piece. I made this decision for multiple reasons. The first, of course being time management and having figure out what I’d actually have time to compelte, and the second being that these stages don’t really have much that could be digitally represented like with the other two games. Step 2 typically just requires cutting a piece of film and labelling it while step 3 is literally just putting it in the machine. Therefore, by giving them this informative, resource functionality I believe it further instills how this program can be a resource for film photographers.

I also have a small easter egg which appears when you click on the film negatives hanging on the wall that just feature some photos, some of which were shot on film so that were not. While this doesn’t really add anything to the program I thought it was on theme with the design and added another layer of creativity to the project.

What I’m proud of

I am particularly proud of the mix chemicals station because it took many many hours of trial and error to reach the stage its at currently. Originally I wanted to incorporate the g, r, b, and y keys to represent filling up the vials but decided that jumping between input functions might be too much for the user. Also, while working on this station I completely deleted the relevant functions three times which I am honestly quite proud of because it took quite a bit of guts to just start over like that, but I am glad I did.

if (grow.blue && blueHeight < maxHeight) blueHeight += growthRate;
  if (grow.red && redHeight < maxHeight) redHeight += growthRate;
  if (grow.green && greenHeight < maxHeight) greenHeight += growthRate;
  if (grow.yellow && yellowHeight < maxHeight) yellowHeight += growthRate;

  // drawing rectangles
  fill('#4ba0f7');
  rect(windowWidth * 0.2 + 1.5, baseY - blueHeight, 57, blueHeight);
  fill('#f12721');
  rect(windowWidth * 0.31 - 5.5, baseY - redHeight, 57, redHeight);
  fill('#52c204');
  rect(windowWidth * 0.41 + 2, baseY - greenHeight, 57, greenHeight);
  fill('#ffeb67');
  rect(windowWidth * 0.52 - 3.75, baseY - yellowHeight, 57, yellowHeight);

The algorithm I ended up with is actually pretty simple it was just hard for me to conceptualize because I was originally unable to breakdown the mini-game into each separate requirement for what I wanted to happen. Above you can see the main part of the function that illustrates the rectangle growth.

I am also proud of the fact that everything is appropriately ratioed in full screen (or at least on my 13 inch MacBook Air screen it is) because it was a topic of growing anxiety for me as I continued to ratio everything in a split screen when I was actually implementing my ideas. Furthermore, while this is technically an area of improvement, I think that that way I problem solved was particularly effective. Due to poor design and planning I quickly became overwhelmed with the various errors I was dealing with and didn’t really know how to approach them but eventually just went back to the basic and wrote down whatever needed to be changed and I think that really helped reset  my mentality and also the direction of my program.

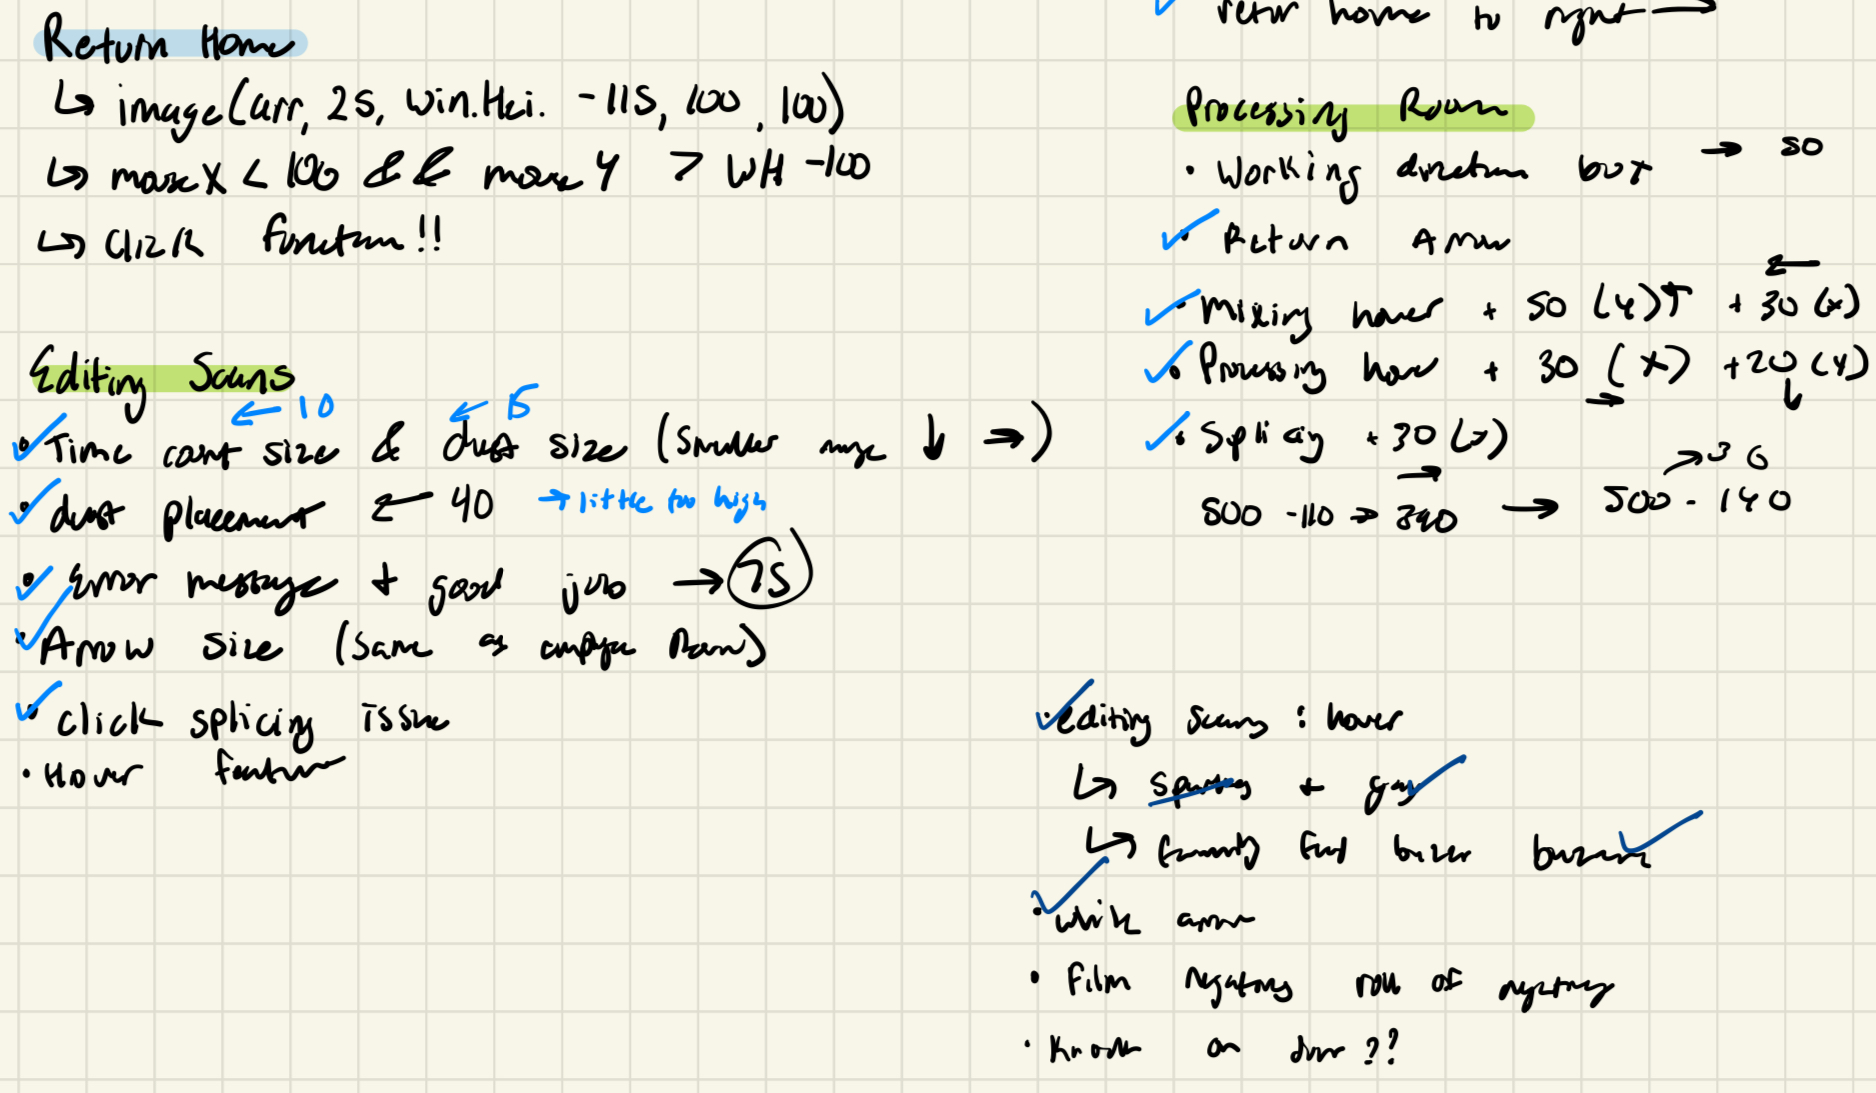
Please excuse my awful handwriting, it was nearing 3 AM when I wrote this…

Areas of improvement 

Although I am very happy with how my program turned out, I also have a lot of areas of improvement that I’d like to see happen in the future. During the implementation process my code was extremely disorganized and messy which cause for a lot of unnecessary confusion and frustration while I was debugging errors. Also, while the worst of it has since been improved, I did quite a bit of hardcoding that I think with the right approach could be simplified in some creative ways that I’d like to test out. Lastly, I would like to think of some more ways I can further develop the user experience. In conceptualizing this project I considered having some drag and drop features, using the the laptops camera to take a picture, and other unique components that I would like to further explore eventually.

The Flame Boy: Becoming a Robinson (Midterm Project)

Concept

link to full sketch: https://editor.p5js.org/takuthulani/full/gdL68sjHc

This project is an adaptation of a fictional world I’ve created, designed to offer an immersive storytelling experience. Instead of passively observing, users actively engage with the narrative, making it more like an interactive movie or book. The story centers around the protagonist and key events from his life. To preserve the element of surprise and keep the experience enjoyable, I encourage you to explore the story firsthand!The narrative also takes place in a sci-fi setting, featuring an alien planet inhabited by human-like beings with enhanced abilities. This concept influenced the design, with fire playing a central role and red as the dominant color theme.

How the Game Works:

The game starts by greeting the user with a cover page that plays The Flame Boy’s theme song (it’s catchy, so you might get lost in it—don’t forget to progress, though you’re welcome to just listen!). The theme song was created using Suno AI (credit to them). On the cover image, there are instructions to click on the screen, which takes the user to a menu page (with its own theme song as well from Pixabay). The menu presents two options: “His Story” and “His Home,” and the user is expected to click on one.

If the user clicks on “His Home,” the page transitions to an image showing his home—simple and straightforward. This image was made using DALL-E. To exit this view and return to the menu, the user can press the escape button. If the user clicks on “His Story,” a video begins to play, so sit back and enjoy! After the video, the user must make a choice: either “Trust” or “Don’t Trust” the character they interact with. Clicking “Don’t Trust” progresses the game to the conclusion and eventually to a thank you message. The user can return to the cover screen by pressing the mouse key.

If the user chooses “Trust,” the game transitions to a section where they need to earn 100 points to reach the story’s conclusion. The experience continues until the user decides to stop the sketch.

Parts I’m Proud of:

There are several aspects of this project that I’m truly proud of. First and foremost is the video element, which made everything possible. Initially, I planned to use images and recordings to narrate the story, but p5.js kept crashing, so integrating video became the best solution. Even though it’s technically “out of scope” based on what we covered in class, it was a practical way to bring the project to life. I turned to resources like Stack Overflow, the p5.js help section, and ChatGPT to guide me through the video implementation. Below is an example of the code I used to incorporate video into the project:

// Video elements
let storyVideo; // Video for the story sequence
let conclusionVideo; // Video for the conclusion sequence
let decisionImage; // Image for the decision screen where the player chooses their path
...
function playStory() {
  // Stop the story video if it's currently playing to reset the playback
  storyVideo.stop(); 
  
  // Reset the playback time of the story video to the beginning (0 seconds)
  storyVideo.time(0);  
  
  // Start playing the story video from the beginning
  storyVideo.play();  
}
...
function playConclusion() {
  // Stop the conclusion video if it is currently playing
  conclusionVideo.stop();
  
  // Reset the video playback time to the start (0 seconds)
  conclusionVideo.time(0);
  
  // Start playing the conclusion video from the beginning
  conclusionVideo.play();
}

Secondly, I’m particularly proud of the shooting game and its mechanics. I’ll include snippets of the code for the parts I’m most proud of below, and I’ll also provide a link to the full sketch so you can explore the many amazing functions I’ve implemented. Here’s a sample of the code for the game within the game:

function playShootingGame() {
  // Draw the background night sky for the shooting game
  drawNightSky();
  
  // Set the fill color to white for the score text
  fill(255);
  
  // Set the text size for the score display
  textSize(16);
  
  // Align text to the right and top of the canvas
  textAlign(RIGHT, TOP);
  
  // Display the current score at the top-right corner of the canvas
  text("Score: " + score, width - 10, 10);

  // Check if 2 seconds have passed since the last star was spawned
  if (millis() - starTimer > 2000) {
    // Spawn new stars for the shooting game
    spawnGameStars();
    
    // Update the star timer to the current time
    starTimer = millis();
  }

  // Loop through the stars array in reverse order to avoid issues with splicing
  for (let i = stars.length - 1; i >= 0; i--) {
    // Get the current star object from the stars array
    let star = stars[i];
    
    // Set the fill color to yellow for larger stars, white for smaller stars
    fill(star.size === 40 ? 'yellow' : 'white'); 
    
    // Draw the star as an ellipse at its specified x and y coordinates with its size
    ellipse(star.x, star.y, star.size);

    // Check if the star has been on screen for more than 2 seconds
    if (millis() - star.appearTime > 2000) {
      // Remove the star from the array if it has been displayed long enough
      stars.splice(i, 1);
    }
  }

  // Check if the score has reached 100 points
  if (score >= 100) {
    // Change the game state to 'conclusion'
    state = 'conclusion';
    
    // Play the conclusion video or sequence
    playConclusion();
  }
}

link to the sketch: <iframe src=”https://editor.p5js.org/takuthulani/full/gdL68sjHc”></iframe>

Problems I encountered and possible solutions:

The main challenge I faced was implementing video into the sketch after my original plan didn’t work out. I found solutions using the online resources mentioned earlier. Another problem was integrating the mini-game within the story. The best approach was to treat the game as a separate entity and then integrate it into the sketch, rather than seeing it as one large game (which added unnecessary stress while coding). Additionally, I encountered performance issues, as I used too many audio and visual files. Optimizing the game speed and performance became a key focus. Below is a screenshot showing some of the media I used:

files and resources used to generate the story for the game

This includes various assets like fonts, PowerPoint presentations, a mini script for the game, and a massive 500MB PSD file (trust me, you don’t want to know how many images are in that!). I also went through multiple iterations of the menu and cover page designs.

Since I’m not the best at drawing, I used Meta AI to generate the images, which I then manually edited in Photoshop. I recorded the vocal narrations using Audacity and assembled the video using CapCut before uploading it into my program. Some of the images, sounds, and music were sourced from Pixabay.com, which allows usage for projects like this.

Areas needing improvements:

The overall workflow of the game could use some enhancements. For example, the “His Home” area could feature more interactive functions to increase engagement and enjoyment. Additionally, the story’s flow would benefit from a clearer rationale for why the user needs to earn 100 points to advance to the conclusion. While some of these creative flaws may have been overlooked, they can be incorporated as features in future updates.

Overall, I thoroughly enjoyed working on this project and was fully invested, as I was creating something I loved, among other reasons. It provided a fun and technical way to learn, and I am excited for you all to see what I build as time progresses.

The following images are alternative designs that did not make the cut:

According to a few people, the guy on the right did not fit in well so this menu did not make it.
Although my overall theme was red and black, I did not think thiss would benefit the aesthetics of the overall story.
This was a test I did when I tried integrating mock-up text with my overall design.