Week 4 – Loading Data, Displaying text

I speak both Arabic and English, so when I learned that our project had to involve words, I knew I wanted to create something that brought both languages together. My first idea was simple: a program that translates colors typed in English into Arabic and displays them on the screen. At first, I liked it, but I quickly realized it felt too basic. Each time you typed a color, the same thing happened, for the same input you got the same output every single time.

To improve it, I thought to add a quiz that tested you on three random colors each time. This added some variation, but it still didn’t feel interactive enough. I wanted users to not just type answers but to interact with the piece and feel like they were shaping the experience. As I worked on making the program more dynamic, I found a YouTube video that helped me learn how to add randomness and interactivity to my code: https://youtu.be/-6v_AYyn49k?si=Ra0T98ejk4Xkcr-J. From that tutorial, I learned how to make the Arabic words appear in different random positions and sizes and how to create multiple modes so the user can switch between still, bouncing, and floating text. This gave the piece a balance between control and randomness, the user can make choices, but there’s still some sort of randomness. I also used custom fonts from Google Fonts by embedding them directly into my HTML file.

In the final version, I kept my original concept of translating colors, but now the project feels much more alive. The user can explore different modes, play with the experience, and see something new each time. It’s almost as if its art created by the words now. It’s structured enough for the user to have some control, but there’s always randomness, so it’s never exactly the same twice. For me, this connects to Chris Crawford’s ideas about interactivity, where both the user and the program are working together to create something meaningful, rather than the program just showing a static result. It’s no longer just a translation tool, it’s an interactive artwork that bridges both of my languages while letting others engage with it in a fun and personal way.

When I first added Arabic text to my program, it kept printing from left to right, which looked really strange because Arabic is supposed to flow right to left. It took me a couple of tries to figure out why this was happening. Eventually, I realized I needed to set the text direction directly in the code. Once I added a line to force the drawing context to use RTL, the Arabic words finally displayed correctly. It was a small but important fix that made the project look much more natural and readable.

// Draw Arabic word correctly (right to left)
   push();
   drawingContext.direction = 'rtl'; 
   textFont(arabicFont);
   textSize(item.size);
   fill(item.color);
   text(item.word, item.x, item.y);
   pop();
 }


Week 3 – Reading Response ( The Art of Interactive Design )


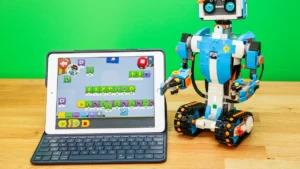
I think a strongly interactive system is one that feels like it’s really engaging with you, almost like having a conversation. The author describes interactivity as two sides listening, thinking, and responding, and I see that especially in how responsive a system is. When I was younger, I joined a LEGO robotics competition and built a robot from scratch. At first, it didn’t do anything, but once we added the Arduino parts and coded it, it started moving and reacting to our commands. It felt alive, like it was “listening” to us.

Artificial intelligence takes this even further. I heard about a study where researchers kept breaking a robot’s leg, and instead of shutting down, it figured out a new way to walk. That’s incredibly interactive because it shows learning and adaptation. Even something like Siri or Alexa shows this on a smaller scale, you ask a question, and it responds right away. For me, a truly interactive system listens, adapts, and almost feels like a partner, not just a machine following instructions.

I love how they made something normal we play with everyday interactive.

One idea I have for improving the degree of user interaction in my p5 sketches is adding an AI chat voice, kind of like Siri. Instead of having to leave the sketch and go back to the coding page whenever I have a question or need to fix something, I could just talk to the AI while working on my project. It would feel like we’re coding “together,” where I can ask questions out loud and get instant feedback or suggestions. This would make the process more fun and interactive, and it would keep me focused on creating instead of constantly switching between different pages or tools.

week 2 – patterns

Overview

At first, I wasn’t sure what to create for this project, so I decided to just start by making something simple: dots. My plan was to practice using loops by randomly placing dots on the screen. I used a while loop to create many dots, and once I saw them on the canvas, I realized they looked a lot like stars scattered across a dark night sky.

That gave me the idea to turn my project into a night sky scene. I kept the dots as stars, and then I wanted to make them feel more realistic. To do this, I decided to practice with a for loop to make the stars twinkle. By adjusting their brightness smoothly over time, the stars started to fade in and out, creating a gentle twinkling effect.

In the end, my project isn’t just a pattern of dots, it’s a simple, animated night sky that uses both while and for loops, and I really enjoyed the process of seeing it come to life step by step.

Highlight of code

One part of my code that I really enjoyed working on was where I used the while loop to create all of my stars. At first, I didn’t fully understand how a while loop worked, but through this project, I learned how it keeps running over and over until a certain condition is met.

let count = 0;
  while (count < 500) {  
    stars.push({
      x: random(width),
      y: random(height),
      size: random(1, 3),
      phase: random(TWO_PI) // different twinkle timing
    });
    count++; // increase count each time
  }

I used the while loop to generate 500 stars, each with a random position and size. What I liked about this was how simple it felt to control the number of stars, I just set a limit, and the loop kept creating stars until that limit was reached.

This helped me understand loops better because I could actually see the results on the screen. It also made me realize the difference between a while loop and a for loop. The while loop gave me more control over the setup process, and it was perfect for building the starting starfield for my night sky.

Week 9 – Assignment

Concept:

For this assignment, I decided to create a gender reveal project. I used a red LED and a button to represent “girl,” and a blue LED and button to represent “boy.”

Implementation:

When the red button is pressed, the red LED (representing “girl”) lights up. Similarly, when the blue button is pressed, the blue LED (representing “boy”) turns on.

int yellowLED = 13; // yellow LED
int blueLED = 9;    //  blue LED
int yellowButton = A0; // yellow button 
int blueButton = A2;   // blue button 
void setup() {  
  pinMode(yellowLED, OUTPUT);    
  pinMode(blueLED, OUTPUT);        
  pinMode(yellowButton, INPUT_PULLUP); 
  pinMode(blueButton, INPUT_PULLUP);   
}

void loop() {
  int switchPositionYellow = digitalRead(yellowButton);  
  int switchPositionBlue = digitalRead(blueButton);     

  // Check if both buttons are pressed at the same time
  if (switchPositionYellow == LOW && switchPositionBlue == LOW) {
    digitalWrite(yellowLED, LOW);  
    digitalWrite(blueLED, LOW);     
    delay(500);               

    digitalWrite(yellowLED, HIGH);  
    delay(500);
    digitalWrite(yellowLED, LOW);

    digitalWrite(blueLED, HIGH);    
    delay(500);
    digitalWrite(blueLED, LOW);
  }
  
  // If only the yellow button is pressed
  else if (switchPositionYellow == LOW) { 
    digitalWrite(yellowLED, HIGH);   // Turn ON yellow LED
    digitalWrite(blueLED, LOW);      // Turn OFF blue LED
  }

  // If only the blue button is pressed
  else if (switchPositionBlue == LOW) { 
    digitalWrite(yellowLED, LOW);    // Turn OFF yellow LED
    digitalWrite(blueLED, HIGH);     // Turn ON blue LED
  }

  // If neither button is pressed
  else {
    digitalWrite(yellowLED, LOW);    // Turn OFF both
    digitalWrite(blueLED, LOW);
  }
}

IMG_8148

week13&14 – final project documentation

USER TESTING:
My deliverable was still at a premature stage so I was unable to film a user-testing video, however I was able to get verbal feedback on my p5 program design (and so have adjusted my code accordingly). Initially, I had no text to indicate any sort of instructions or context, as I had thought the arrow buttons were enough to prompt users into action. However, my sister advised against this and suggested I include a phrase or 2 to provide basic information as to what my project is about – even more so since I did not have a start/ introductory screen. Another feedback I got was regarding the separate display screen for when the recommended playlist sounds – which was mentioned in the previous documentation. I was initially just planning to display the user’s chosen personalised cassette however my sister thought it to be too static, commenting that it was lacking flair. I starting brainstorming other potential display screens I could have but the one that resonated most with me was actually animating a rolling cassette tape, of course this would mean I had to create animations for all possible cassette tape designs.

Final project video: https://youtu.be/t_wIKjY5s1o

My final project concept is based off of my midterm project. In the previous midterm, I made a digital radio that played 2 meaningful songs. Each song displayed (what was supposed to be) a dynamic background of a personal memory associated with the songs. My final project builds off on this idea but with an added twist. You are able to customise your own cassette tape and based on your choices, it assembles a recommended playlist. There are 3 choices in each stage of customizing for the personalisation of your cassette and when finished, it plays a recommended playlist of 4 songs, each similar in genre. You can adjust the volume, use a skip function and reset the entire experience through physical means (buttons and potentiometer). Whilst my midterm involved a sense of personal intimacy, I tried to make this project evoke a more shared intimacy. Music is very personal to me and by sharing it with others, I am able to show a partial extension of my own identity which can be reciprocated by external users. Speaking from personal experience, it cements a bond quicker.

//arduino code:

int button1Pin = A2; 
int button2Pin = A3; 
int potentiometerPin = A0;

void setup() {
  // Start serial communication so we can send data
  // over the USB connection to our p5js sketch
  Serial.begin(9600);

  // We'll use the built-in LED as a status output.
  pinMode(LED_BUILTIN, OUTPUT);
}

void loop() {
  // Read button states and potentiometer value
  int button1State = digitalRead(button1Pin);
  int button2State = digitalRead(button2Pin);
  int potValue = analogRead(potentiometerPin);

  // Send data to p5.js
  Serial.print(button1State);
  Serial.print(",");
  Serial.print(button2State);
  Serial.print(",");
  Serial.println(potValue);

  delay(100); // Adjust delay as needed
}

This final project was so so painstakingly challenging and was such an arduous experience in general it took my soul and a chunk of hair by the time I was finished. Every portion of code had a bug and debugging it took a minimum of 1.5 hours (rarely as I wasn’t so lucky) and a maximum of 7 hours+. I will most likely never forget such an experience. The first portion – p5.js, was doable, yes there were countless debugging that was really frustrating but the cherry on the cake was the second portion – serial communication of the final project. The process of this entire final was tedious overall:

PROCESSES – ART STAGE:
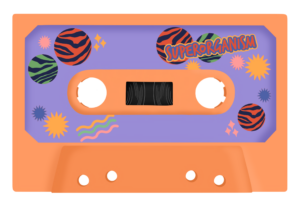
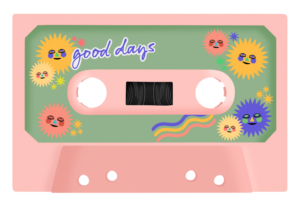
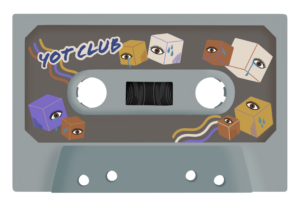
I first created 3 playlists of 4 songs. Then using pinterest inspirations of vintage cassette tapes, I drew each stage: cassette base, cassette sticker, cassette detail using procreate. I illustrated specific combinations of these cassettes to equate to a certain playlist and I drew the details to correspond with the overall music vibe and aesthetic: (see below: 1) result1, 2) result2, 3) result3). As mentioned in my user-testing documentation section,  I wanted to create an animation of the cassette tape rolling when users entered the final stage: music playing. The only plausible way was to create a gif file containing such animation. Because there are 3 choices for each 3 stages and 3 different combinations users could select, it meant I had to create animations for a total of 27 cassettes, hence why it was so time consuming.

PROCESSES – P5.JS:
Essentially both coding experiences were one I do not want to remember… the endless bug fixes, the endless error messages on the console, it was just incredibly stressful. However the code that evoked the most stress and hence, I’m most proud of was attributing the corresponding gif files to every possible indices user could end up with – likewise with creating the cassette animations, there were 27 different combinations. This meant that the program had to store the index chosen at each stage and use this information to call upon a gif file with the corresponding index. This was one of those sections that took 7+ hours to debug and code. I didn’t know where to start and how, so, like I always did with previous assignments, I began researching and looking for codes that fulfilled similar instances on google. Then came the experimentation and checking using console.log. Through this I was able to learn syntax I had never encountered before and this acted as a sort of revelation for me. Here is the relevant code section:

//
const gifFilenameMap = { //attributing gif file pathway to user selected indices
//for cassetteBase[0]
  "0_0_0": "gifs/result1_prpl1.gif",
  "0_0_1": "gifs/result1_prpl2.gif",
  "0_0_2": "gifs/result1_prpl3.gif",
  "0_1_0": "gifs/result1_green1.gif",
  "0_1_1": "gifs/result1_green2.gif",
  "0_1_2": "gifs/result1_green3.gif",
  "0_2_0": "gifs/result1_grey1.gif",
  "0_2_1": "gifs/result1_grey2.gif",
  "0_2_2": "gifs/result1_grey3.gif",

//for cassetteBase[1]
  "1_0_0": "gifs/result2_prpl1.gif",
  "1_0_1": "gifs/result2_prpl2.gif",
  "1_0_2": "gifs/result2_prpl3.gif",
  "1_1_0": "gifs/result2_green1.gif",
  "1_1_1": "gifs/result2_green2.gif",
  "1_1_2": "gifs/result2_green3.gif",
  "1_2_0": "gifs/result2_grey1.gif",
  "1_2_1": "gifs/result2_grey2.gif",
  "1_2_2": "gifs/result2_grey3.gif",

//for cassetteBase[2]
  "2_0_0": "gifs/result3_prpl1.gif",
  "2_0_1": "gifs/result3_prpl2.gif",
  "2_0_2": "gifs/result3_prpl3.gif",
  "2_1_0": "gifs/result3_green1.gif",
  "2_1_1": "gifs/result3_green2.gif",
  "2_1_2": "gifs/result3_green3.gif",
  "2_2_0": "gifs/result3_grey1.gif",
  "2_2_1": "gifs/result3_grey2.gif",
  "2_2_2": "gifs/result3_grey3.gif",
};

//generates gif filename based on indices of selected cassette components
function generateGifFilename(baseIndex, stickerIndex, detailIndex) {
  return gifFilenameMap[`${baseIndex}_${stickerIndex}_${detailIndex}`]; //generating filename using map => e.g., 2_1_0
}

function determineResult() {
...
//generating filename (e.g., "1_2_3") based on indices of selected components
  const gifFilename = generateGifFilename(selectedBaseIndex, selectedStickerIndex, selectedDetailIndex);
  gifElement = createImg(gifFilename, "selectedGif"); // displaying selected gif on canvas
  gifElement.size(imageWidth, imageHeight);
  gifElement.position(imagePosition.x, imagePosition.y);
}

PROCESSES – ARDUINO + SERIAL COMMUNICATION:
Serial communication was one I had the most issues with. I used the existing serial communication code (in mang’s lecture notes) for both arduino and p5.js and altered it around my main piece of code however, problem 1) there seemed to be issues with p5.js and arduino exchanging data, hence it was impossible to know whether the physical wiring of the components on the breadboard was the problem or whether it was the code itself that was causing issues. 2) I continually experienced error messages stating that there was a network error hence I was unable to connect to a serial port. Both cases required patience, calmness and perseverance and through this it was engrained into me again the importance of console logging when debugging faulty code. At the start, I wasn’t able to understand the serial communication code that was provided but after the completion of my final project, everything kind of clicked into place.

Regarding attributing functions to the physical components: 2 push buttons and a potentiometer, I was also having major problems with applying my desired functions: play/pause, skip forward, skip backward, to the push buttons. Mapping the volume to the potentiometer value was really easy as something like it had already been done for the serial communication assignment. For the rest, it was a nightmare. I think it was the structure of the code and the specific manner in which I coded that caused so many breakdowns and errors. In the end I was incredibly short for time and so was forced to compensate and only code 1) resetToInitialState, 2) skip forward on loop. when coding for the function: resetToInitialState, 2 problems occurred: 1) gif image appearing over initial state, 2) sound continuing to play regardless of being set to its initial state. With extensive experimentation, I realised that creating new variables to keep track of the states of both the gif and sound was the most simplest and most rational solution – here is the relevant code:

let gifElement; (ADDED) 

//within function determineResult() 
if (gifElement) { (ADDED) 
  gifElement.remove(); //remove existing gifElement if it exists 
} 

const gifFilename = generateGifFilename(selectedBaseIndex, selectedStickerIndex, selectedDetailIndex); 
gifElement = createImg(gifFilename, "selectedGif"); // displaying selected gif on canvas (ADDED) 
gifElement.size(imageWidth, imageHeight); (ADDED) 
gifElement.position(imagePosition.x, imagePosition.y); (ADDED) 

/////////////////////////////////////////////////////////////////////////////////////
let shouldPlayNextSound = true; //(ADDED) 

//within function playNextSound()
if (shouldPlayNextSound) { //(ADDED)
  currentSoundIndex++; // increment sound index
  if (currentStage === 4 && currentSoundIndex >= result1.length) {
    determineResult();
    currentSoundIndex = 0; //reset to the beginning if end is reached
  }
}

//within function resetToInitialState()
shouldPlayNextSound = false; //disable skip function (ADDED)

//stopping all currently playing sounds
for (let i = 0; i < result1.length; i++) {
result1[i].stop();
}
for (let i = 0; i < result2.length; i++) {
result2[i].stop();
}
for (let i = 0; i < result3.length; i++) {
result3[i].stop();
}
shouldPlayNextSound = true; //enable skip function (ADDED)

FINAL REFLECTIONS + FUTURE IMPROVEMENTS:
Whilst it was the most nerve wrecking, anxiety inducing overall experience, since persisting bugs were fixed the day of the IM show, I was quite proud of what I have completed. Whilst the coding aspect of this project was beyond challenging, I can’t deny that it was lowkey fun at the same time – creating a project that involves my passion. To me, it certainly felt like a large leap in the level of difficulty, compared to my midterm project, and this was more so why I am proud of the finished result. For future improvements on the project, perhaps there could be a personality test which based on your selected answers allocates you to a specific design for each stage of the cassette customisation. This way the experience maintains for longer. I also think it builds more excitement and anticipation as to what cassette you’ll end up with. Improvements for the physical aspect of the project would be to build a radio with more extensive functions, like originally planned.

Regarding improvements for future IM projects, I am incredibly motivated to put thought into the building of an exterior because that, at the end of the day, is what can elevate user experience. Since it was my first time both showcasing and attending an IM show, I experienced somewhat of an epiphanous moment. In future classes I will be more mindful in creating a more immersive user experience that is able to appeal to a wider body of people, because whilst mine did have some sort of user experience, it was more so stagnant with limited interaction compared to the other projects that were showcased. Overall I think it was an excellent opportunity to understand the fundamentals of what Interactive Media embodies and it has further propelled my motivation to learn in depth creative coding.

week 11&12 – (final project) preliminary concept | idea finalization | user testing

PRELIMINARY CONCEPT:
I wanted to do some brainstorming regarding the concept of my final project. I wanted to do something that wasn’t too ambitious (considering the myriad of deadlines as a result of finals week and the limited time constraints). I think because I couldn’t think of a theme, ideas were very vast which didn’t help. After some major considerations and scrapping of multiple ideas, I came to the conclusion that I would want to build off on my midterm project to create a physical radio that is controllable through i.e., buttons, potentiometer, power switch. Output would be digital and input would be both digital and physical.

FINALIZED CONCEPT:
I thought creating a purely physical radio with a digital output would not be enough interactivity or at least a meaningful interaction, hence I wanted to perpetuate intimacy. I love music and (to me) what is more intimate than sharing your favourite playlists/ artists with others? I decided to make my final project a 2-part: 1) determine corresponding mood/ personality through personalizing their own cassette tape, 2) according to results, a playlist of 4 songs would be curated – this way there is more intimate and meaningful back and forth. Essentially it would work like those buzzfeed quizzes except physical input via push buttons are possible.

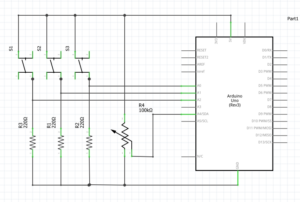
Total physical components would include 3 push buttons and a potentiometer for volume control. My arduino program will read the potentiometer value and buttons’/switch’s state and send the information to p5.js via serial communication. When p5.js receives information about the button’s push state, it will call upon its corresponding function, i.e., pause/play, skip forward/ backward. I will use the mapping function to map the potentiometer value to the volume so that whenever the potentiometer is toggled, p5.js will continuously receive its p value and adjust the volume accordingly. With regards to my p5 program design, I intend to have a cassette displayed in the middle with “select” and arrows buttons. Since users will select designs for each of the 3 stages, the “select” button will store user choices in a separate variable so as to assign a “result1/2/3” playlist. Although undecided, I intend to have a separate display screen for when the recommended playlist sounds to indicate the change of focus from p5 to the actual physical components.

User Testing

Before completing the project, I did some user testing with a small sample of participants. Here is a video of Zion using my project:

User testing stage gave me valuable insight that was difficult to see from my perspective as the creator of the project. Here are the tips that I implemented in the final version:

  • Specifying how many stages (color inputs) there will be, helps the participant to understand the structure of the experience from the start.
  • Starting the instructions by saying what is the main thing that will be required (color input based on prompts).
  • Introducing an additional screen in between the last color input and generated gradient to build some suspension.

Are they able to figure it out? Where do they get confused and why? Do they understand the mapping between the controls and what happens in the experience?

– Everyone was able to figure it out, sometimes there would be a little confusion in the beginning due to multiple potentiometers though.

What parts of the experience are working well? What areas could be improved?

– The generative gradient tends to produce a pleasant reaction, so I would say that works well. The button perhaps is the one that is not too reliable.

What parts of your project did you feel the need to explain? How could you make these areas more clear to someone that is experiencing your project for the first time?

-I would often receive questions as to how many stages there will be in total, therefore I decided to add this information to the instructions page.

Final project: user testing

User testing video:

I gave a user a try of the project after I finished the pairing and connection, and he was able to figure out what everything meant. He was very smart and was able to figure out what should be done even with my hints being somewhat not quite directional. Also, my intention for this project is to let the user figure out what everything does because one thing about cats is that it is hard to get what they mean, and finding out what everything is is part of the process. Eventually, my tester understood everything and had fun playing around with it.

During the testing, basically, everything turned out well. The only thing that might be improved is that sometimes when you are obviously mean towards the cat, she becomes more affectionate and happier, which should not be happening. That is also why I added to the notes that the cat’s change in emotions can be quite unpredictable. It is the problem with the AI model, so I don’t have a fix for it. Another thing is that the API only accepts three inputs per minute. therefore if the user input too fast the program might crash because the parseInt function can get nothing and the mood becomes corrupted. I couldn’t think of a way that could fix this.

For now, I think I don’t need to explain anything more because the exploration is part of the process. but I might find the need to do further explaining when giving this to a wider audience. I could add a page to the “help” button to explain the whole mechanism but I truly believe that would decrease the fun and make it really a simulator instead of an experience.

Final Project User Testing

User Testing:

After finalizing my project and creating a prototype of the box, I asked my friend to test out my code and this is a video of her trying it out.


*I am still in the process of creating a nice box for my project so it would look nicer than what is shown in the video.

  • Are they able to figure it out? Where do they get confused and why? Do they understand the mapping between the controls and what happens in the experience?

Yes, She was able to figure it out pretty easily. My project is pretty easy to understand and link the

  • What parts of the experience are working well? What areas could be improved?

Mostly, everything is working well, the only thing that might need some improvement is the sensitivity of the button because sometimes it loops through multiples rooms according to the force of the button press.

  • What parts of your project did you feel the need to explain? How could you make these areas more clear to someone that is experiencing your project for the first time?

The only part I felt I needed to explain in the beginning was that each room has a different sound file, but she managed to figure it out pretty quickly. The description on the front page explains everything and the labels on the buttons also provide some info on what each button is for.

Week 13: Final Project

Crack the Code!

In this project, I’ve developed a “Crack the Code” puzzle to unlock a wooden box. The user receives four sets of hints to guess the three-digit code required to open the safe. Using the knob and button on the box, the user inputs each digit of the code. When the correct code is entered, the box unlocks, and the user wins the chocolate candies inside! Until the correct code is guessed, the box remains locked.

Video Demonstration of the Project

Interaction Design: The user is initially provided instructions on how to interact with the box through the computer screen. The red button on the box not only enters digits but also serves as a “start” and “restart” button for the game, functioning as a navigation button.


Beginning of the game. Box is locked and instruction to start is given on the screen.
Playing the game. Entering the digits of the code.
End of the game. Box is open and the candies are inside!!!

Arduino Sketch: My implementation involves using a servo motor, potentiometer, and button. The servo motor locks and unlocks the box by turning to 90 degrees when locked and 0 degrees when unlocked. The potentiometer changes the digits when the user inputs the code, mapping different resistances to digits from 0 to 10 (mapped to 0-9 initially, but because of display issues, extended to 10). The button navigates the game or inputs digits based on the game state. These data are sent to p5.js, which in turn determines whether to open the box or not.

const int servoPin = 9;
const int buttonPin = 3;
const int potentioPin = A1;
const int ledPin = 11;

#include <Servo.h>
Servo myservo;

int potValue;
bool locked = true;
int digit;

void setup() {
  pinMode(ledPin, OUTPUT);
  digitalWrite(ledPin, HIGH);
  delay(1000);
  digitalWrite(ledPin, LOW);

  myservo.attach(servoPin);
  pinMode(buttonPin, INPUT_PULLUP); 

  Serial.begin(9600);

  // Always lock the safe at the beginning of the program
  unlock();
  delay(2000);
  lock();
}

void loop() {
  // Check if data is available to read from serial
  if (Serial.available() > 0) {
    // Read the incoming data
    String receivedData = Serial.readStringUntil('\n');
    
    // Print received data to the Serial Monitor
    Serial.println(receivedData);
    
    // Check if the received data matches 'true' (to unlock)
    if (receivedData == "true") {
      unlock(); // Unlock the safe
    } else if (receivedData == "false") {
       lock(); // Unlock the safe
    }
  }

  int buttonState = digitalRead(buttonPin);
  potValue = analogRead(potentioPin);
  digit = map(potValue, 0, 1023, 0, 10);

  // Print values to Serial Monitor in a single line
  Serial.print(digit);
  Serial.print(", ");
  Serial.print(buttonState == LOW ? "false" : "true"); // Check if button is pressed
  Serial.print(", ");
  Serial.println(locked ? "true" : "false");
}

void lock() {
  myservo.write(0); // Set the servo to lock the safe (position 0)
  locked = true; // Update the locked status
}

void unlock() {
  myservo.write(90); // Set the servo to unlock the safe (position 90)
  locked = false; // Update the locked status
}

P5.js Sketch: The primary instructions and hints are presented to the user in the p5 sketch. There are three different code sets, one of which is chosen as the code to open the box at the game’s start. I was initially planning to code different sets of hints and it was a difficult process, I changed it to three sets of codes for each game round. For wrong inputs, there’s sound and visual feedback. I aimed for fun and engaging screen slides, including real box images for clear user instructions.

The p5 sketch receives data from the Arduino potentiometer to display corresponding digits. When the game state ends, it sends a signal to Arduino to open the box, and the servo motor complies.


In this project, I’m particularly proud of the box I’ve created. Despite the door hinges don’t function perfectly as intended, the box maintains a good overall shape. The box is made out of ply wood. Creating the box involved learning Adobe Illustrator to sketch precise and accurate measurements for the wooden parts, which was a challenging but rewarding process.

Cut out frame sketch of the box

For future improvements, placing the Arduino board inside the box is important thing to do. It was part of the initial plan, but due to incorrect box measurements the Arduino couldn’t fit in the box. Moreover, improving the box door for sturdiness is crucial. I am also considering to add background sounds for screen feedback interactions and that would enhance the overall experience. 

Overall, the project was an enjoyable and rewarding process, and I learned a lot more about merging creative design, technical use of Arduino and P5.js, and problem-solving to deliver an engaging and interactive experience.