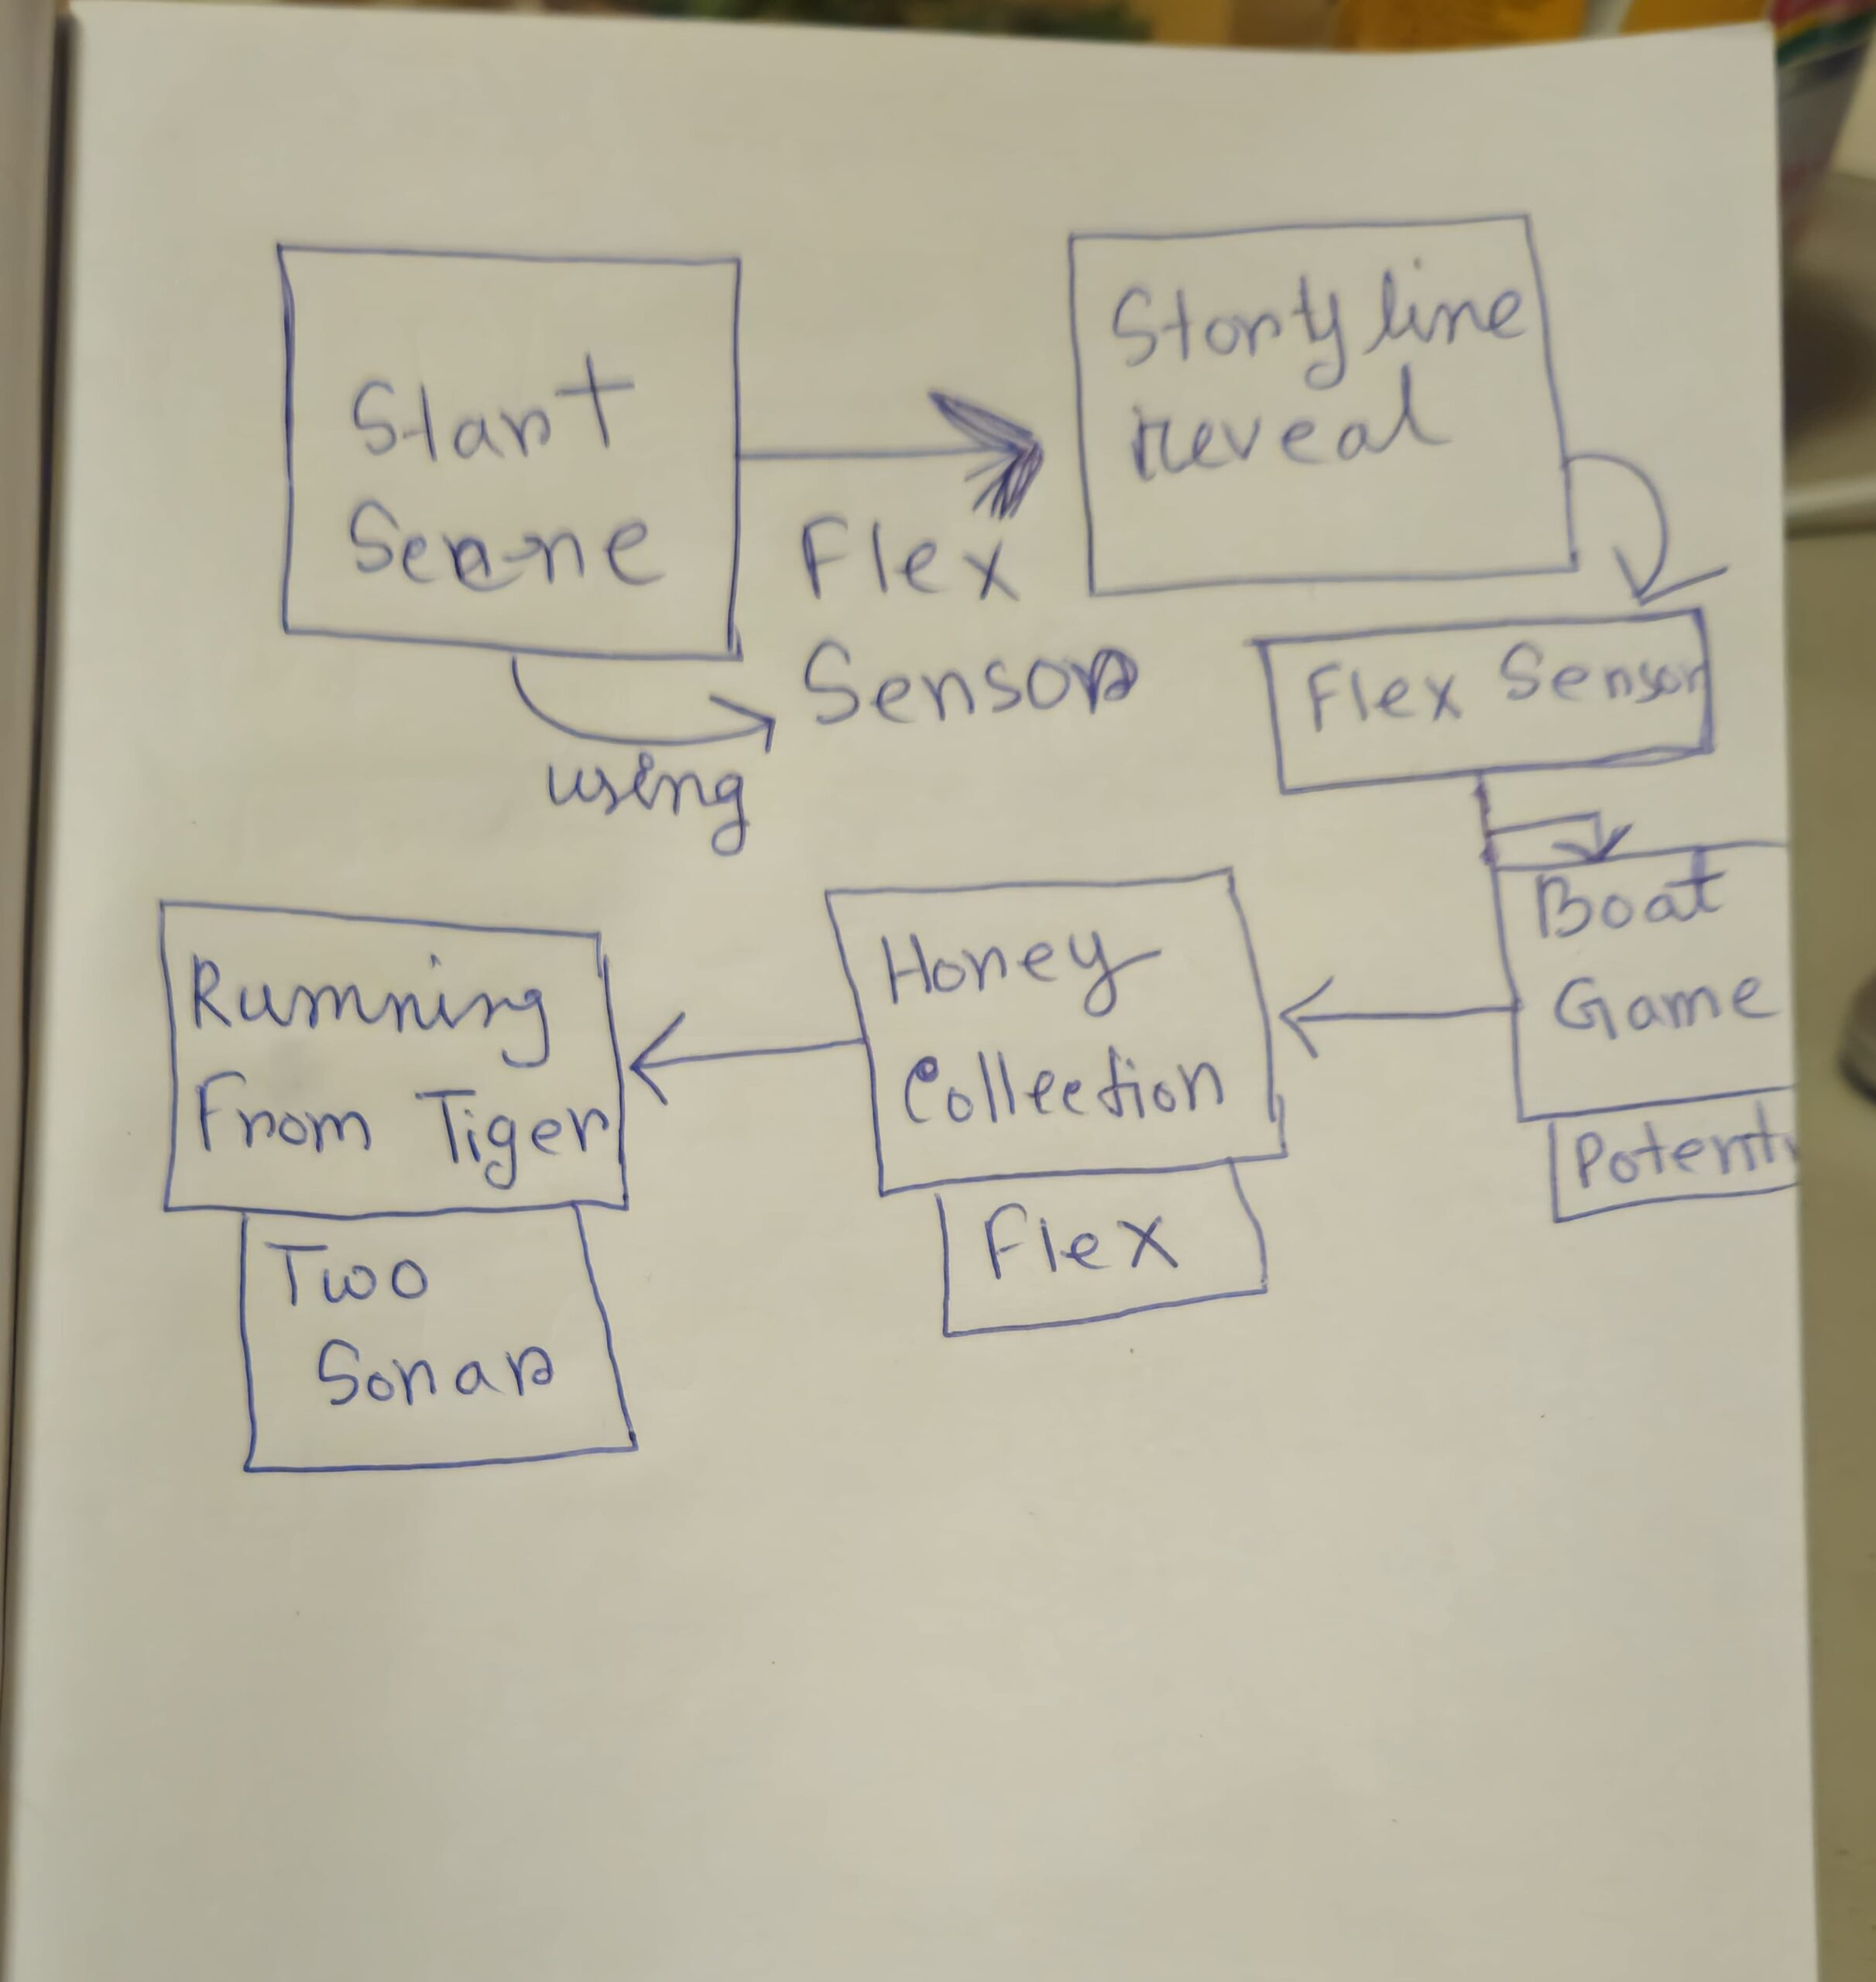
Concept:
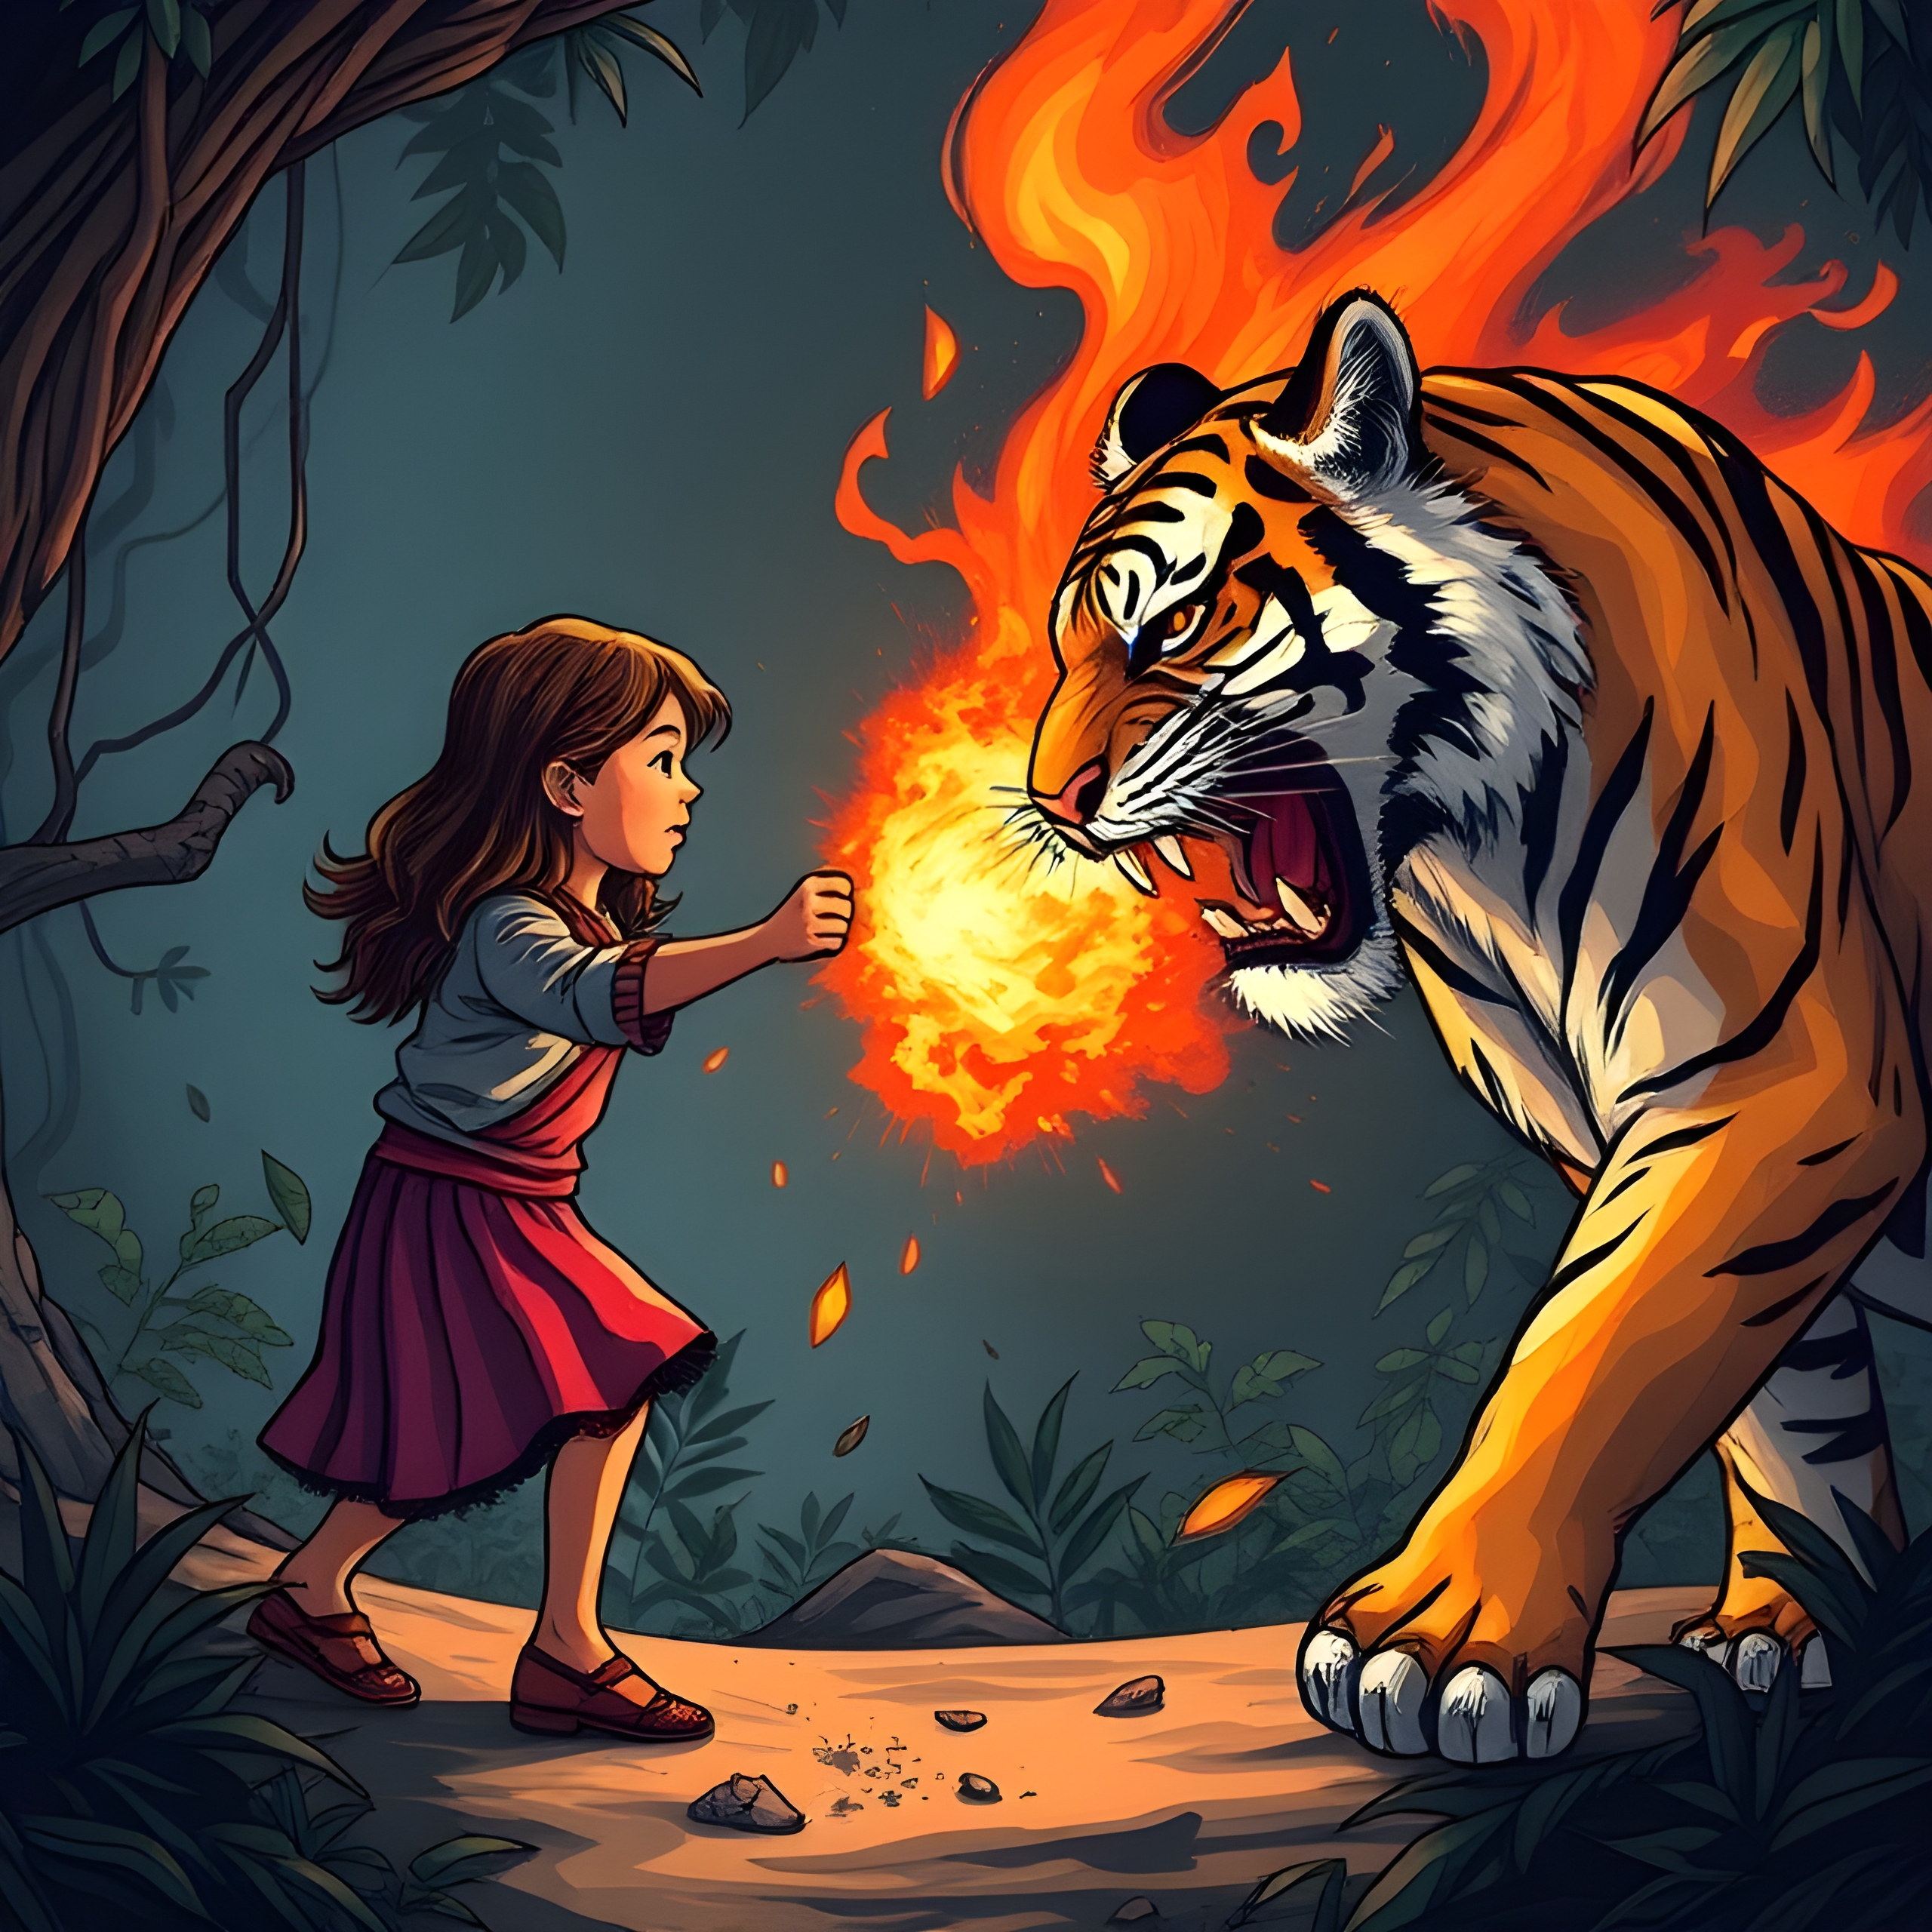
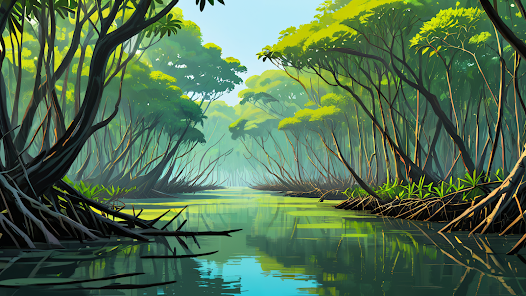
Growing up, I have heard a lot about the Royal Bengal Tiger of Bangladesh, which is our sigil for being brave and strong and they live in the Sundarban, which is the largest mangrove forest of the world.
In Bangladesh, we have myths related to Sundarban and its history of man-eating tigers and a spirit/deity, named “Bonbibi” who protects the human from the tigers. An amazing fact, I learned while searching for this project is that both Muslims and Hindus in those certain area, believe in Bonbibi which is very conflicting with the concept of Islam. Yet, she is thought to be the daughter of Prophet Abraham. I did not wanted to miss the chance to let people get introduced to “Sundarban” and the legendary myth.
Inspirations:
While working on this project, I listened to the song named “Bonobibi” by Coke Studio Bangladesh, which says the story of her and connects the life of Bangladeshi to a very deep level. Another book, I took as my inspiration, is Amitav Ghosh‘s “Hungry Tide“. I am personally inspired and try to treasure these amazing parts of my culture close to my identity and personality. I am not sure, how much I was able to tell the story through my game project but it was a project, not only for IM course but also me to navigate ways of spreading my culture to a diverse student body and faculties.
Project Interaction Archive:
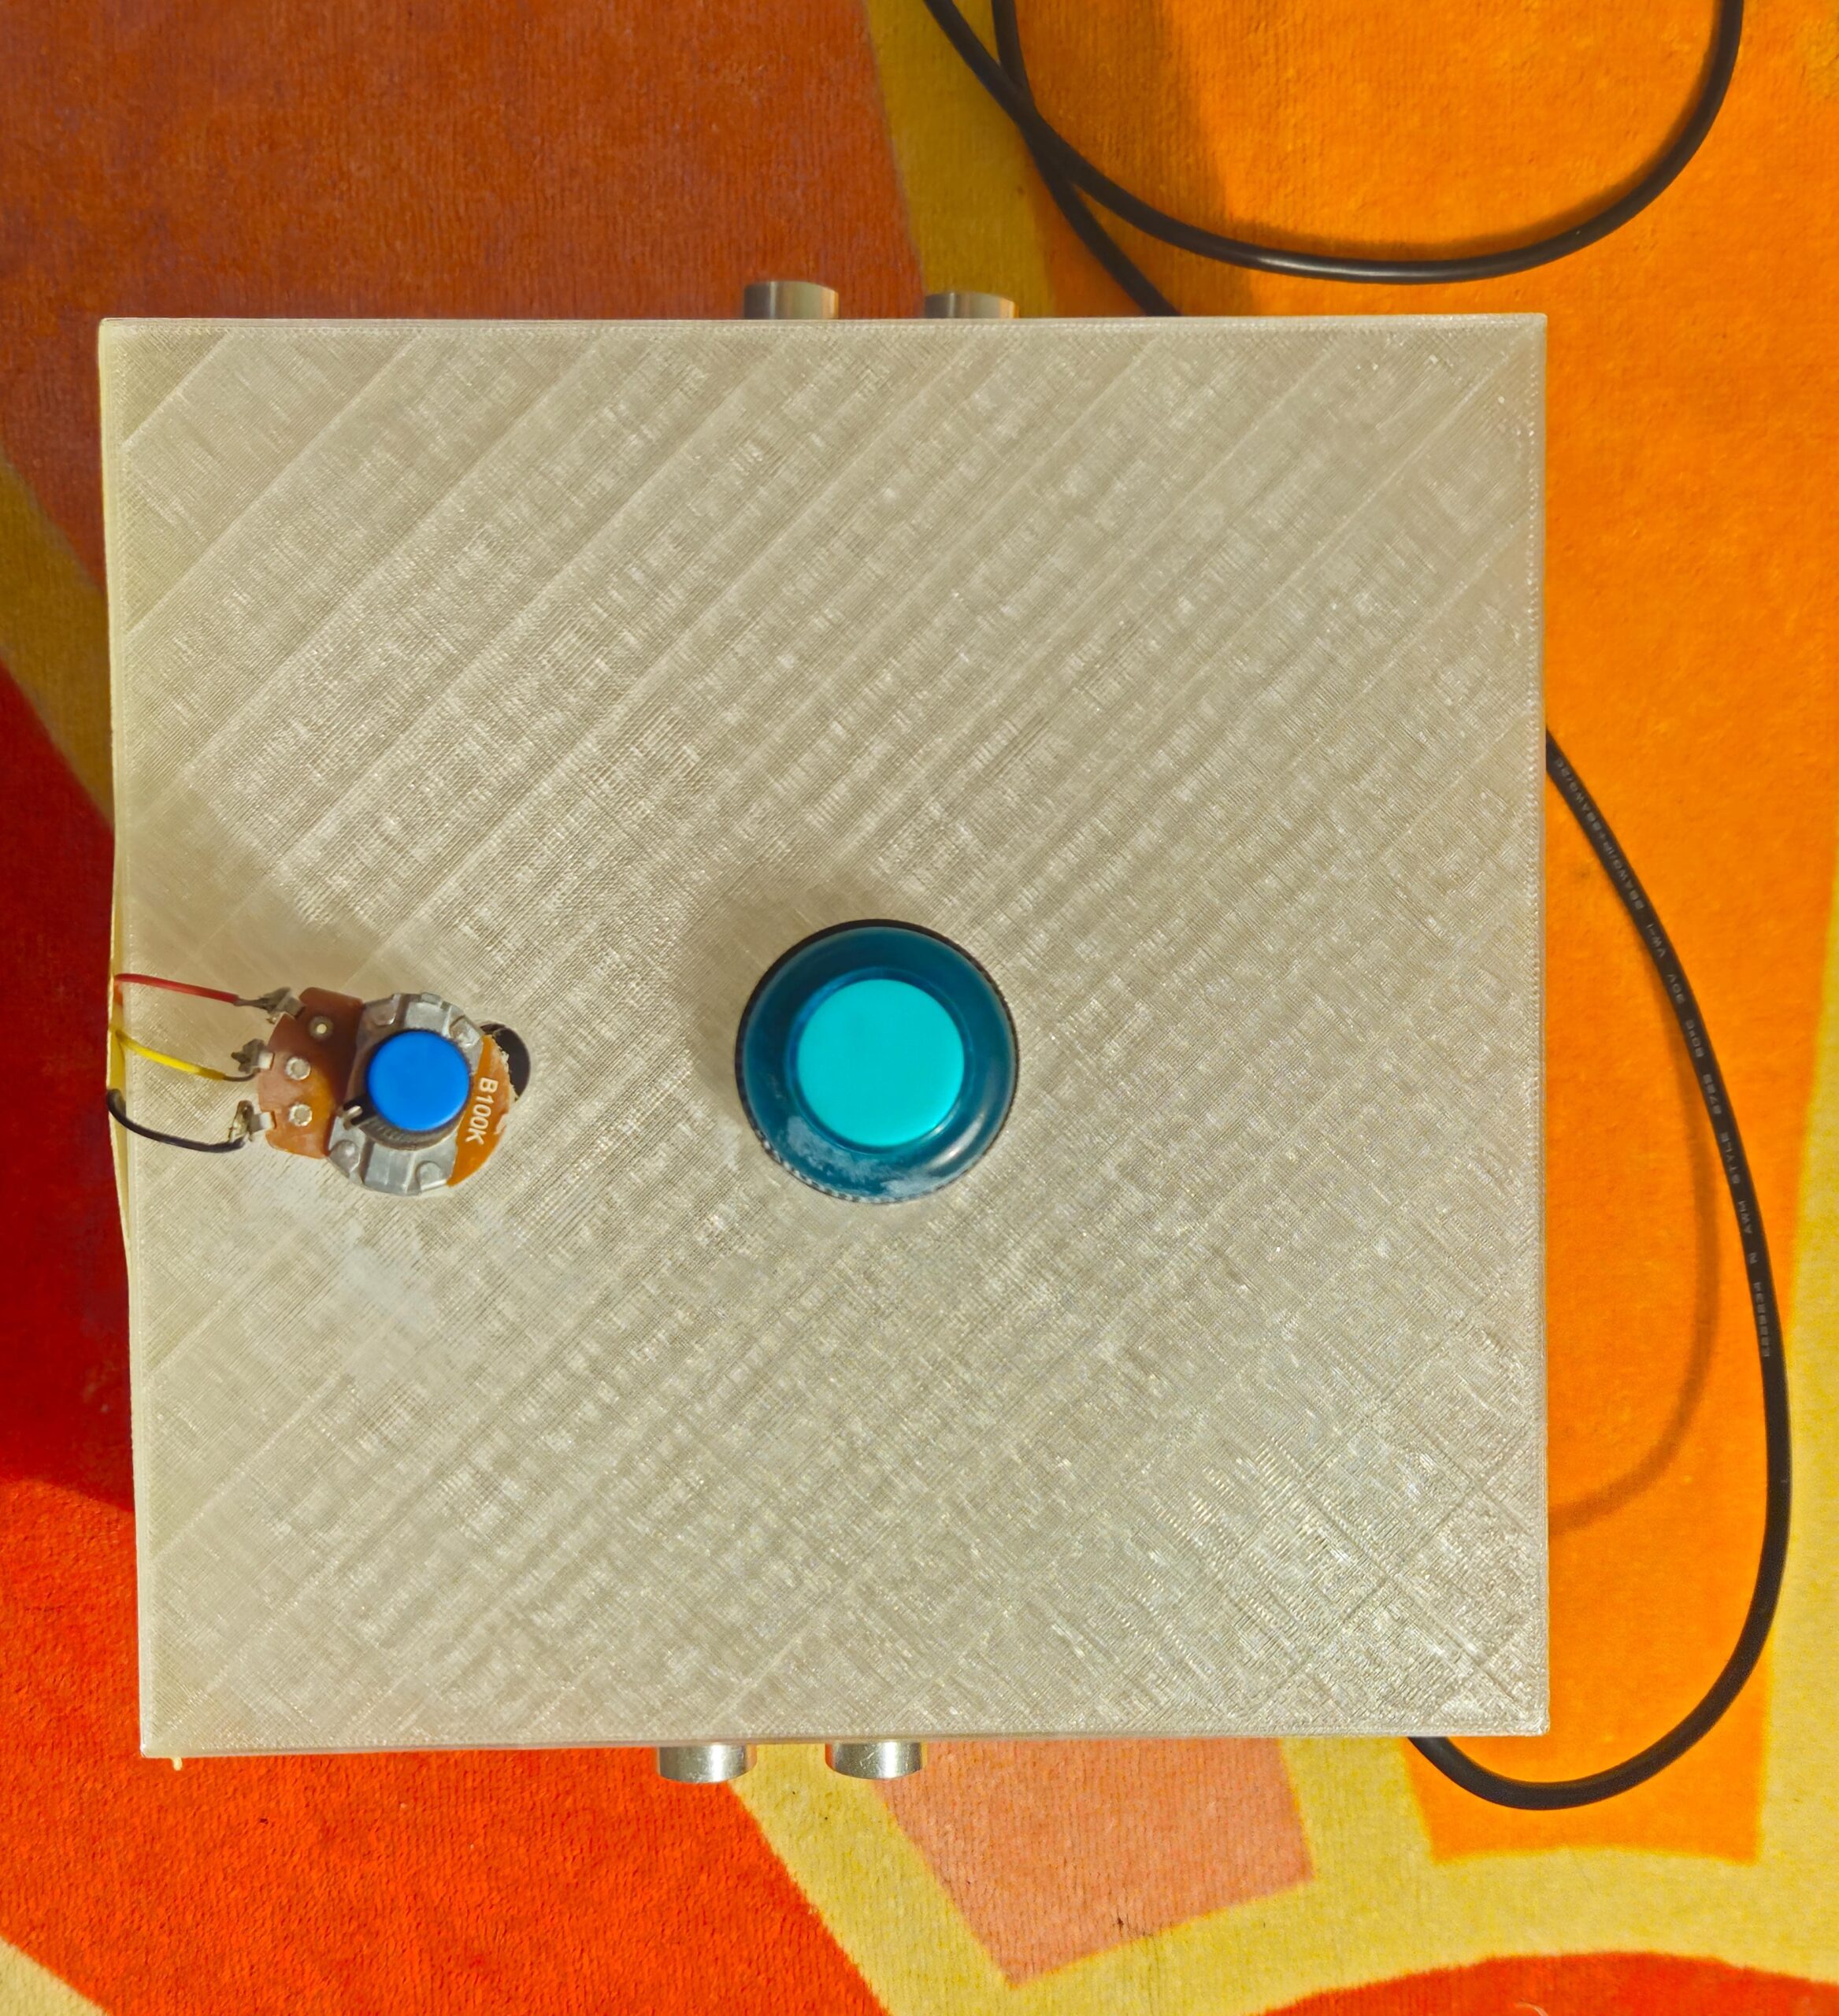
Project Box:
Player Interaction: IM Showcase 2024
INTERACTION DESIGN:
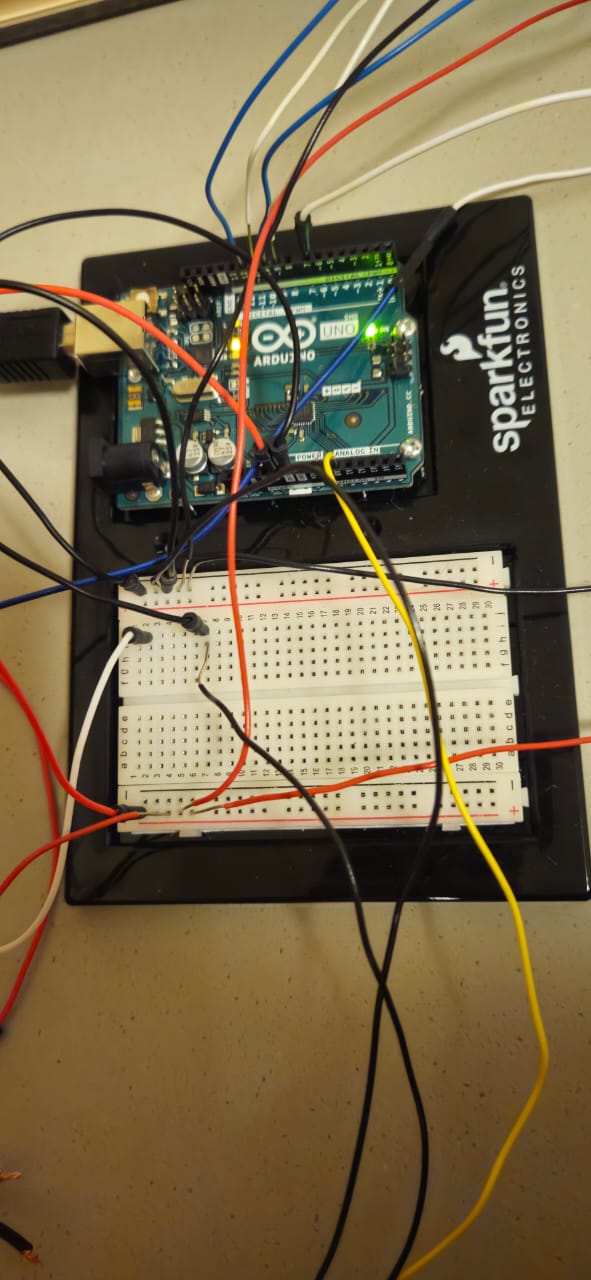
Arduino for Physical Interactions
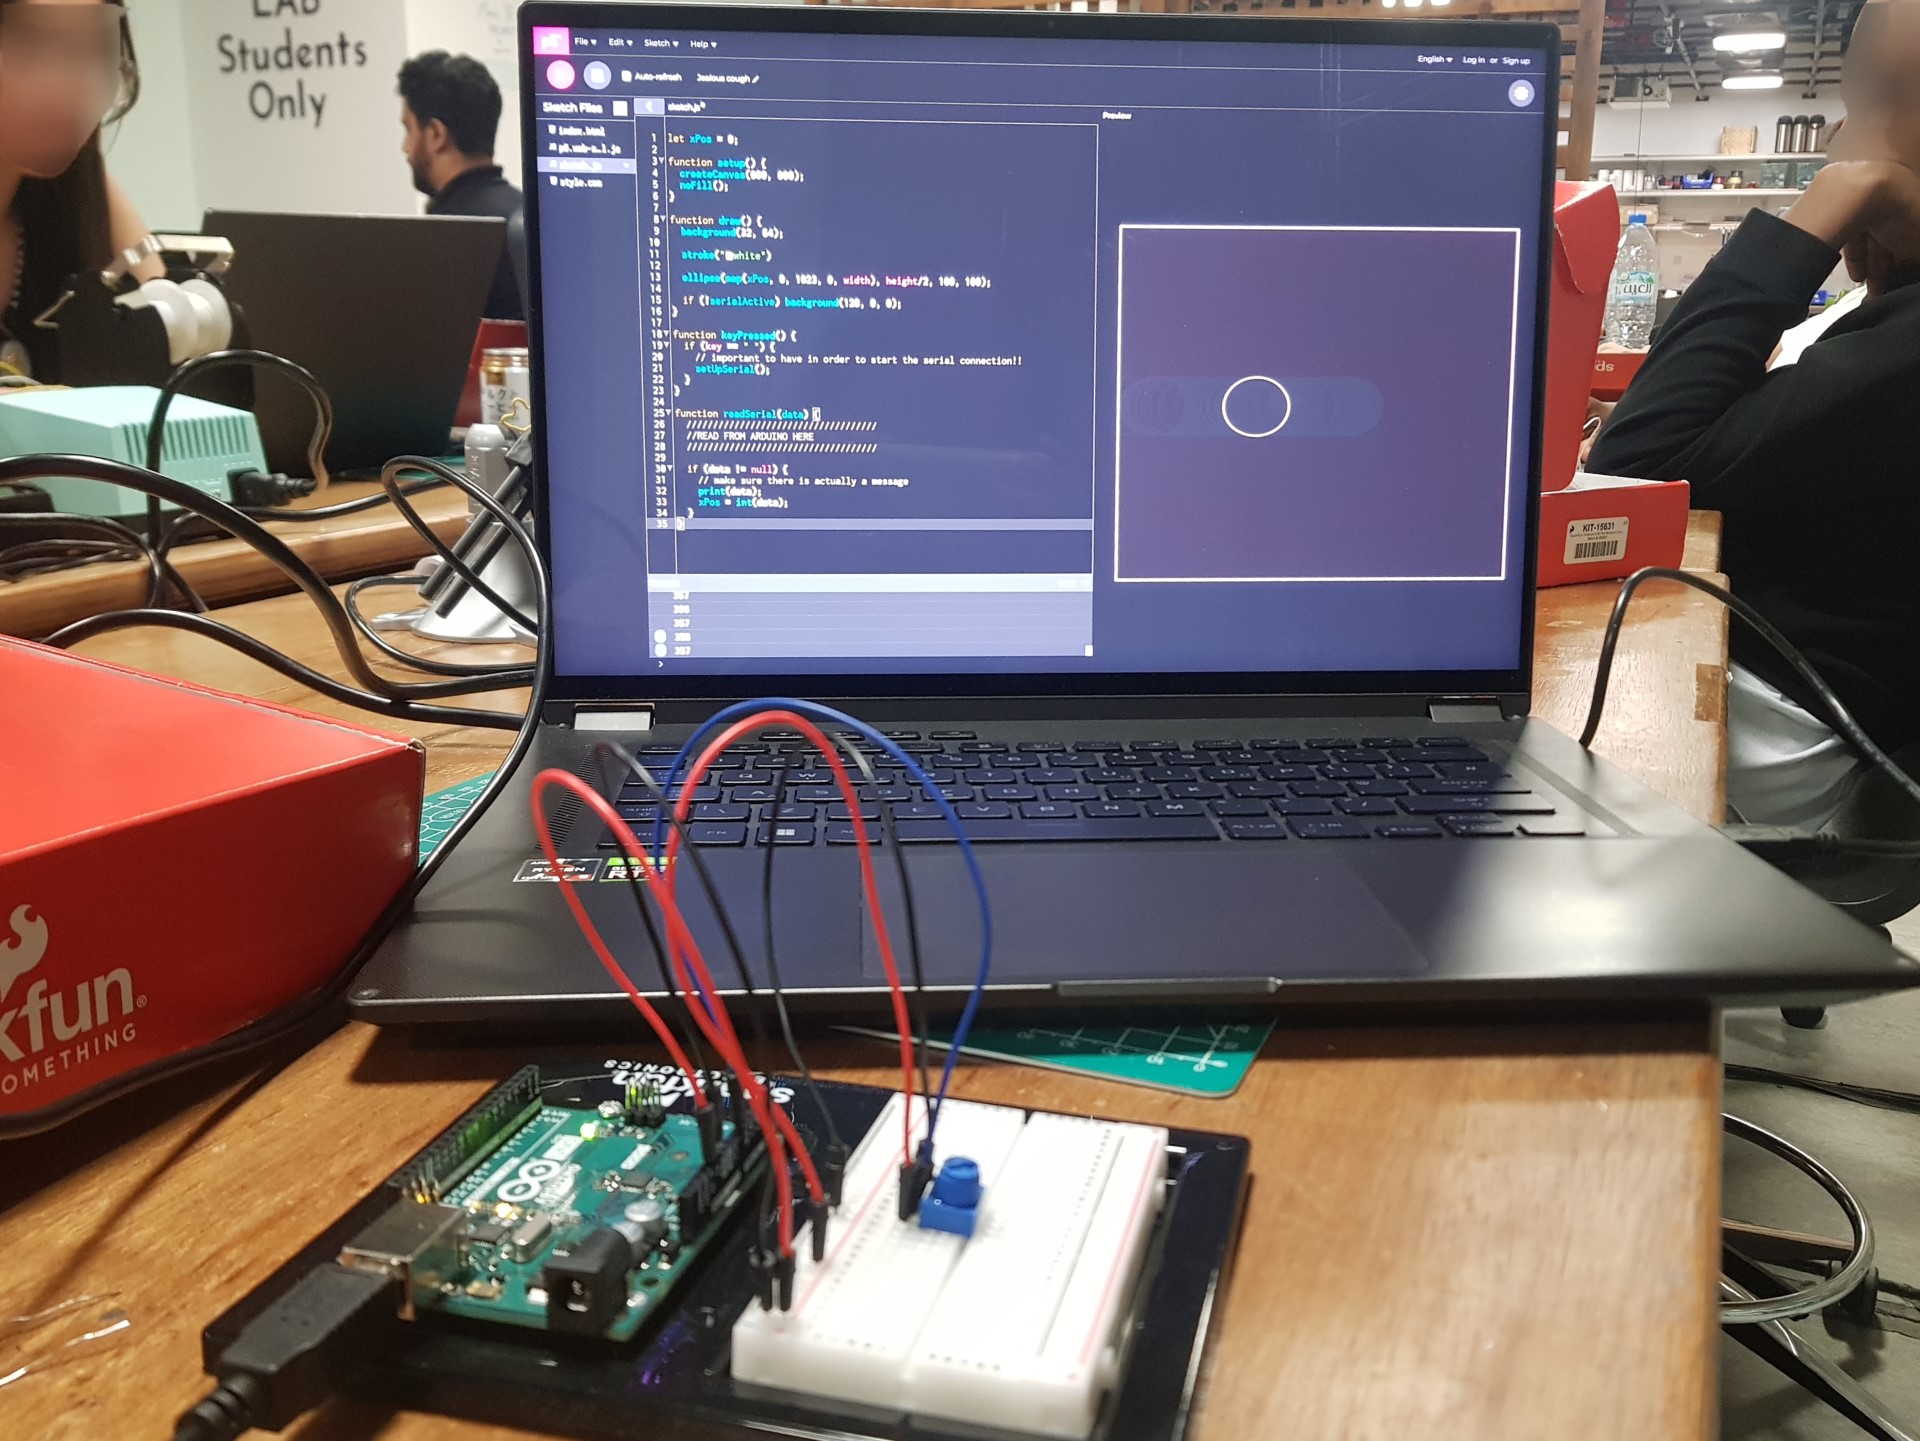
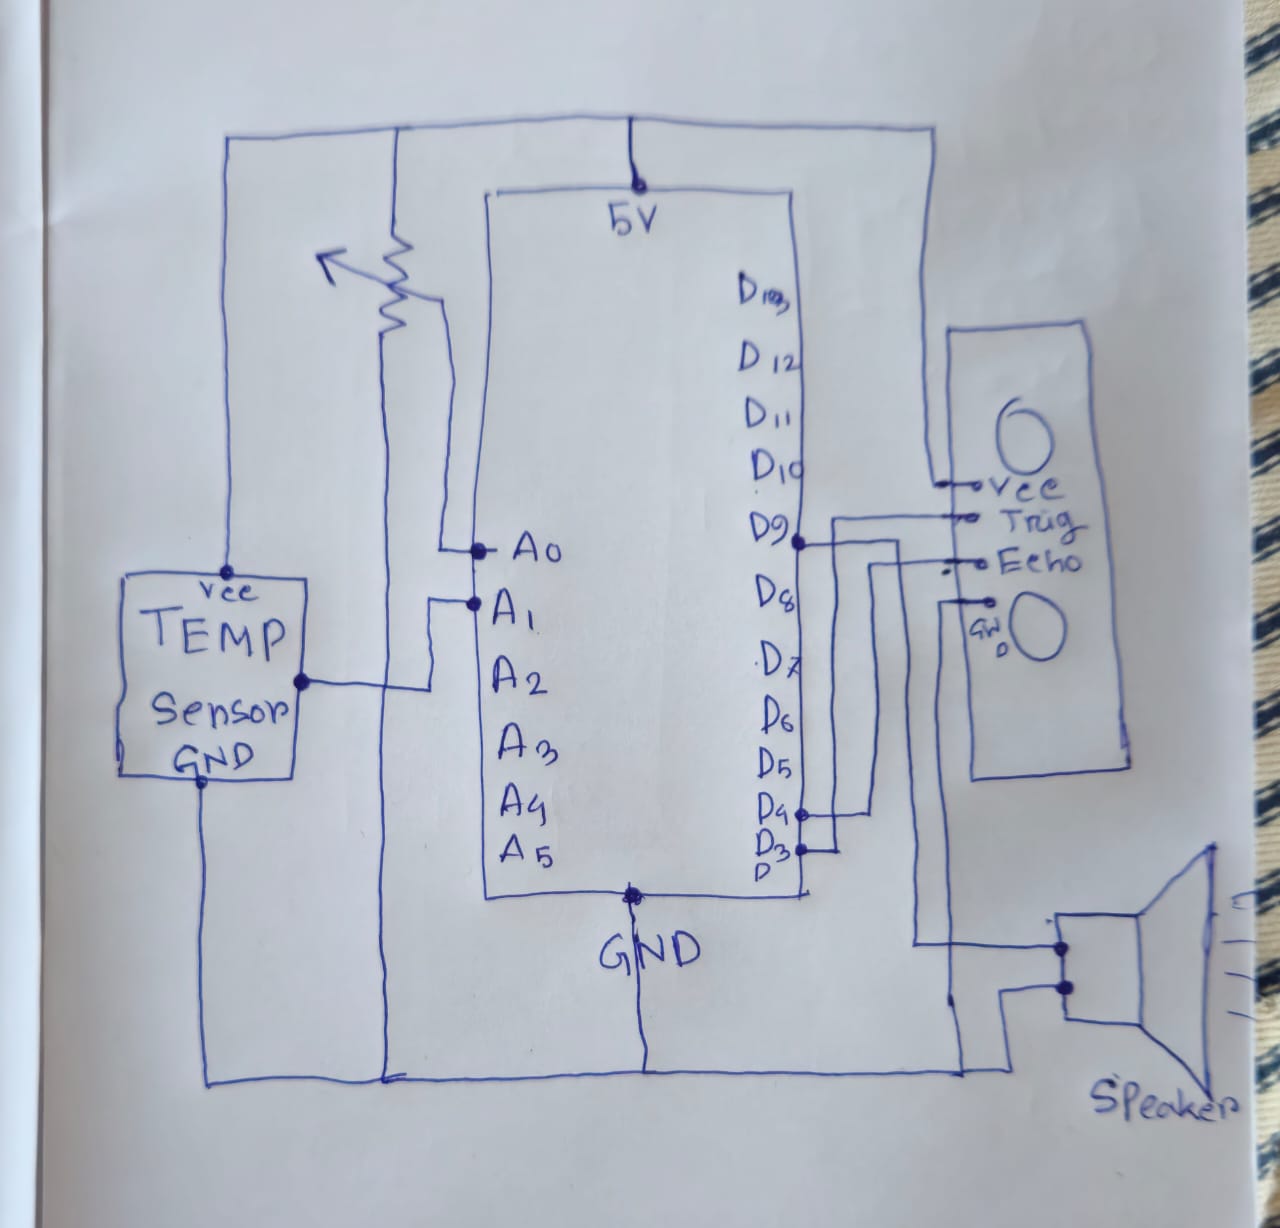
The Arduino serves as the core hardware interface. It reads data from two ultrasonic sensors, a potentiometer, and a physical button. This data is sent to the p5.js sketch via serial communication which to manage gameplay.
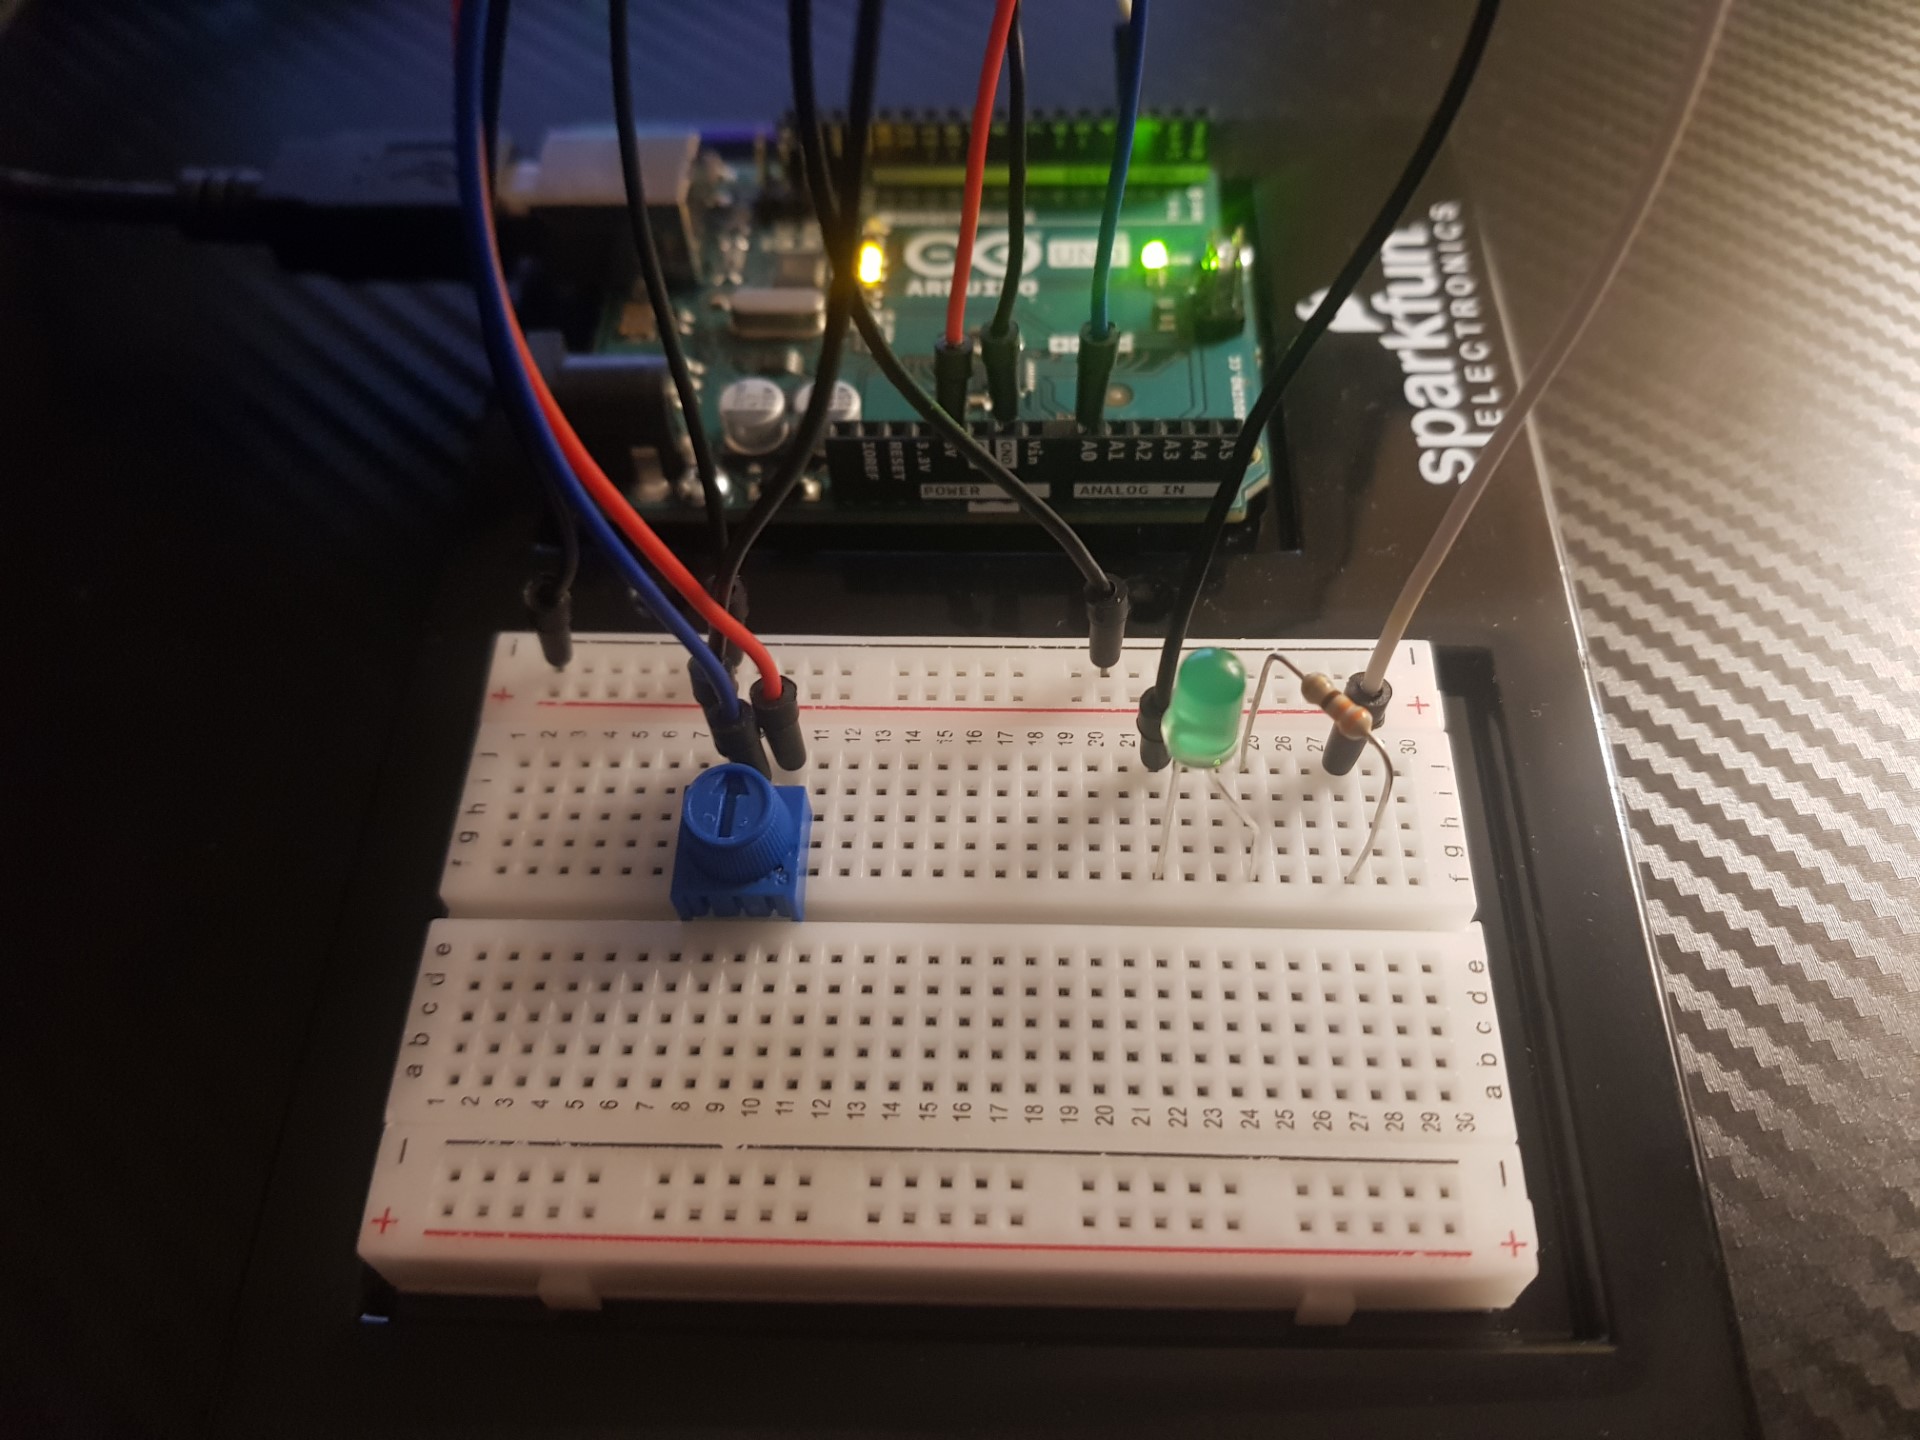
The project is divided into two games. To start any of the game player needs to press a physical button. The physical button is connected to Arduino pin 07 which takes the input from the button and allows the p5.js through serial communication to start the game. Pressing the button changes the state (HIGH → LOW or LOW → HIGH) is how Arduino code listens to detect button presses. Using a button is a common practice to start any game, so I used it for my final project as well.
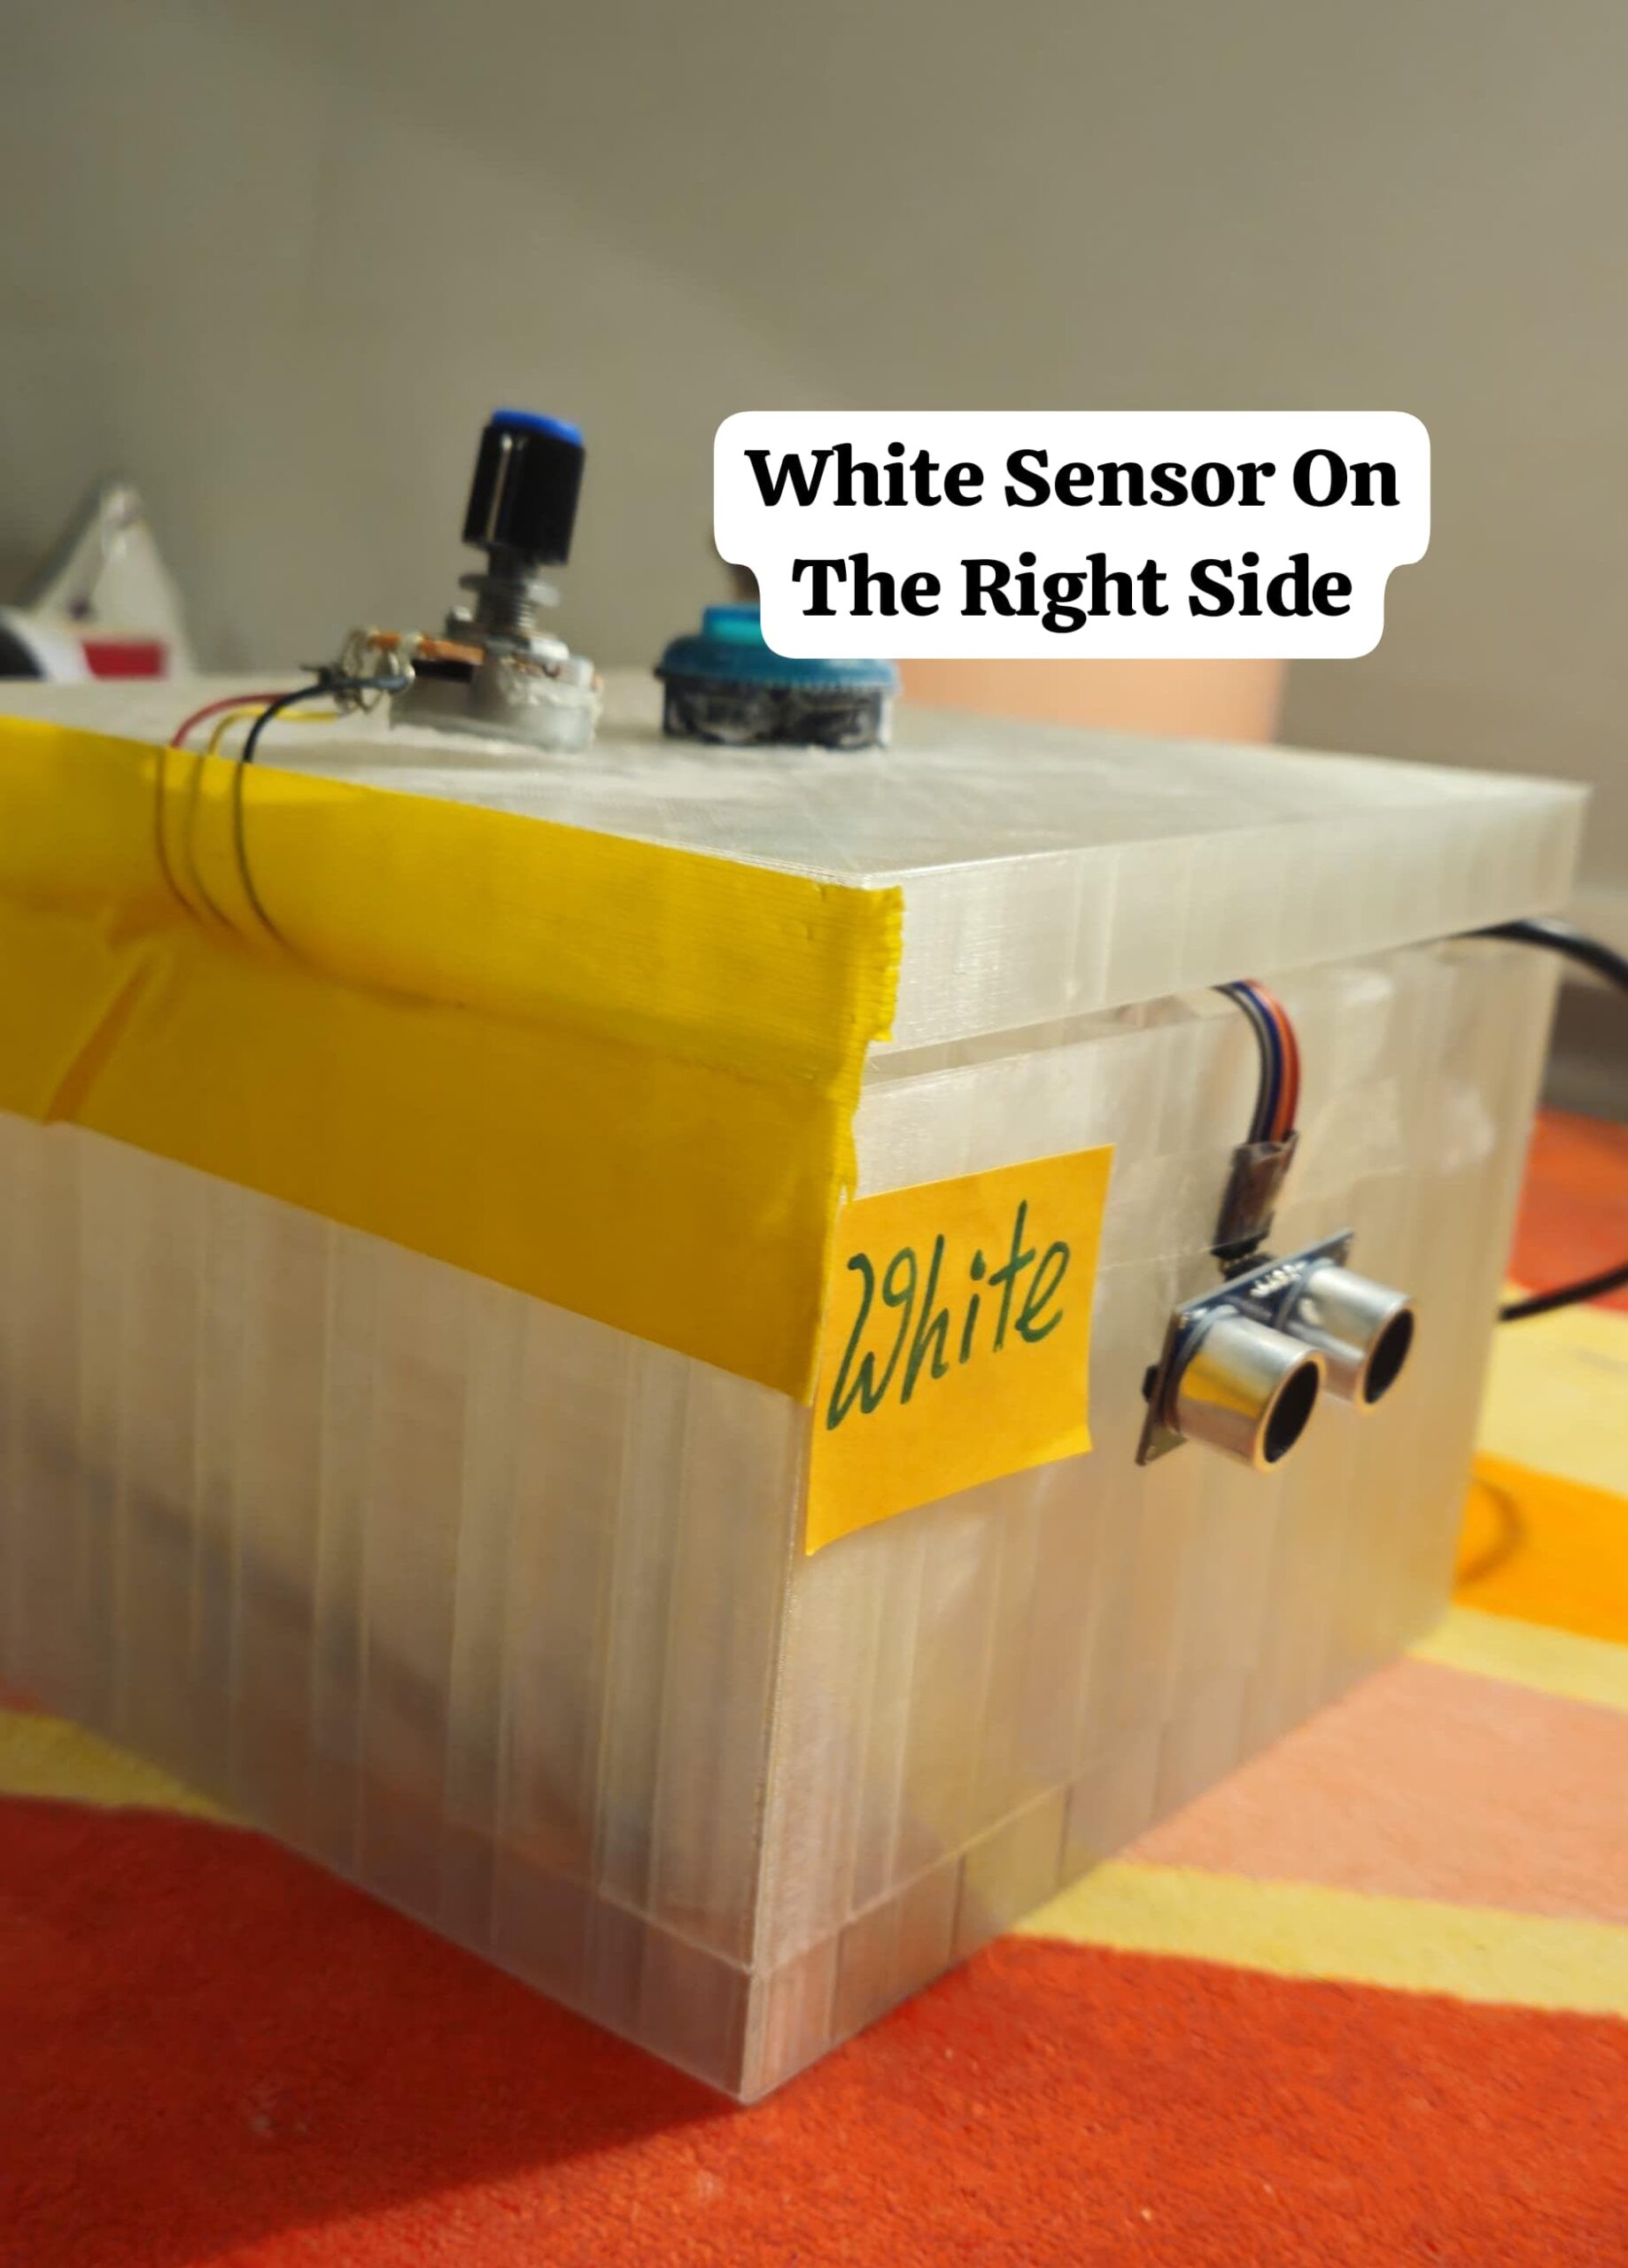
Ultrasonic sensors detect hand proximity for selecting words based on their color. Two sensors were connected to take output for either Yellow or for White Color. I have set the threshold value to 15, so anything that comes below 15cm of distance, the sonar sensors will count them and if the obstacle is detected on the right sensor, the score will go up. To decide which one is dedicated for Yellow and Which one is White, I mapped each ultrasonic sensor to a specific word color in the code. The sensor on the left is dedicated to detecting Yellow, while the one on the right is dedicated to White. This mapping is based on the hardware connection and the logic in the Arduino and p5.js code.
The Arduino identifies which sensor detects an obstacle by reading the distance from the sensors. If the left sensor’s reading goes below the threshold of 15 cm, it corresponds to Yellow, and if the right sensor detects proximity, it corresponds to White. The data is then sent to p5.js via serial communication, which matches the color of the detected word with the respective sensor input to determine if the interaction is correct.
For the second game of collecting flowers, the potentiometer allows players to control the basket horizontally to collect flowers. The potentiometer is connected to an analog pin on the Arduino, which reads its position as a voltage value ranging from 0 to 1023, but I saw in mine it was somewhere around 990 as max value. This raw input is then mapped to the screen width in p5.js, allowing the basket’s movement to correspond seamlessly with the player’s adjustments. When the basket aligns with a falling flower, the game detects a collision, increasing the score.
arduino code:
 // Arduino Code for Sundarbans Challenge Game

// Define Button Pin
#define BUTTON_PIN 7

// Define Ultrasonic Sensor Pins
const int trigPinYellow = 9;
const int echoPinYellow = 10;
const int trigPinWhite = 11;
const int echoPinWhite = 12;

// Define Potentiometer Pin
const int potPin = A0;

// Variables to track button state
bool buttonPressed = false;

void setup() {
  Serial.begin(9600);
  pinMode(BUTTON_PIN, INPUT_PULLUP);

  // Initialize Ultrasonic Sensor Pins
  pinMode(trigPinYellow, OUTPUT);
  pinMode(echoPinYellow, INPUT);
  pinMode(trigPinWhite, OUTPUT);
  pinMode(echoPinWhite, INPUT);
}

void loop() {
  // Read Button State
  bool currentButtonState = digitalRead(BUTTON_PIN) == LOW; // Button pressed when LOW

  if (currentButtonState && !buttonPressed) {
    buttonPressed = true;
    Serial.println("button:pressed");
  } else if (!currentButtonState && buttonPressed) {
    buttonPressed = false;
    Serial.println("button:released");
  }

  // Read distances from both ultrasonic sensors
  long distanceYellow = readUltrasonicDistance(trigPinYellow, echoPinYellow);
  long distanceWhite = readUltrasonicDistance(trigPinWhite, echoPinWhite);

  // Read potentiometer value
  int potValue = analogRead(potPin); // 0 - 1023

  // Send data in "pot:<value>,ultra1:<value>,ultra2:<value>" format
  Serial.print("pot:");
  Serial.print(potValue);
  Serial.print(",ultra1:");
  Serial.print(distanceYellow);
  Serial.print(",ultra2:");
  Serial.println(distanceWhite);

  delay(100); // Update every 100ms
}

long readUltrasonicDistance(int trigPin, int echoPin) {
  // Clear the Trigger Pin
  digitalWrite(trigPin, LOW);
  delayMicroseconds(2);

  // Send a 10 microsecond HIGH pulse to Trigger
  digitalWrite(trigPin, HIGH);
  delayMicroseconds(10);
  digitalWrite(trigPin, LOW);

  // Read the Echo Pin and calculate the duration
  long duration = pulseIn(echoPin, HIGH, 30000); // Timeout after 30ms

  // Calculate distance in centimeters
  long distance = duration * 0.034 / 2;

  // Handle out-of-range measurements
  if (duration == 0) {
    distance = -1; // Indicate out of range
  }

  return distance;
}
Description of Code:
The button, connected to pin 7, uses an internal pull-up resistor to detect when it’s pressed, sending a signal (button:pressed) to the computer. Two ultrasonic sensors measure distance: one for yellow and one for white. These sensors send a pulse and listen for its echo to calculate how close a hand is, allowing players to interact with words based on their color.
The potentiometer, connected to A0, controls the basket in the flower-collecting game by adjusting its position smoothly. All data — button states, distances, and potentiometer readings — is sent to the computer via serial communication in a structured format given as a file from the professor and it is read as serial data in p5.js.
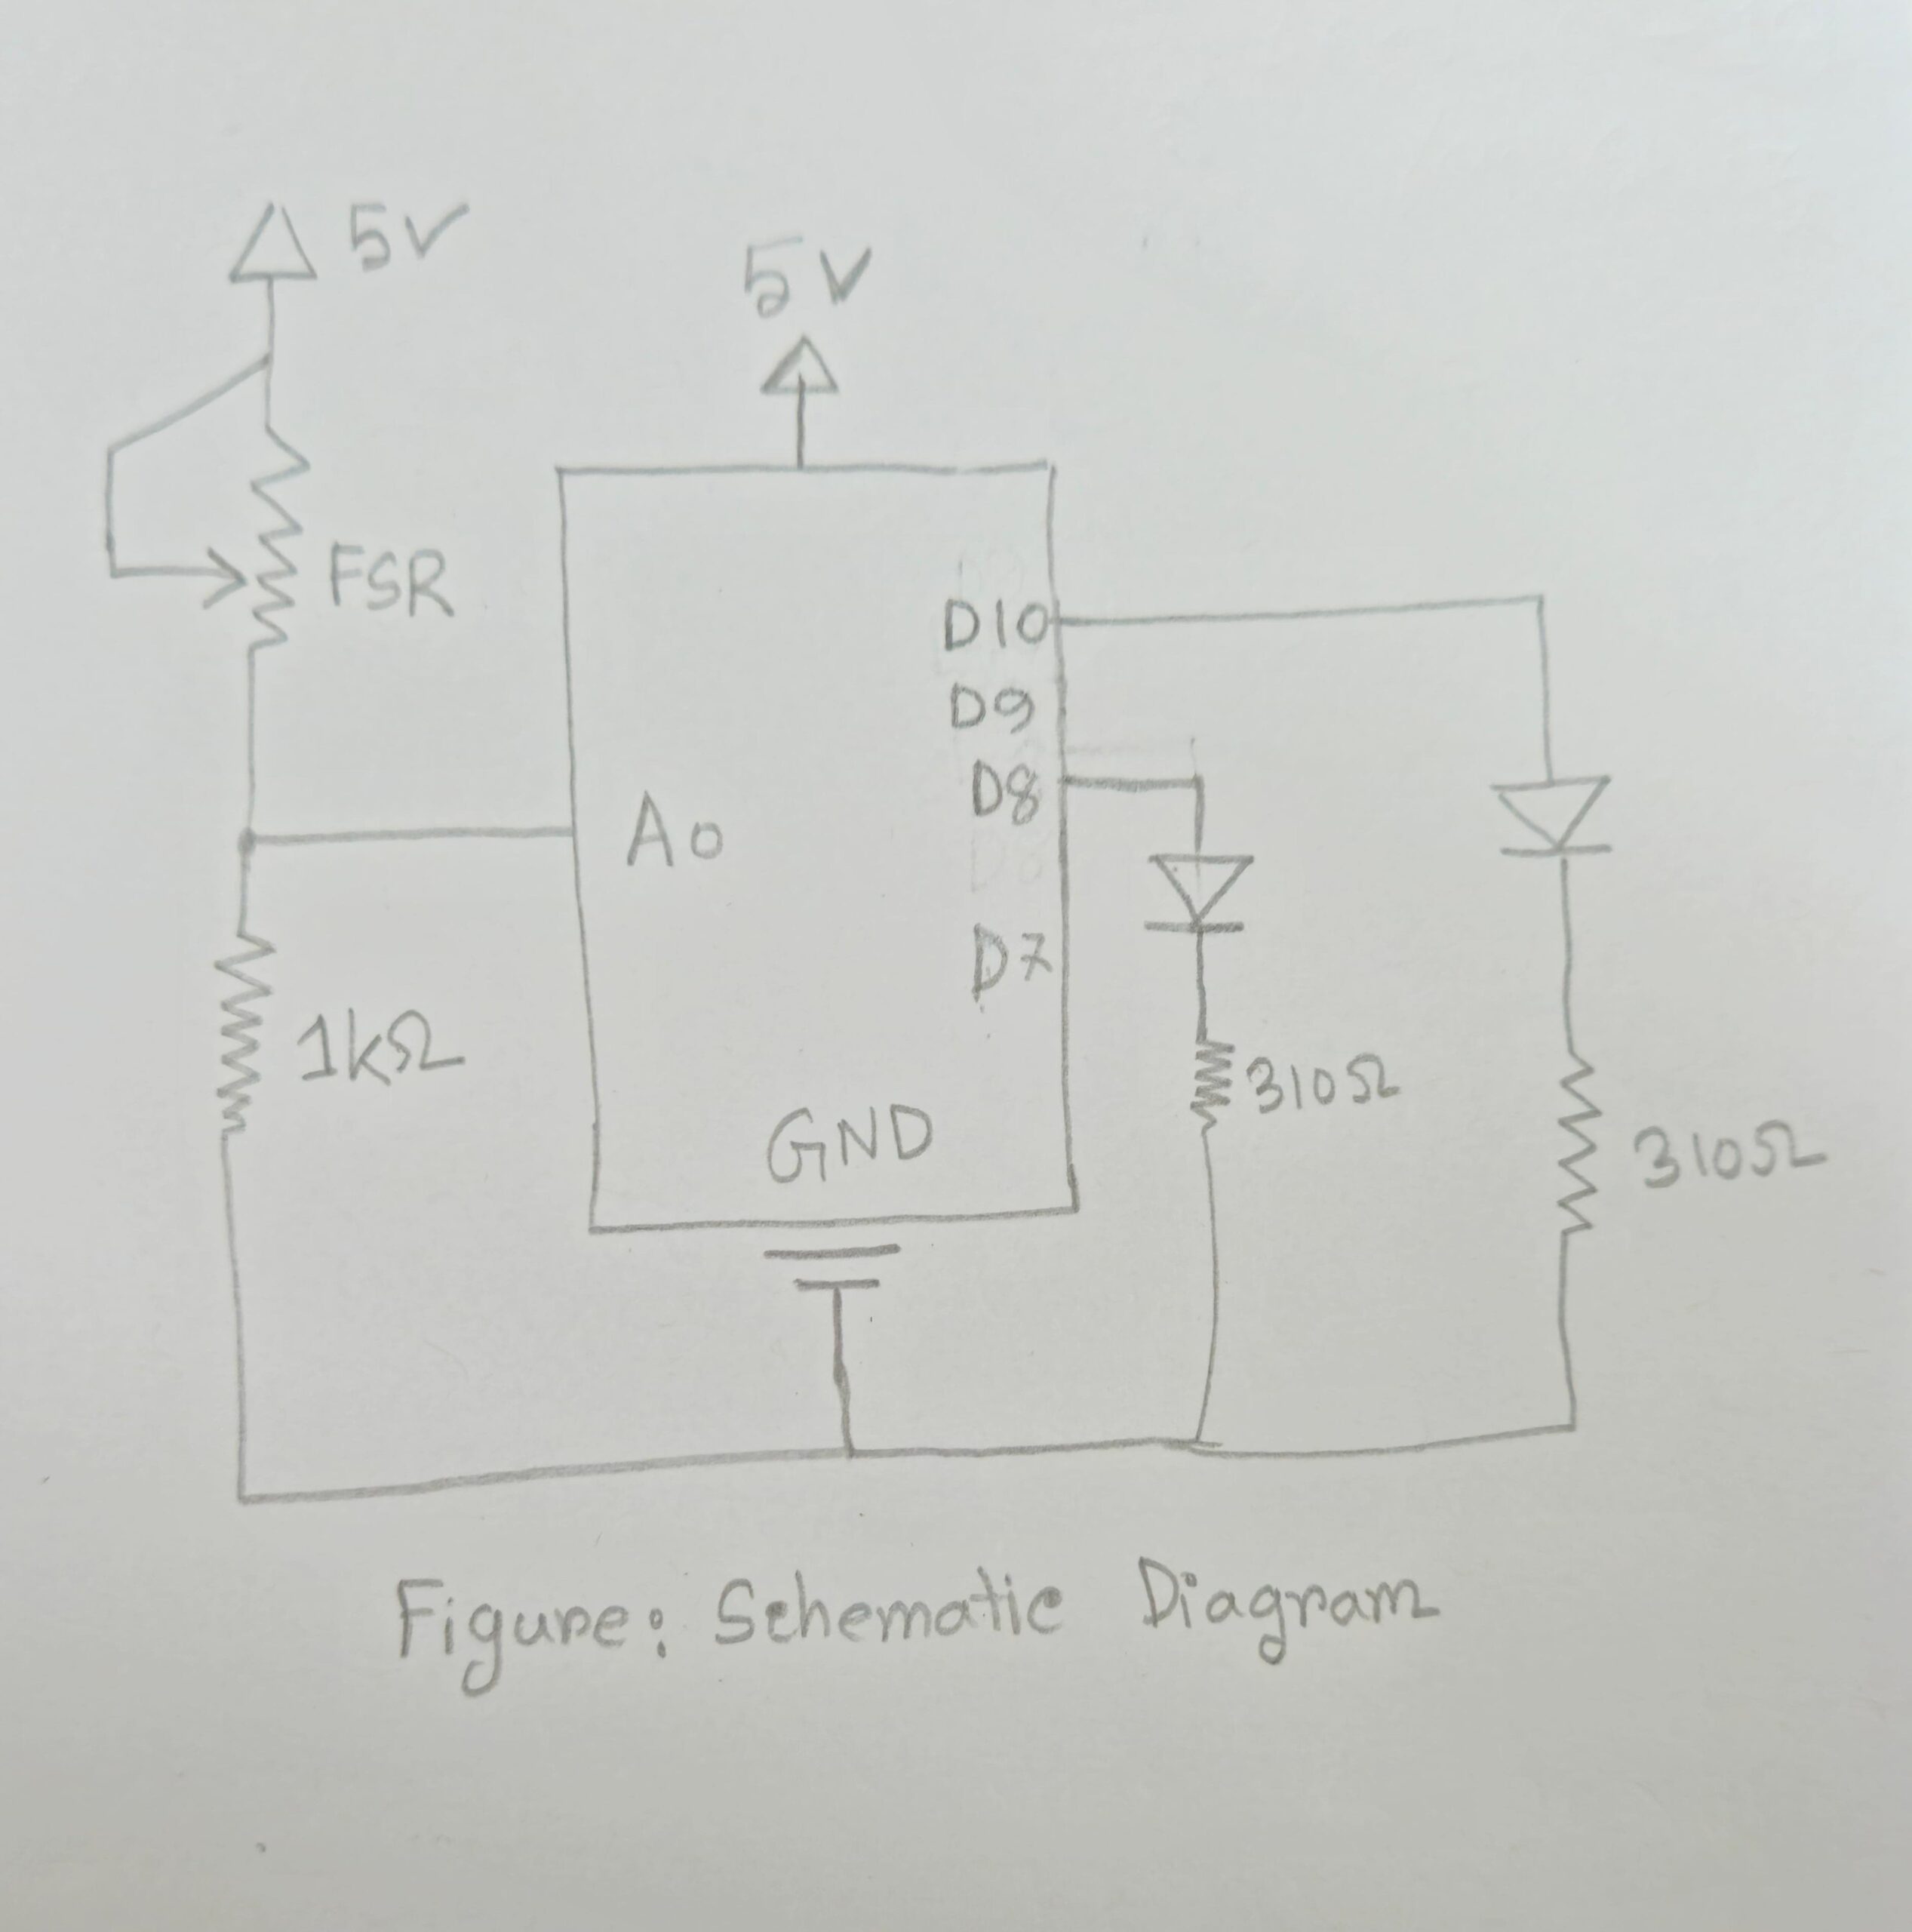
Schematic Diagram: Tinkercad

P5.js Sketch:
P5.js Code with description commented:
// sketch.js

// ----------------------
// 1. Global Variable Declarations
// ----------------------
let page = "start"; // Initial page
let howToPlayButton, mythologyButton, connectButton, fullscreenButton, backButton; // Buttons
let timer = 45; // Total game time in seconds
let countdown = timer;
let timerStart = false;
let gameOver = false;
let gameResult = "";
let score = 0;
let getReadyBg;
let endgame;


let gameStartInitiated = false; // Flag for transitioning from gameStart to game

// Typewriter effect variables
let typewriterText = "Press the green button to start your adventure!";
let currentText = "";
let textIndex = 0;
let typewriterSpeed = 50;


// Word display variables
let words = [
  "The", "Sundarbans", "is", "home", "to", "the",
  "man-eater", "Bengal", "tiger.", "Local", "honey",
  "hunters,", "the", "Mowallis,", "brave", "its", "dangers",
  "to", "collect", "honey,", "often", "facing", "tiger",
  "encounters.", "Myths", "surround", "these", "tigers,",
  "people", "can", "only", "stay", "safe", "if", "they",
  "remember", "Bonbibi,", "the", "spirit."
];


let currentWordIndex = 0;
let wordInterval = 8000; // first 5 words every 4s
let fastInterval = 6000; // subsequent words every 2s
let wordDisplay = "";
let wordColor = "white";

// Basket game variables
let basketX, basketY;
let flowers = [];
let vehicles = []; // Water particles for aesthetic effect in basket game


let textToDisplay = "The Sundarbans, is home to the man-eater Bengal tiger. Local honey hunters, the Mowallis, brave its dangers to collect honey, often facing tiger encounters. Myths surround these tigers, people can only stay safe if they remember Bonbibi, the spirit.";


// Background Text for mythology and gameStart
let backgroundText = "In the Sundarbans myth, Bonbibi, the guardian goddess of the forest, defends the local woodcutters and honey gatherers from the malevolent tiger god, Dakshin Rai. The story highlights a young boy, Dukhey, who becomes a victim of a pact between his greedy employer and Dakshin Rai, aiming to sacrifice him to the tiger god. Bonbibi intervenes, rescuing Dukhey and ensuring his safe return, emphasizing her role as a protector and mediator between the natural world and human interests. This myth underscores the intricate balance between exploitation and conservation of the Sundarbans' resources.";

// Variables for serial communication
let latestData = "waiting for data";

// Images
let startBg, nightBg, bonbibi;

// Typewriter interval ID
let typewriterIntervalID;

// Variable to store the setTimeout ID for word transitions
let wordTimeoutID;

// Debugging Mode
let debugMode = false; // Set to false when using actual sensors

// Feedback Variables
let feedbackMessage = "";
let feedbackColor;
let feedbackTimeout;
let wordTouched = false;

// ----------------------
// 2. Function Declarations
// ----------------------

function setPage(newPage) {
  page = newPage;

  if (page === "start") {

    if (!bgMusic.isPlaying()) {
      bgMusic.loop(); // Loop the music
      bgMusic.setVolume(0.5); // Adjust volume (0.0 to 1.0)
    }


    connectButton.show();
    howToPlayButton.show();
    mythologyButton.show();
    fullscreenButton.show(); // Show fullscreen button on Start page
    backButton.hide(); // Hide Back button on Start page

  } else if (page === "howToPlay" || page === "mythology") {
    connectButton.hide();
    howToPlayButton.hide();
    mythologyButton.hide();
    fullscreenButton.hide(); // Hide fullscreen on these pages
    backButton.show(); // Show Back button on these pages
  } else if (page === "gameStart") {
    console.log("Get Ready! Transitioning to game...");
    setTimeout(() => {
      setPage("game"); // Transition to game page after 15 seconds
    }, 18000);

    connectButton.hide();
    howToPlayButton.hide();
    mythologyButton.hide();
    fullscreenButton.hide();
    backButton.hide(); // hide Back button on new page

  }  else if (page === "secondGameIntro") {
    connectButton.hide();
    howToPlayButton.hide();
    mythologyButton.hide();
    fullscreenButton.hide();
    backButton.hide();
  } else {
    connectButton.hide();
    howToPlayButton.hide();
    mythologyButton.hide();
    fullscreenButton.hide();
    backButton.hide();
  }
}

function toggleFullscreen() {
  let fs = fullscreen();
  fullscreen(!fs);
  console.log(fs ? "Exited fullscreen mode." : "Entered fullscreen mode.");
}

function styleButtons(buttonColors = {}) {
  const defaults = {
    connect: '#855D08',
    howToPlay: '#B77607',
    mythology: '#8C5506',
    fullscreen: '#E1D8D8',
    back: '#555555'
  };

  const colors = { ...defaults, ...buttonColors };

  let buttonStyles = `
    color: rgb(255,255,255);
    font-size: 15px;
    border: none;
    border-radius: 5px;
    padding: 8px 20px;
    text-align: center;
    text-decoration: none;
    display: inline-block;
    margin: 5px;
    cursor: pointer;
    transition: all 0.3s ease;
    box-shadow: 0 4px 6px rgba(0,0,0,0.1);
  `;

  connectButton.style(buttonStyles + `background-color: ${colors.connect};`);
  howToPlayButton.style(buttonStyles + `background-color: ${colors.howToPlay};`);
  mythologyButton.style(buttonStyles + `background-color: ${colors.mythology};`);
  fullscreenButton.style(buttonStyles + `background-color: ${colors.fullscreen};`);
  backButton.style(buttonStyles + `background-color: ${colors.back};`);

  [connectButton, howToPlayButton, mythologyButton, fullscreenButton, backButton].forEach((btn, index) => {
    const baseColor = Object.values(colors)[index];
    btn.mouseOver(() => {
      btn.style('background-color', shadeColor(baseColor, -10));
      btn.style('transform', 'translateY(-2px)');
      btn.style('box-shadow', '0 6px 8px rgba(0,0,0,0.15)');
    });
    btn.mouseOut(() => {
      btn.style('background-color', baseColor);
      btn.style('transform', 'translateY(0px)');
      btn.style('box-shadow', '0 4px 6px rgba(0,0,0,0.1)');
    });
  });
}

function shadeColor(color, percent) {
  let f = parseInt(color.slice(1),16),t=percent<0?0:255,p=percent<0?percent*-1:percent,
  R=f>>16,G=(f>>8)&0x00FF,B=f&0x0000FF;
  return '#'+(0x1000000+(Math.round((t-R)*p)+R)*0x10000+(Math.round((t-G)*p)+G)*0x100+(Math.round((t-B)*p)+B)).toString(16).slice(1);
}


// All preload
//--------------
function preload() {
  startBg = loadImage('start.png', () => console.log("start.png loaded."), () => console.error("Failed to load start.png."));
  nightBg = loadImage('village.png', () => console.log("night.png loaded."), () => console.error("Failed to load night.png."));
  bonbibi = loadImage('bonbibi.png');
  endgame = loadImage('endgame.png');

    bgMusic = loadSound('start.mp3', () => console.log("Music loaded!"), () => console.error("Failed to load music."));

}

// setup
function setup() {
  createCanvas(windowWidth, windowHeight);
  textAlign(CENTER,CENTER);

  backButton = createButton('Back');
  backButton.position(width/2 - backButton.width/2, height-100);
  backButton.mousePressed(() => setPage("start"));
  backButton.hide();

  createButtons();
  styleButtons();
  setPage("start");

  feedbackColor = color(255);

  typewriterIntervalID = setInterval(() => {
    if(textIndex < typewriterText.length) {
      currentText += typewriterText[textIndex];
      textIndex++;
    }
  }, typewriterSpeed);
}

// draw
function draw()

{
  if (page === "gameStart") {
    handleGameStartPage(); // Render the "Get Ready!" page
  }

{
  if(page === "start" && startBg && startBg.width > 0) {
    imageMode(CORNER);
    image(startBg,0,0,width,height);
  } else if((page === "gameStart"||page==="game"||page==="won"||page==="lost"||page==="secondGameIntro"||page==="basketGame") && nightBg && nightBg.width>0) {
    imageMode(CORNER);
    image(nightBg,0,0,width,height);
  } else {
    background(30);
  }

  switch(page) {
    case "start":
      handleStartPage();
      break;
    case "gameStart":
      handleGameStartPage();
      break;
    case "game":
      handleGamePage();
      break;
    case "basketGame":
      handleBasketGame();
      break;
    case "howToPlay":
      handleHowToPlay();
      break;
    case "mythology":
      drawMythologyPage();
      break;
    case "secondGameIntro":
      handleSecondGameIntro();
      break;
    case "won":
    case "lost":
      handleEndPage();
      break;
    default:
      break;
  }

  if(feedbackMessage!==""){
    push();
    let boxWidth=width*0.3;
    let boxHeight=50;
    let boxX=width/2 - boxWidth/2;
    let boxY=height-80;

    fill('#F2D9A4');
    noStroke();
    rect(boxX,boxY,boxWidth,boxHeight,10);

    fill(feedbackColor);
    textSize(24);
    text(feedbackMessage,width/2,boxY+boxHeight/2);
    pop();
  }
}
}

//------------
// createButtons

function createButtons() {
  connectButton = createButton('Connect to Serial');
  connectButton.position(width/2 - connectButton.width/2, height/2 -220);
  connectButton.mousePressed(()=>{
    setUpSerial();
    connectButton.hide();
    console.log("Serial connection initiated.");
  });

  howToPlayButton = createButton('How to Play');
  howToPlayButton.position(width/2 - howToPlayButton.width/2, height/2 +205);
  howToPlayButton.mousePressed(()=>{
    setPage("howToPlay");
    console.log("Navigated to How to Play page.");
  });

  mythologyButton = createButton('Read the Mythology');
  mythologyButton.position(width/2 - mythologyButton.width/2, height/2 +255);
  mythologyButton.mousePressed(()=>{
    setPage("mythology");
    console.log("Navigated to Mythology page.");
  });

  fullscreenButton = createButton('Fullscreen');
  fullscreenButton.mousePressed(toggleFullscreen);

  positionButtons();

  if(page==="start"){
    connectButton.show();
    howToPlayButton.show();
    mythologyButton.show();
    fullscreenButton.show();
  } else {
    connectButton.hide();
    howToPlayButton.hide();
    mythologyButton.hide();
    fullscreenButton.hide();
  }
}

// positionButtons
function positionButtons(){
  let centerX=width/2;
  connectButton.position(centerX - connectButton.width/2, height/2 -220);
  howToPlayButton.position(centerX - howToPlayButton.width/2, height/2 +225);
  mythologyButton.position(centerX - mythologyButton.width/2, height/2 +265);
  fullscreenButton.position(centerX - fullscreenButton.width/2, height/2 +305);
}


function setupBasketGameElements(){
  basketY=height-50;
  basketX=width/2;
  score=0;
  countdown=timer;
  gameOver=false;

  flowers=[];
  vehicles=[];

  for(let x=0;x<=width;x+=10){
    for(let y=-200;y<height;y+=10){
      let v=new Vehicle(x,y);
      vehicles.push(v);
    }
  }

  noCursor();
}

// Page Handling Functions
function handleStartPage(){
  fill(255);
  textSize(48);
  stroke(0);
  strokeWeight(2);
  text("Myths Of Sundarban", width/2, height/13);

  noStroke();
  drawInstructionBox(currentText);
}

function handleGameStartPage() {
  background(0); // Dark background
  fill('#F7E4BA');
  textSize(36);
  stroke(0);
  strokeWeight(2);
  text("Get Ready To Play Using One Hand!", width / 2, height / 2 - 50);

  fill(255);
  textSize(24);
  text("Words will appear in yellow or white.\n", width / 2, height / 2 + 50);

  fill(255);
  textSize(24);
  text("You have two ultrasound sensor: Yellow and White", width / 2, height / 2 + 100);

    fill(255);
  textSize(24);
  text("If the word is yellow, place your hand in front of the yellow sensor.\n"+
    "If the word is white, place your hand in front of the white sensor.\n"+
    "Respond Quickly and Accurately to score points.", width / 2, height / 2 + 195);


  fill(255);
  textSize(24);
  text("IF YOU SCORE 20, YOU WILL JUMP TO THE NEXT LEVEL!.", width / 2, height / 2 + 270);
}


function handleGamePage(){
  displayTimerAndScore();
  displaySensorData();

  if (wordDisplay !== "") {
  push();
  textAlign(CENTER, CENTER);
  textSize(64);

  // Choose a background color that contrasts well with yellow and white text
  let backgroundColor = wordColor === "yellow" ? color(0, 0, 0, 100) : color(0, 0, 0, 150); // Semi-transparent dark background

  // Border color to match the glowing effect
  let borderColor = wordColor === "yellow" ? color(255, 204, 0) : color(255); // Yellow border for yellow text, white border for white text

  // Calculate the width of the text to adjust the background size
  let textWidthValue = textWidth(wordDisplay);

  // Draw background rectangle with a border
  fill(backgroundColor);
  noStroke();
  let padding = 20; // Padding around the text
  rectMode(CENTER);
  rect(width / 2, height / 2, textWidthValue + padding, 80); // Adjust rectangle width based on text width

  // Draw the border around the background
  stroke(borderColor);
  strokeWeight(6);
  noFill();
  rect(width / 2, height / 2, textWidthValue + padding, 80); // Same size as the background

  // Draw the glowing text on top
  fill(wordColor === "yellow" ? color(255, 255, 0) : color(255)); // Glow color for text
  strokeWeight(4);
  stroke(wordColor === "yellow" ? color(255, 255, 0) : color(255)); // Glow color for text
  text(wordDisplay, width / 2, height / 2);
  pop();
}

}

function handleBasketGame(){

  background("#094F6D");

  noCursor();

  displayTimerAndScore();
  displaySensorData();

  for(let i=0;i<vehicles.length;i++){
    vehicles[i].update();
    vehicles[i].show();
  }

  for(let i=flowers.length-1;i>=0;i--){
    flowers[i].update();
    flowers[i].show();

    if(dist(flowers[i].pos.x,flowers[i].pos.y,basketX,basketY)<40){
      score++;
      flowers.splice(i,1);
    }

    if(flowers[i] && flowers[i].pos.y>height){
      flowers.splice(i,1);
    }
  }

  if(frameCount%30===0){
    let f=new Flower(random(50,width-50),-50,random(30,60),random(TWO_PI),floor(random(6)));
    flowers.push(f);
  }

  drawBasket();

 if (score >= 20 && !gameOver) {
    gameOver = true;
    gameResult = "Congratulations! You Win!";
    setPage("won"); // Transition to the winning page
    console.log("Player reached 20 flowers. Game won!");
    return; // Stop further game logic
  }
}

function handleEndPage() {
    background(50); // Set a dark background or whatever fits your game design
   image(endgame, 0, 0, width, height);

    textSize(48);
    textAlign(CENTER, CENTER);

    // Calculate rectangle and text positions
    let rectWidth = 800;
    let rectHeight = 100;
    let rectX = (width / 2);
    let rectY = (height / 2) - (rectHeight / 2);

    // Draw a background rectangle for the message
    fill(255, 204, 0); // Bright yellow color for both win and lose
    rect(rectX, rectY, rectWidth, rectHeight, 20); // Rounded corners with a radius of 20

    // Check the game result and set text and colors accordingly
    if (gameResult === "Congratulations! You Win!") {
        fill(0); // Black text for winning message
        text("Congratulations! You Win!", width / 2, height / 2-30);
    } else if (gameResult === "Time's Up! You Lose!") {
        fill(0); // Black text for losing message
        text("Time's Up! You Lose!", width / 2, height / 2-30);
    }

    // Additional UI elements
    textSize(24);
    fill(255); // White color for secondary text
    text("Press 'R' to Restart", width / 2, rectY + rectHeight + 40);
}


function handleHowToPlay(){
  clear();
  background(34,139,34);
  fill(255);
  textSize(32);
  text("How to Play:",width/2,height/5);

  textSize(24);
  text(
    "Words will appear in yellow or white.\n"+
    "If the word is yellow, use the yellow sensor.\n"+
    "If the word is white, use the white sensor.\n"+
    "Respond quickly and accurately to score points.",
    width/2,height/2
  );

  backButton.show();
}

function drawMythologyPage(){
  clear();
  background(34,139,34);
  fill(255);
  textSize(28);
  textAlign(LEFT,TOP);

  text(backgroundText,50,50,width-100,height-100);

  backButton.show();
  textAlign(CENTER,CENTER);
}

function handleSecondGameIntro() {
  // Change background image for this page
  if (bonbibi && bonbibi.width > 0) {
    imageMode(CORNER);
    image(bonbibi, 0, 0, width, height);
  } else {
    background('#7A3B0C'); // Fallback background color
  }

  // Box styling
  let boxWidth = width * 0.8; // Box width (80% of screen width)
  let boxHeight = height * 0.4; // Box height (40% of screen height)
  let boxX = (width - boxWidth) / 2; // Center horizontally
  let boxY = (height - boxHeight) / 2; // Center vertically

  noStroke();
  fill(0, 150); // Semi-transparent background for the box
  rect(boxX, boxY, boxWidth, boxHeight, 10); // Draw the box with rounded corners

  // Text inside the box
  fill(255);
  textSize(24);
  textAlign(CENTER, CENTER);

  // Split the text into vertical lines and display it
  let instructions = [
    "Collect flowers for Bonobibi."," Move basket by rotating the potentiometer.",
    "Press the button to start the basket game."
  ];
  let lineSpacing = 35; // Space between each line
  let textY = boxY + boxHeight / 2 - (instructions.length * lineSpacing) / 2;

  instructions.forEach((line, index) => {
    text(line, width / 2, textY + index * lineSpacing);
  });

  // Title text at the top
  textSize(36);
  stroke(2);
  strokeWeight(4);
  text("Prepare for the Next Challenge!", width / 2, boxY - 40);

  // Hide the back button
  backButton.hide();
}


// drawInstructionBox
function drawInstructionBox(textContent){
  textSize(18);

  let boxWidth=width*0.4;
  let boxHeight=60;
  let boxX=width/2 - boxWidth/2;
  let boxY=height/1.5 - boxHeight/12;

  noStroke();
  fill('rgb(165,88,8)');
  rect(boxX,boxY,boxWidth,boxHeight,10);

  fill(255);
  text(textContent,width/2,boxY+boxHeight/2);
}

function displayTimerAndScore(){
  push();
  textAlign(CENTER,CENTER);
  textSize(24);
  noStroke();
  fill(0,150);
  rectMode(CENTER);
  rect(width/2,50,220,60,10);
  fill(255);
  text("Time: "+countdown+"s | Score: "+score,width/2,50);
  pop();
}

function displaySensorData(){
  push();
  textAlign(LEFT,CENTER);
  textSize(16);
  noStroke();
  fill(0,150);
  rectMode(CORNER);
  rect(20,height-60,320,40,10);
  fill(255);
  text("Latest Data: "+latestData,40,height-40);
  pop();
}

function setupGameElements(){
  currentWordIndex=0;
  wordDisplay="";
  wordColor="white";
  countdown=timer;
  gameOver=false;
  gameResult="";
  score=0;

  wordInterval= 8000;
  console.log("Game elements reset.");

  gameStartInitiated=false;
}

function setNextWord() {
  if (gameOver) return;

  if (score > 20) {
    gameOver = true;
    gameResult = "Congratulations! You Win the First Game!";
    console.log("Score exceeded 20. Transitioning to second game intro...");
    setPage("secondGameIntro");
    return;
  }


  // Set the next word and its color
  wordDisplay = words[currentWordIndex];
  wordColor = random(["yellow", "white"]); // Assign color randomly
  currentWordIndex++;
  wordTouched = false; // Reset interaction flag

  // Schedule the next word transition
  wordTimeoutID = setTimeout(setNextWord, currentWordIndex < 5 ? 8000 : 6000);
}


let timerInterval;

function startTimer() {
  // Prevent multiple intervals
  if (timerStart) return;

  timerStart = true;
  clearInterval(timerInterval); // Clear any existing timer interval

  timerInterval = setInterval(() => {
    if (countdown > 0) {
      countdown--; // Decrement the timer
      console.log(`Timer: ${countdown}s`);
    } else {
      clearInterval(timerInterval); // Stop the timer when it reaches zero
      timerStart = false;
      if (!gameOver) {
        gameOver = true;
        gameResult = "Time's Up! You Lose!";
        setPage("lost"); // Go to the game over page
        console.log("Timer ended. Time's up!");
      }
    }
  }, 1000);
}

//--------------
// Debug with keyboard
//---------------

function keyPressed(){
  if(debugMode){
    if(key==='Y'||key==='y'){
      let simulatedData="5,15";
      console.log("Simulated Yellow Sensor Activation:",simulatedData);
      readSerial(simulatedData);
    }

    if(key==='W'||key==='w'){
      let simulatedData="15,5";
      console.log("Simulated White Sensor Activation:",simulatedData);
      readSerial(simulatedData);
    }

    if(key==='B'||key==='b'){
      let simulatedData="ButtonPressed";
      console.log("Simulated Button Press:",simulatedData);
      readSerial(simulatedData);
    }

    if(key==='P'||key==='p'){
      let simulatedData="600";
      console.log("Simulated Potentiometer Activation:",simulatedData);
      readSerial(simulatedData);
    }
  } else {
    if(key==='r'||key==='R'){
      if(page==="secondGameIntro"||page==="won"){
        setupGameElements();
        setPage("start");
        console.log("Game restarted to Start page.");
        currentText="";
        textIndex=0;

        clearInterval(typewriterIntervalID);

        typewriterIntervalID=setInterval(()=>{
          if(textIndex<typewriterText.length){
            currentText+=typewriterText[textIndex];
            textIndex++;
          }
        },typewriterSpeed);
      } else {
        setupGameElements();
        setPage("start");
        console.log("Game restarted to Start page.");
        currentText="";
        textIndex=0;

        clearInterval(typewriterIntervalID);

        typewriterIntervalID=setInterval(()=>{
          if(textIndex<typewriterText.length){
            currentText+=typewriterText[textIndex];
            textIndex++;
          }
        },typewriterSpeed);
      }
    }
  }
}
//------------


//----------
//Window Resize Code
//------------
function windowResized(){
  resizeCanvas(windowWidth,windowHeight);
  positionButtons();
  backButton.position(width/2 - backButton.width/2, height-100);
}

function calcTextSize(baseSize){
  return min(windowWidth,windowHeight)/800 * baseSize;
}

function updateTextSizes(){
  // Can be expanded if needed
}


// class constrauction for driving particles
//---------------------
class Vehicle {
  constructor(x,y){
    this.pos=createVector(x,y);
    this.vel=createVector(0,random(1,3));
    this.acc=createVector(0,0);
  }

  update(){
    this.vel.add(this.acc);
    this.pos.add(this.vel);
    this.acc.mult(0);

    if(this.pos.y>height){
      this.pos.y=0;
      this.pos.x=random(width);
    }
  }

  show(){
    stroke(173,216,230,150);
    strokeWeight(2);
    point(this.pos.x,this.pos.y);
  }
}

let gameSpeed = 2.8; // Default speed multiplier for the game

class Flower {
  constructor(x, y, size, rotation, type) {
    this.pos = createVector(x, y);
    this.size = size;
    this.rotation = rotation;
    this.type = type;
    this.speed = random(3, 6) * gameSpeed; // Adjust speed with multiplier
  }

  update() {
    this.pos.y += this.speed;
  }

  show() {
    push();
    translate(this.pos.x, this.pos.y);
    rotate(this.rotation);
    drawFlower(0, 0, this.size, this.type);
    pop();
  }
}


function drawFlower(x,y,size,type){
  switch(type){
    case 0:
      drawDaisy(x,y,size);
      break;
    case 1:
      drawTulip(x,y,size);
      break;
    case 2:
      drawRose(x,y,size);
      break;
    case 3:
      drawSunflower(x,y,size);
      break;
    case 4:
      drawLily(x,y,size);
      break;
    case 5:
      drawMarigold(x,y,size);
      break;
    default:
      drawDaisy(x,y,size);
      break;
  }
}

function drawDaisy(x,y,size){
  let petalCount=9;
  let petalLength=size;
  let petalWidth=size/3;

  stroke(0);
  fill('#D9E4E6');
  push();
  translate(x,y);
  for(let i=0;i<petalCount;i++){
    rotate(TWO_PI/petalCount);
    ellipse(0,-size/2,petalWidth,petalLength);
  }
  pop();

  fill('#F2F2F2');
  noStroke();
  ellipse(x,y,size/2);
}

function drawTulip(x,y,size){
  let petalCount=6;
  let petalWidth=size/2;

  stroke(0);
  fill('#AEB7FE');
  push();
  translate(x,y);
  for(let i=0;i<petalCount;i++){
    rotate(TWO_PI/petalCount);
    ellipse(0,-size/2,petalWidth,size);
  }
  pop();

  fill('#EDEAE6');
  noStroke();
  ellipse(x,y,size/3);
}

function drawRose(x,y,size){
  let petalCount=10;
  let petalWidth=size/3;

  stroke(0);
  fill('#D87373');
  push();
  translate(x,y);
  for(let i=0;i<petalCount;i++){
    rotate(TWO_PI/petalCount);
    ellipse(0,-size/2,petalWidth,size/1.5);
  }
  pop();

  fill('#F5E6E8');
  noStroke();
  ellipse(x,y,size/4);
}

function drawSunflower(x,y,size){
  let petalCount=20;
  let petalLength=size*1.5;
  let petalWidth=size/2;

  stroke(0);
  fill('#FACA49');
  push();
  translate(x,y);
  for(let i=0;i<petalCount;i++){
    rotate(TWO_PI/petalCount);
    ellipse(0,-size/2,petalWidth,petalLength);
  }
  pop();

  fill('#6E4B1B');
  noStroke();
  ellipse(x,y,size);
}

function drawLily(x,y,size){
  let petalCount=6;
  let petalWidth=size/2;

  stroke(0);
  fill('#998D30');
  push();
  translate(x,y);
  for(let i=0;i<petalCount;i++){
    rotate(TWO_PI/petalCount);
    ellipse(0,-size/2,petalWidth,size);
  }
  pop();

  fill('#FBE7E7');
  noStroke();
  ellipse(x,y,size/4);
}

function drawMarigold(x,y,size){
  let petalCount=12;
  let petalLength=size;
  let petalWidth=size/2;

  stroke(0);
  fill('#F4A263');
  push();
  translate(x,y);
  for(let i=0;i<petalCount;i++){
    rotate(TWO_PI/petalCount);
    ellipse(0,-size/2,petalWidth,petalLength);
  }
  pop();

  fill('#FFC107');
  noStroke();
  ellipse(x,y,size/3);
}

function drawBasket() {
  fill("#F6DC89"); // Set the fill color to a brown, typical of baskets
  rectMode(CENTER);
  rect(basketX, basketY-10, 60, 20, 5); // Main basket shape

  // Adding lines to create a woven effect
  for (let i = -30; i <= 30; i += 6) {
    stroke(139, 69, 19); // Darker brown for the weave lines
    line(basketX + i, basketY - 20, basketX + i, basketY); // Vertical lines
  }

  for (let j = -10; j <= 0; j += 5) {
    stroke(160, 82, 45); // Lighter brown for a highlight effect
    line(basketX - 30, basketY + j - 10, basketX + 30, basketY + j - 10); // Horizontal lines
  }

  noStroke(); // Resetting stroke to default
}
function handleSerialEvent(event) {
  console.log("Handling Serial Event:", event);

  // Parse sensor data
  let keyValues = event.trim().split(',');
  let data = {};
  keyValues.forEach((kv) => {
    let [key, value] = kv.split(':');
    if (key && value !== undefined) data[key.trim()] = value.trim();
  });

  console.log("Parsed Data:", data);

   // Check for the physical button press
  // Check for physical button press
  if (data.button === "pressed") {
    if (page === "start") {
      console.log("Physical button pressed. Transitioning to gameStart page.");
      setPage("gameStart"); // Transition to 'Get Ready' page

      // Add a 3-second delay before transitioning to the 'game' page
      setTimeout(() => {
        setPage("game");
        setupGameElements();
        setNextWord();
        startTimer();
        console.log("Word game started after 10-second delay.");
      }, 15000);
      return;
    }

    if (page === "secondGameIntro") {
      console.log("Physical button pressed. Transitioning to basketGame page.");
      setPage("basketGame");
      setupBasketGameElements();
      startTimer();
      return;
    }
  }


  // Handle Sensor Data (Ultrasonics) for Game 1
  if (page === "game" && !gameOver && !wordTouched) {
    let distanceYellow = parseFloat(data.ultra1);
    let distanceWhite = parseFloat(data.ultra2);

    if (!isNaN(distanceYellow) && !isNaN(distanceWhite)) {
      console.log(`Sensor Readings - Yellow: ${distanceYellow}cm, White: ${distanceWhite}cm`);
      let touchThreshold = 5; // Proximity threshold

      // Check if the correct sensor is touched
      if (wordColor === "yellow" && distanceYellow < touchThreshold) {
        handleCorrectTouch();
      } else if (wordColor === "white" && distanceWhite < touchThreshold) {
        handleCorrectTouch();
      } else if (
        (wordColor === "yellow" && distanceWhite < touchThreshold) ||
        (wordColor === "white" && distanceYellow < touchThreshold)
      ) {
        handleIncorrectTouch();
      }
    } else {
      console.log("Invalid sensor data received.");
    }
  }

  // Handle Potentiometer for Basket Game (Game 2)
  if (page === "basketGame" && !gameOver) {
    let potValue = parseFloat(data.pot);
    console.log("Potentiometer Reading:", potValue);

    if (!isNaN(potValue)) {
      basketX = map(potValue, 0, 1023, 50, width - 50);
      basketX = constrain(basketX, 50, width - 50);
    } else {
      console.log("Invalid potentiometer value:", potValue);
    }
  }
}

// Helper for correct touch
function handleCorrectTouch() {
  score++;
  wordTouched = true;
  feedbackMessage = "Correct!";
  feedbackColor = color(0, 200, 0);

  // Clear the current word and load the next one
  wordDisplay = "";
  clearTimeout(wordTimeoutID); // Cancel any pending word transitions
  setTimeout(() => {
    feedbackMessage = ""; // Clear feedback after 500ms
    setNextWord(); // Transition to the next word
  }, 500); // Allow brief feedback display
}

// Helper for incorrect touch
function handleIncorrectTouch() {
  feedbackMessage = "Incorrect!";
  feedbackColor = color(200, 0, 0);
  wordTouched = true;

  // Clear feedback and reset touch state after a short delay
  setTimeout(() => {
    feedbackMessage = "";
    wordTouched = false; // Allow interaction again
  }, 500);
}


function readSerial(data){
  if(data.trim().length>0){
    latestData=data.trim();
    handleSerialEvent(latestData);
  }
}
Code Explanation:
As I had two sensors, potentiometer and button along with two levels, I had to maintain the setPage very carefully. From here, I structured the game into multiple pages like start, gameStart, game, and basketGame. The setPage() function ensures smooth transitions between these stages. For example, when the button is pressed, the game transitions from start to gameStart with a delay before entering the gameplay. I decided to keep my words that will come with yellow or white color randomly, in an array together. To draw the flowers, I generated different types of them following to the styles of flowers found at Sundarban region.
Two sensors are dedicated to detecting hand proximity for selecting yellow and white words. My code receives distance values as ultra1 (Yellow) and ultra2 (White). If a hand comes within the set threshold (15 cm), the game registers the corresponding selection and updates the score. I also kept them on the console log to monitor how are the sensors working.
Feedback messages like “Correct!” or “Incorrect!” are displayed dynamically based on player interactions. These are managed using helper functions like handleCorrectTouch() and handleIncorrectTouch(). The code also includes a timer and score tracker to keep the gameplay engaging and competitive.
The readSerial() and handleSerialEvent() functions handle all incoming data from the Arduino. I used the P5.web-serial.js file given by the Professor.
Aspects that I’m proud of:
I felt even though, it does not exactly showcase how I wanted to tell the story to my audience, but it was a satisfying play for the audience. Specially, the flower game was tough to finish with the randomness of flower speed and generation, that it was even tough for me to win my own game. I heard feedback from Professor Aya Riad that the flowing collection using potentiometer was very satisfying to play and collect the flowers while the time is running down. Kids enjoyed this one as they liked the visuals and this was also a part of my class assignments. I am glad that I was able to refine my codes to give it a new look.
For the word touching game, I am proud that the concept was unique in this show and was a bit of psychology side that one needs to pay full attention to the color and to their hand movement as well. Even though I had tons of problems with sensor calibration, I was able to pull it off nicely.
I also got reviews from players who read the whole mythology and listened to the song and asked me about it. It was the biggest win for me that people were really interested to know what is the story behind.
Future Implementations:
I plan to implement all the levels and make it a full fledged game that everyone can play while learning about the culture and stories of this region with fun. I want to change the ultrasonic distance sensors to some other sensors as they are tough to maintain when two sensors are kept together.