Final Documentation – HeartBeat/Pulse Sensor – Lie detection maybe?

Description

Create a physically interactive system of your choice that relies on a multimedia computer for some sort of processing or data analysis. The Final should use BOTH Processing AND Arduino. Your focus should be on careful and timely sensing of the relevant actions of the person or people that you’re designing this for, and on clear, prompt, and effective responses. Any interactive system is going to involve systems of listening, thinking, and speaking from both parties. Whether it involves one cycle or many, the exchange should be engaging. You may work alone or in pairs.

Project

I started this project by working with a pulse sensor without thinking about what I would end up with. I progressed by displaying a heartbeat on the screen by using the data I received. I also wanted to work with LEDs, I attached the LEDs with the breadboard. I used two LEDs that turn on and off according to the pulse rate. I also checked the timings between heartbeats by subtracting the last-current, the variable I have used is TBH(time between heartbeats). I also made the heart pump by increasing the stroke weight. You can also use “S” or “s” to save the heartbeat in the folder where the code is saved and later you can compare the heartbeat. To make the pulse rate monitor more interesting, I added some questions to the screen to see how the heartbeat changed with respect to the question, which can be used as a lie detection test. If someone wanted to reset their heartbeats, they can press ‘r’ to reset it, and the monitor displays no heartbeat until some other person uses the sensor. For this project, I used two sensors, out of which one had technical problems. So, I couldn’t use that. But, the idea was that I would compare two people’s heartbeats by asking them questions.

I took some shots during the exhibition of people testing out the monitor and playing the yes/no question game.

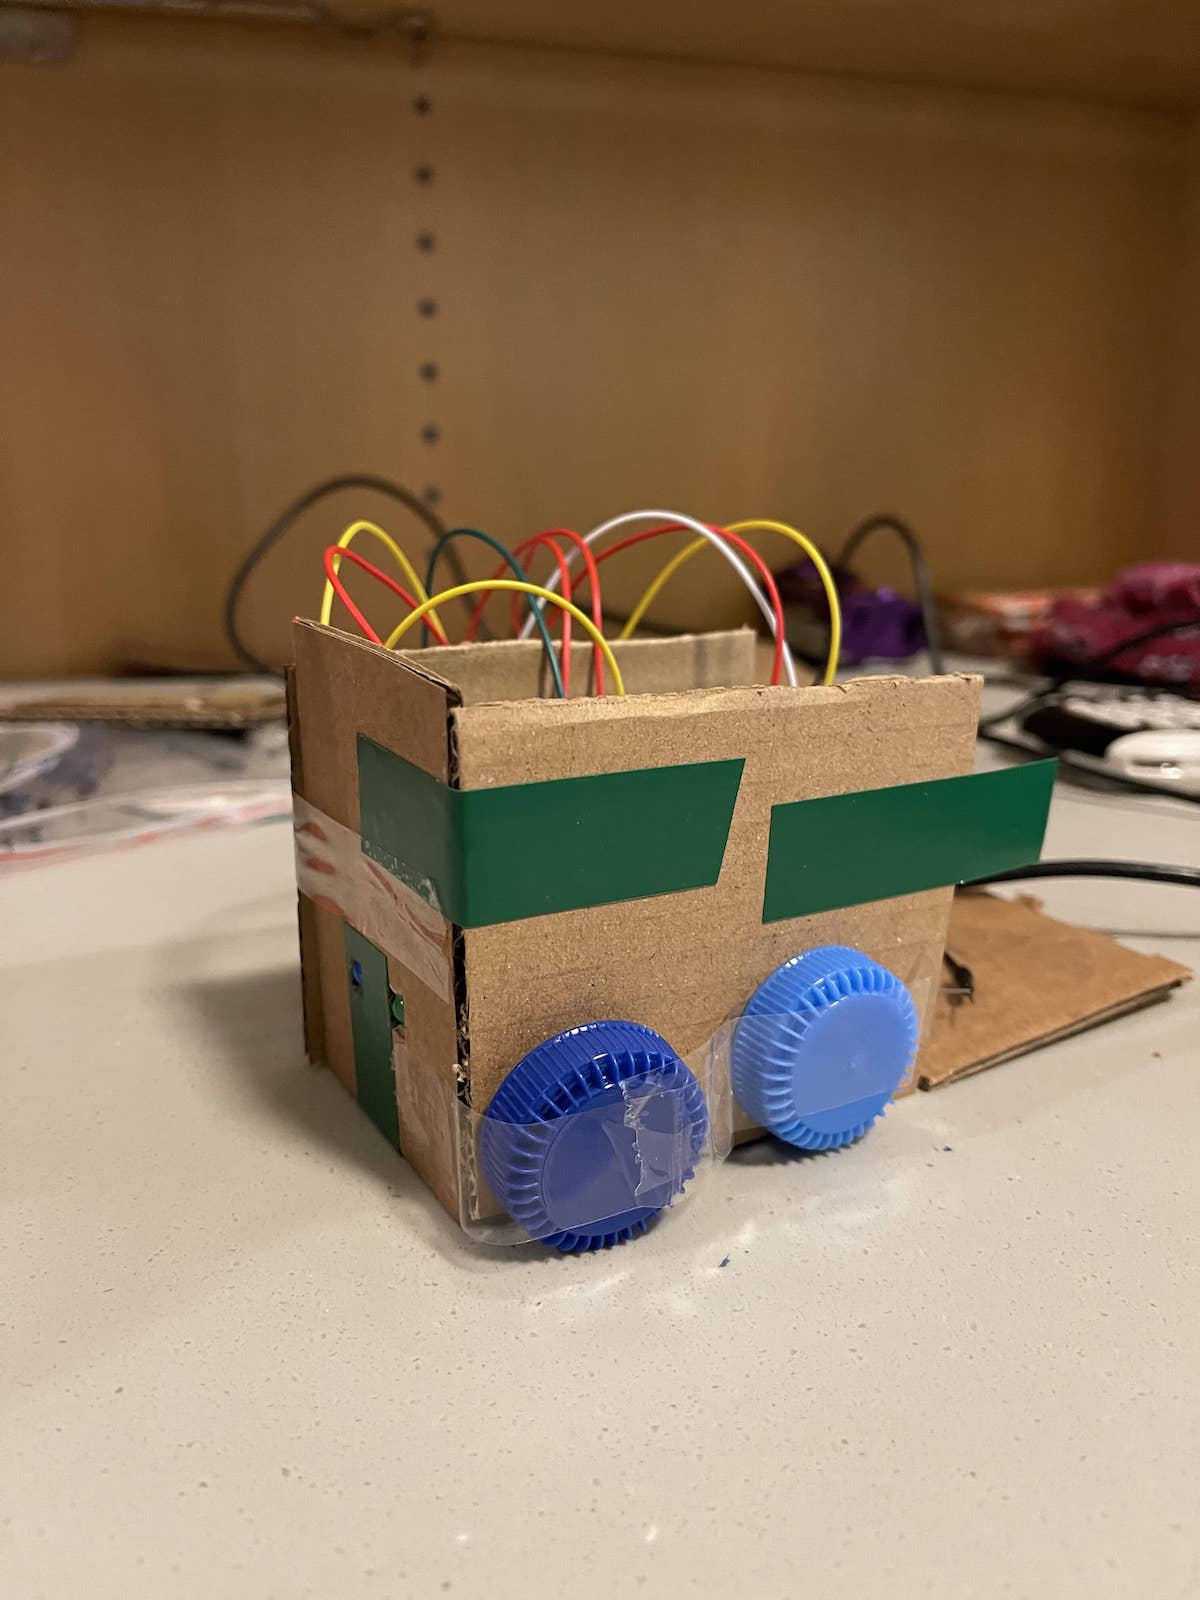
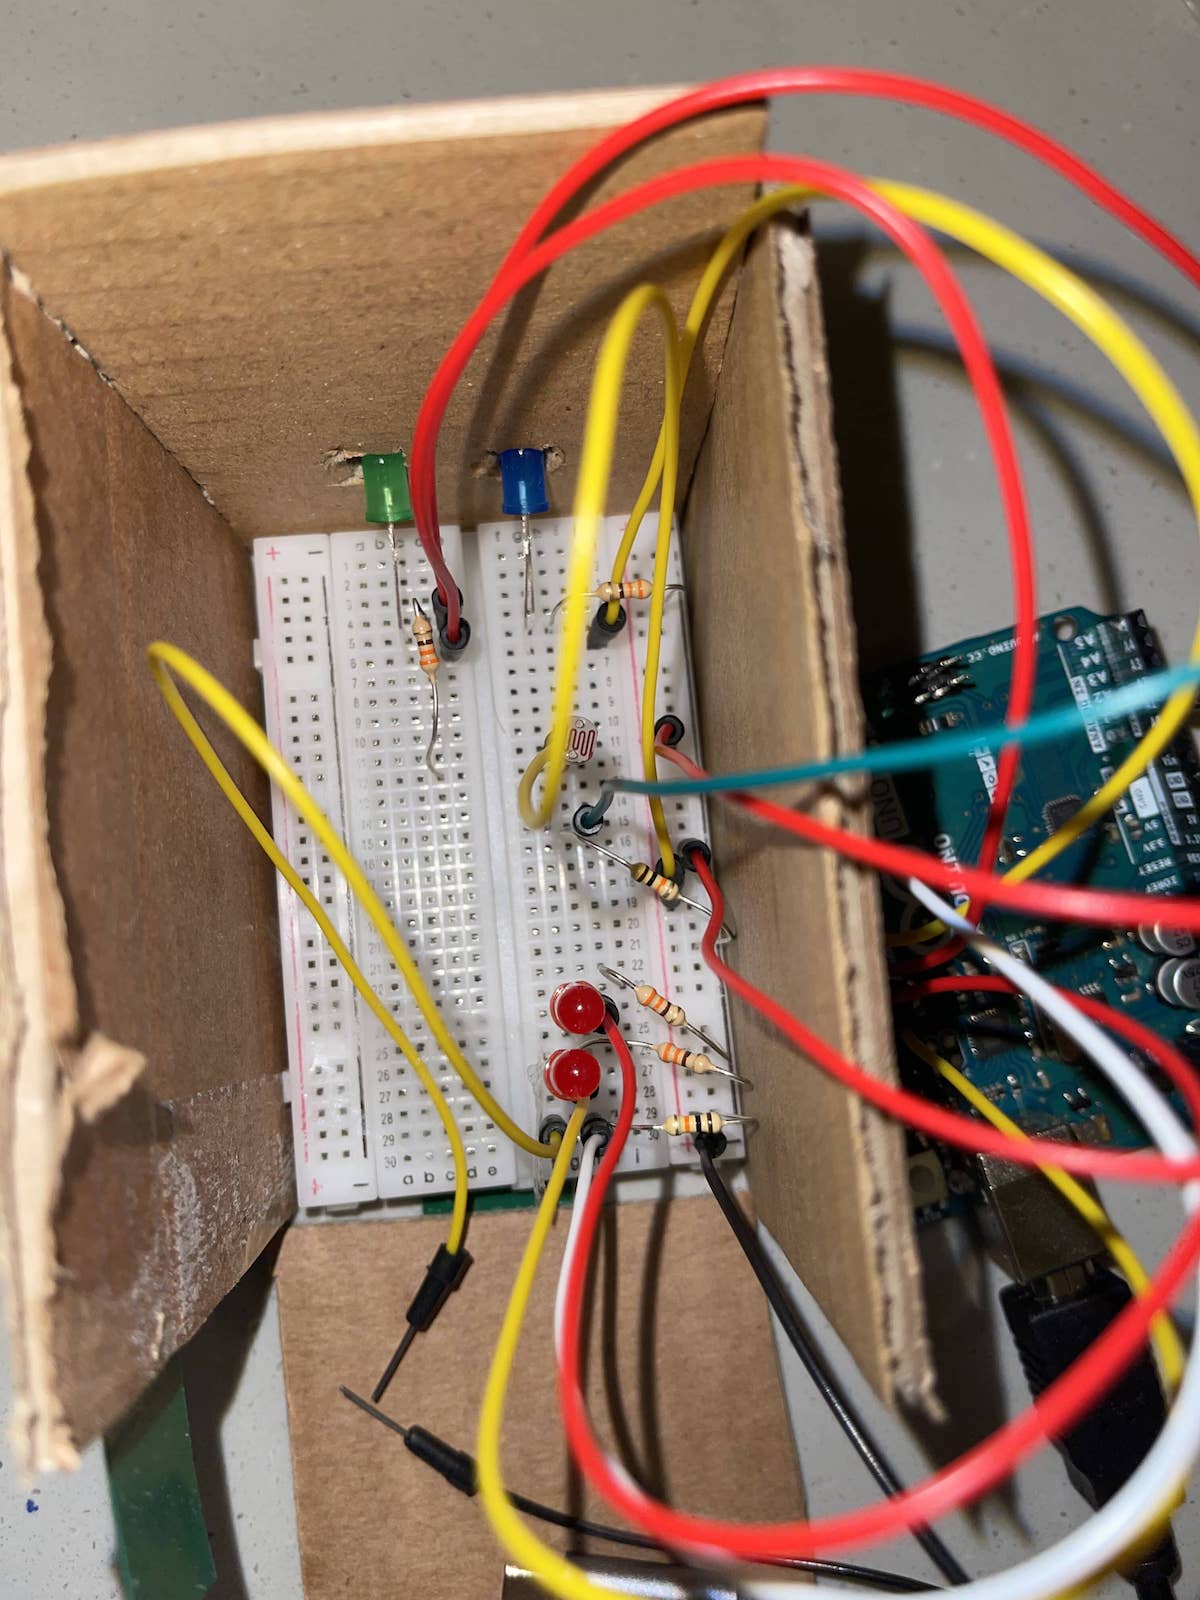
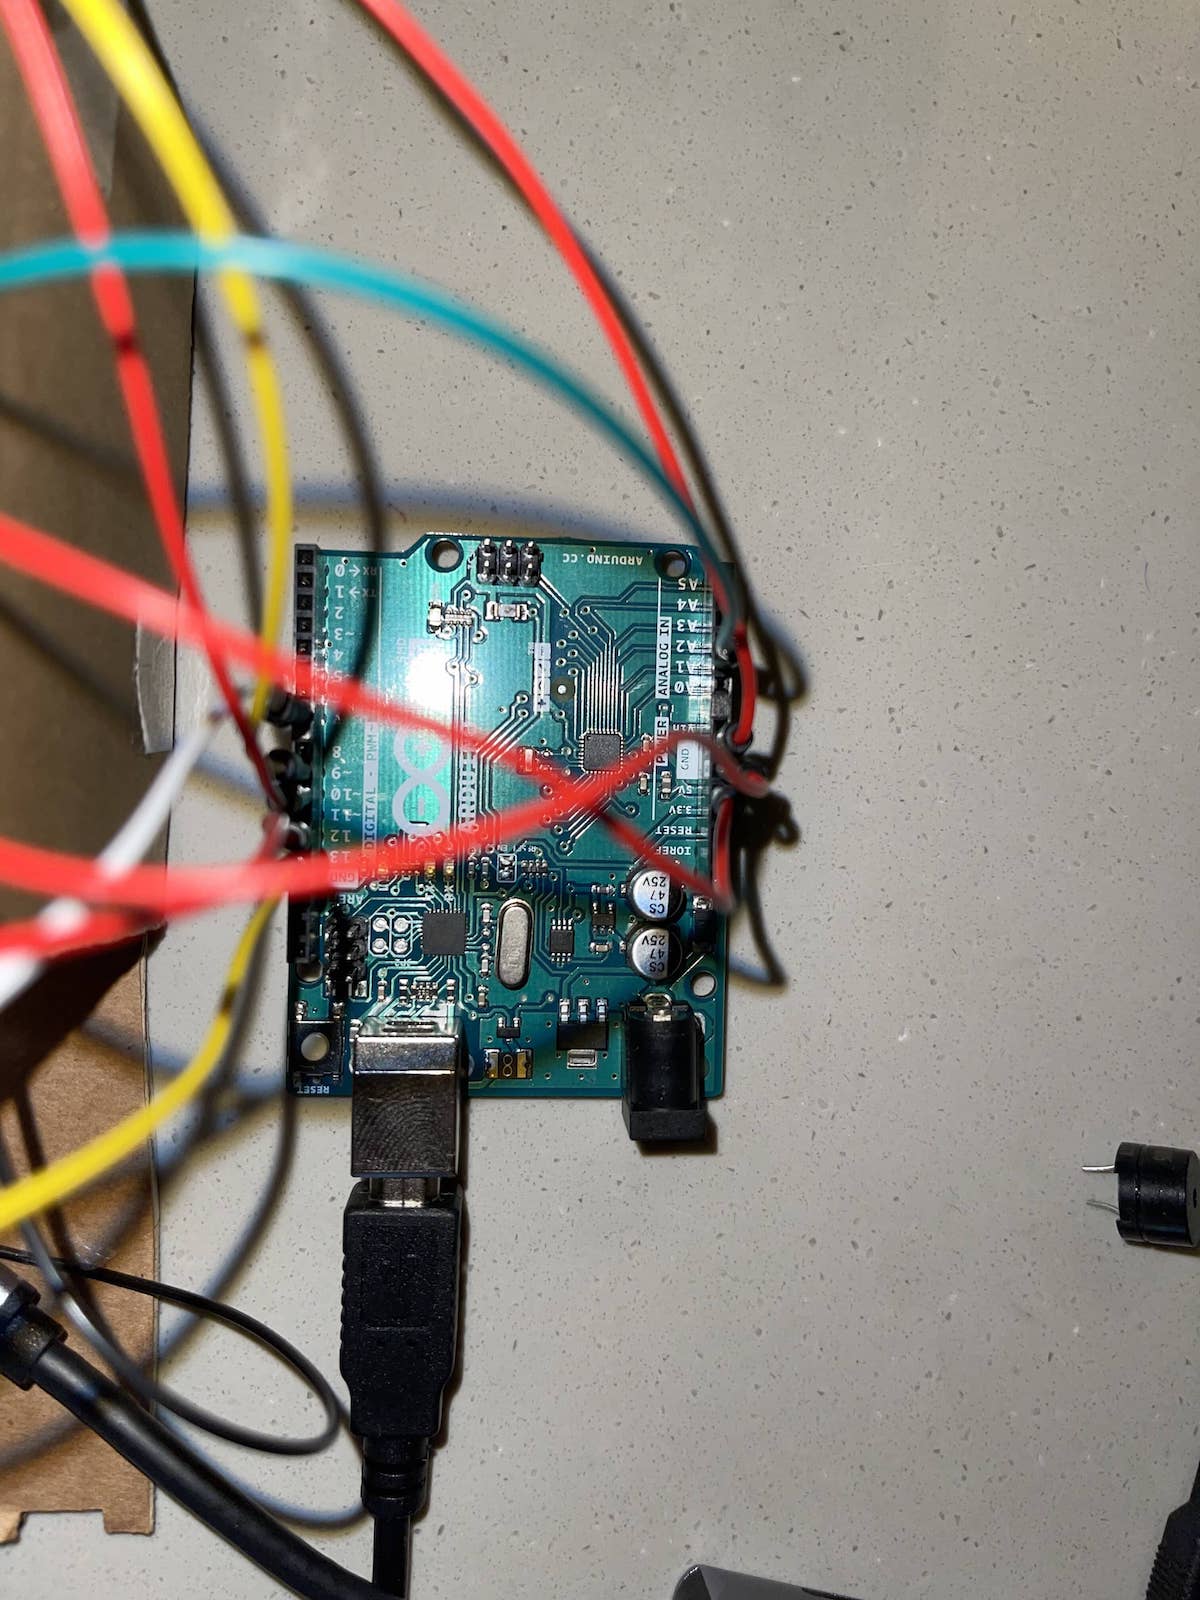
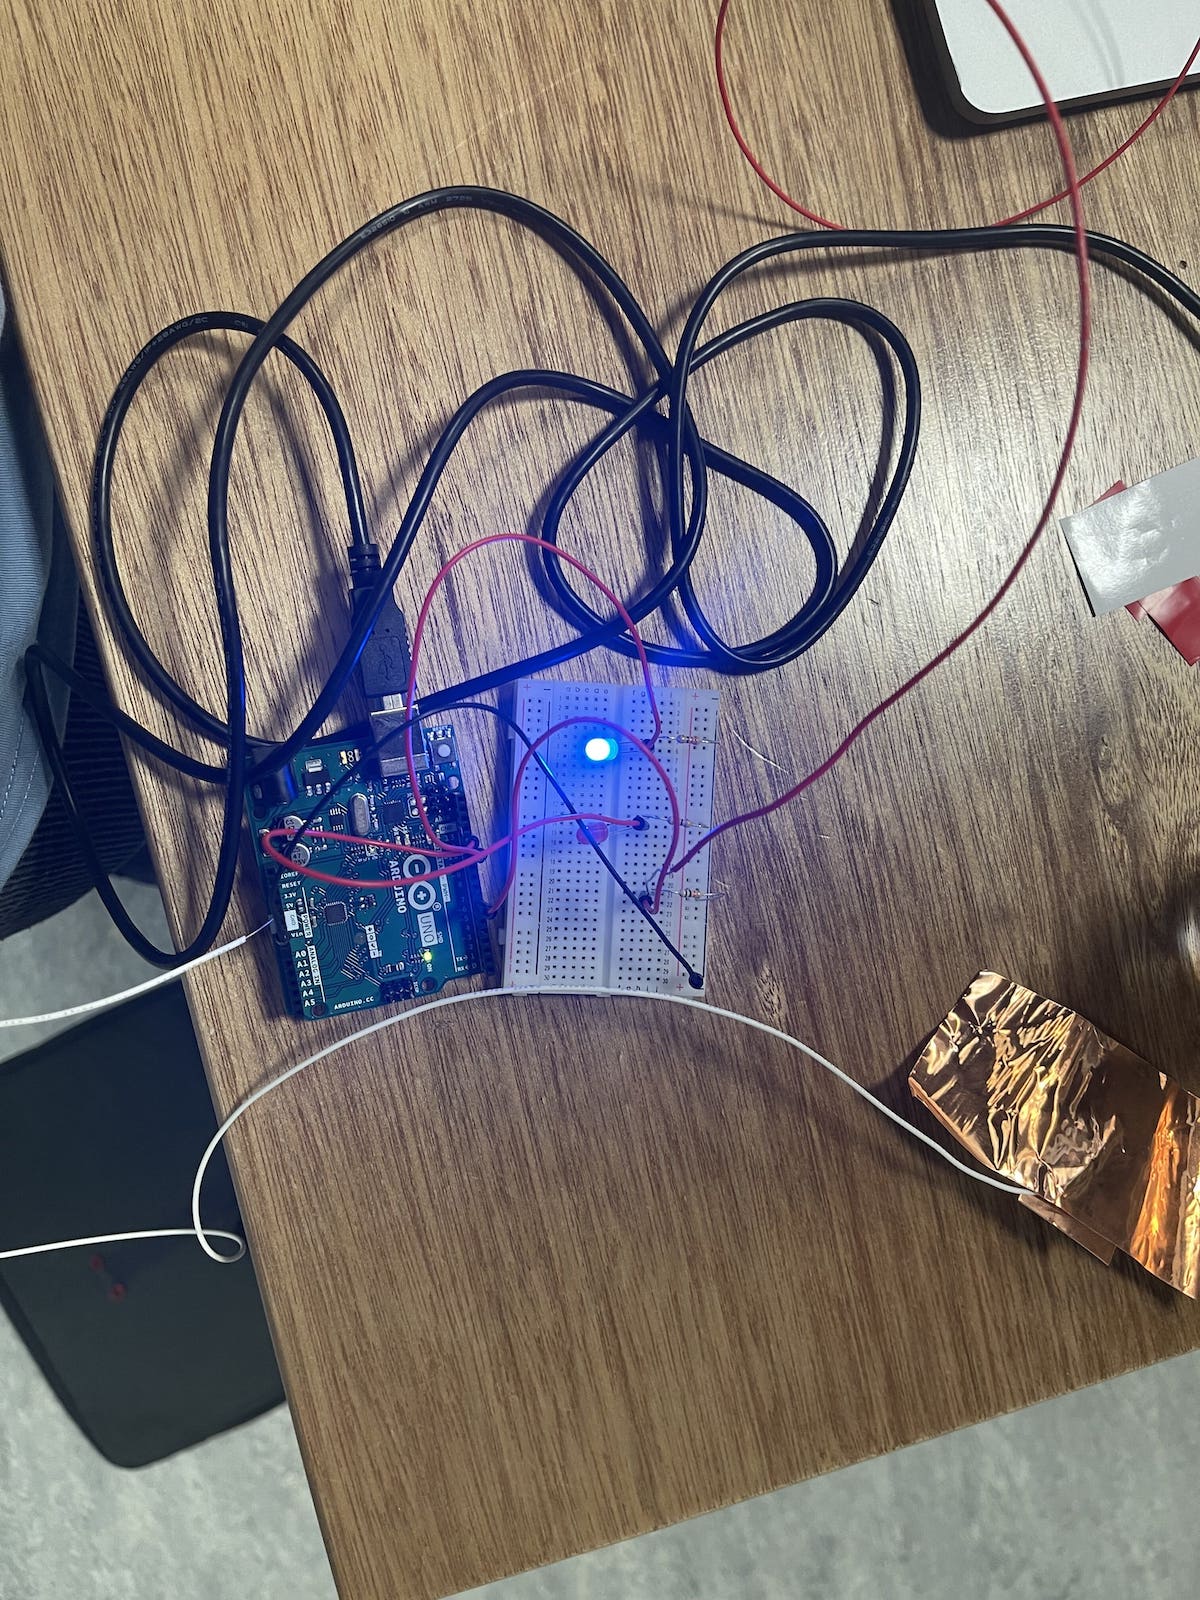
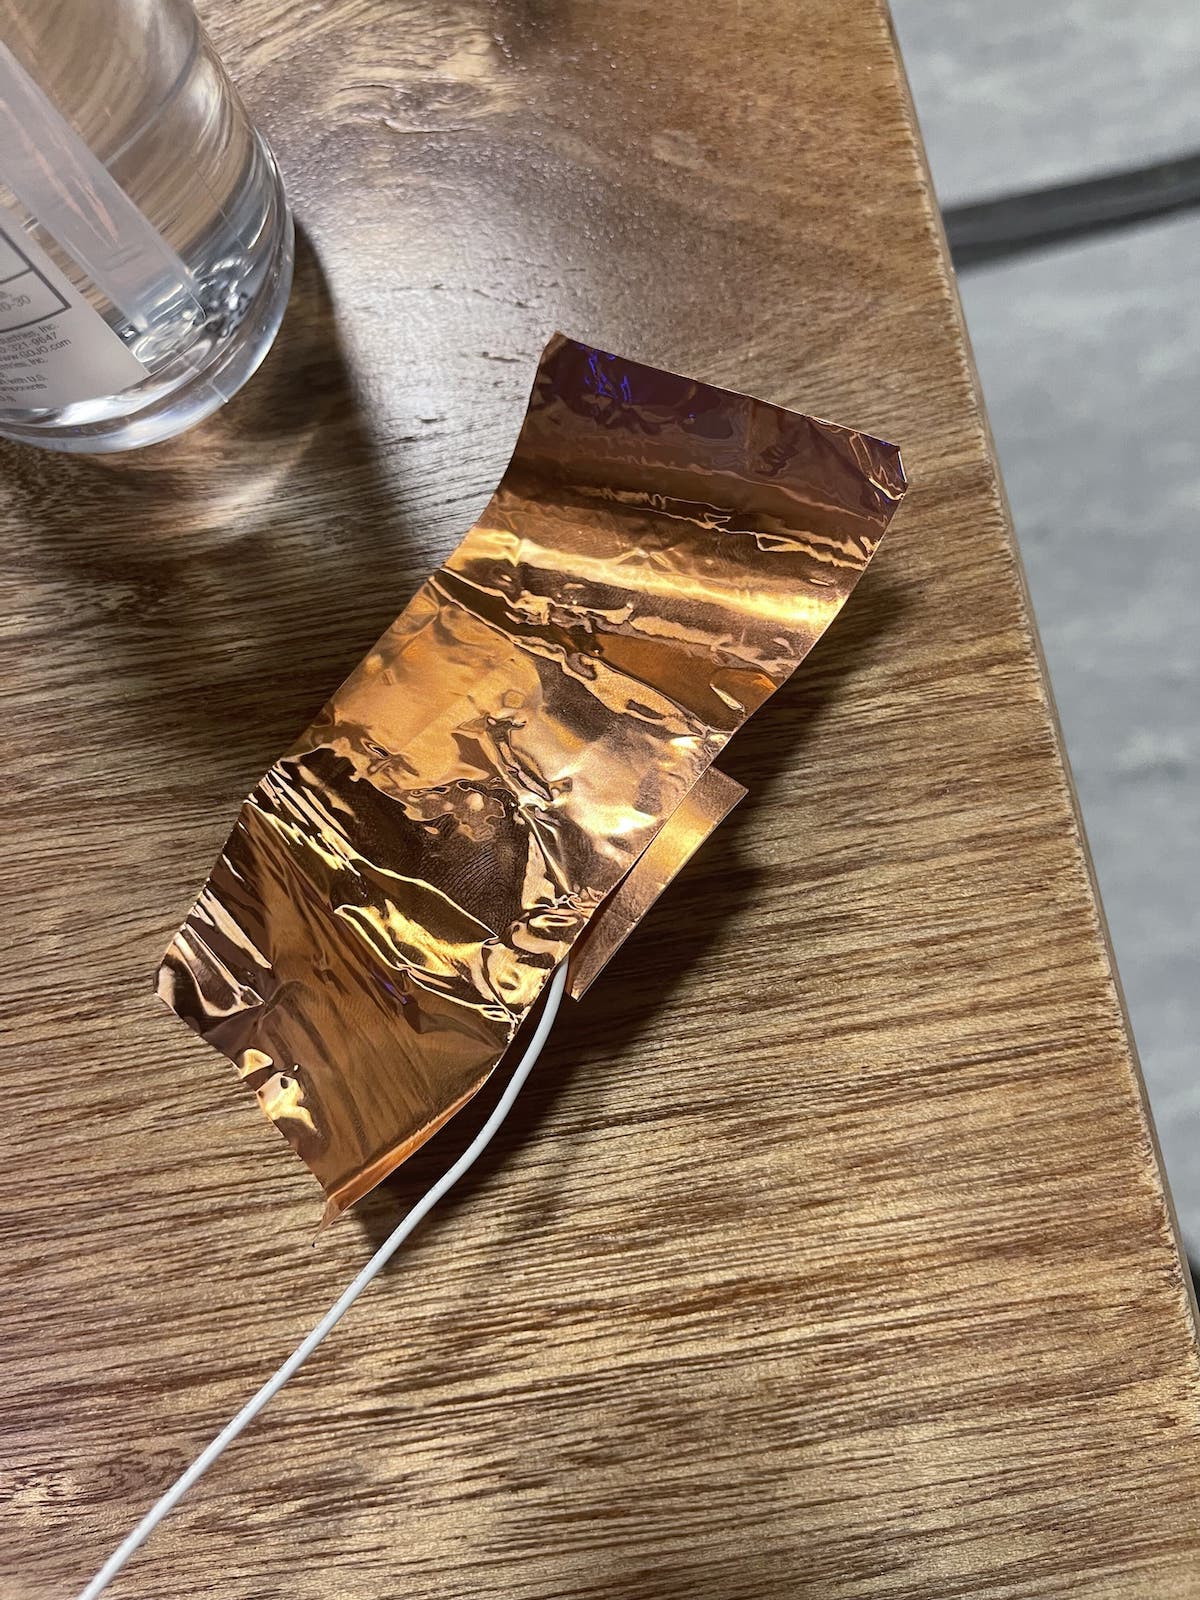
The LEDs were covered with a white box that looked like an artificial heart because it would beat every time your pulse was beating. The circuit looked like this:

Certain challenges:-

  1. It took me some time to figure out how the sensor worked because I have never worked with a pulse sensor before.
  2. it was hard to display the pulse wave first, then I found some resources to make me understand the concept.
  3. it was hard to add further things to the project to make it more useful.

The code is following:-

Arduino

#define USE_ARDUINO_INTERRUPTS true
#include <PulseSensorPlayground.h>


const int OUTPUT_TYPE = PROCESSING_VISUALIZER;

const int PULSE_SENSOR_COUNT = 2;


const int PULSE_INPUT0 = A0;
const int PULSE_BLINK0 = 13;    //led
const int PULSE_FADE0 = 5;

const int PULSE_INPUT1 = A1;
const int PULSE_BLINK1 = 12;
const int PULSE_FADE1 = 11;

const int THRESHOLD = 550;   // to avoid noise when idle


PulseSensorPlayground pulseSensor(PULSE_SENSOR_COUNT);

void setup() {

  Serial.begin(250000);

  pulseSensor.analogInput(PULSE_INPUT0, 0);
  pulseSensor.blinkOnPulse(PULSE_BLINK0, 0);
  pulseSensor.fadeOnPulse(PULSE_FADE0, 0);

  pulseSensor.analogInput(PULSE_INPUT1, 1);
  pulseSensor.blinkOnPulse(PULSE_BLINK1, 1);
  pulseSensor.fadeOnPulse(PULSE_FADE1, 1);

  pulseSensor.setSerial(Serial);
  pulseSensor.setOutputType(OUTPUT_TYPE);
  pulseSensor.setThreshold(THRESHOLD);


  if (!pulseSensor.begin()) {
   
    for (;;) {
      
      digitalWrite(PULSE_BLINK0, LOW);
      delay(50);
      digitalWrite(PULSE_BLINK0, HIGH);
      delay(50);
    }
  }
}

void loop() {


  delay(20);

 
  pulseSensor.outputSample();

  for (int i = 0; i < PULSE_SENSOR_COUNT; ++i) {
    if (pulseSensor.sawStartOfBeat(i)) {
      pulseSensor.outputBeat(i);
    }
  }
}

Processing

import processing.sound.*;
SoundFile file;
import processing.serial.*;
PFont font;

Serial port;
int numSensors = 2; //variable that holds number of sensors
//the varible given below holds certain information
int[] Sensor;      
int[] TBH;         
int[] BPM;        
int[][] RawPPG;      
int[][] ScaledPPG;  
int[][] ScaledBPM;      
float offset;    
color bgcolor = color(171,219,227);
int heart[];   //when timing the pulse

//determine the size 
int pulseWidth; 
int pulseHeight; 
int pulseX;
int pulseY[];
int bpmWidth; 
int bpmHeight; 
int bpmX;
int bpmY[];
int spacer = 10;
boolean beat[]; //boolean to check if heart beat detected

//find serial port
String serialPort;
String[] serialPorts = new String[Serial.list().length];
boolean serialPortFound = false;
Radio[] button = new Radio[Serial.list().length*2];
int numPorts = serialPorts.length;
boolean refreshPorts = false;
int duration = 1000;
int pressTime;

void setup() {
  fullScreen();
  frameRate(100);
  font = loadFont("Arial-BoldMT-24.vlw");
  file = new SoundFile(this, "heart.mp3");
  textFont(font);
  textAlign(CENTER);
  rectMode(CORNER);
  ellipseMode(CENTER);
  pulseWidth = width-520;
  pulseHeight = 1080/numSensors;
  pulseX = 10;
  pulseY = new int [numSensors];
  for(int i=0; i<numSensors; i++){
    pulseY[i] = 43 + (pulseHeight * i);
    if(i > 0) pulseY[i]+=spacer*i;
  }
  bpmWidth = 300;
  bpmHeight = pulseHeight;
  bpmX = pulseX + pulseWidth + 10;
  bpmY = new int [numSensors];
  for(int i=0; i<numSensors; i++){
    bpmY[i] = 43 + (bpmHeight * i);
    if(i > 0) bpmY[i]+=spacer*i;
  }
  heart = new int[numSensors];
  beat = new boolean[numSensors];
  // Data Variables Setup
  Sensor = new int[numSensors];      
  TBH = new int[numSensors];         
  BPM = new int[numSensors];         
  RawPPG = new int[numSensors][pulseWidth];          
  ScaledPPG = new int[numSensors][pulseWidth];       
  ScaledBPM = new int [numSensors][bpmWidth];           
  //setting lines to 0
  resetDataTraces();

 background(0);
 noStroke();
 drawDataWindows();
 drawHeart();

  
  fill(bgcolor);
  text("Select Your Serial Port",245,30);
  listAvailablePorts();
}

void draw() {
  
if(serialPortFound){
  // run only when port connected
  background(0);
  drawDataWindows();
  drawPulseWaveform();
  drawBpmWave();
  drawHeart();
  printDataToScreen();
  
  if(spacePressed){
    text("The following game involves Yes/No questions.\n Press 1 to view the first question.", 670, 500);
  }
  if(onePressed){
    text("Are you happy with your life?", 700, 500);
  }
  if(twoPressed){
    text("Have you ever truly been in love?", 700, 500);
  }
  if(threePressed){
    text("Do you think you're successful in life?", 700, 500);
  }
  if(fourPressed){
    text("Have you ever done something unforgivable?", 750, 500);
  }
  if(fivePressed){
    text("Would you save your mother over 17 other random people?", 700, 500);
  }
  if(sixPressed){
    text("Are you a good person?", 700, 500);
  }
  if(sevenPressed){
    text("If you died tomorrow, would you have regrets?", 750, 500);
  }

} else { 
  autoScanPorts(); //scan to find port
  

  if(refreshPorts){
    refreshPorts = false;
    drawDataWindows();
    drawHeart();
    listAvailablePorts();
  }

  for(int i=0; i<numPorts+1; i++){
    button[i].overRadio(mouseX,mouseY);
    button[i].displayRadio();
  }

}

}  


void drawDataWindows(){
  noStroke();
  fill(bgcolor);  
  for(int i=0; i<numSensors; i++){
    rect(pulseX, pulseY[i], pulseWidth, pulseHeight);
    rect(bpmX, bpmY[i], bpmWidth, bpmHeight);
  }
}

void drawPulseWaveform(){
  for (int i=0; i<numSensors; i++) {
    RawPPG[i][pulseWidth-1] = (1023 - Sensor[i]);  
    

    for (int j = 0; j < pulseWidth-1; j++) {      
      RawPPG[i][j] = RawPPG[i][j+1];                         
      float dummy = RawPPG[i][j] * 0.625/numSensors;       
      offset = float(pulseY[i]);                
      ScaledPPG[i][j] = int(dummy) + int(offset);   
    }
    stroke(250, 0, 0);                               
    noFill();
    beginShape();                                  
    for (int x = 1; x < pulseWidth-1; x++) {
      vertex(x+10, ScaledPPG[i][x]);                    
    }
    endShape();
  }

}

void drawBpmWave(){
//draw bpm wave

for (int i=0; i<numSensors; i++) {  
if (beat[i] == true) {  
    file.play();
  beat[i] = false;      

    for (int j=0; j<bpmWidth-1; j++) {
      ScaledBPM[i][j] = ScaledBPM[i][j+1];                  
    }
   
    BPM[i] = constrain(BPM[i], 0, 200);                     // limit the highest BPM value to 200
    float dummy = map(BPM[i], 0, 200, bpmY[i]+bpmHeight, bpmY[i]);   
    ScaledBPM[i][bpmWidth-1] = int(dummy);      
  }
}
// graph heart rate in small window
stroke(250, 0, 0);                          // color of heart rate graph
strokeWeight(2);                          // thicker line is easier to read
noFill();

for (int i=0; i<numSensors; i++) {
  beginShape();
  for (int j=0; j < bpmWidth; j++) {   
    vertex(j+bpmX, ScaledBPM[i][j]);                 
  }
  endShape();
}
}
void drawHeart(){
  //make the heart and make it beat
    fill(250,0,0);
    stroke(250,0,0);
  int bezierZero = 0;
  for(int i=0; i<numSensors; i++){
   
    heart[i]--;                   
    heart[i] = max(heart[i], 0);   
    if (heart[i] > 0) {            
      strokeWeight(8);         
    }
    smooth();   //draw hearts
    bezier(width-100, bezierZero+70, width-20, bezierZero, width, bezierZero+160, width-100, bezierZero+170);
    bezier(width-100, bezierZero+70, width-190, bezierZero, width-200, bezierZero+160, width-100, bezierZero+170);
    strokeWeight(1);          // reset the strokeWeight for next time
    bezierZero += bpmHeight+spacer;
  }
}


void listAvailablePorts(){
  //println(Serial.list());   
  serialPorts = Serial.list();
  fill(0);
  textFont(font,16);
  textAlign(LEFT);
  
  int yPos = 0;

  for(int i=numPorts-1; i>=0; i--){
    button[i] = new Radio(35, 95+(yPos*20),12,color(180),color(80),color(255),i,button);
    text(serialPorts[i],50, 100+(yPos*20));
    yPos++;
  }
  int p = numPorts;
   fill(233,0,0);
  button[p] = new Radio(35, 95+(yPos*20),12,color(180),color(80),color(255),p,button);
    text("Refresh Serial Ports List",50, 100+(yPos*20));

  textFont(font);
  textAlign(CENTER);
}

void autoScanPorts(){
  if(Serial.list().length != numPorts){
    if(Serial.list().length > numPorts){
      println("New Ports Opened!");
      int diff = Serial.list().length - numPorts;	
      serialPorts = expand(serialPorts,diff);
      numPorts = Serial.list().length;
    }else if(Serial.list().length < numPorts){
      println("Some Ports Closed!");
      numPorts = Serial.list().length;
    }
    refreshPorts = true;
    return;
}
}

void resetDataTraces(){
  for (int i=0; i<numSensors; i++) {
    BPM[i] = 0;
    for(int j=0; j<bpmWidth; j++){
      ScaledBPM[i][j] = bpmY[i] + bpmHeight;
    }
  }
  for (int i=0; i<numSensors; i++) {
    Sensor[i] = 512;
    for (int j=0; j<pulseWidth; j++) {
      RawPPG[i][j] = 1024 - Sensor[i]; 
    }
  }
}

void printDataToScreen(){ 
    fill(255);                                       
    text("Pulse Sensor to compare heart beats", 245, 30);    
    for (int i=0; i<numSensors; i++) {
      text("Sensor  " + (i+1), 1700, bpmY[i] + 220);
      text(BPM[i] + " BPM", 1700, bpmY[i] +185);         
      text("TBH " + TBH[i] + "mS", 1700, bpmY[i] + 160);

    }
}
class Radio {
  int _x,_y;
  int size, dotSize;
  color baseColor, overColor, pressedColor;
  boolean over, pressed;
  int me;
  Radio[] radios;

  Radio(int xp, int yp, int s, color b, color o, color p, int m, Radio[] r) {
    _x = xp;
    _y = yp;
    size = s;
    dotSize = size - size/3;
    baseColor = b;
    overColor = o;
    pressedColor = p;
    radios = r;
    me = m;
  }

  boolean pressRadio(float mx, float my){
    if (dist(_x, _y, mx, my) < size/2){
      pressed = true;
      for(int i=0; i<numPorts+1; i++){
        if(i != me){ radios[i].pressed = false; }
      }
      return true;
    } else {
      return false;
    }
  }

  boolean overRadio(float mx, float my){
    if (dist(_x, _y, mx, my) < size/2){
      over = true;
      for(int i=0; i<numPorts+1; i++){
        if(i != me){ radios[i].over = false; }
      }
      return true;
    } else {
      over = false;
      return false;
    }
  }

  void displayRadio(){
    noStroke();
    fill(baseColor);
    ellipse(_x,_y,size,size);
    if(over){
      fill(overColor);
      ellipse(_x,_y,dotSize,dotSize);
    }
    if(pressed){
      fill(pressedColor);
      ellipse(_x,_y,dotSize,dotSize);
    }
  }
}

//understood some of these concepts throught additional information on web
boolean spacePressed;
boolean onePressed;
boolean twoPressed;
boolean threePressed;
boolean fourPressed;
boolean fivePressed;
boolean sixPressed;
boolean sevenPressed;


void mousePressed(){
  if(!serialPortFound){
    for(int i=0; i<=numPorts; i++){
      if(button[i].pressRadio(mouseX,mouseY)){
        if(i == numPorts){
          if(Serial.list().length > numPorts){
            println("New Ports Opened!");
            int diff = Serial.list().length - numPorts;	
            serialPorts = expand(serialPorts,diff);
            //button = (Radio[]) expand(button,diff);
            numPorts = Serial.list().length;
          }else if(Serial.list().length < numPorts){
            println("Some Ports Closed!");
            numPorts = Serial.list().length;
          }else if(Serial.list().length == numPorts){
            return;
          }
          refreshPorts = true;
          return;
        }else

        try{
          port = new Serial(this, Serial.list()[i], 250000);
          delay(1000);
          println(port.read());
          port.clear();           
          port.bufferUntil('\n');  
          serialPortFound = true;
        }
        catch(Exception e){
          println("Couldn't open port " + Serial.list()[i]);
          fill(255,0,0);
          textFont(font,16);
          textAlign(LEFT);
          text("Couldn't open port " + Serial.list()[i],60,70);
          textFont(font);
          textAlign(CENTER);
        }
      }
    }
  }
}

void mouseReleased(){

}

void keyPressed(){
  if(key == ' '){
    spacePressed = true;
  }
  if(key == '1'){
    onePressed = true;
  }
  if(key == '2'){
    twoPressed = true;
  }
  if(key == '3'){
    threePressed = true;
  }
  if(key == '4'){
    fourPressed = true;
  }
  if(key == '5'){
    fivePressed = true;
  }
  if(key == '6'){
    sixPressed = true;
  }
  if(key == '7'){
    sevenPressed = true;
  }
  
 switch(key){
   case 's':    // pressing 's' or 'S' will take a jpg of the processing window
   case 'S':
     saveFrame("heartLight-####.jpg");    
     break;
   case 'r':
   case 'R':
     resetDataTraces();
     break;
   case ' ':

   default:
     break;
 }
}

void keyReleased(){
  spacePressed = false;
  onePressed = false;
  twoPressed = false;
  threePressed = false;
  fourPressed = false;
  fivePressed = false;
  sixPressed = false;
  sevenPressed = false;
}


void serialEvent(Serial port){
try{
   String inData = port.readStringUntil('\n');
   inData = trim(inData);                 

 for(int i=0; i<numSensors;i++){
   if (inData.charAt(0) == 'a'+i){           // leading 'a' for sensor data
     inData = inData.substring(1);           
     Sensor[i] = int(inData);                 
   }
   if (inData.charAt(0) == 'A'+i){           // leading 'A' for BPM data
     inData = inData.substring(1);           
     BPM[i] = int(inData);                   
     beat[i] = true;                         
     heart[i] = 20;                          
   }
 if (inData.charAt(0) == 'M'+i){             // leading 'M' means TBH data
     inData = inData.substring(1);           
     TBH[i] = int(inData);                   
   }
 }
  } catch(Exception e) {
  }

}


Final Project – Rhythm Kukreja (Pulse/Heart Beat Monitor with LEDs)

Description

Create a physically interactive system of your choice that relies on a multimedia computer for some sort of processing or data analysis. The Final should use BOTH Processing AND Arduino. Your focus should be on careful and timely sensing of the relevant actions of the person or people that you’re designing this for, and on clear, prompt, and effective responses. Any interactive system is going to involve systems of listening, thinking, and speaking from both parties. Whether it involves one cycle or many, the exchange should be engaging. You may work alone or in pairs.

Description of the game

So, I used a pulse sensor to make a heartbeat monitor which can be used for different purposes. Maybe in the health care industry or sports industry.

I used two LEDs that turn on and off according to the pulse rate. I added a scaling component in the code to adjust the size of the rate. I also checked the timings between heartbeat by subtracting the last-current. I also made the heart pump by increasing the stroke weight. You can also use “S” or “s” to save the heartbeat in the folder where the code. it saved and later you can compare the heartbeat.

I did the user testing as well after that. The test person came back from a run, thus his heart was beating faster.

He gave some feedback. Thank you.


Certain challenges:-

  1. It took me some time to figure out how the sensor worked because I have never worked with a pulse sensor before.
  2. it was hard to display the pulse wave first, then I found some resources to make me understand the concept.
  3. it was hard to add further things to the project to make it more useful.

The code is following:-

Arduino

//  Variables
int pulsePin = 0;                 // Pulse Sensor purple wire connected to analog pin 0
int blinkPin = 13;                // pin to blink led at each beat
int fadePin = 5;                  // pin to do fancy classy fading blink at each beat
int fadeRate = 0;                 // used to fade LED on with PWM on fadePin

// Volatile Variables, used in the interrupt service routine!
volatile int BPM;                   // int that holds raw Analog in 0. updated every 2mS
volatile int Signal;                // holds the incoming raw data
volatile int TBH = 600;             // int that holds the time interval between beats! Must be seeded! 
volatile boolean Pulse = false;     // "True" when User's live heartbeat is detected. "False" when not a "live beat". 
volatile boolean QS = false;        // becomes true when Arduoino finds a beat.

// Regards Serial OutPut  -- Set This Up to your needs
static boolean serialVisual = false;   // Set to 'false' by Default.  Re-set to 'true' to see Arduino Serial Monitor ASCII Visual Pulse 

void setup(){
  pinMode(blinkPin,OUTPUT);         // pin that will blink to your heartbeat!
  pinMode(fadePin,OUTPUT);          // pin that will fade to your heartbeat!
  Serial.begin(115200);             // we agree to talk fast!
  interruptSetup();                 // sets up to read Pulse Sensor signal every 2mS 
   // IF YOU ARE POWERING The Pulse Sensor AT VOLTAGE LESS THAN THE BOARD VOLTAGE, 
   // UN-COMMENT THE NEXT LINE AND APPLY THAT VOLTAGE TO THE A-REF PIN
//   analogReference(EXTERNAL);   
}

//  Where the Magic Happens
void loop(){
  
    serialOutput() ;       
    
  if (QS == true){     // A Heartbeat Was Found
                       // BPM and TBH have been Determined
                       // Quantified Self "QS" true when arduino finds a heartbeat
        fadeRate = 255;         // Makes the LED Fade Effect Happen
                                // Set 'fadeRate' Variable to 255 to fade LED with pulse
        serialOutputWhenBeatHappens();   // A Beat Happened, Output that to serial.     
        QS = false;                      // reset the Quantified Self flag for next time    
  }
     
  ledFadeToBeat();                      // Makes the LED Fade Effect Happen 
  delay(20);                             //  take a break
}

void ledFadeToBeat(){
    fadeRate -= 15;                         //  set LED fade value
    fadeRate = constrain(fadeRate,0,255);   //  keep LED fade value from going into negative numbers!
    analogWrite(fadePin,fadeRate);          //  fade LED
  }


void serialOutput(){   // Decide How To Output Serial. 
 if (serialVisual == true){  
     arduinoSerialMonitorVisual('-', Signal);   // goes to function that makes Serial Monitor Visualizer
 } else{
      sendDataToSerial('S', Signal);     // goes to sendDataToSerial function
 }        
}


//  Decides How To OutPut BPM and TBH Data
void serialOutputWhenBeatHappens(){    
 if (serialVisual == true){            //  Code to Make the Serial Monitor Visualizer Work
    Serial.print("*** Heart-Beat Happened *** ");  //ASCII Art Madness
    Serial.print("BPM: ");
    Serial.print(BPM);
    Serial.print("  ");
 } else{
        sendDataToSerial('B',BPM);   // send heart rate with a 'B' prefix
        sendDataToSerial('Q',TBH);   // send time between beats with a 'Q' prefix
 }   
}


//  Sends Data to Pulse Sensor Processing App, Native Mac App, or Third-party Serial Readers. 
void sendDataToSerial(char symbol, int data ){
    Serial.print(symbol);

    Serial.println(data);                
  }


//  Code to Make the Serial Monitor Visualizer Work
void arduinoSerialMonitorVisual(char symbol, int data ){    
  const int sensorMin = 0;      // sensor minimum, discovered through experiment
const int sensorMax = 1024;    // sensor maximum, discovered through experiment

  int sensorReading = data;
  // map the sensor range to a range of 12 options:
  int range = map(sensorReading, sensorMin, sensorMax, 0, 11);

  // do something different depending on the 
  // range value:
  switch (range) {
  case 0:     
    Serial.println("");     /////ASCII Art Madness
    break;
  case 1:   
    Serial.println("---");
    break;
  case 2:    
    Serial.println("------");
    break;
  case 3:    
    Serial.println("---------");
    break;
  case 4:   
    Serial.println("------------");
    break;
  case 5:   
    Serial.println("--------------|-");
    break;
  case 6:   
    Serial.println("--------------|---");
    break;
  case 7:   
    Serial.println("--------------|-------");
    break;
  case 8:  
    Serial.println("--------------|----------");
    break;
  case 9:    
    Serial.println("--------------|----------------");
    break;
  case 10:   
    Serial.println("--------------|-------------------");
    break;
  case 11:   
    Serial.println("--------------|-----------------------");
    break;
  
  } 
}


volatile int rate[10];                    // array to hold last ten TBH values
volatile unsigned long sampleCounter = 0;          // used to determine pulse timing
volatile unsigned long lastBeatTime = 0;           // used to find TBH
volatile int P =512;                      // used to find peak in pulse wave, seeded
volatile int T = 512;                     // used to find trough in pulse wave, seeded
volatile int thresh = 525;                // used to find instant moment of heart beat, seeded
volatile int amp = 100;                   // used to hold amplitude of pulse waveform, seeded
volatile boolean firstBeat = true;        // used to seed rate array so we startup with reasonable BPM
volatile boolean secondBeat = false;      // used to seed rate array so we startup with reasonable BPM


void interruptSetup(){     
  // Initializes Timer2 to throw an interrupt every 2mS.
  TCCR2A = 0x02;     // DISABLE PWM ON DIGITAL PINS 3 AND 11, AND GO INTO CTC MODE
  TCCR2B = 0x06;     // DON'T FORCE COMPARE, 256 PRESCALER 
  OCR2A = 0X7C;      // SET THE TOP OF THE COUNT TO 124 FOR 500Hz SAMPLE RATE
  TIMSK2 = 0x02;     // ENABLE INTERRUPT ON MATCH BETWEEN TIMER2 AND OCR2A
  sei();             // MAKE SURE GLOBAL INTERRUPTS ARE ENABLED      
} 


// THIS IS THE TIMER 2 INTERRUPT SERVICE ROUTINE. 
// Timer 2 makes sure that we take a reading every 2 miliseconds
ISR(TIMER2_COMPA_vect){                         // triggered when Timer2 counts to 124
  cli();                                      // disable interrupts while we do this
  Signal = analogRead(pulsePin);              // read the Pulse Sensor 
  sampleCounter += 2;                         // keep track of the time in mS with this variable
  int N = sampleCounter - lastBeatTime;       // monitor the time since the last beat to avoid noise

    //  find the peak and trough of the pulse wave
  if(Signal < thresh && N > (TBH/5)*3){       // avoid dichrotic noise by waiting 3/5 of last TBH
    if (Signal < T){                        // T is the trough
      T = Signal;                         // keep track of lowest point in pulse wave 
    }
  }

  if(Signal > thresh && Signal > P){          // thresh condition helps avoid noise
    P = Signal;                             // P is the peak
  }                                        // keep track of highest point in pulse wave

  //  NOW IT'S TIME TO LOOK FOR THE HEART BEAT
  // signal surges up in value every time there is a pulse
  if (N > 250){                                   // avoid high frequency noise
    if ( (Signal > thresh) && (Pulse == false) && (N > (TBH/5)*3) ){        
      Pulse = true;                               // set the Pulse flag when we think there is a pulse
      digitalWrite(blinkPin,HIGH);                // turn on pin 13 LED
      TBH = sampleCounter - lastBeatTime;         // measure time between beats in mS
      lastBeatTime = sampleCounter;               // keep track of time for next pulse

      if(secondBeat){                        // if this is the second beat, if secondBeat == TRUE
        secondBeat = false;                  // clear secondBeat flag
        for(int i=0; i<=9; i++){             // seed the running total to get a realisitic BPM at startup
          rate[i] = TBH;                      
        }
      }

      if(firstBeat){                         // if it's the first time we found a beat, if firstBeat == TRUE
        firstBeat = false;                   // clear firstBeat flag
        secondBeat = true;                   // set the second beat flag
        sei();                               // enable interrupts again
        return;                              // TBH value is unreliable so discard it
      }   


      // keep a running total of the last 10 TBH values
      word runningTotal = 0;                  // clear the runningTotal variable    

      for(int i=0; i<=8; i++){                // shift data in the rate array
        rate[i] = rate[i+1];                  // and drop the oldest TBH value 
        runningTotal += rate[i];              // add up the 9 oldest TBH values
      }

      rate[9] = TBH;                          // add the latest TBH to the rate array
      runningTotal += rate[9];                // add the latest TBH to runningTotal
      runningTotal /= 10;                     // average the last 10 TBH values 
      BPM = 60000/runningTotal;               // how many beats can fit into a minute? that's BPM!
      QS = true;                              // set Quantified Self flag 
      // QS FLAG IS NOT CLEARED INSIDE THIS ISR
    }                       
  }

  if (Signal < thresh && Pulse == true){   // when the values are going down, the beat is over
    digitalWrite(blinkPin,LOW);            // turn off pin 13 LED
    Pulse = false;                         // reset the Pulse flag so we can do it again
    amp = P - T;                           // get amplitude of the pulse wave
    thresh = amp/2 + T;                    // set thresh at 50% of the amplitude
    P = thresh;                            // reset these for next time
    T = thresh;
  }

  if (N > 2500){                           // if 2.5 seconds go by without a beat
    thresh = 512;                          // set thresh default
    P = 512;                               // set P default
    T = 512;                               // set T default
    lastBeatTime = sampleCounter;          // bring the lastBeatTime up to date        
    firstBeat = true;                      // set these to avoid noise
    secondBeat = false;                    // when we get the heartbeat back
  }

  sei();                                   // enable interrupts when youre done!
}// end isr

Processing:-

import processing.sound.*;
SoundFile file;
import processing.serial.*;
PFont font;
PFont portsFont;
Scrollbar scaleBar;

Serial port;

int Sensor;      // holds pusle sensor data from the arduino
int TBH;         // HOLDS TIME BETWEN HEARTBEATS FROM ARDUINO
int BPM;         // HOLDS HEART RATE VALUE FROM ARDUINO
int[] RawY;      // HOLDS HEARTBEAT WAVEFORM DATA BEFORE SCALING
int[] ScaledY;   // USED TO POSITION SCALED HEARTBEAT WAVEFORM
int[] rate;      // USED TO POSITION BPM DATA WAVEFORM
float zoom;      // USED WHEN SCALING PULSE WAVEFORM TO PULSE WINDOW
float offset;    // USED WHEN SCALING PULSE WAVEFORM TO PULSE WINDOW
color eggshell = color(171,219,227);
int heart = 0;   // This variable times the heart image 'pulse' on screen
//  THESE VARIABLES DETERMINE THE SIZE OF THE DATA WINDOWS
int PulseWindowWidth = 490;
int PulseWindowHeight = 512;
int BPMWindowWidth = 180;
int BPMWindowHeight = 340;
boolean beat = false;    // set when a heart beat is detected, then cleared when the BPM graph is advanced

// SERIAL PORT STUFF TO HELP YOU FIND THE CORRECT SERIAL PORT
String serialPort;
String[] serialPorts = new String[Serial.list().length];
boolean serialPortFound = false;
Radio[] button = new Radio[Serial.list().length];


void setup() {
  size(700, 600);  // Stage size
  file = new SoundFile(this, "heart.mp3");
  frameRate(100);
  font = loadFont("Arial-BoldMT-24.vlw");
  textFont(font);
  textAlign(CENTER);
  rectMode(CENTER);
  ellipseMode(CENTER);
// Scrollbar constructor inputs: x,y,width,height,minVal,maxVal
  scaleBar = new Scrollbar (400, 575, 180, 12, 0.5, 1.0);  // set parameters for the scale bar
  RawY = new int[PulseWindowWidth];          // initialize raw pulse waveform array
  ScaledY = new int[PulseWindowWidth];       // initialize scaled pulse waveform array
  rate = new int [BPMWindowWidth];           // initialize BPM waveform array
  zoom = 0.75;                               // initialize scale of heartbeat window

// set the visualizer lines to 0
 for (int i=0; i<rate.length; i++){
    rate[i] = 555;      // Place BPM graph line at bottom of BPM Window
   }
 for (int i=0; i<RawY.length; i++){
    RawY[i] = height/2; // initialize the pulse window data line to V/2
 }

 background(0);
 noStroke();
 // DRAW OUT THE PULSE WINDOW AND BPM WINDOW RECTANGLES
 drawDataWindows();
 drawHeart();

// GO FIND THE ARDUINO
  fill(eggshell);
  text("Select Your Serial Port",245,30);
  listAvailablePorts();

}

void draw() {
if(serialPortFound){
  // ONLY RUN THE VISUALIZER AFTER THE PORT IS CONNECTED
  background(0);
  noStroke();
  drawDataWindows();
  drawPulseWaveform();
  drawBPMwaveform();
  drawHeart();
// PRINT THE DATA AND VARIABLE VALUES
  fill(eggshell);                                       // get ready to print text
  text("Check your Heart Beat and Pulse",245,30);     // tell them what you are
  text("TBH " + TBH + "mS",600,585);                    // print the time between heartbeats in mS
  text(BPM + "BPM",600,200);                           // print the Beats Per Minute
  text("Scale the Pulse Rate " + nf(zoom,1,2), 150, 585); // show the current scale of Pulse Window

//  DO THE SCROLLBAR THINGS
  scaleBar.update (mouseX, mouseY);
  scaleBar.display();

} else { // SCAN BUTTONS TO FIND THE SERIAL PORT

  for(int i=0; i<button.length; i++){
    button[i].overRadio(mouseX,mouseY);
    button[i].displayRadio();
  }

}

}  //end of draw loop


void drawDataWindows(){
    // DRAW OUT THE PULSE WINDOW AND BPM WINDOW RECTANGLES
    fill(eggshell);  // color for the window background
    rect(255,height/2,PulseWindowWidth,PulseWindowHeight);
    rect(600,385,BPMWindowWidth,BPMWindowHeight);
}

void drawPulseWaveform(){
  // DRAW THE PULSE WAVEFORM
  // prepare pulse data points
  RawY[RawY.length-1] = (1023 - Sensor) - 212;   // place the new raw datapoint at the end of the array
  zoom = scaleBar.getPos();                      // get current waveform scale value
  offset = map(zoom,0.5,1,150,0);                // calculate the offset needed at this scale
  for (int i = 0; i < RawY.length-1; i++) {      // move the pulse waveform by
    RawY[i] = RawY[i+1];                         // shifting all raw datapoints one pixel left
    float dummy = RawY[i] * zoom + offset;       // adjust the raw data to the selected scale
    ScaledY[i] = constrain(int(dummy),44,556);   // transfer the raw data array to the scaled array
  }
  stroke(250,0,0);                               // red is a good color for the pulse waveform
  noFill();
  beginShape();                                  // using beginShape() renders fast
  for (int x = 1; x < ScaledY.length-1; x++) {
    vertex(x+10, ScaledY[x]);                    //draw a line connecting the data points
  }
  endShape();
}

void drawBPMwaveform(){
// DRAW THE BPM WAVE FORM
// first, shift the BPM waveform over to fit then next data point only when a beat is found
 if (beat == true){   // move the heart rate line over one pixel every time the heart beats
   file.play();
   beat = false;      // clear beat flag (beat flag waset in serialEvent tab)
   for (int i=0; i<rate.length-1; i++){
     rate[i] = rate[i+1];                  // shift the bpm Y coordinates over one pixel to the left
   }
// then limit and scale the BPM value
   BPM = min(BPM,200);                     // limit the highest BPM value to 200
   float dummy = map(BPM,0,200,555,215);   // map it to the heart rate window Y
   rate[rate.length-1] = int(dummy);       // set the rightmost pixel to the new data point value
 }
 // GRAPH THE HEART RATE WAVEFORM
 stroke(250,0,0);                          // color of heart rate graph
 strokeWeight(2);                          // thicker line is easier to read
 noFill();
 beginShape();
 for (int i=0; i < rate.length-1; i++){    // variable 'i' will take the place of pixel x position
   vertex(i+510, rate[i]);                 // display history of heart rate datapoints
 }
 endShape();
}

void drawHeart(){
  // DRAW THE HEART AND MAYBE MAKE IT BEAT
    fill(250,0,0);
    stroke(250,0,0);
    // the 'heart' variable is set in serialEvent when arduino sees a beat happen
    heart--;                    // heart is used to time how long the heart graphic swells when your heart beats
    heart = max(heart,0);       // don't let the heart variable go into negative numbers
    if (heart > 0){             // if a beat happened recently,
      strokeWeight(8);          // make the heart big
    }
    smooth();   // draw the heart with two bezier curves
    bezier(width-100,50, width-20,-20, width,140, width-100,150);
    bezier(width-100,50, width-190,-20, width-200,140, width-100,150);
    strokeWeight(1);          // reset the strokeWeight for next time
}

void listAvailablePorts(){
  serialPorts = Serial.list();
  fill(0);
  textFont(font,16);
  textAlign(LEFT);
  // set a counter to list the ports backwards
  int yPos = 0;
  for(int i=serialPorts.length-1; i>=0; i--){
    button[i] = new Radio(35, 95+(yPos*20),12,color(180),color(80),color(255),i,button);
    text(serialPorts[i],50, 100+(yPos*20));
    yPos++;
  }
  textFont(font);
  textAlign(CENTER);
}
void mousePressed(){
  scaleBar.press(mouseX, mouseY);
  if(!serialPortFound){
    for(int i=0; i<button.length; i++){
      if(button[i].pressRadio(mouseX,mouseY)){
        try{
          port = new Serial(this, Serial.list()[i], 115200);  // make sure Arduino is talking serial at this baud rate
          delay(1000);
          println(port.read());
          port.clear();            // flush buffer
          port.bufferUntil('\n');  // set buffer full flag on receipt of carriage return
          serialPortFound = true;
        }
        catch(Exception e){
          println("Couldn't open port " + Serial.list()[i]);
        }
      }
    }
  }
}

void mouseReleased(){
  scaleBar.release();
}

void keyPressed(){

 switch(key){
   case 's':    // pressing 's' or 'S' will take a jpg of the processing window
   case 'S':
     saveFrame("heartLight-####.jpg");    // take a shot of that!
     break;

   default:
     break;
 }
}
class Radio {
  int _x,_y;
  int size, dotSize;
  color baseColor, overColor, pressedColor;
  boolean over, pressed;
  int me;
  Radio[] radios;
  
  Radio(int xp, int yp, int s, color b, color o, color p, int m, Radio[] r) {
    _x = xp;
    _y = yp;
    size = s;
    dotSize = size - size/3;
    baseColor = b;
    overColor = o;
    pressedColor = p;
    radios = r;
    me = m;
  }
  
  boolean pressRadio(float mx, float my){
    if (dist(_x, _y, mx, my) < size/2){
      pressed = true;
      for(int i=0; i<radios.length; i++){
        if(i != me){ radios[i].pressed = false; }
      }
      return true;
    } else {
      return false;
    }
  }
  
  boolean overRadio(float mx, float my){
    if (dist(_x, _y, mx, my) < size/2){
      over = true;
      for(int i=0; i<radios.length; i++){
        if(i != me){ radios[i].over = false; }
      }
      return true;
    } else {
      return false;
    }
  }
  
  void displayRadio(){
    noStroke();
    fill(baseColor);
    ellipse(_x,_y,size,size);
    if(over){
      fill(overColor);
      ellipse(_x,_y,dotSize,dotSize);
    }
    if(pressed){
      fill(pressedColor);
      ellipse(_x,_y,dotSize,dotSize);
    }
  }
}


/*
    from the book "Processing" by Reas and Fry
*/

class Scrollbar{
 int x,y;               // the x and y coordinates
 float sw, sh;          // width and height of scrollbar
 float pos;             // position of thumb
 float posMin, posMax;  // max and min values of thumb
 boolean rollover;      // true when the mouse is over
 boolean locked;        // true when it's the active scrollbar
 float minVal, maxVal;  // min and max values for the thumb

 Scrollbar (int xp, int yp, int w, int h, float miv, float mav){ // values passed from the constructor
  x = xp;
  y = yp;
  sw = w;
  sh = h;
  minVal = miv;
  maxVal = mav;
  pos = x - sh/2;
  posMin = x-sw/2;
  posMax = x + sw/2;  // - sh;
 }

 // updates the 'over' boolean and position of thumb
 void update(int mx, int my) {
   if (over(mx, my) == true){
     rollover = true;            // when the mouse is over the scrollbar, rollover is true
   } else {
     rollover = false;
   }
   if (locked == true){
    pos = constrain (mx, posMin, posMax);
   }
 }

 // locks the thumb so the mouse can move off and still update
 void press(int mx, int my){
   if (rollover == true){
    locked = true;            // when rollover is true, pressing the mouse button will lock the scrollbar on
   }else{
    locked = false;
   }
 }

 // resets the scrollbar to neutral
 void release(){
  locked = false;
 }

 // returns true if the cursor is over the scrollbar
 boolean over(int mx, int my){
  if ((mx > x-sw/2) && (mx < x+sw/2) && (my > y-sh/2) && (my < y+sh/2)){
   return true;
  }else{
   return false;
  }
 }

 // draws the scrollbar on the screen
 void display (){

  noStroke();
  fill(255);
  rect(x, y, sw, sh);      // create the scrollbar
  fill (250,0,0);
  if ((rollover == true) || (locked == true)){
   stroke(250,0,0);
   strokeWeight(8);           // make the scale dot bigger if you're on it
  }
  ellipse(pos, y, sh, sh);     // create the scaling dot
  strokeWeight(1);            // reset strokeWeight
 }

 // returns the current value of the thumb
 float getPos() {
  float scalar = sw / sw;  // (sw - sh/2);
  float ratio = (pos-(x-sw/2)) * scalar;
  float p = minVal + (ratio/sw * (maxVal - minVal));
  return p;
 }
 }


void serialEvent(Serial port){
try{
   String inData = port.readStringUntil('\n');
   inData = trim(inData);                 // cut off white space (carriage return)

   if (inData.charAt(0) == 'S'){          // leading 'S' for sensor data
     inData = inData.substring(1);        // cut off the leading 'S'
     Sensor = int(inData);                // convert the string to usable int
   }
   if (inData.charAt(0) == 'B'){          // leading 'B' for BPM data
     inData = inData.substring(1);        // cut off the leading 'B'
     BPM = int(inData);                   // convert the string to usable int
     beat = true;                         // set beat flag to advance heart rate graph
     heart = 20;                          // begin heart image 'swell' timer
   }
 if (inData.charAt(0) == 'Q'){            // leading 'Q' means IBI data
     inData = inData.substring(1);        // cut off the leading 'Q'
     TBH = int(inData);                   // convert the string to usable int
   }
} catch(Exception e) {
  // println(e.toString());
}

}


Final HeartBeat Monitor/ Music (BEEPS)/ LED project

Description

Finalize your idea,  determine whether it’s going to be a group/solo arrangement,  identify the materials/space you need, and identify what you think will be hardest to complete. Post your progress on the project so far.

Idea

For the final project, I would be creating a heartbeat monitor using a pulse sensor and working with LEDs and a buzzer to generate sounds and lights according to the pulse sensor.

Materials

Pulse Sensor

Jumper Wires

Resistors

Transistors

LEDs

Arduino Board

and other resources while working on the project

Hardest Part

I think the hardest part would be controlling the way heartbeat would be displayed on the processing screen, since I haven’t done that before.

Progress

I have been waiting for the pulse sensor until today, but in the meantime, I was finding alternatives to the buzzer to create sounds. Maybe use the mac speaker and processing to do that work.

Final Project Proposal

Concept:-

The idea is basically, I would be using a pulse sensor to display the heart rate onto the screen and play around with it to see if I can do something cool.

I would try to represent the data provided by the pulse sensor to make a pulse/ heart rate and some variations.

I would also want to add the buzzer to make different sounds for different rates, which I think would be pretty cool!

I think I’ll get more ideas after I start playing with the sensor and get some feedback on the basis of that.


Serial Communication Examples

 Exercises 1

Make something that uses only one sensor on Arduino and makes the ellipse in processing move on the horizontal axis, in the middle of the screen, and nothing on Arduino is controlled by processing

– Arduino

int left = 0;
int right = 0;
void setup() {
  Serial.begin(9600);
  Serial.println("0,0");
  pinMode(2, OUTPUT);
  pinMode(5, OUTPUT);
}
void loop() {
  // while the serial is available
  while (Serial.available()) {
    // info that we parse and send to processor 
    right = Serial.parseInt();
    left = Serial.parseInt();
    if (Serial.read() == '\n') {
      digitalWrite(2, right);
      digitalWrite(5, left);
      int sensor = analogRead(A0);
      delay(1);
      Serial.print(sensor);
    }
  }
}

– Processing

import processing.serial.*;
Serial myPort;
int xPos=0;
int yPos=0;
boolean onOff=false;
boolean onOff2=false;
void setup(){
  size(960,720);
  // print list of ports
  printArray(Serial.list());
  // find the arduino port in the list and choose the right index/port
  String portname=Serial.list()[3];
  println(portname);
  myPort = new Serial(this,portname,9600);
  myPort.clear();
  myPort.bufferUntil('\n');
}
void draw(){
  background(255);
  // when mouse pressed, we change the onoff
  // if mouse is on right , turn on the light
  ellipse(xPos,height/2,30,30);
  
  if (mousePressed){
    if(mouseX<=width/2)
      onOff2=false;
    else
      onOff=false;
  }else{
    onOff=onOff2=true;
  }
  
}
void serialEvent(Serial myPort){
  String s=myPort.readStringUntil('\n');
  s=trim(s);
  if (s!=null){
    println(s);
    int values[]=int(split(s,','));
    if (values.length==2){
      xPos=(int)map(values[0],0,1023,0, width);
    }
  }
  
 
  myPort.write(int(onOff)+","+int(onOff2)+"\n");
 
}

 Exercises 2

Make something that controls the LED brightness from processing
-Arduino
float brightness_led;
void setup() {
  Serial.begin(9600);
  Serial.println("0");
  pinMode(5, OUTPUT);
}
void loop() {
  while (Serial.available()) {
    
    brightness_led = Serial.parseFloat();
    
    if (Serial.read() == '\n') {
    
      analogWrite(5, brightness_led);
      Serial.println(brightness_led);
    }
  }
}

– Processing

import processing.serial.*;
Serial myPort;
int pos_x = 0;
int pos_y;
float brightness_led;
void setup() {
  size(960, 720);
  printArray(Serial.list());
  String portname=Serial.list()[5];
  println(portname);
  myPort = new Serial(this, portname, 9600);
  myPort.clear();
  myPort.bufferUntil('\n');
}
void draw() {
  background(255);
  brightness_led = int(map(mouseX, 0, width, 0, 255));
  
  pos_y = height/2;
  ellipse(mouseX, pos_y, 30, 30);
}
void serialEvent(Serial myPort) {
  String s=myPort.readStringUntil('\n');
  s=trim(s);
  myPort.write(brightness_led+ "\n");
}

 Exercises 3

Take the gravity wind example and make it so every time the ball bounces one led lights up and then turns off, and you can control the wind from one analog sensor

-Processing

PVector velocity;
PVector gravity;
PVector position;
PVector acceleration;
PVector wind;
float drag = 0.99;
float mass = 50;
float hDampening;
int Mover = 0;
import processing.serial.*;
Serial myPort;
int speedWind;
int xPos=0;
int yPos=0;
boolean onOff=false;
void setup() {
  size(640,360);
  printArray(Serial.list());
  String portname=Serial.list()[5];
  println(portname);
  myPort = new Serial(this,portname,9600);
  myPort.clear();
  myPort.bufferUntil('\n');
  
  noFill();
  position = new PVector(width/2, 0);
  velocity = new PVector(0,0);
  acceleration = new PVector(0,0);
  gravity = new PVector(0, 0.5*mass);
  wind = new PVector(0,0);
  hDampening=map(mass,15,80,.98,.96);
}
void draw() {
  background(255);
  if (!keyPressed){
    wind.x= speedWind;
    velocity.x*=hDampening;
  }
  applyForce(wind);
  applyForce(gravity);
  velocity.add(acceleration);
  velocity.mult(drag);
  position.add(velocity);
  acceleration.mult(0);
  ellipse(position.x,position.y,mass,mass);
  if (position.y > height-mass/2) {
      velocity.y *= -0.9;  // A little dampening when hitting the bottom
      position.y = height-mass/2;
    }


  println(velocity.y);
}
  
void applyForce(PVector force){
  // Newton's 2nd law: F = M * A
  // or A = F / M
  PVector f = PVector.div(force, mass);
  acceleration.add(f);
}
void serialEvent(Serial myPort){
  String s=myPort.readStringUntil('\n');
  s=trim(s);
  if (s!=null){
    
    int values[] = int(split(s,','));
    
    
    if (values.length == 2){
      if (values[0] > values[1]){
        speedWind = 10;
      }
      else if (values[0] < values[1]){
        speedWind = -10;
      }
      else if (values[1] == values[1]){
        speedWind = 0;
      }
    }
    
  }
    if (round(position.y + mass) > height && round(velocity.y)  != 0){
    onOff = true;
    }
    else{
      onOff = false;
    }
  
    myPort.write(int(onOff) + "\n");
  
}
void keyPressed(){
  if (keyCode==LEFT){
    wind.x=-1;
  }
  if (keyCode==RIGHT){
    wind.x=1;
  }
  if (key==' '){
    mass= random(15,80);
    position.y=-mass;
    velocity.mult(0);
  }
}

– Arduino

int brightness = 0;
int previousValue = 0;
int moving = 0;
int onOff = 0;
void setup() {
  Serial.begin(9600);
  Serial.println("0");
  pinMode(2, OUTPUT);
  
}
 
void loop() {
  while (Serial.available()) {
    onOff = Serial.parseInt();
    if (Serial.read() == '\n') {
      int sensor = analogRead(A0);
      delay(1);
      
      
      Serial.print(sensor);
      Serial.print(",");
      Serial.println(previousValue);
      previousValue = sensor;
      
      if (onOff == 1){
        analogWrite(2, 255);
      }
      else{
        analogWrite(2, 0);
      }
    }
  }
}

Ford Cardboard Truck

Description:

Get information from at least one analog sensor and at least one digital sensor (switch), and use this information to control at least two LEDs, one in a digital fashion and the other in an analog fashion, in some creative way.

Process:

I first started this process, just by completing the circuit and finishing the requirements of the assignment, that is, to use a sensor (analog), button (digital switch )

I used 4 LEDs, 6 resistors ( 4 – 330 v and 2- 10k), jumper cables, LDR (Light-dependent resistor) resistors, breadboard, and Arduino board.

I used the LDR in a way in which if the surroundings are bright (more than 400 (LDR sensor status)), blue LED would light up, and if the surroundings are dark(less than 400 (LDR sensor status)), green LED would light up. By bending the lights a little and using the cardboard, I made it look like a car.

So, I used the LEDs as the front light of the truck. Then, I had to use a switch, so I did that by using the back of the truck.

So, if I closed the back of the truck, one red LED would light up, if I opened it, the other would light up.

This is what the breadboard and Arduino looked like:

This is how the LDR resistor looked like when it worked:

Overall, it was fun to use my creativity to learn how to use these tools.

The code for this is given below:

const int ledPin = 10;
const int ledPin2 = 9;
const int knobPin = A1;

const int ledRed = 13;
const int switch1 = 7;
const int ledBlue = 12;
bool currentState = false;
bool switchState = LOW;


void setup() {
  // put your setup code here, to run once:
  Serial.begin(9600);
  pinMode(ledPin, OUTPUT);
  pinMode(ledPin2, OUTPUT);
  pinMode(knobPin, INPUT);

  pinMode(ledRed, OUTPUT);
  pinMode(ledBlue, OUTPUT);
  pinMode(switch1, INPUT);

}

void loop() {
  // put your main code here, to run repeatedly:

  int ldrStatus = analogRead(knobPin);

  if(ldrStatus <= 400){
    digitalWrite(ledPin, HIGH);
    digitalWrite(ledPin2, LOW);
    
    }
    else{
      digitalWrite(ledPin, LOW);
      digitalWrite(ledPin2, HIGH);
      
      
      }

    switchState = digitalRead(switch1);
    if (currentState != switchState ){
      digitalWrite(ledBlue, LOW);
      digitalWrite(ledRed, HIGH);
     } else {
      digitalWrite(ledBlue, HIGH);
      digitalWrite(ledRed, LOW);
    }
}


Week 8 – Sitting changes colour

Description

Create an unusual switch that doesn’t require the use of your hands. Use Arduino digital input and output for the interaction.

Process

So, I was just sitting on my chair trying to think about what to make. I got the idea, why don’t I just make something that involves sitting on the chair. So here it goes.

I used two LEDs ( red and blue). I used 3 resistors ( two 330 v and one 10k) to control the flow of electricity. I used basic conductors wires and jumper twins to finish the circuit. I connected the Red LED to Digital Input 13, Blue LED to Digital Input 12. I connected the switch to 7.

I connected the copper wires to the copper tape to give it a bigger surface area to conduct electricity.

This is the final video of me testing out the product:-

The code was pretty simple.

HERE IT GOES:-

const int ledRed = 13;
const int switch1 = 7;
const int ledBlue = 12;
bool currentState = false;
bool switchState = LOW;

void setup() {
  // put your setup code here, to run once:
  pinMode(ledRed, OUTPUT);
  pinMode(ledBlue, OUTPUT);
  pinMode(switch1, INPUT);
}

void loop() {

///put your main code here, to run repeatedly:
    switchState = digitalRead(switch1);
    if (currentState != switchState ){
      digitalWrite(ledBlue, LOW);
      digitalWrite(ledRed, HIGH);
     } else {
      digitalWrite(ledBlue, HIGH);
      digitalWrite(ledRed, LOW);
    }

}

COVID NINJA – Rhythm Kukreja’s Midterm Game

Inspiration:

As I mentioned in my proposal, my game was inspired by Fruit Ninja. Apart from slicing the fruits, you had to catch the covid objects, like pills, syringes, sanitizers, and masks. You also had to avoid catching the virus. There is also a powerup in the game, that looks like a clock, which slows the frameRate for about 5 seconds.

Process:

The game starts by showing a start screen, which gives the instructions for the game. Then, when you click any key on the keyboard, the game starts.

I used the keypressed function in order to switch from the start screen to the main game.

After that, you can see a glove and objects falling from the top. The glove is made on mouse X and mouse Y. The objects use a random function on the width, to fall randomly from different sides and I have used gravity along with velocity to randomise the speed of the objects falling from the top.

Everytime, you catch the object, score increases by 1 and everytime you miss an object, the X on top gets red. If you miss 10 objects, the game ends. If you catch the virus game ends. I have used null to remove the objects.

Once the game ends, you see the following screen and I have again used keypressed function to restart the game, once the game ends.

This is what the game looks like:-

The code for the above game is below:-

//setting up the variables, importing libraries, importing images and fonts. 
import processing.sound.*;
SoundFile file;
SoundFile objects;
SoundFile bomb;
SoundFile gameover;
PImage back;
PImage knife;
PImage start;
PFont font;

int height = 720;
int width = 1040;
int frame = 0;


//initialising variables
Game game = new Game();
boolean gameOver = false;
boolean startScreen = true;

void setup(){
  //setting up the screen and the background
  size(1040, 720);
  back = loadImage("back.jpg");
  background(0);
  font = createFont("Optima-Bold", 20);
  
  //accessing sound path
  file = new SoundFile(this, "main.wav");
  objects = new SoundFile(this, "objects.mp3");
  bomb = new SoundFile(this, "bomb.mp3");
  gameover = new SoundFile(this, "gameover.mp3");
  
  //loading the images
  knife = loadImage("knife.png");
  knife.resize(100,150);
  
  start = loadImage("start.jpeg");
  start.resize(width,height);
  
  //looping the background music
  file.amp(0.05);
  file.loop();
}

void draw(){
  // setting font to optima bold
  textFont(font);
  
  //changing cursor settings
  if(startScreen || gameOver){
    cursor(CROSS);
  } else {
    cursor(knife);
  }
  
  // start screen for instructions
  if(startScreen){
    background(start);
    strokeWeight(0);
    fill(200,0,0,100);
    rect((width/2)-400,(height/2)-150,800,400);
    
    fill(200,0,0,200);
    stroke(255);
    textSize(80);
    textAlign(CENTER);
    text("COVID NINJA", (width/2)-20,(height/2)-180);
    
    fill(255);
    textSize(40);
    textAlign(CENTER);
    text("INSTRUCTIONS", (width/2)-20,(height/2)-100);
    
    textSize(30);
    textAlign(CENTER);
    text("Catch every object on the screen apart from the virus. \n If you catch the virus, you die. If you catch the clock, \n the time slows and the objects move slower. Use the cursor \n to catch the objects", (width/2),(height/2)-50); 
    text("PRESS ANY KEY TO START",(width/2), (height/2)+150);
    textAlign(BASELINE);
    
  }
  
  //condition to remove the start screen after keypressed
  if(keyPressed){
    startScreen = false;
  }
  
  //starting the game
  if(!startScreen){
    background(back);  
    //score change
    fill(255); textSize(30); text("SCORE: ", 40, 50);
    text(game.score, 150, 50);
    
    //x's turing red after every miss
    for(int i = 0; i < 10; i++){
      if(i < game.missed){ 
           fill(255,0,0); 
      } 
      else { 
            fill(220, 220, 220); 
          }
      textSize(40);
      text("x", width - 40 - (30*i), 50);
    }
    
    game.display();
    
    //restarting the game after game is over
    if(gameOver == true && keyPressed){
      game = new Game();
      frameRate(60);
      gameOver = false;
    }
  }
  
}

//setting up class covid with variables
class Covid {
  int x, y;
  float vy, g;
  boolean virus = false;
  boolean clock = false;
  PImage img;
  int img_w, img_h;
  
  Covid() {
    x = (int) random(150, width-150);
    y = 60;
    g = random(0.1,0.3);
    int selection = (int) random(1,60);
    if(selection < 8){
      selection = 6;
    } else if(selection < 10) {
      selection = 5;
    } else {
      selection = (selection%4) + 1;
    }
    img = loadImage(str(selection) + ".png");
    if(selection == 6){ 
      virus = true;
    }
    if(selection == 5){
      clock = true;
    }
    img_w = 100; img_h = 100;
  }
  
  void gravity() {
    vy = vy + g;
  }
  
  void update() {
    gravity();
    y += vy;
  }
  
  void display() {
    update();
    image(img, x, y, img_w, img_h);
  }
}

class Game {
  int difficulty;
  int score;
  int missed;
  int numCovidItems;
  boolean roundOver;
  Covid[] covid;
  
  //using the constructor
  Game() {
    difficulty = 1;
    score = 0;
    missed = 0;
    roundOver = true;
  }
  
  //defining method
  void updateCovid(){
    //increasing the number of objects 
    difficulty++;
    numCovidItems = difficulty;
    covid = new Covid[numCovidItems];
    for (int i=0; i<numCovidItems; i++){
      covid[i] = new Covid();
    }
  }
  
  //method display
  void display(){
    //condition for game over
    if(missed >= 10){
      // GAME OVER SCREEN
      if (gameOver == false){
        gameover.play();
      }
      gameOver = true;
      
      textSize(30);
      fill(255);
      text("PRESS ANY KEY TO RESTART.", (width/2)-200, height/2);
      
    } else {
      if(frame+150 < frameCount){
        frameRate(60);
      }
      if(roundOver == true){
        updateCovid();
        roundOver = false;
      }
      
      numCovidItems = difficulty;
      
      //making the objects disappear
      int killedobjs = 0;
      for (int i=0; i<numCovidItems; i++){
        if(covid[i] == null){
          killedobjs++;
        }        
      }
      if(killedobjs == numCovidItems){
        roundOver = true;
      }
  
      for (int i=0; i<numCovidItems; i++){
        // checks if object is missed
        if(covid[i] != null){
          if(covid[i].y > height) {
            if(!covid[i].virus) { missed++; }
            covid[i] = null;
          }
        }
        // checks if object is cut else displays
        if(covid[i] != null){
          if((covid[i].x <= (mouseX+50) && (mouseX-50) <= (covid[i].x + covid[i].img_w)) && (covid[i].y <= (mouseY+40) && (mouseY-50) <= (covid[i].y + covid[i].img_h))){
            if(covid[i].virus) { 
              missed = 11; 
              bomb.play();
            } else if (covid[i].clock) {
              covid[i] = null;
              frameRate(20);
              frame = frameCount;
            } else {
              covid[i] = null;
              score++;
              objects.amp(0.1);
              objects.play();
            }
          } else {
            covid[i].display();
          }
        }
      }
    }
  }
}


Midterm Progress (Covid Ninja) – Rhythm Kukreja

For our midterm project, we were tasked with making a game on Processing.

Inspiration

I was inspired by Fruit Ninja to make this kind of game. In fruit ninja, you slice fruits and avoid bombs.

Idea

My idea is to make a game that works similar to fruit ninja but instead of cutting fruits, we cut covid related things; like pills, vaccines, masks, etc and avoid cutting the virus. This game is called covid ninja.

Process

I started by assigning an X and Y variable that works for assigning the coordinates of the fruits. We want gravity in the covid objects, so we added randomize gravity between 0.1 and 0.5, which is further added with velocity to make it look like a free-falling object. Then, I will use a mouse pressed at the location of the object to slice the items. There will also be a slow time powerup which will come to a couple of times in the game for a few seconds to make the items go slower.

This is what the free-falling objects would look like for now:-

The code goes like this:-

int height = 720;
int width = 1040;

String[] covidType = {"mask", "sanitizer", "virus", "vaccine", "pills"};
Game game = new Game();

void setup(){
  size(1040, 720);
  background(0);
}

void draw(){
  background(0);
  game.display();  
}

class Covid {
  int x, y;
  float vy, g;
  PImage img;
  int img_w, img_h;
  
  Covid() {
    x = (int) random(150, width-150);
    y = 0;
    g = random(0.1,0.4);
    img = loadImage(str((int) random(1,6)) + ".png");
    img_w = 100; img_h = 100;
  }
  
  void gravity() {
    vy = vy + g;
  }
  
  void update() {
    gravity();
    y += vy;
  }
  
  void display() {
    update();
    image(img, x, y, img_w, img_h);
  }
}

class Game {
  int difficulty;
  int score;
  int missed;
  int numCovidItems;
  boolean roundOver;
  Covid[] covid;
  
  Game() {
    difficulty = 1;
    score = 0;
    missed = 0;
    roundOver = true;
  }
  
  void updateCovid(){
    numCovidItems = difficulty*3;
    covid = new Covid[numCovidItems];
    for (int i=0; i<numCovidItems; i++){
      covid[i] = new Covid();
    }
  }
  
  void display(){
    if(roundOver == true){
      updateCovid();
      roundOver = false;
    }
    numCovidItems = difficulty*3;
    for (int i=0; i<numCovidItems; i++){
      covid[i].display();
    }
  }
}


Week 4 Diner Advertisements – Rhythm Kukreja

Description:

Create a generative typography/text output.

Process:

In the beginning, I just wanted to play with letters and characters. I thought I would use noise to make a pattern as I did in my previous assignment, but randomness in this assignment suited better. So I started by writing a simple text message in the center of the screen, then I split the message into characters by using an array. Then I played around to make the characters randomly move around the screen, so it looked like the letter was flying in the air. This is what it looked like.

Then, this looked boring, so I decided to add the key pressed function into it. So every time I would press the key pressed, my name would appear. The name would change its color and randomly disappear making it look nice and interactive. This is what it looked like.

Overall, I would say I wanted to try some other things as well, but I did not know the process for some things, so in the end, I ended up experimenting and made this.

The final video looks like this:


This is the entire code:

// Intro to IM - Assignment #4
// Rhythm Kukreja (rk3781@nyu.edu)

//setting the variables below
String letter = "rhythmrhythmrhythm";
String letter2 = "RHYTHM";
PFont font;
float x,y;
float hr, vr;
float w = 40;
float h = 40;
float r = 100;
char[] charArray;


void setup(){
  frameRate(10);//reducing the framerate for the random effect in the beginning 
  size(640, 640);
  
  charArray = new char[letter.length()];//to separate the words by character
  for(int i=0; i<letter.length(); i++){
    charArray[i] = letter.charAt(i); 
  }

  background(255);
  hr = textWidth(letter) / 2;
  vr = (textAscent() + textDescent()) / 2;
  font = createFont("Courier New", 100, true);
  textFont(font);
  textAlign(CENTER);
 
   x = height/2;
   y = width/2;
}

void draw(){
  fill(0); 
  rect(0, 0, width, height);
  float xpos=0; float ypos=0;
  
  if (keyPressed){// the key is pressed we see the text that changes color and disappers
     for (int i = 0; i < letter2.length(); i++) {
      int flag = int(random(0,100));
      if(flag%2==1){
        fill(random(0,200), random(180,200), random(50,180));
      } else {
        fill(0);
      }
     text(letter2, width/2, ((i*100)+100));
    }
    
  } else {    //if key is not pressed, then we see characters flying around randomly
    fill(random(0,200), random(180,200), random(50,180));
    for(int i=0; i<letter.length(); i++){
      xpos = random(10,width-10); ypos = random(10,height-10);
      text(charArray[i], xpos, ypos);
    }
  }
}