Trio Exercises with Aya

In this week’s assignments, we were tasked with figuring out three different exercises to understand and practice serial communication between Arduino and P5js.

EXERCISE 1:

In this exercise we have to make an eclipse move across the p5js sketch using anything on the Arduino. For this we decided to use a potentiometer and an eclipse that gradually changes color along with it’s background.

Code:

/* Week 11.2 bidi serial example
 * Originally by Aaron Sherwood
 * Modified by Mangtronix
 *
 * Add this library to Sketch files
 *  https://github.com/mangtronix/IntroductionToInteractiveMedia/blob/master/code/p5.web-serial.js files
 *
 * You must include this line in your index.html (in Sketch Files) to load the
 * web-serial library
 *
 *     <script src="p5.web-serial.js"></script>
 *
 * Arduino code:
 * https://github.com/mangtronix/IntroductionToInteractiveMedia/blob/master/code/Week11Serial.ino
 */


let rVal = 0;
let alpha = 255;
let left = 0; // True (1) if mouse is being clicked on left side of screen
let right = 0; // True (1) if mouse is being clicked on right side of screen

function setup() {
  createCanvas(640, 480);
  textSize(18);
}

function draw() {
  // one value from Arduino controls the background's red color
  background(map(rVal, 0, 1023, 0, 255), 255, 255);
let ellipseX = map(rVal, 0, 1023, 0, width);
  ellipse(ellipseX, height / 2, 50, 50); // The ellipse's Y position is fixed at the center

  // the other value controls the text's transparency value
  fill(255, 0, 255, map(alpha, 0, 1023, 0, 255));

  if (!serialActive) {
    text("Press Space Bar to select Serial Port", 20, 30);
  } else {
    text("Connected", 20, 30);

  }


  // click on one side of the screen, one LED will light up
  // click on the other side, the other LED will light up
  if (mouseIsPressed) {
    if (mouseX <= width / 2) {
      left = 1;
    } else {
      right = 1;
    }
  } else {
    left = right = 0;
  }
}

function keyPressed() {
  if (key == " ") {
    // important to have in order to start the serial connection!!
    setUpSerial();
  }
}

// This function will be called by the web-serial library
// with each new *line* of data. The serial library reads
// the data until the newline and then gives it to us through
// this callback function
function readSerial(data) {
  ////////////////////////////////////
  //READ FROM ARDUINO HERE
  ////////////////////////////////////

  if (data != null) {
    // make sure there is actually a message
    // split the message
    let fromArduino = split(trim(data), ",");
    // if the right length, then proceed
    if (fromArduino.length == 2) {
      // only store values here
      // do everything with those values in the main draw loop
      
      // We take the string we get from Arduino and explicitly
      // convert it to a number by using int()
      // e.g. "103" becomes 103
      rVal = int(fromArduino[0]);
      alpha = int(fromArduino[1]);
    }

    //////////////////////////////////
    //SEND TO ARDUINO HERE (handshake)
    //////////////////////////////////
    let sendToArduino = left + "," + right + "\n";
    writeSerial(sendToArduino);
  }
}

//Arduino Code
/*
// Week 11.2 Example of bidirectional serial communication

// Inputs:
// - A0 - sensor connected as voltage divider (e.g. potentiometer or light sensor)
// - A1 - sensor connected as voltage divider 
//
// Outputs:
// - 2 - LED
// - 5 - LED

int leftLedPin = 2;
int rightLedPin = 5;

void setup() {
  // Start serial communication so we can send data
  // over the USB connection to our p5js sketch
  Serial.begin(9600);

  // We'll use the builtin LED as a status output.
  // We can't use the serial monitor since the serial connection is
  // used to communicate to p5js and only one application on the computer
  // can use a serial port at once.
  pinMode(LED_BUILTIN, OUTPUT);

  // Outputs on these pins
  pinMode(leftLedPin, OUTPUT);
  pinMode(rightLedPin, OUTPUT);

  // Blink them so we can check the wiring
  digitalWrite(leftLedPin, HIGH);
  digitalWrite(rightLedPin, HIGH);
  delay(200);
  digitalWrite(leftLedPin, LOW);
  digitalWrite(rightLedPin, LOW);


  // start the handshake
  while (Serial.available() <= 0) {
    digitalWrite(LED_BUILTIN, HIGH); // on/blink while waiting for serial data
    Serial.println("0,0"); // send a starting message
    delay(300);            // wait 1/3 second
    digitalWrite(LED_BUILTIN, LOW);
    delay(50);
  }
}

void loop() {
  // wait for data from p5 before doing something
  while (Serial.available()) {
    digitalWrite(LED_BUILTIN, HIGH); // led on while receiving data

    int left = Serial.parseInt();
    int right = Serial.parseInt();
    if (Serial.read() == '\n') {
      digitalWrite(leftLedPin, left);
      digitalWrite(rightLedPin, right);
      int sensor = analogRead(A0);
      delay(5);
      int sensor2 = analogRead(A1);
      delay(5);
      Serial.print(sensor);
      Serial.print(',');
      Serial.println(sensor2);
    }
  }
  digitalWrite(LED_BUILTIN, LOW);
}
*/

P5* Sketch:
Video:

EXERCISE 2:

For this exercise we were tasked with making an LED change brightness based on a p5js sketch, which we decided to make more interesting by taking inspiration from the sun and making a p5 sketch look like a sky.  The latter has moving clouds and a sun that changes based on the brightness which is controlled by the keyboard “up” and “down” keys which also control the LED brightness.

Code:

let brightness=0;
let cloud1X = 100;
let cloud2X = 40;
let cloud3X = 200;

function setup() {
  createCanvas(1000, 480);
  textSize(18);
}


function draw() {
  noStroke();
  background(135, 206, 235);
  fill(0);
  drawCloud(cloud1X, 60); // Cloud on the right of the sun
  drawCloud(cloud2X, 100); // Cloud below the sun
  drawCloud(cloud3X, 350); // Cloud at the bottom

  //Moves the clouds
  cloud1X += 1;
  cloud2X += 1;
  cloud3X += 1; 
  // Loop the clouds once they move off screen
  if (cloud1X > width + 30) {
    cloud1X = -60;
  }
  if (cloud2X > width + 30) {
    cloud2X = -60;
  }
  if (cloud3X > width + 30) {
    cloud3X = -60;
  }
  

  if (!serialActive) {
    text("Press Space Bar to select Serial Port", 20, 30);
  } else {
    text("Connected", 20, 30);
  }
  fill(255,255,0,brightness)
  circle(width/2-150,height/2-30, 100)
  fill(0)
  text("WATCH THE SUN LIGHT UP: "+str(brightness),width/2-50,height/2)
  text("UP to make the brightness higher, DOWN to make brightness dimmer ",width/2-220,height/2+50)

  if (keyIsPressed) {
    if (keyCode==UP_ARROW) {
      if (brightness<255){
        brightness+=5;
      }  
    } else if (keyCode==DOWN_ARROW) {
      if (brightness>0){
        brightness-=5;
      }
      
    }
  } 
}


function drawCloud(x, y) {
  fill(255);

  // Group of ellipses to form a cloud shape
  ellipse(x, y, 30, 30);
  ellipse(x + 20, y, 30, 30);
  ellipse(x - 20, y, 30, 30);
  ellipse(x - 20, y, 30, 30);
  ellipse(x + 10, y + 15, 30, 30);
  ellipse(x - 10, y + 15, 30, 30);
}
function keyPressed() {
  if (key == " ") {
    // important to have in order to start the serial connection!!
    setUpSerial();
  }
}

function readSerial(data) {
  if (data != null) {
    writeSerial(brightness+"\n");
  }
}
//ARDUINO
//int LedPin = 9;

//void setup() {
  // Start serial communication so we can send data
  // over the USB connection to our p5js sketch
  //Serial.begin(9600);

  // We'll use the builtin LED as a status output..
  //pinMode(LED_BUILTIN, OUTPUT);

  // Outputs on this pin
  //pinMode(LedPin, OUTPUT);

  // Blink them so we can check the wiring
 // digitalWrite(LedPin, HIGH);
 // delay(200);
 // digitalWrite(LedPin, LOW);

  // start the handshake
 //// while (Serial.available() <= 0) {
 //   digitalWrite(LED_BUILTIN, HIGH); // on/blink while waiting for serial data
  //  Serial.println("0"); // send a starting message
  //  delay(300);            // wait 1/3 second
  //  digitalWrite(LED_BUILTIN, LOW);
  //  delay(50);
////  }
//}

//void loop() {
  // wait for data from p5 before doing something
//  while (Serial.available()) {
 //   Serial.println("0");
 //   digitalWrite(LED_BUILTIN, HIGH); // led on while receiving data

 //   int brightness = Serial.parseInt();
 //   if (Serial.read() == '\n') {
  //    analogWrite(LedPin, brightness);
 //   }
 // }
 // digitalWrite(LED_BUILTIN, LOW);
//}

P5* sketch:

Video:

EXERCISE 3:

This exercise comes in two parts, part one is creating a circuit that can blink an LED every time that the ball bounces on the p5 sketch and the second part is making a circuit that controls the wind on the game and moves the ball depending on it and as a general theme and personal touch we choose to use a soccer ball and green background.

Part 1 and 2 code:

let velocity;
let gravity;
let posit5
let acceleration;
let wind;
let drag = 0.99;
let mass = 50;
let LED=0;
let wind_speed=0;
let ball;

function preload(){
  ball = loadImage('ball.png');
}

function setup() {
  createCanvas(640, 360);
  noFill();
  position = createVector(width/2, 0);
  velocity = createVector(0,0);
  acceleration = createVector(0,0);
  gravity = createVector(0, 0.5*mass);
  wind = createVector(0,0);
}

function draw() {
  background (34, 139, 34 );
  fill(0)
  if (!serialActive) {
    text("Press , RIGHT key to select Serial Port", 20, 30);
  } else {
    text("Connected", 20, 30);
  }
  applyForce(wind);
  applyForce(gravity);
  velocity.add(acceleration);
  velocity.mult(drag);
  position.add(velocity);
  acceleration.mult(0);
  fill(205,104,219); 
  imageMode(CENTER); // Ensures the image is centered on the position
  image(ball, position.x, position.y, mass, mass); // Draw the image
  if (position.y > height-mass/2) {
      velocity.y *= -0.9;  // A little dampening when hitting the bottom
      position.y = height-mass/2;
    }
  
  if (position.y==height-mass/2){
    LED=1
  }
  else{
    LED=0
  }
  
  if (position.x>=width || position.x<=0){
    position.x=width/2
  }
  
    
}

function applyForce(force){
  // Newton's 2nd law: F = M * A
  // or A = F / M
  let f = p5.Vector.div(force, mass);
  acceleration.add(f);
}

function keyPressed(){
  if (key==' '){
    
    mass=random(15,80);
    position.y=-mass;
    velocity.mult(0);
  }
  if (keyCode==RIGHT_ARROW){
    setUpSerial();
  }
}

function readSerial(data) {
  ////////////////////////////////////
  //READ FROM ARDUINO HERE
  ////////////////////////////////////

  if (data != null) {
    let fromArduino = trim(data);
    distance= int(fromArduino);
    if (distance>10){
      wind.x=2
    }
    else{
      wind.x=-2
    }
    
    let sendToArduino = LED+"\n";
    writeSerial(sendToArduino);
  }
}

//Arduino
// int LedPin = 9;
// int trigPin = 8;
// int echoPin = 10;
// long duration;
// int distance;

// void setup() {
//   // Start serial communication so we can send data
//   // over the USB connection to our p5js sketch
//   pinMode(trigPin, OUTPUT); 
//   pinMode(echoPin, INPUT);
//   Serial.begin(9600);
//   pinMode(LED_BUILTIN, OUTPUT);
//   // Outputs on these pins
//   pinMode(LedPin, OUTPUT);
//   // Blink them so we can check the wiring
//   digitalWrite(LedPin, HIGH);
//   delay(200);
//   digitalWrite(LedPin, LOW);
//   // start the handshake
//   while (Serial.available() <= 0) {
//     digitalWrite(LED_BUILTIN, HIGH); // on/blink while waiting for serial data
//     Serial.println("0,0"); // send a starting message
//     delay(300);            // wait 1/3 second
//     digitalWrite(LED_BUILTIN, LOW);
//     delay(50);
//   }
// }
// void loop() {
//   // wait for data from p5 before doing something
//   while (Serial.available()) {
//     digitalWrite(LED_BUILTIN, HIGH); // led on while receiving data
//     int LED = Serial.parseInt();
//     if (Serial.read() == '\n') {
//       digitalWrite(LedPin, LED);
//       digitalWrite(trigPin, LOW);
//       delayMicroseconds(2); 
//       digitalWrite(trigPin, HIGH);
//       delayMicroseconds(10);
//       digitalWrite(trigPin, LOW);
//       // Reads the echoPin, returns the sound wave travel time in microseconds
//       duration = pulseIn(echoPin, HIGH);
//       // Calculating the distance
//       distance = duration * 0.034 / 2;
//       Serial.println(distance);
//     }
//   }
//   digitalWrite(LED_BUILTIN, LOW);
// }

P5* Sketch:

Video:

Part 1:

Part 2:

Let’s Surf- Post IM Showcase Post

LET’S SURF!

Concept:

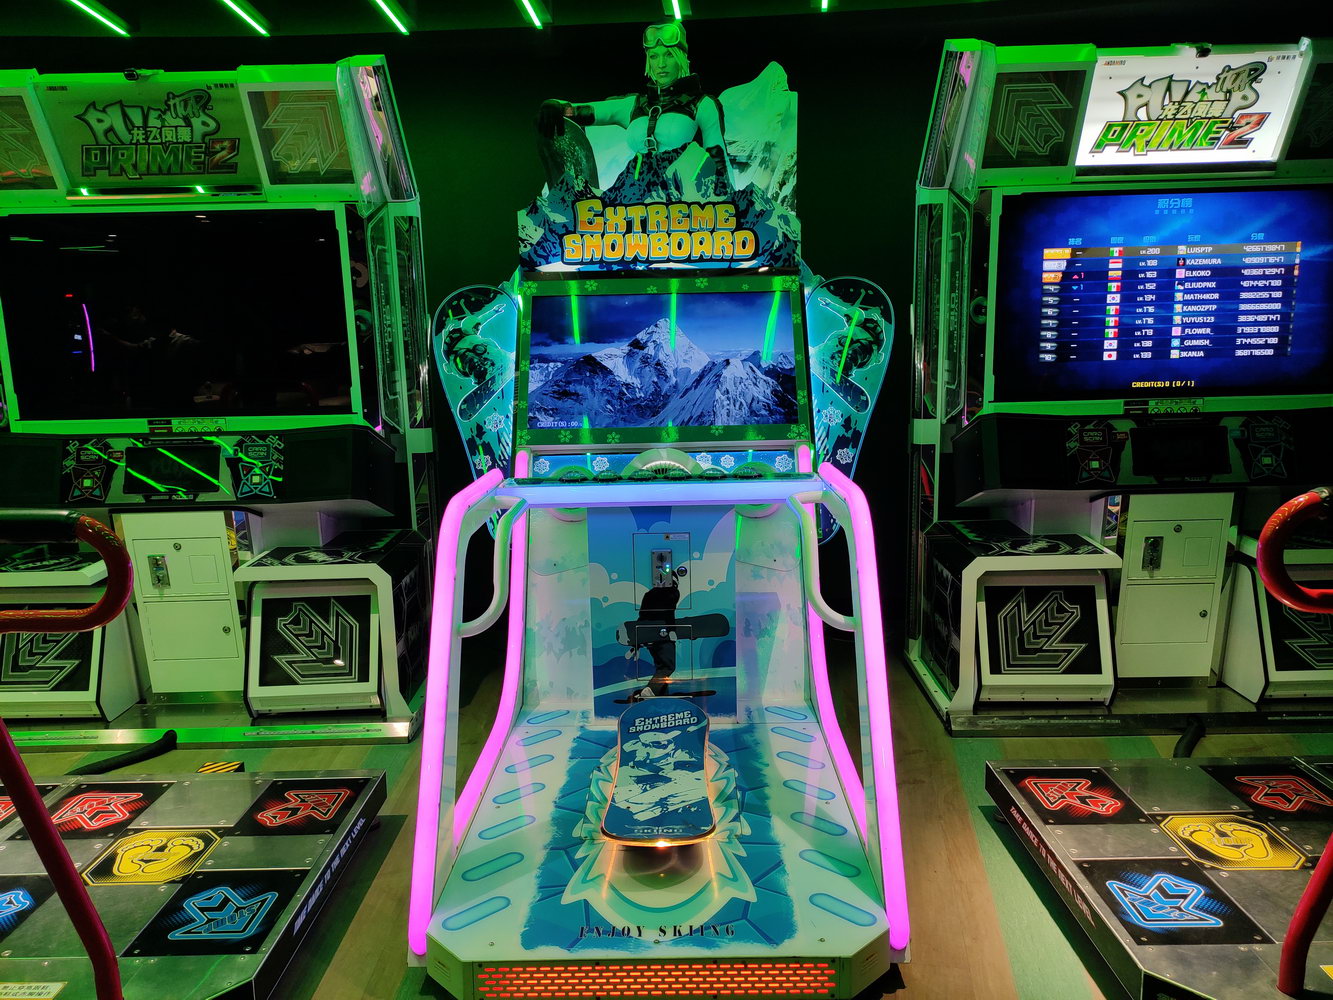
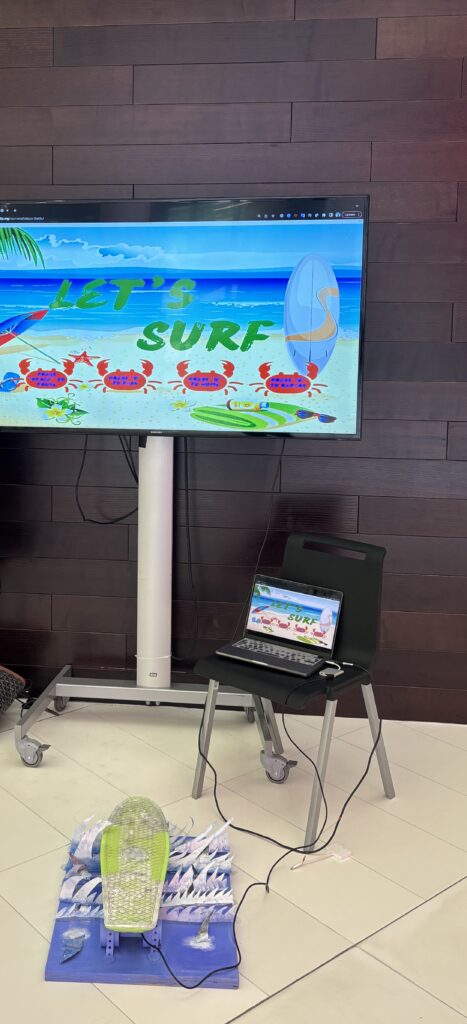
The end of an era! I’m proud to say that my game was a huge success and came out exactly how I envisioned it which was an immersive and interactive surfing simulator game. The idea came to me when I went to the arcade and saw a snowboarding game and it sparked my interest to know how it was made and if I could replicate it with something I enjoyed and miss which is surfing. The game uses a physical skateboard found in the IM lab equipped with an accelerometer to capture the player’s movements and mimics the snowboarding game actions, and a P5.js-based game that simulates surfing and where the user collects shells and avoids sharks (3 bites gets them killed) and the speed increases as the game goes on.

Inspiration:

Extreme Snowboard – Toggi Fun World

Results:

Circuit:

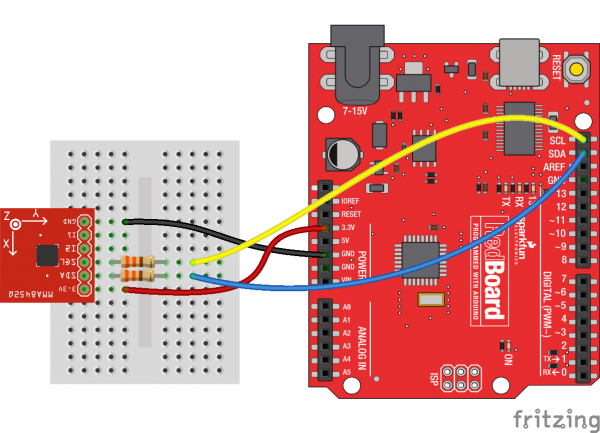
Schematic:

MMA8452Q Hookup Fritzing Diagram


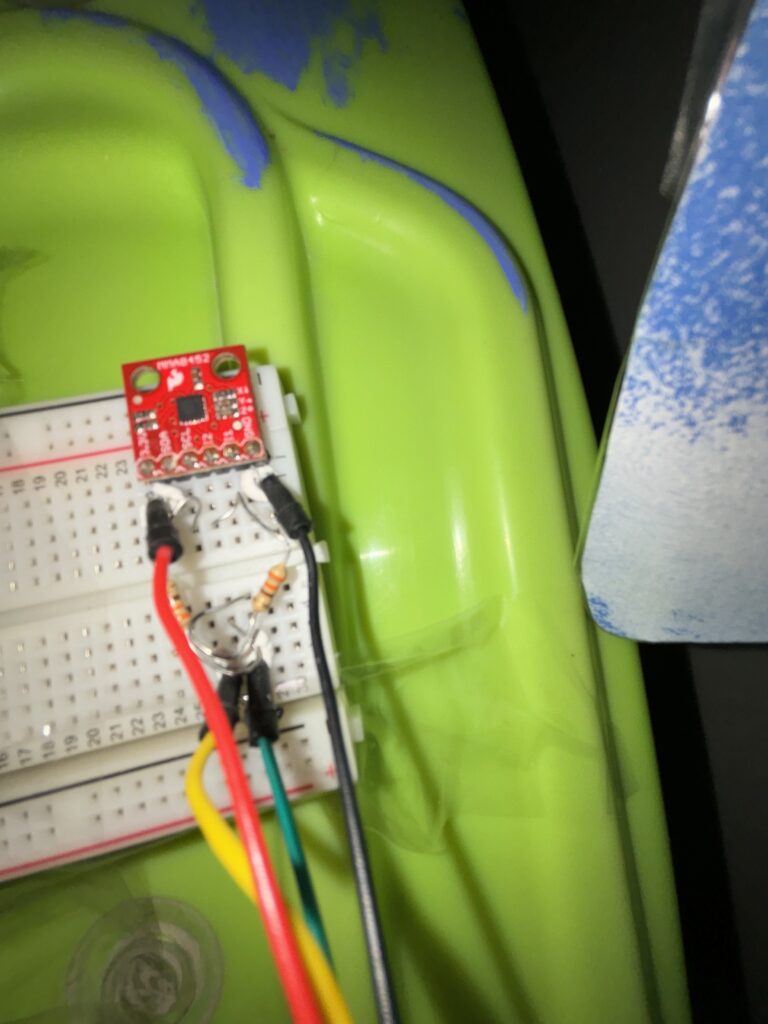
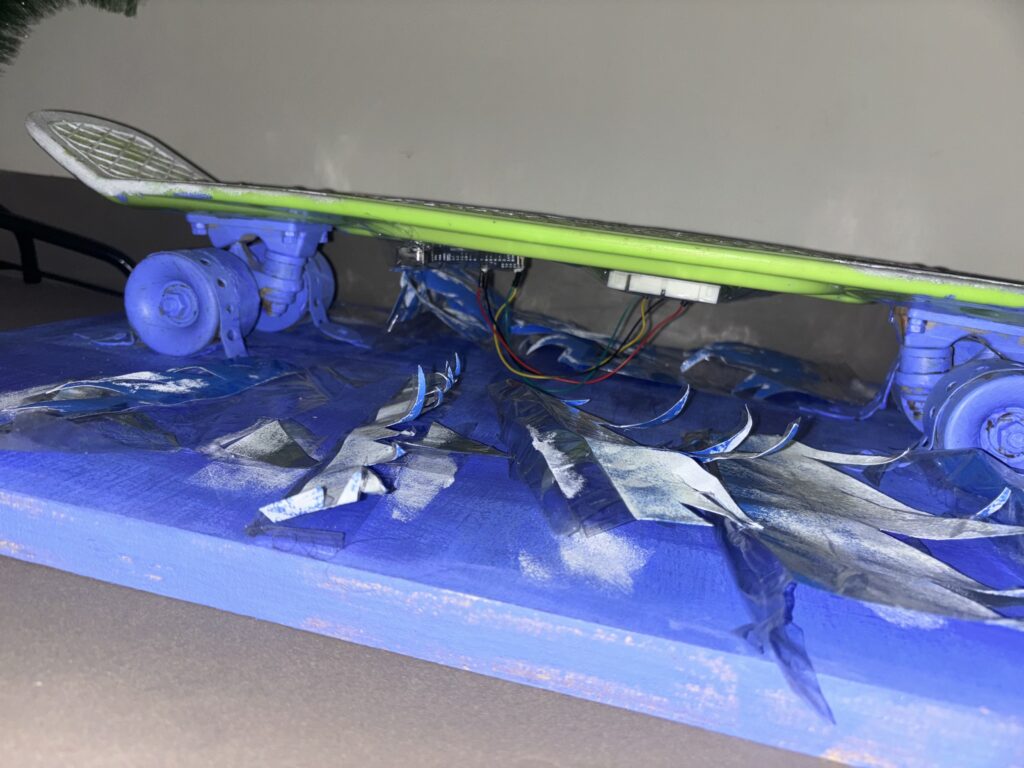
Real-life:


In Action:

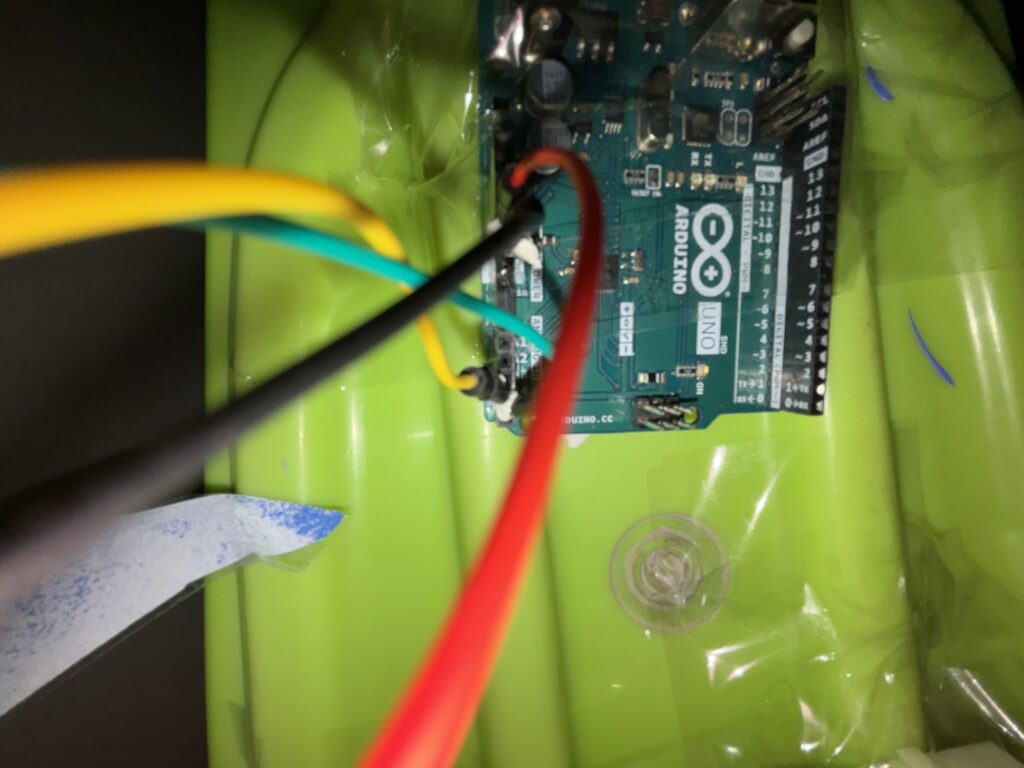
Arduino Setup
  • Hardware: The core of the physical interaction is an accelerometer (like the MMA8452Q) mounted on a skateboard. This sensor detects the angle and intensity of the skateboard’s tilt.
  • Arduino Sketch:
    • Setup(): Initializes serial communication at a specific baud rate and sets up the accelerometer.
    • Loop(): Continuously reads the X and Y-axis data from the accelerometer. This data is formatted into a string (e.g., “X,Y”) and sent over serial communication to the P5.js sketch. Additionally, the sketch listens for incoming data from P5.js, which could be used for future features like haptic feedback based on game events.

Code:

// Define variables for images, screens, sounds, buttons, game state, and other parameters
let bgImage, bgImage2, catImage, sharkImage, shellImage; // Images for background, cat, shark, and shell
let welcomeScreen, instructionScreen, countdownScreen, gameOverScreen; // Images for different game screens
let bgSound, collectedSound, sharkBiteSound; // Sound effects for background, collecting items, and shark bite

let replayButton, homeButton, pauseButton; // Buttons for replay, home, and pause (not implemented in the code)
let catY, sharks = [], shells = []; // Y position of the cat, arrays for sharks and shells
let bgX1 = 0, bgX2, speed = 4, hits = 0, score = 0; // Background positions, game speed, hit count, and score
let waterLevel; // Level of the water in the game
let gameState = 'welcome'; // Current state of the game (e.g., welcome, play, paused)
let countdownValue = 3; // Countdown value before the game starts
let accelerometerX, accelerometerY; // Variables to store accelerometer values (for physical device interaction)

let left = 50; // Value to be sent to Arduino 

let right = -50; // Value to be sent to Arduino 

// Preload function to load images and sounds before the game starts
function preload() {
  // Load images
  bgImage = loadImage('background.png');
  bgImage2 = loadImage('background2.png');
  catImage = loadImage('cat.png');
  sharkImage = loadImage('shark.png');
  shellImage = loadImage('seashell.png');
  welcomeScreen = loadImage('welcome screen.png');
  instructionScreen = loadImage('instruction screen.png');
  countdownScreen = loadImage('countdown screen.png');
  gameOverScreen = loadImage('game over screen.png');

  // Setup sound formats and load sound files
  soundFormats('wav');
  bgSound = loadSound('background sound.wav');
  collectedSound = loadSound('collected.wav');
  sharkBiteSound = loadSound('shark bite.wav');
}

// Function to read data from a serial connection (presumably from an Arduino)
function readSerial(data) {
  // Check if the data is not null
  if (data != null) {
    let fromArduino = split(trim(data), ",");
    if (fromArduino.length == 2) { // Ensure the data has two parts (X and Y)
      accelerometerX = int(fromArduino[0]); // Parse X value
      console.log(accelerometerX); // Log X value (for debugging)
      accelerometerY = int(fromArduino[1]); // Parse Y value
      console.log(accelerometerY); // Log Y value (for debugging)
    }
  }
  let sendToArduino = left + "," + right + "\n"; // Prepare data to send back to Arduino
  console.log('writing'); // Log writing action (for debugging)
  writeSerial(sendToArduino); // Send data to Arduino (writeSerial function not provided in the code)
}

// Setup function runs once when the program starts
function setup() {
  createCanvas(windowWidth, windowHeight); // Create a canvas that fills the window
  catY = height / 2; // Set initial Y position of the cat
  waterLevel = height / 2.5; // Set water level position
  bgX2 = width; // Set initial position of the second background image
  bgSound.loop(); // Play background sound in a loop
}

// Draw function continuously executes the lines of code contained inside its block
function draw() {
  clear(); // Clear the canvas
  displayScreenBasedOnState(); // Call function to display the appropriate screen based on the game state
}

// Function to display the current screen based on the game's state
function displayScreenBasedOnState() {
  // Use a switch statement to handle different game states
  switch (gameState) {
    case 'welcome':
      image(welcomeScreen, 0, 0, width, height); // Display welcome screen
      break;
    case 'instructions':
      image(instructionScreen, 0, 0, width, height); // Display instructions screen
      break;
    case 'countdown':
      image(countdownScreen, 0, 0, width, height); // Display countdown screen
      displayCountdown(); // Call function to display countdown
      break;
    case 'play':
      playGame(); // Call function to play the game
      break;
    case 'paused':
      fill(173, 216, 230, 130); // Set color for pause screen overlay
      rect(0, 0, width, height); // Draw rectangle overlay
      fill(255); // Set color for text (white)
      textSize(48); // Set text size
      textAlign(CENTER, CENTER); // Set text alignment
      text("Game Paused", width / 2, height / 2); // Display pause text
      break;
    case 'gameOver':
      image(gameOverScreen, 0, 0, width, height); // Display game over screen
      noLoop(); // Stop the draw loop, effectively pausing the game
      break;
  }
}

// Function to display the countdown before the game starts
function displayCountdown() {
  fill(255); // Set color for text (white)
  textSize(70); // Set text size
  textAlign(CENTER, CENTER); // Set text alignment
  text(countdownValue, width / 2, height / 2); // Display countdown number

  // Decrease countdown value every second
  if (frameCount % 60 === 0 && countdownValue > 0) {
    countdownValue--;
  } else if (countdownValue === 0) {
    gameState = 'play'; // Change game state to play when countdown reaches 0
    countdownValue = 3; // Reset countdown value for next time
  }
}

// Function to handle the gameplay
function playGame() {
  backgroundScrolling(); // Call function to scroll the background
  displayCat(); // Call function to display the cat
  handleSharks(); // Call function to handle sharks
  handleSeashells(); // Call function to handle seashells
  displayScore(); // Call function to display the score
  increaseDifficulty(); // Call function to increase game difficulty over time
}

// Function to handle background scrolling
function backgroundScrolling() {
  image(bgImage, bgX1, 0, width, height); // Draw the first background image
  image(bgImage2, bgX2, 0, width, height); // Draw the second background image
  bgX1 -= speed; // Move the first background image leftward
  bgX2 -= speed; // Move the second background image leftward

  // Reset background positions for continuous scrolling effect
  if (bgX1 <= -width) bgX1 = bgX2 + width;
  if (bgX2 <= -width) bgX2 = bgX1 + width;
}

// Function to display the cat character
function displayCat() {
  // Move the cat up or down based on key presses or accelerometer data
  if (keyIsDown(UP_ARROW) || keyIsDown(85)) catY -= 5; // Move up with UP_ARROW or 'U' key
  if (keyIsDown(DOWN_ARROW) || keyIsDown(68)) catY += 5; // Move down with DOWN_ARROW or 'D' key
  catY = accelerometerY + 500; // Position cat based on accelerometer data
  catY = constrain(catY, waterLevel, height - 100); // Constrain cat's movement within the canvas
  image(catImage, 50, catY, 125, 125); // Draw the cat image at the calculated position
}

// Function to handle sharks in the game
function handleSharks() {
  // Generate new sharks at regular intervals
  if (frameCount % 150 === 0) {
    let sharkY = random(waterLevel - 1, height - 90); // Random Y position for sharks
    sharks.push({ x: width, y: sharkY }); // Add new shark to the sharks array
  }

  // Loop through all sharks and update their positions
  for (let i = sharks.length - 1; i >= 0; i--) {
    let shark = sharks[i];
    shark.x -= speed; // Move shark leftward
    image(sharkImage, shark.x, shark.y, 300, 300); // Draw shark image

    // Check for collision between cat and shark
    if (dist(30, catY, shark.x, shark.y) < 84) {
      hits++; // Increase hits count
      sharkBiteSound.play(); // Play shark bite sound
      sharks.splice(i, 1); // Remove the collided shark from the array
      if (hits >= 3) {
        gameState = 'gameOver'; // End the game after 3 hits
      }
    }
  }
}

// Function to handle seashells in the game
function handleSeashells() {
  // Generate new seashells at regular intervals
  if (frameCount % 300 === 0) {
    let shellY = random(waterLevel + 100, height - 70); // Random Y position for seashells
    shells.push({ x: width, y: shellY }); }// Add new shell to the shells array
   // Loop through all seashells and update their positions
  for (let i = shells.length - 1; i >= 0; i--) {
    let shell = shells[i];
    shell.x -= speed; // Move shell leftward
    image(shellImage, shell.x, shell.y, 50, 50); // Draw shell image

    // Check for collision between cat and shell
    if (dist(50, catY + 62.5, shell.x, shell.y) < 100) {
      score++; // Increase score
      shells.splice(i, 1); // Remove the collected shell from the array
      collectedSound.play(); // Play sound upon collecting a shell
    }
  }
}

// Function to display the game score
function displayScore() {
  fill(255); // Set text color to white
  textSize(27); // Set text size
  text('Score: ', 70, 30); // Display "Score: "
  text(score, 150, 30); // Display the current score
  image(shellImage, 110, 11, 30, 30); // Display shell icon next to score

  text('Bitten: ', 70, 68); // Display "Bitten: "
  text(hits, 150, 70); // Display the number of times the cat has been bitten
  image(sharkImage, 73, 17, 100, 100); // Display shark icon next to hits
}

// Function to gradually increase the difficulty of the game
function increaseDifficulty() {
  if (frameCount % 500 === 0) speed += 0.5; // Increase the speed of the game every 500 frames
}

// Function to toggle the game's pause state
function togglePause() {
  if (gameState === 'play') {
    gameState = 'paused'; // Change game state to paused
    noLoop(); // Stop the draw loop, effectively pausing the game
  } else if (gameState === 'paused') {
    gameState = 'play'; // Resume playing the game
    loop(); // Restart the draw loop
  }
}

// Function that handles key press events
function keyPressed() {
  if (key === 'u') { // If 'u' is pressed, set up serial communication
    setUpSerial(); // Function to set up serial communication (not provided in the code)
    console.log('u clicked'); // Log action for debugging
  }
  else if (keyCode === 32) { // If space bar is pressed, toggle pause
    togglePause();
  } else if (keyCode === 82) { // If 'R' is pressed, reset the game
    resetGame();
  } else if (keyCode === 72) { // If 'H' is pressed, go to home screen
    homeGame();
  } else if (key === 'p' || key === 'P') { // If 'P' is pressed, proceed to the next game state
    if (gameState === 'welcome') {
      gameState = 'instructions';
    } else if (gameState === 'instructions') {
      gameState = 'countdown';
    }
  }
}

// Function to reset the game to its initial state
function resetGame() {
  sharks = []; // Clear the sharks array
  shells = []; // Clear the shells array
  score = 0; // Reset score to 0
  hits = 0; // Reset hits to 0
  catY = height / 2; // Reset the cat's position to the middle
  gameState = 'countdown'; // Change the game state to countdown
  countdownValue = 3; // Reset the countdown value
  loop(); // Restart the draw loop
}

// Function to return to the game's home screen
function homeGame() {
  sharks = []; // Clear the sharks array
  shells = []; // Clear the shells array
  score = 0; // Reset score to 0
  hits = 0; // Reset hits to 0
  catY = height / 2; // Reset the cat's position to the middle
  gameState = 'welcome'; // Change the game state to welcome
  countdownValue = 3; // Reset the countdown value
  loop(); // Restart the draw loop
}

// Function to handle window resizing
function windowResized() {
  resizeCanvas(windowWidth, windowHeight); // Resize the canvas to the new window size
}

//ARDUINO CODE
// #include <Wire.h>
// #include <SparkFun_MMA8452Q.h>  // Include the SparkFun MMA8452Q accelerometer library

// MMA8452Q accel;  // Create an instance of the MMA8452Q class

// void setup() {
//   Serial.begin(9600);
//   Wire.begin();  // Initialize I2C communication
  

//   if (accel.begin() == false) {  // Initialize the accelerometer
//     Serial.println("Not Connected. Please check connections and restart the sketch.");
//     while (1);
//   }
  
//   // Start the handshake
//   while (Serial.available() <= 0) {
    
//     Serial.println("0,0");           // Send a starting message to p5.js
//     delay(300);                      // Wait for a bit
//   }
// }

// void loop() {
//   // If there is data from p5.js, read it and blink the LED
//   if (Serial.available()) {

//     // Read the incoming data from p5.js
//     int left = Serial.parseInt();
//     int right = Serial.parseInt();


//   }

//   // Read data from the accelerometer
//   if (accel.available()) {
//     accel.read();  // Read the accelerometer data
//     int x = accel.getX();  // Get the X-axis data
//     int y = accel.getY();  // Get the Y-axis data
//     int z = accel.getZ();  // Get the Z-axis data

//     // Send the accelerometer data to p5.js
//     Serial.print(x);
//     Serial.print(",");
//     Serial.println(y);
//   }

//   delay(100);  // Delay before the next loop iteration
// }
P5.js:
  • Game Environment: The game features various interactive elements – a cat character, shark obstacles, collectible seashells, and a scrolling background to simulate underwater movement.
  • Control Mechanism: The game interprets the serial data received from the Arduino as control commands for the cat character. The X and Y values from the accelerometer dictate the cat’s vertical position on the screen.
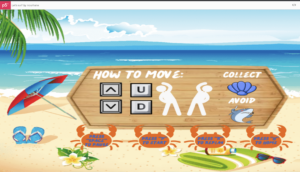
  • Game States: Includes multiple states like ‘welcome’, ‘instruction’, ‘play’, ‘pause’, and ‘game over’, each managed by different functions and displaying appropriate screens.
  • Game Dynamics:
    • Sharks appear at random intervals and positions. Collisions between the cat and sharks result in a ‘hit’.
    • Seashells also appear randomly and can be collected for points.
    • The game’s difficulty increases over time by gradually speeding up the background scroll and the frequency of obstacles.
Interaction Design:
  • Physical Interaction: The player stands on the skateboard. By tilting the board, they control the cat’s vertical position. The degree of tilt corresponds to the direction of the cat’s movement.
  • Visual and Auditory Feedback: The game provides immediate visual responses to the player’s actions. Collecting shells and colliding with sharks triggers distinct sound effects.
Communication Between Arduino and P5.js:
  • Serial Communication: Utilizes the P5.serialport library. The Arduino sends accelerometer data, which P5.js receives, parses, and uses for gameplay control.
  • Data Format and Handling: The data is sent as a comma-separated string of X and Y values (e.g., “45,-10”). P5.js parses this string and maps these values to the cat’s movement.
Highlights:
  • Innovative Control Mechanism: The use of a skateboard with an accelerometer as a game controller stands out as a unique feature. This approach not only adds a physical dimension to the gaming experience but also encourages physical activity.
  • Responsive and Intuitive Gameplay: One of the key successes of the project is the fluid responsiveness of the game to the skateboard’s movements. The calibration of the accelerometer was fine-tuned to ensure that even subtle tilts are accurately reflected in the game, providing an intuitive control system that players can easily adapt to.
  • Engaging Game Environment: The theme complete with sharks, seashells, and a dynamic background, creates a visually appealing and engaging world. This immersive setting, combined with sound effects for different interactions (like collecting shells and shark encounters), enriches the gaming experience.
Challenges:
  • Calibrating the Accelerometer: One of the main challenges was calibrating the accelerometer to accurately reflect the skateboard’s movements in the game. This required extensive testing and adjustments to ensure that the data from the accelerometer translated into appropriate movements of the cat character without being overly sensitive or unresponsive.
  • Understanding Accelerometer Usage: Learning to effectively use the accelerometer was a considerable challenge. It involved understanding the principles of motion and tilt detection, and then implementing this understanding in code that could accurately interpret and utilize the data.
  • Serial Communication Issues: Ensuring consistent and error-free serial communication between the Arduino and P5.js was a significant challenge. This involved not only setting up the communication channel but also ensuring that the data was sent, received, and parsed correctly, without any loss or corruption.
Future Ideas:
  • Multiplayer Capability: Adding a multiplayer option could transform the game into a more social and competitive experience, possibly even allowing for collaborative play.
  • Enhanced Physical Design: Improving the skateboard’s design for increased stability, comfort, and safety would make the game more accessible to a wider range of players.
  • Adding Levels: Implementing difficulty levels based on the player’s performance could make the game more engaging and challenging for players of all skill levels.
  • Haptic Feedback Integration: Incorporating haptic feedback on the skateboard based on game events could significantly enhance the immersive quality of the game.
  • High Score: Adding a high score in the end in order to keep track of everyone’s score so that they can keep trying to beat it.


Following the showcase, I am just extremely satisfied and proud of my entire game and how it turned out because a lot of people really loved and enjoyed it a lot and kept returning to try to beat their score again and even if it drove me crazy several times I’m so glad that I persevered and made something that I’m proud of.

References:

https://learn.sparkfun.com/tutorials/mma8452q-accelerometer-breakout-hookup-guide


User Testing-Nourhane Sekkat- Let’s Surf

Initially, users couldn’t believe that the skateboard controls the game since for them it was impossible to make that as a student and so they try to use the keyboard keys to control the game and when they see that it doesn’t work they get up on the skateboard with still a lot of reluctancy and asking me several times if it’s safe and if it works and if that’s what they should do (even though I have the exact instructions of what they should do in the screen but I think having using keys on the screen instructions is also what caused this confusion since the reason I added it was in order to make the game usable even without the Arduino but once the Arduino is connected it stops the keys from working). Once they start playing they are impressed and start asking all kinds of questions about how I did it especially because I hid the circuit so well so they didn’t realize that was how it worked until I explain it. I think for the future I could add more specific instructions telling users to check whether the game is physical or online or maybe even a how to video. The game once explained is very self explanatory since I give them time to get used to the board and how to use it before the sharks start appearing. What i feel like I have to explain the most tho is just the direction to tilt to go to what direction but i don’t think there’s a way to make it better since it depends on what side people choose to stand which makes their instructions specific for them.

Week 12: Final Idea of Final project

Concept Overview

My final project idea is to develop an immersive and interactive surfing simulator game. The idea came to me when I went to the arcade and saw a snowboarding game and it sparked my interest to know how it was made and if I could replicate it with something I enjoyed and miss which is surfing. This game will use a physical skateboard found in the IM lab equipped with an accelerometer to capture the player’s movements, and a P5.js-based game that simulates a surfing and will have the concept of collecting and avoiding.

Inspo:

Extreme Snowboard – Toggi Fun World

Components

1. Arduino Setup:
Hardware: A skateboard with an accelerometer attached to its bottom. The accelerometer will detect tilt and motion, translating the player’s physical movements into digital inputs.

Functionality: The Arduino will continuously read the accelerometer data to determine the orientation and motion of the skateboard. This data will be sent to the P5.js game to control the virtual surfer’s movements.

2. P5.js Game Development:
Visual Interface: A surfing game created in P5.js, displaying a cat surfer surfing through the ocean. The game will have an avoiding and collecting concept.

Game Mechanics: The game will respond to the skateboard’s movements, controlling the surfer’s actions like speeding up, slowing down, turning, and performing tricks.

Feedback and Scoring: Visual and auditory feedback will be provided based on the player’s performance, along with a scoring system and life left.

3.Interaction Flow:
– The player stands on the skateboard and starts the game through a simple interface.
– As the player tilts and moves the skateboard, the accelerometer sends this data to the Arduino.
– The Arduino processes these movements and sends corresponding commands to the P5.js game.
– The game responds in real-time, translating these movements into the surfer’s actions on the screen.
– The player receives visual and audio feedback from the game, creating an engaging loop of action and response.

4.Design Considerations:
Responsiveness: Ensuring that it doesn’t feel or look shaky between physical movements and digital responses for a seamless experience.
User Safety: Designing the physical setup to be safe and stable for users of different skill levels.
Game Challenge: Balancing the game difficulty to be both fun and challenging, encouraging players to improve their skills.
Aesthetic Appeal: Creating an attractive and immersive game environment that enhances the overall experience.

5.Potential Challenges:
– Ensuring accurate and consistent data transmission from the accelerometer to the game.
– Balancing the physical skateboard movements with the digital game mechanics for a realistic surfing experience.
– Optimizing the game’s performance to prevent lag or glitches that could disrupt the immersive experience.

Conclusion
This project aims to create a novel gaming experience that blends physical activity with digital interaction, using Arduino and P5.js. It not only introduces a new way to play and enjoy a surfing game but also encourages physical movement, making gaming a more active experience.

Week 11 Final project idea

My final project idea is to develop an immersive and interactive surfing simulator game. The idea came to me when I went to the arcade and saw a snowboarding game and it sparked my interest to know how it was made and if I could replicate it with something I enjoyed and miss which is surfing. This game will use a physical skateboard found in the IM lab equipped with an accelerometer to capture the player’s movements, and a P5.js-based game that simulates a surfing and will have the concept of collecting and avoiding.


This is the inspiration below:

Extreme Snowboard – Toggi Fun World

Week 11- Nourhane’s Reading Response

Reading Graham Pullin’s “Design Meets Disability” was like opening a window to a new world of possibilities in design. Pullin’s approach is transformative, merging concepts like simplicity, universality, exploratory problem-solving, fashion, and discretion into a cohesive vision for disability aids. He challenges the traditional, function-first mindset and proposes a more inclusive, style-conscious approach, arguing that assistive devices should be as much a statement of personal style as they are functional.

Pullin’s ideas are inspiring, urging us to think beyond the conventional. He’s not just talking about making things easier to use but also about embracing the diversity of users. His call for a blend of aesthetics and functionality in design resonates with me. It’s a fresh take that adds dignity and choice to the equation, offering people with disabilities more than just practical solutions but also products they can feel good about using.

However, as a student thinking critically, I see challenges in Pullin’s vision. His idealistic approach makes me wonder about the real-world implications. How do we balance these ambitious design goals with practical constraints like cost, manufacturing complexities, and the varied needs of individuals with disabilities? It’s one thing to dream of stylish, universally accessible designs, but another to implement them in a way that’s affordable and accessible to all.

“Design Meets Disability” has definitely broadened my understanding of what design can and should do. It’s pushed me to think about how we can make the world more inclusive through thoughtful design. But it’s also left me with questions about the balance between idealism and feasibility. How do we make these innovative designs a reality for everyone who needs them, not just those who can afford them? It’s a challenging question, and Pullin’s book is a compelling starting point for this important conversation.

Week 10 reading response- Nourhane Sekkat

In Bret Victor’s “A Brief Rant on the Future of Interaction Design,” he advocates for a more comprehensive approach to technology design, one that surpasses the conventional focus on visual stimuli. He highlights the necessity of integrating multiple sensory inputs, such as touch, sound, and perhaps even smell, to create a more immersive and human-centric experience. This perspective challenges the current trend in technology that heavily relies on visual elements, often neglecting other senses that could enrich the user’s interaction with digital environments.

Victor’s call for a balance in sensory engagement in technology design underlines the importance of harmony in user experience. By harmonizing different sensory inputs, designers can create more intuitive and natural interfaces that resonate with the user’s innate human capabilities. This balance would not only enhance usability but also foster a deeper connection between users and their technological tools, making technology more accessible and enjoyable.

Moreover, the pursuit of this balance in design philosophies raises several pertinent questions. How can designers effectively integrate different sensory modalities without overwhelming the user? What are the implications of such a balanced approach for users with sensory impairments? How will this shift impact the future trajectory of technology design, particularly in fields like virtual reality, gaming, and educational tools?

Victor’s ideas, although possibly viewed as idealistic, serve as a crucial reminder of the untapped potential in interaction design. They encourage designers and technologists to think beyond the current paradigms and explore innovative ways to make technology more human, not just in function but in experience. This reflection not only broadens our understanding of what interaction design could be but also inspires a more thoughtful and inclusive approach to technology development.

Musical Instrument (Nourhane & Aya)

Concept:

Finding a concept for this assignment was complicated. We had a couple of cool ideas at the beginning, like using soda cans as drums, but unfortunately, their implementation didn’t go as planned.  We decided  in the end to use our favorite part of the kit: the ultrasonic sensor, and get a concept out of it.

Both our previous assignments used ultrasonic sensors as distance detectors. So we thought to base this assignment on the same concept.

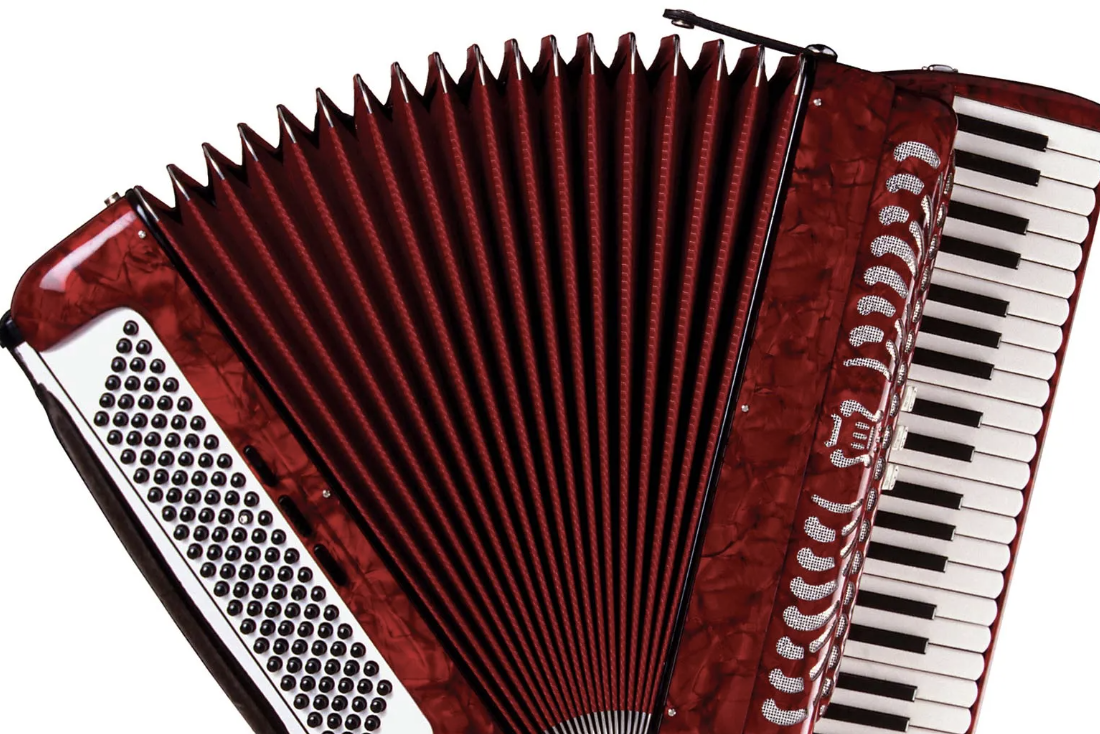
We were inspired by the Accordion instrument when designing this musical instrument (with a twist):


With a plastic spiral, we mimicked the same movement of an accordion to produce different notes. The different notes are being produced by the distance between the hand and the sensor. We have assigned a different note to each range of distances. The instrument has a switch on the circuit to turn it on or off.

Here is a video of it in action to understand better:

IMG_8161-2

Code:

Again, assembling the circuit was a challenging task, but we managed to make it work! The code is straightforward and includes an ultrasonic sensor and a switch and loop function repeatedly used. The ultrasonic sensor to measure the distance to an object then converts this distance to centimeters based on the speed of sound. Depending on these values, we determine whether to play a musical note. If the distance is outside our defined range or the force is below our certain threshold, we make sure to stop playing the note. Otherwise, if enough force is applied then the distance is matched to the value in an array of musical notes based on distance and plays it using a piezo buzzer.


int trig = 10;
int echo = 11;
long duration;
long distance;
int force;

void setup() {
  pinMode(echo, INPUT);

  pinMode(trig, OUTPUT);

  Serial.begin(9600);
}

void loop() {
  digitalWrite(trig, LOW); //triggers on/off and then reads data
  delayMicroseconds(2);
  digitalWrite(trig, HIGH);
  delayMicroseconds(10);
  digitalWrite(trig, LOW);
  duration = pulseIn(echo, HIGH);
  distance = (duration / 2) * .0344;    //344 m/s = speed of sound. We're converting into cm


  int notes[7] = {261, 294, 329, 349, 392, 440, 494}; //Putting several notes in an array
  //          mid C  D   E   F   G   A   B

  force = analogRead(A0); //defining force as FSR data


  if (distance < 0 || distance > 50 || force < 100) { //if not presed and not in front

    noTone(12); //dont play music

  }

  else if ((force > 100)) {  //if pressed

    int sound = map(distance, 0, 50, 0, 6);  //map distance to the array of notes
    tone(12, notes[sound]);  //call a certain note depending on distance

  }


}

Reflection:

In future iteration i would love to make it look more like an accordion and also sound like it more, since for now the notes don’t sound as musical as I would like. However in the end i love this simple version of it that does the job really well and looks very cute.

Hot or Cold?

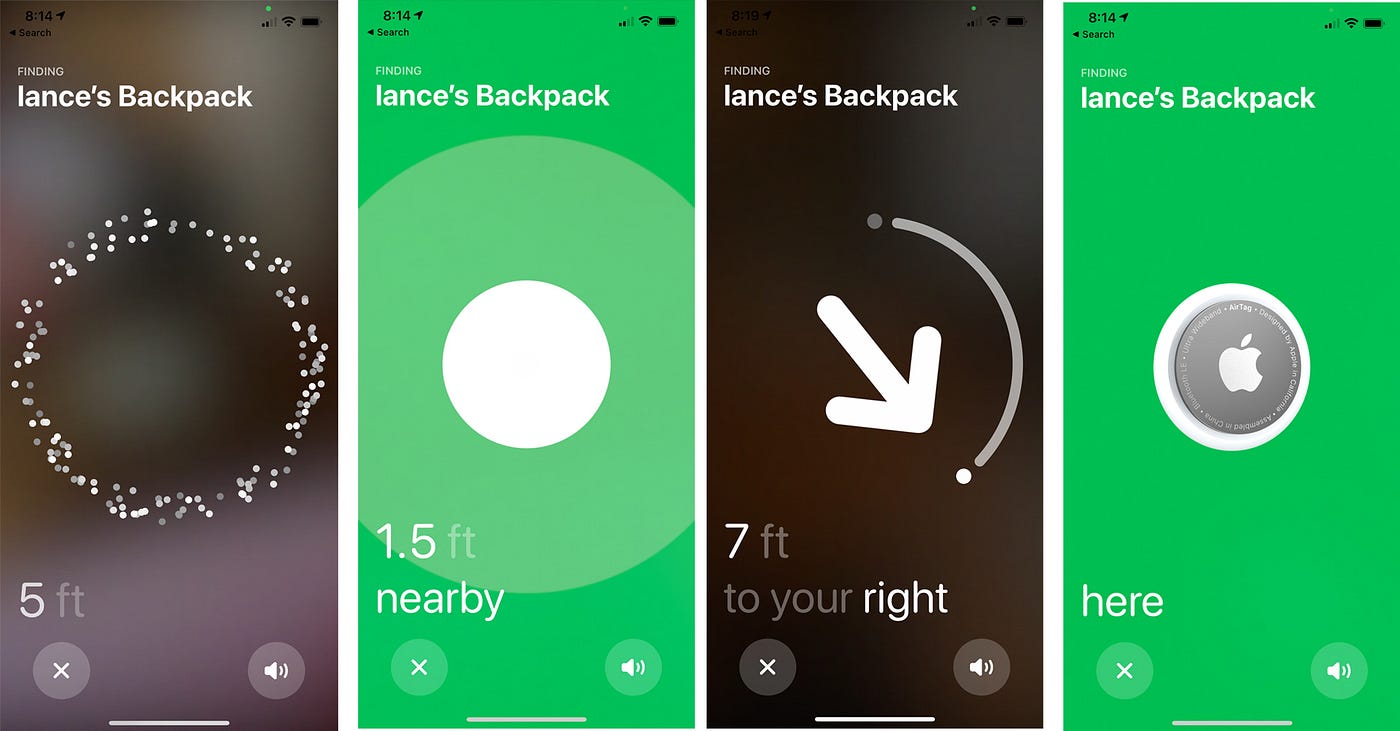
Who doesn’t love a classic game of hot or cold? Simple yet so fun and played for generations. Which is exactly why I felt like it was time for an update. Inspired by the apple AirTag and its precision proximity, I created my own little simpler version of it.

Inspiration:

Apple AirTags: What You Need to Know | by Lance Ulanoff | Debugger


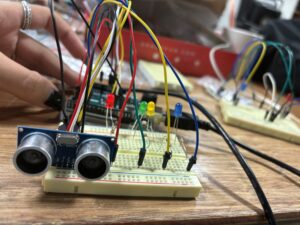
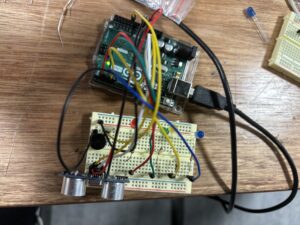
My version:

In Action:

IMG_9190


Process:

Before settling down with this idea as my final one I went through a period of many trial and error as I played around with other sensors and other ideas that unfortunately all failed me somehow but in the end I went back to what I was familiar with and created something that I really love and is fun to play and test its limits with an UltraSonic Sensor.

To make this I first added the different level of closeness LED to resemble the app’s screen and lighting up levels of LED to show how hot or cold you are from the object and then I added the ultrasonic sensor to be able to detect the closeness of the object, following that I added a piezo buzzer to make it give audio feedback as to how close “hot” you are to the object. For the code I just wrote several if else statements that change the LED based on it’s distance and plays a tone on the buzzer and builds up on each other depending on the amount of LED you have on which makes them sound louder.

Code:
// Define the connection pins for the ultrasonic sensor
const int trig = 11;
const int echo = 12;

// Define the pins for the LED indicators
const int LED1 = 5;
const int LED2 = 4;
const int LED3 = 3;
const int LED4 = 2;

// Define the pin for the piezo buzzer
const int piezoPin = A0;

// Variables to store the duration of the echo pulse and the calculated distance
int duration = 0;
int distance = 0;

void setup()
{
  // Set the ultrasonic sensor pins
  pinMode(trig , OUTPUT); // Trigger pin will send the pulse
  pinMode(echo , INPUT);  // Echo pin will receive the pulse

  // Set the LED pins as outputs
  pinMode(LED1 , OUTPUT);
  pinMode(LED2 , OUTPUT);
  pinMode(LED3 , OUTPUT);
  pinMode(LED4 , OUTPUT);

  // Set the piezo buzzer pin as an output
  pinMode(piezoPin, OUTPUT);

  // Start serial communication at 9600 baud rate
  Serial.begin(9600);
}

void loop()
{
  // Trigger the ultrasonic sensor to send a pulse
  digitalWrite(trig , HIGH);
  delayMicroseconds(10); // Ultrasonic pulse is 10 microseconds long
  digitalWrite(trig , LOW);

  // Measure the duration of the incoming echo pulse
  duration = pulseIn(echo , HIGH);
  
  // Calculate the distance based on the duration of the echo pulse
  distance = (duration/2) / 28.5;
  
  // Print the distance to the Serial Monitor
  Serial.println(distance);

  // Light up LED1 and sound buzzer if distance is 10 cm or less
  if (distance <= 10)
  {
    digitalWrite(LED1, HIGH);
    tone(piezoPin, 1000); // Emit a 1000Hz tone
  }
  else
  {
    digitalWrite(LED1, LOW);
    noTone(piezoPin); // Stop the buzzer if condition is not met
  }

  // Light up LED2 and sound buzzer if distance is 30 cm or less
  if (distance <= 30)
  {
    digitalWrite(LED2, HIGH);
    tone(piezoPin, 1000); // Emit a 1000Hz tone
  }
  else
  {
    digitalWrite(LED2, LOW);
    noTone(piezoPin); // Stop the buzzer if condition is not met
  }

  // Light up LED3 and sound buzzer if distance is 50 cm or less
  if (distance <= 50)
  {
    digitalWrite(LED3, HIGH);
    tone(piezoPin, 1000); // Emit a 1000Hz tone
  }
  else
  {
    digitalWrite(LED3, LOW);
    noTone(piezoPin); // Stop the buzzer if condition is not met
  }

  // Light up LED4 and sound buzzer if distance is 60 cm or less
  if (distance <= 60)
  {
    digitalWrite(LED4, HIGH);
    tone(piezoPin, 1000); // Emit a 1000Hz tone
  }
  else
  {
    digitalWrite(LED4, LOW);
    noTone(piezoPin); // Stop the buzzer if condition is not met
  }
}
Future Changes and reflection:

In the future I would love to make it more aesthetic and maybe even be able to have a way to make it detect only something specific by adding a magnet to it and making it only sensitive to that magnet for example but i’m not really sure how feasible that is. I’d also love to add an LCD screen that says how close you are to the object. But overall as a first time working with sensors and Arduino I do think that this is an amazing start and I can’t help but be proud of myself for it especially with the amount of times my circuits failed or the idea just wasn’t it when I was trying out with the other sensors and how frustrating that was to deal with.


Nourhane Sekkat’s Week 9 Reading Response

Reflecting on the themes presented in Tom Igoe’s blog post “Physical Computing’s Greatest Hits (and misses)”, I couldn’t help but notice the recurrence of certain project themes within physical computing classes. The observation that certain ideas, while not novel, provide a canvas for originality resonates with the principle that innovation often comes from iteration rather than from invention. This challenges the notion that only entirely new concepts are worthy of pursuit. The notion that projects like musical instruments or interactive gloves are perennial favorites because they engage with deeply human and culturally ingrained activities like music and gesture underpins this idea.

The insight that the value of such projects lies not in their novelty but in the personal touch and the learning process they encapsulate raises questions about the true nature of creativity. Is it the creation of something completely new, or the personal interpretation and adaptation of existing themes? This view aligns with Igoe’s critique of over-simplifying interactions, such as the hand-waving in video mirrors, which, while aesthetically pleasing, offer limited structured interaction.

In his other post, “Making Interactive Art: Set the Stage, Then Shut Up and Listen”, Igoe urges interactive artists to refrain from over-explaining their work, allowing the audience to engage and interpret the art independently. This guidance counters the traditional artistic impulse to control the narrative and suggests a bias towards creating an open-ended dialogue with the audience. It is a call for humility from the artist, to step back and appreciate the autonomy of the audience’s experience. This approach aligns with contemporary participatory art practices, emphasizing the importance of the viewer’s role in creating the artwork’s meaning. It raises the question of how much guidance is optimal in interactive art to provoke engagement without prescribing it.

Additionally, comparing the planning of interactive artwork to directing actors highlights the collaborative nature of interactive experiences. Here, the audience’s role parallels that of an actor bringing their interpretation to a performance, completing the artwork through interaction. This analogy inspires one to think about the balance between the artist’s intention and the participant’s contribution. How does one design interactive systems that are flexible enough to accommodate diverse interactions while still conveying a cohesive theme or message? This perspective can shift one’s belief about the ownership of meaning in art, recognizing the shared creation between artist and audience.