Final Project User Testing

User Testing:

After finalizing my project and creating a prototype of the box, I asked my friend to test out my code and this is a video of her trying it out.


*I am still in the process of creating a nice box for my project so it would look nicer than what is shown in the video.

  • Are they able to figure it out? Where do they get confused and why? Do they understand the mapping between the controls and what happens in the experience?

Yes, She was able to figure it out pretty easily. My project is pretty easy to understand and link the

  • What parts of the experience are working well? What areas could be improved?

Mostly, everything is working well, the only thing that might need some improvement is the sensitivity of the button because sometimes it loops through multiples rooms according to the force of the button press.

  • What parts of your project did you feel the need to explain? How could you make these areas more clear to someone that is experiencing your project for the first time?

The only part I felt I needed to explain in the beginning was that each room has a different sound file, but she managed to figure it out pretty quickly. The description on the front page explains everything and the labels on the buttons also provide some info on what each button is for.

Final Project: Md studios

Final Project concept:

An Interactive drum kit with multiple rooms, each room has a different theme and different drum kit sounds. some of the themes are unusual everyday sounds. I have implemented a regular drum kit, an arabic percussion kit,  a kitchen kit and a sci-fi kit. I wanted to give my users a new experience that they would not be able to get using traditional musical instruments, a small glimpse of the world of electronic music you may say.

Implementation design:

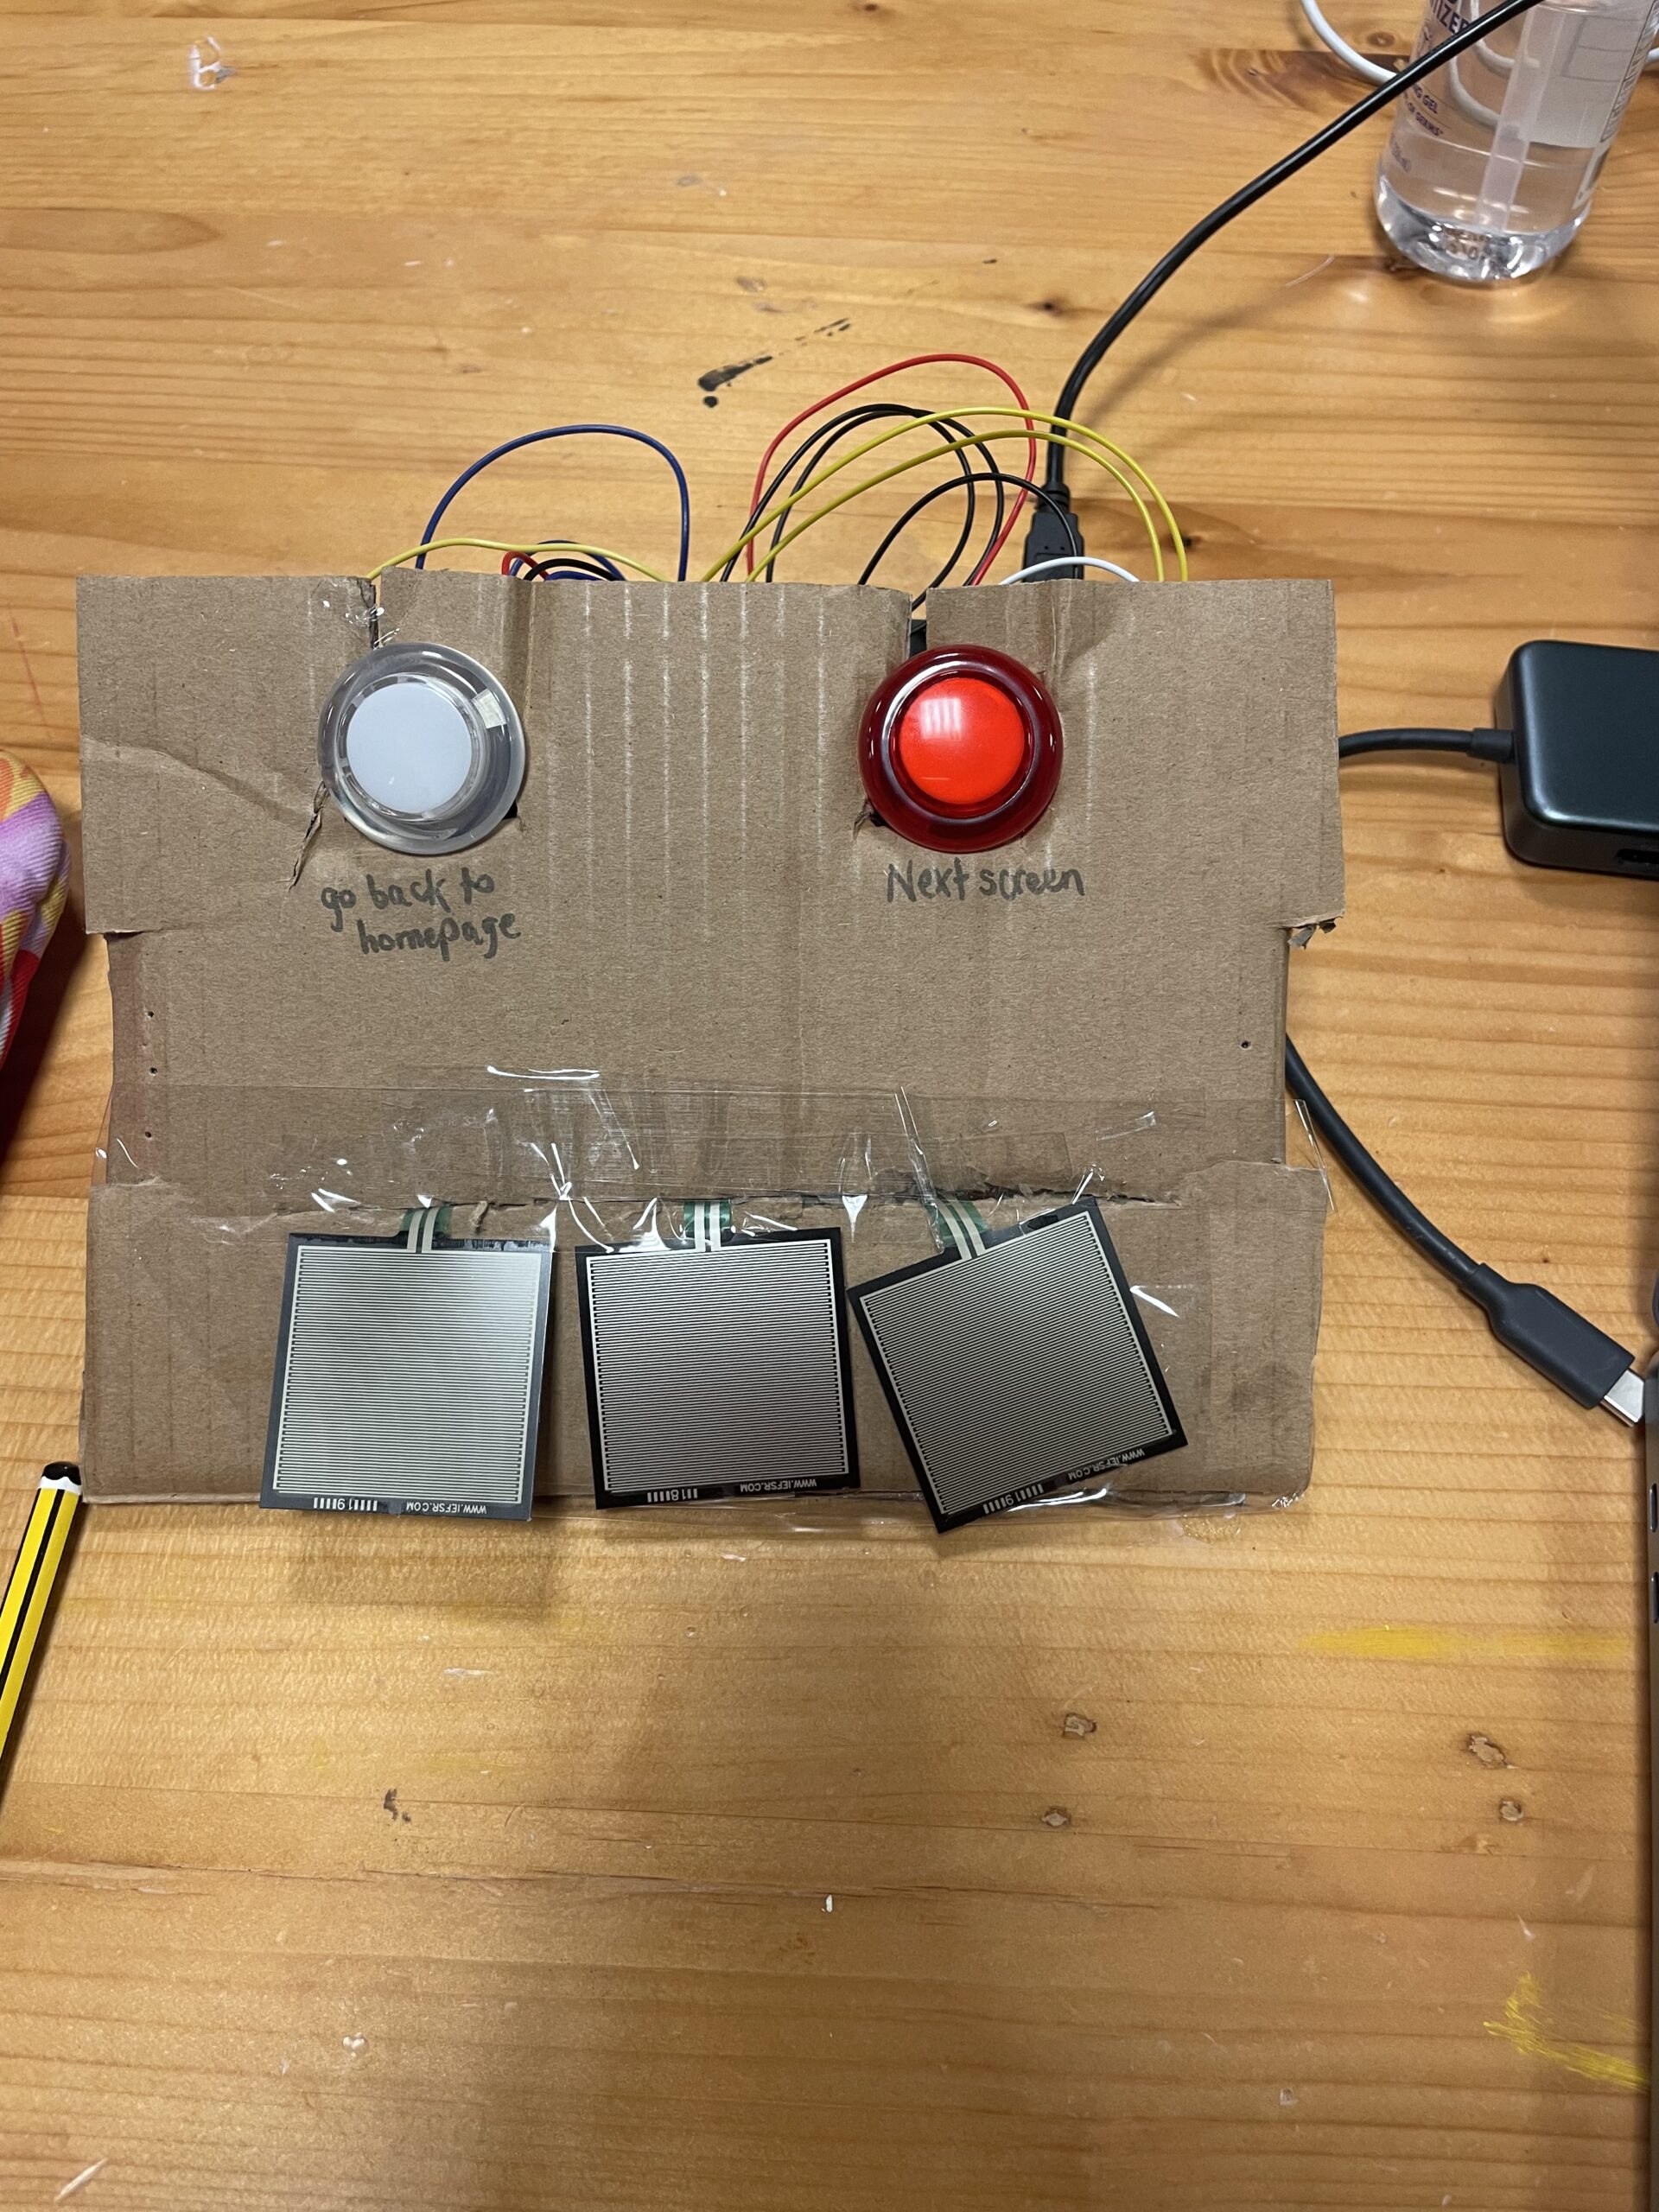
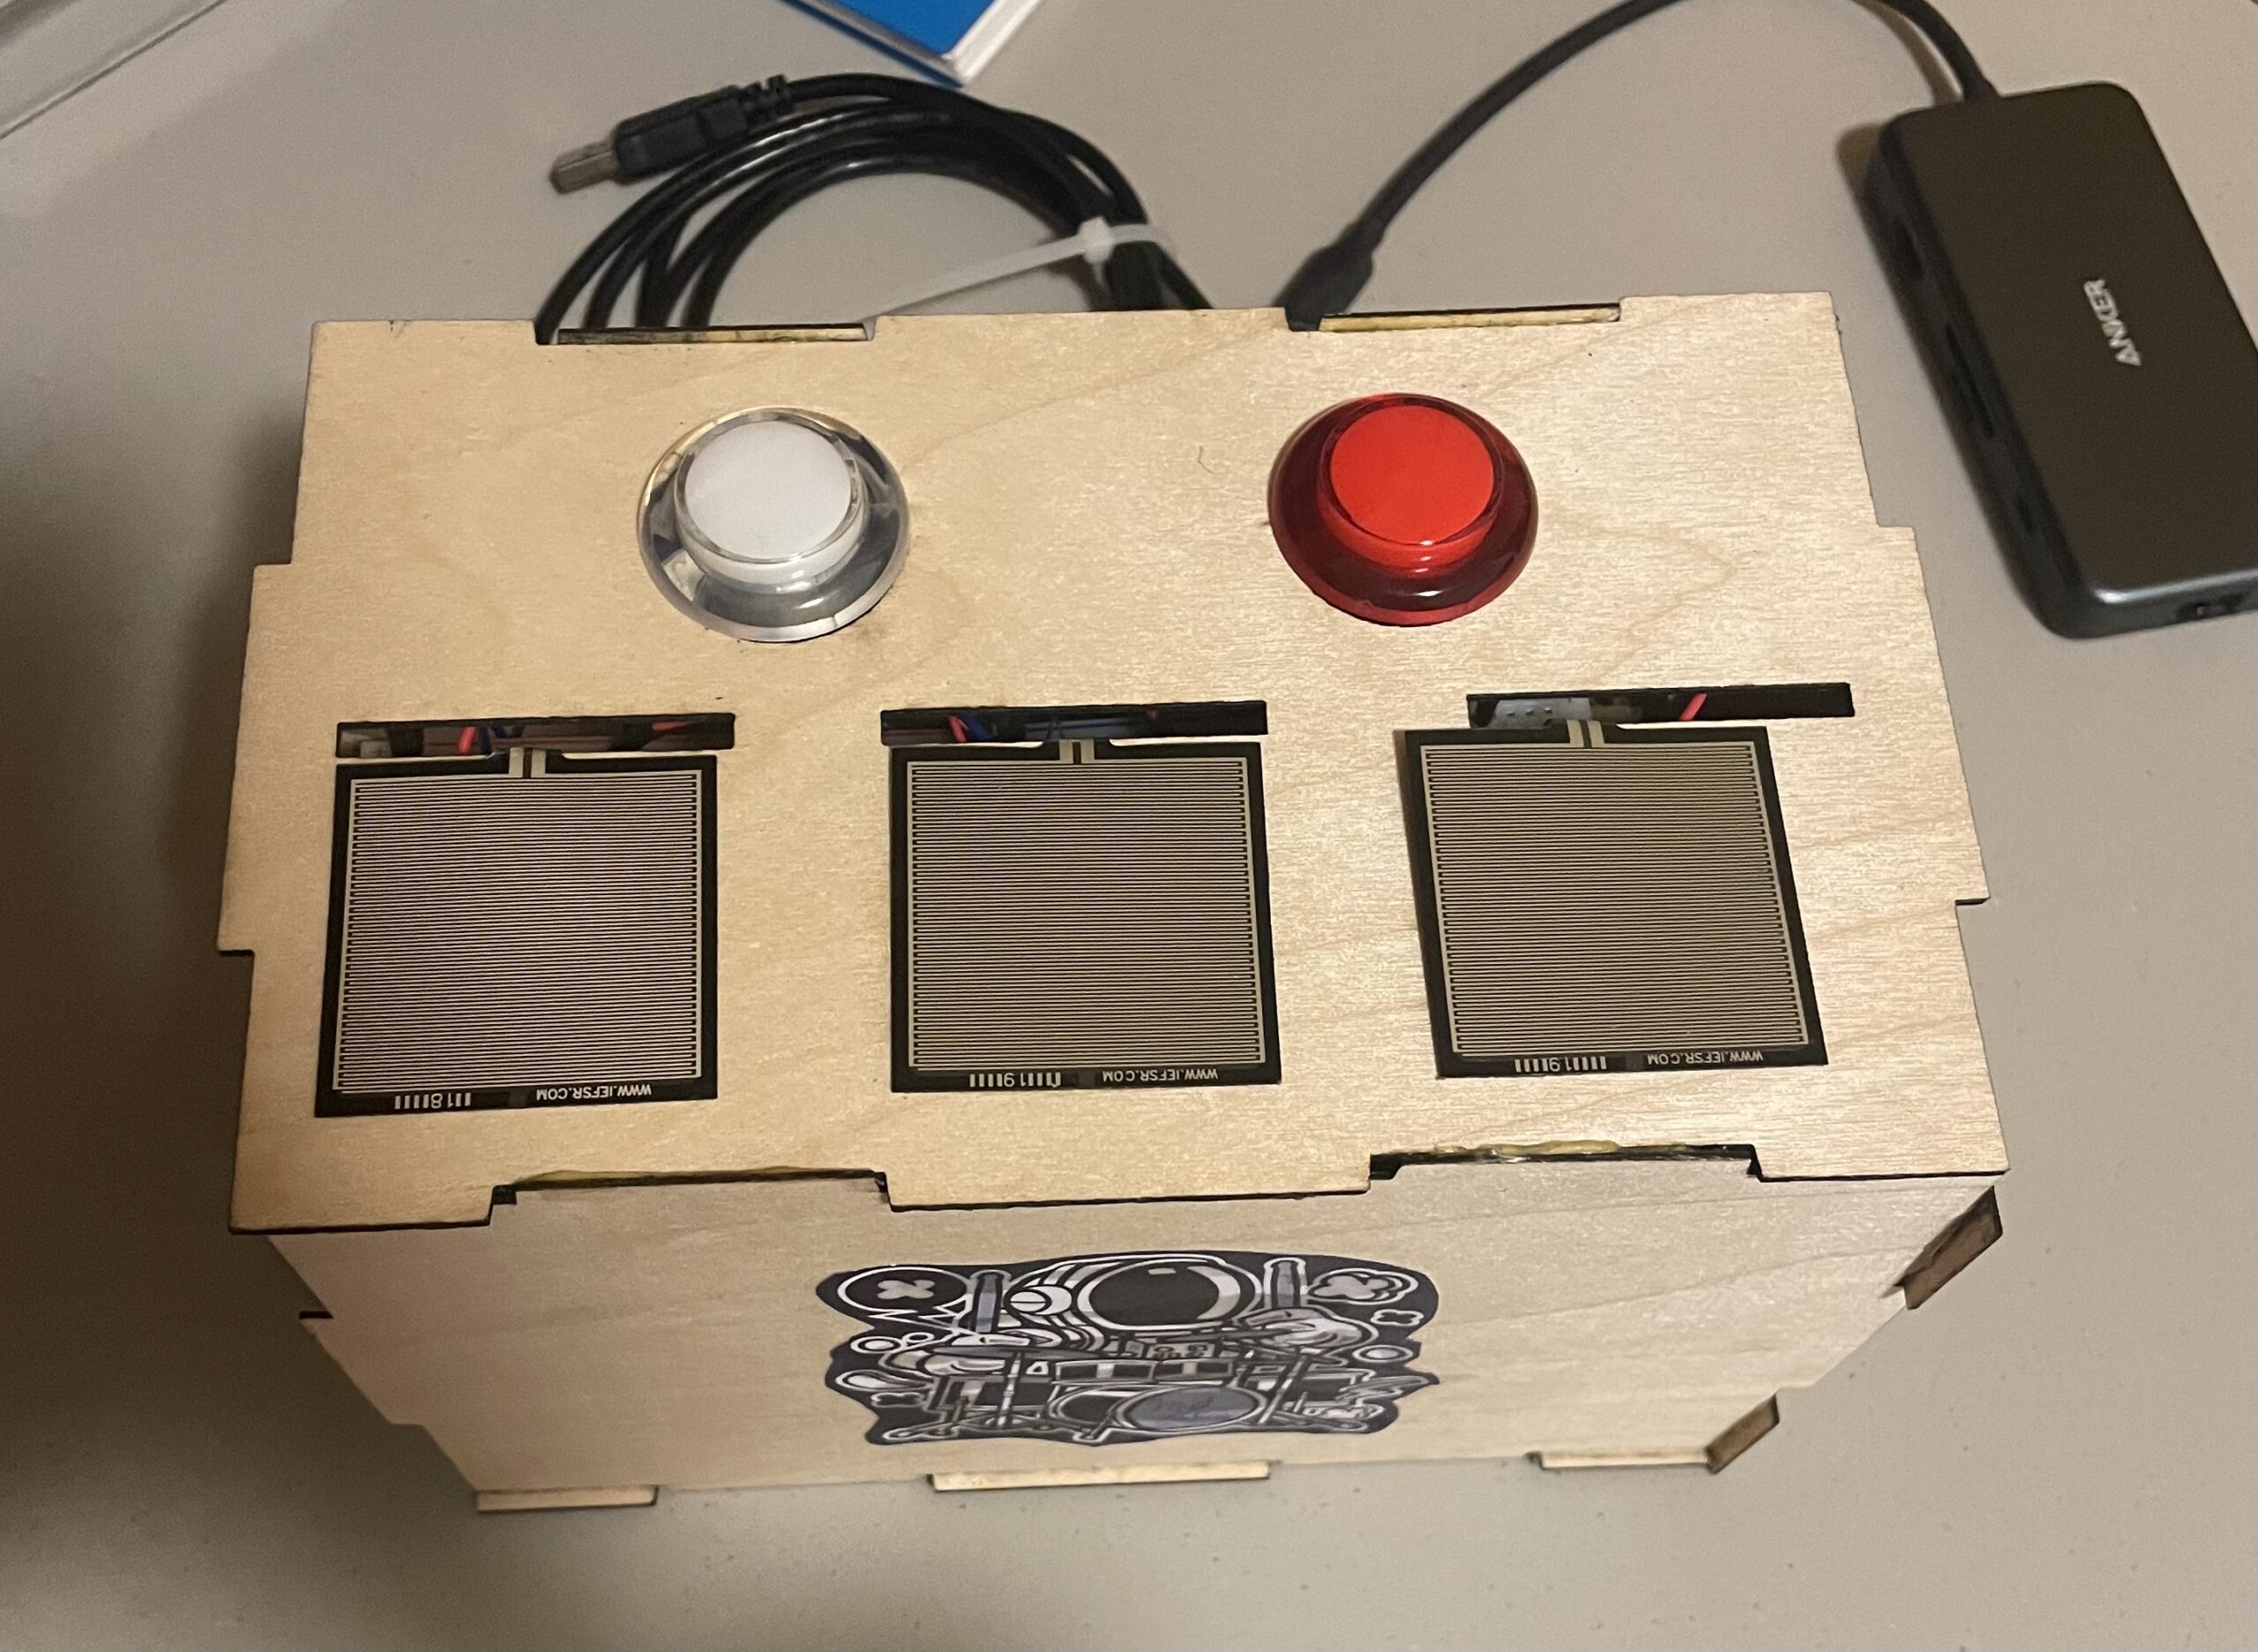
I used 3 force sensors for the drum plates and I used 2 buttons to loop between the themes and go back to home screen. I created screenshots of the themes and added a creative touch to each theme to make it more relevant to the theme.

Interaction between Arduino and P5js:

The only interaction between Arduino and p5js is reading the force sensors and buttons on Arduino and sending it to p5js to change the themes/sounds accordingly. To make my buttons and force sensors work as smooth as possible I have added a delay on reading certain inputs without using the delay() function so that other inputs work simultaneously

Arduino Code:

for the arduino code, I read the values from the sensors and sent them to the p5js through serial.print() by using commas to separate the values. to make the interaction smoother I used “delay without delay()” to ensure that the button is only read every few seconds whereas t

he force sensors are read on a continuous basis.

#define FORCE_SENSOR_PIN1 A0 // the FSR and 10K pulldown are connected to A0
#define FORCE_SENSOR_PIN2 A1 // the FSR and 10K pulldown are connected to A1
#define FORCE_SENSOR_PIN3 A2 // the FSR and 10K pulldown are connected to A2
#define Button1 7 //the switch in connected to D7 (Red button)
#define Button2 6 //the switch in connected to D6 (Yellow button)
#define Button3 5 //the switch in connected to D5 (Blue button)

unsigned long previousMillis = 0;
const long interval = 200; 

void setup() {
  Serial.begin(9600);
}

void loop() {
    unsigned long currentMillis = millis();
    int analogReading1 = analogRead(FORCE_SENSOR_PIN1);
    int analogReading2 = analogRead(FORCE_SENSOR_PIN2);
    int analogReading3 = analogRead(FORCE_SENSOR_PIN3); 
    int digitalReading1 = 1;
    int digitalReading2 = digitalRead(Button2);

    if (currentMillis - previousMillis >= interval) {
    // save the last time you read from the button
      previousMillis = currentMillis;
      digitalReading1 = digitalRead(Button1);
    }
    // print the raw analog readings seperated by commas

    Serial.print(analogReading1); //read without delay
    Serial.print(",");
    Serial.print(analogReading2); //read without delay
    Serial.print(",");
    Serial.print(analogReading3); //read without delay
    Serial.print(",");    
    Serial.print(digitalReading1); //read with delay!!!!!!
    Serial.print(",");    
    Serial.print(digitalReading2); // read without delay
    Serial.println();

}

p5js:

for my p5js code, I read the values from Arduino and split them at the comma and stored each value in a variable that I later used to create conditions on to make sure that the right sounds and the right themes are displayed depending on the user’s inputs.

The aspects of the project I am proud of: 

I am proud that I managed to create the force sensors responsive to the touch so that the sounds are played right when the user presses on the force sensor, to make it smooth. I am also proud of the the

me designs I created, I put in extra thought to make sure the user can understand what the theme is without having to explain it.

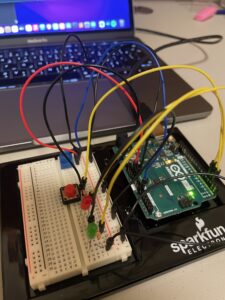
Pictures of my project:

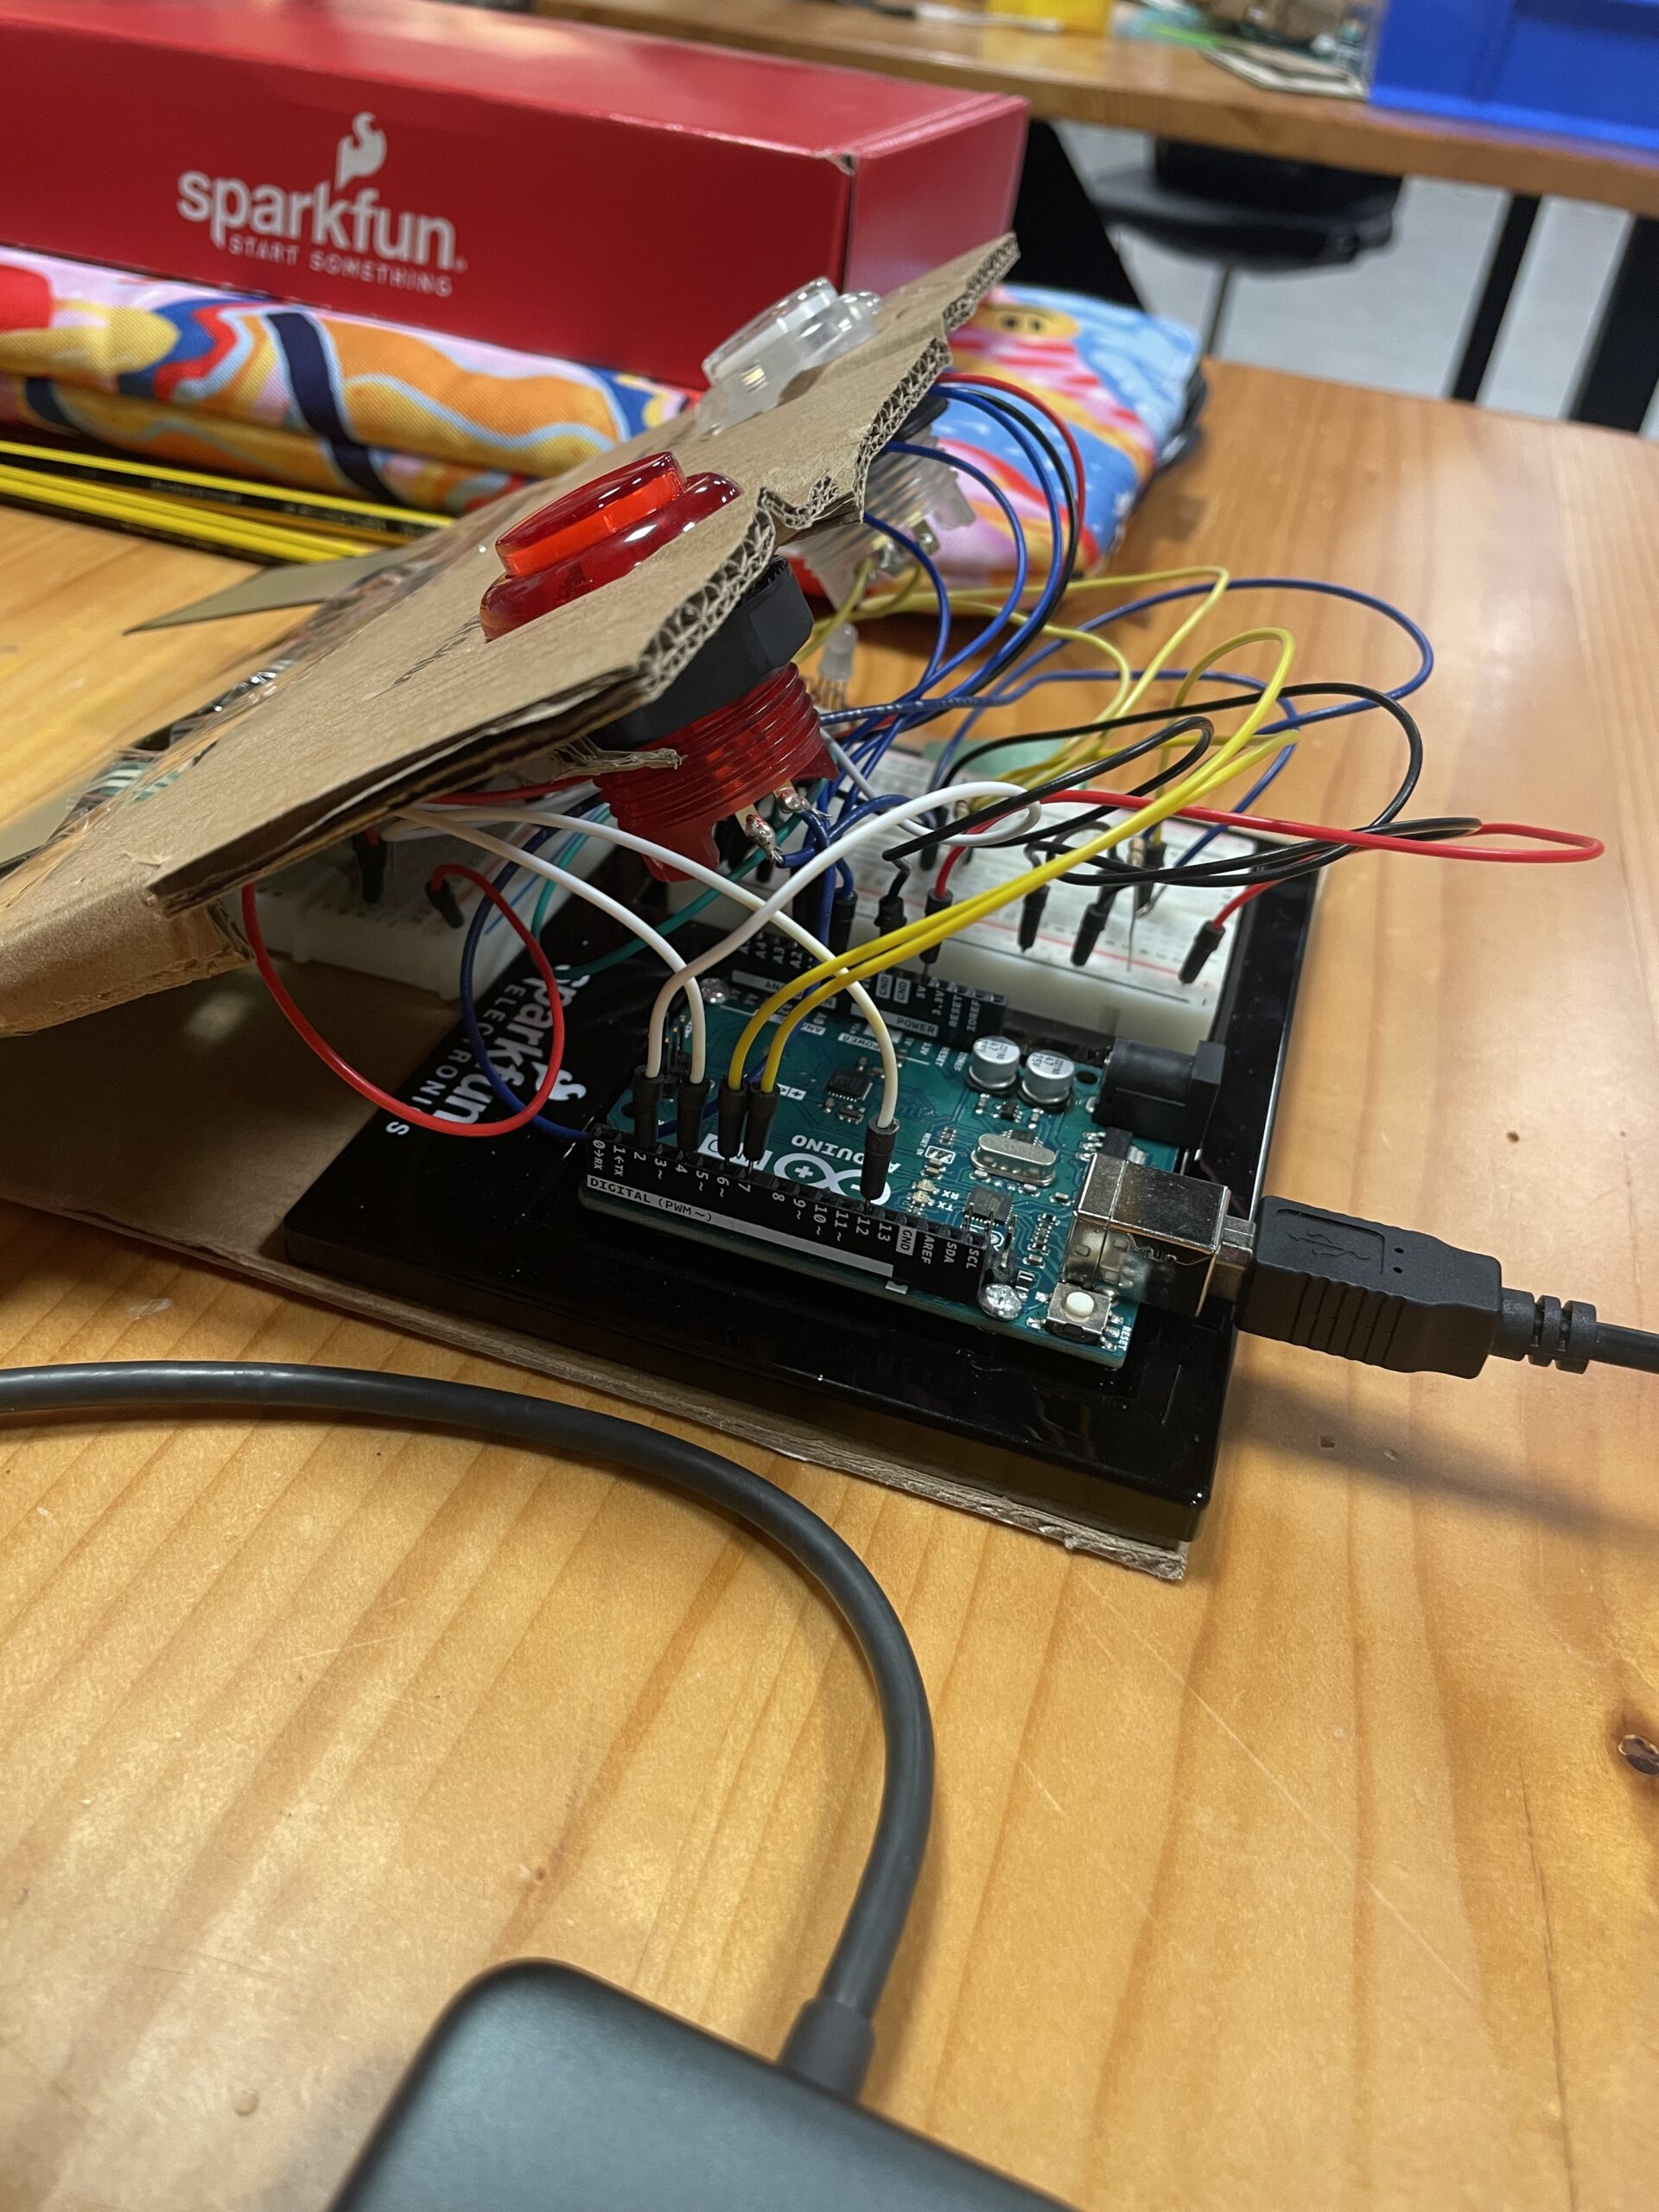
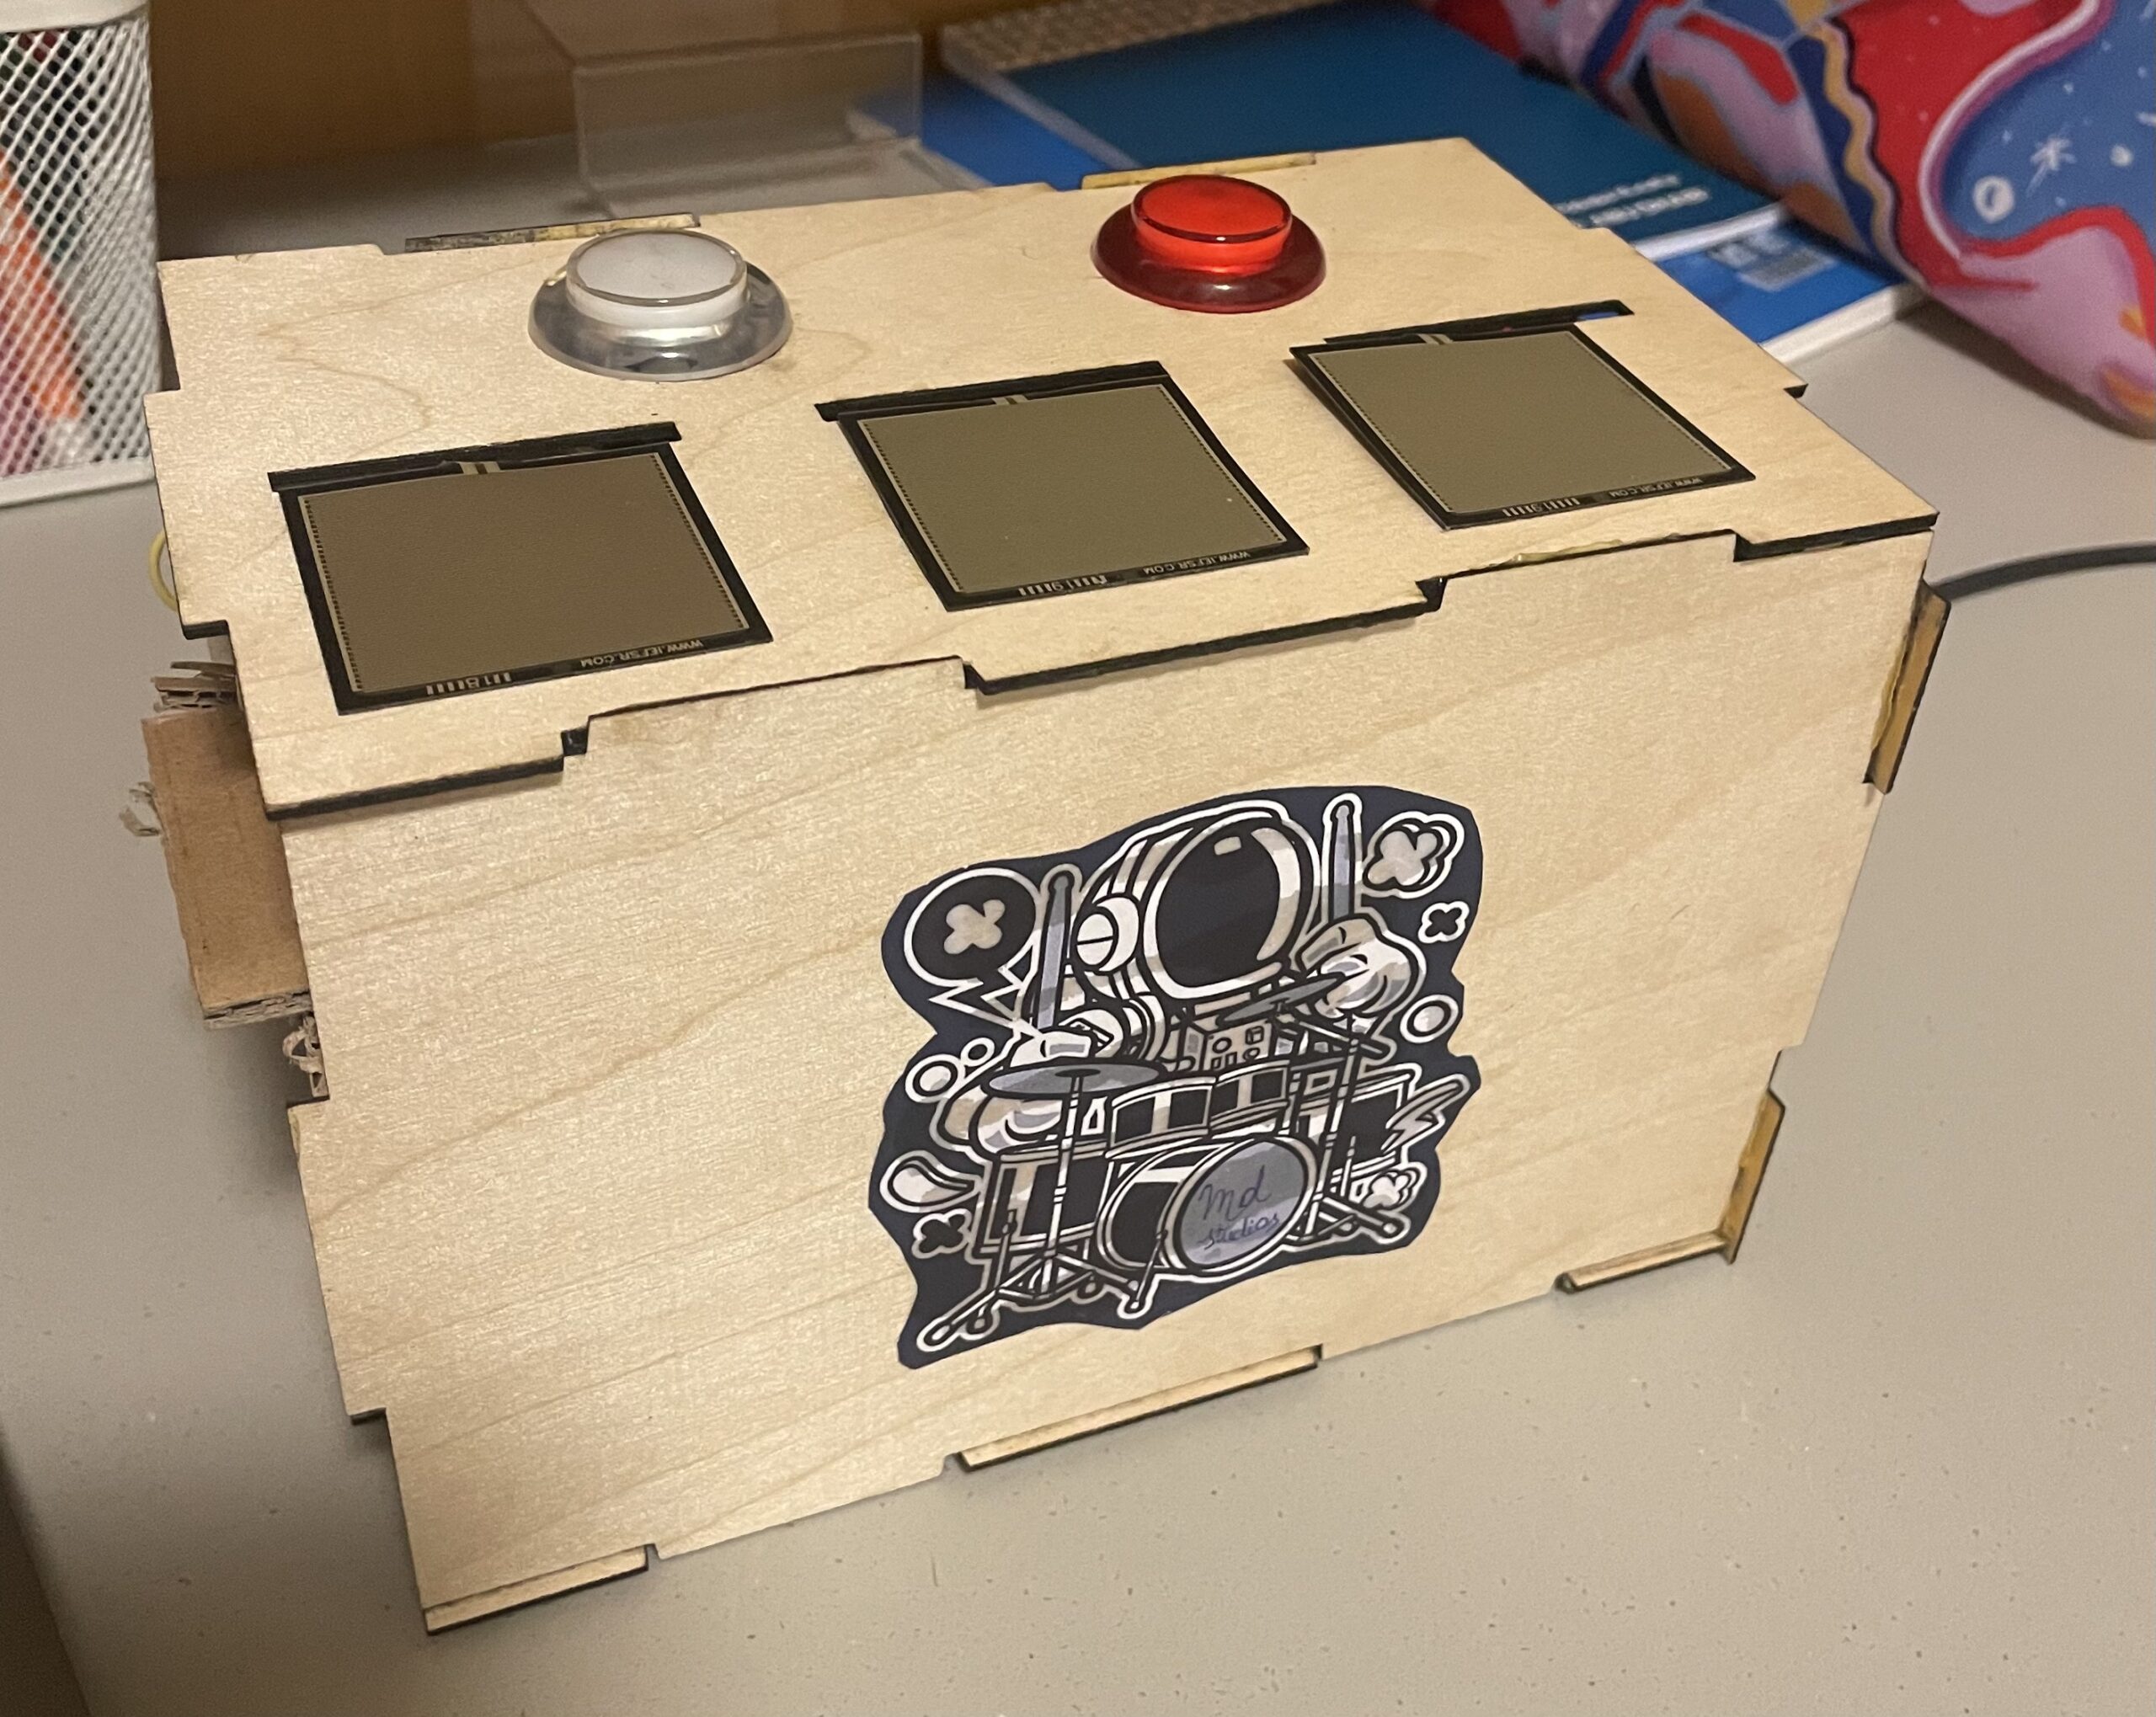
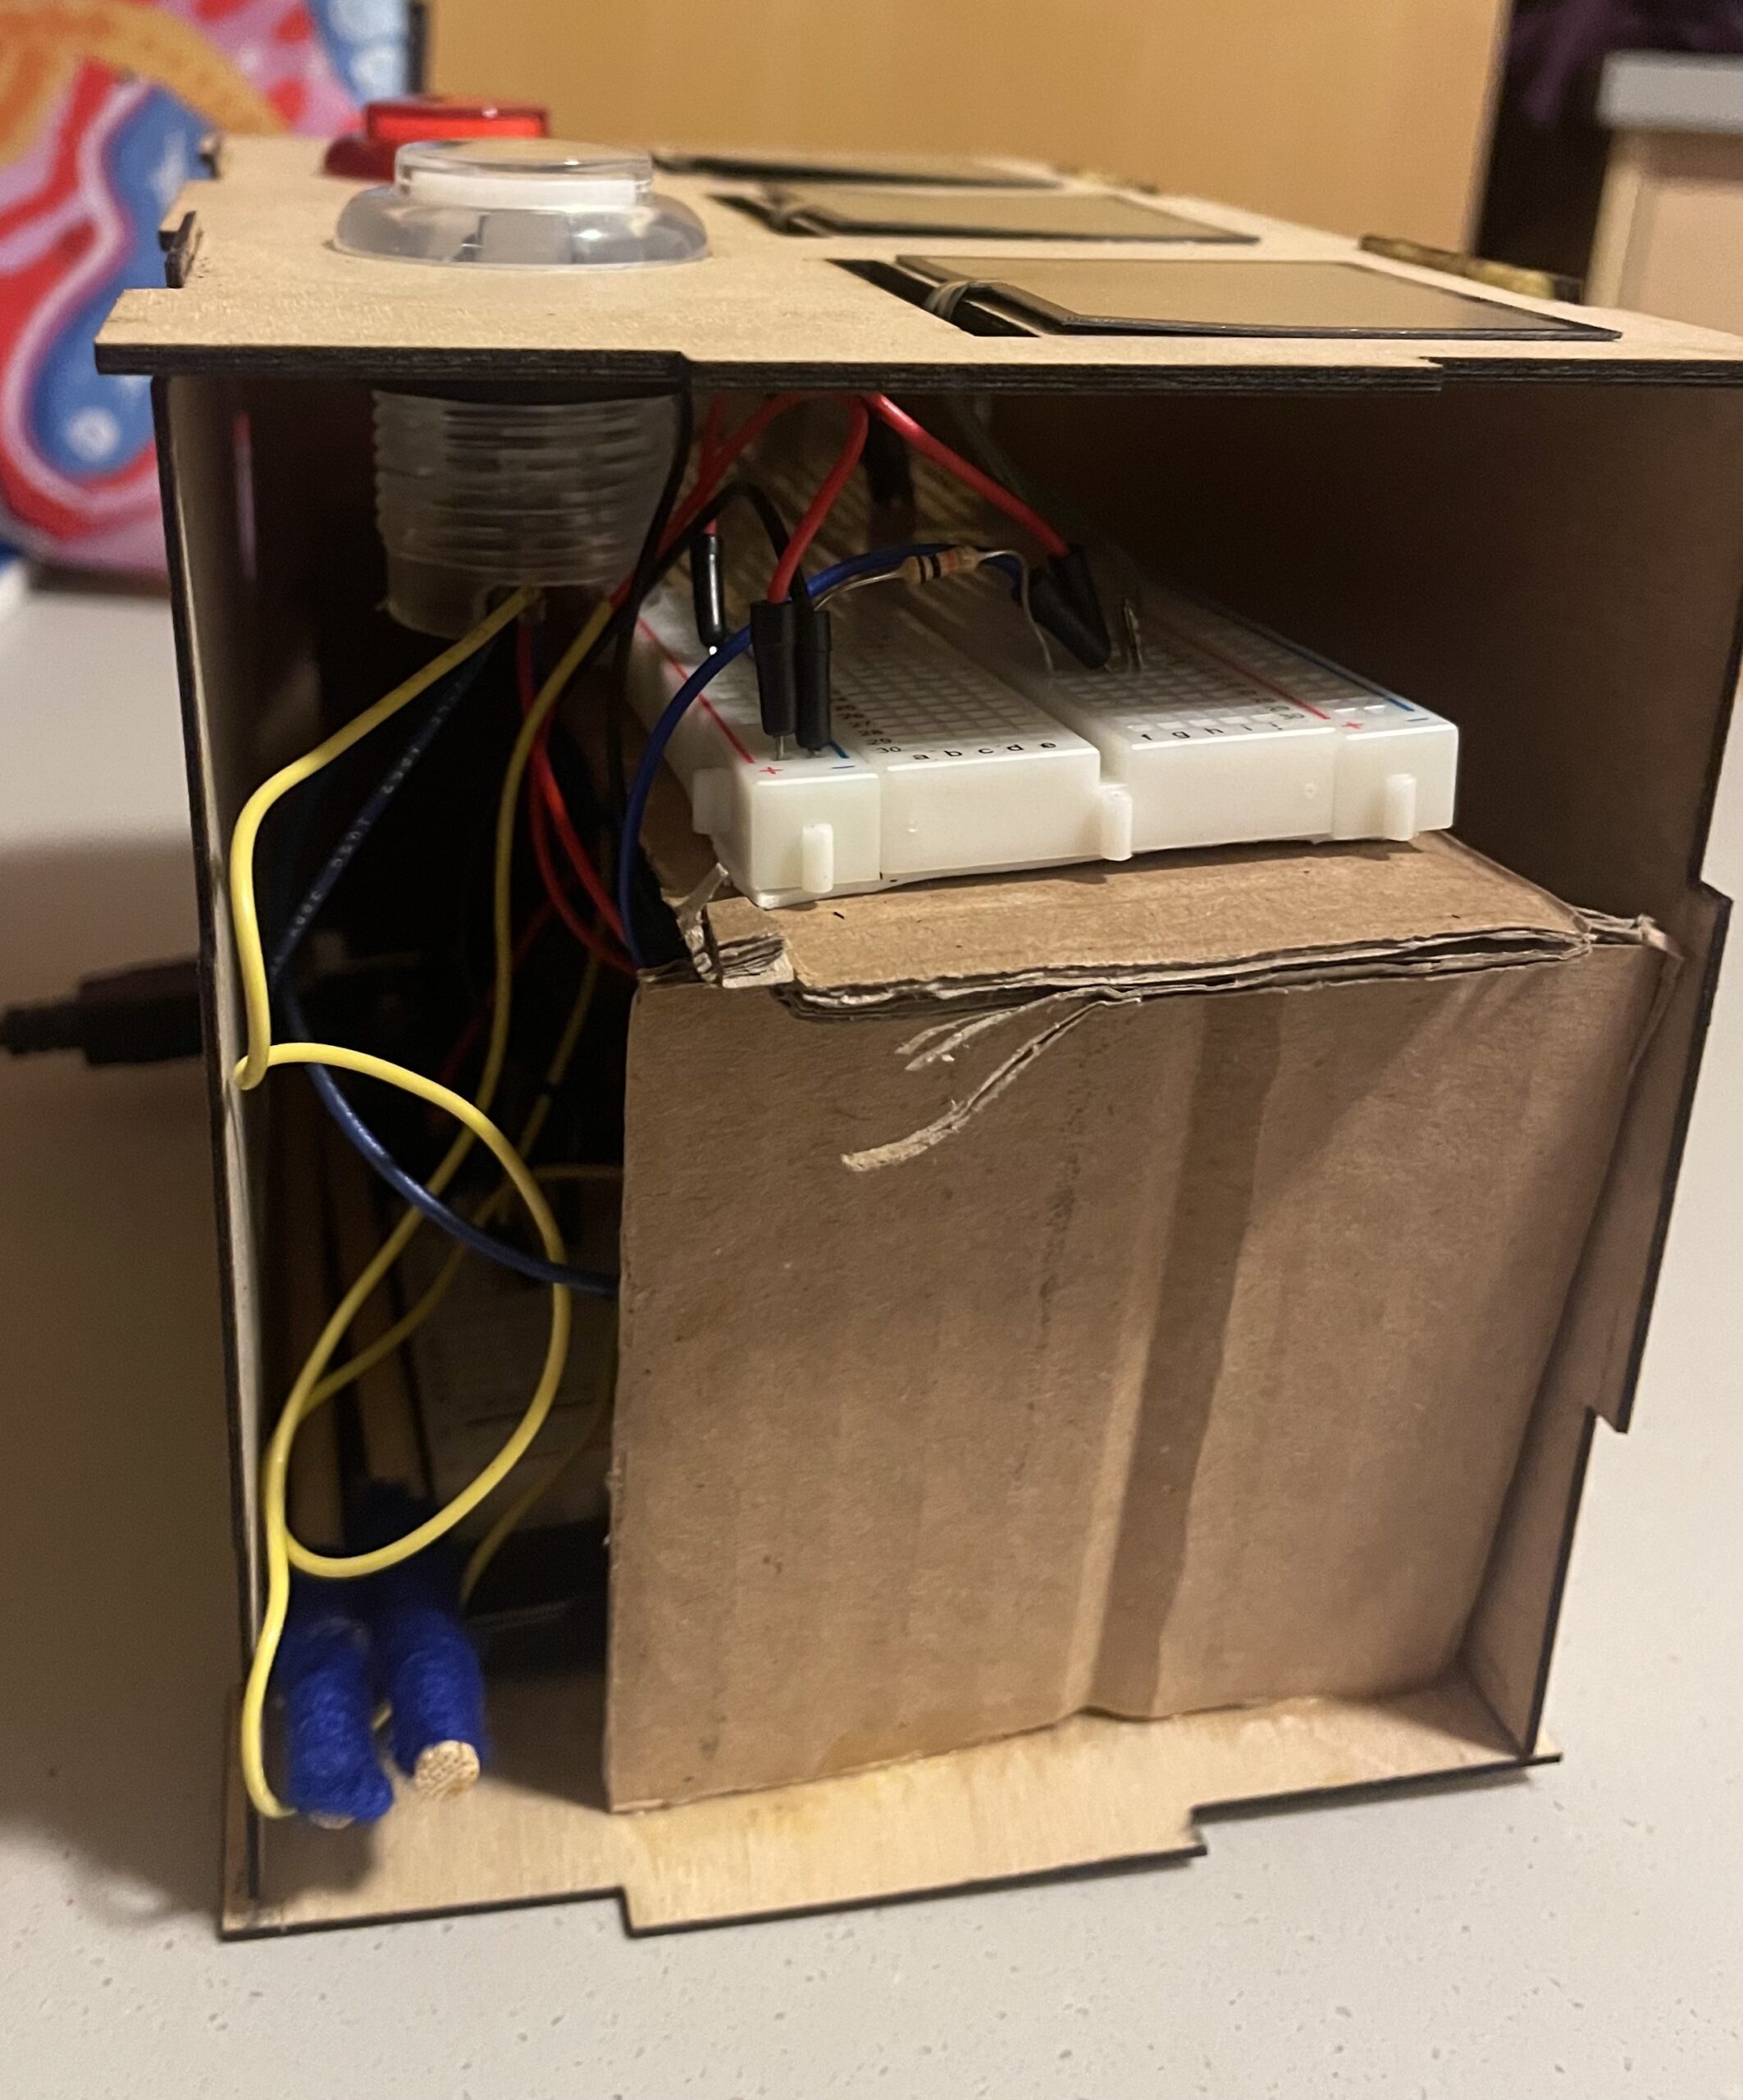
first prototype:


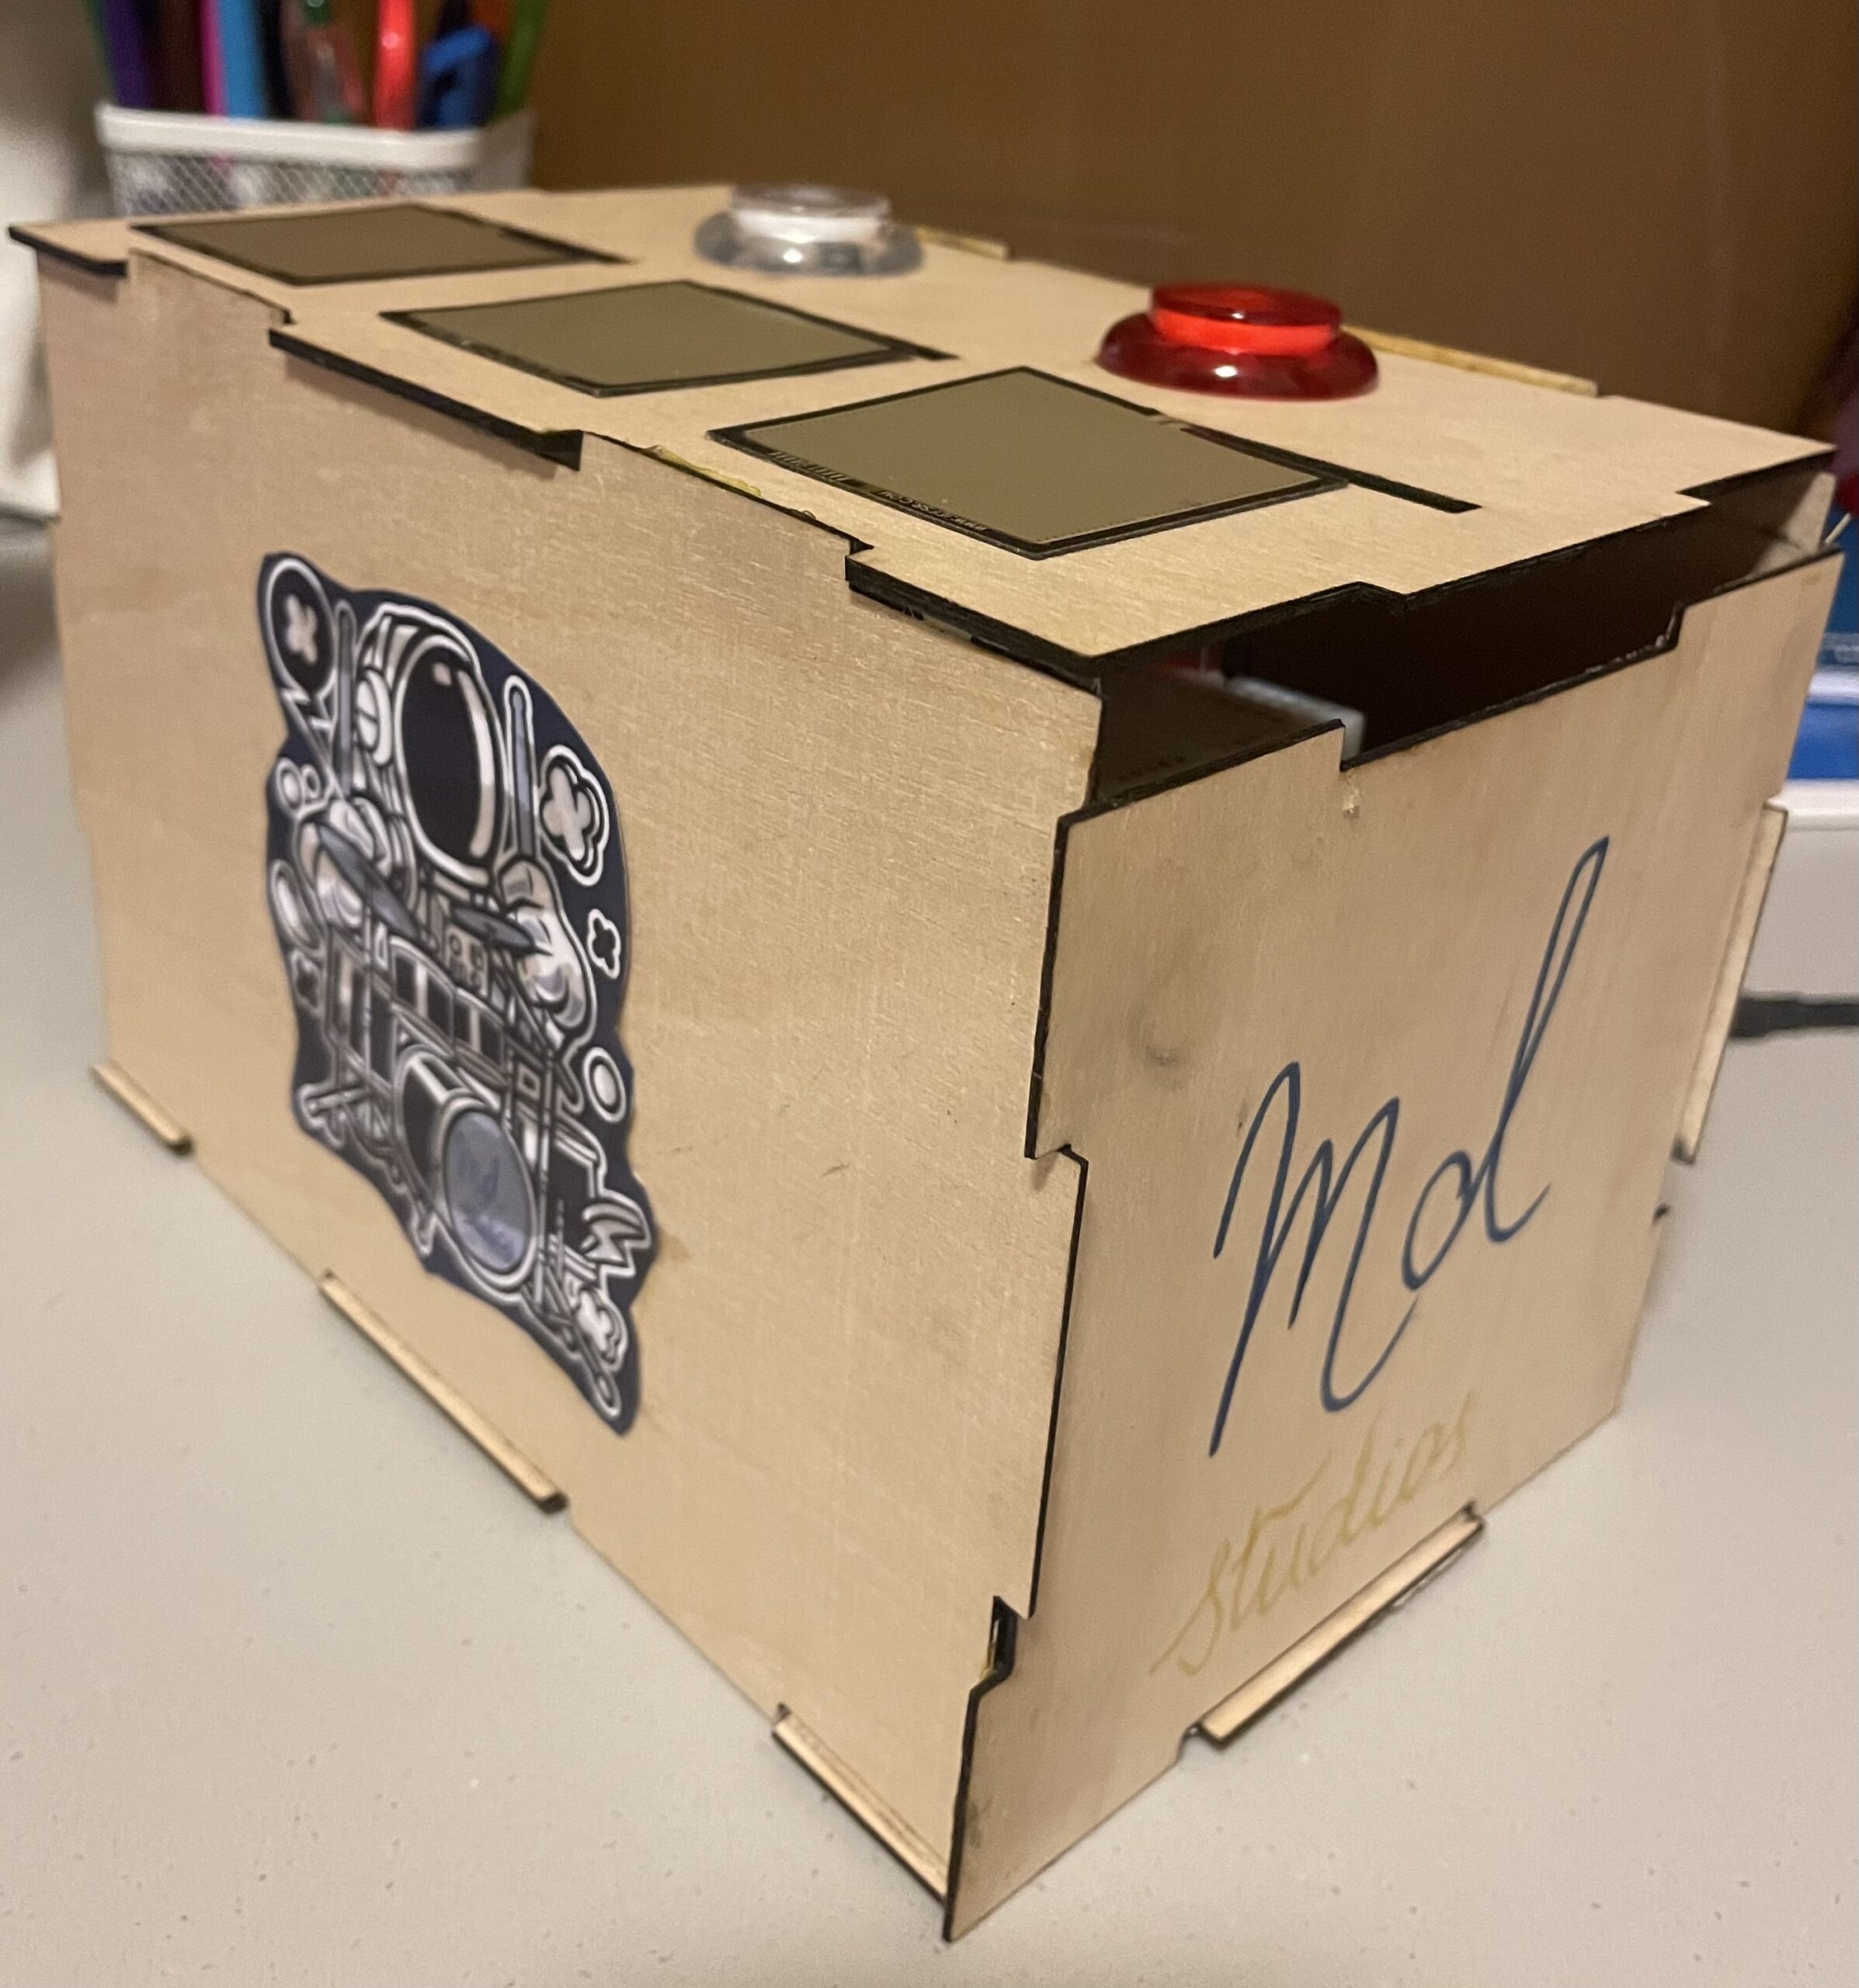
Final Version:


Future improvements:

I initially wanted to create a record button that records users’ jams and adds them all to one file to have a collective file of many users’ artistic touch, but the p5js sound. library was not working as expected and was causing so many bugs in my program so I decided to skip it for now, but I would love to add later on because I believe it makes the project much more interesting.

Sources:

https://soundpacks.com/free-sound-packs/sci-fi-sound-fx-pack/

https://www.reddit.com/r/edmproduction/comments/3lh4t0/free_kitchen_sounds_sample_pack/

https://docs.arduino.cc/built-in-examples/digital/BlinkWithoutDelay

https://www.clipartmax.com/


Week 12: Final Project Proposal

Finalized Concept:

For my final project of the semester, I want to incorporate my love for music, inspired by an idea I had worked on before in a different class last semester. In Making Music, we had an assignment to create a drum kit out of “everyday” sounds. It was really interesting to listen to music tracks created purely out of “everyday” sounds. For my project I want to create an interactive drum kit, where the user presses on a button to choose one of the multiple themes available. Then the user can use their fingers to hit the “drum plates”, which are going to be placed on force sensors. Depending on which theme they are on, they would get different sounds from each plate.I will include one regular drum kit and multiple unusual ones. Additionally, I want to include a feature where a user can record up to 10 seconds of music as well. When the recording is complete it is attached to previous users’ recordings so that at the end of the night, I have a recording of different people playing different drum kits each using their own style. I also would like to include a feature that allows users to listen to the cumulative recording at any point. My idea is to mix everyday sounds, to sound like unusual drum kits, and allow users to improvise for a bit and mashup their improvisation later on to have a piece of music that is reflective of our different personalities. My idea is to implement it as a virtual studio, each room in the studio has a different theme and a different drum kit.

Input from Arduino: Force sensors, button

Output from Arduino: RGB LED that displays different colors depending on what theme they are on

Arduino code:

The Arduino code will read values from the sensors and send them to p5js, it will also change the color of the RGB LED by receiving a value from p5js and acting accordingly

Input from P5js: Space bar to record a short performance, if possible. Enter to return to homepage.

Output from P5js: Sounds, screen display

P5js code:

The P5js code will control the display of the themes by reading the switch values sent from the Arduino. It will also trigger sound files according to the data sent from the force sensors by the Arduino. Additionally, it would control the recording process and the playback of the recordings.

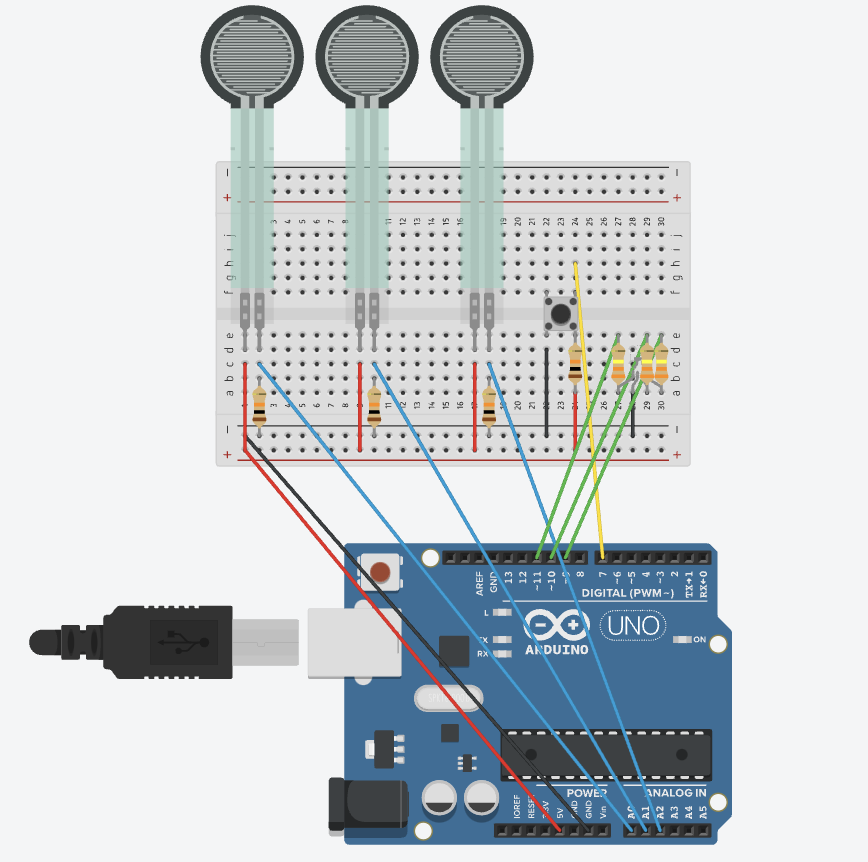
Schematic: 

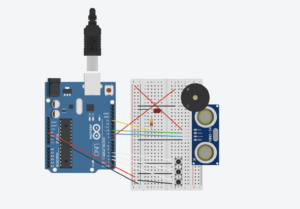
Arduino schematic

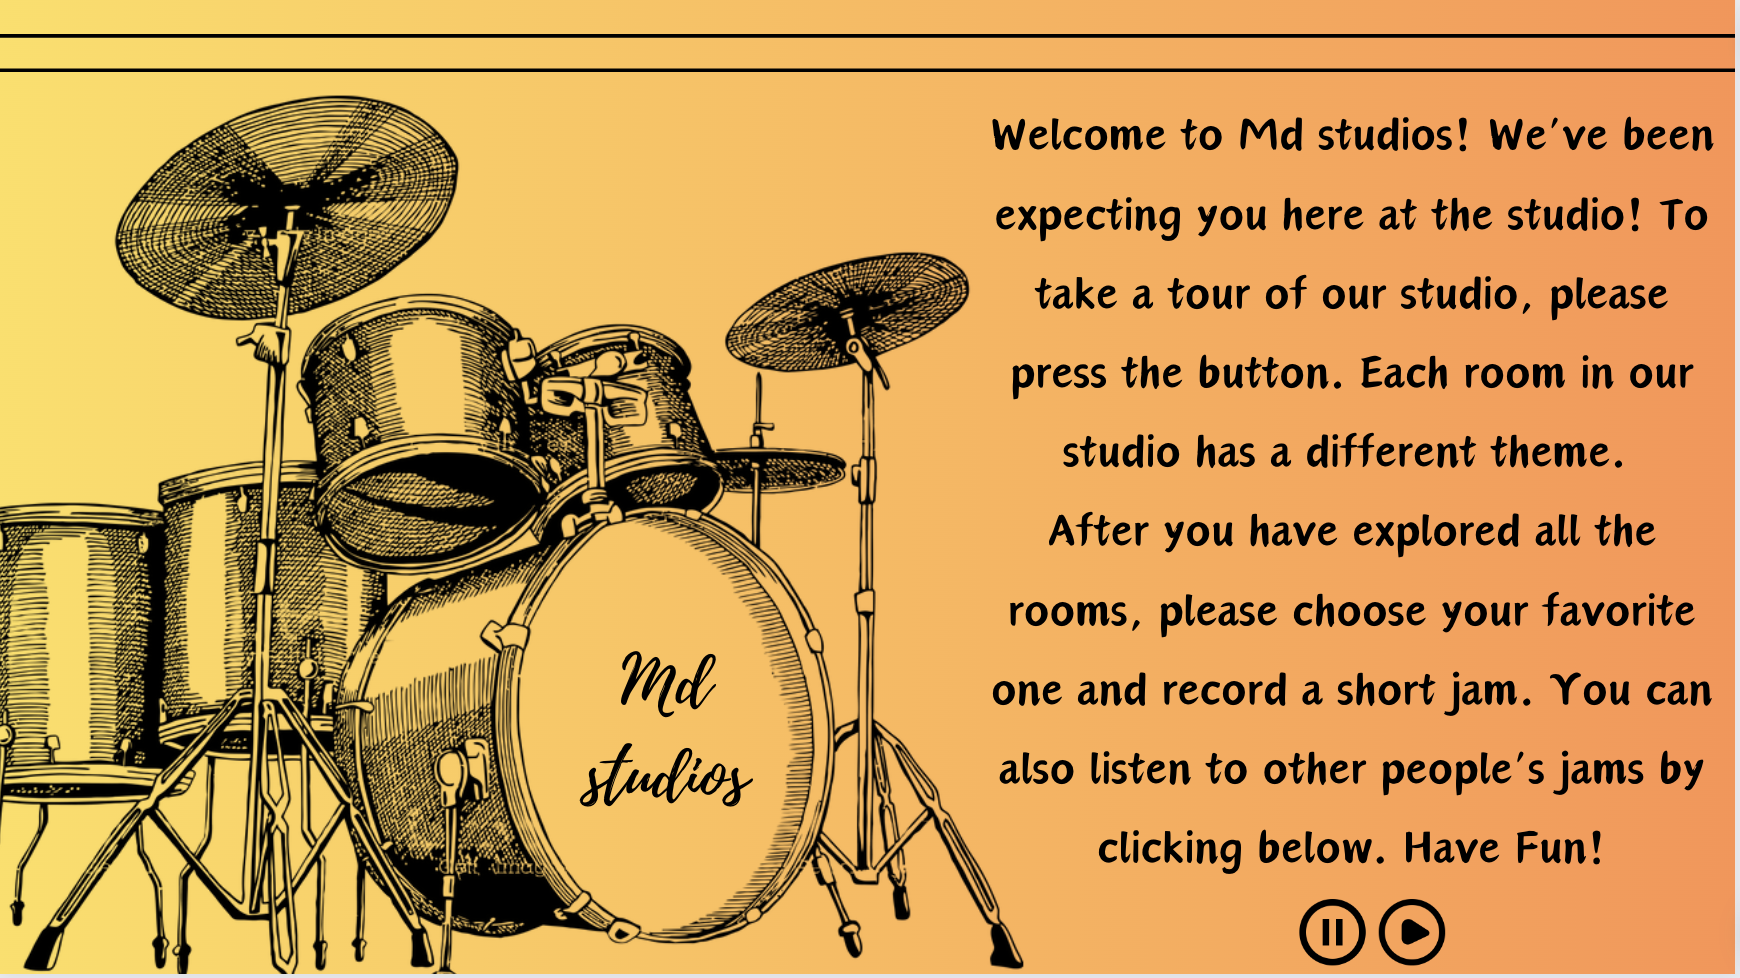
This is the initial design of my home p5js screen, but I have not designed the other themed screens yet, so I am not sure if I would stick with the same vibe for my project. I might change it if necessary when I am implementing the other screens as well:

Homepage initial design


Week 11: In class exercises

  1. make something that uses only one sensor  on Arduino and makes the ellipse in p5 move on the horizontal axis, in the middle of the screen, and nothing on arduino is controlled by p5:

For this exercise, I kept the arduino code the same as the one in the example and I expanded on the p5js code in the example to include input from the potentiometer on the arduino. Different values of the potentiometer are mapped to the x coordinates of the ellipse. This makes it move across the horizontal axis in the middle of the screen. 

/* Week 11.2 bidi serial example
 * Originally by Aaron Sherwood
 * Modified by Mangtronix
 * Modified further by Mirette Dahab
 *
 * Add this library to Sketch files
 *  https://github.com/mangtronix/IntroductionToInteractiveMedia/blob/master/code/p5.web-serial.js files
 *
 * You must include this line in your index.html (in Sketch Files) to load the
 * web-serial library
 *
 *     <script src="p5.web-serial.js"></script>
 *
 * Arduino code:
 * https://github.com/mangtronix/IntroductionToInteractiveMedia/blob/master/code/Week11Serial.ino
 */

let Y = 0;
let X = 0;
let left = 0; // True (1) if mouse is being clicked on left side of screen
let right = 0; // True (1) if mouse is being clicked on right side of screen

function setup() {
  createCanvas(640, 480);
  textSize(18);
}

function draw() {
  // one value from Arduino controls the background's red color
  background(255);
  fill(255,0,0);
  ellipse(map(X, 0, 1023, 0, width), 220, 100);

  // the other value controls the text's transparency value
  // fill(255, 0, 255, map(alpha, 0, 1023, 0, 255));

  if (!serialActive) {
    text("Press Space Bar to select Serial Port", 20, 30);
  } 


  // click on one side of the screen, one LED will light up
  // click on the other side, the other LED will light up
  if (mouseIsPressed) {
    if (mouseX <= width / 2) {
      left = 1;
    } else {
      right = 1;
    }
  } else {
    left = right = 0;
  }
}

function keyPressed() {
  if (key == " ") {
    // important to have in order to start the serial connection!!
    setUpSerial();
  }
}

// This function will be called by the web-serial library
// with each new *line* of data. The serial library reads
// the data until the newline and then gives it to us through
// this callback function
function readSerial(data) {
  ////////////////////////////////////
  //READ FROM ARDUINO HERE
  ////////////////////////////////////

  if (data != null) {
    // make sure there is actually a message
    // split the message
    let fromArduino = split(trim(data), ",");
    // if the right length, then proceed
    if (fromArduino.length == 2) {
      // only store values here
      // do everything with those values in the main draw loop
      
      // We take the string we get from Arduino and explicitly
      // convert it to a number by using int()
      // e.g. "103" becomes 103
      Y = int(fromArduino[0]);
      X = int(fromArduino[1]);
    }

    //////////////////////////////////
    //SEND TO ARDUINO HERE (handshake)
    //////////////////////////////////
    let sendToArduino = left + "," + right + "\n";
    writeSerial(sendToArduino);
  }
}

  1. make something that controls the LED brightness from p5

for this exercise, I created a short program that allows the user to control the brightness by moving the mouse around the screen, each area in the screen has a different brightness value assigned and the value is sent to the arduino to light up the led as expected.

p5js:

let brightnessVal= 0;

function setup() {
  createCanvas(400, 400);
  background(220);
}

function draw() {//control the brightness value according to the placement of the mouse on the x axis
  if(mouseX >= 0 && mouseX <= 100){
      brightnessVal = 0;
  }else if(mouseX > 100 && mouseX <= 200){
      brightnessVal = 50;
  }else if(mouseX > 200 && mouseX <= 300){
      brightnessVal = 150;
  }else if(mouseX > 300 && mouseX <= 400){
      brightnessVal = 250;
  }
  // console.log(brightnessVal);
}

function keyPressed() {
  if (key == " ") {
    // important to have in order to start the serial connection!!
    setUpSerial();
  }
}

function readSerial(data) { //sends data to arduino
  let SentData = brightnessVal + ", \n";
  writeSerial(SentData);  
}

arduino:

const int RedledPin = 5;  // assign the pin for the LED

void setup() {
  pinMode(RedledPin, OUTPUT);
  Serial.begin(9600);// Start serial communication
}

void loop() {
  Serial.println("sensor");
  if (Serial.available() > 0) {  // Check if data is available from p5.js
    int brightnessVal = Serial.parseInt();   // Read value from p5.js
    analogWrite(RedledPin, brightnessVal);
  }
}

3.take the gravity wind example (https://editor.p5js.org/aaronsherwood/sketches/I7iQrNCul) and make it so every time the ball bounces one led lights up and then turns off, and you can control the wind from one analog sensor

For this exercise, I extended the example given by creating an OnOff variable that would store whether or not the ball is hitting the ground or not and sending it to the arduino to control the LED. I also read input from the potentiometer and stored it in the wind.x variable so that it controls the wind.


p5js:

let velocity;
let gravity;
let position;
let acceleration;
let wind;
let drag = 0.99;
let mass = 50;
let OnOff = 0;

function setup() {
  createCanvas(640, 360);
  noFill();
  position = createVector(width/2, 0);
  velocity = createVector(0,0);
  acceleration = createVector(0,0);
  gravity = createVector(0, 0.5*mass);
  wind = createVector(0,0);
}

function draw() {
  background(255);
  applyForce(wind);
  applyForce(gravity);
  velocity.add(acceleration);
  velocity.mult(drag);
  position.add(velocity);
  acceleration.mult(0);
  ellipse(position.x,position.y,mass,mass);
  if (position.y > height-mass/2) {
      velocity.y *= -0.9;  // A little dampening when hitting the bottom
      position.y = height-mass/2;
  }
  if(position.y == height-mass/2 && (velocity.y > 0.5 || velocity.y < -0.5)){ 
    OnOff = 1;
  }else{
    OnOff = 0;
  }
}

function applyForce(force){
  // Newton's 2nd law: F = M * A
  // or A = F / M
  let f = p5.Vector.div(force, mass);
  acceleration.add(f);
}

function keyPressed(){
  if (keyCode == UP_ARROW) {
    // important to have in order to start the serial connection!!
    setUpSerial();
  }
  if (key==' '){
    mass=random(15, 80);
    position.y=-mass;
    velocity.mult(0);
  }
}

function readSerial(data) {

  if (data != null) {
    wind.x = data ;
    let sentData = OnOff + "\n";
    writeSerial(sentData);
  }
}

Arduino:

int ledPin = 5; 
int Potpin = A1;

void setup() {
  // Start serial communication so we can send data
  Serial.begin(9600);
  pinMode(ledPin, OUTPUT); //set led for output
  pinMode(Potpin, INPUT);//set potentiometer for input
}

void loop() {
  int windsensor = analogRead(Potpin);//read data from the potentiometer
  int wind = map(windsensor, 0, 1023, -2, 2);
  delay(10);
  if (Serial.available() > 0) { //read data from p5js
    int Val = Serial.parseInt();
    digitalWrite(ledPin, Val);
  }
}


Week 11: Reading Response

“Design Meets Disability”:

While reading this chapter, one thing kept popping into my mind, the story of my best friend who was diagnosed with diabetes when she was 4. Growing up together, I got to witness all the phases she went through to accept her disability. Her biggest problem wasn’t the illness itself but rather the equipment she had to “wear” as medication. When she was first diagnosed she used to wear an insulin pump that looked like the one in the picture below, except hers had longer tubes and the proportion of the device to her little body was much bigger, so naturally it was very obvious and raised so many questions that she started getting very self-conscious about it because other children were pointing out that she was a robot or that she needed to be charged like their phones:

Fast forward a few years, her insulin pump was upgraded to this one, the Omnipod: 

The Omnipod is less obvious and is only visible if she is wearing short sleeved shirts, so it is easier for her to hide it when she wants to and display it when she desires. The change in her mental health was very obvious and she seemed to accept her illness more and slowly she started wearing tank tops to display her pump and show the world her “superpower” as she likes to call it. 

I have always wondered why they couldn’t have designed a smaller pump for little children, or made it look nicer so that they wouldn’t be ashamed of it or feel like outcasts wearing it. Lately I have been seeing ads of sticker packs and covers to “style” the Omnipod which makes me wonder if this would make little children more accepting of their illness and less of an outcast.


I have always believed that designers tend to not care about the implications of their design when it comes to designing for disabled people, because for them it’s a need not a want so they would accept whatever is given to them. It was nice to read about examples of design that are more inclusive and more thoughtful of disabled people’s feelings.

Week 11: Final project idea

Interactive drum kit

For my final project I would love to incorporate my love for music by creating a simulation of a drum kit. If possible, I would like to expand my drum kit to include different kits that could be changed by a click of a button on the arduino board. I would use force sensors on the arduino for the input from the users and generate a sound and a corresponding visual on the screen accordingly. When a user strikes one of the physical drum elements, the force sensor detects the impact, and the Arduino sends a signal to the P5.js application. The P5.js app responds by triggering the associated drum sound and displaying visual feedback. In a way to make my drum kit creative, I would like to create different drum kits that incorporate a collection of everyday sounds mixed to sound like a drum sounds.


Week 10: Musical Instrument – Keya and Mirette

Concept:

Our musical is sort of a 3 note piano with 3 octaves. There are three buttons that each play a specific note (A, B and C), and an ultrasonic sensor to measure the distance which in turn specifies the octave the user wants to play the notes in (3,4,5). The nearest interval plays the notes in the third octave, the next plays the notes in the fourth interval which sounds higher than the first interval and the last interval plays the notes in the fifth interval which sound higher than the middle interval. The buttons are controlled by switches that act as our main digital input and trigger specific notes depending on the secondary input which is the analog input from the ultrasonic sensor that specifies the octave to play the notes. We have also included an LED light that blinks when the instrument is first started and when the user has exceeded the range of the input from the ultrasonic sensor.  We included the pitches.h header file that was used in the example shown in class to get the notes played.

Notes played: A3, A4, A5, B3, B4, B5, C3, C4, C5.

Process & Highlights:

It was an interesting process trying to figure out how to connect everything together the right way and to get the ultrasonic sensor to work as expected, but once we figured everything out it was pretty easy to follow through the code. It helped to work as a team because we brainstormed the idea together and worked on the logic of the code and implemented it together which was more fun than working individually. I would say the highlight was finally getting it to work the way we wanted it to. 

Here is a video demo of our instrument:

Code:

const int trigPin = 9;
const int echoPin = 10;
const int ledPin = 13;
const int buzzerPin = 8;
const int switchPin1 = 2; // Pin for the first switch
const int switchPin2 = 3; // Pin for the second switch
const int switchPin3 = 4; // Pin for the third switch

float duration, distance;

// Melodies
#include "pitches.h"

int melody11 = NOTE_C3;
int melody12 = NOTE_C4;
int melody13 = NOTE_C5;
int melody21 = NOTE_A3;
int melody22 = NOTE_A4;
int melody23 = NOTE_A5;
int melody31 = NOTE_B3;
int melody32 = NOTE_B4;
int melody33 = NOTE_B5;


void playNote(int melody){
  tone(buzzerPin, melody, 800);
  delay(1000);
}

void setup() {
  pinMode(trigPin, OUTPUT);
  pinMode(echoPin, INPUT);
  pinMode(ledPin, OUTPUT);
  pinMode(buzzerPin, OUTPUT);
  pinMode(switchPin1, INPUT_PULLUP);
  pinMode(switchPin2, INPUT_PULLUP);
  pinMode(switchPin3, INPUT_PULLUP);
  Serial.begin(9600);
}

void loop() {
  digitalWrite(trigPin, LOW);
  delayMicroseconds(2);
  digitalWrite(trigPin, HIGH);
  delayMicroseconds(10);
  digitalWrite(trigPin, LOW);

  duration = pulseIn(echoPin, HIGH);
  distance = (duration * 0.0343) / 2;


  if (distance < 10) {
    Serial.println("Distance: 1");
    digitalWrite(ledPin, HIGH);   // Turn on the LED

    if (digitalRead(switchPin1) == LOW) {
      playNote(melody11); 
    } else if (digitalRead(switchPin2) == LOW) {
      playNote(melody21); 
    } else if (digitalRead(switchPin3) == LOW) {
      playNote(melody31); 
    }

  } else if (distance < 20) {
    Serial.println("Distance: 2");
    digitalWrite(ledPin, HIGH);   // Turn on the LED

    if (digitalRead(switchPin1) == LOW) {
      playNote(melody12); 
    } else if (digitalRead(switchPin2) == LOW) {
      playNote(melody22); 
    } else if (digitalRead(switchPin3) == LOW) {
      playNote(melody32); 
    }

  } else if (distance < 30) {
    Serial.println("Distance: 3");
    digitalWrite(ledPin, HIGH);   // Turn on the LED
    digitalWrite(ledPin, LOW);
    digitalWrite(ledPin, HIGH);
    if (digitalRead(switchPin1) == LOW) {
      playNote(melody13); 
    } else if (digitalRead(switchPin2) == LOW) {
      playNote(melody23); 
    } else if (digitalRead(switchPin3) == LOW) {
      playNote(melody33); 
    }

  } else {
    Serial.println("Distance: 4");
    //Blink
    digitalWrite(ledPin, LOW);    // Blink the LED
    digitalWrite(ledPin, HIGH);
    digitalWrite(ledPin, LOW);
    digitalWrite(ledPin, HIGH;
    digitalWrite(ledPin, LOW);
    digitalWrite(ledPin, HIGH);
    digitalWrite(ledPin, LOW);
    noTone(buzzerPin);             // Turn off the buzzer
  }
}


Reflections:

We found this exercise a bit harder than the previous one but it was more fun to implement. If we could change one thing about our instrument, it would be to maybe have a screen display the note being played as well as more buttons to replicate an actual piano with more octaves.Additionally, we would love to find a way to incorporate more creativity within.

Done by Mirette & Keya

References:

pitches.h used from tone()

Week 10: Reading Response

“A Brief Rant on the Future of Interaction Design” and the follow-up article:

At the beginning of the reading, right after I watched the video, I was skeptical of the point the author is trying to make. However, as I read through the entire article, I started nodding my head and agreeing with everything the author was saying. Coincidentally, right before I read the article, I was practicing the violin. Because I hadn’t touched the violin in almost 6 months, my hands were “out of shape,” and I had forgotten to warm up before I started playing. So obviously, after a few minutes, my hands started cramping. In the past 11 years of my life, this was the longest break I have taken from playing the violin, so I felt that my hands were communicating with me through the pain and reflecting my unconscious sadness that I have abandoned one of my favorite hobbies for that long. Reading the article made me aware of the emotions we feel when we use our hands to do basic things, from brushing our teeth to playing the violin. I realize our hands are not just a body part we use to do things but rather a part of who we are—an important sense that makes us more aware of ourselves and our emotions somehow. I realize that replacing the use of our hands with a touch of a button or using voice control like Siri or Alexa affects our emotions and makes us numb to the feelings we naturally have.

After I finished reading the article, I asked myself when this article was written, and to my surprise, I found out that it was written 12 years ago. I started thinking back to 2011 and realized that when this article was written, the iPhone 4s had just been released, and the iPad was only out for a year. I wonder what the author thinks now. Unfortunately, the point the author was trying to make has become the reality we live every day. We all carry small glass screens in our pockets that control every single aspect of our lives. And yes, most children are now glued to iPads instead of playing with toys and running around their neighborhood playgrounds. In the response the author wrote, he mentioned that there are ultimately two functionalities that are changing: creating and understanding. He mentions that we cannot create with the use of technology because technology lacks creativity and emotion, but it can be an aid to help us understand stuff. This got me thinking about AI and how people are using ChatGPT to create, understand, and basically everything else. How can we control the advancement of technology so that it doesn’t take over our lives and change us to lifeless robots? Will our future really look like the video? How can we stop it before it’s too late?

Week 9: Analog and Digital switch

Stopwatch

Concept: 

The concept of this circuit is pretty straightforward, it’s a stopwatch! You specify the number of seconds you want the stopwatch to count by setting the potentiometer to a number on a scale of 1-60. Then you press on the red button. The LEDs start lighting in an alternating pattern that represents the seconds passed. When the time specified has passed both LEDs turn off.

Process & Highlights:

The potentiometer is connected in series with the analog input and is used to set the countdown time. The switch is connected in parallel and is used to start the countdown. The LEDs are connected in parallel with resistors and are used to display the countdown time. One LED indicates even seconds, and the other indicates odd seconds and it varies each time depending on the previous state.

Here is a video demo of the switch:

Code:

const int potentiometerPin = A0;
const int switchPin = 2;
const int ledPin1 = 3;
const int ledPin2 = 4;

int countdownTime = 0;
bool countdownStarted = false;

void setup() {
  pinMode(potentiometerPin, INPUT);
  pinMode(switchPin, INPUT_PULLUP);
  pinMode(ledPin1, OUTPUT);
  pinMode(ledPin2, OUTPUT);
  Serial.begin(9600);
}

void loop() {
  if (!countdownStarted) {
    countdownTime = map(analogRead(potentiometerPin), 0, 1023, 1, 60); // Set countdown time based on potentiometer
    Serial.println(countdownTime);
  }

  if (digitalRead(switchPin) == LOW) {
    countdownStarted = true;
  }

  if (countdownStarted && countdownTime > 0) {
    countdownTime--;
    displayCountdown();
    delay(1000); // One-second delay
  } else if (countdownTime == 0) {
    // Countdown finished
    digitalWrite(ledPin1, LOW);
    digitalWrite(ledPin2, LOW);
    countdownStarted = false;
  }
}

void displayCountdown() {
  int ledState = (countdownTime % 2 == 0) ? HIGH : LOW; // Toggle LED state
  digitalWrite(ledPin1, ledState);
  digitalWrite(ledPin2, !ledState);
}

Reflections:

I found this exercise a bit harder than the first one but it was fun to implement. If I could change one thing about my circuit, it would be to maybe have a screen display the seconds that have elapsed as well. I would love to create more advanced circuits in the future and find a way to incorporate more creativity within.

Week 9: Reading response

Making Interactive Art: Set the Stage, Then Shut Up and Listen:

The author points out that people often mix up the real idea behind interactive media and art. Art usually constitutes people expressing their own feelings and emotions whereas interactive media installations usually urge the viewer to come up with their own interpretation, part of the installation is the viewer coming up with a creative interpretation based on their own observations. In my opinion, this concept can be applied to all sorts of art to create a more interesting and captivating experience for the viewers as they unconsciously start relating the art piece to what they want to see. I took a class last year that discussed the idea of close-viewing paintings with zero context. We were not allowed to know who the artist was, when the painting was drawn, in which country it was drawn, the title, nothing. Our final project was to go to the Louvre and each choose a painting and close-view it for an hour and take notes of what we believed was the story behind the painting and the message the painter wanted to send through the painting, before actually reading the description of the painting. During the presentations, I remember that everyone had come up with these amazing and extreme interpretations of their piece that actually had no correlation at all to the description written by the painter. I was surprised by how different everyone’s interpretation can be depending on what their background is, what they currently have on their mind, what their hobbies and interests are, etc. I believe that giving your viewer the space to come up with their own interpretation makes the art experience more enjoyable and relatable to them.

Physical Computing’s Greatest Hits (and misses):

This author lists and describes the most recurring themes in physical computing as of 2008. I have to be honest most of these themes I have seen before, but nevertheless some of them were new to me. I realize that sometimes the best projects stem from the simplest of ideas that incorporate user engagement. I agree that physical computing may seem limited but it is a very broad area and even using creativity to enhance an already existing idea would take it to another level, turning it into an impressive project. I wonder how the rapid evolution of artificial intelligence and machine learning models since this article has affected physical computing projects and installations and how it has enhanced the accessibility of the projects. The article leaves me wondering what new ideas of human interaction could be employed using artificial intelligence and what other possibilities lie ahead in a future of ever evolving technology.