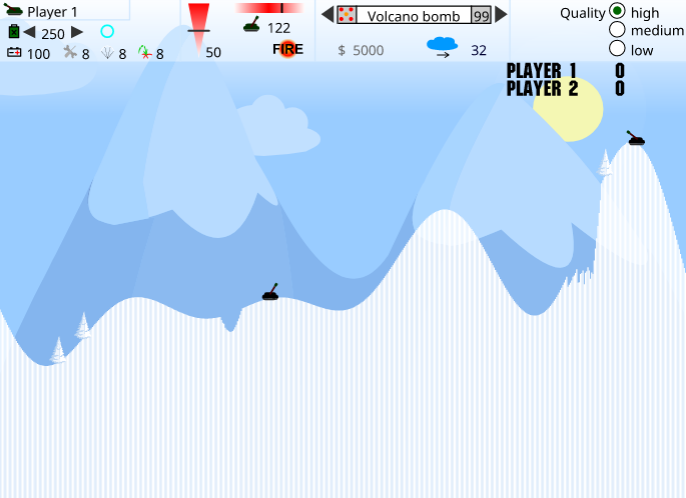
The inspiration came from Tanks, a game which user(s) can control tanks to destroy enemy tanks.
Although the game may look straightforward, it does have many complex in-game interactions such as choosing different weapons, shields, teleportation, shops, and so on. Since my intention is to create a much simpler game, many of the mentioned features will not be implemented. However, there are things which I would like to implement:
Tanks that can move and launch shells to a desired direction.
Exploded shells change landscape (map).
Maps can be easily made (even be drawn with mspaint.exe).
Dashboard of status
Falling out of the map means death.
Multiplayers with turns.
etc.
There may be games that are more easier to make, but I already spent a lot of time creating the below result. I will probably continue to work on this.
So far the implemented features are the followings:
Tank shape
Tank follows gravity unless supported by surface.
Tank can move, and will move slower when going uphill. Cannot go up when the hill is too steep. If tank falls out of the screen, it dies.
Tank can aim.
Tank can launch shells.
Shell explodes when hitting a hard surface (ground, tank, etc.)
Exploded shells permanently change landscape.
Maps are based on images (png). The images are uploaded.
So far there were no serious difficulties (meaning that I could somehow implement things if enough time is invested), but it took a lot of time. But there are more things that should be implemented to finish making the game.
Sound effects
Instructions page
A button to start the game
Functioning in-game dashboard
Multiplayer
Game end condition & restart option
Limited fuel
Controllable launch power.
Health & health bar
More maps
etc.
I wonder how much struggle I will go through just to make this simple game.
This assignment seemed similar to the previous one except how I approached the problem. The goal is to generate art Through Object Oriented Programming (OOP). After seeing an art in Eyeo2012 – Casey Reas video, I wanted to create something similar to the the below image:
9:17
Small, individual creature-like objects moving around black dots. This looked interesting to work on. So, initially, I thought about placing food, creatures, and their predators. But while simulating how my code will work, I realized that it will require a lot of resources(avoiding collisions, having a proper line of sight, etc.) to populate even hundreds of creatures. So, instead of having creature-like objects, I decided to make something simpler: objects that follow gravity.
The above is done as a class work. However, it does not seem like a generative art because it looks too vacant. Also, I do not want the center of gravity to shoot away objects. So I worked on details.
Better. There are 2 major changes other than fancy colors. First, there are tails to the moving objects. As objects move, they leave traces of their previous positions. This is done by a simple trick: instead of overwriting the board with a solid color, use a color with high transparency. The below is the code.
background('rgba(0,0,0, 0.08)');
Second, when particles move too close to the center (and therefore are at risk of being launched back in high velocity), they become reinitialized through init() function. The function is basically a constructor but has a callable name. The below shows how it is done.
constructor() {
  this.init();
}

init() {
  this.size = random(2,8); // random size
  this.vx = random(-3,3); // initial x velocity
  this.vy = random(-3,3); // initial y velocity
  this.x=this.size/2 + random(width-this.size); // initial x position
  this.y=this.size/2 + random(height-this.size); // initial y position
  this.px=this.x;
  this.py=this.y; // previous x and y (for smoothing shapes)
}

...
if (d<30) {this.init();}
...
While working on the above code, I worked on another branch of the project in parallel. Its features include mouse position being the center of gravity and changing the direction of gravity (positive and negative gravity). The sketch is created for the purpose of practice (thus labeled “PR”), so the code is a bit messy and commented not-so-greatly.
Wait… This reminds me of a firework…
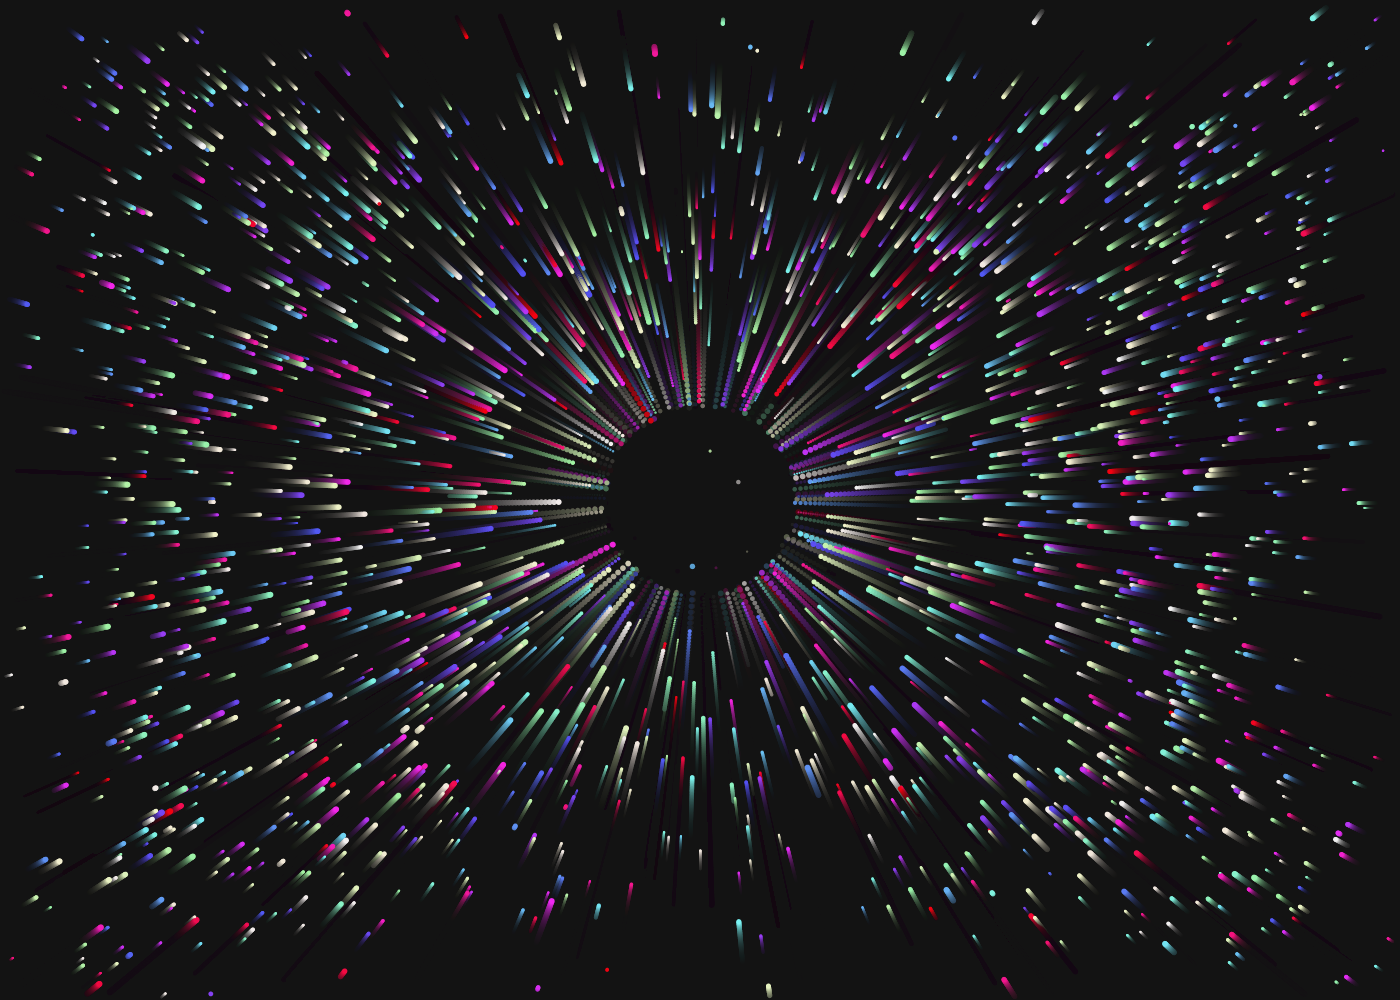
Inspired by what was seen in the above sketch, I created a firework as a side project (“PR”actice). In a big picture, it operates the same way as the gravity function. A circle (point of negative gravity) moves toward the center, and when it reaches its maximum height, 500 colorful circles get teleported around the circle and get pushed away. For more realistic visuals, particles follow gravity toward the floor and their size become smaller as they “burn” over time.
I know. There are too many sketches in one post. I promise to finish my post with one last thing, the generative art. Now that I think of it, it has much less code and complexity compared to the firework, but it does what it needs to do. It should be alright. It is very similar to the second sketch, with slight modifications such as smaller particles and having no velocity other than toward the center.
The biggest problem I encountered during this project was not the difficulties in coding, but headaches I got from my own artwork. Before realizing it was a terrible idea (I just realized as I write this post), I made my generative artwork colorful, which looked like the below.
Imagine seeing thousands of these colorful moving dots and fine-tuning parameters and functions for hours. Definitely a terrible idea. Now I learned that more color does not mean a better art. It was a costly lesson. I hope other people to not make the same mistake as I did this time.
This time, the assignment was to create a digital art based on loops. We learned the basics of the loop, and for the example we were shown multiple houses across a canvas. That may be why; while vaguely thinking about how I should work on this assignment, out of nowhere, an image occupied my mind:
It was blueprint. Not the idea of blueprint, but the image of it: a combination of varying shapes on a blue board. I was not completely sure about the composition of colors, so I looked it up from a webpage called SchemeColor.com.
Seeing these colors, I asked myself whether I had a specific image that I wanted to make. The answer was no. I had a vague image, and this image yielded only a handful of words such as blue background, white drawings, varying shapes, eye-catching, and so on. Because I did not have a specific image in mind, I decided to give my computer a chance. It was time for the chaotic randomness.
Controlling the Chaos
Random can be almost anything. But I did not want anything. I wanted a specific color scheme, specific positions for shapes (they should at least on the canvas so I can see), number of shapes, and other details that make the result look good. The below is a list of fixed values and controlled chaos.
Fixed Canvas Size
Fixed Frame Rate (if too fast, dizzy)
Fixed Background Color
Fixed Number of Shapes
Fixed Number of Scenes (total number of frames shown)
Controlled Shape Border Color
Controlled Shape Border Thickness
Controlled Shape Position
Controlled Shape Rotation (improvement since the last assignment)
Controlled Shape Type
Controlled Shape Size
Controlled Random Seed (So that other people can see the exact thing I saw)
And here is the code that does the above:
function setRandomStroke() {  // sets border color and thickness
  // Color credit to SchemeColor.com
  let colorSet = ['#CED8F7','#4A6DE5','#002082'];
  stroke(random(colorSet));
  strokeWeight(random(1,5)); // 1 to 4
}

function setRandomPosAngle() {  // sets position and rotation
  resetMatrix();
  translate(random(width),random(height));
  rotate(radians(360));
}

// Name is not so descriptive, but it will be used a lot
// It is to limit coordinates(and thus size of the shape)
// 1/downscaleFactor of either width or height (whichever is smaller).
function p() {return random(min(width,height)/downscaleFactor);}

function drawRandomShape() {
  // randomly(based on seed) choose from 1 to 5
  switch (int(random(1,6))) {
    case 1: // rectangle
      rect(0,0,p(),p());
      break;
    case 2: // triangle
      triangle(0,0,p(),p(),p(),p());
      break;
    case 3: // circle
      circle(0,0,p()/2);
      break;
    case 4: // line
      line(0,0,p(),p());
      break;
    case 5: // arc
      arc(0,0,p(),p(),0,radians(random(360)));
      break;
  }
}

function draw() {
  randomSeed((frameCount)%sceneCnt); // shows only sceneCnt # of frames
  for (i=0;i<(width*height/1400);i++) {
    setRandomStroke();
    setRandomPosAngle();
    drawRandomShape();
  }
}
And here is the result. If you look at it for a while, you may start seeing patterns from these random generations.
It is interesting how our minds work. Out of these randomly generated images, our minds start to detect motions. Again, they are (pseudo)randomly generated and thus lack continuity to form a motion. But, if you look at them long enough, you may see them as a tornado of objects, bubbles floating toward you, objects falling down, and so on. I like this randomness. It took a bit of time to refine the details, but I want to use this controlled chaos on later projects.
The below is a variant where only size of the shape is different. Shape, position, rotation, and all the other details are the same as the above (same seed for the random function). After seeing this for a while, you may be able to see a wind blowing.
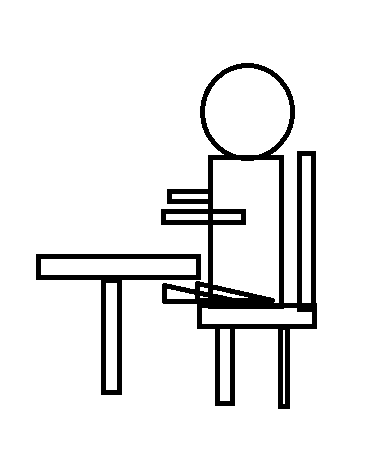
During the first lecture, we learned how p5.js work and the ways to create (seemingly) simple shapes. Second lecture, we dipped tip of our toes on making simple animations. And now we have an assignment: making a self-portrait. Although I do not have an artistic background, I did not want to create an ugly object and call it a portrait of myself. So, I discarded the difficult details. Instead of filling the entire canvas with my face, I decided to make it small. Still, I was pretty sure that I am not good at creating faces, so I turned the head sideway.
Better. But now, it became hard to say that it is my portrait. It looks as it a random person sitting. So, I started to lay out what characteristics I can give to this random person so that it somehow resembles myself. So, I took a picture of myself doing this assignment. Then I extracted some visible characteristics: pose, skin tone, color of clothes, and so on. After some time of planning, I started to think about how I should build this image of myself. So, I went to the p5.js reference page and skimmed through it. For pose, I could use rotate(). For color of clothes, fill(). Using circles and rounded rectangles seemed a good way to create less stiff image. At one point, I thought to myself that it is enough of planning, so I started to work on p5.js.
Difficulties
I knew I would have to go though a ton of trials and errors just to create something that may resemble what I planned. But there was one thing that kept annoyed me: rotate(). I now know better about it, but at the time, I could do nothing but to see my arms fly out of my body and disappear from my sight. After a lot of trials and errors, I could somehow bring back my arms and put it on my body. The outcome somewhat resembled myself, but I was not satisfied. I learned and know how to create animate objects in p5.js, and I wanted to somehow use it. So, I tried to change my arm’s angle of rotation to make it look as if I am typing something. And I saw my arms fly again. It is time for trials and errors.
// this is a pseudo code
rotate(radians(30));
rect(100, 100, 4, 95, 2);
Luckily, soon enough, I realized that there was a way to have a control over the axis of rotation: use translate() and then create objects at relative coordinate of 0, 0. This way, I get to move my arms while my arms still attached to my body.
let rArmAngle = 168;
let v1 = -0.2;

function animateRightArm() {
  fill(250,240,230);
  translate(width/2,height/2);
  translate(95,47);
  rArmAngle += v1;
  if (rArmAngle >= 168 || rArmAngle <= 161) {v1=-v1;}
  rotate(radians(rArmAngle));
  rect(0, 0, 100, 28, 20);
  resetMatrix();
}
And here is my final result: me making my self-portrait.
Maybe I should have figured out how to use rotation() properly before using it right away and manually fix problems. But for next time, now that I figured out how to fix an axis of rotation, I will work on figuring out how to move multiple axis of rotation to create joints, before I start typing codes.

 The original game
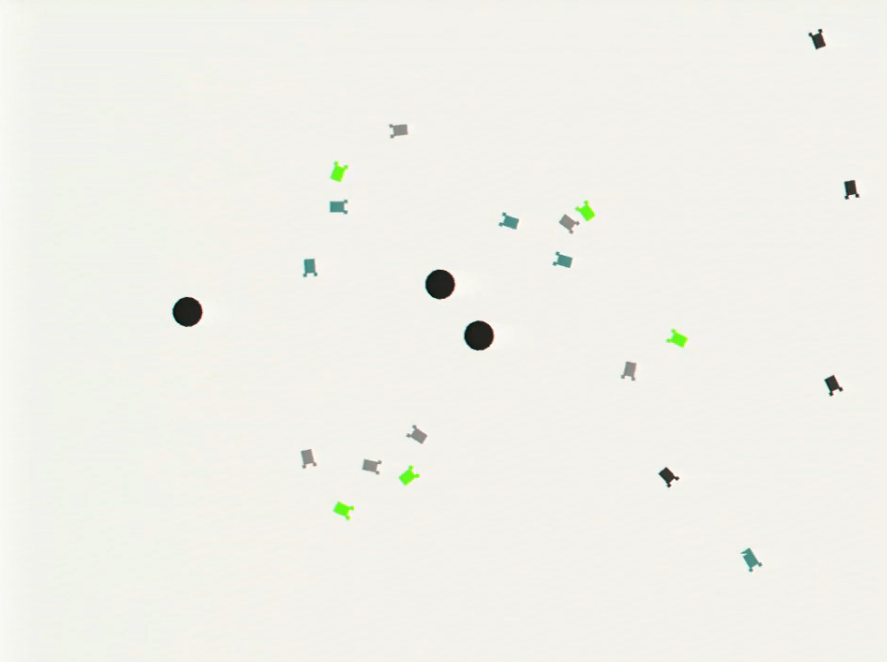
 Click the canvas to see colored version.
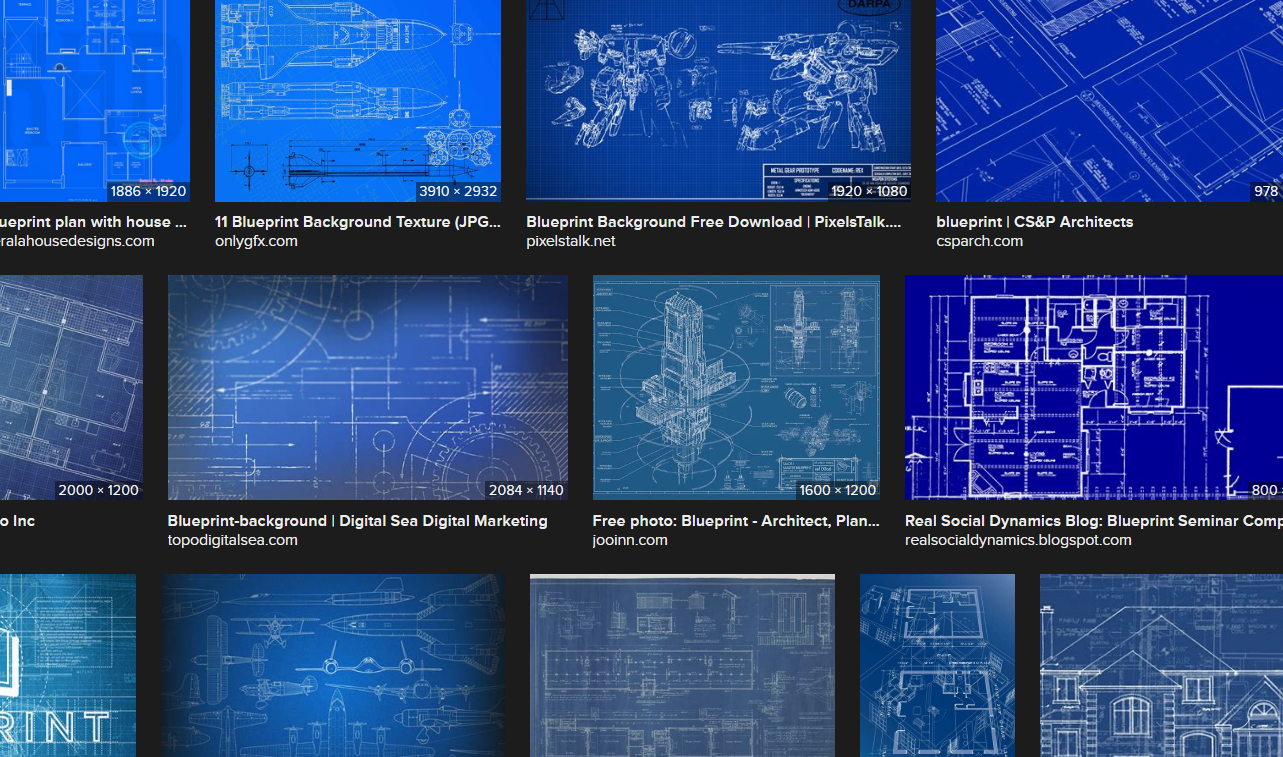 “blueprint” from your favorite search engine
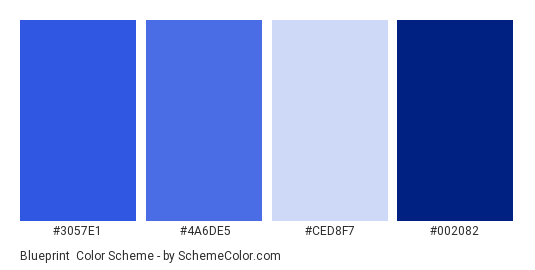
 Initial Design