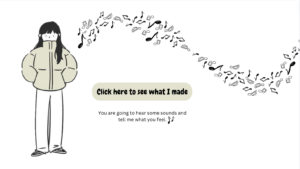
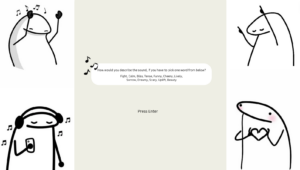
MIDTERM PROJECT – Music Emotions and words

Concept:

My project takes inspiration from one of the psychology study that I recently came across, which discussed how many emotions people feel when they hear a particular sound, they distilled them into 13 distinct feelings. Although I had a different concept when I started working on my midterm project, I thought it would be interesting to incorporate this idea somehow. So I tried to translate this into a digital canvas of P5js. The user encounters random sounds and is prompted to articulate the emotions/feelings about that song. I planned to create something that interconnects the sound and the sentiment that is felt from it. And then also allows users to interact with the words by implementing some transitions to the words they entered.
Link to my project: https://editor.p5js.org/ib2419/full/DcHdGgor5

How does it work:

As I described a bit about my project above, aiming to engage users in exploring the relationship between sound and visual art.

  1.  It starts with the display of users encountering a main Menu page where the user is asked to click anywhere on the screen and describe the project.


2. When clicked,  an invisible grid of sound objects is displayed, each representing a distinct sound, and the display message of  ‘Click wherever you want to hear something‘. After the user clicks anywhere on the screen a sound object triggers the playback of its associated sound. Once a sound is selected, users are prompted to input ‘How would you describe the sound?’


3. And then initiating the generation of visual representations of the input. These visuals are created using bubbles or strokes, depending on the mode selected by the user. Additionally, an image – which displays the message about that type of song and why people feel that corresponds to the chosen sound is displayed alongside the generated visuals. Users can interact further by switching between bubble and stroke modes using the spacebar and returning to the main menu by pressing ‘R’.

Code that I am proud of:

One aspect I’m particularly proud of is the implementation of object-oriented programming (OOP) principles. By structuring the code into classes like soundBoard and bubbleArt, I aimed to encapsulate related functionality and data, fostering code modularity and reusability. This approach not only enhances the readability of the code but also facilitates easier maintenance and future expansion of the project.

Class for sound Board –  The ‘soundBoard’ class defines sound buttons with properties like index, position, and dimensions. Each button instance maintains an association between its index and a corresponding sound object. The ‘boxClicked’  method detects mouse clicks within button boundaries, facilitating user interaction. This class encapsulates functionality for managing interactive sound buttons, enhancing user experience through intuitive audio control.

// Class for sound button
class soundBoard {
  constructor(index, xstart, ystart, boxWidth, boxHeight) {
    this.index = index;
    this.xPos = xstart;
    this.yPos = ystart;
    this.boxWidth = boxWidth;
    this.boxHeight = boxHeight;
    this.soundIndex = this.index;
    this.sound = "";
  }

  // Check if the button is clicked
  boxClicked(mouseXPos, mouseYPos) {
    if (
      mouseXPos >= this.xPos &&
      mouseXPos <= this.xPos + this.boxWidth &&
      mouseYPos >= this.yPos &&
      mouseYPos <= this.yPos + this.boxHeight
    ) {
      return this.index;
    } else {
      return -1;
    }
  }
}

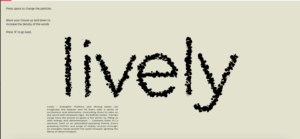
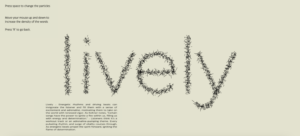
Class for bubbleArt –  I made a ‘bubbleArt’ class to facilitate the creation of bubble text with customizable parameters such as word, position, font size, and style. The ‘wordToBubble’ method converts the text into a series of points, enabling the creation of bubble-shaped characters. Using the ‘brush’ method, individual bubbles or strokes are drawn based on the chosen mode (bubbles or strokes). The ‘moveBubbles’ method adjusts the position of the bubbles based on mouse input, allowing for dynamic interaction with the text. Overall, the class encapsulates functionality for generating visually appealing and interactive bubble text elements within the application.

// Class for creating bubble text
class bubbleArt {
  constructor(
    word,
    xPos,
    yPos,
    fontsize,
    sampleFactor,
    sizeW,
    sizeH,
    mode,
    bubbleMode
  ) {
    this.word = word;
    this.posX = xPos;
    this.posY = yPos;
    this.fontSize = fontsize;
    this.samplefactor = sampleFactor;
    this.sizeW = sizeW;
    this.sizeH = sizeH;
    this.mode = mode;
    this.bubble = bubbleMode;
  }

  // Convert word to bubble text
  wordToBubble() {
    let points;
    points = font.textToPoints(this.word, this.xPos, this.yPos, this.fontSize, {
      sampleFactor: this.sampleFactor,
      simplifyThreshold: 0,
    });
    return points;
  }
  // Get bounding box for text
  boundBox() {
    return font.textBounds(this.word, this.xPos, this.yPos, this.fontSize);
  }

  // Draw bubble text
  drawPoints() {
    let points;
    points = this.wordToBubble();
    if (points) {
      for (let i = 0; i < points.length; i++) {
        this.brush(points[i].x * this.sizeW, points[i].y * this.sizeH);
      }
    }
  }

  // Draw individual bubbles or strokes
  brush(x, y) {

    for (let i = 0; i < 1; i++) {
      let posX = randomGaussian(0, 5);
      let posY = randomGaussian(0, 5);

      if (fontMode == "bubbles") {
        // Drawing bubbles
        let size = randomGaussian(5, 5);
        ellipse(x + posX, y + posY, size, size);
      } else {
        // Drawing lines
        let angle = random(TWO_PI);
        let lineLength = randomGaussian(5, 5);
        let endX = cos(angle) * lineLength + x + posX;
        let endY = sin(angle) * lineLength + y + posY;
        line(x + posX, y + posY, endX, endY);
      }
    }
  }
  
  // Move bubbles based on mouse position
  moveBubbles() {
    let bounds = this.boundBox();
    let adjustedSampleFactor = map(mouseY, 0, windowHeight, 0.1, 3); // Adjusting sampleFactor based on mouseY position
    translate(
      -bounds.x * this.sizeW - (bounds.w / 2) * this.sizeW + windowWidth / 2,
      -bounds.y * this.sizeH + 50 + windowHeight / 5
    );
    translateWidth = -(
      -bounds.x * this.sizeW -
      (bounds.w / 2) * this.sizeW +
      windowWidth / 2
    );
    translateHeight = -(-bounds.y * this.sizeH + 50 + windowHeight / 5);

    this.sampleFactor = adjustedSampleFactor; // Update sampleFactor
    this.drawPoints();
  }
}

Another highlight of the project is the integration of multimedia elements. Using preloaded assets and libraries like p5.js, I incorporated a diverse range of visual and sound files into the user experience (which was a hard task for me, I had to make sure that the files were not too heavy, and I was not aware of it before). Also while I was struggling in the start to create the sound objects for each button and associated them with their respective sound files. I was able to generate a grid layout for sound buttons by using nested loops to iterate over rows and columns. So it calculates the position of each button based on the current row and column, creating instances of the ‘soundBoard’ class and adding them to an array. I think that this approach organized the sound buttons systematically, and helped me establish the connection by assigning the sound files to the sound property of each sound object.

let index = 0;
 for (let row = 0; row < 3; row++) {
   for (let col = 0; col < 4; col++) {
     let xstart = col * boxWidth;
     let ystart = row * totalHeight;
     soundObjects.push(
       new soundBoard(index, xstart, ystart, boxWidth, boxHeight)
     );
     index++;
   }
 }

 soundObjects[0].sound = sound1; // Associate sound object 0 with sound1
 soundObjects[1].sound = sound2; // Associate sound object 1 with sound

One of the key design considerations that I wanted was the emphasis on user interaction and customization. And I was able to do it by providing users with control over sound playback and visual effects, the whole point was to personalize their experience and delve into the creative possibilities of the project.

Improvements:

While developing my sketch, I noticed that it lacked responsiveness. I realized that I relied heavily on fixed dimensions like ‘windowHeight’ and ‘windowWidth’, restricting how my visuals adapt to different screen sizes. This oversight should be addressed for future improvements to ensure a more adaptable layout. Additionally, I believe there’s room to enhance the interaction with the bubble art and lines. Currently, they serve as visual elements without meaningful interaction. In a previous project, I explored integrating them with sound generation, where mouse movements influenced the density of both sounds and visual elements. Exploring similar interactive possibilities could elevate the engagement level of the sketch. Moreover, I’m interested in learning how to integrate text directly with sound, rather than relying on images, which could further enrich the sound-visual part of my project.

Problems:

My main challenge was settling on a single idea for my project. Initially, I experimented with various concepts, aiming to recreate interactive art gifs that inspired me. After discussing ideas with friends, I finally settled on a concept. When I started making this project I encountered difficulty integrating object-oriented programming (OOP) principles into my project, so I opted to start with a simpler sketch using functions in different files. However, I faced hurdles when attempting to connect sounds with messages as I had envisioned. My original plan revolved around particle motion, which I learned about through tutorials. Later, I explored additional references to refine my understanding. Integrating user input functions proved problematic, with errors arising during execution, particularly with transitioning between different states such as ‘main Menu’, ‘sections’, ‘input’, and ‘display’.

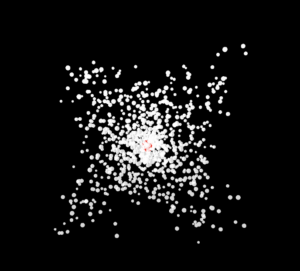
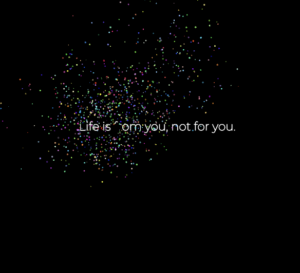
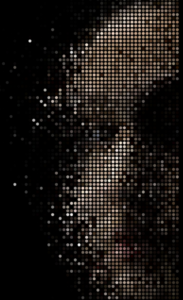
Pictures of previous project displays:


References:

https://p5js.org/reference/#/p5/randomGaussian

https://youtu.be/E2UWkCp3zbo?si=kgW-z1VSCtkdoFNR

Week 5: Midterm Progress

Concept and Design

The core concept of this project revolves around creating an immersive interactive experience that blends art and technology, leveraging the versatility of the p5.js library. The aim is to develop an artwork or game that captivates the user by engaging their senses through visual elements, sound, and interactivity. The design is centered on the principle of simplicity to ensure accessibility while fostering a deep sense of exploration and interaction. By incorporating a variety of media types—including shapes, images, sounds, and on-screen text—the project seeks to create a rich, multi-sensory environment that responds to the user’s actions in intuitive and surprising ways.

Implementation

So far, the project has laid down a foundational structure that supports Object-Oriented Programming (OOP) to manage its various interactive elements effectively. A particle system has been developed as the primary visual feature, showcasing a dynamic and aesthetically pleasing behavior that can be manipulated through user input. The system begins with an instructional screen, ensuring that users understand how to interact with the artwork or game before commencing. This design choice not only improves user experience but also aligns with the project’s requirement to start the experience with an instruction screen and wait for user input before starting.

The current implementation allows for the experience to be restarted without the need to reload the sketch entirely, promoting a seamless user interaction that encourages exploration and repeated engagement. The integration of state management facilitates this process, enabling the transition between different phases of the application, such as viewing instructions, interacting with the experience, and restarting the session.

Challenges

One of the main challenges faced during development has been incorporating all the required elements (shape, image, sound, and on-screen text) into a cohesive and interactive experience. While the foundational structure for shapes and on-screen text has been established through the particle system and instructional screen, the integration of images and sounds remains incomplete. Balancing the aesthetic appeal with functional interactivity, especially when introducing multimedia elements, requires careful consideration to maintain performance and user engagement.

Another significant challenge is ensuring that the experience is equally compelling for one or more users. Designing interactions that are universally intuitive yet offer depth and discovery poses a unique challenge in user experience design. Additionally, creating a mechanism for seamlessly restarting the experience without restarting the sketch has required thoughtful state management and control flow within the code.

Future Directions

Moving forward, the project will focus on integrating the remaining required elements—specifically, the inclusion of at least one image and one sound—to enrich the sensory experience. Exploring creative ways to incorporate these elements will not only fulfill the project’s requirements but also enhance the overall aesthetic and interactive quality of the work. Addressing the challenges of multi-user interaction and refining the user interface to accommodate various interaction modes will also be a priority. Through iterative design and testing, the project aims to evolve into a fully-realized interactive experience that leverages everything learned so far, presenting users with an engaging and memorable exploration of digital art and interactivity.

Progress

Week 5: Response on Computer Vision for Artists

Reflecting on David Rokeby’s “Sorting Daemon,” this piece made me think about how technology watches us and what that means. It offers a commentary on the intricacies and ethical considerations of surveillance technology within contemporary art. Rokeby used cameras and computers to watch people on the street, then changed their images based on color and movement. This gets us asking big questions about privacy and how we’re judged by machines. Although Rokeby’s installation, is motivated by the increasing indulgence of surveillance in the guise of national security, it cleverly navigates the balance between artistic expression and the critical examination of automated profiling’s social and racial implications. What makes this project stand out is its ability to turn a public space into an interactive scene, where people, without realizing it, become part of an artwork that dissects and reconstructs them based on superficial traits like color and movement. This raises significant questions about our identity and privacy in an era dominated by digital surveillance.

The installation makes us consider the complex algorithms that allow “Sorting Daemon” to capture and process the ways of human motion and color. The project’s reliance on computer vision to segregate and categorize individuals echoes broader concerns about the ‘black box’ nature of surveillance technologies—opaque systems whose often inscrutable decisions bear significant consequences. This opacity, coupled with the potential for algorithmic bias, underscores the ethical quandary of using such technologies to distill complex human behaviors into simplistic, quantifiable metrics. The artistic intention behind Rokeby’s work is clear, yet the methodology invites scrutiny, particularly regarding how these technologies interpret and represent human diversity.

Turning to the broader application of computer vision in multimedia authoring tools, Rokeby’s project illuminates the dual-edged sword of technological advancement. On one hand, artists have at their disposal increasingly sophisticated tools to push the boundaries of creativity and interaction. On the other, the complexity of these tools raises questions about accessibility and the potential for a disconnect between the artist’s vision and the audience’s experience. As multimedia authoring evolves, embracing languages and platforms that offer live video input and dynamic pixel manipulation, the dialogue between artist, artwork, and observer becomes ever more intricate. This evolution, while exciting, necessitates careful consideration of user interface design to ensure that the essence of the artistic message is not lost in translation.

The installation makes us to consider the ethical considerations of our increasingly monitored lives, urging us to reconsider our connection with technology, privacy, and one another. As the boundaries between the public and private realms continue to blur, projects like Rokeby’s remind us of the crucial role art plays in questioning, provoking, and fostering dialogue about the critical issues facing us today.

Assignment # 4 Magnetic Effect Text

Concept

The magnetic effects and trails that I have come across a lot while looking for inspiration for this project served as my motivation. After doing some research, I came to Professor Aron’s website, which featured several interactive elements related to text manipulation. And it was these pictures on Pinterest that inspired me. The primary concept was kinetic typography, which used particles to smoothly transition between words to depict the unpredictable character of the natural world. It demonstrates how basic components can come together to create meaningful expressions when they are directed by physics and a little bit of randomness.

Code

The part of the assignment I’m most proud of is the creation of the Vehicle class. This piece of code is special because it makes each dot on the screen move like it has its mind, heading towards a goal. It combines simple rules of movement and direction to bring letters on the screen. What makes this class stand out is how it turns basic coding concepts into something that feels alive and interactive.

let font;
let vehicles = [];
let originalPoints = [];
let cycleDuration = 5000; // Duration of one cycle in milliseconds
let lastResetTime = 0; // Tracks the last time the positions were reset
let words = ["SHOK", "SHAK", "SHOK"]; // Array of words to cycle through
let currentWordIndex = 0; // Index of the current word in the array

function preload() {
  font = loadFont('myfont.otf');
}

function setup() {
  createCanvas(800, 300);
  background(255);
  textFont(font);
  textSize(192);
  setupWord(words[currentWordIndex]);
}

function draw() {
  let currentTime = millis();
  if (currentTime - lastResetTime > cycleDuration) {
    // Move to the next word in the array, cycling back to the start if necessary
    currentWordIndex = (currentWordIndex + 1) % words.length;
    setupWord(words[currentWordIndex]); // Setup points for the new word
    resetPositions();
    lastResetTime = currentTime;
  } else {
    background(255, 20); // Semi-transparent background for trail effect
  }

  for (let v of vehicles) {
    let noiseForce = getNoise(v.pos.x, v.pos.y);
    v.applyForce(noiseForce);
    v.update();
    v.show();
  }
}

function setupWord(word) {
  vehicles = []; // Clear the current vehicles
  let bounds = font.textBounds(word, 0, 0, 192);
  let posX = width / 2 - bounds.w / 2;
  let posY = height / 2 + bounds.h / 4;

  let points = font.textToPoints(word, posX, posY, 192, {
    sampleFactor: 0.5
  });

  originalPoints = points;

  for (let pt of points) {
    let vehicle = new Vehicle(pt.x, pt.y);
    vehicles.push(vehicle);
  }
}

function getNoise(x, y) {
  let noiseVal = noise(x * 0.01, y * 0.01);
  let angle = map(noiseVal, 0, 1, 0, TWO_PI);
  let force = p5.Vector.fromAngle(angle);
  force.mult(0.1);
  return force;
}

function resetPositions() {
  for (let i = 0; i < vehicles.length; i++) {
    vehicles[i].pos = createVector(originalPoints[i].x, originalPoints[i].y);
    vehicles[i].vel = p5.Vector.random2D().mult(0); // Reset velocity
  }
}

class Vehicle {
  constructor(x, y) {
    this.pos = createVector(random(width), random(height)); // Start with random positions
    this.target = createVector(x, y);
    this.vel = p5.Vector.random2D();
    this.acc = createVector();
    this.r = 4;
    this.maxspeed = 4;
    this.maxforce = 1;
  }

  applyForce(force) {
    this.acc.add(force);
  }

  update() {
    this.vel.add(this.acc);
    this.vel.limit(this.maxspeed);
    this.pos.add(this.vel);
    this.acc.mult(0);
  }

  show() {
    stroke(0);
    strokeWeight(this.r);
    point(this.pos.x, this.pos.y);
  }
}

Embedded Sketch

Reflection and ideas for future work or improvements

Reflecting on this assignment, I’m considering the introduction of interactivity, allowing viewers to influence the flow and form of the animation in real-time. Additionally, refining the transitions between words to be even smoother would elevate the visual fluidity, creating a seamless blend from one word to the next. These improvements aim to turn the animation into a more immersive one.

Assignment# 3 – 3D boxes

Concept:

The visual design that I created is reminiscent of waves moving. The inspiration for this design comes from the ‘Bees and Bomb’ design named cube wave . This effect is achieved by varying the height of each box according to a sine wave, with the wave’s phase offset by the box’s distance from the center of the canvas. This creates a harmonious, visually appealing pattern that continuously evolves. I came across this video on YouTube, that kind helped me with the basics of this design.

The choice to center the artwork, combined with the monochromatic color scheme (black boxes with white strokes), emphasizes the geometric shapes and the movement pattern, focusing the viewer’s attention on the fluidity of the motion rather than being distracted by color.

Code:

In this generative art project, I’ve merged Object-Oriented Programming (OOP) with arrays to manage dynamic 3D visualizations using p5.js. The core of the project is the Box class in box.js, which outlines the characteristics and behaviors of the 3D boxes, including their wave-like height adjustments and rendering on the canvas. Utilizing an array, I efficiently organize multiple Box instances, populating this structure in the setup function and iterating over it in the draw function to update and display each box according to a sine wave pattern. This setup leverages OOP for encapsulation and arrays for managing multiple objects, showcasing the project’s complexity through simple user interaction—a keypress initiates the animation, demonstrating a direct engagement with the artwork and highlighting the thoughtful integration of coding principles to bring interactive, dynamic art to life.

Box.js:

class Box {
    constructor(x, z, w, h) {
        this.x = x;
        this.z = z;
        this.w = w;
        this.h = h;
    }

    updateHeight(offset, offsetIncrement) {
        let d = dist(this.x, this.z, width / 2, height / 2);
        let a = offset + d * offsetIncrement;
        this.h = floor(map(sin(a), -1, 1, 100, 300));
    }

    show() {
        push();
        translate(this.x - width / 2, 0, this.z - height / 2);
        // stroke(255); // White stroke
        // noFill(); // No fill, or use fill(0) for a black fill
        // box(this.w, this.h, this.w); // Draw the 3D box with p5.js's box function
        // pop();
      
        fill(0); // Fill with black color
        stroke(255); // White stroke
        box(this.w, this.h, this.w); // Draw the 3D box with p5.js's box function
        pop();

    }
}

Sketch.js:

let boxes = []; // Array to store Box objects
let angle = 0;
let w = 24; // Width of the boxes
let ma; // Magic angle
let offsetIncrement;

function setup() {
  createCanvas(400, 400, WEBGL);
  ma = atan(1 / sqrt(2));
  offsetIncrement = TWO_PI / 30; // Adjust this for smoother or more rapid changes
  
  // Populate the array with Box objects
  for (let z = 0; z < height; z += w) {
    for (let x = 0; x < width; x += w) {
      // Adjust the initial height (h) as needed to fit your artistic vision
      boxes.push(new Box(x, z, w, 200)); // Using 200 as an example height
    }
  }
}

function draw() {
  background(0);
  ortho(-400, 400, 400, -400, 0, 1000);
  rotateX(-QUARTER_PI);
  rotateY(ma);

  // Update and display boxes from the array
  let offset = angle;
  boxes.forEach(box => {
    box.updateHeight(offset, 0.15); // Adjust the second parameter to change the wave's speed
    box.show();
    offset += offsetIncrement;
  });

  angle += 0.1; // Adjust this for faster or slower animation
}

Embedded Code:

Reflections and Improvement:

Reflecting on the project, I see several areas for improvement that could make the interactive experience and the visual complexity of the art much better. One immediate enhancement that I wanted to add was introducing varied color dynamics, where each box’s color changes in response to its height or position, adding another layer of depth and engagement, but I think I need to learn more about it as I was messing up my structure while to achieve it. Also experimenting with different geometric shapes or incorporating interactive elements that react to mouse movements could offer viewers a more immersive experience. These reflections seem to open up exciting possibilities for evolving the project, pushing the boundaries of what can be achieved with creative coding and interactive design.

Week 3 – Response The Art of Interactive Design

Reading chapter of ‘The Art of Interactive Design,’ made me think about my understanding of interactivity, where the author offered dynamic exchange of ideas to redefine what interactivity really is. This perspective pushes against the grain of conventional digital design, where interaction is often mistaken for simple user interface manipulations. Reflecting on this, one inference that came to my mind was the depth of our daily digital engagements—are we truly interacting, or just reacting? I believe that author’s argument that true interaction involves a meaningful exchange where both parties listen, think, and respond, gives us a different conceptual framework and also make us critically examine our roles as designers and users in the digital realm.

Another critique that’s presented in the reading stirs a debate of what we value in interactive experiences. Which also more seems to be like a call to action for creators and consumers alike to seek out and foster genuine connections within digital spaces. Reading through this chapter also has truly reshaped my understanding of what makes design genuinely impactful. It’s made me rethink my previous stance on what effective design truly means, guiding me towards valuing deeper, more meaningful interactions over just eye-catching or user-friendly interfaces. This new insight is quite enlightening; it opens up a whole new world of questions about how we can create digital experiences that foster real, two-way conversations with users. It’s not just about altering my viewpoint; it’s about sparking a curiosity to explore how these insights could revolutionize our interaction with technology, making it more immersive and interactive in truly meaningful ways.

Reading Reflection — Week 2

It was something new for me to dive into how art projects are more than just what meets the eye, especially when Casey Reas explored the theme of randomness. I found it quite interesting to see how a simple tweak in shapes and algorithms can transform art in unexpected ways, that create something new each time.

This got me thinking—why do we use art to reflect the randomness around us, or in creating randomness, is it ever purely random? Or we just choose how much of it we truly want to be random. This whole idea makes me curious to think deeper about the intention behind art and the unpredictability it represents. Because for me randomness seems like a paradox, despite our efforts to control or understand it.

Assignment 2 — Fishes in Colors

Concept:
I wanted to create an animated visual effect this time. I was trying to represent the fluid nature of water and fishes by capturing the randomness. I have used HSB color mode for vibrant, holographic colors of the small circles that represent the fishes. The program generates 1000 points with random positions, sizes, colors, and movement angles. Each frame, draws these points as ellipses, creating a trail effect with a semi-transparent background. Points move based on their angles, occasionally changing direction, and wrap around the canvas edges. The color of each point gradually changes, creating a dynamic display.

Code:

let pointCount = 1000;
let shapes = [];

function setup() {
  createCanvas(600, 600);
  colorMode(HSB, 255); // Use HSB color mode for the holographic effect
  noStroke();

  // Create initial points with random positions and properties
  for (let i = 0; i < pointCount; i++) {
    shapes.push({
      position: createVector(random(width), random(height)),
      size: random(1, 5),
      color: color(random(255), 200, 255, 100), // Holographic color with some transparency
      angle: random(TWO_PI),
      speed: random(0.005, 0.03), // Speed of change
    });
  }
}

function draw() {
  background(0, 0, 0, 25); // Semi-transparent background for a trail effect

  // Draw each point and update properties
  shapes.forEach((shape) => {
    fill(shape.color);
    ellipse(shape.position.x, shape.position.y, shape.size);

    // Update position
    shape.position.x += cos(shape.angle) * 2;
    shape.position.y += sin(shape.angle) * 2;

    // Randomly change the movement angle
    if (random(1) < 0.05) {
      shape.angle += random(-0.5, 0.5);
    }

    // Wrap around the edges of the canvas
    if (shape.position.x > width) shape.position.x = 0;
    if (shape.position.x < 0) shape.position.x = width;
    if (shape.position.y > height) shape.position.y = 0;
    if (shape.position.y < 0) shape.position.y = height;

    // Update color
    shape.color = color(frameCount % 255, 200, 255, 100);
  });
}

Embedded Version:

Reflection and Improvement:

I am happy that it finally worked in the end because I was having a hard time wrapping around the edges of the canvas. In the future, I would like to ensure that the randomness is affected by the user interaction through the mouse or keyboard. Maybe also integrate some shapes, so that the small circles are affected by them and then place them in a transparent grid.

Self-Portrait: Bird by Bytes

Concept

My aim was to create any drawings using geometric shapes. I had previous experience drawing illustrations but had never coded them to visualize them. That’s why I decided to go through bunch of geometric pictures on the internet and came up with the idea of making a ‘toucan’. I chose to go with a ‘funky colours’ concept, so I separated the background into two triangles and painted them different colors. Then I decided to sketch  on paper to see how many shapes I needed.

I went through everything and chose to use two triangles, four semi-circles, two rectangles, two ellipses, one line, and one circle to represent the toucan’s body. The body is formed of ellipses, the head is made of two semi-circles, the beak is made of a rectangle and a semi-circle, and the feet are made of another semi-circle.
Here is the Sketch that I made

Image

Code

Being able to rotate the ellipse diagonally, because when I was dealing with other coordinates, it was difficult for me to get the shapes to form something that resembled what I was attempting to create. And after quite a bit of effort, I was able to arrange all of the shapes in their proper arrangement. My first plan was to have transparency in the colour of some shapes, but each time I changed the transparency, the colour changed, so I used this plugin  in Chrome to retrieve the colour codes, which was quite useful. Here are some code snippets that demonstrate how I created a diagonal oval shape and animated the eye movement.

function setup() {
  createCanvas(500, 600);
  background(225);
   }

function draw() {
  // for the left triangle of the background
  c = color('hsl(65,16%,54%)');
  fill(c);
  triangle(0, 0, 500, 0, 500, 600); 

  // for the right triangle of the background
  b = color('hsl(179,43%,22%)');
  fill(b);
  triangle(0, 0, 0, 600, 500, 600); 
  

  // beak semi-circle right side
  arc(355, 135, 175, 175, radians(270), 0);
  
  // beak rect
  b = color('hsl(37,75%,52%)');
  fill(b);
  rect(270, 48, 86, 87); 
  
  //feet
  fill('#212c3f')
  arc(340, 560, 240, 240, radians(180), 0);

  //below body
  noStroke();
  fill('hsl(30,81%,59%)');
  ellipse(150, 390, 245, 190) 
  
  // rect for feet
  fill('#c2bd48');
  rect(220, 440, 115, 170);


  // Draw a diagonal oval
  push(); // Start a new drawing state
  translate(250, 300); // Move to the desired position
  rotate(PI / 5); // Rotate by 45 degrees (PI/4 radians)
  fill('#060d30'); // White color for the oval
  ellipse(20, 15, 380, 250); // Draw the oval at the new origin
  pop(); // Restore original state

  //bigger one - head
  fill('#212c3f')
  arc(255, 180, 300, 270, radians(90), radians(270)); 
  
  //head smaller semi-circle
  fill('#e9e4b9')
  arc(255, 120, 180, 150, radians(90), radians(270)); 
  
  // Static line above the eye
  stroke(0); // Set line color
  line(240, 95, 180, 95); // Line for the eye
  
  // Dynamic eye that follows the mouse cursor horizontally
  let eyeX = constrain(mouseX, 190, 230); // Constrain the eye's horizontal movement
  let eyeY = 107; // Keep the eye's vertical position constant
  
  fill(0); // Set fill color for the eye
  noStroke(); // No border for the eye circle
  circle(eyeX, eyeY, 20); // Draw the eye circle
}


Embedded sketch

Reflection

I think having a dynamic image would be a great idea. And using other forms of shapes, such as curves and beziers, would help me create a better graphic. Because it is difficult to play with shapes in such a way that the coordinates coincide without leaving unnecessary gaps. Another thing I want to improve is my understanding of color theory, because even though I was able to obtain the color codes I desired, I know I fell short of obtaining the various transperacy levels of colors required for particular shapes.