Final Project: Inside Out Runner Game

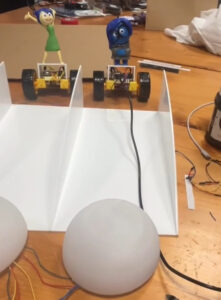
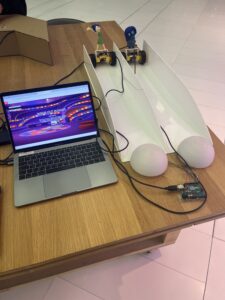
For this final project, I built an interactive game that represents the mental world of a child’s mind—heavily inspired by Inside Out. The digital part of the game was made using p5.js, and it connects to three physical Arduino setups: two for the moving characters (Joy and Sadness) and one for the glowing memory balls.

You play by dodging obstacles and collecting star-shaped powerups. There are two types of obstacles: the memory bridge (which the player slides under) and the memory ball cluster (which you jump over). As the player moves through the level, their real-life emotions move along a race track: Joy advances when the player collects powerups, and Sadness moves forward every time an obstacle is hit.

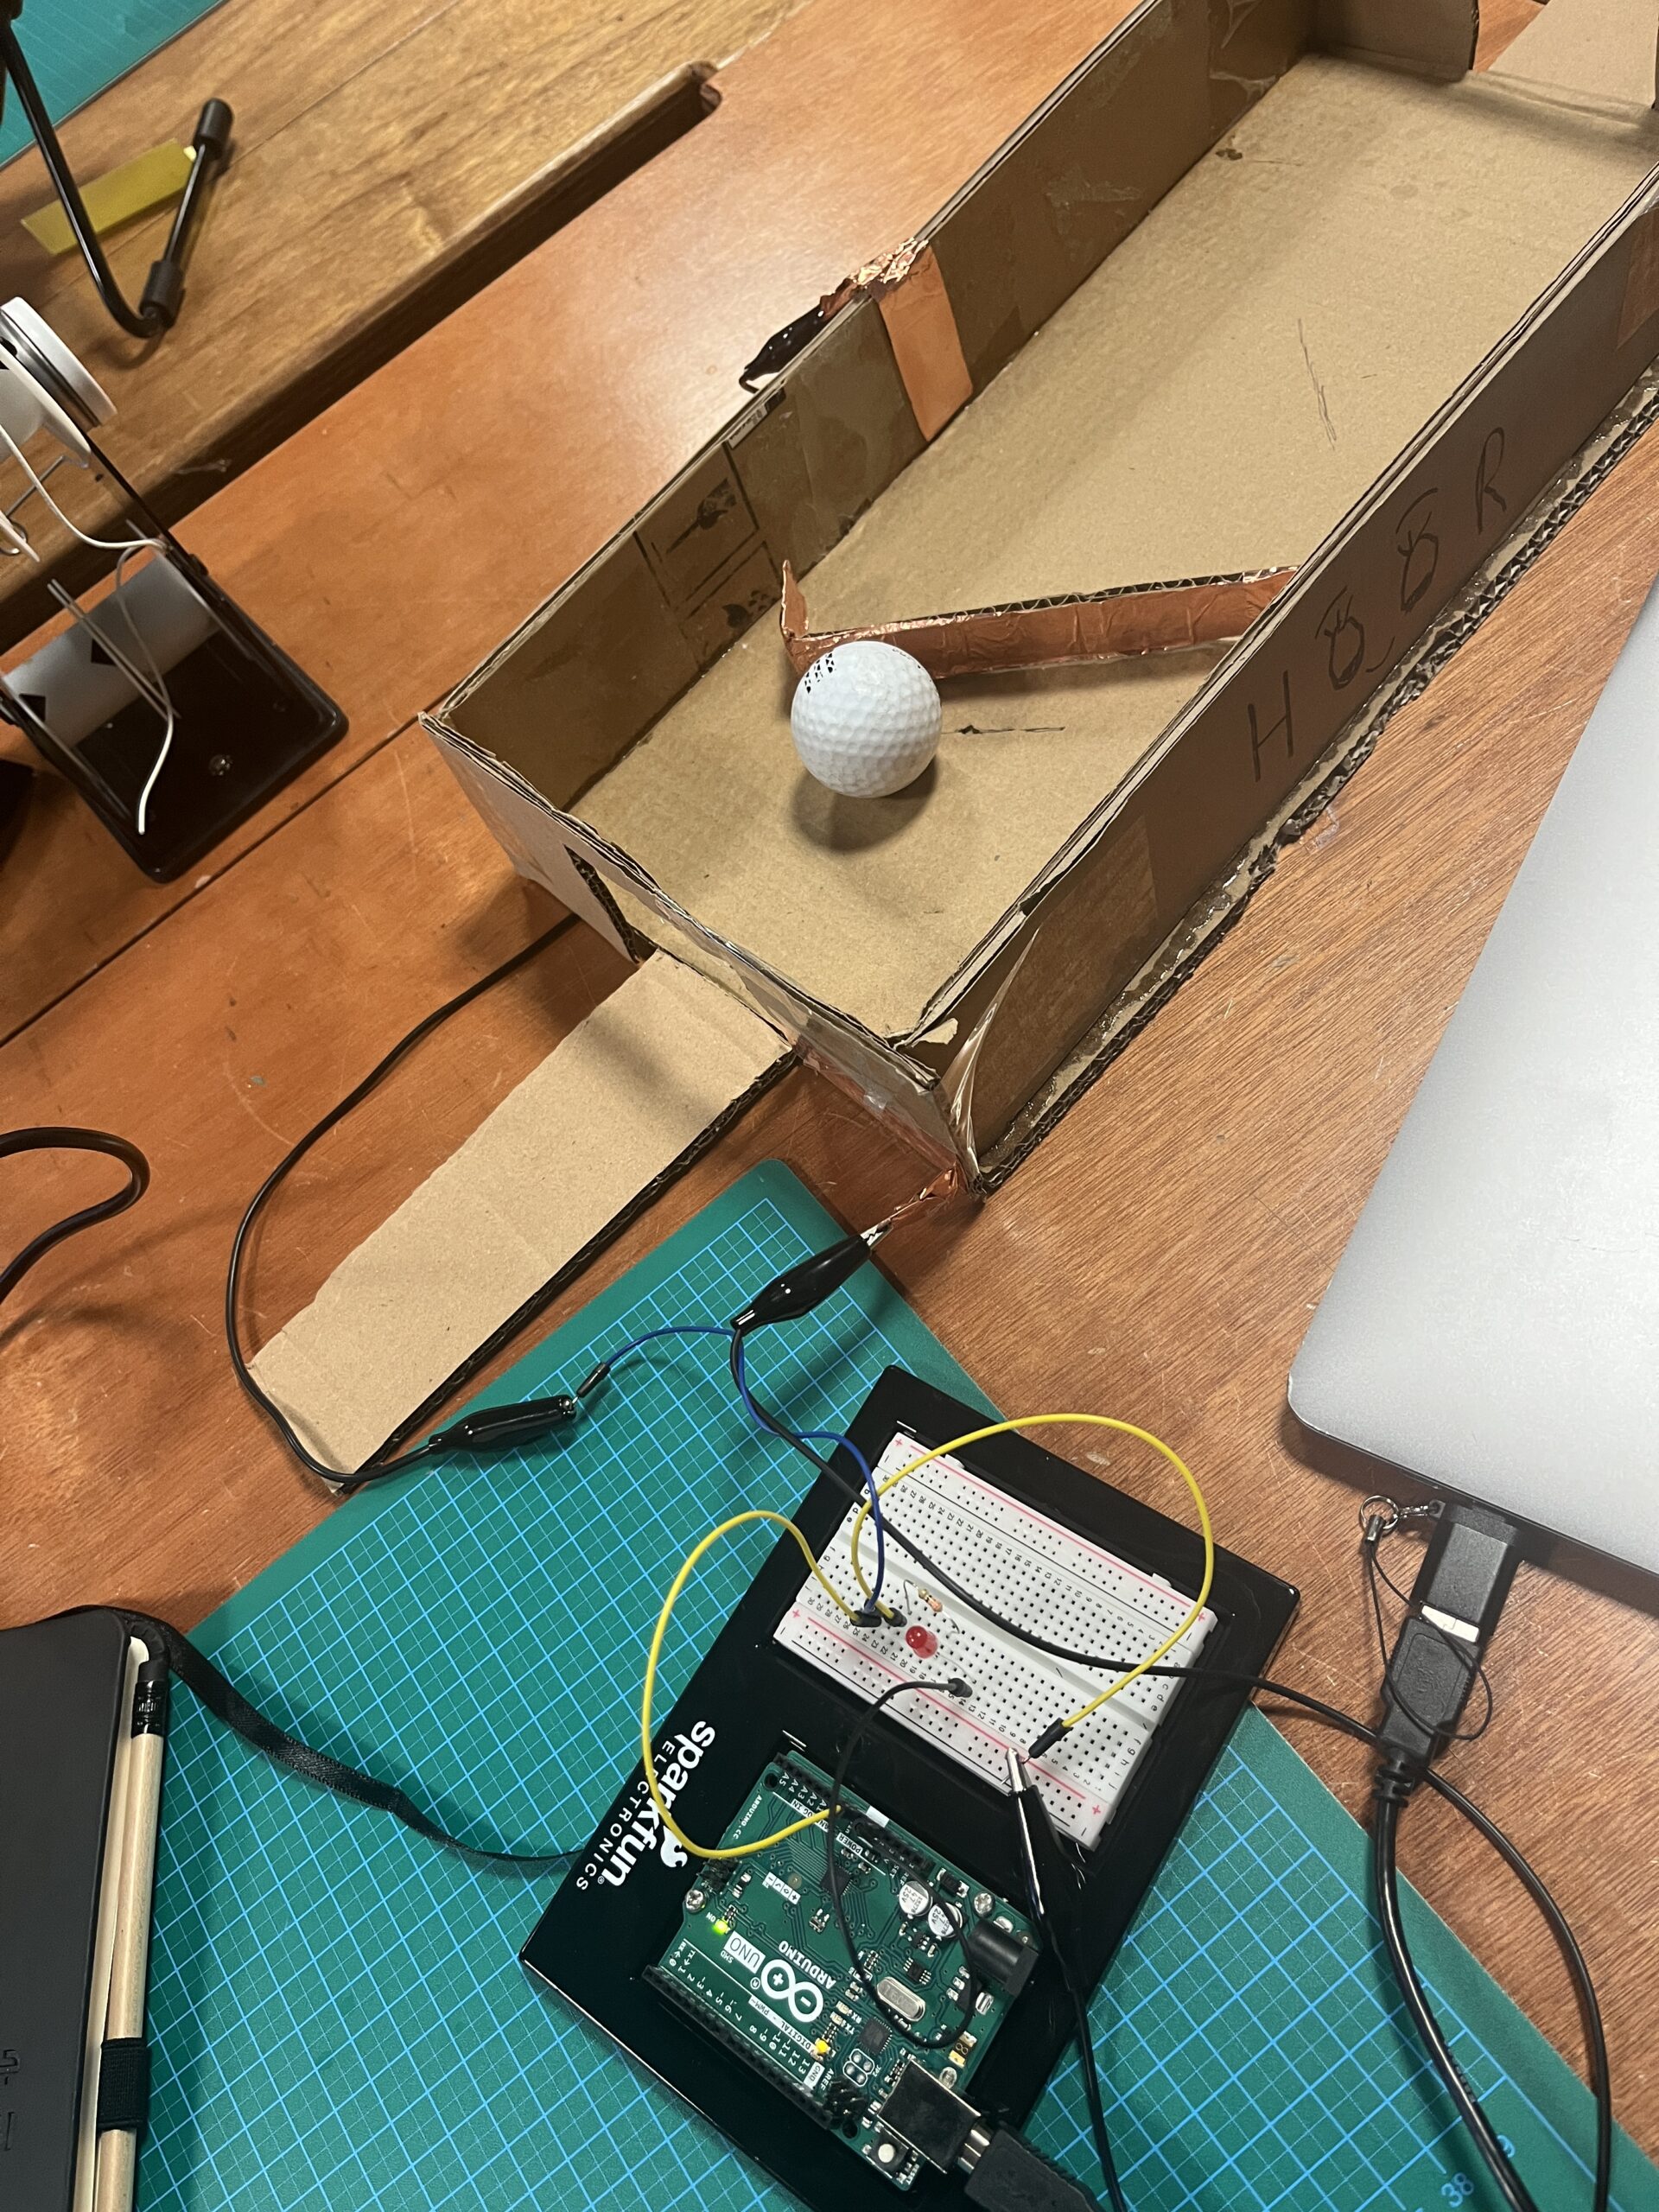
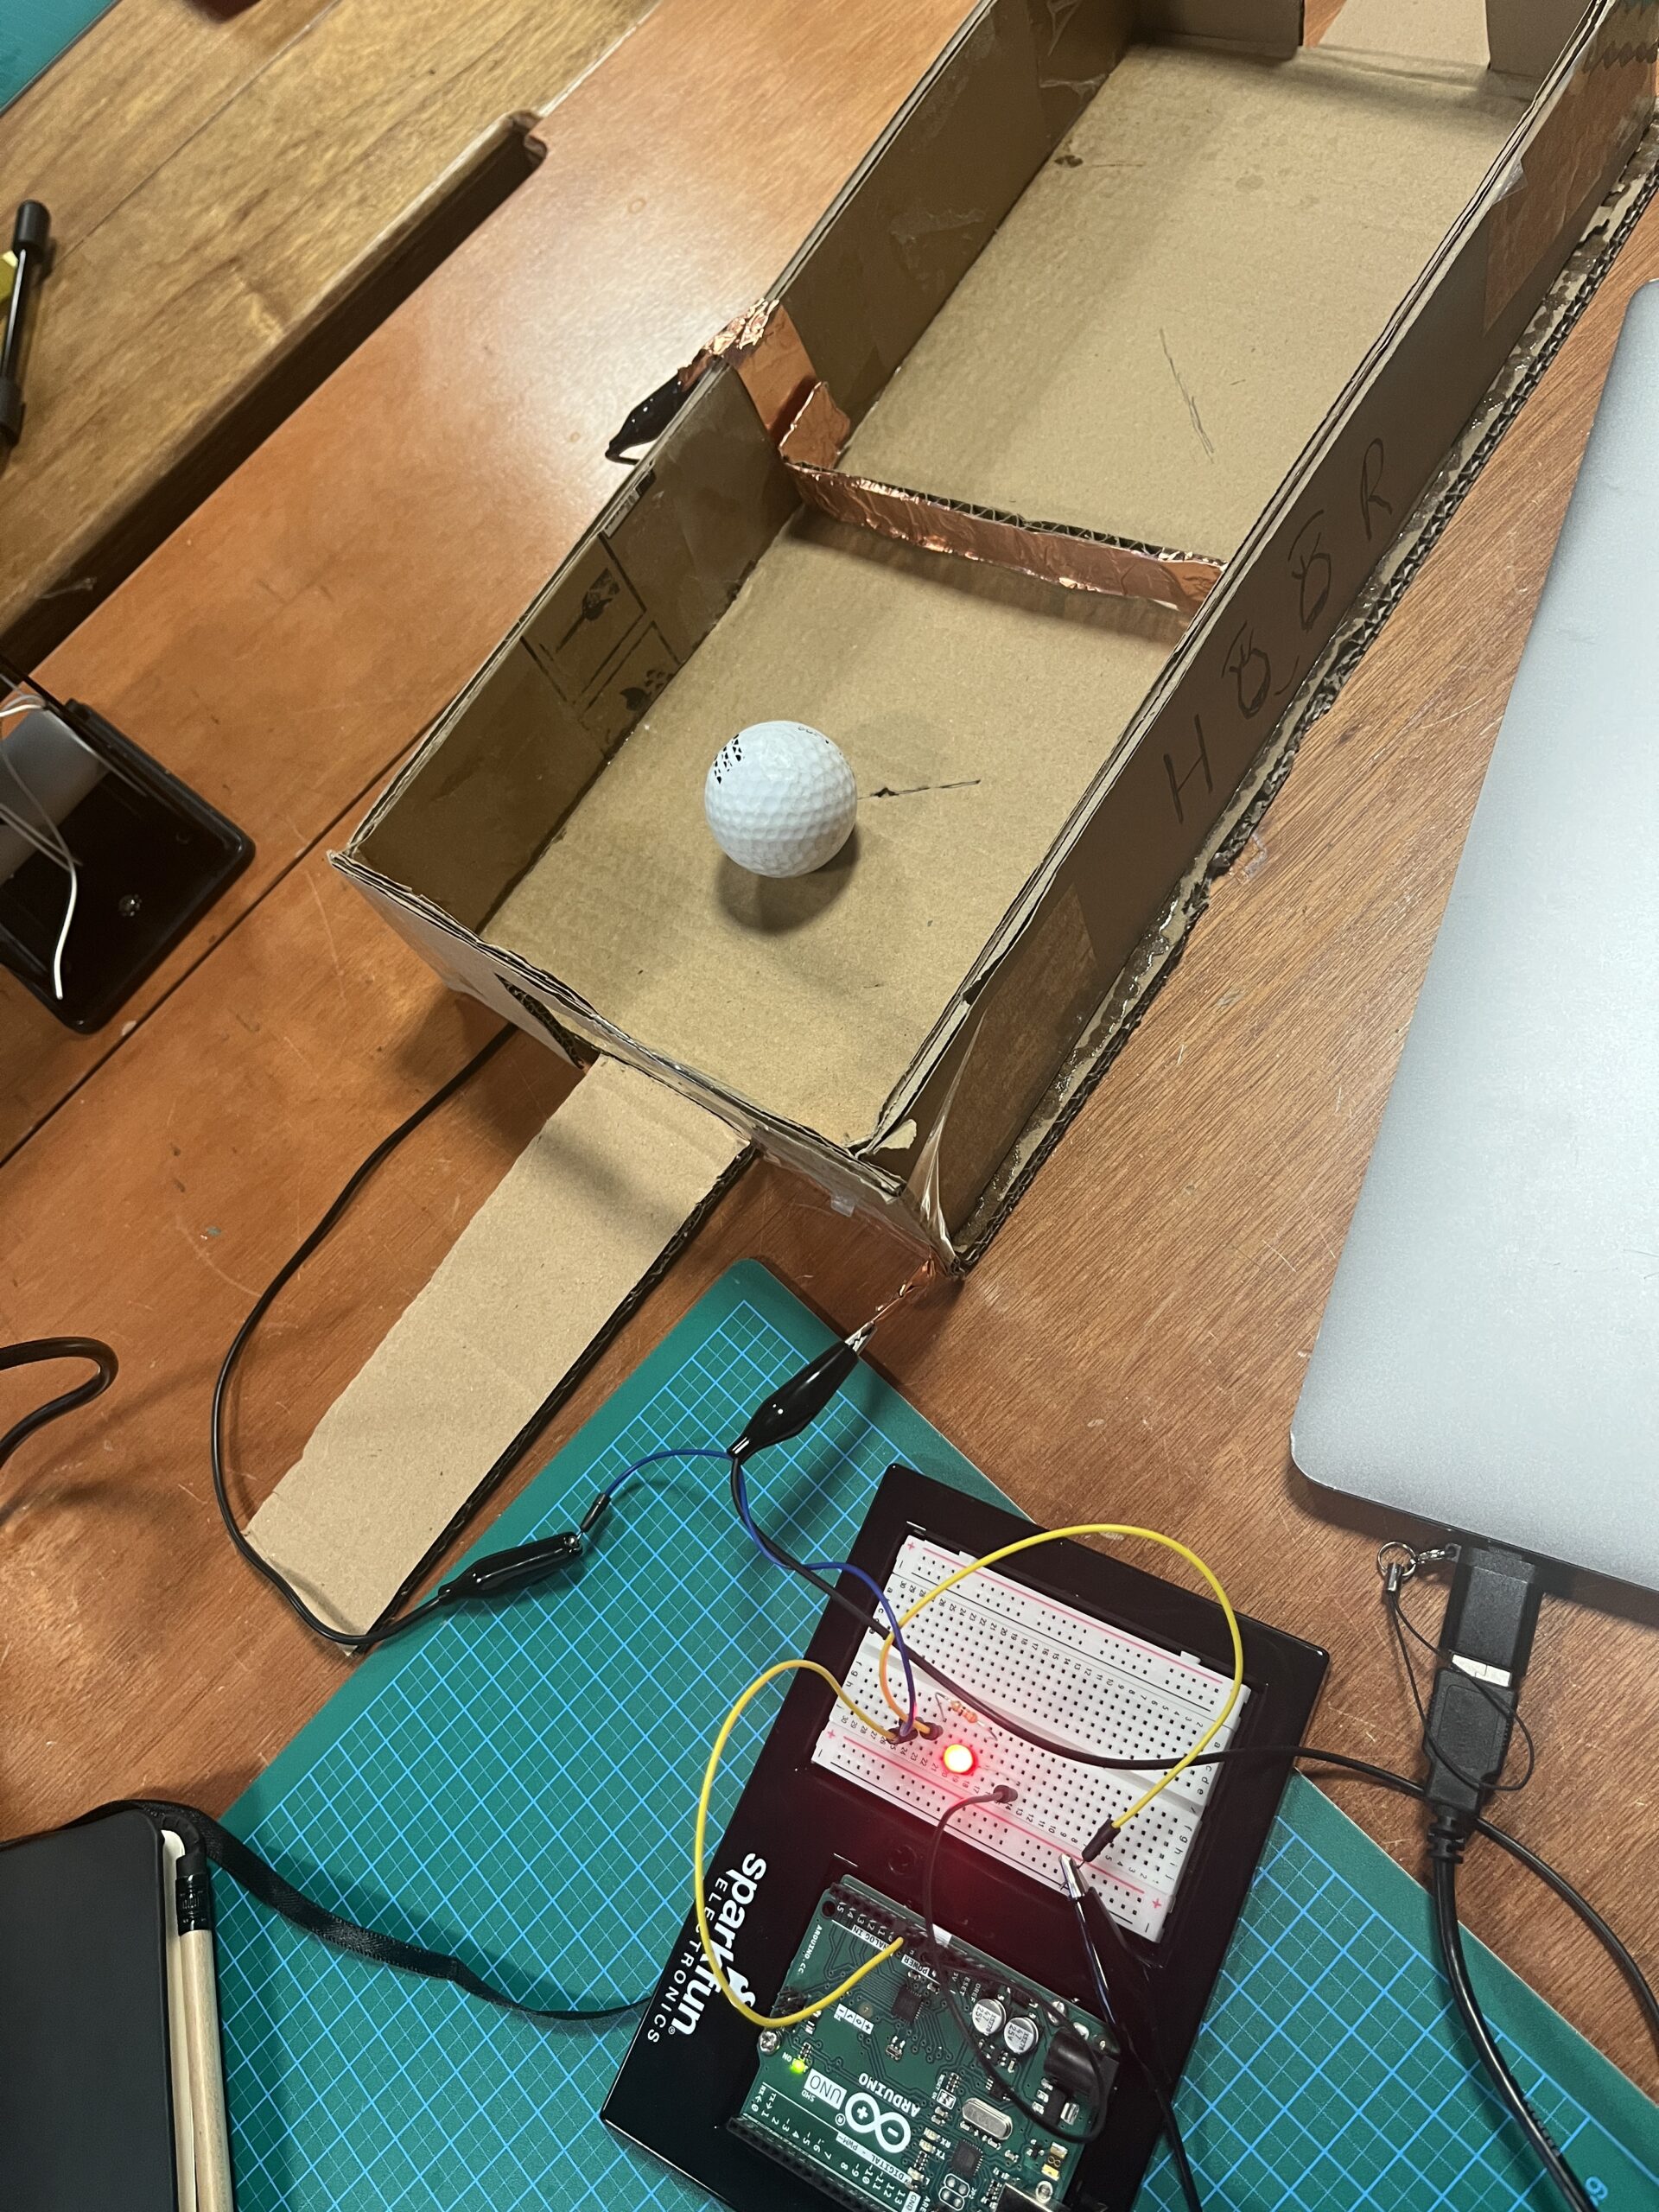
If Sadness reaches the end first (if user hit 3 obstacles), a memory ball glows blue. If Joy wins (3 powerups), it glows yellow.


Hardware + Fabrication:

  • I designed the track pattern in Illustrator and laser-cut it .

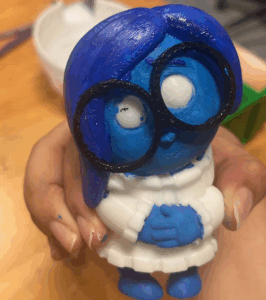
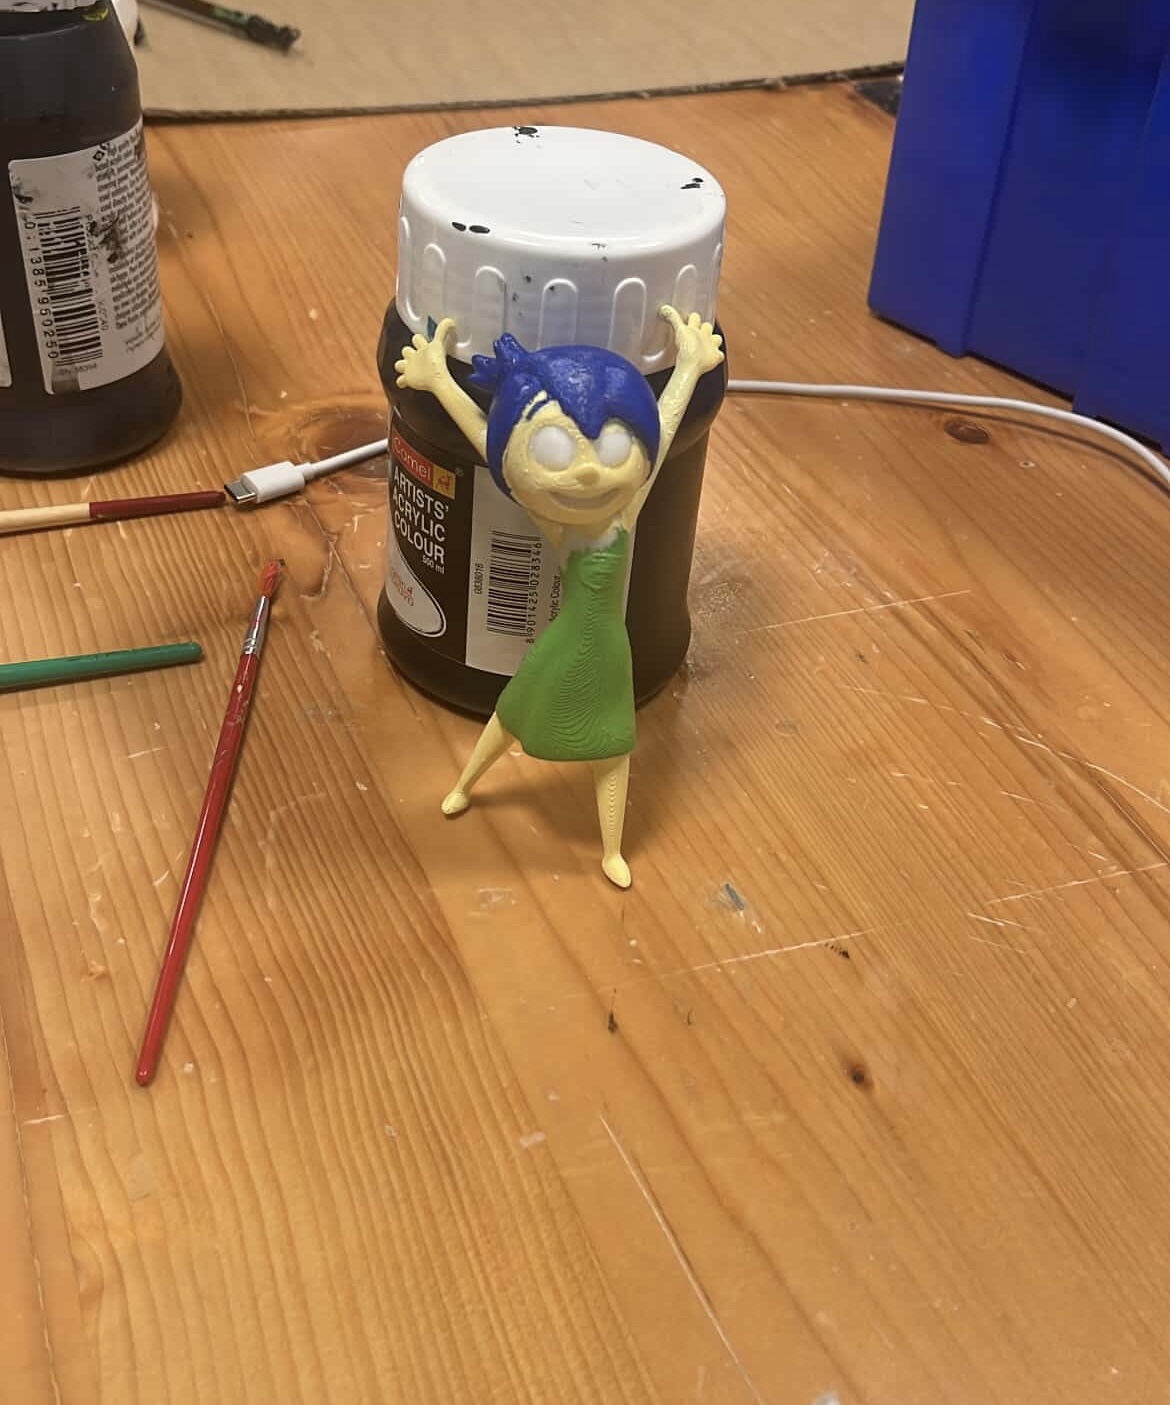
  • I downloaded STL files of Joy and Sadness from Printables, 3D printed them, and painted them with acrylic paint. Then i laser cut a stand and glued them to it so that they were on top of the arduino boards that were connected to the wheels.

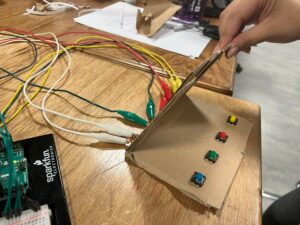
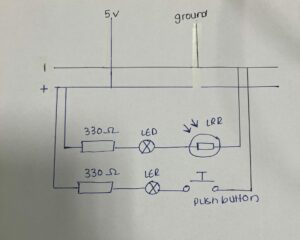
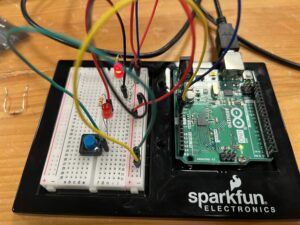
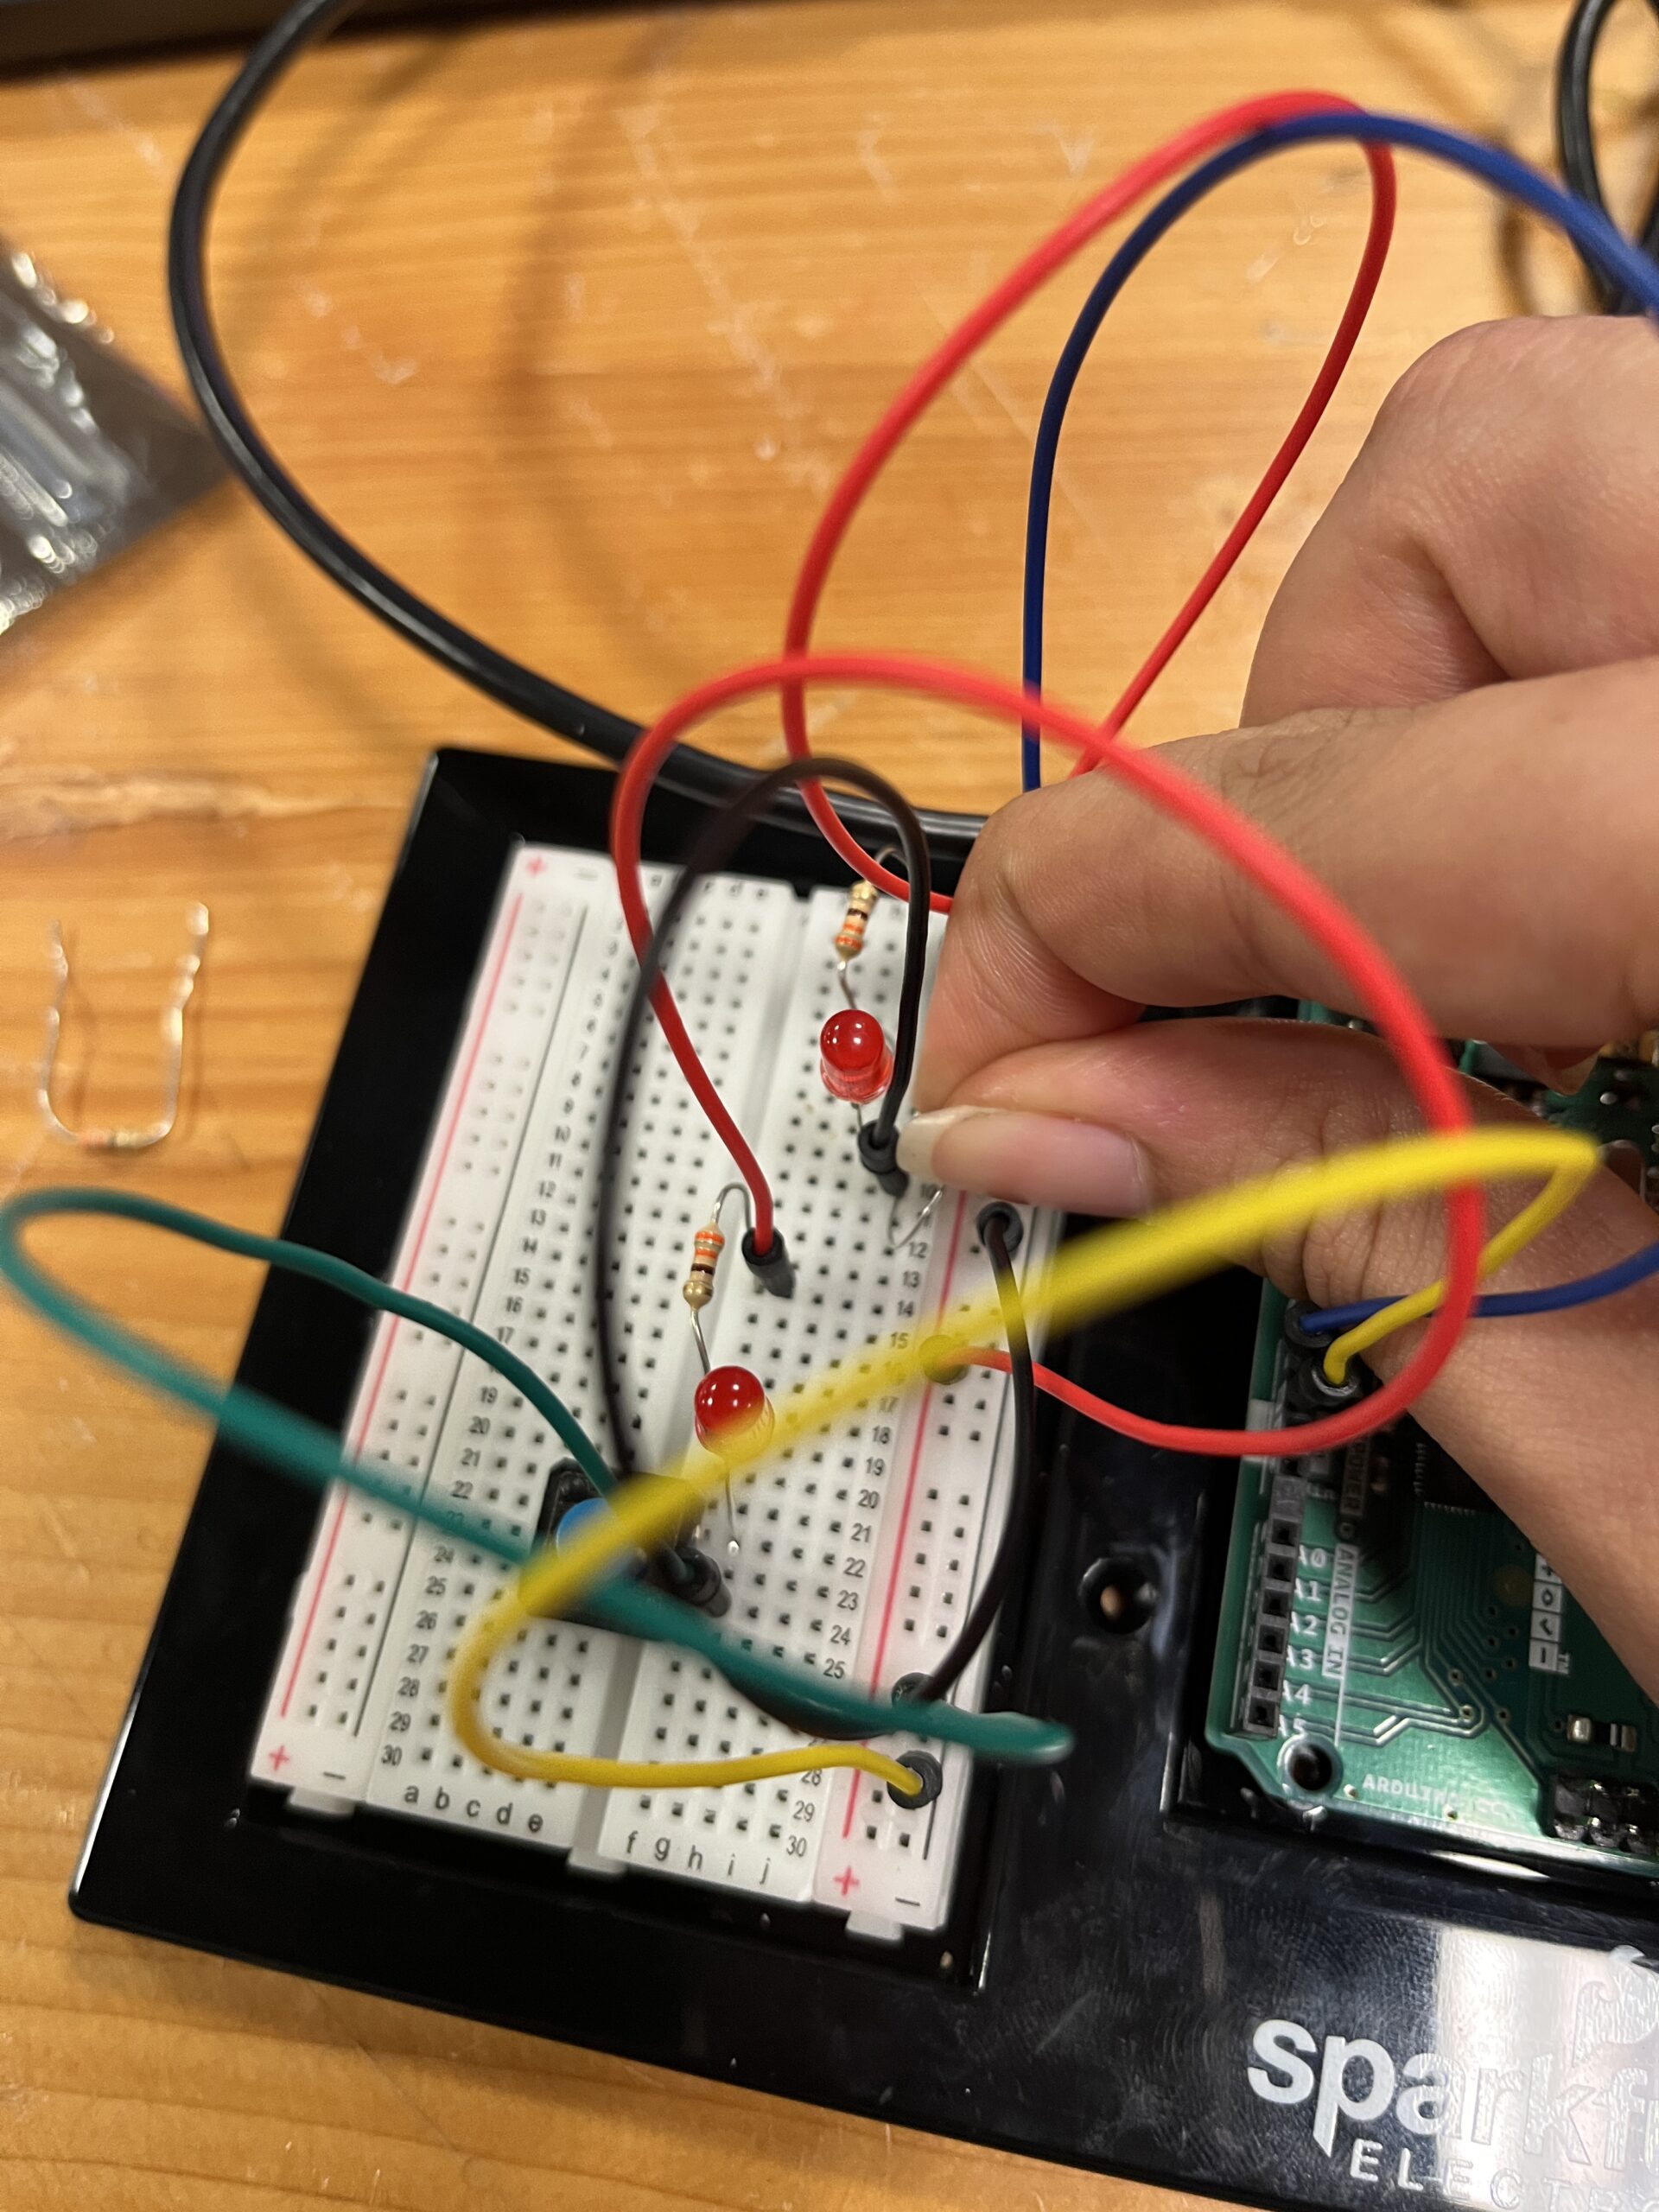
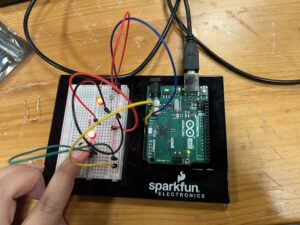
  • I used SolidWorks to model the memory ball, 3D printed it, and added LEDs connected to breadboards inside then connected the 2 breadboards to a single arduino.

  •  


Code + Arduino Integration:

At first, I wanted to send letters (‘O’, ‘P’, etc.) from p5 to Arduino to trigger events, but it just wasn’t reliable. After about 8 hours of trial and error, I figured out that using numbers instead of characters made the communication consistent.

Another issue was the Arduinos themselves. Because the boards are inside the moving characters, they were getting damaged by all the motion and collisions. They’d randomly stop working even though the wiring was fine. I had to replace the connections multiple times, and one of the boards is still a little unstable.


Arduino Code – Joy & Sadness Movement (Boards 1 & 2):

const int STBY = 6;

// Motor A
const int AIN1 = 4;
const int AIN2 = 5;
const int PWMA = 3;

// Motor B
const int BIN1 = 7;
const int BIN2 = 8;
const int PWMB = 9;

void setup() {
  Serial.begin(9600);

  pinMode(STBY, OUTPUT);
  pinMode(AIN1, OUTPUT);
  pinMode(AIN2, OUTPUT);
  pinMode(PWMA, OUTPUT);
  pinMode(BIN1, OUTPUT);
  pinMode(BIN2, OUTPUT);
  pinMode(PWMB, OUTPUT);

  digitalWrite(STBY, HIGH); // Enable motor driver
}

void loop() {
  if (Serial.available()) {
    char command = Serial.read();

    if (command == 0 || command == 1) {
      moveForward(200); // Set speed here (0–255)
      delay(1000);       // Adjust this value to travel the desired cm (experiment to tune)
      stopMotors();
    }
  }
}

void moveForward(int speed) {
  // Motor A forward
  digitalWrite(AIN1, HIGH);
  digitalWrite(AIN2, LOW);
  analogWrite(PWMA, speed);

  // Motor B forward
  digitalWrite(BIN1, HIGH);
  digitalWrite(BIN2, LOW);
  analogWrite(PWMB, speed);
}

void stopMotors() {
  // Stop Motor A
  analogWrite(PWMA, 0);
  digitalWrite(AIN1, LOW);
  digitalWrite(AIN2, LOW);

  // Stop Motor B
  analogWrite(PWMB, 0);
  digitalWrite(BIN1, LOW);
  digitalWrite(BIN2, LOW);
}


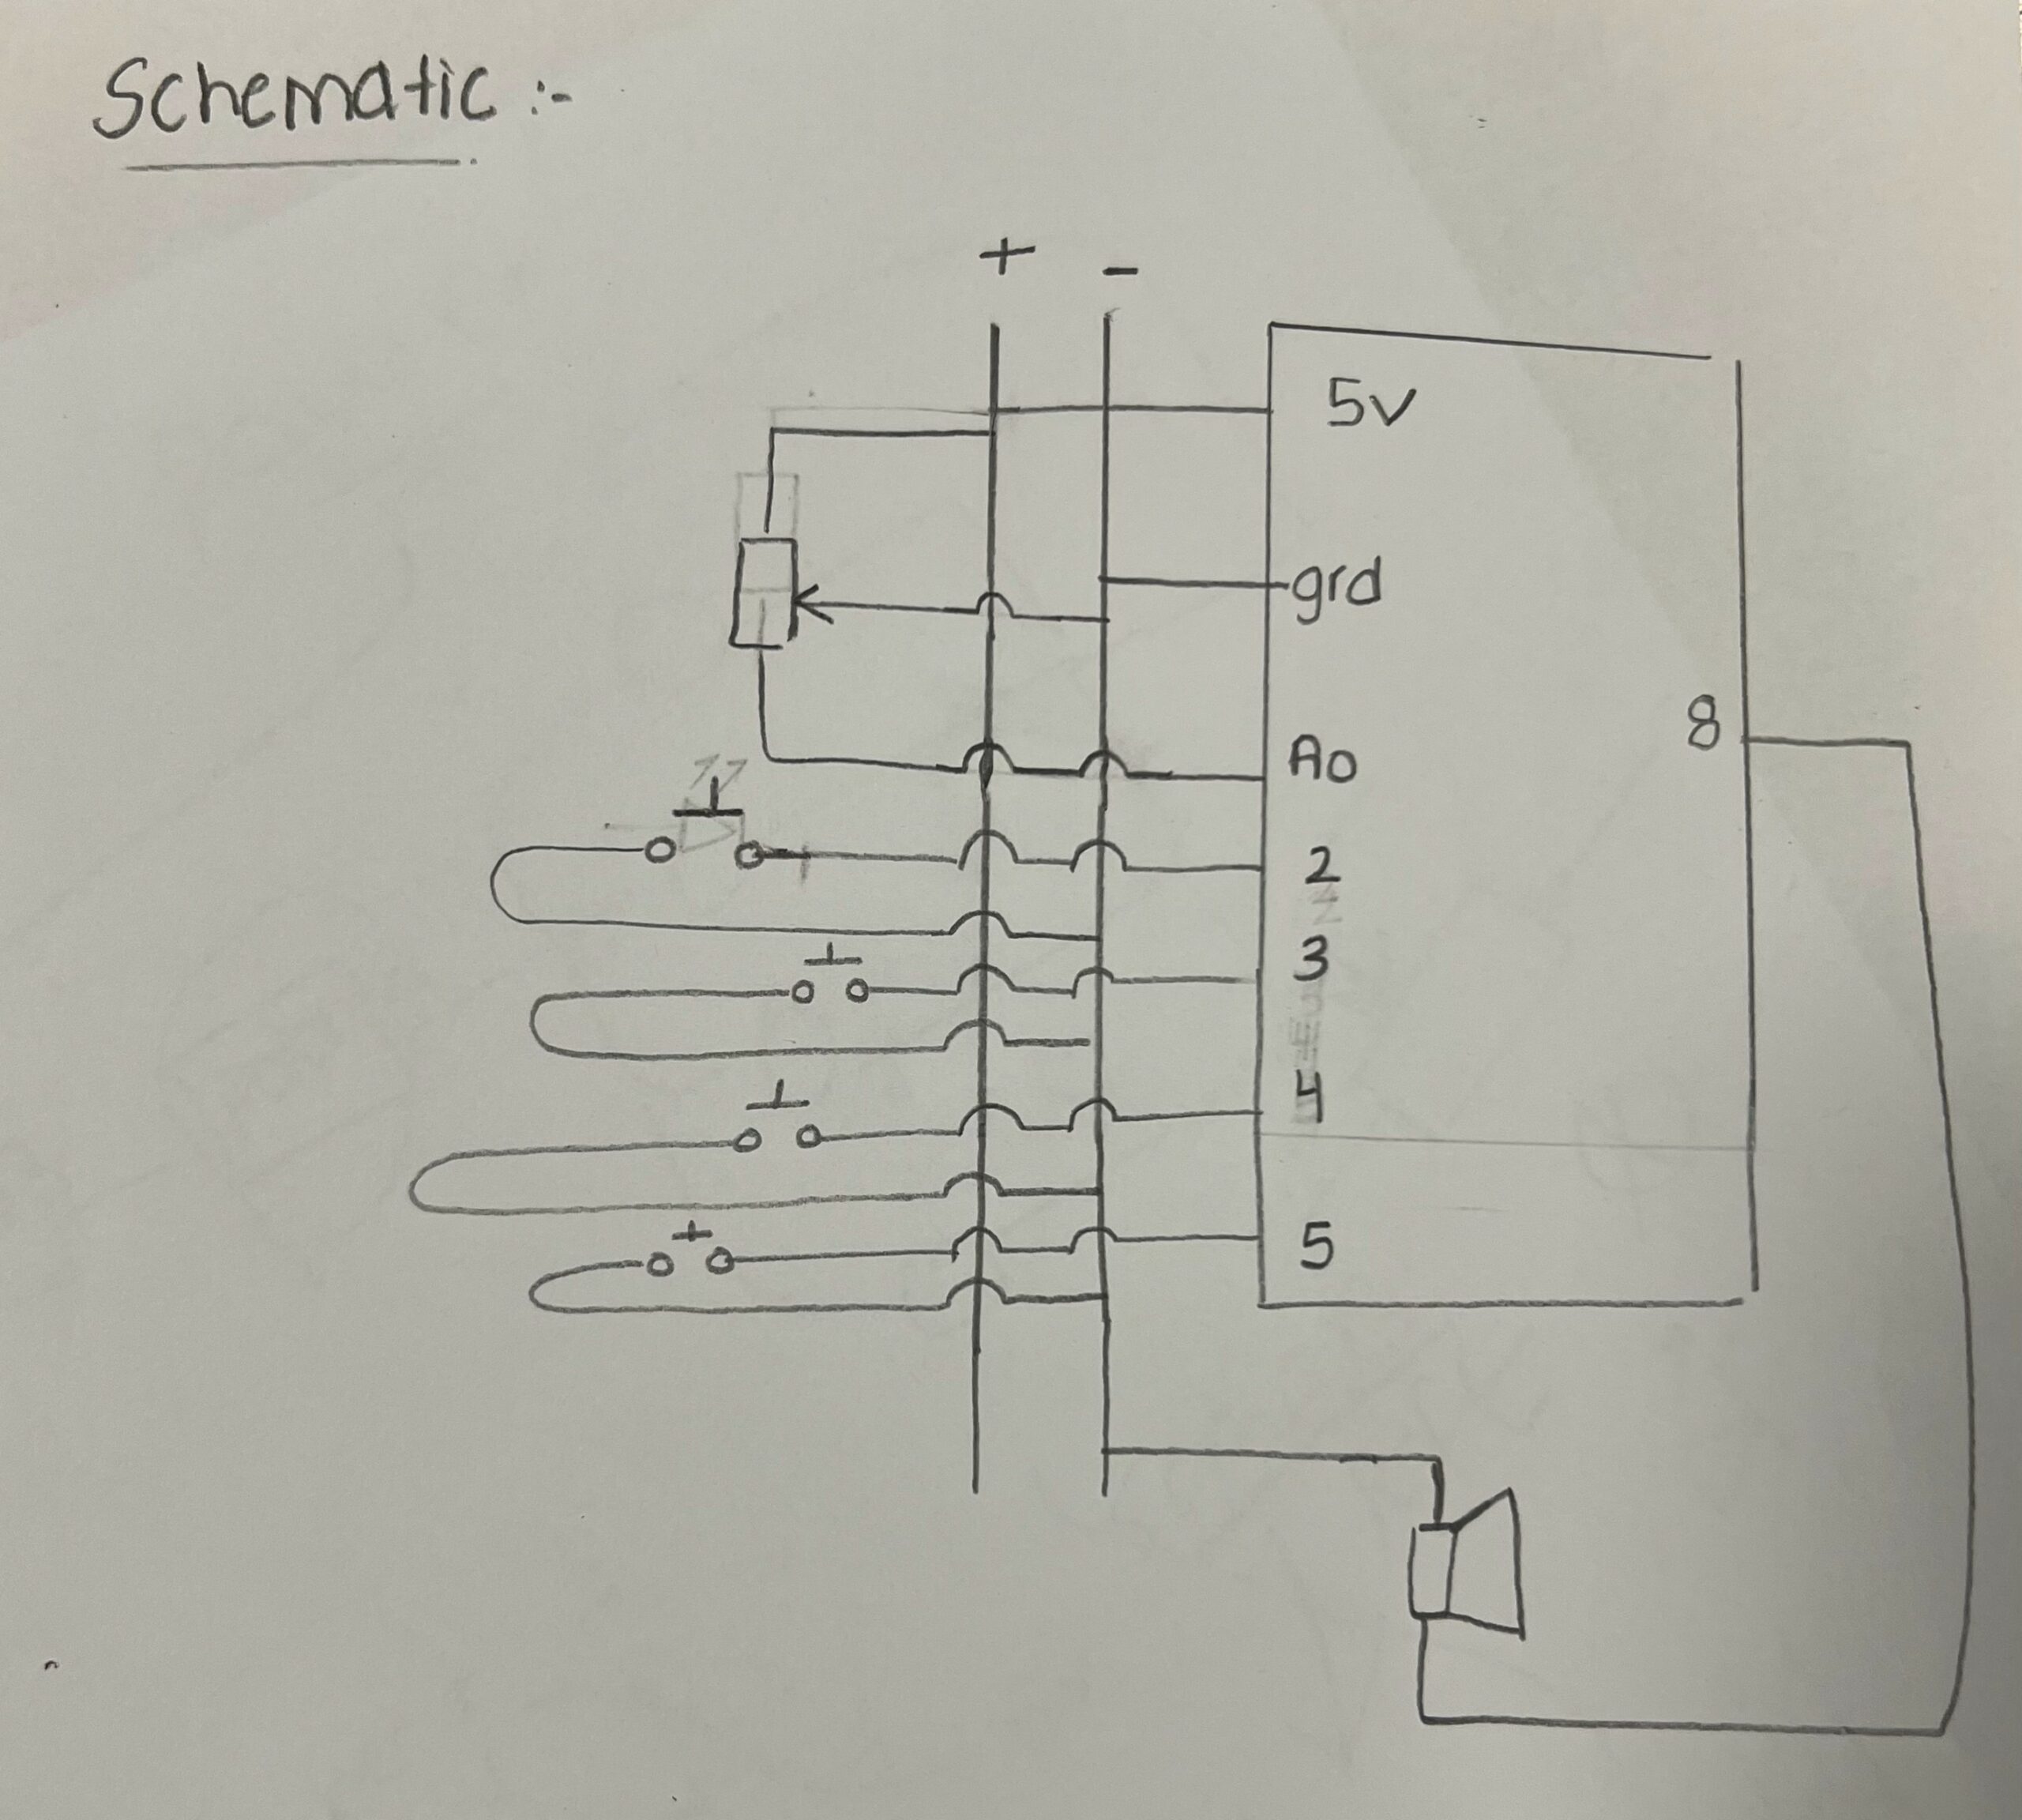
Arduino Code – Memory Ball LEDs (Board 3):

// Pins for Motor Driver (L298N or similar)
#define MOTOR1_PIN1 2
#define MOTOR1_PIN2 3
#define MOTOR2_PIN1 4
#define MOTOR2_PIN2 5

void setup() {
  Serial.begin(9600);
  pinMode(MOTOR1_PIN1, OUTPUT);
  pinMode(MOTOR1_PIN2, OUTPUT);
  pinMode(MOTOR2_PIN1, OUTPUT);
  pinMode(MOTOR2_PIN2, OUTPUT);
}

void loop() {
  if (Serial.available()) {
    char cmd = Serial.read();
    if (cmd == 'O') { // 'O' for Obstacle
      // Move both motors forward for 1 second
      digitalWrite(MOTOR1_PIN1, HIGH);
      digitalWrite(MOTOR1_PIN2, LOW);
      digitalWrite(MOTOR2_PIN1, HIGH);
      digitalWrite(MOTOR2_PIN2, LOW);
      delay(1000);
      stopMotors();
    }
  }
}

void stopMotors() {
  digitalWrite(MOTOR1_PIN1, LOW);
  digitalWrite(MOTOR1_PIN2, LOW);
  digitalWrite(MOTOR2_PIN1, LOW);
  digitalWrite(MOTOR2_PIN2, LOW);
}


The p5.js Sketch:

The sketch handles the game logic—collision detection, button controls, score tracking, and serial communication with  Arduinos.

  • Character controller with jump/slide mechanics

  • Obstacle spawning at set intervals

  • Collision detection that updates the win count for Joy or Sadness

  • Serial output that sends a number to each board depending on the in-game event


What I’m Most Proud Of:

Definitely the connection between digital and physical. Seeing Joy or Sadness physically move when something happens in the game is so rewarding. It brings the internal emotional world of the game into the real world.

Also, figuring out how to manage serial communication across 3 Arduinos (despite many boards dying on me) felt like a huge accomplishment.


If I Had More Time:

  • Improve the Arduino casing so that the wires don’t come loose so easily

  • Add a small screen showing who’s winning in real-time

P5 Code: 

let port1, port2;
let connectBtn1, connectBtn2;
let player;
let obstacles = [];
let laneWidth;
let lanes = [0, 1, 2];
let score = 0;
let gameSpeed = 5;
let obstacleSpawnCounter = 0;
let bg1, bg2;
let gameState = "start";
let startButton;
let powerUps = [];
let powerUpSpawnCounter = 0;
let gameMusic;
let obstacleHits = 0;
let powerUpHits = 0;
const MAX_HITS = 3;

function preload() {
  bg2 = loadImage("background.png");
  bg1 = loadImage("headquarters.png");
  gameMusic = loadSound("Song.mp3");
}

function setup() {
  createCanvas(windowWidth, windowHeight);
  laneWidth = width / 3;
  setupGame();

  port1 = createSerial();
  port2 = createSerial();

  startButton = createButton("Start Game");
  startButton.position(width / 2 - 50, height / 2 + 40);
  startButton.size(100, 40);
  startButton.mousePressed(() => {
    gameState = "playing";
    startButton.hide();
  });

  connectBtn1 = createButton("Connect Arduino 1 (Obstacle)");
  connectBtn1.position(50, 50);
  connectBtn1.mousePressed(() => port1.open(9600));

  connectBtn2 = createButton("Connect Arduino 2 (Powerup)");
  connectBtn2.position(50, 100);
  connectBtn2.mousePressed(() => port2.open(9600));
}

function setupGame() {
  player = new Player();
  obstacles = [];
  score = 0;
  gameSpeed = 5;
  obstacleSpawnCounter = 0;
  powerUps = [];
  powerUpSpawnCounter = 0;
  obstacleHits = 0;
  powerUpHits = 0;

  if (gameState === "start" && startButton) {
    startButton.show();
  }
}

function draw() {
  background(bg2);

  if (gameState === "start") {
    drawStartScreen();
  } else if (gameState === "playing") {
    if (!gameMusic.isPlaying()) {
      gameMusic.loop();
    }
    runGame();
  } else if (gameState === "gameover") {
    if (gameMusic.isPlaying()) {
      gameMusic.stop();
    }
    drawGameOverScreen();
  }
}

function drawStartScreen() {
  fill(255);
  background(bg1);
  textAlign(CENTER, CENTER);
  textSize(48);
  text("INSIDE OUT RUNNER", width / 2, height / 2 - 120);

  textSize(24);
  text("Instructions:", width / 2, height / 2 - 50);
  textSize(20);
  text("Up Arrow: Jump over Memory Ball Cluster (obstacle)", width / 2, height / 2 - 15);
  text("Down Arrow: Slide under Memory Bridge (obstacle)", width / 2, height / 2 + 5);
  text("Left/Right Arrows: Move between the 3 lanes", width / 2, height / 2 + 25);

  textSize(24);
  text("Objective:", width / 2, height / 2 + 100);
  textSize(20);
  text("Collect 3 stars for Joy to win!", width / 2, height / 2 + 130);
  text("Hit 3 obstacles for Sadness to win!", width / 2, height / 2 + 150);
}

function drawGameOverScreen() {
  background(bg1);
  fill(255, 50, 50);
  textAlign(CENTER, CENTER);
  textSize(48);
  text("Game Over", width / 2, height / 2 - 40);
  textSize(24);
  text("Final Score: " + floor(score / 10), width / 2, height / 2 + 10);
  text("Press R to Restart", width / 2, height / 2 + 50);

  if (obstacleHits >= 3) {
    text("Sadness Wins!", width / 2, height / 2 + 80);
  } else if (powerUpHits >= 3) {
    text("Joy Wins!", width / 2, height / 2 + 80);
  }
}

function runGame() {
  gameSpeed += 0.0005;
  background(bg2);

  player.update();
  player.show();

  obstacleSpawnCounter++;
  if (obstacleSpawnCounter > max(90 - gameSpeed * 5, 40)) {
    obstacles.push(new Obstacle());
    obstacleSpawnCounter = 0;
  }

  for (let i = obstacles.length - 1; i >= 0; i--) {
    if (obstacles[i].offscreen()) {
      obstacles.splice(i, 1);
      continue;
    }
    obstacles[i].move();
    obstacles[i].show();

    if (obstacles[i].hits(player)) {
      obstacleHits++;
      obstacles.splice(i, 1);
      if (port1 && port1.opened()) {
        port1.write(0);
      }
      if (obstacleHits >= MAX_HITS) {
        gameState = "gameover";
      }
    }
  }

  powerUpSpawnCounter++;
  if (powerUpSpawnCounter > 300) {
    powerUps.push(new PowerUp());
    powerUpSpawnCounter = 0;
  }

  for (let i = powerUps.length - 1; i >= 0; i--) {
    if (powerUps[i].offscreen()) {
      powerUps.splice(i, 1);
      continue;
    }
    powerUps[i].move();
    powerUps[i].show();

    if (powerUps[i].hits(player)) {
      powerUpHits++;
      powerUps.splice(i, 1);
      score += 100;
      if (port2 && port2.opened()) {
        port2.write(1);
      }
      if (powerUpHits >= MAX_HITS) {
        gameState = "gameover";
      }
    }
  }

  score += 1;
  fill(255);
  textSize(24);
  textAlign(LEFT);
  text("Score: " + floor(score / 10), 10, 30);

  textAlign(RIGHT);
  text("Obstacles: " + obstacleHits + "/3", width - 10, 30);
  text("Powerups: " + powerUpHits + "/3", width - 10, 60);
  textAlign(LEFT);
}

function keyPressed() {
  if (gameState === "start" && key === " ") {
    gameState = "playing";
  } else if (gameState === "gameover" && (key === "r" || key === "R")) {
    setupGame();
    gameState = "playing";
  }

  if (gameState === "playing") {
    if (keyCode === LEFT_ARROW) {
      player.move(-1);
    } else if (keyCode === RIGHT_ARROW) {
      player.move(1);
    } else if (keyCode === UP_ARROW) {
      player.jump();
    } else if (keyCode === DOWN_ARROW) {
      player.slide();
    }
  }
}

class Player {
  constructor() {
    this.lane = 1;
    this.x = laneWidth * this.lane + laneWidth / 2;
    this.baseY = height - 50;
    this.y = this.baseY;
    this.r = 20;
    this.gravity = 1;
    this.velocity = 0;
    this.isJumping = false;
    this.isSliding = false;
    this.slideTimer = 0;
  }

  show() {
    fill(255);
    noStroke();
    if (this.isSliding) {
      ellipse(this.x, this.y + this.r / 2, this.r * 2, this.r);
    } else {
      ellipse(this.x, this.y, this.r * 2);
    }
  }

  move(dir) {
    this.lane += dir;
    this.lane = constrain(this.lane, 0, 2);
    this.x = laneWidth * this.lane + laneWidth / 2;
  }

  jump() {
    if (!this.isJumping && !this.isSliding) {
      this.velocity = -20;
      this.isJumping = true;
    }
  }

  slide() {
    if (!this.isJumping && !this.isSliding) {
      this.isSliding = true;
      this.slideTimer = 30;
    }
  }

  update() {
    this.y += this.velocity;
    this.velocity += this.gravity;

    if (this.y >= this.baseY) {
      this.y = this.baseY;
      this.velocity = 0;
      this.isJumping = false;
    }

    if (this.isSliding) {
      this.slideTimer--;
      if (this.slideTimer <= 0) {
        this.isSliding = false;
      }
    }
  }
}

function drawEmotionCloud(x, y) {
  const colors = ['#A066FF', '#FF6666', '#FFFF66', '#66FF66', '#66CCFF'];
  for (let i = 0; i < 5; i++) {
    fill(colors[i % colors.length]);
    noStroke();
    ellipse(x + i * 20, y + sin(i) * 8, 30, 30);
  }
}

function drawMemoryBridge(x, y) {
  fill("purple");
  beginShape();
  for (let dx = -60; dx <= 60; dx += 5) {
    let dy = -20 * sin(PI * (dx + 60) / 120);
    vertex(x + dx, y + dy);
  }
  for (let dx = 60; dx >= -60; dx -= 5) {
    let dy = -10 * sin(PI * (dx + 60) / 120);
    vertex(x + dx, y + dy + 20);
  }
  endShape(CLOSE);

  stroke(0);
  strokeWeight(2);
  for (let dx = -50; dx <= 50; dx += 20) {
    let dy = -20 * sin(PI * (dx + 60) / 120);
    line(x + dx, y + dy, x + dx, y + dy - 10);
  }

  noFill();
  strokeWeight(2);
  beginShape();
  for (let dx = -50; dx <= 50; dx += 5) {
    let dy = -20 * sin(PI * (dx + 60) / 120);
    vertex(x + dx, y + dy - 10);
  }
  endShape();
}

// --- Obstacle Class ---
class Obstacle {
  constructor() {
    this.lane = random(lanes);
    this.x = laneWidth * this.lane + laneWidth / 2;
    this.y = 350;
    if (random(1) < 0.5) {
      this.type = "high";
    } else {
      this.type = "low";
    }
    this.color = color("blue");
  }

  move() {
    this.y += gameSpeed;
  }

  show() {
    if (this.type === "low") {
      drawMemoryBridge(this.x, this.y);
    } else {
      drawEmotionCloud(this.x, this.y);
    }
  }

  hits(player) {
    let playerRadius = player.isSliding ? player.r * 0.5 : player.r;
    let px = player.x;
    let py = player.isSliding ? player.y + player.r / 2 : player.y;

    let collisionX = abs(this.x - px) < 60 / 2 + playerRadius;
    let collisionY = abs(this.y - py) < 40 / 2 + playerRadius;

    if (collisionX && collisionY) {
      if (this.type === "high" && !player.isJumping) return true;
      if (this.type === "low" && !player.isSliding) return true;
    }
    return false;
  }

  offscreen() {
    return this.y > height + 40;
  }
}

// --- PowerUp Class ---
class PowerUp {
  constructor() {
    this.lane = random(lanes);
    this.x = laneWidth * this.lane + laneWidth / 2;
    this.y = 350;
    this.size = 30;
    this.color = color(255, 174, 66);
  }

  move() {
    this.y += gameSpeed;
  }

  show() {
    push();
    fill(this.color);
    noStroke();
    translate(this.x, this.y);
    beginShape();
    for (let i = 0; i < 10; i++) {
      let angle = TWO_PI * i / 10;
      let r = i % 2 === 0 ? this.size : this.size / 2;
      let sx = cos(angle) * r;
      let sy = sin(angle) * r;
      vertex(sx, sy);
    }
    endShape(CLOSE);
    pop();
  }

  offscreen() {
    return this.y > height + this.size;
  }

  hits(player) {
    let d = dist(this.x, this.y, player.x, player.y);
    return d < this.size + player.r;
  }
}


Final project testing

For this step of the project, I focused on user testing and started making some updates based on how people interacted with the game. The concept is a physical memory-based game where two characters move forward when the player makes a correct choice, but if they hit an obstacle, a glowing memory ball (controlled by another Arduino) lights up.

Right now, I’m still working on the Arduino connection between the boards. Each moving character has its own Arduino, and I’ve written code that lets them move forward when they receive a command — but syncing the movement between the two boards and handling serial communication properly is still a work in progress. I’m also still refining how everything connects with the third Arduino, which controls the obstacle LED reaction in the memory balls.

During testing, I noticed that sometimes one board would move while the other didn’t, or the LED wouldn’t react consistently. So I’ve been going back into the code and checking the timing, delays, and serial input handling. It’s been a bit tricky trying to get all three Arduinos to communicate clearly without any delays or missed signals.

This week, I’m focusing on:

**Finalizing the Arduino code for the two moving boards
**Getting the serial communication between the three Arduinos to work smoothly

The part I’m most proud of so far is how the basic movement is already working and how the obstacle-triggered lights bring the whole thing to life. Once the connection part is sorted out, I think the physical interactions will feel much more natural and immersive.

Week 11

For this assignment, Izza and I worked together to do the 3 tasks.

Task 1: 

For this task, we used a potentiometer to control whether the ellipse was moving to the left or the right on the horizontal axis. We did this by mapping the values of the potentiometer (0-1023) on the horizontal axis. Then, when we turned the potentiometer the value would translate to a position on the horizontal axis that the ball would move to. We had some difficulties with the delay between the arduino and p5js as sometimes we’d have to wait a couple seconds before the code would update in p5. Here is the code for the arduino:

void setup() {

  Serial.begin(9600);

}


// Read potentiometer value (0–1023) and sends to p5js

void loop() {

  int sensorValue = analogRead(A0);

  Serial.println(sensorValue);

  delay(1);

}


Task 2:

For this task, we had to do something that controlled the brightness of an LED on the arduino breadboard through p5js. So, we decided to create a dropdown for the user to pick between 1-10 to control the brightness of the LED with 1 being off and 10 being maximum brightness. We then mapped that to the 0-255 range for the brightness of an LED and sent that to the arduino which would control how brightly the LED would light up for a few seconds. On the arduino we simply had one bulb connected to digital pin 9. The arduino code can be seen below:

void setup() {

  Serial.begin(9600);

  pinMode(9, OUTPUT);

}


//gets the serial converted value from p5js

void loop() {

  if (Serial.available() > 0) {

    int brightness = Serial.parseInt(); 

    brightness = constrain(brightness, 0, 255); //make sure the value isn't out of range

    analogWrite(9, brightness);

  }

}


Task 3:

In this task, we had to take already existing code and alter it such that every time the ball bounced, one LED light on the arduino lit up, and the wind was controlled by an analog sensor. For controlling our wind, we used a potentiometer once again as we could make it such that values above 512 would move the ball to the east (right) and values below 512 would move the ball towards the west (left). On the arduino, we connected a potentiometer at analog pin A0 and an LED light on digital pin 9. We then used p5js to recieve that serial input from the potentiometer and map it to the wind. Whether it bounced being true or false is also what makes the LED light up. Once again, we did experience a delay between the potentiometer value and the wind in p5. The arduino code can be seen below:

const int potPin = A0;

const int ledPin = 9;

bool ledOn = false;

unsigned long ledTimer = 0;

const int ledDuration = 100;


void setup() {

  Serial.begin(9600);

  pinMode(ledPin, OUTPUT);

}


void loop() {

  // Read potentiometer and send value

  int potValue = analogRead(potPin);

  Serial.println(potValue);


  // If LED was turned on recently, turn it off after some time

  if (ledOn && millis() - ledTimer > ledDuration) {

    digitalWrite(ledPin, LOW);

    ledOn = false;

  }


  // recieve signal on whether the ball bounced from p5.js

  if (Serial.available()) {

    String input = Serial.readStringUntil('\n');

    input.trim();


    if (input == "bounce") {

      digitalWrite(ledPin, HIGH);

      ledOn = true;

      ledTimer = millis();

    }

  }


  delay(10); // Slight delay for stability

}


Lastly, here is the link to the video showing the LED light up and the ball being “blown” away by the value sent from the potentiometer:

https://drive.google.com/file/d/140pGv-9DMPd1gCa1xMn_LR3pR_pphx47/view?usp=sharing

Final Project Proposal

For this project, I wanted to explore create a Disney/Pixar themed  game. I got inspired by the core memories idea in  Inside Out and subway surfers which e which was my favourite game to play growing up and so I decided to design an Inside Out racing game.

The digital game, built in p5.js, represents the mental world of a child’s mind. At first, the user enters his/her core memory and then the race starts. The player dodges Disney villains (representing negative emotions like fear, jealousy, and anxiety) and collects Disney heroes (representing friendship, family, hope, and self-acceptance) as power-ups. As the player progresses, either Joy or Sadness physically moves forward on a real-life race track depending on the player’s choices and collisions. If Sadness wins, a memory ball turns blue. If Joy wins, it glows yellow.

The goal of the game is to protect the player’s game memory and collect as many power ups as possible so that joy wins and the memory ball turns yellow.

How It Works:

The p5.js Game:

The main game interface is a side-scrolling runner similar to Subway Surfers. The player character avoids villains (like Scar, Maleficent, or Ursula) and collects heroes (like Buzz Lightyear, Elsa, and Baymax). Each obstacle or power-up has a symbolic connection to an emotion or social concept:

  • Jealousy→ Evil Queen (Snow White)
  • Fear→ Randall (Monsters Inc.)
  • Anxiety→ Mother Gothel (Tangled)
  • Friendship→ Woody and Buzz
  • Family→ Elsa and Anna
  • Self-doubt→ Forky (Toy Story)
  • Memory Loss→ Dory
  • Stereotypes→ Judy Hopps and Nick Wilde (Zootopia)

When a villain is hit, Sadness moves closer to the finish line. When a hero is collected, Joy moves ahead.

The game is built using OOP principles and screen transitions, just like in my previous project. Each frame checks for collisions, updates the character’s position, and sends signals via serial communication to the Arduino based on whether Joy or Sadness should move forward.

Arduino:
The physical track features 3D-printed figures of Joy and Sadness mounted on sliding mechanisms (like small carts or servo-driven platforms). The Arduino receives signals from p5.js via serial and moves either character forward in small steps.

At the finish line, each figure holds a translucent memory ball (ping pong ball or resin sphere). Using RGB LEDs, the Arduino lights up the ball:

  • Yellow: for Joy (Emotion: Happiness)
  • Blue: for Sadness (Emotion: Nostalgia/Grief)

Challenges:

One big challenge I’m still figuring out is how to power the LEDs inside the moving figures.

I’m also still testing how I’ll light up the memory ball when the character reaches the end. It might involve placing a proximity sensor at the finish line, or coding a timer that tracks when one character hits the end point based on movement count

Week 10: Musical Instrument

For this assignment, Izza and I worked together to come up with the idea of using the push buttons from our kit as keys for a piano. We used cardboard to create the piano keys and poked the push buttons through the bottom layer. We then used copper tape to cover the push button’s pins and give the alligator clips something to attach to in order to connect the buttons with wires that went into the breadboard. For our analog sensor, we used a potentiometer to control the length of the sound made once a key was pressed. The result can be seen here:

https://drive.google.com/file/d/187WqUyYvRZ6KFFVMn0NtSO0ycqEzKyXq/view?usp=sharing


Our circuit diagram can also be seen here:

We’re really proud of the fact that we were able to complete the circuit using a variety of tools like the copper tape and alligator pins and were able to have a creative and working result. We are also really proud of the code that was inspired by the toneMelody exercise we did in class for the pitches. The code can be seen below:

#include "pitches.h"

const int speakerPin = 8;
const int potPin = A0;

const int buttonPins[] = {2, 3, 4, 5};
const int numButtons = 4;

// Define the notes for each button
int notes[] = {NOTE_C4, NOTE_D4, NOTE_E4, NOTE_F4};

void setup() {
  for (int i = 0; i < numButtons; i++) {
    pinMode(buttonPins[i], INPUT_PULLUP);  // Internal pull-up resistor
  }
  pinMode(speakerPin, OUTPUT);
}

void loop() {
  int potValue = analogRead(potPin);  // 0–1023
  int noteDuration = map(potValue, 0, 1023, 100, 1000);  // Adjusts the lengths of the notes

  for (int i = 0; i < numButtons; i++) {
    if (digitalRead(buttonPins[i]) == LOW) {  // Button is pressed
      tone(speakerPin, notes[i], noteDuration);
      delay(noteDuration * 1.3);  // Pause between tones
      noTone(speakerPin);
    }
  }
}

We had some difficulty getting the buttons to connect with the alligator clips using the copper tape since it kept poking through the tape and was very fragile to move around. Even with a double reinforcement, the pins would still stick through. If we were to recreate it, we may seek another alternative that is thicker. We also encountered an unknown issue with some ghost keys where sounds would appear even if no key was pressed. This could be due to the copper tape issue as well.

Overall though, we are proud of the fact that the piano keys worked when pressed and the potentiometer properly adjusted the length of the notes as seen in the video.

Week 9: analog input & output

For this project, we were asked to use both a digital and an analog sensor to control two separate light bulbs. I chose an LDR as the analog sensor and a push button switchas the digital one.

The circuit was designed with both connections set up in parallel, but each individual sensor and its LED were wired in series. That means the LDR is connected to a resistor and then to an LED in one path, while the button switch is connected to a resistor and another LED in a separate path. Both paths share power and ground—so they’re technically in parallel, but operate independently.

My favorite part of the project was seeing how the LDR affected the brightness of the LED in real-time. The more light it receives, the dimmer the LED gets, and vice versa. It was satisfying to see that dynamic shift as I covered and uncovered the sensor.


For the digital sensor, the behavior is much simpler: the LED turns on when the button is pressed and turns off when it’s released. There’s no change in brightness—just a clean on/off action.

One challenge I faced was protecting the LEDs from burning out. I ended up frying three of them before realizing that I needed to be more careful with resistor values and connections. In the end I started disconnecting my board from power before making any changes to the connections which I realize now I should’ve done from the start but I just forgot about it.

For future improvements, I’d love to swap the LDR for a microphone sensor and make the LED respondto sound intensity instead of light. I thinkit would be fun to experiment with how volume or rhythm could control brightness, especially for interactive or musical projects.

Hand-drawn schematic diagram:

Switch not pushed. LDR exposed to room light.

Switch not pushed. LDR covered.

Switch pushed. LDR exposed to room light.

Week 8: Creative switch

For this project, I got inspired by bowling, and so I wanted to use a  rolling ball to control the LED light. The idea was to turn it into a competition between two players, where the goal is to light up a bulb three times before the other player.

To build this, I created a mini bowling alley out of cardboard. At the center of the alley, there’s a handle wrapped in copper tape. The game starts with the handle tilted at an angle, and each player takes turns rolling a ball, trying to push the handle into the exact center position. When the handle aligns just right, it connects with another piece of copper tape, completing the circuit and lighting up an LED. The first player to do this successfully three times wins the game.

My favorite part of this project was designing the handle mechanism and experimenting with the balance between accuracy and force.

One challenge I faced was adjusting the friction of the handle. At first, it slid way too easily, which made the game too simple and boring. But when I added more resistance, it became too difficult, and no one could win. After asking multiple people to try the game and integrating their feedback I finally reached a state where the game worked as I pictured it at the start and became enjoyable to play.

Things I’d like to improve in the future include adding a digital scoreboard to track each player’s progress and wins. I’d also like to experiment with different materials as cardboard was really hard to work with due to differences in friction between different kinds and cuts of cardboard.

Starting/Losing:

Winning: 

Midterm Project: Interactive Fantasy Game

For this project, I decided to transform a short fantasy story I wrote in primary school into an interactive game using p5.js. This game is played by a single player who guides the protagonist, Eden, on her quest to slay the dargon and save her village. The game has multiple choices that affect the storyline, but in the end, all paths lead to the same outcome. There are a total of 5 key decision points and 14 different screens in the game.

How it works:

The game’s structure is built around a series of screens, each representing a different part of Eden’s journey. The transitions between screens are managed efficiently through the mousePressed() function and buttons. The game utilizes object-oriented programming (OOP) for button management.

Proud Achievements and Technical Decisions
One of the most significant achievements in this project is the implementation of the OOP approach for button management. Initially, built-in functions were used, but switching to OOP proved to be a more flexible and maintainable solution. This decision allows for easier customization of button behavior and appearance across different screens.

Another achievment is the overall structure of thegame, with its multiple screens and decision points. This took a long time and required  careful planning and implementation to ensure smooth transitions and logical flow of the story.

The integration of background images and music also adds to the immersive experience of the game. These elements help bring the fantasy world of EverLand to life for the player.

The buttons code:

//Creating the buttons class
class GameButton {
  //initializing the state of the button
  constructor(label) {
    this.label = label;
    this.x = 0;
    this.y = 0;
    this.width = 105;
    this.height = 30;
    this.visible = false;
  }
  //method to show button at specified coordinates
  show(x, y) {
    this.x = x;
    this.y = y;
    this.visible = true;
    fill("white");
    noStroke();
    rect(this.x, this.y, this.width, this.height);
    fill("black");
    textSize(13);
    textAlign(CENTER, CENTER);
    text(this.label, this.x + this.width / 2, this.y + this.height / 2);
    fill("white") //so trhat the text itself is white
    textSize(15); //so that the text itself has a size of 15
  }
  //method to hide button
  hide() {
    this.visible = false;
  }

  //method to identify if mouse is hovering over button
  isMouseOver() {
    return (
      this.visible &&
      mouseX > this.x &&
      mouseX < this.x + this.width &&
      mouseY > this.y &&
      mouseY < this.y + this.height
    );
  }
}

The screens code:

function draw() {
  //calling the function that displays the screen based on the screen assignment which happens when the mouse is pressed
  if (screen === 0) {
    showStartScreen();
  } else if (screen === 1) {
    showBirthdayScreen();
  } else if (screen === 11) {
    showSuppliesScreen();
  } else if (screen === 12) {
    showWeaponScreen();
  } else if (screen === 111 || screen === 121) {
    showNightScreen();
  } else if (screen === 112 || screen === 122) {
    showMorningScreen();
  } else if (screen === 1111 || screen === 1121 || screen === 1211 || screen === 1221) {
    showRiverScreen();
  } else if (screen === 1112 || screen === 1122 || screen === 1212 || screen === 1222) {
    showForestScreen();
  } else if (screen === 11000 || screen === 12000 || screen === 21000 || screen === 22000) {
    showNextScreen();
  } else if (screen === 5000) {
    showDragonCaveScreen();
  } else if (screen === 5001) {
    showInsideScreen();
  } else if (screen === 5002) {
    showOutsideScreen();
  } else if (screen === 5003) {
    showTrapScreen();
  } else if (screen === 262626) {
    showFinalScreen();
  }
}

//function to hide all buttons which i will use when switching screens so that the previous buttons don't appear on the screen
function hideAllButtons() {
  enterButton.hide();
  suppliesButton.hide();
  weaponButton.hide();
  nightButton.hide();
  morningButton.hide();
  riverButton.hide();
  forestButton.hide();
  fishButton.hide();
  riverspiritsButton.hide();
  next1Button.hide();
  insideButton.hide();
  outsideButton.hide();
  trapButton.hide();
  next2Button.hide();
  forestspiritsButton.hide();
  firefliesButton.hide();
  playButton.hide();
  quitButton.hide();
}

//assigns screen with next number based on the previous screen and the button pressed and also hides all buttons so that they aren't layered on top of one another
function mousePressed() {
  if (screen === 0 && enterButton.isMouseOver()) {
    screen = 1;
    hideAllButtons();
  } else if (screen === 1) {
    if (suppliesButton.isMouseOver()) {
      screen = 11;
      hideAllButtons();
    }else if (weaponButton.isMouseOver()) {
      screen = 12;
      hideAllButtons();
    }
  } else if (screen === 11 || screen === 12) {
    if (nightButton.isMouseOver()) {
      screen = screen * 10 + 1;
      hideAllButtons();
    }else if (morningButton.isMouseOver()) {
      screen = screen * 10 + 2;
      hideAllButtons();
    }
  }else if (screen === 111 || screen === 112 || screen === 121 || screen === 122) {
    if (riverButton.isMouseOver()) {
      screen = screen * 10 + 1;
      hideAllButtons();
    } else if (forestButton.isMouseOver()) {
      screen = screen * 10 + 2;
      hideAllButtons();
    }
  } else if (screen === 1111 || screen === 1121 || screen === 1211 || screen === 1221) {
    if (fishButton.isMouseOver()) {
      screen = 11000;
      hideAllButtons();
    } else if (riverspiritsButton.isMouseOver()) {
      screen = 12000;
      hideAllButtons();
    }
  } else if (screen === 1112 || screen === 1122 || screen === 1212 || screen === 1222) {
    if (firefliesButton.isMouseOver()) {
      screen = 21000;
      hideAllButtons();
    } else if (forestspiritsButton.isMouseOver()) {
      screen = 22000;
      hideAllButtons();
    }
  } else if (screen === 11000 || screen === 12000 || screen === 21000 || screen === 22000) {
    if (next1Button.isMouseOver()) {
      screen = 5000;
      hideAllButtons();
    }
  } else if (screen === 5000) {
    if (insideButton.isMouseOver()) {
      screen = 5001;
      hideAllButtons();
    } else if (outsideButton.isMouseOver()) {
      screen = 5002;
      hideAllButtons();
    } else if (trapButton.isMouseOver()) {
      screen = 5003;
      hideAllButtons();
    }
  } else if (screen === 5001 || screen === 5002 || screen === 5003) {
    if (next2Button.isMouseOver()) {
      screen = 262626;
      hideAllButtons();
    }
  } else if (screen === 262626) {
    if (playButton.isMouseOver()) {
      restartGame();
    } else if (quitButton.isMouseOver()) {
      quitGame();
    }
  }
}

Areas for Improvement:
While the current version of the game is functional, there are several areas for potential improvement:

Expanding the storyline: Adding more options and choices would increase replayability and make the game more interactive. For example, allowing players to pick specific weapons or have more detailed interactions with characters like the spirits could add depth to the game.

Enhanced interactivity: Implementing features like dialogue systems for conversations with spirits or other characters could make the game more engaging. This could involve creating a more complex dialogue management system.

Challenges:

One of the main challenges faced was transitioning from built-in button functions to the OOP approach. This required refactoring a significant portion of the code and it would’ve been so much easier if I just started with OOP.

Moving forward, the focus will be on enriching the game content and enhancing the player’s ability to influence the story through their choices.

The game sketch:

Midterm Project Progress: Interactive Fantasy Game

For this project, I decided to transform a short fantasy story I wrote in primary school into an interactive game using p5.js. The game has multiple choices that affect the storyline, but in the end, all paths lead to the same outcome. There are a total of 5 key decision points and 14 different screens in the game.

One of my biggest challenges was implementing the buttons. I initially tried to create them using object-oriented programming (OOP), but it became too confusing because the button positions change so frequently from screen to screen so i just used the built-in function createButton().

Currently, the game has a pink background, but I plan to replace it with images that reflect the setting of each screen, adding to the immersive experience. I also intend to incorporate sound effects that correspond to the events in the story to further enhance the game’s atmosphere.

During this week, I’ll be focusing on:

**Using OOP for the buttons instead of builtin functions

**Adding some sounds and background images

The part I’m most proud of so far is the overall structure of the different screens and managing the transitions between them as it  took a lot of time to figure out how to switch between screens smoothly.

Here is the code snippet of the screens and buttons changing:

function draw() {
  background('pink');
  //The Screen is picked based on the screen number
  if (screen === 0) {
    showStartScreen();
    } else if (screen === 1) {
    showBirthdayScreen();
  } else if (screen === 11) {
    showSuppliesScreen();
  } else if (screen === 12) {
    showWeaponScreen();
  } else if (screen === 111) {
    showNightScreen();
  } else if (screen === 112) {
    showMorningScreen();
  } else if (screen === 121) {
    showNightScreen();
  } else if (screen === 122) {
    showMorningScreen();
  } else if (screen === 1111 || screen === 1121 || screen === 1211 || screen === 1221) {
    showRiverScreen();
  } else if (screen === 1112 || screen === 1122 || screen === 1212 || screen === 1222) {
    showForestScreen();
  } else if (screen === 11000 || screen === 12000 || screen === 21000 || screen === 22000) {
    showNextScreen();
  } else if (screen === 5000) {
    showDragonCaveScreen();
  } else if (screen === 5001) {
    showInsideScreen();
  } else if (screen === 5002) {
    showOutsideScreen();
  } else if (screen === 5003) {
    showTrapScreen();
  } else if (screen === 262626) {
    showFinalScreen();
  }
}

function mousePressed() {
  if (screen == 0 && isMouseOver(enterButton)) {
    screen = 1;
    hideAllButtons();
    showBirthdayScreen();
  } else if (screen == 1) {
    if (isMouseOver(suppliesButton)) {
      screen = 11;
      hideAllButtons();
      showSuppliesScreen();
    } else if (isMouseOver(weaponButton)) {
      screen = 12;
      hideAllButtons();
      showWeaponScreen();
    }
  } else if (screen === 11) {
    if (isMouseOver(nightButton)) {
      screen = 111;
      hideAllButtons();
      showNightScreen();
    } else if (isMouseOver(morningButton)) {
      screen = 112;
      hideAllButtons();
      showMorningScreen();
    }
  } else if (screen === 12) {
    if (isMouseOver(nightButton)) {
      screen = 121;
      hideAllButtons();
      showNightScreen();
    } else if (isMouseOver(morningButton)) {
      screen = 122;
      hideAllButtons();
      showMorningScreen();
    }
  } else if (screen === 111) {
    if (isMouseOver(riverButton)) {
      screen = 1111;
      hideAllButtons();
      showRiverScreen();
    } else if (isMouseOver(forestButton)) {
      screen = 1112;
      hideAllButtons();
      showForestScreen();
    }
  } else if (screen === 112) {
    if (isMouseOver(riverButton)) {
      screen = 1121;
      hideAllButtons();
      showRiverScreen();
    } else if (isMouseOver(forestButton)) {
      screen = 1122;
      hideAllButtons();
      showForestScreen();
    }
  } else if (screen === 121) {
    if (isMouseOver(riverButton)) {
      screen = 1211;
      hideAllButtons();
      showRiverScreen();
    } else if (isMouseOver(forestButton)) {
      screen = 1212;
      hideAllButtons();
      showForestScreen();
    }
  } else if (screen === 122) {
    if (isMouseOver(riverButton)) {
      screen = 1221;
      hideAllButtons();
      showRiverScreen();
    } else if (isMouseOver(forestButton)) {
      screen = 1222;
      hideAllButtons();
      showForestScreen();
    }
  } else if (screen === 1111 || screen === 1121 || screen === 1211 || screen === 1221) {
    if (isMouseOver(fishButton)) {
      screen = 11000;
      hideAllButtons();
      showNextScreen();
    } else if (isMouseOver(riverspiritsButton)) {
      screen = 12000;
      hideAllButtons();
      showNextScreen();
    }
  } else if (screen === 1112 || screen === 1122 || screen === 1212 || screen === 1222) {
    if (isMouseOver(firefliesButton)) {
      screen = 21000;
      hideAllButtons();
      showNextScreen();
    } else if (isMouseOver(forestspiritsButton)) {
      screen = 22000;
      hideAllButtons();
      showNextScreen();
    }
  } else if (screen === 11000 || screen === 12000 || screen === 21000 || screen === 22000) {
    if (isMouseOver(next1Button)) {
      screen = 5000;
      hideAllButtons();
      showDragonCaveScreen();
    }
  } else if (screen === 5000) {
    if (isMouseOver(insideButton)) {
      screen = 5001;
      hideAllButtons();
      showInsideScreen();
    } else if (isMouseOver(outsideButton)) {
      screen = 5002;
      hideAllButtons();
      showOutsideScreen();
    } else if (isMouseOver(trapButton)) {
      screen = 5003;
      hideAllButtons();
      showTrapScreen();
    }
  } else if (screen === 5001 || screen === 5002 || screen === 5003) {
    if (isMouseOver(next2Button)) {
      screen = 262626;
      hideAllButtons();
      showFinalScreen();
    }
  }
}

Here is the game:

Week 3: Reading Response

Before the reading, I thought interactivity was just another word for engagement. I thought that books, movies and anything with a user interface were interactive. But now, I understand that there is a difference between the two and that the word interactive has been majorly overused specially over the last couple of years and mainly for marketing purposes that it has lost its true meaning. Interactivity is closer to a conversation that includes the metaphoric acts of listening, thinking, and speaking (input, processing, output), while engagement is more of a one-sided conversation where there is only output (content) that the audience reacts to. 

What I consider to be the characteristics of a strongly interactive system is one that has all the features to make it interactive in the first place. It has to receive an input, process the  information and produce an output based on the input. All 3 aspects have to be good, and one cannot be the substitute of the other. Something highly interactive for me would make it easy for the user to input (good user interface), quickly process the information (have an efficient system) and produce an accurate output.

To improve the degree of interaction in my p5 sketches, I would try and work on each interactivity aspect individually so that they’re all equally good. For the input: I’d use more of the key and mouse functions and I would make the sketch more aesthetically pleasing, maybe including simple instructions for the user to understand what he’s supposed to do. For processing, I’d use more variables and OOP instead of hardcoding everything in order to make the code run smoother. And as for the output, I’d try and make sure that the program actually does what it’s supposed to do and that it is accurate in its reactions by testing multiple times.