The time has come to choose the murderer…We have a murder mystery game with supernatural elements now!
Since the last post, the game has come a long way in terms of implementation as well as the storyline! After a very long meeting, we created the plot for the murder storyline with supernatural elements of Indian origin.
Here’s a (kinda long) elevator pitch for the game “Eyes of Enakshi”:
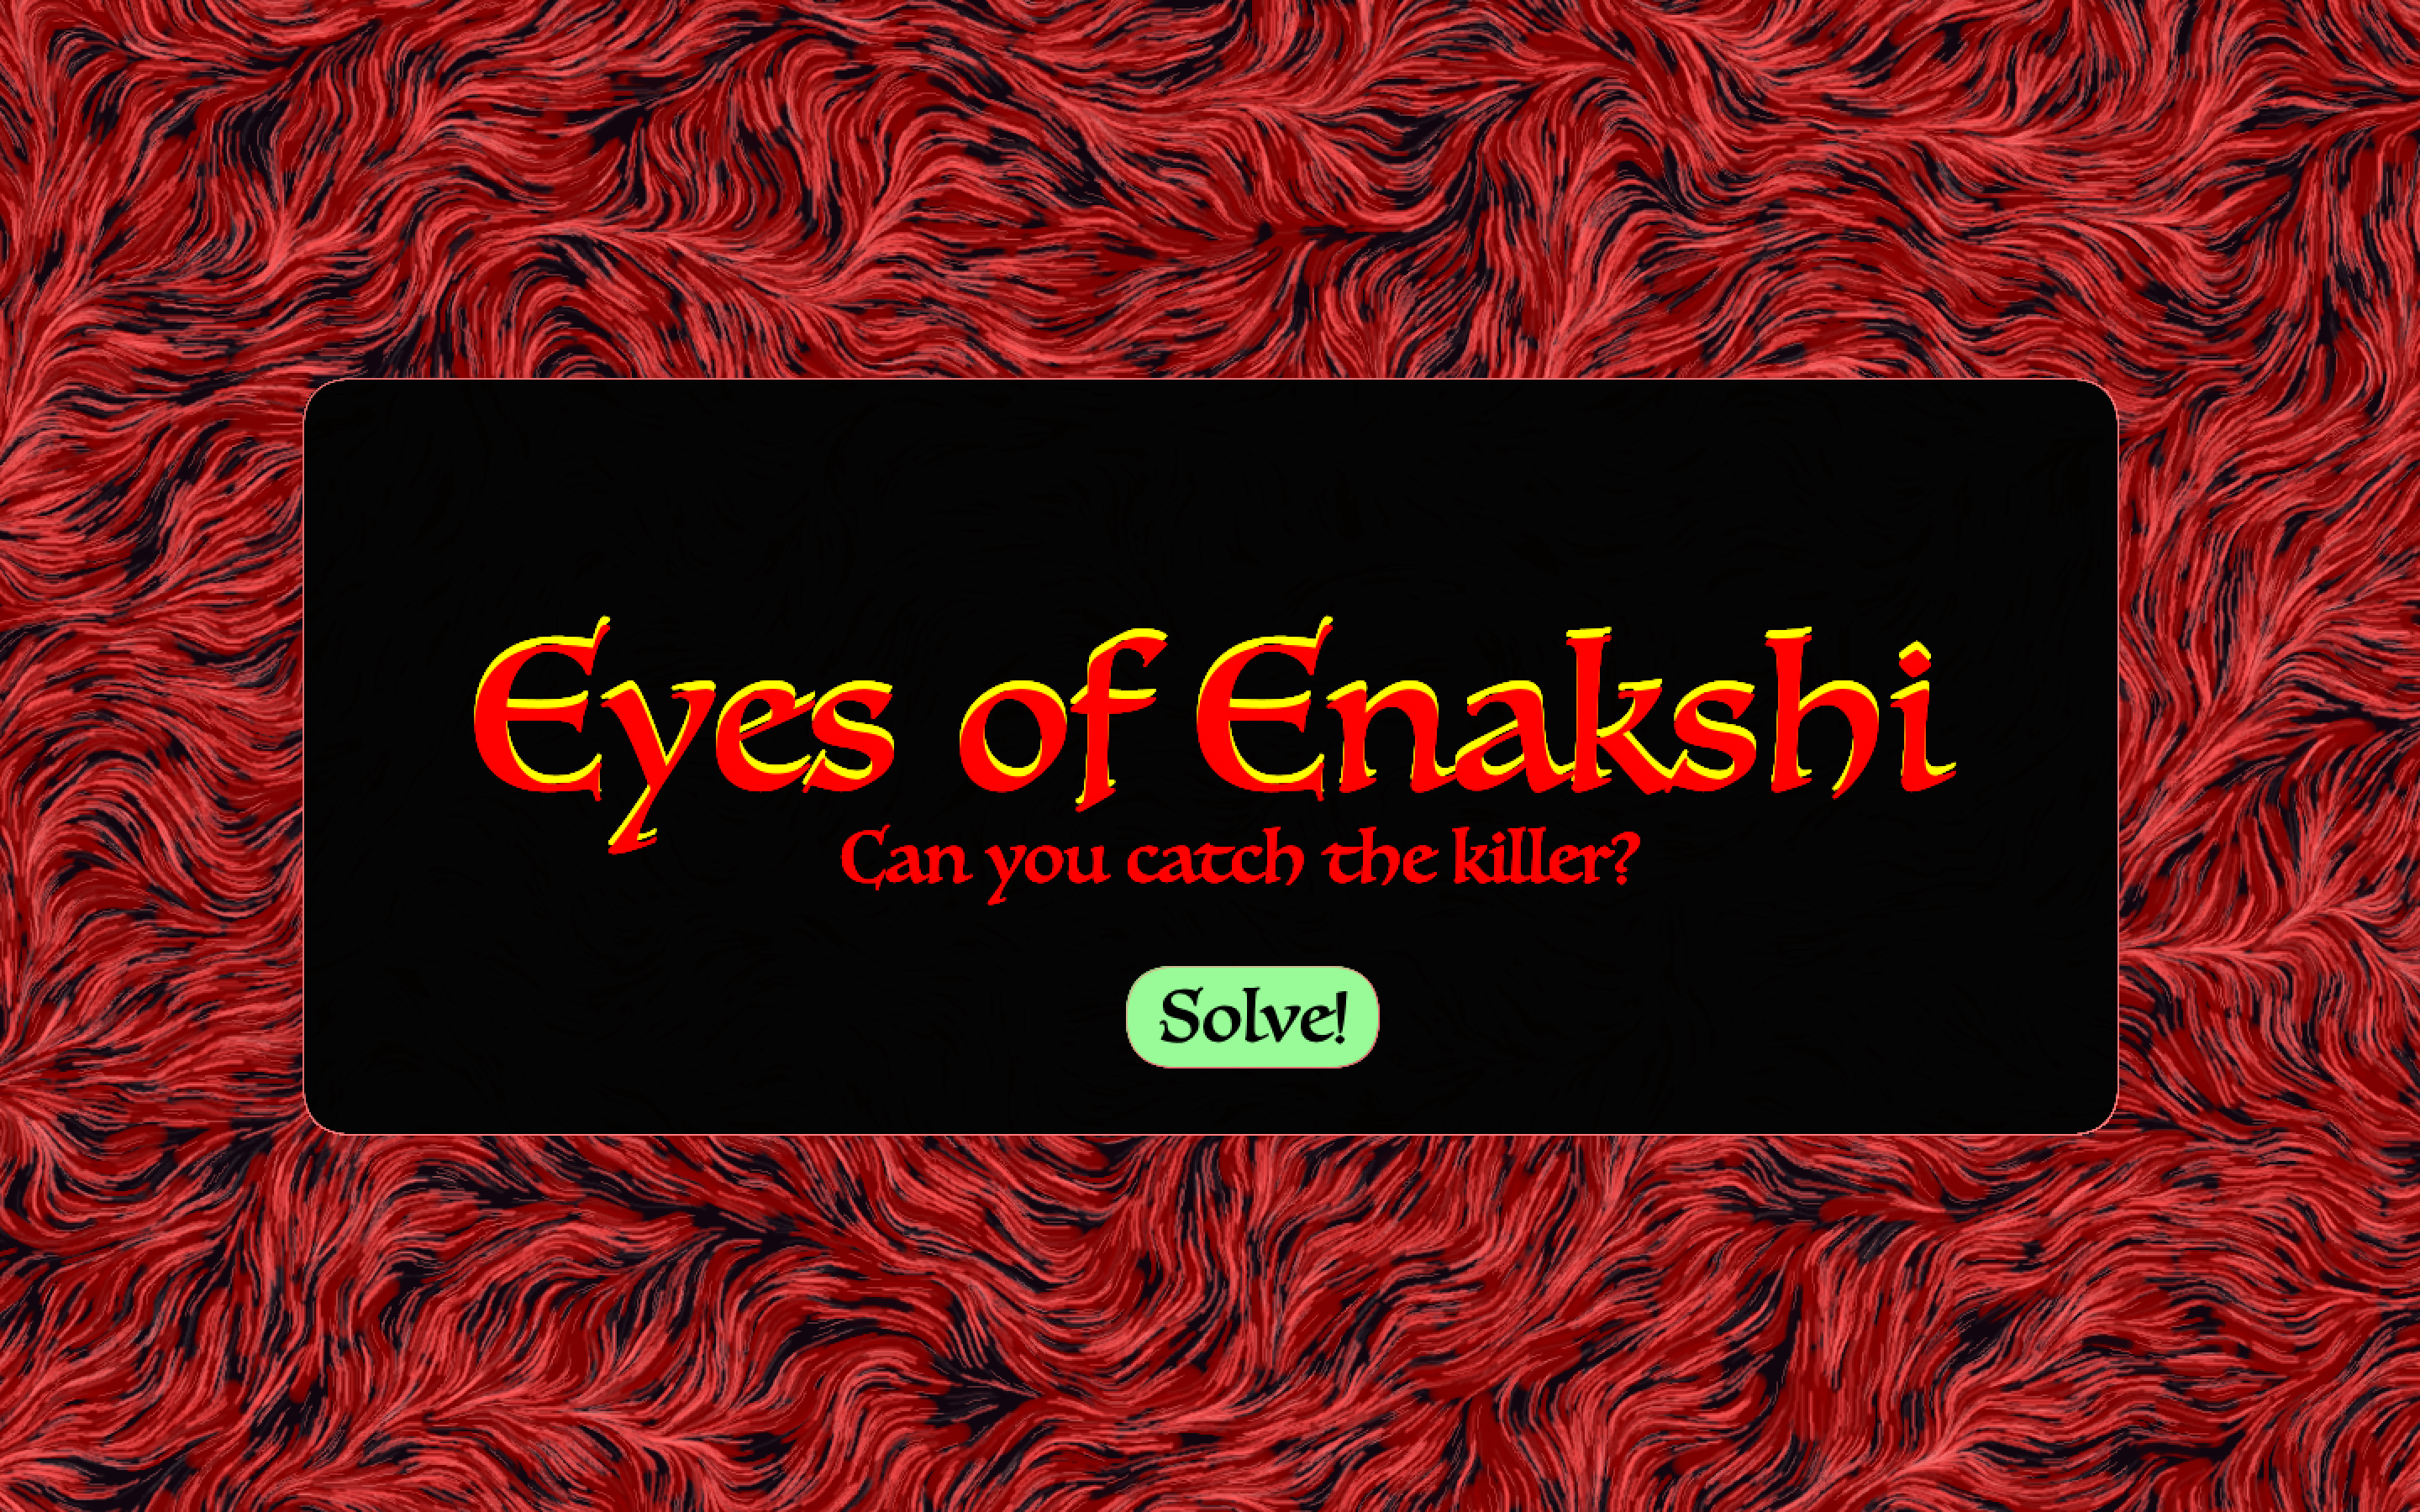
Eyes of Enakshi
The game follows the murder of Gayathri Devi, a successful businesswoman who came to the town of Medikeru (hometown of her young husband) to celebrate her mother-in-law’s 80th birthday. She was found dead the day after her arrival, choked to death. The town is abuzz with rumors guessing the cause of her death – but there’s one guess that’s the most popular – it’s the work of Enakshi! Enakshis are spirits that wander on the earth and are known to kill with their doe-shaped red-eyed gaze. They kill when they are furious and there’s a legend in the town about a man who was killed by Enakshi when he refused to donate to the town temple. Gayathri Devi had done the same, no wonder she’s dead, right?
Well, in this game, Enakshi guides you – she knows it’s not her and she thinks the family is too suspicious- and you, the detective can figure it out, otherwise – well, the Enakshi will be after you!
The Game – Implementation
The starting screen of the game uses Perlin noise with a palette of reds to invoke an ominous feeling. The name of the game is there on-screen throughout the animation and the “Solve” button and the tagline appear when the animation is over. The font we use throughout is “Luminari” to maintain a specific aesthetic to the game. Here’s the starting screen –
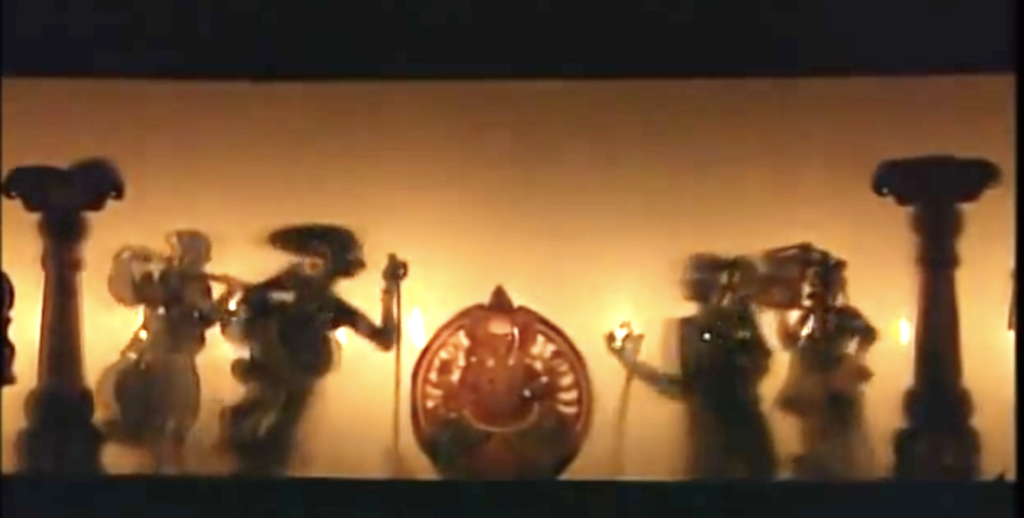
For the legend, we used visuals from the famous “Tholppavakkoothu” art form from Kerala – it’s a form of shadow puppet art. We used it because it went along with the aesthetic of legends – because the stories told by the artform are usually legends. The different type of visual on the screen allows the user to understand that this is an old legend narrative – and not a present-day story – we wanted to create something akin to the “dreamy-like” editing in flashback scenes in movies.
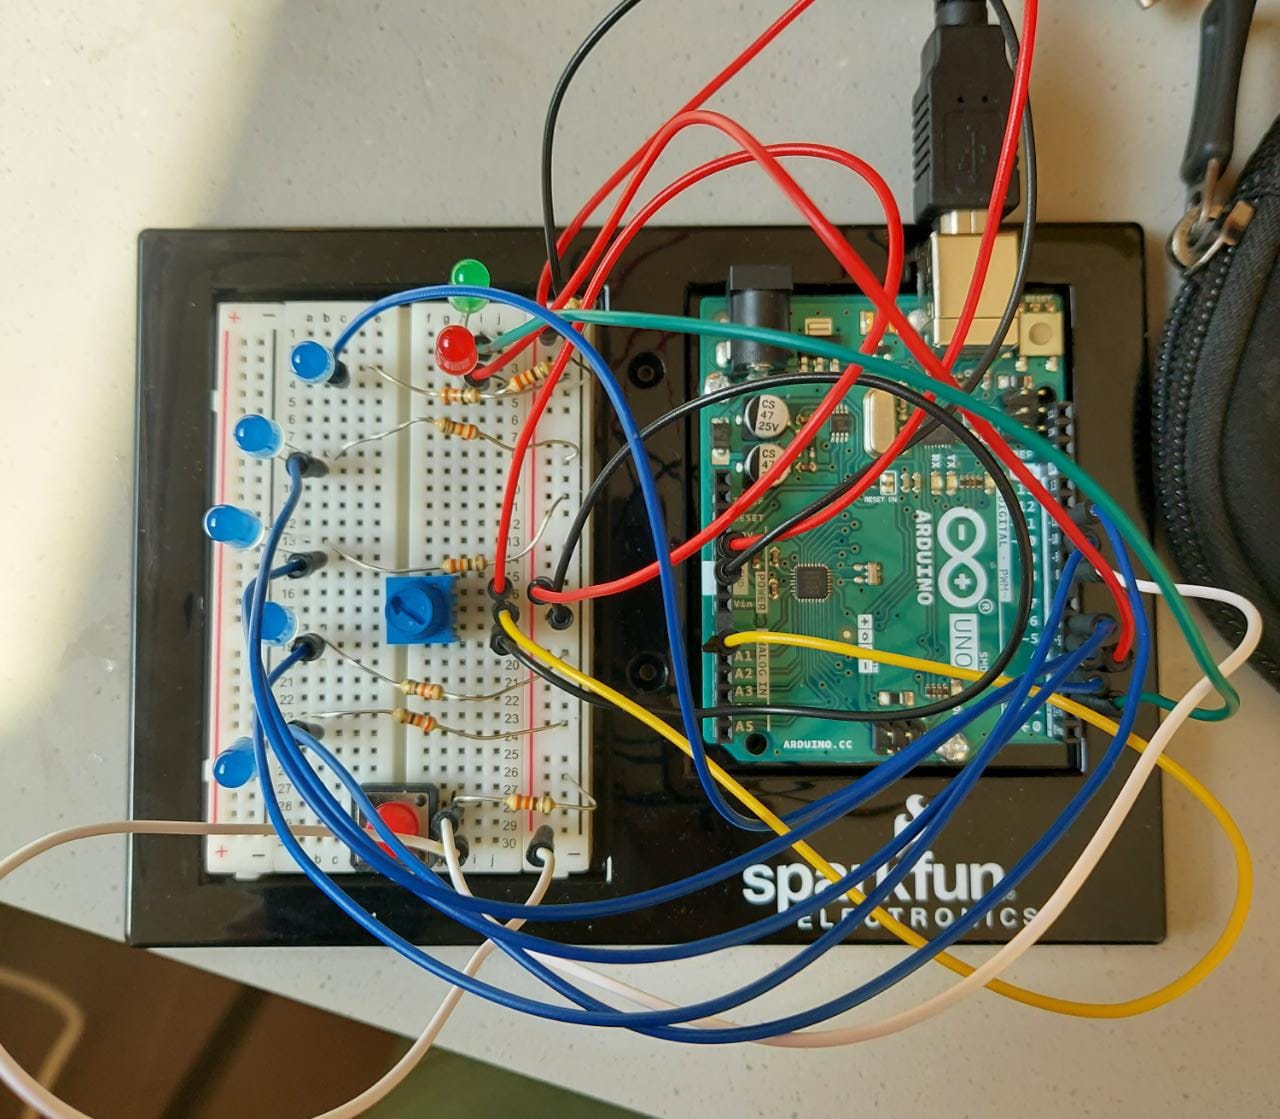
Push buttons are used throughout the game to navigate screens and for the final part – where they choose the murderer – they use a slider to choose. The buttons are color-coded similarly to the pushbutton on the breadboard, to make it easier for the player to understand while being subtle.
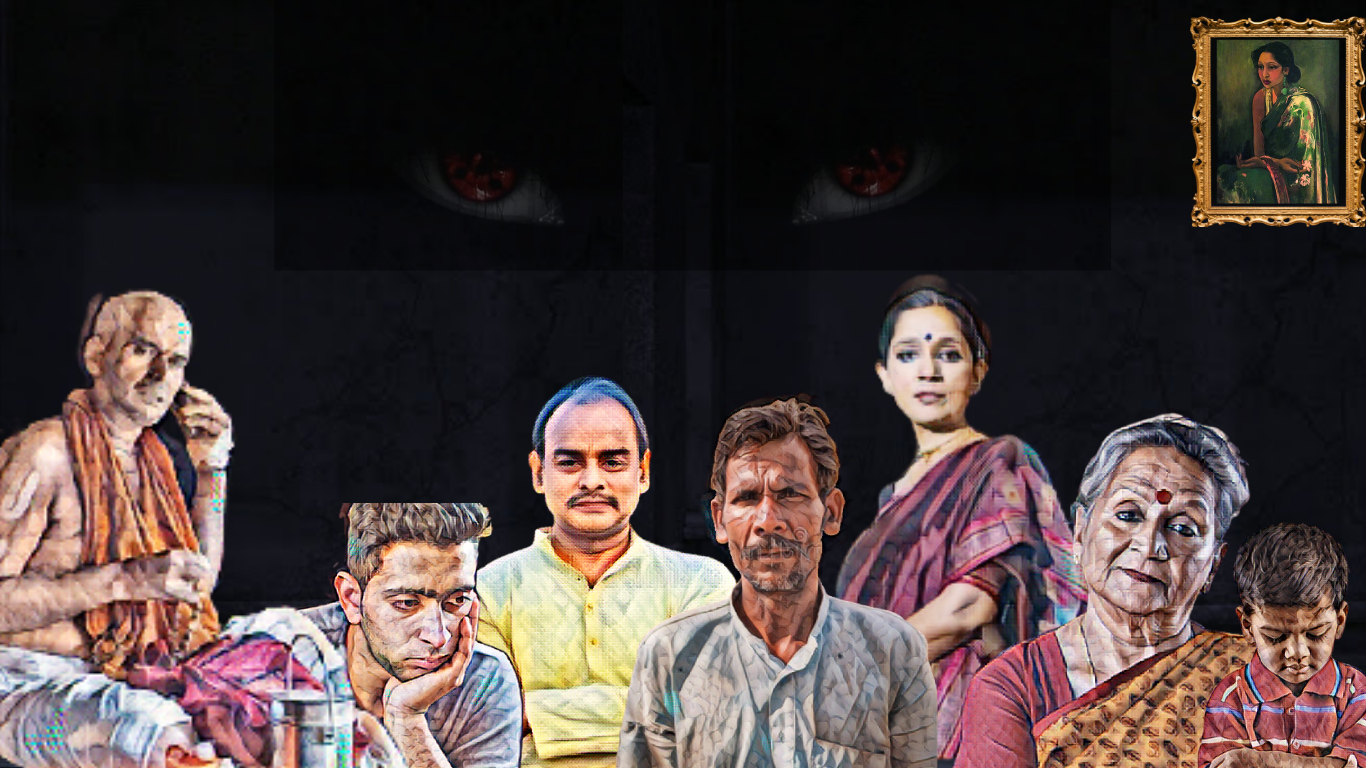
The character of Enakshi was heavily inspired by “Yakshis” who are believed to be spirits that wander the earth (trying to seek revenge) in my home state, Kerala. The images used in the game of Enakshi are artist interpretations of Yakshi –
We found stock images of people that looked like the characters we had in mind for the story – and used Canva to apply similar paint effects to create graphics. Here they are:
For the clues, we have five clues in the game:
The Morse Code
Enakshi communicates to the detective a secret code using morse code. The code is communicated using LEDs and the replay is signified using a buzz sound.
The Diary
The number that is communicated by the Enakshi is the clue for unlocking this clue. The detective has to flip to the page number that is communicated by the Enakshi and this triggers a new screen – it says that you have to write on the paper to get old imprints. If the detective rubs onto the paper several times – a diary page will appear.
The Newspaper Scrap
There will be a newspaper scrap on the table and if the detective picks it up, a connection will be disrupted, and this digital input is used as a trigger to show the clue.
The Child
There will be a toy on the table as well and when the detective picks it up. The working is similar to the newspaper clue
The Police Department Communication
SImilar to the newspaper clue, you pick something up to trigger the beginning of uncovering the clue. But then they have to press the button a certain number of times to see the final clue.
Once all the clues have been discovered, the detective gets to choose themurderer finally. Depending on whether they chose right or wrong, different screens get triggered. If they are wrong, the Enakshi will be out to get the detective. So, beware!
Here’e the user testing video:
From this here’s the feedback we got and how we want to work on them:
-morse code : The game works beginning with the. morse code, if they don’t figure it out, there’s no going back and our player couldn’t figure out what to do. Morse code itself is a bit hard to work with. So, we want to work on making sure they can figure out the morse code any time during the game with no order. -diary clue: diary clue was hard to figure out for the user, because of a lack of feedback from the game in the beginning – they didn’t know where to rub on the paper. And the user has the tendency to pick up the diary which would mess up the system. -the clues were moved too easily: the way the clues were placed were too easy to be moved – making the clues trigger without intentional movement from the user. So, we need to work on making sure they stay put until intentionally moved by the user. -add clue log and character log: Putting in a summary of all the clues so far before choosing the murderer would help the detective choose better
Overall, we want to work on making sure that 1) there’s clarity in our instructions and 2) the clues are properly placed when presented (in a way that they would be moved only when the detective intentionally picks it up).
The plotline itself seems to be a good mix of ease and hard, so the murder mystery is not too easy to solve but at the same time, not too hard, which is what we wanted. We got to implement the clues as we desired and the visuals and the storyline came out as we had envisioned, which is really encouraging to think about (that realization came when I was writing down this documentation!). But yeah, with some more improvements, our detective should have all the tools needed to catch the murderer!
We were supposed to finalize our final project idea today and I am going ahead with the interactive murder mystery project as a group project with Bhavicka.
The interactive murder mystery game would let the user play detective at a murder scene. They will get a sense of the murder scene and characters in the beginning. Followed by this, they can inspect objects from the murder scene and get clues. Finally, the user can select who the murderer is.
As for the storyline, we have developed a pretty vague idea. We want the murder victim to be a rich man who was at their holiday home in a hill station in south India. We want to add in some supernatural elements (like Yakshi) to add to the thrill. For aesthetics, we want to have a soundscape that would consist of typical murder mystery elements like a nursery rhyme out of place, jumpscares, etc.
Materials/Space Needed
Projector – we were thinking this would add to the aesthetics – but we are unsure about this
Slider – to choose menu options, choice of character, etc.
Gloves
Aluminum Foil
Timeline of the Game
Set the story – user interaction includes using buttons to go to the next scene and during this part of the game, the player gets to understand the characters, the story, and the motive of the game.
Clues inspection – in this part, the user gets to interact with the objects from the murder scene and find clues. The story develops in parallel as the user interacts with the objects to find clues. We were thinking of having the story progress once the user finds, for example, 2 clues. Rather than having a timer to reveal the story. So, the story goes at the pace of the player. Here are some ideas we’ve had for the clues:
Morse code with LEDs – have it seem like the supernatural element is communicating the clues to the player
Hidden switch in one of the objects to reveal a clue
Letters/messages/diary notes are revealed
Set up a switch that requires simultaneous pressure on multiple items. We were also thinking of having the pressure points be tapped in a certain sequence and a sequence is revealed by an earlier clue.
User chooses their pick – they can reach this phase by either pressing a button mid-game deciding to finalize their pick or after they’ve found all the clues.
The user has access to all the clues they found so far – throughout the game – they can access it by clicking a button. This helps them review all the clues they’ve gotten so far as they progress through the game.
Hardest Part
The hardest part would be to develop a storyline that is engaging enough for the player to continue interacting with. We think that once we have the story and aesthetics finalized, it should get better to implement them in code. The clues can be coded separately using different sensors so, integrating code for the clues would be easier. We also want to make sure the clues are easy enough to crack but not too easy so that the user has fun playing the game and is not bored/finds it too hard.
For my final project, I want to work on an interactive murder mystery game. The piece would let the player interact with it to get a sense of the setting of the story and the characters within it and then the player can proceed to search for clues, take interviews and finalize the suspect. The goal of the game is to find the killer.
On a side note, as I finalize the storyline, I want to explore non-murder mystery storylines too, focusing on plots with mystery and thrill. Right now, I’m thinking of doing a storyline with Christie’s Crooked House.
I want to create a soundscape for the game with eerie sounds, where the narrator invites the player to the story, talks about the place, and let them choose different characters and learn about them. For this part, I was thinking of implementing a potentiometer and a button or a switch that will let the user choose the character – as opposed to clicking on the screen itself.
After learning about the setting and the characters, the player can now look at the objects provided to them – these are things acquired from the murder scene. In this section, the user can interact with these objects to find some clues. I’m taking inspiration from the reading, “Brief Rant on the Future of Interaction Design”, by incorporating ways of interaction beyond buttons and slides. With the objects, I’m thinking of hiding some switches. What I’m envisioning is having all the objects connected via wires to make it look like they are secured to the table. As the player interacts with the object, I’m thinking of having a particular part of the material have some conductive material which when the user touches that part, it completes the circuit to reveal the clue. I was thinking of adding in some sounds for feedback as soon as this is done so that the player knows that they’ve found a clue and continues to press the hidden switch.
The clues on their own could be simple puzzles like cracking codes, trying to find the missing pattern, riddles, etc. This way the player is engaged with the piece.
Finally, when the time is up, they can choose the character who they think is the culprit and the screen will reveal whether they’ve won or lost.
Processing would show the story, the clues, the stories of the character, and the final result. Arduino would take input from the user on which menu setting they’d like to choose, which character they’ve chosen, and input puzzle answers.
make something that uses only one sensor on Arduino and makes the ellipse in processing move on the horizontal axis, in the middle of the screen, and nothing on Arduino is controlled by processing
make something that controls the LED brightness from processing
int left = 0;
int right = 0;
int ledOn=0;

void setup() {
  Serial.begin(9600);
  Serial.println("0,0");
  pinMode(2, OUTPUT);
}

void loop() {

 while (Serial.available()) {

    ledOn = Serial.parseInt();
    if (Serial.read() == '\n') {

      digitalWrite(2, ledOn);
      delay(2);

      int sensor = analogRead(A0);
      delay(1);
      Serial.println(sensor);
    }
  }

}
Processing sketch
PVector velocity;
PVector gravity;
PVector position;
PVector acceleration;
PVector wind;
float drag = 0.99;
float mass = 50;
float hDampening;


import processing.serial.*; //serial library built-in
Serial myPort;


int bounce = 0;
float oldPos = 0;
int oldValue;

void setup() {
 String portname=Serial.list()[6];
 println(portname);
  myPort = new Serial(this, portname, 9600);
  myPort.clear(); //cleaning out serial buffer
  myPort.bufferUntil('\n'); //buffer /fill it up until \n

    size(960, 720);
  printArray(Serial.list());  //print out all the port that's available
 //find which one is your arduino that's the one port
  //this can change everytime - so recheck - check if it is the right port


  size(640,360);
  noFill();
  position = new PVector(width/2, 0);
  velocity = new PVector(0,0);
  acceleration = new PVector(0,0);
  gravity = new PVector(0, 0.5*mass);
  wind = new PVector(0,0);
  hDampening=map(mass,15,80,.98,.96);
  delay(1000);
}

void draw() {
    bounce = 0;

  background(255);
  if (!keyPressed){
   // wind.x=0;
    velocity.x*=hDampening;
  }
  applyForce(wind);
  applyForce(gravity);
  velocity.add(acceleration);
  velocity.mult(drag);
  position.add(velocity);
  acceleration.mult(0);
  ellipse(position.x,position.y,mass,mass);
  if ((int(position.y) >= height-mass/2) && (oldPos!=int(position.y))){
      bounce = 1;
    }
  if (position.y > height-mass/2) {
      oldPos=int(position.y);
      velocity.y *= -0.9;  // A little dampening when hitting the bottom
      position.y = height-mass/2;
      //bounce = 1;
    }

// println("Y:"+position.y+" "+cond);
}

void applyForce(PVector force){
  // Newton's 2nd law: F = M * A
  // or A = F / M
  PVector f = PVector.div(force, mass);
  acceleration.add(f);
}

void keyPressed(){

  if (key==' '){
    mass=random(15,80);
    position.y=-mass;
    velocity.mult(0);
  }
}

void serialEvent(Serial myPort) {
  myPort.write(bounce+"\n"); //send information to the arduino
  String s=myPort.readStringUntil('\n');
  s=trim(s);

  if (s!=null){
    int value=int(s);
    int mappedValues=(int)map(value,0,1023,0, width);
  //  println(s);
        println(value+" "+oldValue);

    if ((mappedValues <= width/2)&&(value!=oldValue)){
      wind.x=-1;
    }
    else if ((mappedValues > width/2)&&(value!=oldValue)){
      wind.x=1;
  }
  else
  wind.x=0;
      oldValue = value;


  }

}
For this week’s assignment, we started off with wanting to do something with the distance sensors. There’s something really cool about moving your hands in thin air and creating music.
We wanted to use the distance sensor to record the distance and convert that into musical notes and have lasers put in just for the aesthetics and as a guide for the player to know where to move. We took inspiration from the laser keyboard/bass featured in this video.
We soon realized that lasers were too complicated to integrate into the instrument as we would need some kind of smoke in the air to trace the path of the beam and that was a huge, complicated process to replicate on campus. So, we decided to work with just air.
For the instrument, we decided to have a one-octave scale and a button that would take digital input, which would shift the scale by an octave. We replicated the same thing with another Arduino so that we could play in harmony with different octaves. There’s also a button that acts like an on/off switch in the beginning and once the instrument is switched on, it acts as a momentary pause.
We had a few issues with balancing the tone() function from both the digital input of the push button and the input from the distance sensor, but it was some wiring issues, once that was sorted out, all was done.
We added a few lines of codes that would convert distances beyond a certain point to 0 so that we don’t hear any annoying noise when there is no object in front of the instrument.
Interestingly, what we achieved, in the end, sounded a lot like bagpipes.
Here are a few demos. The first one is just using one octave and the second one is by shifting octaves midway. It’s ‘The Lion Sleeps Tonight’:
Here’s the code:
#define echoPinC 12
#define trigPinC 11
const int BUTTON_PIN = 7; // Arduino pin connected to button's pin
const int BUTTON_PIN2 = 8;
# include "pitches.h"

String notes6[7] = {"C4", "D4", "E4", "F4", "G4", "A4", "B4"};

int notes[7] = {NOTE_C5, NOTE_D5, NOTE_E5, NOTE_F5, NOTE_G5, NOTE_A5, NOTE_B5};
int notesHigh[7] = {NOTE_C4, NOTE_D4, NOTE_E4, NOTE_F4, NOTE_G4, NOTE_A4, NOTE_B4};

long durationC;
int distanceC;

int playNote;

bool start = false;

void setup() {
  pinMode(trigPinC, OUTPUT);
  pinMode(echoPinC, INPUT);
  pinMode(BUTTON_PIN, INPUT_PULLUP);
  pinMode(BUTTON_PIN2, INPUT_PULLUP);
  Serial.begin(9600);
}

void loop() {

   int buttonState = digitalRead(BUTTON_PIN); // read new state
   int offState = digitalRead(BUTTON_PIN2);

  //switch on
   if (offState == LOW) {
    start=true;
   }

  if(start)
  {

    // put your main code here, to run repeatedly:
  digitalWrite(trigPinC, LOW);
    delayMicroseconds(2);
    digitalWrite(trigPinC, HIGH);
    delayMicroseconds(10);
    digitalWrite(trigPinC, LOW);
    durationC = pulseIn(echoPinC, HIGH);
    distanceC = durationC * 0.034 / 2;

    Serial.print("DistanceC: ");
    Serial.print(distanceC);
    Serial.print(" cm");
    Serial.print("mapped: ");

    int constrainedInput=constrain(distanceC, 1, 70);

    int mappedNoteC = map(constrainedInput, 1, 70, 0, 6);

  Serial.println(notes6[mappedNoteC]);

    if (buttonState == LOW) {
     Serial.print("button unpressed: ");


    // noTone(4);
    playNote = notesHigh[mappedNoteC];

    if(distanceC > 70){
     noTone(4);
    }

    }
    else
    if (buttonState == HIGH) {
     Serial.print("button pressed: ");
        playNote = notes[mappedNoteC];
    }

  //no note when button is triggered
    if (offState == LOW) {
       Serial.print("button unpressed: ");
       noTone(4);
    }
    else

    //when the button is not triggered play a note
      if (offState == HIGH) {
        tone(4, playNote);
      }

      //distances beyonf a point has no tone
      if(distanceC > 70){
        noTone(4);
      }

}

}
For this week’s assignment, I struggled a lot to come up with an idea, because I’ve never really had to think creatively in this medium (this case, arduino and LEDs), so it took a lot of brainstorming to conclude on an idea. I finally settled on a guessing game. It is a game you play wherein the code chooses a random bulb on the board, and you, as a player, have to guess which bulb it is. If you guess right, you win!
I used a potentiometer to get the analog input and a push-button for the digital input. I settled on five blue LEDs in total and the player has to guess which LED is the secret LED. There are green and red LEDs on the board that will indicate whether the chosen LED is correct. The choice is decided by rotating the knob on the potentiometer. And the choice is finally sealed in by pressing the push button.
Also, I wanted to put in some breather time in between two games and also when the game begins. I really liked the idea of showing patterns through LEDs, so I decided to make a pattern through the blue LEDs at the beginning of the game to settle in, and between games when whether the player is right or wrong is indicated.
Making the circuit was easier than I had anticipated. I imagined the absolute worst scenarios when I decided on the idea, but it helped me seal the concepts learned in class, so it went along better than expected 🙂
One problem I faced was the placement of the different elements on the board because at first I put in all the elements on one end of the board and it became very crowded, so I changed the placement and put in the potentiometer in the middle. While it can be troublesome to move in between the wires, it is intuitive in relation to the 5 LEDs surrounding it because the mapping is quite obvious.
Here’s the circuit:
For the code itself, I divided the game into 4 different parts and worked on them one at a time, tested it, and then integrated it with whatever I had done until before and tested again.
The parts where:
the patterns by the 5 blue LEDs
potentiometer mapping to the 5 LEDs
sealing the deal with the switch and checking whether the guess was right (and lighting the corresponding LED)
Resetting the game to restart
Serial.print helped a lot with error correction. I had some trouble with the pushbutton and the resetting of the game. So, in addition to setting the numbers for mapping the knob value to the corresponding LED, the logs helped with the switch error too. The error I had was related to delays in the pattern function. While the pattern was still going on, the checking for the next guess would proceed, and this would cause the green/red bulb to light again. But this was a premature checking step as the player hadn’t chosen their next guess yet. So, I changed the code to make sure that all the variables were reset as soon as the push button was pressed and the pattern was called at the end of the game rather than executing the loop I had for the pattern at the beginning of the game (since it was too late by then). This solved all problems.
Something I hadn’t realized before was that with analog input, I could also use the same for digital input too. While we did learn this in class, it hadn’t properly set in my mind until I did that with the code. I used digitalWrite for the 5 LED bulbs with the patterns in the beginning and analogWrite for the same bulbs when guessing the number.
Here’s a demo:
Here’s the code:
const int lightVis = 75;
const int num = 7;
int lightPins[7] = {2,3,4,5,6,10,11};
const int switchPin = 8;
const int knob = A0;
bool startPat = false;
int pins[5]={1,3,4,5,6};
int randNumber = pins[random(5)];
bool gameOver = false;
bool prevButtonState = false;


void setup() {
  Serial.begin(9600);
  for(int i=0;i<num;i++)
  {
    pinMode(lightPins[i],OUTPUT);
  }
  pinMode(switchPin,INPUT);
}


void loop() {
  bool currentState = digitalRead(switchPin);

  //pattern
  if( startPat == false){
  for(int i=0; i<=5; i++) {
     pattern();
     startPat = true;
  }
  }

  //green and red lights are now OFF
  digitalWrite(lightPins[2], LOW);
  digitalWrite(lightPins[0], LOW);

 //mapping knob values to corresponding LED
  int knobValue = analogRead(knob);
  int ledNum;
  if ((knobValue>0 && knobValue<435) || knobValue<0)
    ledNum=6;
  if (knobValue>435 && knobValue<700)
    ledNum=5;
  if (knobValue>700 && knobValue<755)
    ledNum=4;
  if (knobValue>755 && knobValue<838)
    ledNum=3;
  if (knobValue>838)
    ledNum=1;


  Serial.print("Random Value: ");
  Serial.print(randNumber);
  Serial.print(" Knob Value: ");
  Serial.print(knobValue);
  Serial.print(" Mapped Value:");
  Serial.print(mappedValue);
  Serial.print(" ");
  Serial.print(currentState);
  Serial.print(" ");
  Serial.println(prevButtonState);

  analogWrite(lightPins[ledNum],254);
  for(int i=0; i<num; i++) {
     if(i!=ledNum){
        analogWrite(lightPins[i],0);
     }
  }


  if (currentState != prevButtonState && currentState==HIGH) {
    gameOver=true;
    if(ledNum==randNumber){
      digitalWrite(lightPins[0], HIGH);
      digitalWrite(lightPins[2], LOW);
    }
    else{
      digitalWrite(lightPins[2], HIGH);
      digitalWrite(lightPins[0], LOW);

    }
    prevButtonState = false;
    currentState=false;
  }


  if(gameOver)
  {

    randNumber = pins[random(5)];
    gameOver = false;
    for(int i=0; i<=5; i++) {
     pattern();

  }

  }

}


void pattern(){
    for(int i=0; i<num; i++) {
      if(lightPins[i]!=2 && lightPins[i]!=4)
      {
        digitalWrite(lightPins[i],HIGH);
        delay(lightVis);
        digitalWrite(lightPins[i],LOW);
      }

    }

    for(int i=num-1; i>=0; i--) {
      if(lightPins[i]!=2 && lightPins[i]!=4)
      {
        digitalWrite(lightPins[i],HIGH);
        delay(lightVis);
        digitalWrite(lightPins[i],LOW);
      }
    }
}
This will be a fun replacement for heads or tails. I’ve used heads/tails toss to make a lot of arbitrary decisions before, but I’m thinking that in situations wherein I’m leaning against a particular choice, this would be a great way to make a decision as there’s only a 1/5th chance of getting it right! But if you do guess right, even probability isn’t on your side ://
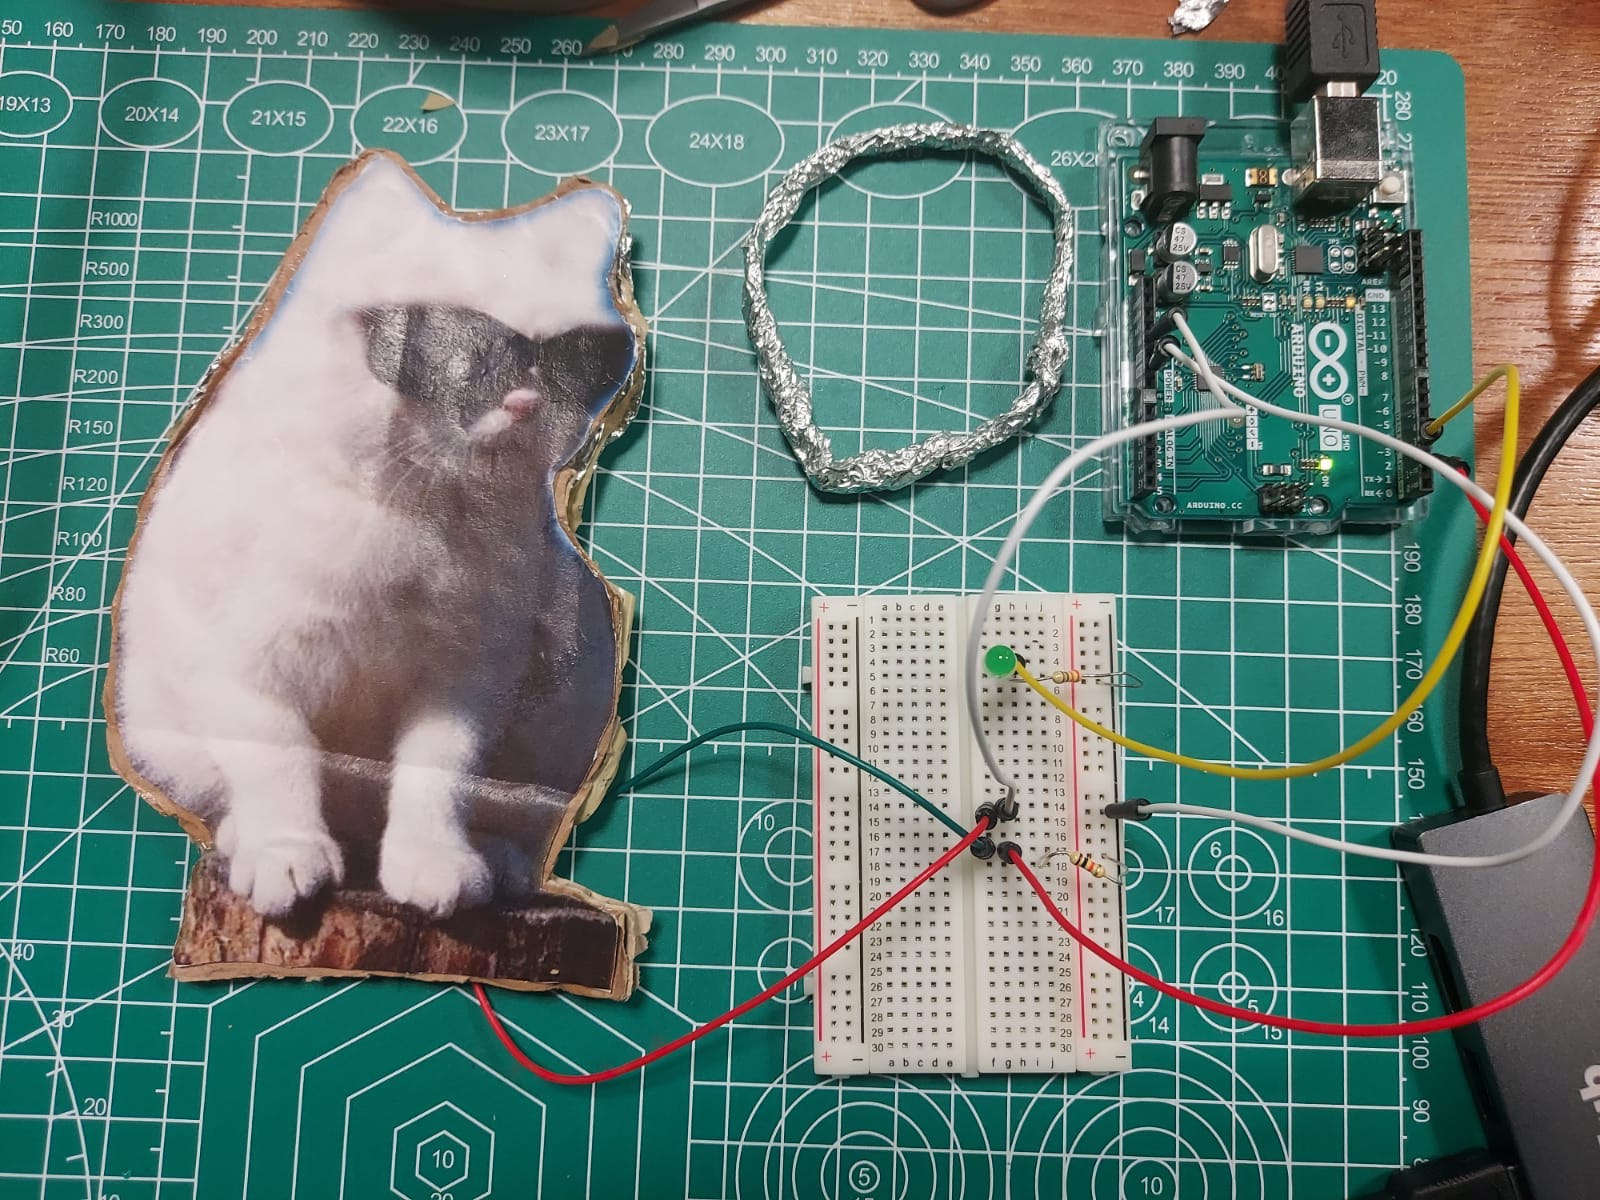
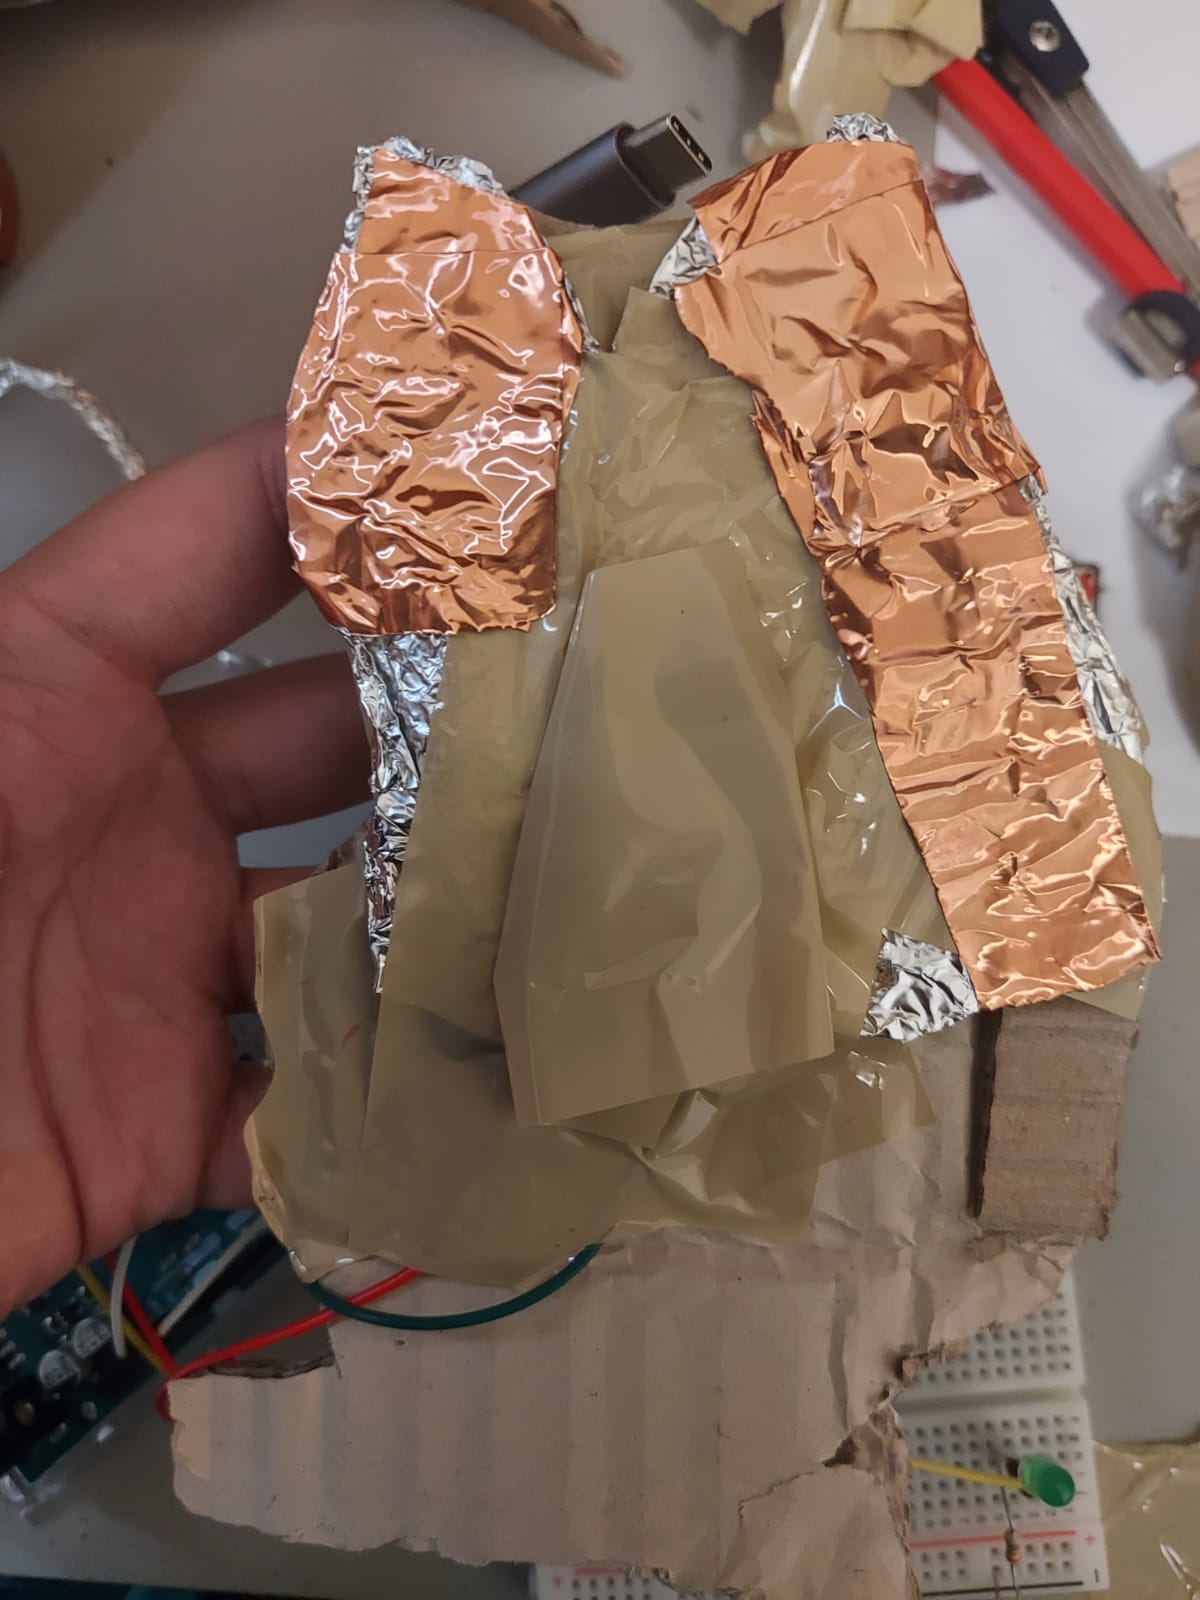
For this week’s assignment, we had to make a switch using Arduino digital input and output for interaction. I started off with the idea of a switch where when you put a hat on a cat figurine, the light would switch on. But I scrapped that idea since it would involve using my hands.
So, I decided to adapt my idea to lower the degree of interaction hands may have on the switch. I ended up with a carnival-like game Ring toss, where you win if you throw a ring and it goes on a bottle. In my version, the bottle is a cat, and I’m throwing a ring of aluminum foil. When the ring falls on the cat, the green light glows and you win.
For this, I had two jumper wires from the breadboard attached to aluminum foil and this was pasted to the cat’s ears and body, and the ring was made of aluminum foil as well. So when the ring fell on the cat, the aluminum foil would complete the circuit which would go as Arduino digital input.
I had some trouble understanding how to incorporate Arduino digital input so after playing around with the push button switch schematic, I realized what the assignment meant.
Here’s the video showing the switch and there’s pictures of the whole setup below it.
The game that I made for the midterm project was definitely a product of a lot of ideas and concepts that were discussed in the class – not just pertaining to the environment of processing itself. As a CS major, I had done a bit of Processing for my Intro to CS class, but this time around, I approached making a game on Processing differently – and the biggest difference was I was actively thinking about whether the game was designed to make sense to a player – whereas back then I was concentrating on achieving functionality.
My game, in a nutshell, can be thought of as snake and ladders but instead of the snakes and ladders, there are cards that describe the number of steps you move back and forth. The theme I chose was my state in India – Kerala and it can be seen in the tokens – Theyyam and Kathakali (both of which are art forms in Kerala) and the cards. The cards are things that are related to Kerala. Here are the cards:
Implementation
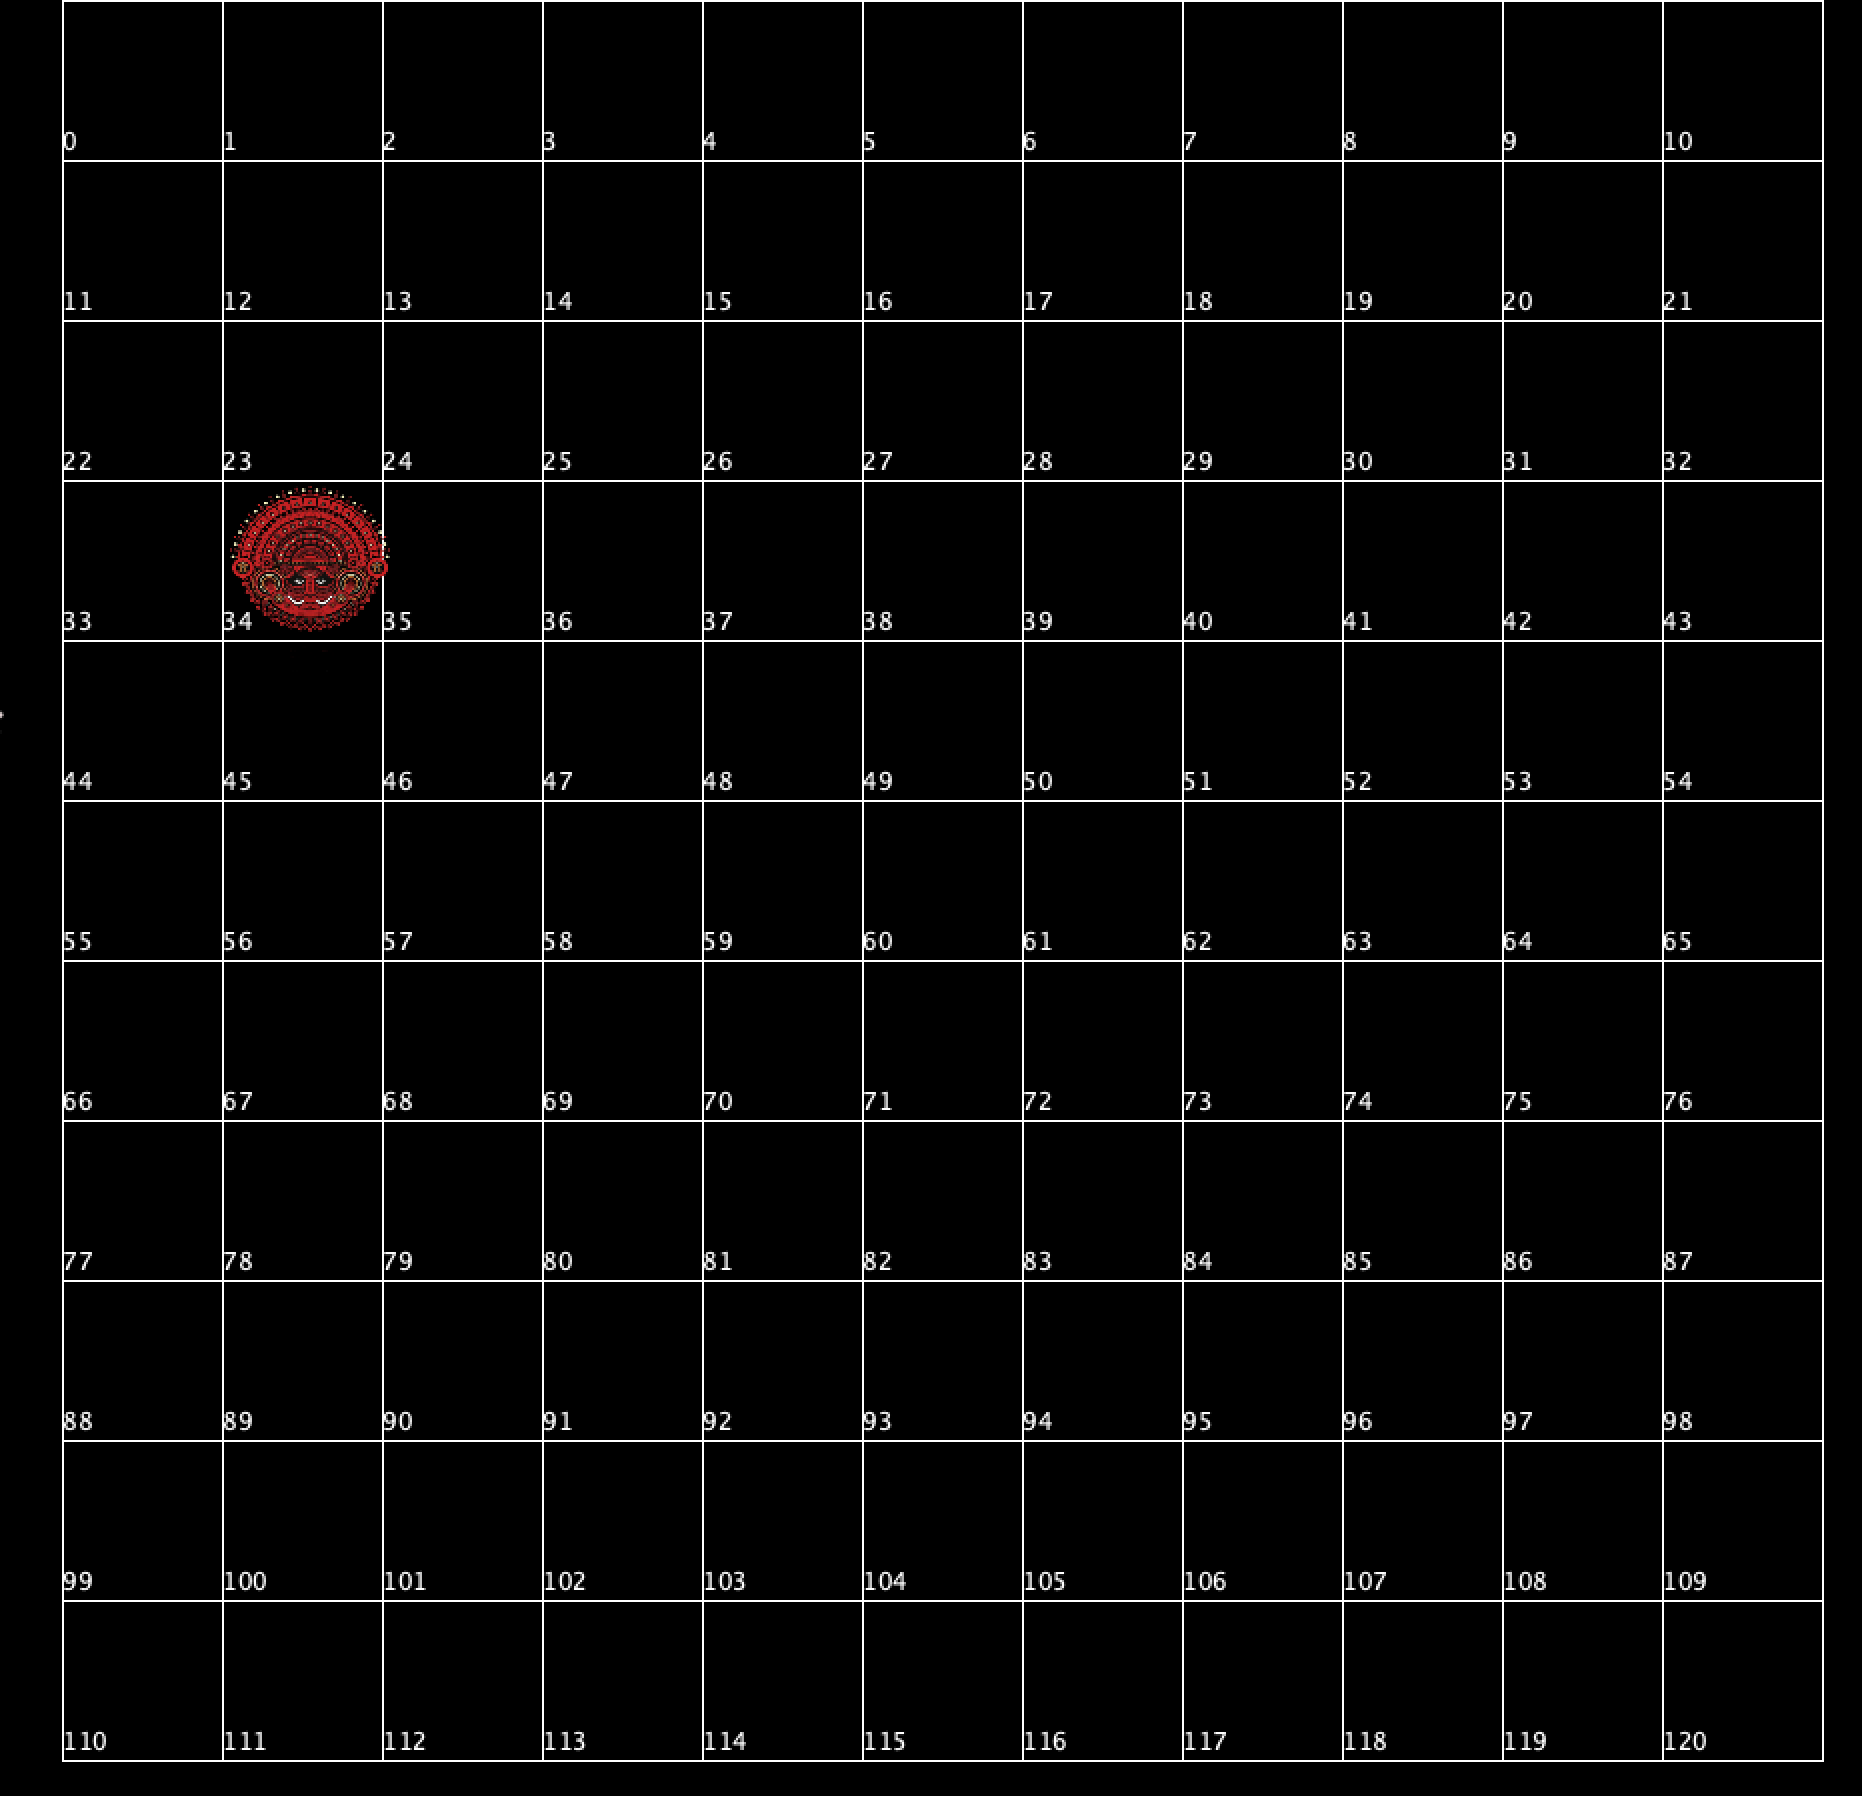
I took a step-by-step approach and broke down the game into smaller units and then tied them together. In the last week, I worked on the rolling die, the grid, and the tokens. This week, I started on improving the design of the grid. The one I had before was a grid with 121 squares starting on the top left and ending on the bottom right. I wasn’t satisfied with these specifications – the idea of reaching a 100 had more of a victorious effect than 121. Also, traditionally, most of these games begin at the bottom left and end on the top left. I tried playing through a game with the original specifications, but knowledge of previous games made it hard to play, so I decided to match the specifications. Moreover, the numbers were displayed in n order, so when the next line comes, it starts from the left again, but with the movement of the tokens, this path is very abrupt and cut off. Making these changes was very confusing, especially alternating between going from left to right and then vice-versa, but finally, I used the (%2==0) condition and alternated to get the left to right and right to left display. Also, I changed the colors of the squares from just black and alternated between shades of black, to provide more definition to the individual squares.
Then, I worked on picking random squares on each row to have a colored square that would represent a card. This was very easy to implement, and I made an array of colors and randomized which color to pick for each game from this array, and the position of the squares is random for each game as well.
After this, I worked on moving the tokens and recording what the die returned on rolling. Further, I had to add the functionality of moving when arriving on a colored square and then showing the card when the token arrives at the colored square. This was definitely the hardest part to figure out – implementation-wise and design-wise. I went through a lot of ways to implement this and figuring out how the token should move, when should it move, should there be triggers, etc. I picked the version that seemed the simplest of the bunch. The player rolls the die and the token moves according to the die number, and this is automatic. If they happen to arrive at a colored square, the extra steps are also accounted for in the movement of the token, and the card is displayed on the side to make sense of the movement. In order to understand whose turn it is, the token is displayed on the side of whose turn it is.
Rolling of the die and coordinating that with the turns of the user was confusing. I had a global variable to keep track of the turns. Figuring out the logic behind it took some time though. Also, I found out that the number of steps the tokens take the first time around is always -1 the number of steps they are supposed to take, so I made an if condition to check if it is the first time they are moving and take that into account as well. The explanation I have for it is that the number displayed starts at 1 and the internal number starts at 0, and I created the program handling both, so I changed that. Finally, the player gets to move, only when a 1 or 6 comes up, so I had a global variable to indicate whether they are on the board yet.
Then, I designed the beginning and end slides of the game which was fairly easy to implement.
Welcome page + InstructionsExit Page
The functionality of the restart button took some time to figure out, the core of the issue was that many of my global variables needed to be reinitialized too, not just those in the setup(). But once I figured that out, all was done. The final addition was the sound! I added an evil laugh effect every time the player enters a colored square that makes them move back and a “woohoo” effect for when they progressed. I added some instructions on the game board as well, just in case the player chooses to skip the instructions on the welcome slide, they’ll not be completely confused during the game. A lot of the things I incorporated in the game design-wise were from feedback from family and friends playing the game. They noticed things that seemed very obvious to me (for example, you have to double click on the dice to stop it). So, yeah, it was a cool learning experience.
Here’s a demo of the game
//sound
import processing.sound.*;
SoundFile[] soundFiles = new SoundFile[2];

//images
PImage kathakali, kToken, kathakaliWon;
PImage theyyam, tToken, theyyamWon;
PImage power, filter, daagini, mosquito, dosa, coconut, houseboat, mahabali, traffic, sadya;
PImage welcome;


Rect rect[];
int size = 82;
int diceX = (100*width/8)+25;
int diceY =(60*height/8)+10;
int diceSize = 90;
boolean toggleRun=false;
boolean gameMode = false;
int yOffset = 35;
int xOffset = 40;

//color palette
color c1=#ffc097;
color c2=#ffee93;
color c3=#fcf5c7;
color c4=#aeced9;
color c5=#adf7b6;
int die = 0;
color[] palette = {c1, c2, c3, c4, c5};


//game logisitics
int turn=-1;
int token=0;
Token token1, token2;
boolean card=false;
int cardButton=0;
int start1;
int start2;
boolean celebrate = false;
boolean start=false;

void setup() {
  fullScreen();

  soundFiles[0] = new SoundFile(this, "evil.wav");
  soundFiles[1] = new SoundFile(this, "woohoo.wav");
  theyyam = loadImage("theyyam.png");
  tToken = loadImage("theyyam.png");
  theyyam.resize(220, 260);
  tToken.resize(88, 104);
  theyyamWon = loadImage("theyyamWon.jpg");


  kathakali = loadImage("kathakali.png");
  kToken  = loadImage("kathakali.png");
  kathakali.resize(180, 224);
  kToken.resize(72, 90);
  kathakaliWon = loadImage("kathakaliWon.jpg");


  power = loadImage("power.jpg");
  filter = loadImage("filter.jpg");
  daagini = loadImage("daagini.jpg");
  mosquito = loadImage("mosquito.jpg");
  dosa = loadImage("dosa.jpg");
  coconut = loadImage("coconut.jpg");
  houseboat = loadImage("houseboat.jpg");
  mahabali = loadImage("mahabali.jpg");
  traffic = loadImage("traffic.jpg");
  sadya = loadImage("sadya.jpg");

  welcome = loadImage("WELCOME.jpg");

  background(0);
  image(welcome, 0, 40);
}

void draw() {


  if (start)
  {

    //when restart, show image of dice, so that player can click on it to begin game
    if (celebrate)
    {
      fill(#FFF3D6);
      rectMode(CENTER);
      rect(diceX, diceY, diceSize, diceSize, diceSize/5);

      //dots
      fill(50);


      ellipse(diceX, diceY, diceSize/5, diceSize/5);
      rectMode(CORNER);
      celebrate=false;
    }


    if (toggleRun)
    {
      die=dice();
    }


    for (int j=0; j<rect.length; j++) {
      rect[j].display();
    }


    if (token1.mode)
    {
      token1.display();
    }
    if (token2.mode)
    {
      token2.display();
    }


    if (((die==1) || (die ==6)) && ((!toggleRun)))
    {


      if (token==0 && !token1.mode)
      {

        token1.start();
      }
      if (token==1 && !token2.mode)
      {
        token2.start();
      }
    }


    fill(0);
    noStroke();
    rect(0, 0, 285, 800);
    fill(0);
    noStroke();
    rect(diceX-diceSize, diceY-diceSize, 200, 30);
    fill(255);

    text("Double click on the dice to roll it", diceX-diceSize, diceY-diceSize+20);

    text("Goal: Reach Square 100", 60, 600);
    text("Roll die and move accordingly, movement", 20, 620);
    text(" changes if there's a card involved on the square ", 0, 640);
    text("you land.", 100, 660);
    text("Each player needs to roll a one or a six", 30, 300);
    text("to begin their game ", 80, 320);

    if (turn==-1)
      image(kathakali, 35, height/2-100);
    else
    {
      if (token==0)
        image(theyyam, 25, height/2-100);
      else
        image(kathakali, 35, height/2-100);
    }

    if (token1.num>=99)
    {

      token1.celebrate();
      celebrate = true;
    }

    if (token2.num>=99)
    {

      token2.celebrate();
      celebrate = true;
    }
  }
}

//grid print
void grid() {
  int xlen = (width)/size ;
  int ylen = (height)/size;
  rect = new Rect[(xlen-7)*(ylen)];

  int i=99;
  color clr;


  int card;
  int cardNum=0;
  for (int y=0; y < ylen; y++) {
    cardNum++;
    int rand = int(random(4, xlen-5));
    if (y%2==0)
    {

      for (int x =3; x < xlen-4; x++) {
        card=0;
        PVector p = new PVector(x*size+xOffset, y*size+yOffset);
        int j = y%2;
        if ((i+j)%2==0)
          clr=color(40);
        else
          clr=color(0);
        if (x==rand)
        {
          clr=palette[int(random(5))];

          //clr=color(247,221,123);
          card=1;
        }
        rect[i] = new Rect(p, size, i, clr, card, cardNum);

        i--;
      }
    } else
    {
      for (int x =xlen-4; x >3; x--) {
        card=0;
        PVector p = new PVector(x*size+xOffset-size, y*size+yOffset);
        int j = y%2;
        if ((i+j)%2!=0)
          clr=color(40);
        else
          clr=color(0);
        if (x==rand)
        {

          clr=palette[int(random(5))];

          //clr=color(247,221,123);
          card=1;
        }
        rect[i] = new Rect(p, size, i, clr, card, cardNum);
        i--;
      }
    }
  }
}


int dice() {

  fill(255);

  fill(#FFF3D6);
  rectMode(CENTER);
  rect(diceX, diceY, diceSize, diceSize, diceSize/5);

  //dots
  fill(50);
  int side = int(random(1, 7));
  if (side == 1 || side == 3 || side == 5)
    ellipse(diceX, diceY, diceSize/5, diceSize/5);
  if (side == 2 || side == 3 || side == 4 || side == 5 || side == 6) {
    ellipse(diceX - diceSize/4, diceY - diceSize/4, diceSize/5, diceSize/5);
    ellipse(diceX+ diceSize/4, diceY + diceSize/4, diceSize/5, diceSize/5);
  }
  if (side == 4 || side == 5 || side == 6) {

    ellipse(diceX - diceSize/4, diceY + diceSize/4, diceSize/5, diceSize/5);
    ellipse(diceX + diceSize/4, diceY- diceSize/4, diceSize/5, diceSize/5);
  }
  if (side == 6) {
    ellipse(diceX, diceY- diceSize/4, diceSize/5, diceSize/5);
    ellipse(diceX, diceY + diceSize/4, diceSize/5, diceSize/5);
  }
  rectMode(CORNER);


  return side;
}

void mousePressed() {
  color red = color(255, 0, 0);
  color yellow = color(255, 255, 0);
  if (start) {
    if (start1!=-1||start2!=-1)
    {
      fill(0);
      rect(1160, 450, 250, 70, 50 );
    }
    PVector p = new PVector(0, 0);
    if (mouseX>(diceX)-(diceSize/2) && mouseX<(diceX)+(diceSize/2) && mouseY>(diceY)-(diceSize/2) && mouseY<(diceY)+(diceSize/2 ))
    {

      toggleRun=!toggleRun;
      turn+=1;
      fill(0);
      rect(1160, 100, 281, 450);
      if ((turn%2==0))
      {
        token=1-token;
      } else
      {
        if (token==1 && token2.mode)
        {
          if (token2.num>99) {
            token2.num=99;
          }
          if (token2.num<0) {
            token2.num=0;
          }
          token2.num +=die;
          for (int i=0; i<rect.length; i++)
          {
            if (rect[i].num==token2.num)
            {
              if (start1<0)
              {
                p = rect[i-1].position;
                token2.move(p);

                token2.num=rect[i-1].num;
                if (rect[i-1].card==1)
                {
                  showCards(rect[i-1].cardNum, yellow, token2);
                  cardButton=2;
                }
                break;
              }
              p = rect[i].position;
              token2.move(p);

              if (rect[i].card==1)
              {
                showCards(rect[i].cardNum, yellow, token2);
                cardButton=2;
              }

              break;
            }
          }


          start1++;
        }


        if (token==0 && token1.mode)
        {

          token1.num +=die;
          if (token1.num>99) {
            token1.num=99;
          }
          if (token1.num<0) {
            token1.num=0;
          }

          for (int i=0; i<rect.length; i++)
          {
            if (rect[i].num==token1.num)
            {
              if (start2<0)
              {
                p = rect[i-1].position;
                token1.move(p);
                token1.num=rect[i-1].num;
                if (rect[i-1].card==1)
                {

                  showCards(rect[i-1].cardNum, red, token1);
                  cardButton=1;
                }

                break;
              }
              p = rect[i].position;
              token1.move(p);
              if (rect[i].card==1)
              {
                showCards(rect[i-1].cardNum, red, token1);
                cardButton = 1;
              }

              break;
            }
          }

          start2++;
        }
      }
    }

    if ((token2.num>=99||token1.num>=99) && celebrate)
    {
      //reset
      if (mouseX>360 && mouseX<660 && mouseY>459 && mouseY<542)
      {
        restart();
      }

      //exit
      if (mouseX>719 && mouseX<982 && mouseY>459 && mouseY<542)
      {
        exit();
      }
    }
  }
  if (!start)
  {
    if (mouseX>121 && mouseX<1319 && mouseY>742 && mouseY<782)
    {
      start=true;
      restart();
    }
  }
}


void showCards(int cardNum, color c, Token token)
{

  PVector p = new PVector(0, 0);
  switch(cardNum)
  {
  case 1:
    fill(c);
    token.num -=5;
    soundFiles[0].play();
    image(power, 1160, 100);
    break;
  case 2:
    fill(c);
    token.num +=8;
    soundFiles[1].play();
    image(filter, 1160, 100);
    break;
  case 3:
    fill(c);
    token.num -=8;
    image(daagini, 1160, 100);
    soundFiles[0].play();
    break;
  case 4:
    fill(c);
    token.num -=3;
    image(mosquito, 1160, 100);
    soundFiles[0].play();
    break;
  case 5:
    fill(c);
    token.num +=10;
    soundFiles[1].play();

    image(dosa, 1160, 100);
    break;
  case 6:
    fill(c);
    token.num -=10;
    image(coconut, 1160, 100);
    soundFiles[0].play();
    break;
  case 7:
    fill(c);
    token.num +=12;
    soundFiles[1].play();
    image(houseboat, 1160, 100);
    break;
  case 8:
    fill(c);
    token.num +=3;
    soundFiles[1].play();

    image(mahabali, 1160, 100);
    break;
  case 9:
    fill(c);
    token.num -=3;
    image(traffic, 1160, 100);
    soundFiles[0].play();
    break;
  case 10:
    token.num +=5;
    soundFiles[1].play();

    image(sadya, 1160, 100);
    break;
  }


  if (token.num>99) {
    token.num=99;
  }
  if (token.num<0) {
    token.num=0;
  }


  for (int i=0; i<rect.length; i++)
  {
    if (rect[i].num==token.num)
    {

      token.position = rect[i].position;


      break;
    }
  }


}

void restart()
{
  background(0);


  toggleRun=false;
  gameMode = false;

  die = 0;
  turn=-1;
  token=0;
  card=false;
  cardButton=0;
  start1=-1;
  start2=-1;

  token1 = new Token(tToken, theyyam, theyyamWon);
  token2 = new Token(kToken, kathakali, kathakaliWon);

  grid();

  dice();


}
Disclaimer: The components of the art used in this game are done by other artists and some of them by me, I worked on them on illustrator for the game.
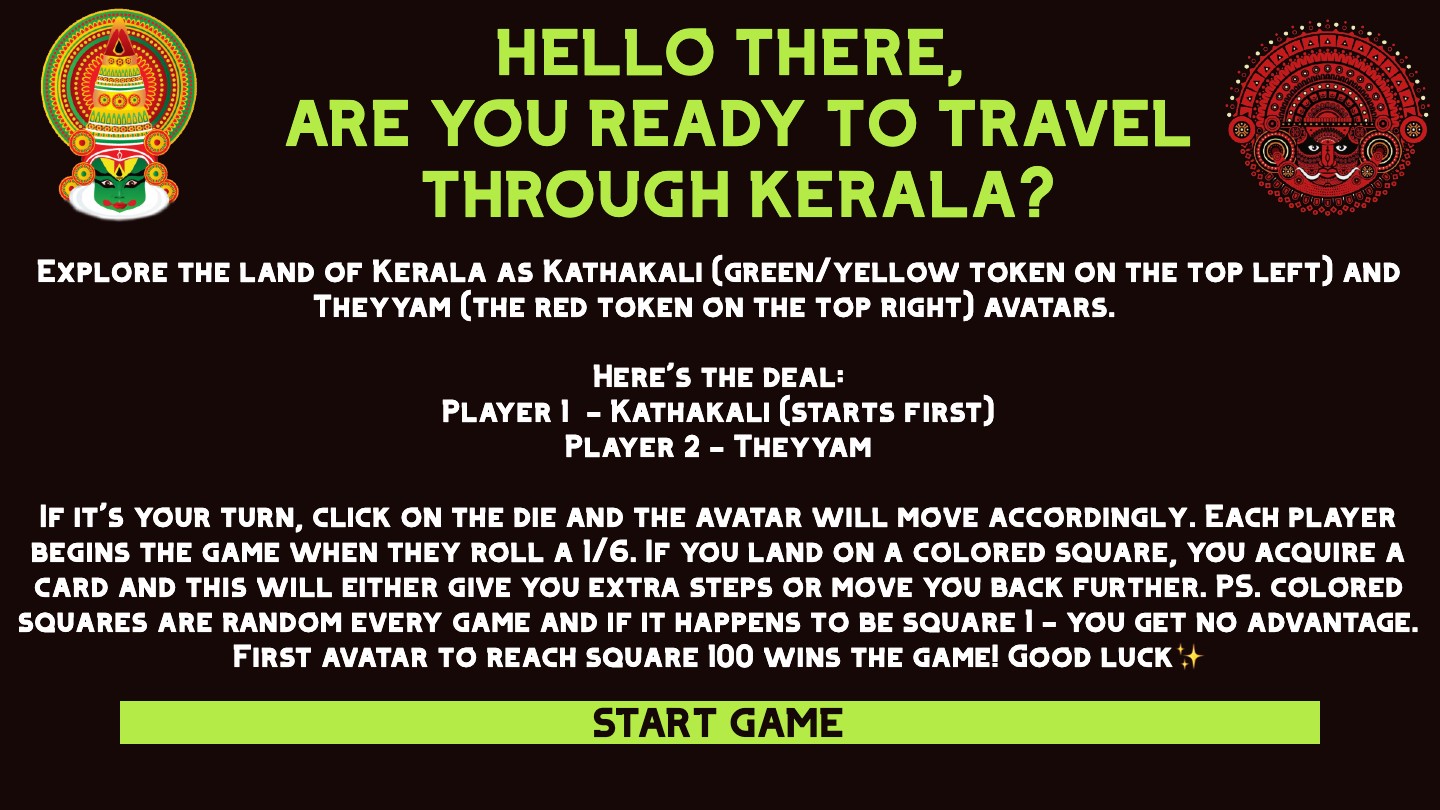
For the midterm, I wanted to work on a game that was in the board games genre of games, and thus, I decided to take a spin on Snakes and Ladders. Snakes and Ladders is a board game with a grid of numbers. It is a multi-player game and the target is to reach the 100th block from the 1st block. The movement of the tokens is decided by a die and if you happened to land on a square with a snake or a ladder – you’ll either move down a lot of squares or move up respectively.
Setting the elements of the game
On brainstorming how I could rethink this game, I ended up deciding on having the elements of cards in the game. In addition, I started off with a lot of variations for the pathway: from spirals to a boat path to circles – but I finalized on a grid-style format so that, the familiarity of the grid-style game plays into easing the player into learning how to play the game.
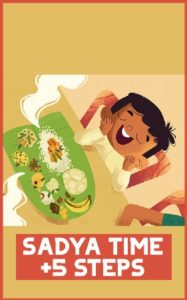
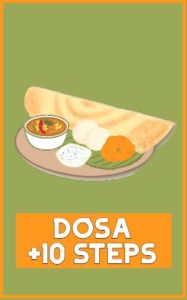
Instead of the elements of snakes and ladders, I put in cards on random squares on the grid – these squares are randomly picked at the beginning of every game – on landing on the square – the player would have to look at the corresponding card and do what the instructions say (related to moving on the squares). These cards are related to my home in Kerala and things that a person from Kerala, India would be familiar with. I wanted to make the cards accessible for anyone, without context to understand – so, there will be text included that will dictate the movement of the user token. Types of cards would include:
Move-ahead cards: Examples – Dosa, Grandma’s Food, Filter Coffee, etc.
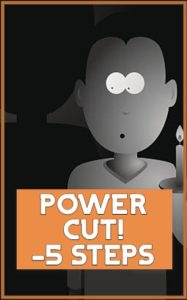
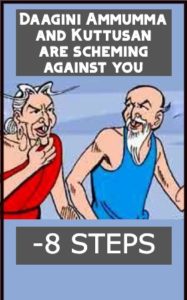
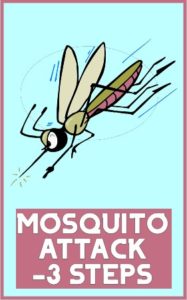
Move-behind cards: Examples – Powercuts, Humungous mosquitoes, Coconut falling on your head, etc.
I tried making these cards using images I could find online but since the styles of art depicting all of these ideas were different, it looked out of place. So, I decided to draw the card art on my own for the game – to keep the aesthetics consistent.
Finally, since it is a multiplayer game – I decided to limit the number to two people to play the game. But if I have the time, I might consider improving the game by having the players input the number of players. For now, the user tokens are images from celebrated artforms in Kerala – Kathakali & Theyyam. Depending on whose turn it is, the corresponding token lights up and the other token is grayed out.
Kathakali Token – Inactive
Kathakali Token – Active
Theyyam – Inactive
Theyyam – Active
Implementation
I started off working on the grid. The grid is made by putting together a number of squares – so I made a class called Rect and a function called grid() which was responsible for making the objects of class Rect and numbering and displaying them. Having classes here helped a lot in adding additional functionality like putting in the number of the rectangle when displaying. For the later part of implementation too, this would greatly help in terms of randomly assigning squares in the grid and have them light a different color to represent the snake or ladder element.
//grid print
void grid(){
  int xlen = (width)/size ;
  int ylen = (height)/size;
  rect = new Rect[(xlen-7)*(ylen)];
  int i=0;

  for (int y=0; y < ylen; y++) {
      for (int x = 3; x <xlen-4; x++) {
        PVector p = new PVector(x*size,y*size);
        rect[i] = new Rect(p, size,i);
        i++;
      }
    }
}


class Rect{
   float size;
   PVector position;
   int num;

   Rect(PVector p, float s, int n){
     position = p;
     size = s;
     num=n;
   }
   void display(){
     stroke(255);
     fill(0);

     rect(position.x,position.y,size,size);
     fill(255);
     text(num,position.x,position.y+size-5);
   }
}
Grid with the Theyyam user token
Then, I worked on implementing a die program on a separate processing sketch. I used this link as a reference to work on this. When you press within the die, it stops otherwise it keeps rolling.
void dice(){
  fill(255);
  text("Click on the dice to roll it, Player 1", diceX-diceSize,diceY-diceSize+20);

  fill(#FFF3D6);
  rectMode(CENTER);
  rect(diceX, diceY, diceSize, diceSize, diceSize/5);

  //dots
  fill(50);
  int side = int(random(1, 7));
  if (side == 1 || side == 3 || side == 5)
    ellipse(diceX, diceY, diceSize/5, diceSize/5);
  if (side == 2 || side == 3 || side == 4 || side == 5 || side == 6) {
    ellipse(diceX - diceSize/4, diceY - diceSize/4, diceSize/5, diceSize/5);
    ellipse(diceX+ diceSize/4, diceY + diceSize/4, diceSize/5, diceSize/5);
  }
  if (side == 4 || side == 5 || side == 6) {
    ellipse(diceX - diceSize/4,diceY + diceSize/4, diceSize/5, diceSize/5);
    ellipse(diceX + diceSize/4, diceY- diceSize/4, diceSize/5, diceSize/5);
  }
  if (side == 6) {
    ellipse(diceX, diceY- diceSize/4, diceSize/5, diceSize/5);
    ellipse(diceX, diceY + diceSize/4, diceSize/5, diceSize/5);
  }

  rectMode(CORNER);

}

void mousePressed(){
  if(mouseX>(diceX)-(diceSize/2) && mouseX<(diceX)+(diceSize/2) && mouseY>(diceY)-(diceSize/2) && mouseY<(diceY)+(diceSize/2 ))
  toggleRun=!toggleRun;
}
I combined all of these together and finally, put in the user tokens on the side indicating whose turn it is.
PImage kathakali,kathakaliInactive;
PImage theyyam,theyyamInactive;
Rect rect[];
int size = 80;
int diceX = (100*width/8)+25;
int diceY =(60*height/8)+10;
int diceSize = 90;
boolean toggleRun=false;


void setup() {
  fullScreen();
  background(0);
  theyyam = loadImage("theyyam.png");
  theyyamInactive = loadImage("theyyamInactive.png");
  theyyam.resize(220, 260);
  theyyamInactive.resize(220, 260);
  kathakali = loadImage("kathakali.png");
  kathakaliInactive = loadImage("kathakaliInactive.png");
  kathakali.resize(180,224);
  kathakaliInactive.resize(180,224);

  //how to play

  //players choose whether they want theyyam or kathakali

  image(theyyamInactive, 0, height/2-190);
  image(kathakaliInactive, 15, height/2+20);
  dice();
}

void draw() {
  grid();
   for (int j=0; j<rect.length; j++){
    rect[j].display();
  }
  scale(0.4);
  image(theyyam, width/2+80, height/2+140);
  if(toggleRun){
    for(int i=0;i<10;i++)
    {
   dice();
  }
 }
}
Next Steps:
Add in a beginning and final sketch for the game
Add an instructions page
Random function to assign cards to squares and change their colors
Make the movement function, so that the tokens move according to the die input and the cards, if applicable.
Celebration visuals when one of the players wins – My idea is to have the grid light up in all sorts of colors to generate excitement.
For this week’s assignment, I wanted to start working on something that was related to honeybees. Since we learned about typography in class, I had this concept of a bee moving in the shape of the word “BEE” leaving behind a trail usually shown in animations/pictures depicting bees.
Based on an example from the last class which used the geomerative library to make the word “circle” from circles, I made the word “BEE” with a bunch of points and had the points showing up in such a way that it looked like a bee-like object traced the word. I made a class for the bee and a function to display the bee moving. The bee was made from a circle and two triangles to make wings. Here’s how this turned out.
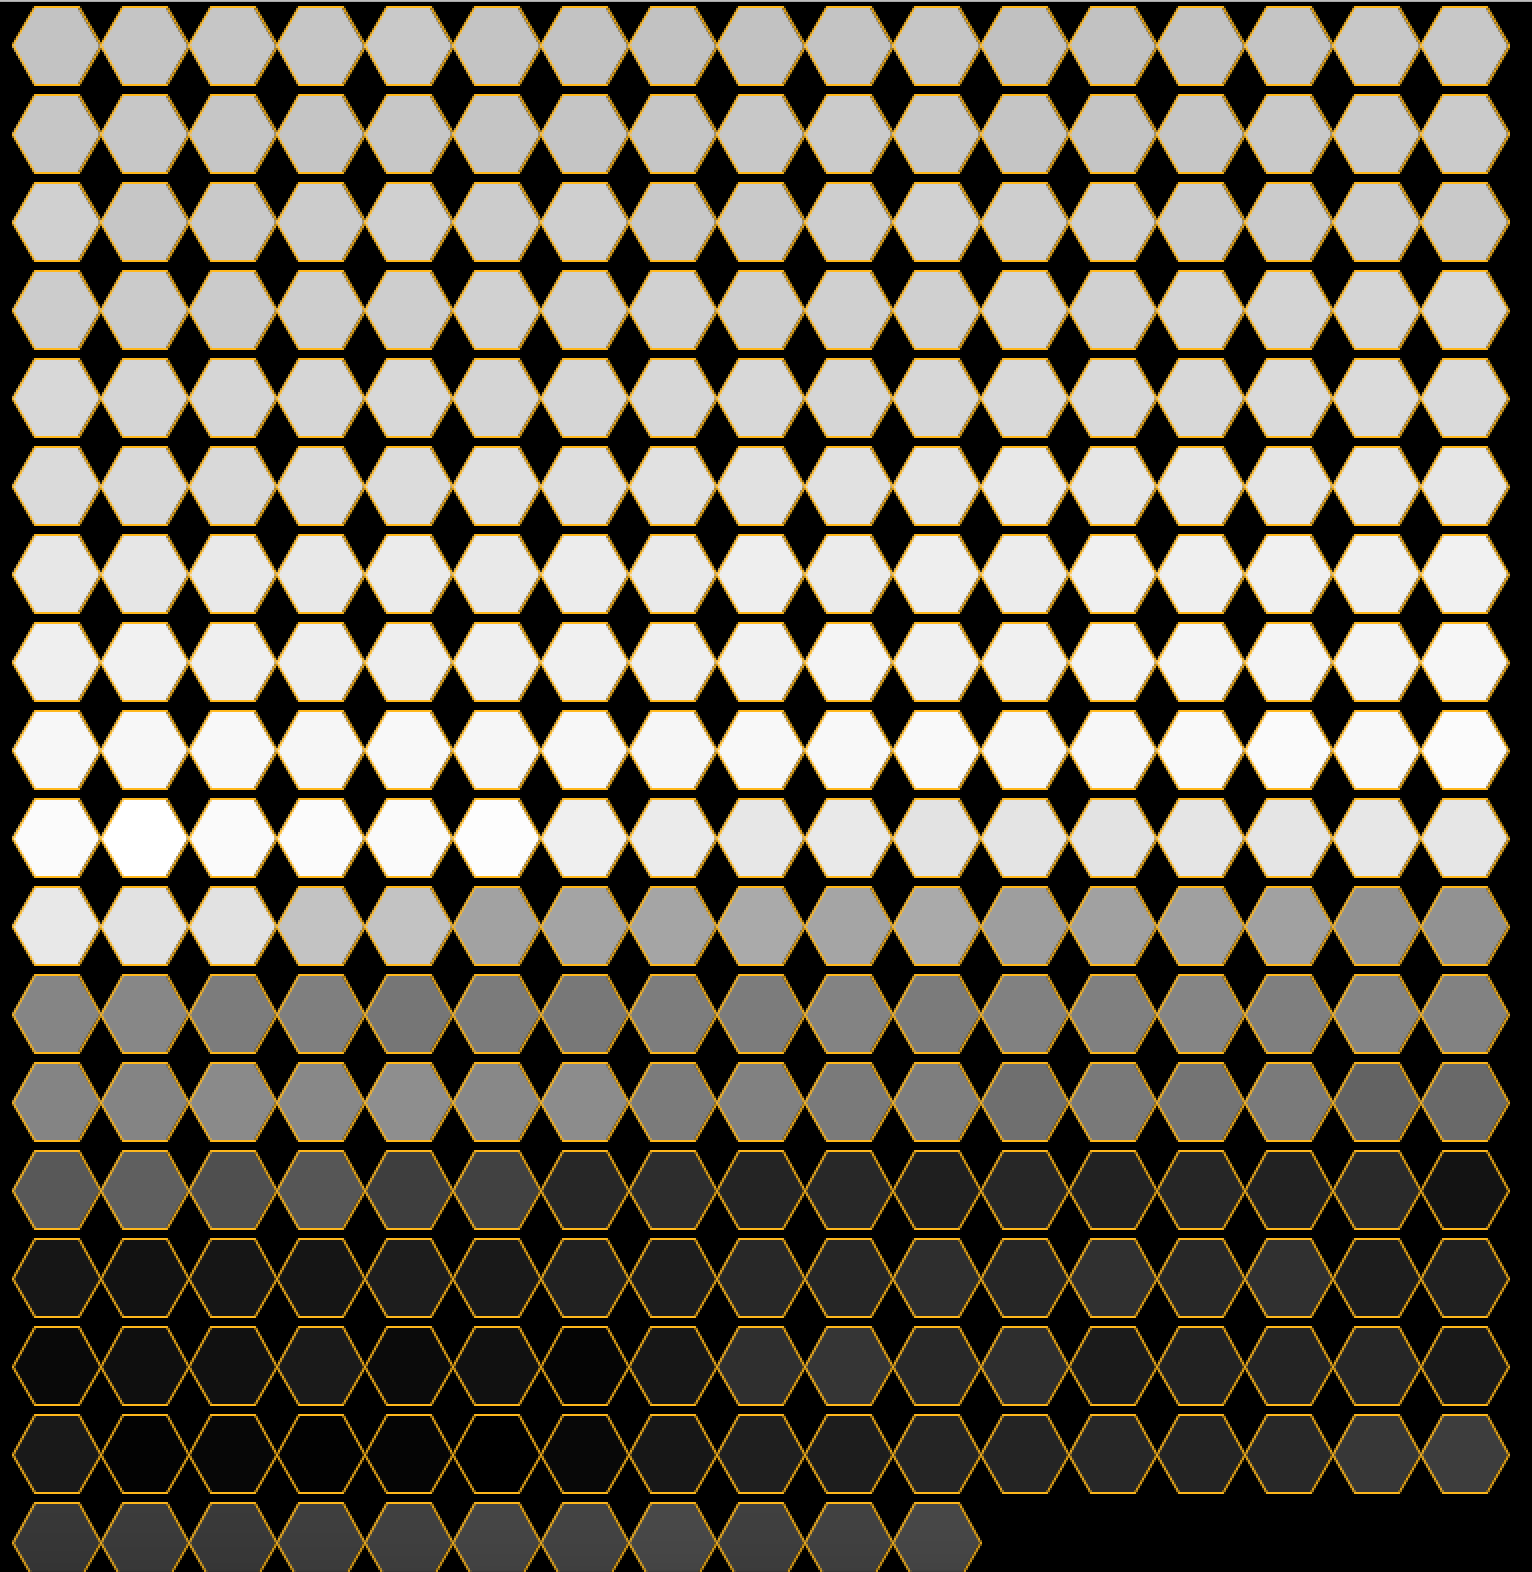
I wanted to add more things to this and so, I decided to look up some datasets related to honey and bees. That’s when I came across a Kaggle page with beehive metrics (https://www.kaggle.com/se18m502/bee-hive-metrics). I used the values from the CSV file from 2019 which measured the weight of a beehive named schwartau and I used the data over the first 5 months of 2019. I used hexagons to show the data to resemble a honeycomb. To achieve this shape, the processing documentation helped a lot. The code was kind of similar to the idea of translating polar to cartesian coordinates for a circle and so, I understood it after experimenting with it for some time. I looked at different ways of visualizing these hexagons in terms of sizes and colors and ended up with the following visual where the color represented how heavy the beehive was. I worked on this on a separate processing program.
Weight of Honeycomb over time
Finally, I combined both the programs wherein the beehive weight visualization formed the background and the word “BEE” was written on the screen. I changed the color palette and transparency of the colors. The beehive visualization had shades of yellow representing honey and it looked really cool against a black background so, I decided to finalize that palette. But the problem was that the animation of the word “Bee” wasn’t clear on-screen and so I decided to change the shape that the bee traced from a point to another hexagon and gave it a very clear shade of honey. This made it stand out.
Since the data and the hexagons were not proportional to the size of the screen, there was some empty space below. So I decided to fill it with another word and I chose the word “Happee” (rhymes with bee, bee is happy that the beehive is heavy, “be happy”). And I put this when the bee is done writing the word “BEE” on screen.
Here’s the final output –
Here’s the code –
import geomerative.*;
RFont font;
String phrase = "BEE";

RPoint[] pnts;
PFont f;
String phrase_1="HAPPEEE";

float xOffset =0;
float yOffset = 150;

int endX; //ending points of hex visual - x coordinate
int endY; //ending points of hex visual - y coordinate
int rad =22; //radius of hexagons


void setup() {
  size(800, 800);
  background(0);

  f=createFont("Courier New",64); //for text "HAPPEEE"
  textSize(32);
  textFont(f);


  RG.init(this);
  font = new RFont("OpenSansCondensed-Light.ttf", 500, RFont.LEFT);

  //setting segment length according to radius of hexagon
  RCommand.setSegmentLength(8);
  RCommand.setSegmentator(RCommand.UNIFORMLENGTH);
  RGroup grp;
  grp = font.toGroup(phrase);
  grp = grp.toPolygonGroup();
  pnts = grp.getPoints();


  xOffset = width - grp.getBottomRight().x - grp.getBottomLeft().x;
  xOffset = xOffset/2;

  //beehive weight visualization
  beeVis();

  noFill();
  stroke(255, 0, 0, 75);
}


//beehive weight visualization
void beeVis()
{
  //beehive weight over 5 months in 2019
  Table table = loadTable("weight.csv","header");

  //minimum value from table of data
  float OldMin = 61188.87528 ;

  //initial height and width of hexagon - rad is added as it is centered, otherwise a half of the hexagon would be hidden
  int h=rad;
  int w=rad+10;


  // iterate over all the rows in a table
  for (int i = 0; i < table.getRowCount(); i++) {
    TableRow row = table.getRow(i);
    float Value = row.getFloat("x");

    //getting the x values to a new range and between 0 to 255 to use for colors
    float x= ((Value -OldMin ) * (255 - 0)) / (80000 - OldMin);

    //fill color is proportional to weight of honeycomb at a given time
    fill(255,255-x,0,100);
    //hexagon has stroke color of honey
    stroke(255,184,28);
    //hexagon
    polygon(w, h,rad);
    //update width
    w+=rad*2;


   //if width is out of range, update height and width
     if((w+rad)>=800)
    {
     h+=rad*2;
     w=rad+10;
    }

  }


 //final coordinates of w and h are recorded to put the phrase "happy"
 endX=w;
 endY=h;

}

void draw() {

  background(0);
  beeVis();
  Bee bee;

  if(frameCount<pnts.length)
  {
    //bee moving
    float x = pnts[frameCount%pnts.length].x + xOffset;
    float y=pnts[frameCount%pnts.length].y + height/2 + yOffset;
    PVector p = new PVector(x, y);
    bee = new Bee(p);
    bee.display();

 //bee leaving trails of hexagons
  for (int j=0; j<frameCount%pnts.length; j++)
  {
    float x_ = pnts[j].x+ xOffset;
    float y_ = pnts[j].y+ height/2+ yOffset;
    stroke(0);
    fill(255,184,28);
    polygon(x_, y_,8);
  }
}

//once "bee" is written, "happy" will be shown and the word "bee" has a swarm like effect
else
{
  fill(255,184,28);
  text(phrase_1,endX,endY+10);


  for (int i=0; i< pnts.length; i++) {
      float swarm = (noise(frameCount*.01+i*.02)-.5)*10;
      float x = pnts[i].x + swarm + xOffset;
      float y = pnts[i].y + swarm + height/2 + yOffset;
      stroke(0);
      polygon(x, y,8);
    }

  }
}


//polygon function to make hexagon
void polygon(float x, float y, float radius) {
  float angle = TWO_PI / 6;
  beginShape();
  for (float a = 0; a < TWO_PI; a += angle) {
    float sx = x + cos(a) * radius;
    float sy = y + sin(a) * radius;
    vertex(sx, sy);
  }
  endShape(CLOSE);
}