HW Week 3 – OOP Art in p5js

Inspiration

I had quite an intensive day and one of the fun parts of it was actually solving puzzles and playing games in a pair for one of the student capstone experiments I participated in. One of the games resembled tic-tac-toe for me and I used to love playing it. With the homework assignment based on the use of classes and arrays, I tried to recreate the game in a basic setting using p5js.

The product

I am overall satisfied with the technical aspect of the code but I as look closer at the visual implementation I think it needs a strong improvement here to be somewhat ‘artsy’ at least to a minimal extent. I want to develop it a bit further playing with design and making it more interactive.

Since I thought that just X and O were completely boring, I decided to switch them simply to IM and CS to draw a winner in this friendly ‘competition’ between majors.

Challenges

For me, it was getting used to the implementation of how to apply a function for each cell in p5js. It was a bit confusing since I am more used to retrieving code functions into separate blocks, yet this implementation looks tidier.

this.cells.forEach(function (cell) {
  if (cell.r == r && cell.c == c && 0 == cell.v) {
    cell.t = t;
    if (turn == "IM") {
      cell.v = 1;
    } else {
      cell.v = -1;
    }
  }
});

Summary

I have used 2 classes for the Tic-Tac-Toe game: Board and Player, and I believe this assignment was useful to me in regards to practising OOP code writing. It was also quite a while since my last game implementation, even a basic one like this. The aspect that I think I really need to work on more is the visual representation of the game and making it more creative in the sense of design. Yet, this was a fun and useful experience of implementing.

HW2 – Generative Art

Concept

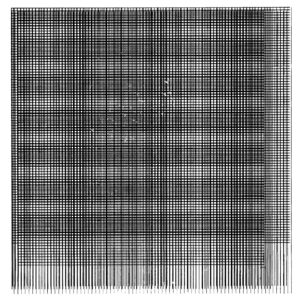
I have started my implementation of the art work from one of the works from Programm-Information21 suggested by Professor Shiloh. It is shown below.
At first, I  replicated  it  trying  to copy  the  idea  of squares populating my  canva  with  various  density. It turned out to not be so exciting, so I have decided to play around with shapes and then I sticked to the idea to use ellipses. My final sketch uses only ellipses.

Different parameters for ellipses gave different visuals, and for my primary part of sketch I attempted to replicate ongoing flames. Background color is set to orange and a number of black ellipses with different parameters moving in a random fashion are responsible for the final effect.

Code for the Fire Imitation

background(249, 94, 4);
fill(0);
for (let x = 0; x < width; x = x + 5) {
  for (let y = 0; y < height; y = y + 5) {
    if (y < height / 4 + 10) {
      ellipse(x + random(width / 20, -width / 20), y, 8, 10);
    } else if (y < height / 2 - 30) {
      ellipse(x + random(width / 20, -width / 20), y, 6, 10);
    } else if (y < (3 * height) / 4) {
      ellipse(x + random(width / 20, -width / 20), y, 4, 10);
    } else {
      ellipse(x + random(width / 20, -width / 20), y, 3, 10);
    }
  }
}

As I mostly implemented the fire animation in class and just changed it a bit at home, I have decided to add something using key controls as well. So, to introduce a bit of contrast to fire, I coded falling rain drops to imitate rain to some extent. I did some quick research on p5js to use Classes and functions to code behavior for each rain drop as an object. It is again ellipses.

Code for Rain using OOP

class Rain {
  constructor() {
    this.x = random(0, width);
    this.y = random(0, -height);
  }
  create() {
    noStroke();
    fill(140, 223, 232);
    ellipse(this.x, this.y, random(3, 6), random(3, 10));
  }
  fall() {
    this.y += random(10, 30);
    if (this.y > height) {
      this.x = random(0, width);
      this.y = random(0, -height);
    }
  }
}

“Rain” activates when a user presses the mouse and stops upon its release. You can check the full sketch below.

Reflection

My final sketch is nowhere near close to the work I got inspiration from. For me, it shows that we may start at one point and end up deviating from our designed path yet enjoy the process. It is certainly exciting that such simple code may produce interesting results.

Future Improvements

I am quite satisfied with the flame animation, yet for the rain part I feel it can be improved further and there it may make sense to add ground, sky, and other attributes to give it a look of something more real, rather than completely artificial.

Homework 1 – Self-Portrait (p5.js)

Hi everyone =) I am finally taking this class and I planned to take it from Freshman Spring! Assignment for today was to create a self-portrait using p5.js. The completion of assignment was quite fun and I enjoyed playing with different shapes and colors. At the end, it turns out to be not really my portrait copy made in p5 but a cute image that I really like.

At the beginning, my initial plan was to stick to my real-life appearance and replicate something alike in code. I tried to convey few features of my appearance with quite noticeable eyebrows and quite long hair. Though, you may barely ever see me without my hair tied.

In the process, I noticed how important is the order. I needed to make sure nothing overlaps in an odd fashion. So, for example, hair code came first, followed by skin and face overall with bang added at the end. For me, the challenging part was to make hair, mouth, and nose appear a bit natural. For hair, I have used arc and rectangle shape to add length. I wanted to use arcs for mouth and nose as well but it turned out to be a bit complicated.

Overall, it was a fun experience and I may continue working on it in my spare time. What I feel may use some improvement is the accuracy of my portrait, yet it should not expected to be 100% exact, right? I browsed through several other projects and I really loved their animation parts and I may recommend myself to add some animation to my image. So, here is my sketch and I will provide my code below it!

function setup() {
  createCanvas(520, 520);
}

function draw() {
  background(163, 187, 236);
  //Hair
  noStroke();
  fill(84, 53, 17);
  arc(260, 260, 300, 380, QUARTER_PI + HALF_PI, QUARTER_PI, OPEN);
  rect(110, 250, 300, 400);
  print(mouseX, mouseY);

  //Neck
  fill(232, 190, 172);
  rect(235, 360, 50, 55, 20);
  //Face
  noStroke();
  fill(232, 190, 172);
  ellipse(260, 255, 200, 260);

  noStroke();
  fill(84, 53, 17);
  arc(300, 120, 150, 100, 0, PI + QUARTER_PI, CHORD);

  //Eyebrows
  stroke(21, 19, 19);
  strokeWeight(7);
  noFill();
  arc(210, 230, 55, 10, PI, TWO_PI, OPEN);
  arc(310, 230, 55, 10, PI, TWO_PI, OPEN);

  //Eyes
  strokeWeight(1);
  fill(57, 36, 12);
  ellipse(210, 260, 28, 35);
  ellipse(310, 260, 28, 35);
  noStroke();
  fill(255);
  ellipse(207, 252, 8, 8);
  ellipse(306, 252, 8, 8);

  //Nose & Mouth
  fill(201, 130, 118);
  triangle(260, 250, 270, 310, 250, 310);

  //Hair (continued)
  stroke(201, 130, 118);
  strokeWeight(10);
  line(250, 335, 270, 335);

  //Shoulders & Shirt
  noStroke();
  fill(239, 246, 138);
  rect(185, 395, 150, 220);
  ellipse(190, 515, 160, 240);
  ellipse(330, 515, 160, 240);
}

Thank you for checking this out!