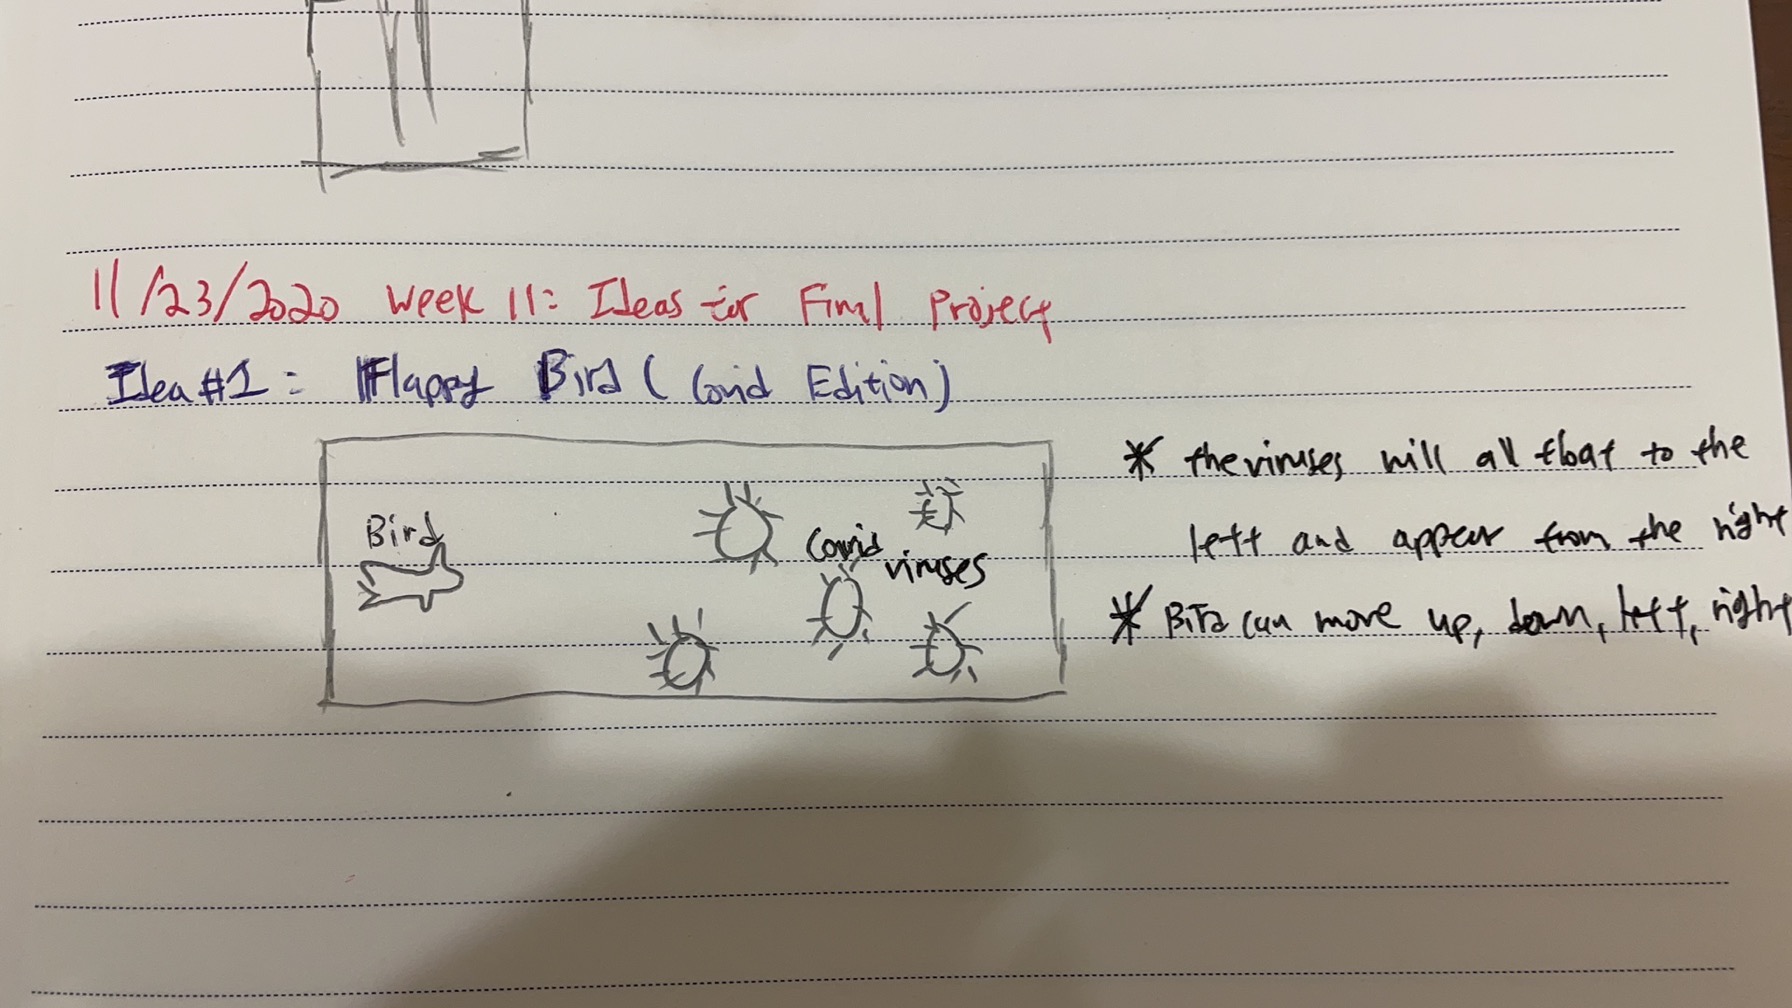
Main Idea/Concept of My Game
The game is sort of a recreation of the Flappy Bird game but I added my own features to make it different from the normal Flappy Bird game that we are all familiar with.
The main idea of the game is for the user to be able to control the Bird through two different methods of their own choosing at the start of the game: Photoresistor or Microphone, and the objective is to control the bird and avoid all of the incoming covid 19 viruses. If the user manages to stay alive for 30 seconds, then the user wins. However, I added a twist where each time the user wins, the covid viruses’ speed will be even faster, therefore increasing the level of difficulty for the user.
Walkthrough of the Game
- When first started, the screen will display several things for the users first such as the Instructions, the types of controls that the user can choose to play with (Photoresistor or Microphone), a brief tutorial for the user about the two types of controls and how to use them, and with a brief note for the users about how the virus will increase in speed each time the user wins. Once finished reading, there will be a start button for the user to press to start playing.
- Once the user has either won or lost, there will be a win or lose screen with instructions for the user to press the mouse to restart and to play again.
- Press the start button again to play once more!
Difficulties/Challenges
Throughout the entire process of creating this, the hardest part was definitely with the coding ,whereas the hardwiring part was extremely easy as compared to the coding.
Regarding some of the major difficulties I encountered in coding, only some because I had encountered a lot of big and small ones, I’m just going to go through each one by one.
The first part where I struggled a bit would be mapping the microphone values to the up and down movement of the bird. The reason I struggled with this is because I have never done anything like this before, so I had to search up the basics through the Processing forum about amplitude and what is it and other tutorial videos online to learn about how to incorporate it into my game. Also, I sought out help with Professor to know more about how to use various things such as what is an amplitude analyzer, etc. However, in the end, I managed to learn more about this new feature that I’ve never used before thanks to this experience.
The second part that I struggled quite a lot with as well would most likely be when I wanted to add both modes (photoresistor and microphone) into a single file and to even add the option for the user to be able to choose which mode they want to play in using the input coming from the Arduino board as it will be decided with the buttons. However, I was able to get over this difficulty as well by consulting with Jack and Aaron.
There are definitely a lot more difficulties that I had encountered throughout this entire process, but mostly are minor coding mistakes as compared to the aforementioned ones. These are also easily overcame by myself by simply looking at the problem in a different perspective and to not overthink some solutions as the answer could just simply be a slight change of position for a piece of code or something.
Pictures Used
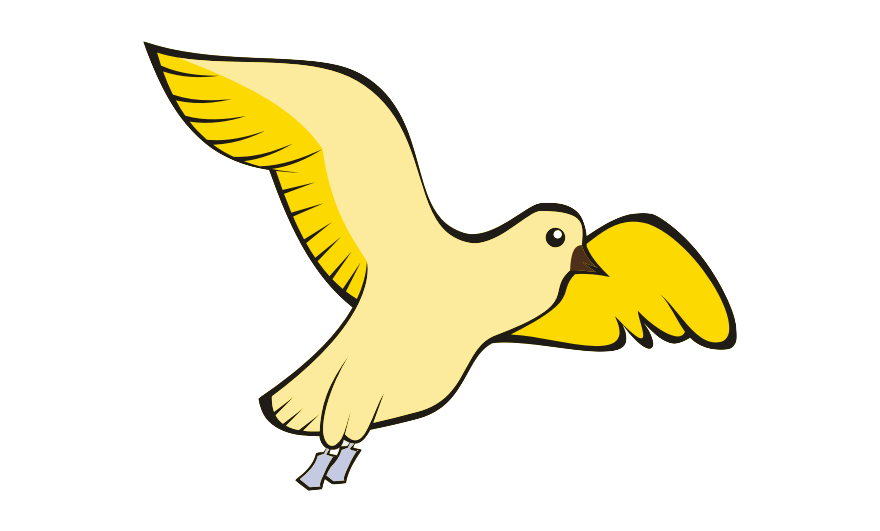
https://www.google.com/search?q=cartoon+virus+png&tbm=isch&ved=2ahUKEwjUupvkzL7tAhUPdZQKHc4MCrcQ2-cCegQIABAA&oq=cartoon+virus+png&gs_lcp=CgNpbWcQAzICCAAyAggAMgYIABAIEB4yBggAEAgQHjIGCAAQCBAeMgYIABAIEB4yBggAEAgQHjIGCAAQCBAeMgYIABAIEB4yBggAEAgQHjoECCMQJ1CVBliMFGC8F2gAcAB4AIABpQGIAZEGkgEEMTAuMZgBAKABAaoBC2d3cy13aXotaW1nwAEB&sclient=img&ei=Q47PX5SNJI_q0QTOmai4Cw&bih=762&biw=1440&safe=active&hl=en#imgrc=mwUFi4Tig-yYgM Bird Picture
https://www.cleanpng.com/png-pigeons-and-doves-homing-pigeon-english-carrier-pi-6970159/preview.html
 Cloud Picture
https://www.vhv.rs/viewpic/wbwxmJ_clouds-png-animated-cute-cartoon-cloud-png-transparent/

Sounds Effects/Music
Gameplay Music:
Win Music:
Lose Music:
Final Product Demonstration/Explanation
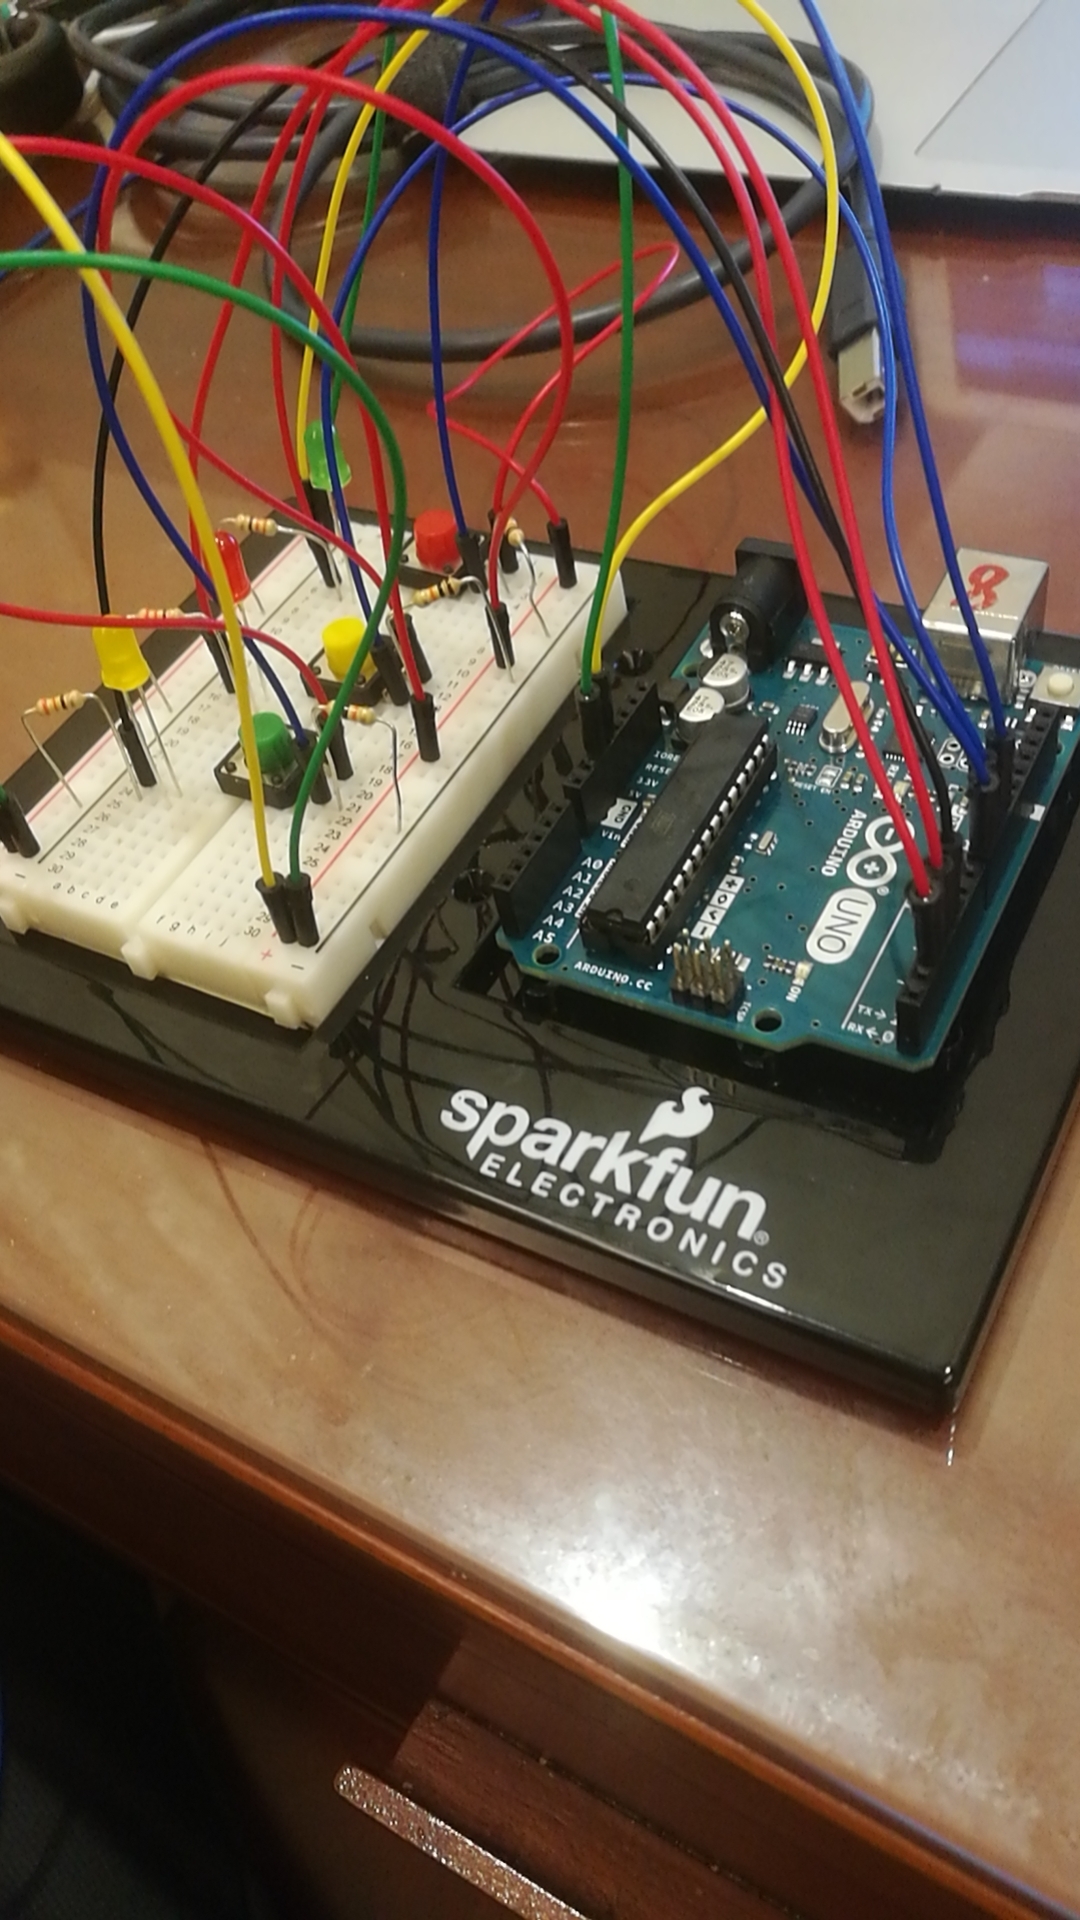
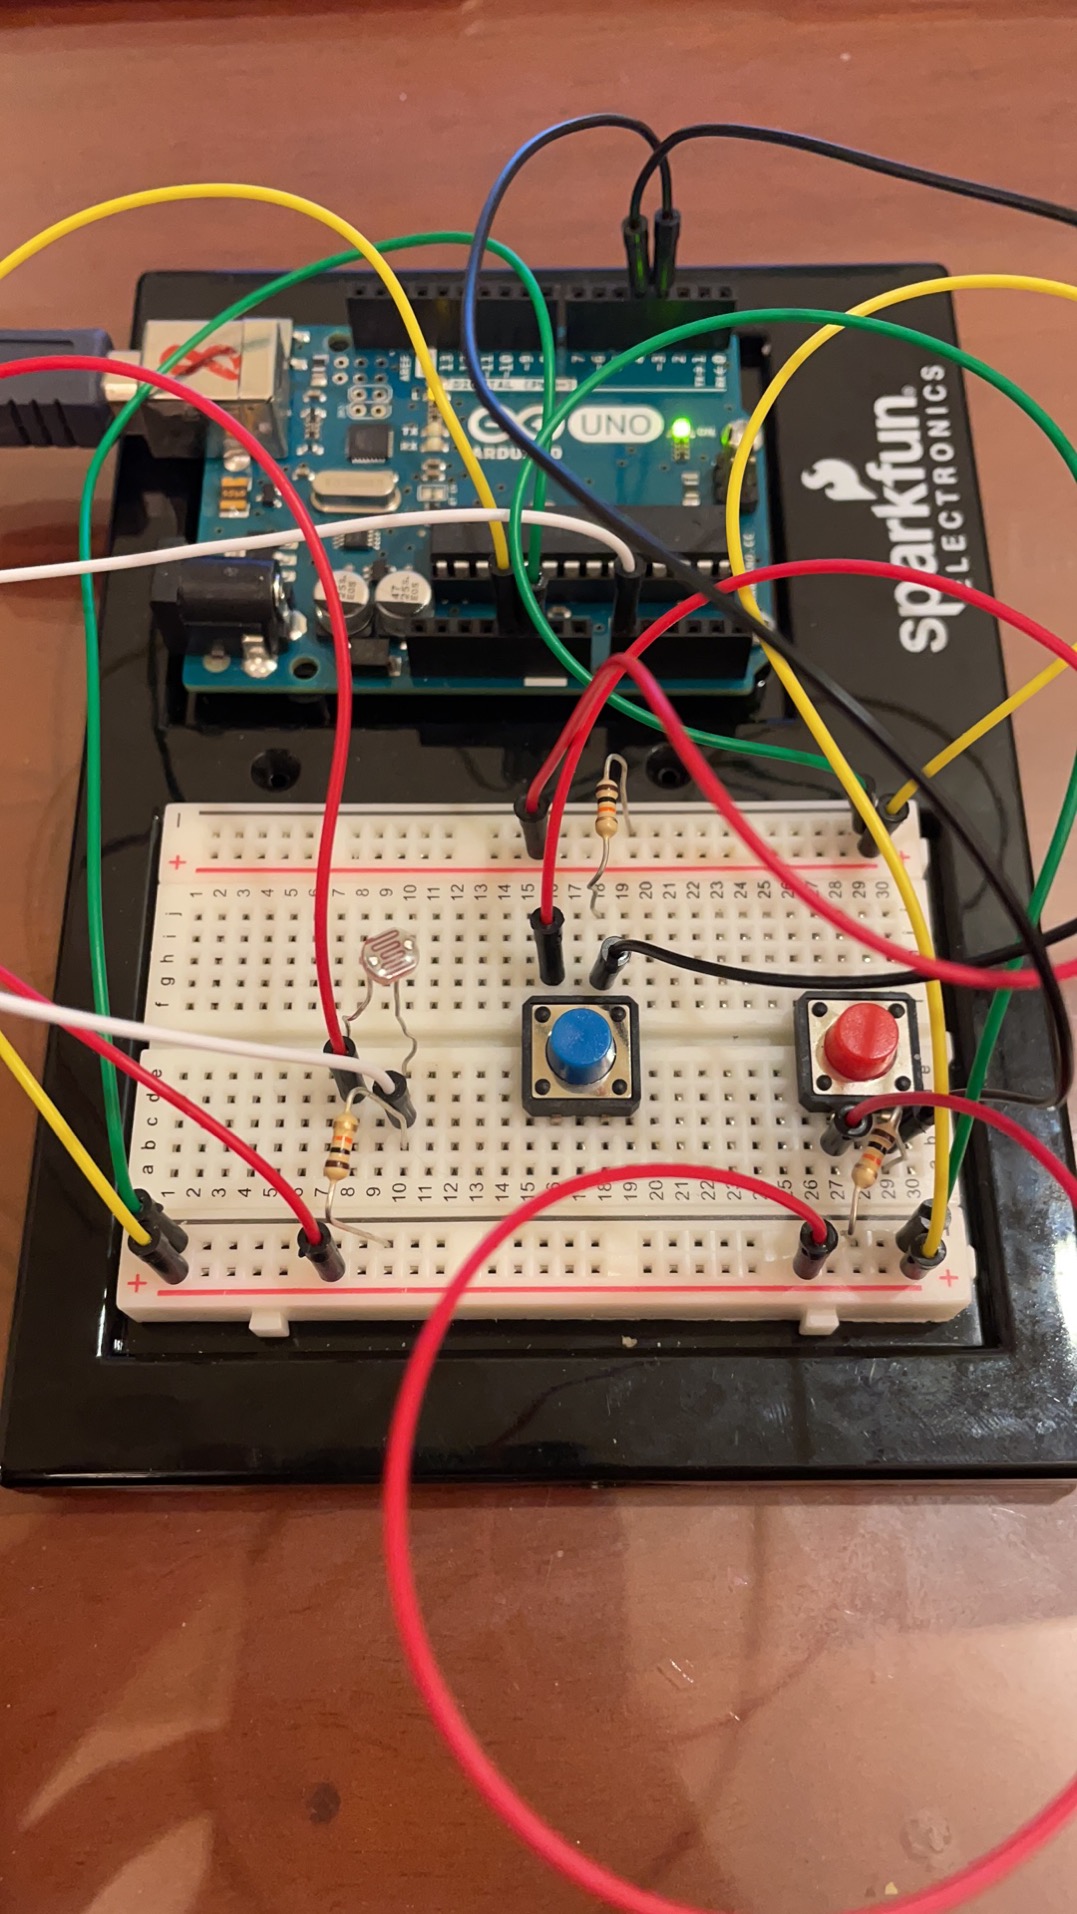
Arduino Setup
Zip File for the Game (TRY IT OUT YOURSELF!)
IM_Final_Project_1_4_FINISHED_
Code
Arduino Code
const int blueSwitch = 3;
const int redSwitch = 4;
const int sensor = A0;

void setup() {
  // put your setup code here, to run once:
  Serial.begin(9600);
  Serial.println("0,0");
  pinMode(blueSwitch, INPUT);
  pinMode(redSwitch, INPUT);
  pinMode(sensor, INPUT);
}

void loop() {
  if (Serial.available() > 0) {
    char inByte = Serial.read();
    int photoresistor = analogRead(sensor);
    delay(10);
    int sensor2 = digitalRead(blueSwitch);
    int sensor3 = digitalRead(redSwitch);
    Serial.print(photoresistor);
    Serial.print(',');
    Serial.print(sensor2);
    Serial.print(',');
    Serial.println(sensor3);
  }
}
Processing Code
Code for Main Sketch
import processing.serial.*;
import processing.sound.*;
Amplitude amp;
AudioIn in;
float smoothedNum = 0;

Serial myPort;

Virus [] virus;
Clouds [] cloud;
Bird bird;
Timer timer;

PImage Birdimg;
PImage Virusimg;
PImage Cloudimg;

boolean buttonPressed;

int gameState;
int numberOfVirus = 1;
int buttonX, buttonY, buttonW, buttonH;
int numberofClouds = 5;
int interactionMode;

String S= "You Win! \n Press the mouse to restart";
String Instructions= "Instructions: \n Control the Bird Up & Down and Avoid All Viruses  \n \n Choose Control Mode: \n Red Button = Photoresistor \n Blue Button = Microphone\n\nControl Tutorial:\n Photoresistor= Hover your hand over the photoresistor and move your hand up and down to control the bird \nMicrophone= Control the Bird with your voice \n\n NOTE: \n Each time you win, the Viruses will become faster next round \n \n";

SoundFile gameplayBGMusic;
SoundFile WinBGMusic;
SoundFile LoseBGMusic;

void setup() {
  size (1400, 600);
  printArray(Serial.list());
  String portname=Serial.list()[4];
  println(portname);
  myPort = new Serial(this, portname, 9600);
  //myPort.clear();
  //myPort.bufferUntil('\n');
  gameState=0;
  //Assume the start button has not been pressed
  buttonPressed = false;
  //Parameters for the start button
  buttonW=335;
  buttonH=100;
  textSize(buttonH);
  buttonX=(width-buttonW)/2;
  buttonY=(height-buttonH)/2;
  Birdimg= loadImage("Bird Picture #1.png");
  Virusimg= loadImage("Virus Picture #1.png");
  Cloudimg = loadImage ("Clouds.png");
  cloud = new Clouds [numberofClouds];
  for (int i=0; i<cloud.length; i++) {
    cloud[i] = new Clouds(Cloudimg);
  }
  virus = new Virus [numberOfVirus];
  for (int i=0; i< virus.length; i++) {
    virus[i] = new Virus(Virusimg);
  }
  bird = new Bird(Birdimg);
  timer = new Timer();
  amp = new Amplitude(this);
  in = new AudioIn(this, 0);
  in.start();
  amp.input(in);


  gameplayBGMusic = new SoundFile(this, "Gameplay BG Music.mp3");
  WinBGMusic = new SoundFile(this, "Win BG Music.mp3");
  LoseBGMusic = new SoundFile(this, "Lose BG Music.mp3");
}

void draw() {
  background(173, 253, 255);
  //start screen w/ instructions
  println(interactionMode);
  if (gameState == 0) {
    //insert starting screen code here
    background(255);
    fill(237, 203, 29);
    //String Instructions= "Instructions: \n Control the Bird Up & Down and Avoid All Viruses  \n \n Choose Control Mode: \n Red Button = Photoresistor \n Blue Button = Microphone\n\nControl Tutorial:\n Photoresistor= Hover and move your hand up and down the photoresistor \nMicrophone= Control the Bird with your voice \n\n NOTE: \n Each time you win, the Viruses will become faster next round \n \n";
    textAlign(CENTER);
    textSize(20);
    text(Instructions, width/2, height/2-250);
    fill(139, 0, 139);
    rect(buttonX, buttonY+200, buttonW+65, buttonH);
    fill(255);
    textSize(50);
    text("PRESS TO START", buttonX+200, buttonY+200+buttonH-10);
  } else if (gameState == 1) { //gameplay screen for Photoresistor Mode
    //insert game code here

    for (int i=0; i<virus.length; i++) {
      virus[i].drawVirus();
      virus[i].moveVirus();
    }
    for (int i=0; i<cloud.length; i++) {
      cloud[i].drawClouds();
      cloud[i].moveClouds();
    }
    bird.drawUserBird();
    bird.checkEdge();
    timer.showTimer();
    collisiondetection();

    if (interactionMode == 1) {
      float temporaryAmplitude;
      temporaryAmplitude = amp.analyze();
      temporaryAmplitude = map(temporaryAmplitude, 0, 0.2, height, 0);
      temporaryAmplitude = constrain(temporaryAmplitude, 0, height);

      //controlling the speed at which the object is reaching its destination
      //takes more frames to arrive at its destination
      bird.locy += (temporaryAmplitude- bird.locy)*.1;
    }
  } else if (gameState == 2) { //Win Screen
    //insert win screen code here
    //numberOfVirus= +1;
    //for (int i=0; i<virus.length; i++) {
    //  virus[i].xspeed -=5;
    //}
    gameplayBGMusic.stop();
    background(0);
    fill(random(255), random(255), random(255));
    textAlign(CENTER);
    textSize(80);
    text(S, width/2, height/2);
    if (mousePressed) {
      for (int i=0; i<virus.length; i++) {
        virus[i].xspeed -=10;
        virus[i].locx = width+50; //this makes them appear from off the screen
        virus[i].locy = random(height); //this makes it appear at random heights
        virus[i].timer1= millis()+1000; // this is the time interval for each virus appearing
      }
      WinBGMusic.stop();
      reset();
    }
  } else if (gameState == 3) { // Lose Screen
    //insert lose screen code here
    String G="You Lose! Game Over";
    String R="Press the mouse to restart";
    background(0);
    fill(random(255), random(255), random(255));
    textAlign(CENTER);
    textSize(80);
    text(G, width/2, height/2);
    textSize(50);
    text(R, width/2, height/2+100);
    if (mousePressed) {
      for (int i=0; i<virus.length; i++) {
        virus[i].locx = width+50; //this makes them appear from off the screen
        virus[i].locy = random(height); //this makes it appear at random heights
        virus[i].timer1= millis()+1000; // this is the time interval for each virus appearing
      }
      LoseBGMusic.stop();
      reset();
    }
  }
}


//if the start button is pressed
void mousePressed() {
  if ( mouseX > buttonX && mouseX < buttonX+buttonW+65 && mouseY > buttonY+200 && mouseY < (buttonY+200)+buttonH) {
    //buttonPressed=true;
    gameState=1;
    gameplayBGMusic.play();
    timer= new Timer();
  }
}


void reset() {
  gameState=0;
  //Assume the start button has not been pressed
  //buttonPressed = false;
  //Parameters for the start button
  buttonW=335;
  buttonH=100;
  textSize(buttonH);
  buttonX=(width-buttonW)/2;
  buttonY=(height-buttonH)/2;
  //Birdimg= loadImage("Bird Picture #1.png");
  //Virusimg= loadImage("Virus Picture #1.jpeg");
  //virus = new Virus [numberOfVirus];
  //for (int i=0; i< virus.length; i++) {
  //  virus[i] = new Virus(Virusimg);
  //}
  bird = new Bird(Birdimg);
  timer = new Timer();
}

void collisiondetection() {
  for (int i=0; i<virus.length; i++) {
    if (dist(virus[i].locx, virus[i].locy, bird.locx, bird.locy)< virus[i].viruswidth + bird.radius) {
      //println(dist(balls[i].locx, balls[i].locy, myBall.locx, myBall.locy));
      gameplayBGMusic.stop();
      LoseBGMusic.play();
      gameState=3; //if it collides, changes the boolean to true, making the lose screen appear
    }
  }
}

void serialEvent(Serial myPort) {
  //read string of information
  String s=myPort.readStringUntil('\n');
  s=trim(s);
  //if there's sth in s
  if (s!=null) {
    //split the string s based on commmas and put it into integer array "values"
    int values[]=int(split(s, ','));
    /*as long as there's a total of three arrays of information from Arduino
     */
    if (values.length==3 ) {
      if (interactionMode == 0) {
        //photoresistor value
        int temporaryBirdValue;
        temporaryBirdValue = values[0];
        //bird.locy=values[0];
        temporaryBirdValue =  (int(map(temporaryBirdValue, 390, 833, height, 0)));
        temporaryBirdValue = constrain(temporaryBirdValue, 0, height);

        //this is the smoothing algorithm for the bird movement
        bird.locy += (temporaryBirdValue - bird.locy)*.05;
      }
      //this is values for blueswitch
      if (values[1] ==1) { //if the blueswitch is pressed change to photoresistor mode
        interactionMode = 0;
      }
      //this is values for redswitch
      if (values[2] == 1) { //if the redswitch is pressed change to microphone mode
        interactionMode = 1;
      }
      //code to map the values of the photoresistor to the width of the screen
      //gotta change the values for the range of the photoresistor
    }
  }
  //println(xPos);
  myPort.write('0');
}
Code for Bird
class Bird {
  PImage Birdimg;
  //int locx, locy;
  float locx, locy;
  float Birdwidth, Birdheight;
  //no x speed as the x coordinates will be determined by values of photoresistor
  float yspeed=5;
  float radius=30;// for now, as we'll use a ball to determine the range of collision for the bird image


  Bird(PImage birdimg) { //constructor for the Bird object
    Birdimg= birdimg;
    locx = width/4;
    locy = height/2;
    Birdwidth = 4*radius;
    Birdheight = 4*radius;
  }

  void drawUserBird(){
    //fill(255,10,243);
    //stroke(255);
    //ellipse(locx, locy, Birdwidth, Birdheight);
    image(Birdimg, locx, locy, Birdwidth, Birdheight);
  }

  void checkEdge(){
    if (locy+10 < 0){
      locy +=10;
    }
    if (locy+10 >height){
      locy -=10;
    }
    if (locx+10 < 0){
      locx +=10;
    }
    if (locx+10 >width){
      locx -=10;
    }
  }
}
Code for Clouds
class Clouds {
  float locx, locy;
  float cloudwidth, cloudheight;
  float speed = -3;
  PImage Cloudimg;
  long timer1;


  Clouds(PImage _img) {
    Cloudimg = _img;
    locx = random(0+10, width-10);
    locy = random(0+10, height-10);
    cloudwidth = 120;
    cloudheight = 120;
    timer1= millis()+1000; // this is the time interval for each virus appearing
  }

  void drawClouds() {
    imageMode(CENTER);
    //ellipse(locx, locy, cloudwidth, cloudheight);
    image(Cloudimg, locx, locy, cloudwidth, cloudheight);
  }
  void moveClouds() {
    if (millis()>timer1) {
      locx += speed; //only move the x positions
    }
    if (locx<-20) {
      locx = width+50;
      locy = int(random(20, height-20));
    }
  }
}
Code for Timer
class Timer {
  //basic definitions for Timer
  float locx, locy;
  float timerwidth, timerheight;
  int countdown=30;
  int seconds;
  float startTime;

  Timer() {// constructor for Timer object
    textSize(50);
    startTime= millis()/1000 + countdown;
    seconds = int(startTime- millis()/1000);
  }
  void showTimer() {
    if (seconds<0) {
      startTime= millis()/1000 + countdown;//resets the timer and restarts it when less than 0
      //if seconds is zero, display "game over"
      gameplayBGMusic.stop();
      WinBGMusic.play();
      gameState=2; //if the time ends, it means the person has won and avoided all figures
    } else {
      seconds = int(startTime- millis()/1000);
      fill(255, 0, 0);
      text(seconds, width/2, 100);
    }
  }
}
Code for Viruses
class Virus {
  int locx;
  float locy;
  long timer1;
  float viruswidth, virusheight;
  //the virus balls only need xspeed as it will only move towards the left
  float xspeed= -10;//it's negative 10 as it moves to the left
  int radius=30;
  PImage Virusimg;

  //constructor for the Virus objects
  Virus(PImage _img) {
    Virusimg = _img;
    locx = width+50; //this makes them appear from off the screen
    locy = random(height); //this makes it appear at random heights
    viruswidth = 4*radius;
    virusheight = 4*radius;
    timer1= millis()+1000; // this is the time interval for each virus appearing
  }
  void drawVirus() {
    //stroke(0);
    //ellipse(locx, locy, viruswidth, virusheight);
    imageMode(CENTER);
    image(Virusimg, locx, locy, viruswidth, virusheight);
  }
  void moveVirus() {
    if (millis()>timer1) {
      locx += xspeed; //only move the x positions
    }
    if (locx<-20){
      locx = width+50;
      locy = int(random(20, height-20));
    }
  }
}
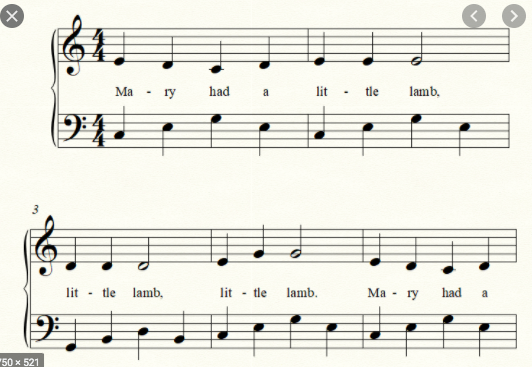 Twinkle Twinkle Little Star
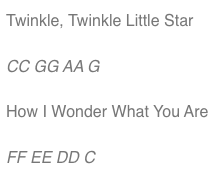
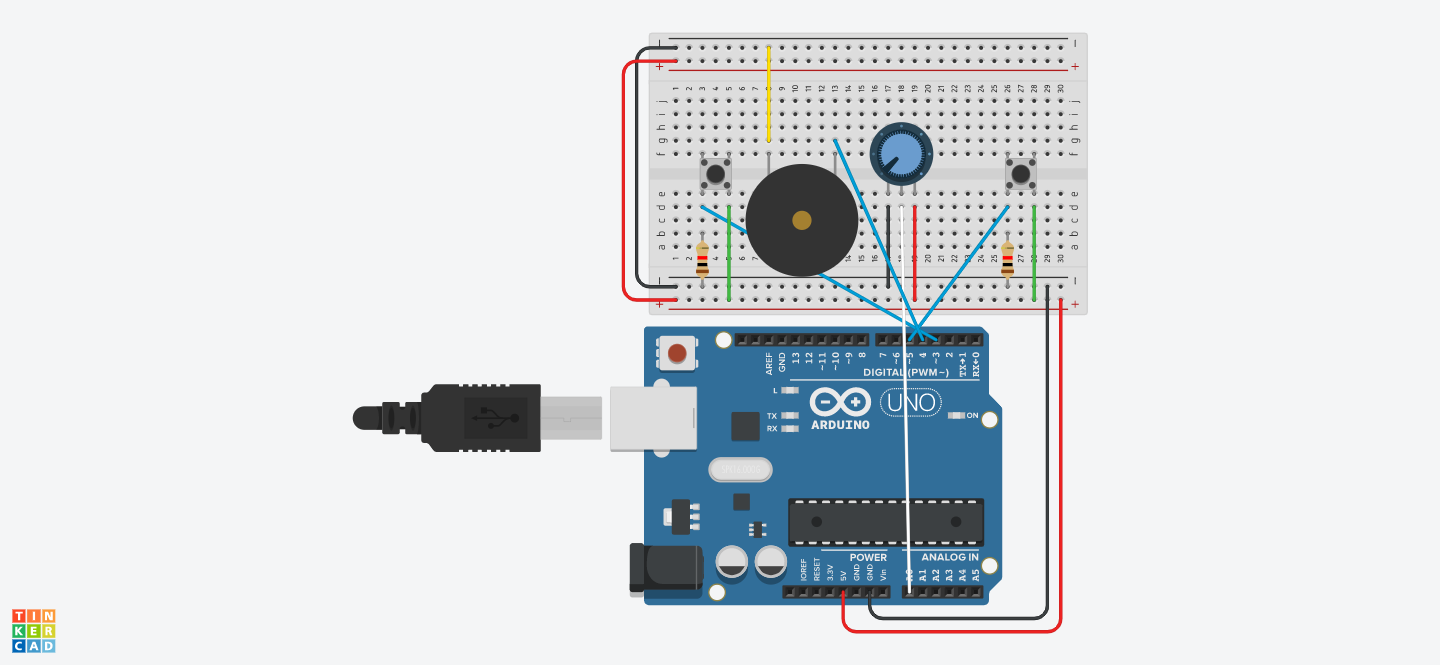
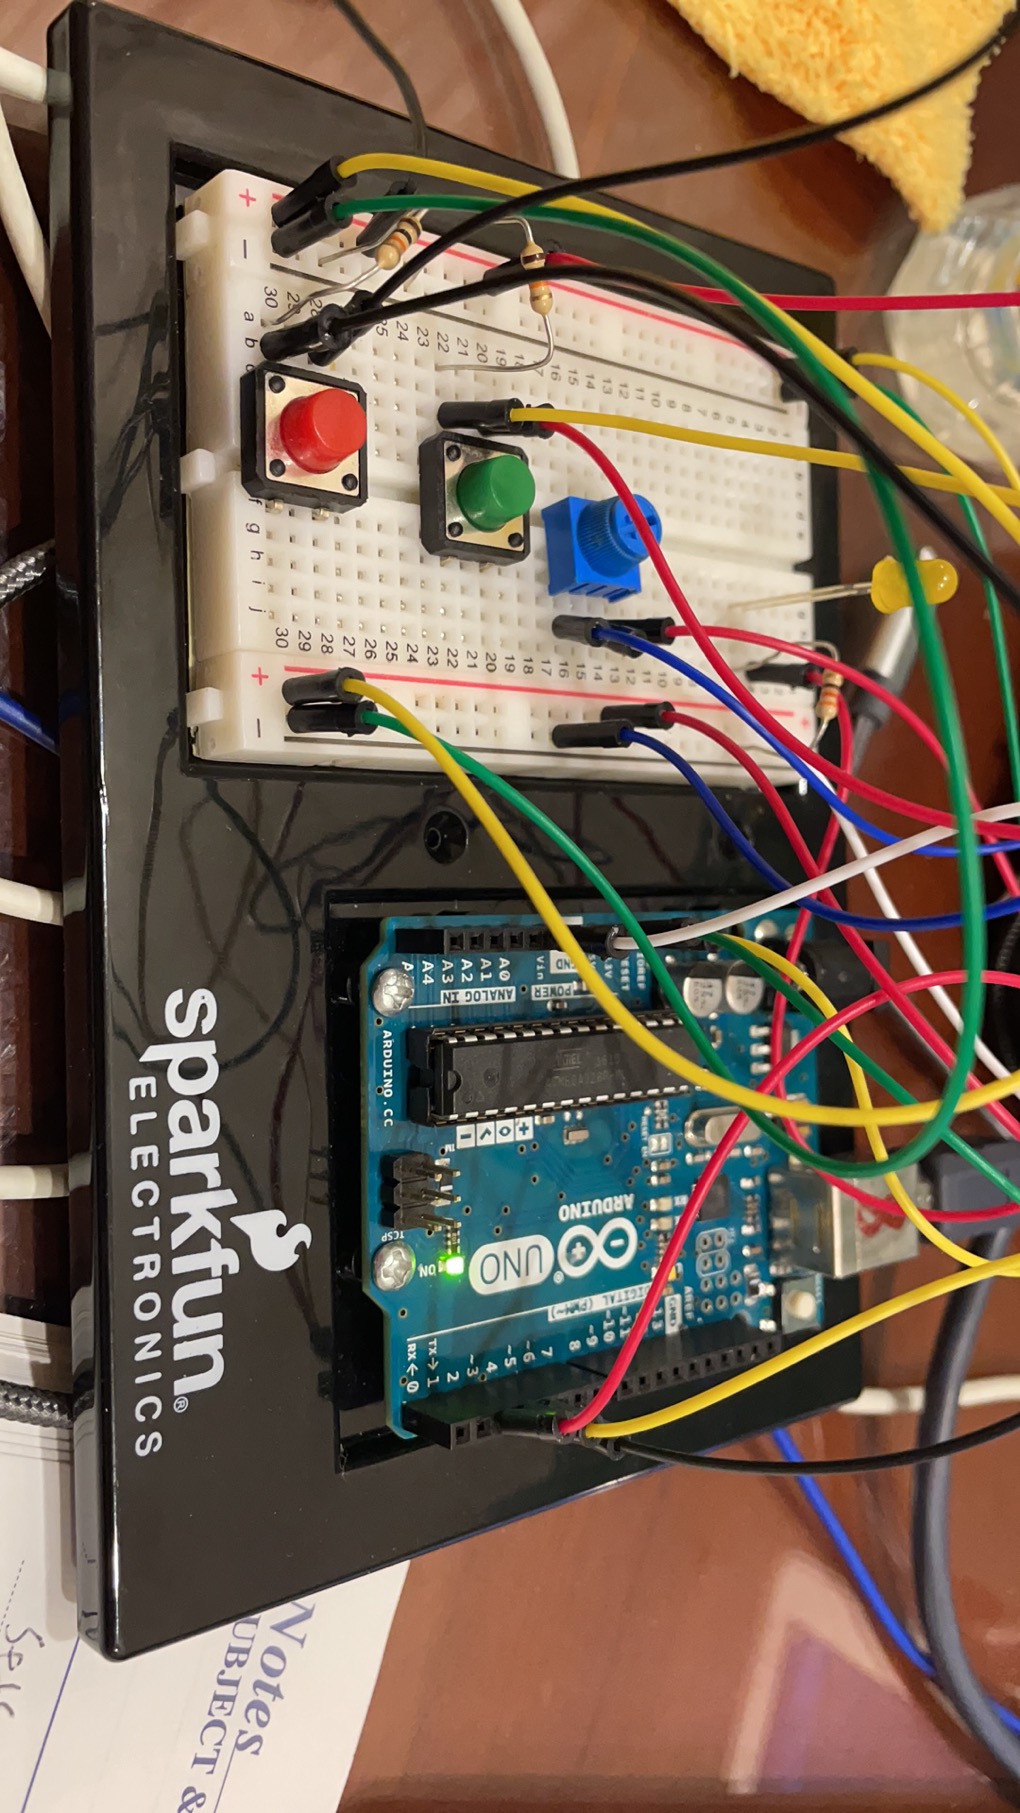
 Final Setup
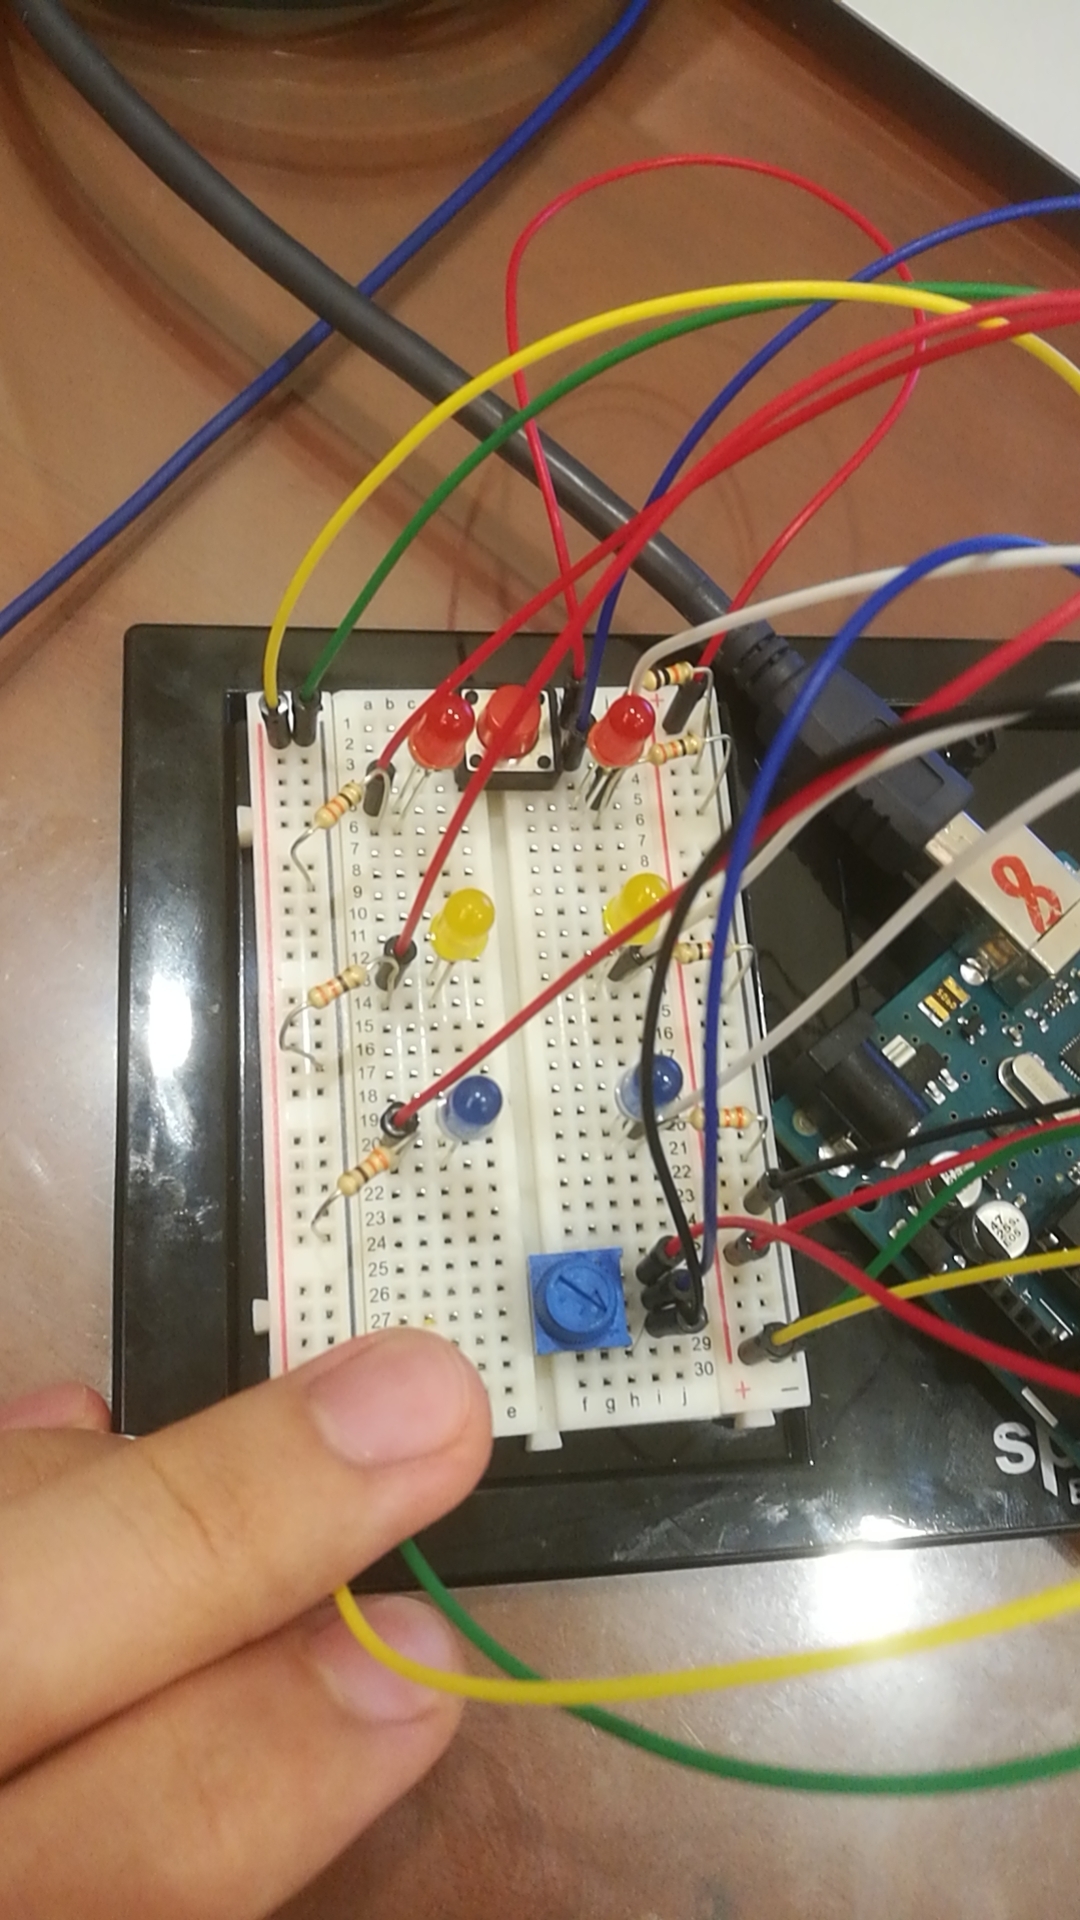
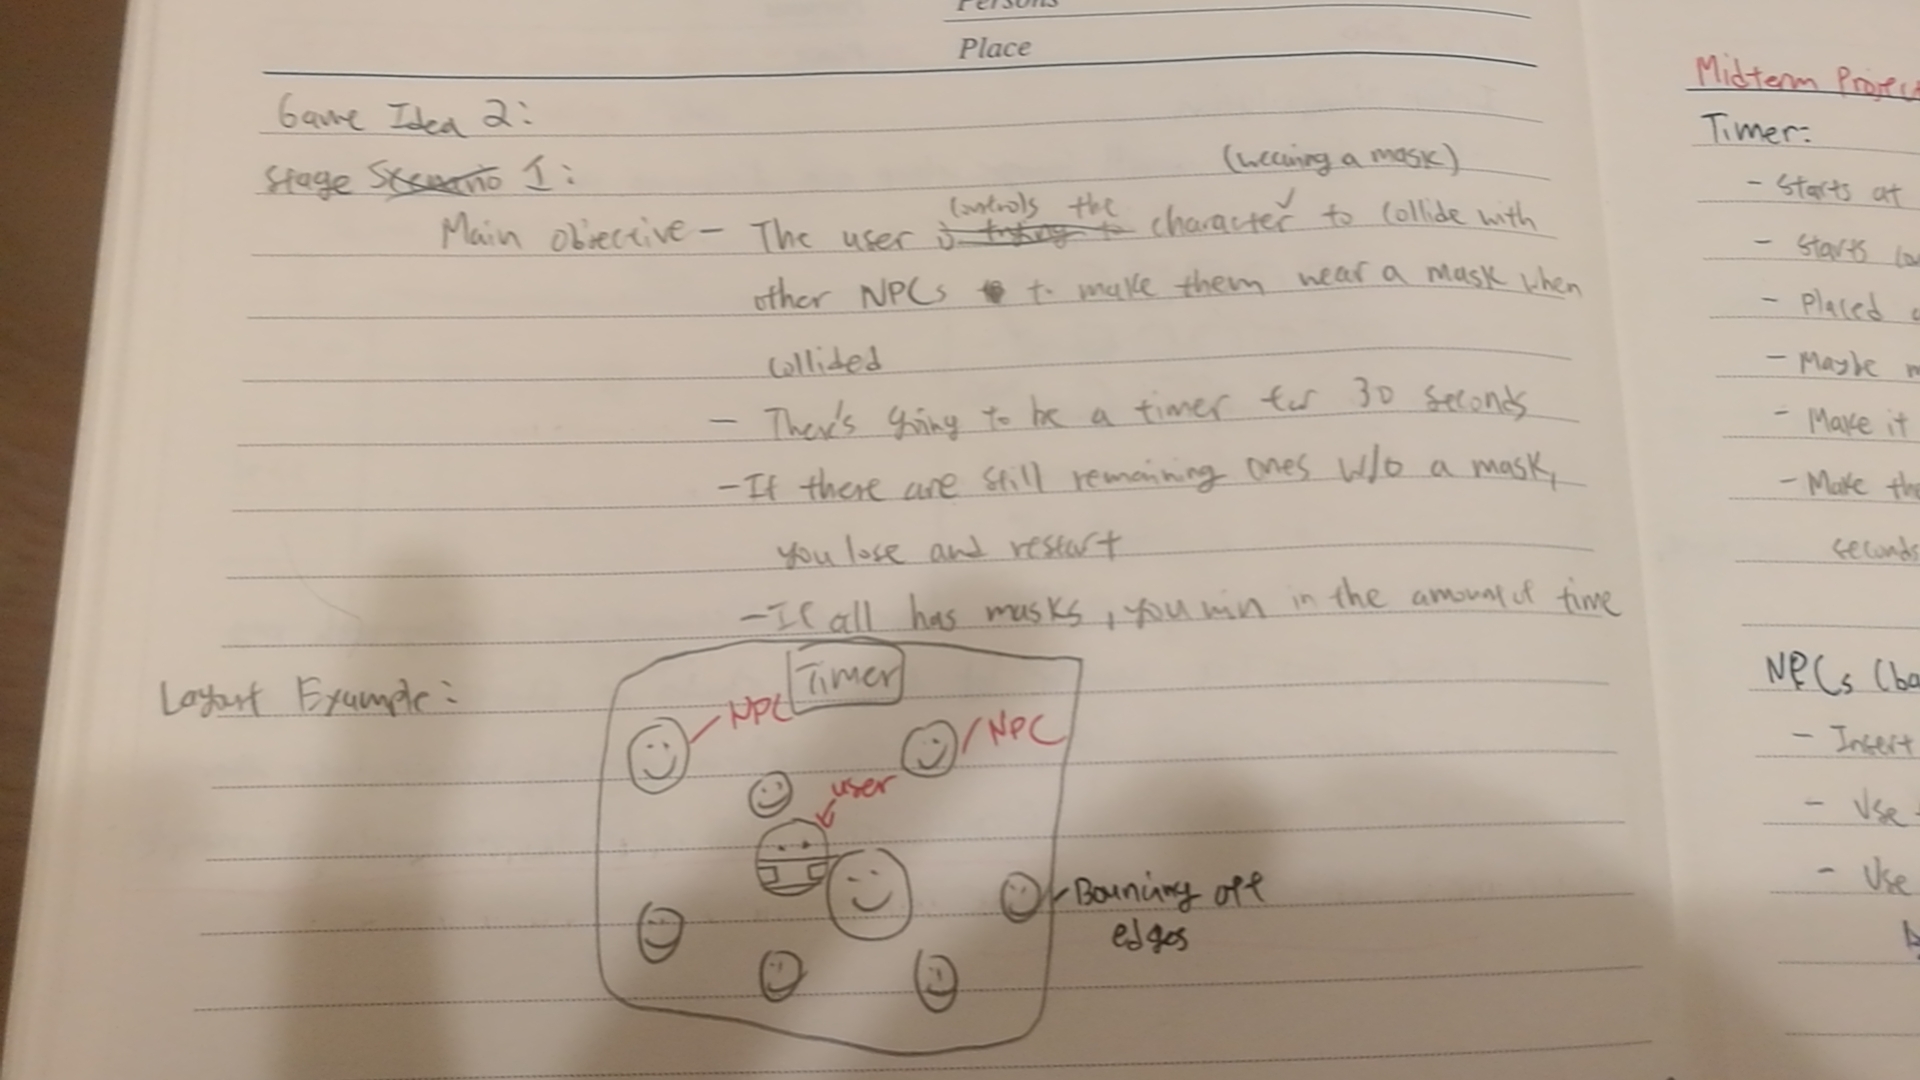
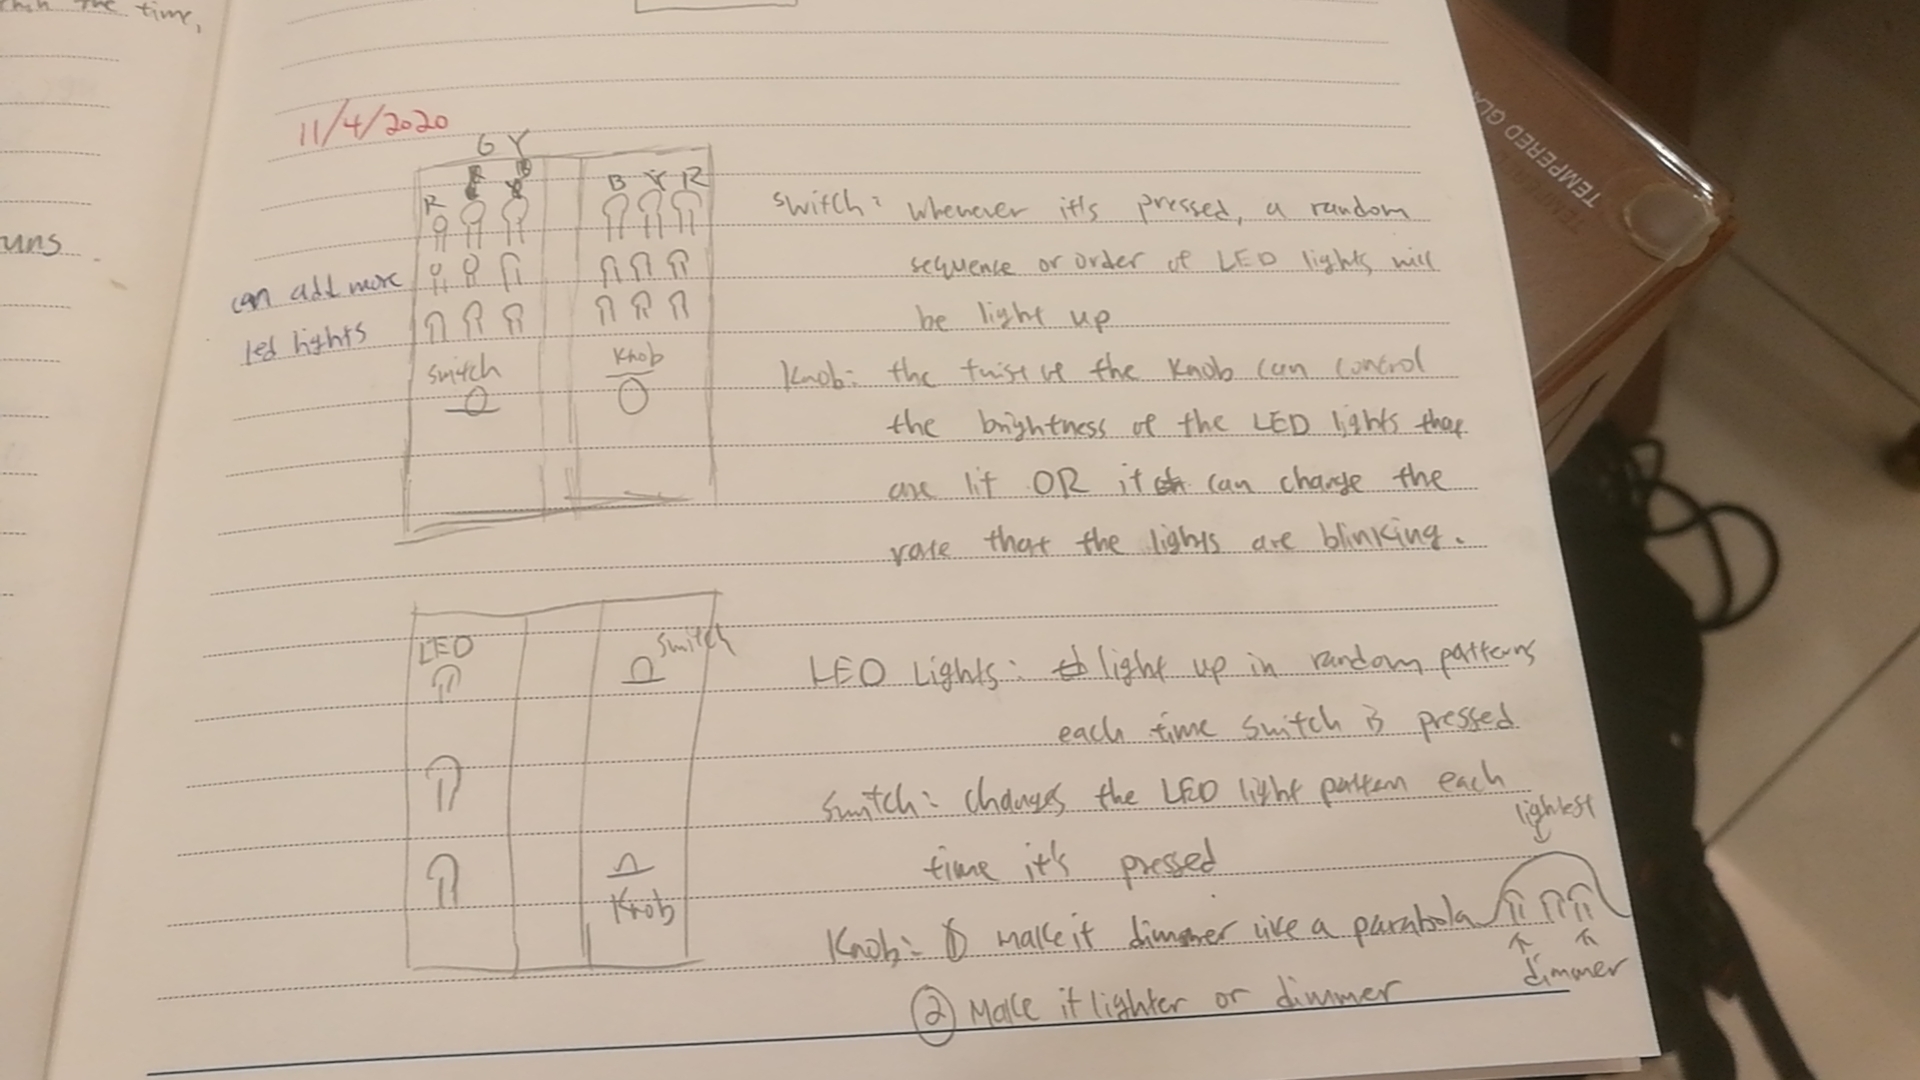
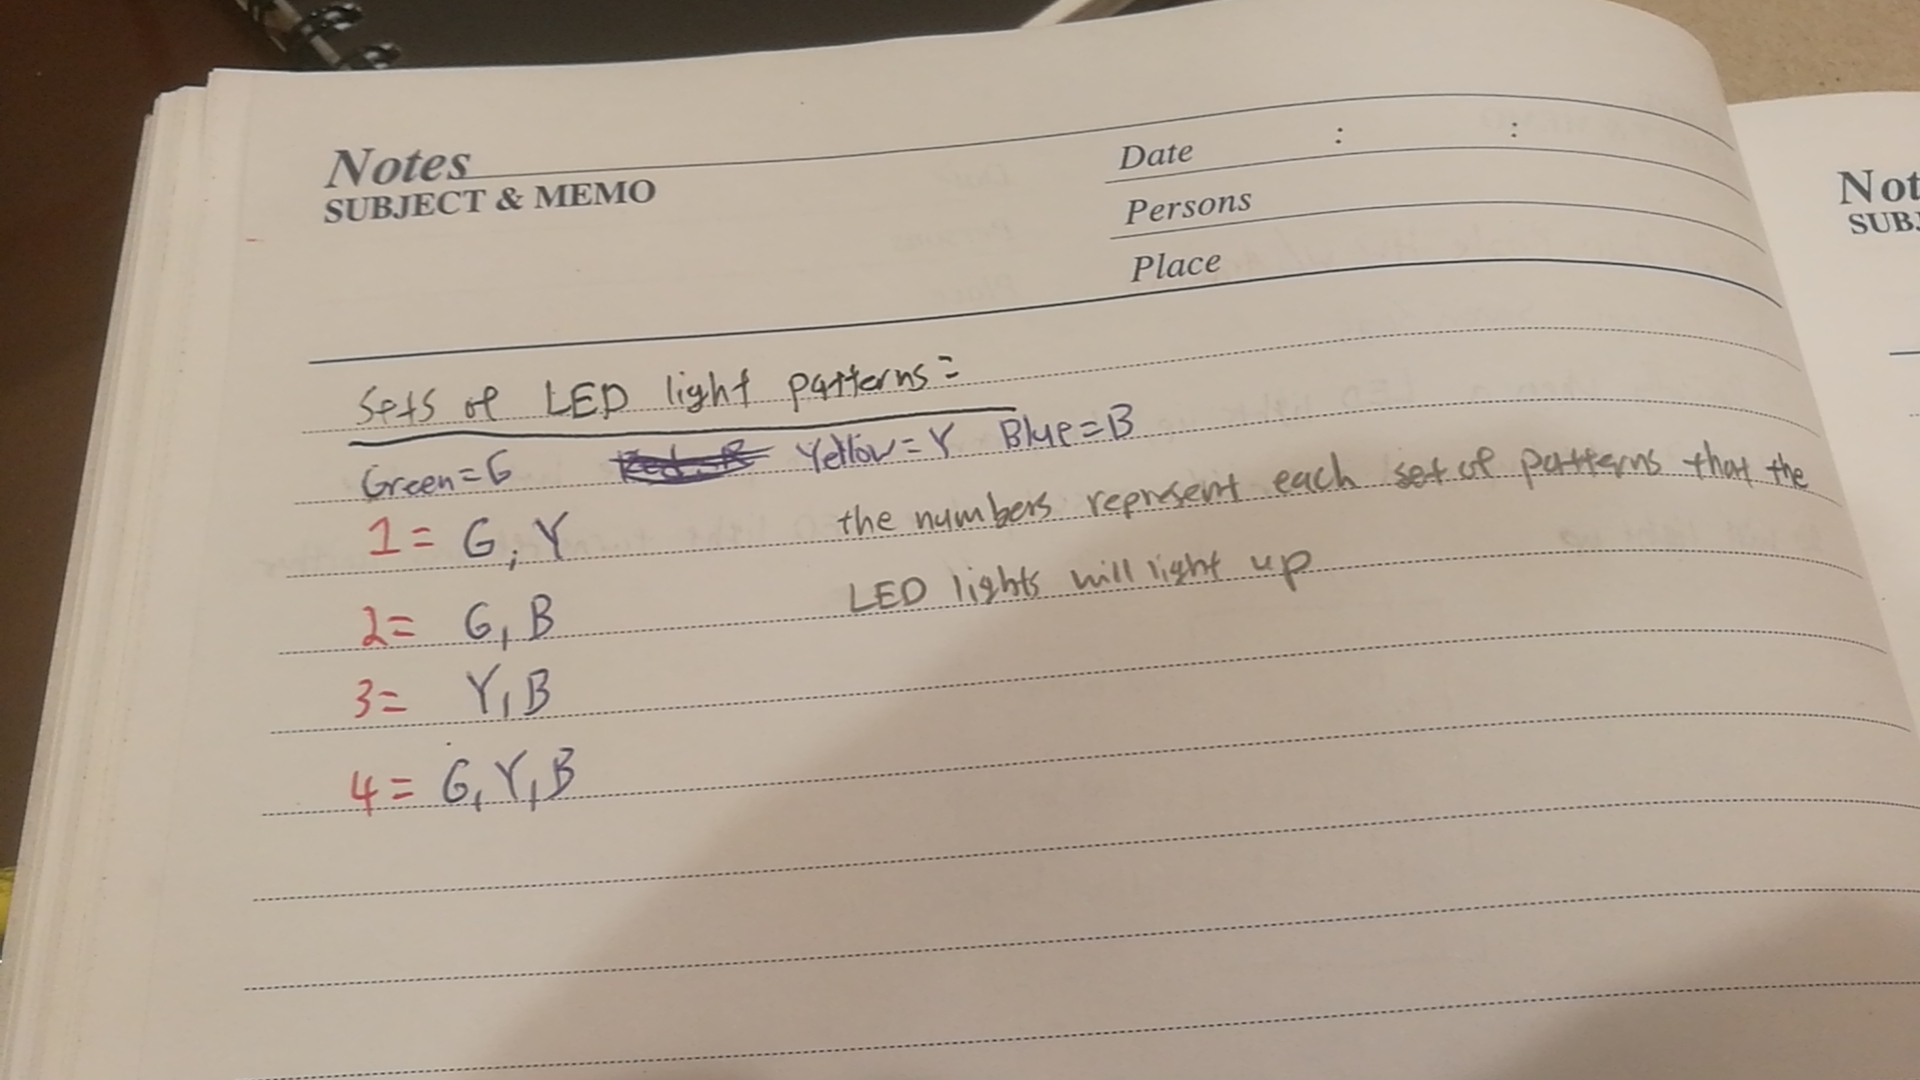
 Sketch of original idea