1962 – Aadil, Janindu, and Tarek

Project Overview:

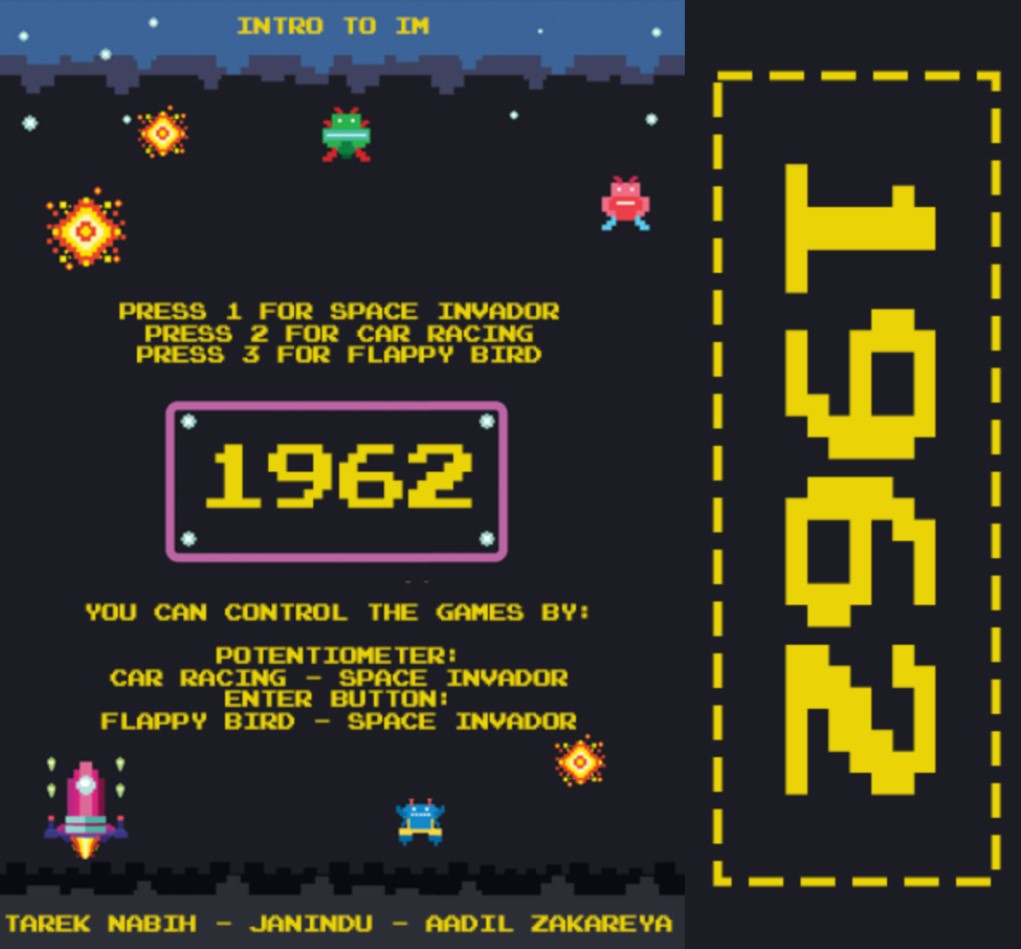
The three of us collectively decided to make something similar to an arcade machine as it was a very exciting part of our childhoods. Therefore, the project is a collection of three games that are designed to be played using an Arduino controller. The games include Flappy Bird, a popular mobile game in which the player controls a bird and navigates through obstacles; Racing Game, in which the player controls a race car and avoids colliding with the randomly generated cars as the race car overtakes them; and Space Invaders, a classic arcade game in which the player controls a spaceship and fights against invading aliens.

Arduino to P5js communication:

int button = 2;
int pot = A0;
int lastPotValue;
int lastbutton;
 
long previousmill = 0;
long timebutton = 500;
 
void setup() {
  // put your setup code here, to run once:
  Serial.begin(9600);
  pinMode(button, INPUT_PULLUP);
  pinMode(pot, INPUT);
}
 
int getpot(){
  int potValue = analogRead(pot)/255  ;
  int temp;
  if(potValue == 2 || potValue == 1){
    temp = 1;
  }else if(potValue == 3 || potValue == 4){
    temp = 2;
  }else{
    temp = 0;
  }
  return temp;
}
 
void loop() {
  int potValue = getpot();
  int buttonState = !digitalRead(button);
  long currentmill = millis();
 
  Serial.println(String(buttonState) + "," + String(potValue));
  
  if(buttonState == 1 && currentmill - previousmill >= timebutton){
    previousmill = currentmill;
   
 
    lastbutton = buttonState;
  }
}

We implemented this using the web serial. Here is how it briefly works: 

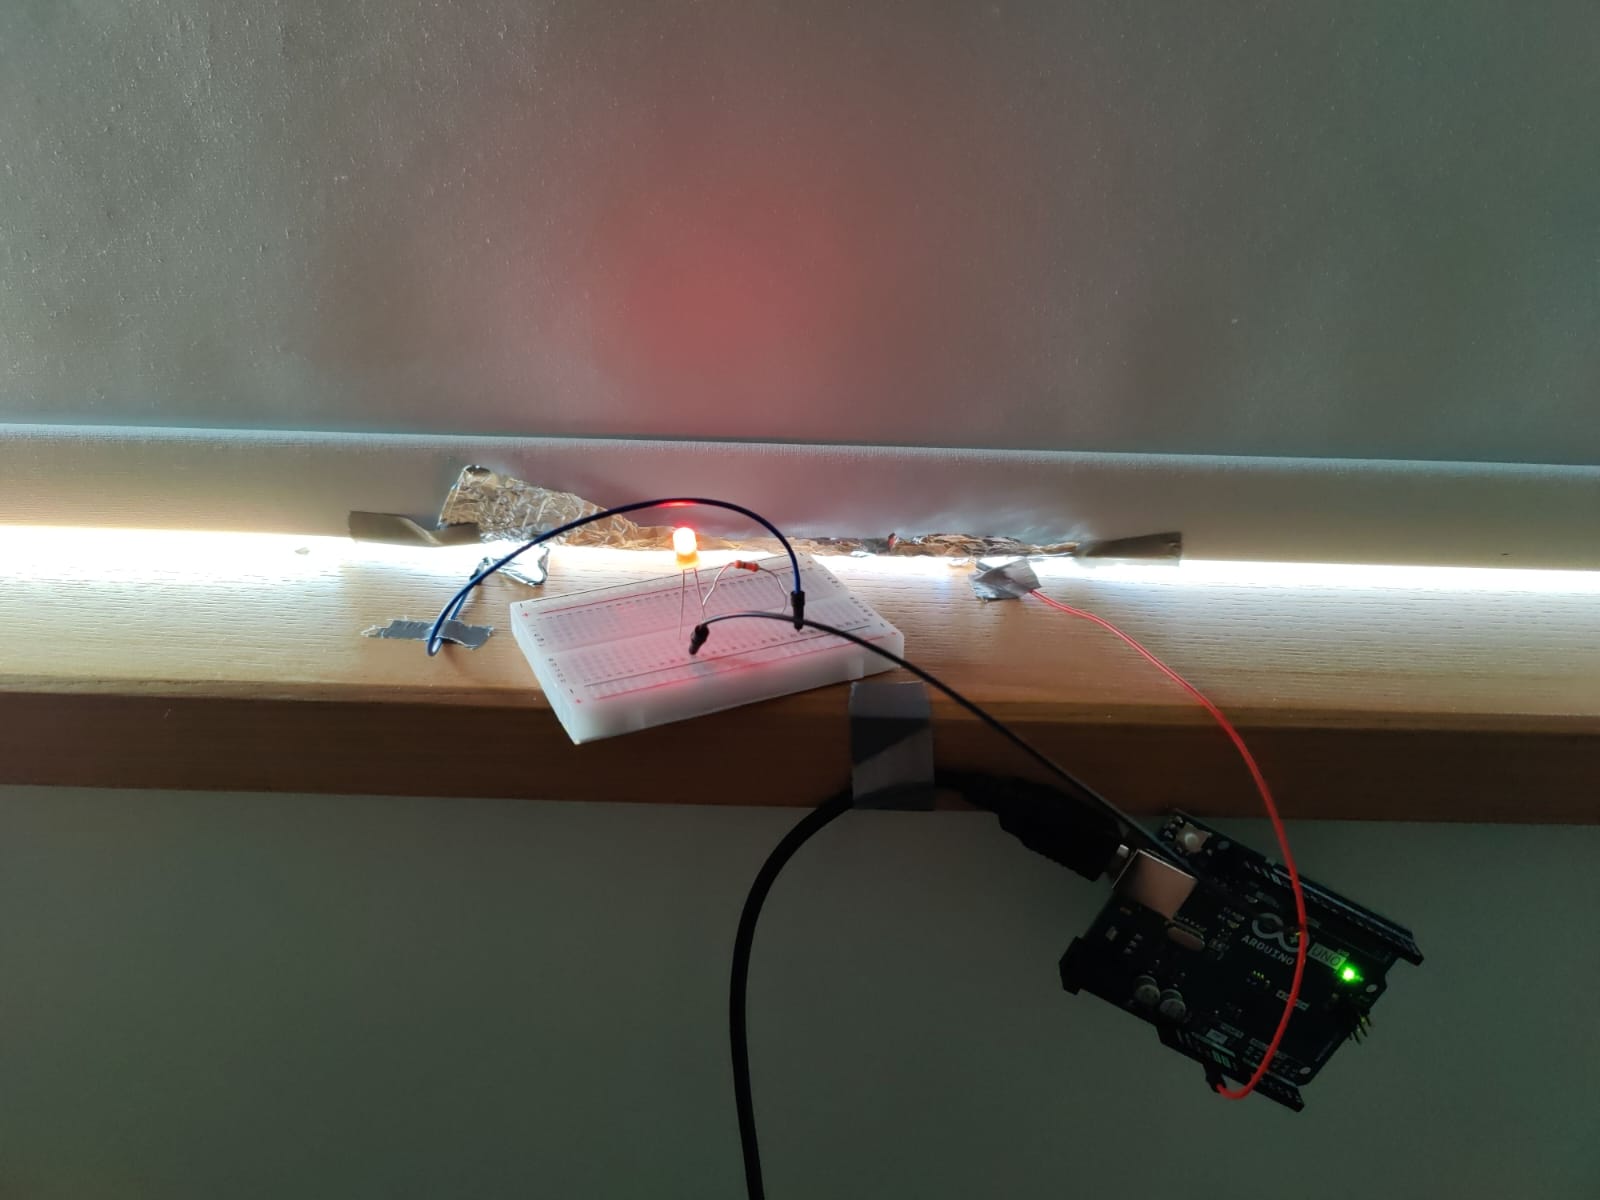
  1.       The user connects an Arduino board to their computer using a USB cable. 
  2.       The user writes and uploads a sketch (see above for the code) to the Arduino board that defines the behavior of the board and the data that it will send to the computer. 
  3.     The user opens a P5.js sketch in their web browser and includes the p5.webserial.js library in their code. 
  4.       The user adds event listeners to their P5.js sketch that will be called when the user connects or disconnects from the Arduino board, when the Arduino board is ready to be connected to, when there is an error communicating with the Arduino board, or when data is received from the Arduino board. 
  5.       The user calls the getPorts() method of the p5.WebSerial object to check for any available Arduino boards. If an Arduino board is available, the portavailable event listener is called, which can be used to open a connection to the Arduino board. 
  6.       Once the connection to the Arduino board is established, the user can send data to the Arduino board using the send() method of the p5.WebSerial object. The user can also receive data from the Arduino board using the data event listener, which is called whenever data is received from the Arduino board. 
  7.       The user can use the received data from the Arduino board to control the behavior and appearance of their P5.js sketch. The user can also send data from the P5.js sketch to the Arduino board to control the behavior of the Arduino board. 
  8.       When the user is finished using the Arduino board, they can close the connection to the board using the close() method of the p5.WebSerial object.

Flappy Bird:

Code:

function restart(){
  menu = 0;
  bird = new Bird(WIDTH / 2, HEIGHT / 2, 30);
  pipes = new Pipes(60, 200, 130);
  SCORE = 0;
  SCROLL_SPEED = 4;
  lives = 5;
}

function getRndInteger(min, max) {
  // https://www.w3schools.com/js/js_random.asp
  return Math.floor(Math.random() * (max - min)) + min;
}


function StartGame(){
  background(bg);
  fill("#7cfc00");
  rect(0, HEIGHT - GROUND_HEIGHT, WIDTH, HEIGHT);

  bird.draw();
  bird.update();
  bird.checkDeath(pipes);
  
  pipes.update();
  pipes.drawPipes();

  fill(255);
  textSize(60);
  textAlign(CENTER);
  text(SCORE, WIDTH / 9, HEIGHT / 7);
  textSize(30);
  text("lives: "+lives,WIDTH - WIDTH / 4, HEIGHT / 9);
  textAlign(CORNER);
}


class Bird {
  constructor(x, y, size) {
    this.x = x;
    this.y = y;
    this.size = size;
    this.vely = 0;
  }

  draw() {
    //fill("#eaff00");
    //circle(this.x+112.5, this.y-112.5, this.size);
    image(b,this.x-this.size, this.y-this.size,this.size, this.size);
    //image("cow.jpg",this.x, this,y);
  }

  update() {
    this.y += this.vely;
    this.vely = lerp(this.vely, GRAVITY, 0.05);
    this.y = Math.max(this.size / 2, Math.min(this.y, HEIGHT - GROUND_HEIGHT - this.size / 2));
  }

  flap() {
    this.vely = -JUMP_HEIGHT;
    jump.play();
  }

  checkDeath(pipes) {
    for (var pipe of pipes.pipes_list) {
      if (this.x + this.size / 2 > pipe.x && pipe.height && this.x - this.size / 2 < pipe.x + pipes.width) {
        if (this.y - this.size / 2 <= pipe.height || this.y + this.size / 2 >= pipe.height + pipes.gap) {          
          // window.location.reload();
          lives--;
          oof.play();
          if(lives === 0){
              // losing1.play();
              // restart(); 
              // break;
            window.location.reload();
          }
          pipes.pipes_list.splice(pipes.pipes_list.indexOf(pipe),1);
          pipes.retq();
          
        }
      }
      if (this.x - this.size / 2 > pipe.x + pipes.width && pipe.scored == false) {
        SCORE += 1;
        pipe.scored = true;
      }
    }
  }
}


class Pipes {
  constructor(width, frequency, gap) {
    this.width = width;
    this.frequency = frequency;
    this.gap = gap;

    this.pipes_list = [
      { x: 500, height: getRndInteger(this.gap, HEIGHT - GROUND_HEIGHT - this.gap), scored: false },
      { x: 500 + this.width + this.frequency, height: getRndInteger(this.gap, HEIGHT - GROUND_HEIGHT - this.gap), scored: false }
    ];
  }

  update() {   
    for (var pipe of this.pipes_list) {
      pipe.x -= SCROLL_SPEED;
      if (pipe.x + this.width <= 0) {
        pipe.x = WIDTH;
        pipe.height = getRndInteger(this.gap, HEIGHT - GROUND_HEIGHT - this.gap - this.gap);
        pipe.scored = false;
      }
    }
  }
  
  retq(){
    this.pipes_list = [
      { x: 500, height: getRndInteger(this.gap, HEIGHT - GROUND_HEIGHT - this.gap), scored: false },
      { x: 500 + this.width + this.frequency, height: getRndInteger(this.gap, HEIGHT - GROUND_HEIGHT - this.gap), scored: false }
    ];
  
  }

  drawPipes() {
    fill((0),(150),(0));
    for (var pipe of this.pipes_list) {
      rect(pipe.x, 0, this.width, pipe.height);
      rect(pipe.x, HEIGHT - GROUND_HEIGHT, this.width, -HEIGHT + pipe.height + GROUND_HEIGHT + this.gap);
    }
  }

}

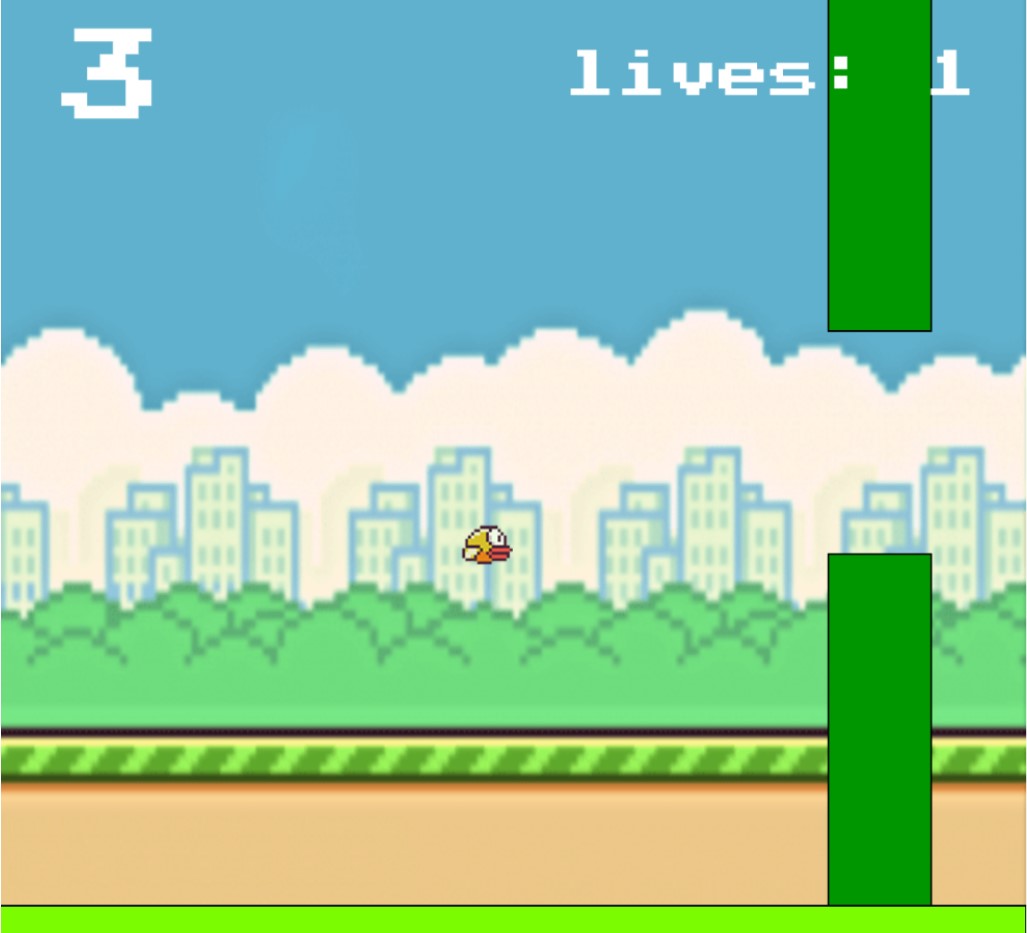
The getRndInteger() function is a helper function that returns a random integer between two given values. This function is used to randomly generate the heights of the pipes in the game. The Bird and Pipes classes define the objects that appear in the game. The Bird class has a draw() method that is used to draw the bird on the screen, an update() method that is used to update the bird’s position and velocity, a flap() method that causes the bird to jump upwards, and a checkDeath() method that checks if the bird has collided with any of the pipes and ends the game if necessary. The Pipes class has an update() method that updates the positions of the pipes and a drawPipes() method that draws the pipes on the screen. Overall, the code defines a simple game in which the player controls a bird and must avoid colliding with pipes by jumping over them. The game keeps track of the player’s score and ends if the bird hits a pipe. 

Racing Game:

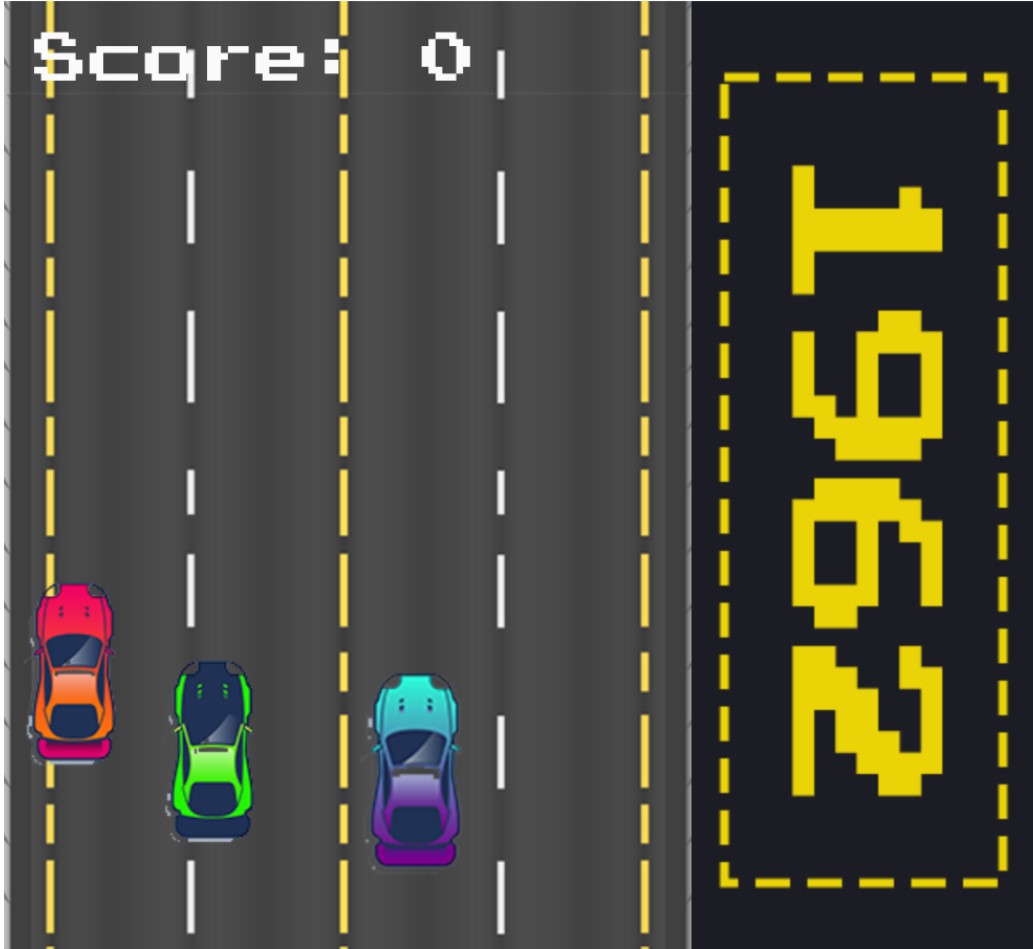
The generateCars() function is used to randomly generate cars that appear on the screen and the displayCars() function is used to draw the cars on the screen. The displayScore() function is used to display the player’s current score on the screen. The potentiometer returns three readings: 0,1, and 2 based on the positioning. Based on the number being returned by the potentiometer – we handle the car movement. 

Space Invaders:

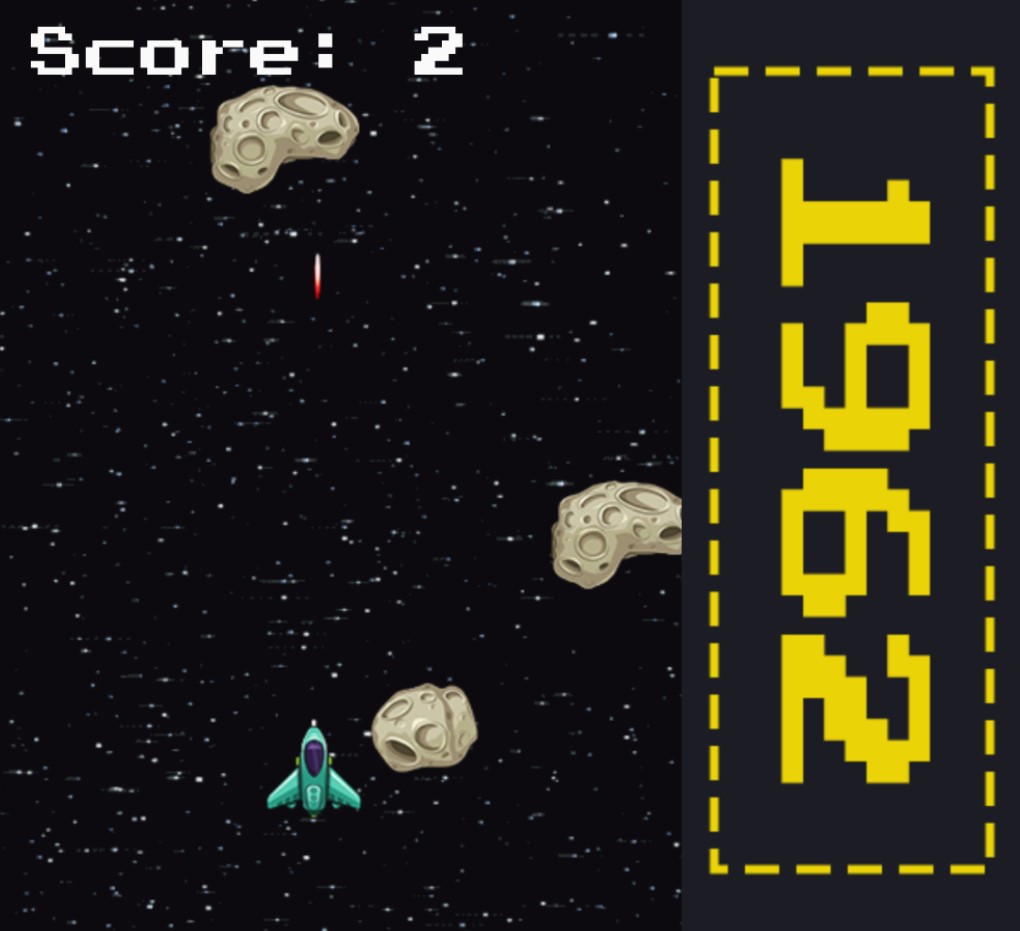
function startPage(){
  textSize(27);
  fill(250);
  text("Space invador",27,250);
  textSize(15);
  text("press enter to start",52,290);
}

function removeRocks(){
  rocks.splice(0,rocks.length);
  rocksctr = 0;
}


function displaybullets(){
    for(let i = 0; i < bullets.length; i++){
      bullets[i].display();
      
      if(bullets[i].y < 0){
        bullets.splice(i,1);
        numBullets--;
      }
      
    }
  // console.log(numBullets);
}

function generaterocks(){
  let rand = int(random(0, 100));
  let rand2 = int(random(0, 100));
  if(rand % 7 == 0){
    if(rand2 % 3 == 0){
      if(rand2 % 2 == 0 && rand % 2 == 0){
          rocks[rocksctr] = new boulders();
          rocks[rocksctr].display();
          // console.log(rocksctr);
          rocksctr++;
        }
     }
  }
}

function displayrocks(){
  for(let i = 0; i < rocks.length; i++){
    rocks[i].display();
    // console.log(">",rocks.length);
    
    let temp = false;
    for(let j = 0; j < bullets.length; j++){
      if(bullets[j].didcollide(rocks[i])){
        temp = true;
        bullets.splice(i,1);
        numBullets--;
      }
    }
    
    if(mainship.didcollide(rocks[i])){
      rocks.splice(i,1);
      rocksctr--;
      gamestatus = "end";
      bomb.play();
      losing1.play();
      
    }else if(rocks[i].y > height || temp){
      rocks.splice(i,1);
      rocksctr--;
    }
  }
}
 var timechecker = 0.5;

function makebullet(x,y){
  bullets[numBullets] = new bulletClass(x,y);
  bullets[numBullets].display();
  numBullets++;
} 

Game Controls

Flappy Bird: Use the button on the arduino or the UP key to jump.

Racing Game: Use the potentiometer or left and right keys to control the car’s steering.

Space Invaders: Use the potentiometers or left and right keys to control the spaceship’s movement and button or UP key to fire lasers.


Conclusion 

This project demonstrates how to create and play games using p5.js and Arduino. The project includes three games that can be controlled using potentiometers and push buttons, and can be easily extended to include additional games and custom controller designs. We’re particularly proud of the aesthetics of the games – we were able to recreate what we initally had in mind. Furthermore, we had a lot of bugs which wouldn’t let the games run smoothly. We figured out how to implement the games smoothly by making changes in our algorithms and by handling specific types of errors which were mostly given by the arduino board. However, there is no proper restart function for flappy bird – if you lose, the canvas simply starts from scratch.

My contribution to the project was coding the flappy bird game, handling errors, debugging, and the documentation.  

Distance musical instrument, Tarek Nabeh & Aadil Zakarya

Concept:

We wanted to create a musical instrument that works without touching anything (of course but the switch button). So we used the ultrasonic sensor to control the frequency of the sound outputted by the buzzer. While coding we found it very annoying for the buzzer to run all of the time, without any option to stop it. Hence, we found it critical to add a button that controls whether the ultrasonic sensor and the buzzer are running. We also wanted to make it fancy in a way that you don’t hold the button for it to work but just press on it to start and press again to stop it, and that’s what we did. The ultrasonic measures the distance by the duration of time of the ultrasonic wave takes to come back, and by that controls the frequency of the buzzer. We also created a feedback loop from the serial by which we can know the distance and the frequency outputted.

Code:

The pins were declared:

int buttonPin = 2;
int echo = 6;
int trig = 5;
int speaker = 9;
long duration;
long distance;
bool isPressed = false;

then the ultrasonic trig and echo were settled up to the pins and the serial was set up as well:

void setup() {
  // setup pin modes
  Serial.begin(9600);
  pinMode(speaker, OUTPUT);
  pinMode(trig, OUTPUT); 
  pinMode(echo, INPUT);
  // pinMode(buttonPin, INPUT);
  // pinMode(buttonPin, INPUT_PULLUP);
}

the void loop basically has everything to do with the switch. a global variable was declared so that we save the last state of the ultrasonic and the buzzer, and when the button is pressed it switches the state. so when if the sensor is not running it makes it start running and vice versa. Moreover, I noticed that a delay had to be added because the void loop runs numerous times while the button is being pressed so it basically turns the sensor on and off numerous times giving us a 50% possibility of tuning the sensors on when the button is released. Hence, the delay is crucial for the project to work.

void loop() {
  digitalWrite(trig, LOW);
  delayMicroseconds(2);
  int buttonState = digitalRead(buttonPin);
  if(buttonState == HIGH){
    Serial.println("button pressed");
    // delay(5000);
    if(isPressed == false){
      isPressed = true;
      delay(1000);
      
    }else if(isPressed == true){
      Serial.print("came pressed ");
      noTone(speaker);
      isPressed = false;
      Serial.println(isPressed);
      delay(1000);
    }    
    // blink(2);
  }
  // Serial.println(isPressed);
  if(isPressed == true){
    updateSensor();
  }
}

Finally, the function that makes the sensor work, as in Tarek’s previous project the sensor calculates the distance by measuring the time it takes for the waves to go out and come back to the sensor again. based on that it scales the distance from 0 to 100 cm to the frequencies from 0 to 455. then it makes the buzzer start the sound in that specific frequency.

void updateSensor(){
  digitalWrite(trig, HIGH);
  delayMicroseconds(10);
  digitalWrite(trig, LOW);
  duration = pulseIn(echo, HIGH);
  distance = duration * 0.034 / 2; 
  int frequency = ((int)(distance * 4.55) );
  frequency = (frequency > 455)? 455 : frequency;
  Serial.print("Distance: ");
  Serial.print(distance);
  Serial.print(" cm, ");
  Serial.print("frequency: ");
  Serial.println(frequency);
  tone(speaker,frequency);
  delay(200);
}

Reflections:

While working on the project we noticed the potential that we have with just this Arduino and minor sensors like the ultrasonic and small gadgets like the buzzer. It also spiked our curiosity to find out what else can be done with such gadgets.


Unusual Switch

Concept

The main functionality of this unusual switch is to create a night lamp of sorts which goes into action as soon as the window blinds are closed.

Method

The method is simple: create a simple circuit and attach two pieces of aluminium foil on both ends of wire where the switch would normally go. Attach foil on the window blind. When the blinds go down – the circuit is completed.

Result

Reflections

Although there is little functionality, the design is really flimsy and it looks very unappealing. This is my first time working with Arduino and I am enjoying it so far.

Data Visualization

Concept

For this task I decided to generate some sort of imagery based upon the music being played. There isn’t a particular reason why  wanted to implement this other than the fact that it seems pretty cool and fun to make.

Implementation

let song, buttton, fft;


function toggleSong() {
  if(song.isPlaying()) {
    song.pause();
  } else {
    song.play();
  }
}

function preload() {
  song = loadSound('bgmusic.mp3'); 
}

function setup() {
  createCanvas(600, 600);
  colorMode(HSB);
  angleMode(DEGREES); // Change the mode to DEGREES
  

  song.play();  
  fft = new p5.FFT(0.9, 128);
}

function draw() {
  background(0);
  space = width / 128;
  
  let spectrum = fft.analyze();
  //console.log(spectrum);
  for (let i = 0; i < (spectrum.length/2)+1; i++) {
    stroke(255);
    let amp = spectrum[i];
    let y = map(amp, 0, 256, height, 0);
    fill(i,125,125); //remove stroke(255);
    noStroke();
    rect(i * space, y, space, height - y);
    rect(width - (i * space), y, space, height);
    //rect(space, height ,width - (i * space), y);
  }
}


function touchStarted() {
  getAudioContext().resume();
}

Sketch (you might have to click the canvas to start)


Reflections

I would love to explore creating 3d visuals for the background and improving the aesthetics in general for this sketch. However, this was a lot of fun to make and I enjoyed the process.


Midterm Game

Concept:

I thought the snake game will be fun to implement – it is simple, fun, and can be done easily using OOP. It turned out to be a little more difficult than I expected it to be. Nevertheless, it was satisfying to implement a game I grew up playing 🙂

Challenges:

One of the most difficult parts was figuring out the algorithm for the movement of snake. It took me a lot of time. The way the algorithm works is that it the snake head (which is a class of itself) moves independently. It changes the direction based on the input key. The rest of the body of the snake is stored in an array. I run a for loop starting from the last index of the array and assign the last element’s x and y coordinate to the second last element. I do so until the second element’s x and y coordinate is equal to the first element’s values. Then I update the the first element’s values basis the position of the head for which I have 4 if conditions.

Another smaller issue I ran into was not being able to make a class which inherits from Arrays. I am not sure if that is possible in JS.

This is the bit on which I spent most of my time.

if(this.direction=="RIGHT"){
    for(let i=(g.arr.length)-1; i>1; i--){  //g is the snake head
        print("LOK");
        g.arr[i].row = g.arr[i-1].row;
        g.arr[i].col = g.arr[i-1].col; 
        g.arr[i].display();
    }
    g.arr[1].row = this.row+0.5;
    g.arr[1].col = this.col+0.5;
    g.arr[1].display();
    this.headimage;
}

else if(this.direction=="LEFT"){
    for(let i=(g.arr.length)-1; i>1; i--){
        print("LOK");
        g.arr[i].row = g.arr[i-1].row;
        g.arr[i].col = g.arr[i-1].col; 
        g.arr[i].display();
    }
    g.arr[1].row = this.row+0.5;
    g.arr[1].col = this.col+0.5;
    g.arr[1].display();
    this.headimage;
}
else if(this.direction=="UP"){
    for(let i=(g.arr.length)-1; i>1; i--){
        print("LOK");
        g.arr[i].row = g.arr[i-1].row;
        g.arr[i].col = g.arr[i-1].col; 
        g.arr[i].display();
    }
    g.arr[1].row = this.row+0.5;
    g.arr[1].col = this.col+0.5;
    g.arr[1].display();
    this.headimage;
}
else if(this.direction=="DOWN"){
    for(let i=(g.arr.length)-1; i>1; i--){
        g.arr[i].row = g.arr[i-1].row;
        g.arr[i].col = g.arr[i-1].col; 
        g.arr[i].display();
    }
    g.arr[1].row = this.row+0.5;
    g.arr[1].col = this.col+0.5;
    g.arr[1].display();
    this.headimage;
}
this.headimage;
this.row += this.vr; 
this.col += this.vc;

Other than that, the code is pretty much straightforward. There are 4 classes: SnakeHead, SnakeElements, Snake (initialises the game), and Food. I use function which calls the necessary class objects in a fucntion called restart which is called every time you click the canvas after losing. The game uses 3 pictures, 2 sounds, OOP, multiple shapes, on screen texts, and has a restart option.

Game: 

Reflections: 

It was a lot of fun to make, but I am unhappy with the aesthetics of the entire game. I also want to make it look a lot more smoother, but I’m not sure if my current algorithm will allow that. Another issue is that there is a possibility that the food can spawn at a location which is currently occupied by the snake – which can get slightly annoying. However, I learnt a lot and gained useful knowledge 🙂


Assignment 3: OOP

Concept: 

Since we had to use OOP for the assignment, my initial thought was to create a game. Initial ideas were Super Mario and Pacman. But I have some experience with those two using Processing, so I thought of making something similar to Flappy Bird, which I remember playing a lot as a child. In this version of Flappy Bird, the bird is a circle. I did think of using a sprite image instead of a circle and that could be a nice feature to add on later.

Code: 

Below are all the necessary classes and the objects I instantiated to start the game:

class Bird {
  constructor(x, y, size) {
    this.x = x;
    this.y = y;
    this.size = size;
    this.vely = 0;
  }

  draw() {
    fill("#eaff00");
    circle(this.x, this.y, this.size);
    //image("cow.jpg",this.x, this,y);
  }

  update() {
    this.y += this.vely;
    this.vely = lerp(this.vely, GRAVITY, 0.05);
    this.y = Math.max(this.size / 2, Math.min(this.y, HEIGHT - GROUND_HEIGHT - this.size / 2));
  }

  flap() {
    this.vely = -JUMP_HEIGHT;
  }

  checkDeath(pipes) {
    for (var pipe of pipes.pipes_list) {
      if (this.x + this.size / 2 > pipe.x && pipe.height && this.x - this.size / 2 < pipe.x + pipes.width) {
        if (this.y - this.size / 2 <= pipe.height || this.y + this.size / 2 >= pipe.height + pipes.gap) {
          //oof.play();
          
          window.location.reload();
        }
      }
      if (this.x - this.size / 2 > pipe.x + pipes.width && pipe.scored == false) {
        SCORE += 1;
        pipe.scored = true;
      }
    }
  }
}


class Pipes {
  constructor(width, frequency, gap) {
    this.width = width;
    this.frequency = frequency;
    this.gap = gap;

    this.pipes_list = [
      { x: 500, height: getRndInteger(this.gap, HEIGHT - GROUND_HEIGHT - this.gap), scored: false },
      { x: 500 + this.width + this.frequency, height: getRndInteger(this.gap, HEIGHT - GROUND_HEIGHT - this.gap), scored: false }
    ];
  }

  update() {   
    for (var pipe of this.pipes_list) {
      pipe.x -= SCROLL_SPEED;
      if (pipe.x + this.width <= 0) {
        pipe.x = WIDTH;
        pipe.height = getRndInteger(this.gap, HEIGHT - GROUND_HEIGHT - this.gap - this.gap);
        pipe.scored = false;
      }
    }
  }

  drawPipes() {
    fill(random(255),random(255),random(255));
    for (var pipe of this.pipes_list) {
      rect(pipe.x, 0, this.width, pipe.height);
      rect(pipe.x, HEIGHT - GROUND_HEIGHT, this.width, -HEIGHT + pipe.height + GROUND_HEIGHT + this.gap);
    }
  }

}

var bird = new Bird(WIDTH / 2, HEIGHT / 2, 30);
var pipes = new Pipes(60, 150, 130);

I took inspiration from this YouTube channel called “Ihabexe.”


Furthermore, to add some touch of creativity to it – I tried giving it a trippy feeling. The game has three backgrounds which change as you progress – increasing the level of difficulty. I also added electronic beats to it., which play when mouse is over the canvas.

Here’s what it looks like (click the canvas to make the circle jump):

Reflections:

I should also have implemented a main menu screen where you can choose when to start the game. Apart from that it was fun to make and to continue making something along the lines of psychedelic art.

Assignment 2: Loops

Concept

Since the assignment needed us to use loop – I thought of creating a simple pattern so that I can update the x and y variables with each iteration. I created two if conditions under the loop using random(1) function. If the random() function picks a number more than 0.5, the code creates a line from the top left to bottom right. Else – it creates a line from bottom left to top right.

let x = 0; 
let y = 0;
function drawLines(){
  stroke(255);
  delta=10;
  stroke(random(255),random(255),random(255));
  strokeWeight(5);
  if(random(1)>0.5){
   line(x,y,x+10,y+delta);
  }
  else{
   line(x,y+delta,x+delta,y);
  }
  x = x+delta;
  
  if(x>width){
    x=0;
    y=y+delta;
  }
  

  if(y>height/2){
    delta = 0;
  }
}

Since there is simple probability at play here – it created a maze-like pattern. I simply added colour to it. Furthermore, I wrote another function which uses the same algorithm, but from bottom right corner and it works its way up – to add a little more life to it.

Reflections

This was relatively simple yet fun to make. I would, however, have liked to add some element of interactivity. Possibly something that affects colours and speed based on the movement of mouse. I tried incorporating other visuals after this pattern finishes – but faced some issues. I would definitely love to incorporate that in this sketch.

Self-portrait

Concept

My portrait is inspired from the show BoJack Horseman. I tried drawing one of the characters – Todd Chavez. Along with this I tried to combine some aspects of psychedelic art – something I find extremely fascinating. The character was made using simple shape including triangle, ellipses, arcs, and lines. As an additional element for interactivity, the visuals get more intense as the mouse is moved towards the right side.

Code

I found it a little difficult to understand the algorithm behind the movement of the visuals. I spent majority of the time trying to understand how movement of the mouse affects the visuals. The visuals have been inspired from https://openprocessing.org/sketch/601793 by Misha Rabinovich. After understanding the code, I simply made the movement of visuals more intense and set the changing of the colours of the elements to random.

(ps: move mouse towards right to control the intensity of the visuals)

Reflections

I enjoyed making the portrait. For further assignments, I would like to explore psychedelic art and make visuals. What I appreciate about such visuals is how strange or foreign they feel. They have the power to make you feel overwhelmed. What I want to improve on is making the sketch of Todd look more realistic. Overall, I am satisfied with the portrait, but I would love to continue learning more about producing similar art.