Assignment 1: Self Portrait

Concept

My p5.js self-portrait is more than simply a picture of my face; it’s a story that illuminates my path to enroll in the “Introduction to Interactive Media” course. The artistic representation of that voyage is this portrait. My conversation with my friends regarding me not being able to enroll in this course until senior spring revolved around how I might be in the hall of fame for not being able to complete my minor because of an introductory course.

The goal of my portrait is to elevate the accomplishment by placing my face on a pedestal and using a lighted stage as the background. It acts as a metaphor for the significant problems I faced since freshmen fall to enroll in this course to complete my minor. Pedestals are typically used to display objects of significant worth or significance. I also thought of adding an interactive element (by clicking the mouse button) that allows me to change the emotions on my face. The face changes from a smile to a laughing face which serves as a cathartic release for the difficulties during the journey.

Sketch

Code 

The code that I am proud of is how I was able to illustrate two different expressions with an easy mouse-click interactive technique. Initially, the value of isLaughing is set to false and when the mouse clicks the value changes to true.

function mouseClicked() {
  // Toggle the laughing state
  isLaughing = !isLaughing; 
}

The drawFace function is the core code for making this sketch possible. This code uses the mouse-toggled laughing boolean variable to show different expressions. The portrait has a lot of facial details that resemble me in real life. The addition of stud-adorned ears, a neck, and a cap enhances the portrait’s authenticity and individuality.

function drawFace(laughing) {
  
  
  // Ears
  fill(skinColor);
  // Left ear   
  ellipse(135, 156, 30, 40);
  // Right ear   
  ellipse(265, 156, 30, 40); 
  
  // Making studs on both ears   
  fill(255,255,255); 
  // stud on left ear   
  ellipse(131, 167, 8, 8);
  fill(255,255,255); 
  // stud on right ear 
  ellipse(269, 167, 8, 8);
  
  // Drawing the neck
  fill(skinColor); 
  rect(175, 206, 50, 60); 
  
  // Drawing the head
  fill(skinColor);
  ellipse(200, 156, 125, 170);
  
  
  // Cap
  fill(0);
  arc(200, 120, 115, 125, PI, TWO_PI, OPEN);
  strokeWeight(10);
  line(150,115,110,115)
  strokeWeight(1);

  if (laughing) {
    // Laughing face
    // Eyes closed
    fill(0);
    // left eye closed    
    ellipse(170, 136, 30, 10); 
    // right eye closed    
    ellipse(230, 136, 30, 10); 

    // Tears
    fill(0, 191, 255);
    // tears from left eye    
    ellipse(165, 151, 10, 25); 
    // tears from right eye
    ellipse(235, 151, 10, 25); 

    // Open mouth - laughing state
    fill(255);
    arc(200, 206, 60, 40, 0, PI, CHORD);

  } else {
    // Smiling Face
    // Eyes
    fill(255);
    // left eye
    ellipse(170, 140, 35, 25); 
    // left eye
    ellipse(230, 140, 35, 25); 
    
    // Pupil     
    fill(0);
    // left eye - pupil  
    ellipse(170, 145, 15, 15); 
    // right eye - pupil 
    ellipse(230, 145, 15, 15); 

    // Mouth
    noFill();
    arc(200, 206, 60, 15, 0, PI); 
  }

  // Nose (same for both faces)
  line(200, 165, 200, 190);
}

Lastly, the concept was achieved by using the pedestal in the center of the room with spotlights showing a significant person.

// Background image of pedestal
function preload(){
  bgImage = loadImage("https://st2.depositphotos.com/1051355/6256/i/450/depositphotos_62569733-stock-photo-illuminated-empty-stage-podiums-for.jpg")
}

Challenges

There were a few challenges that I faced while doing this assignment. Initially, I planned on giving hair to my portrait, however, I was not able to achieve that. So I had to improvise and I made a cap instead.

Another challenge was to determine the x and y coordinates. To solve this issue I printed the cursor’s x and y values in the console using the draw function.

function draw() {
  // finding the value of x and y
  print(mouseX, mouseY)
}

Reflection and Improvements

All the IM courses that I have taken have encouraged me to find meaning behind what I am doing or to show a story. I am happy with the portrait that I have made, it is close to what I look like in real life and also can show the story behind making it.

There is always room for improvement. For example, the portrait may show various emotions depending on which keyboard keys are pressed. Also, the portrait does not have eyebrows, so the eyebrows can follow the mouse when hovering over the portrait.

References

  1. I took a reference from schemecolor.com to use the exact skin color for my portrait.
  2. Another reference was the background image of the pedestal.

Assignment 1 – “Self-Portrait” by Pi Ko

First, below is the p5 js Editor embedding.

In case p5js Editor website is down, below is the recording of working demo on YouTube.

1) 🤔 Conceptualization

As below, I wanted my self portrait to reflect my silhouette, not too realistic but not too cartoony, but something in the style of graphic novels or marvel/DC comics. I am an artist and engineer, and hence, I also would like to include some bells and whistles which define both my art and engineering aspects. Normally for my everyday casual wear, I usually wear the black Chinese long dress – Changshan (長衫), with a red and black Tangzhuang (唐裝) coat on the top, with my long hair properly tied with a red ribbon as below. 

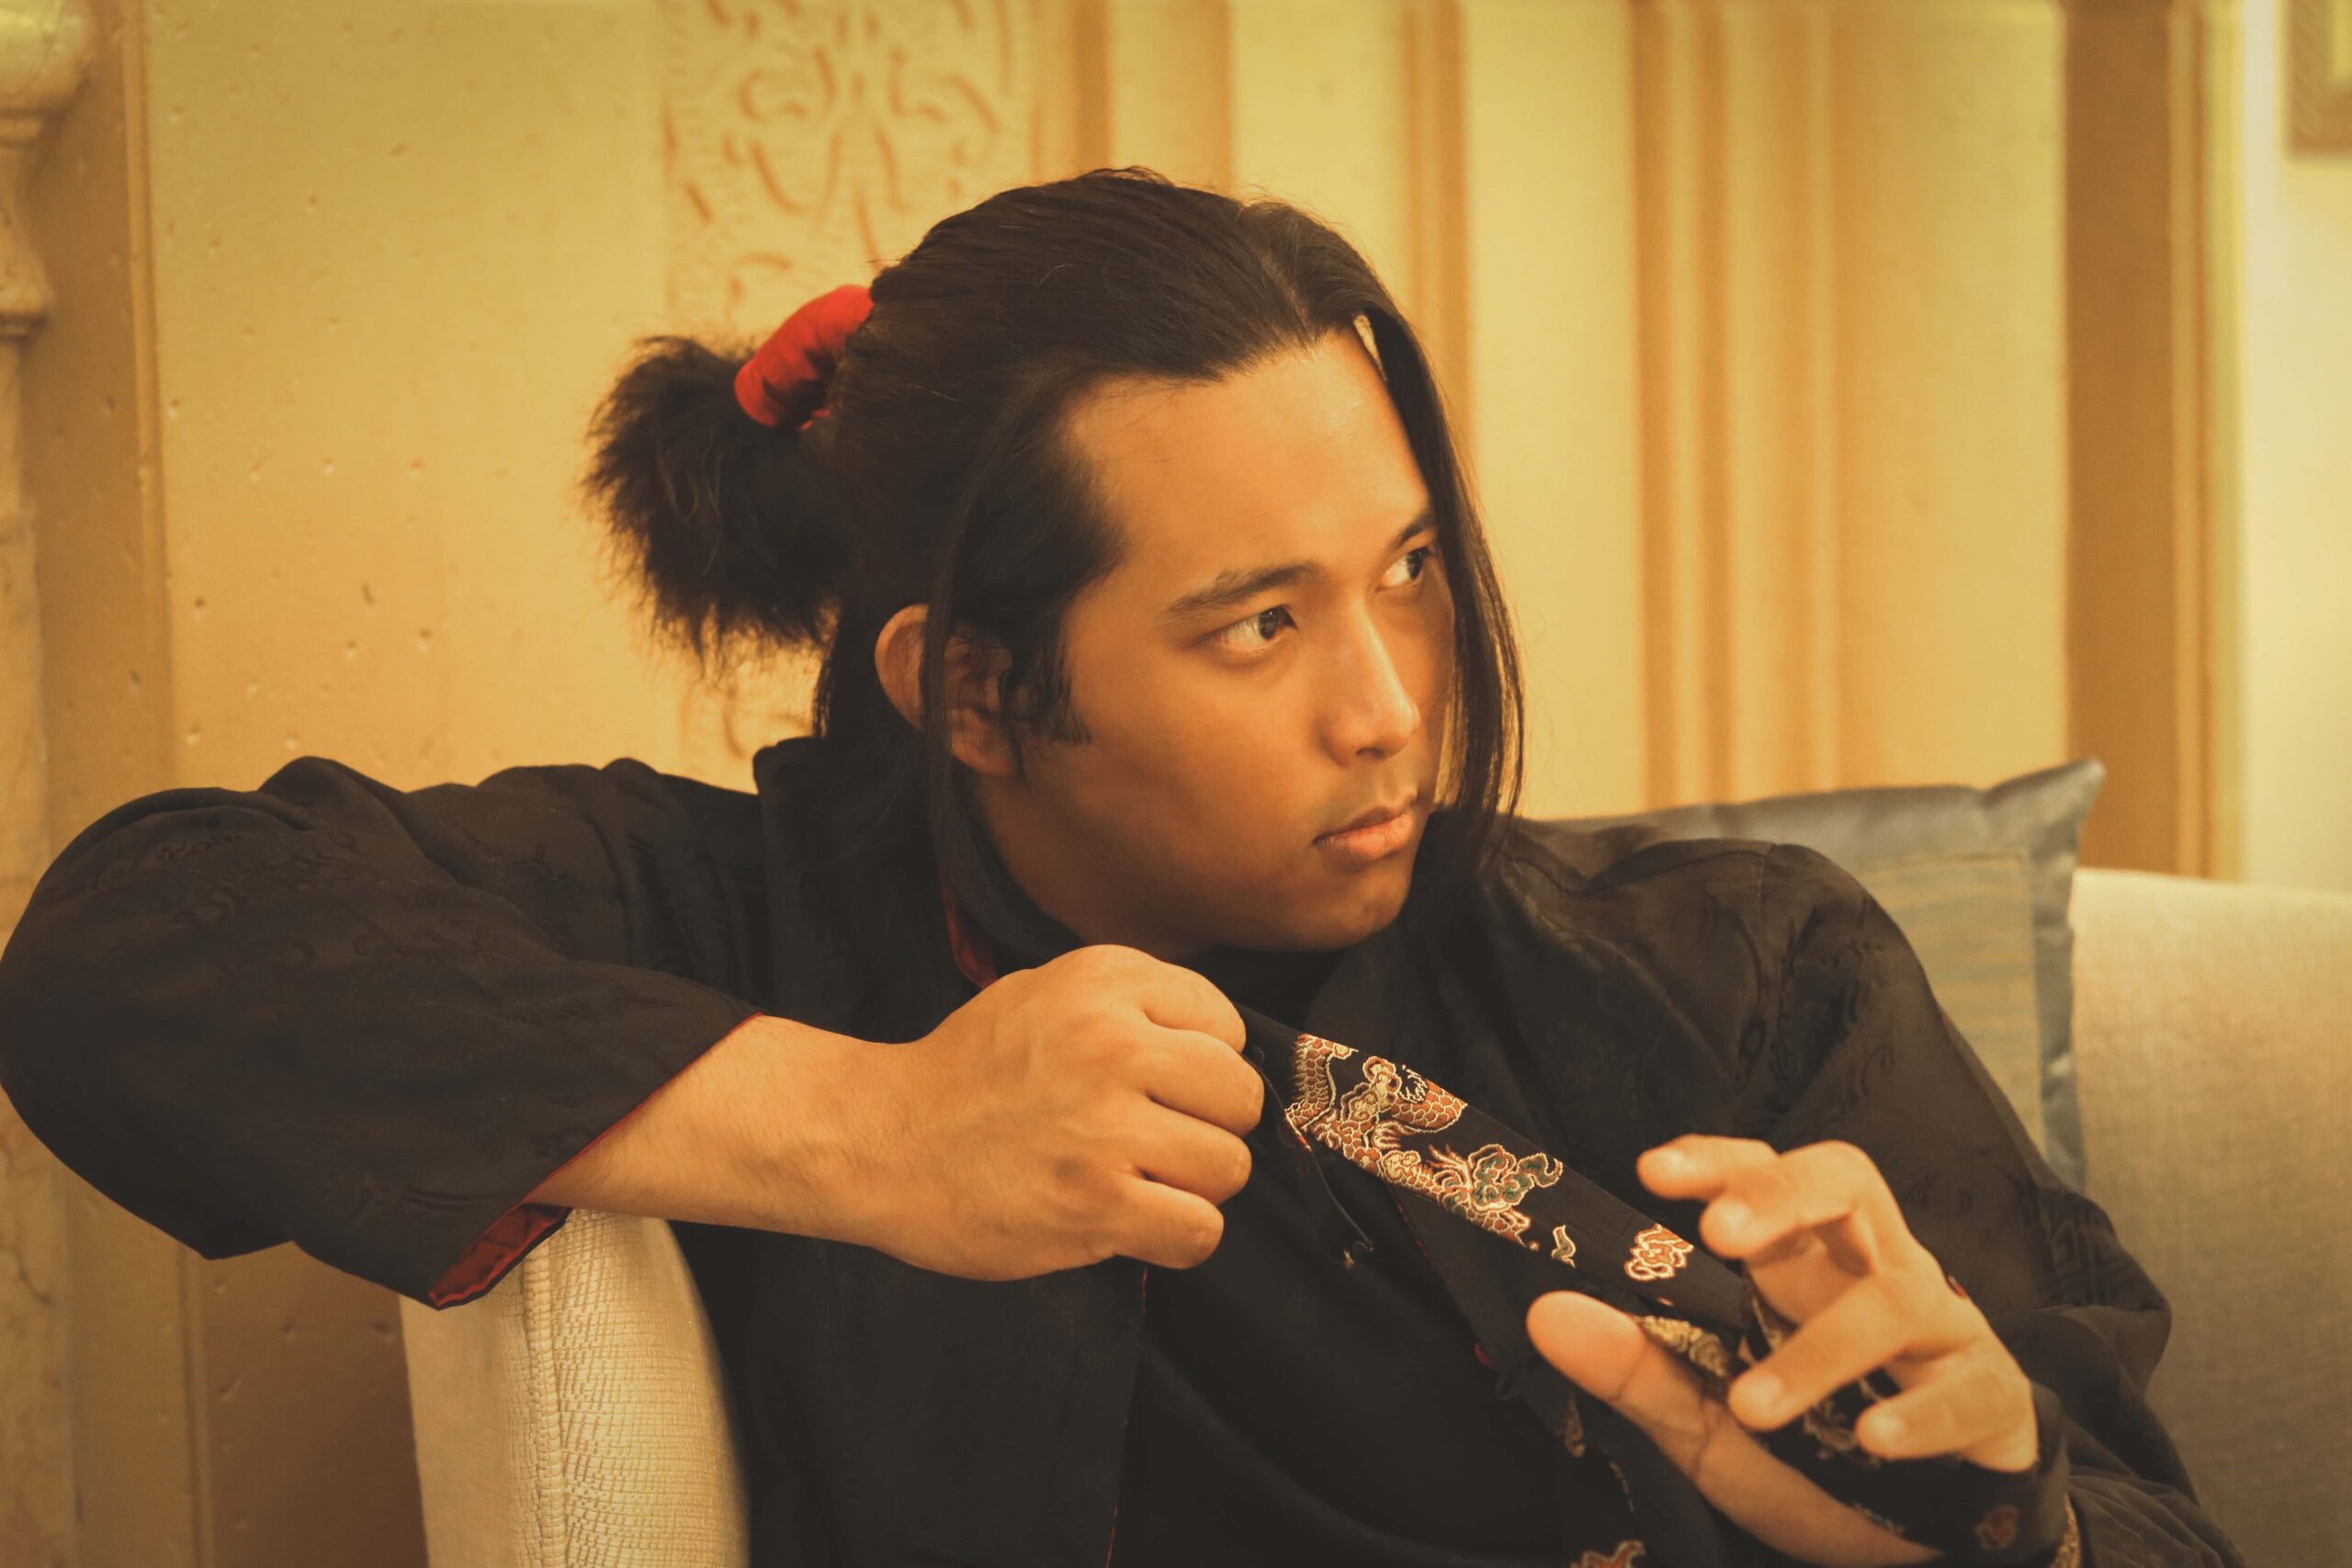
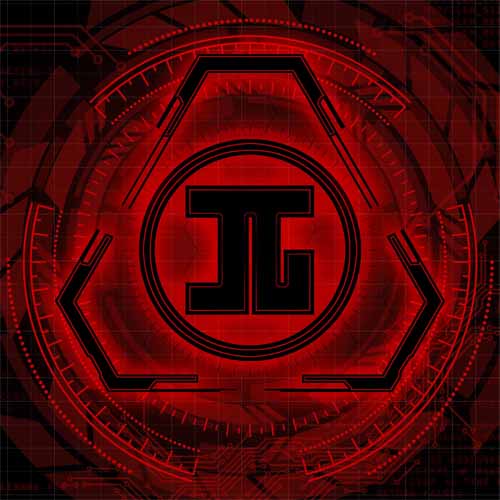
Moreover, I also wanted the portrait to show my personal emblem, the stylized rectangular Greek letter Pi.

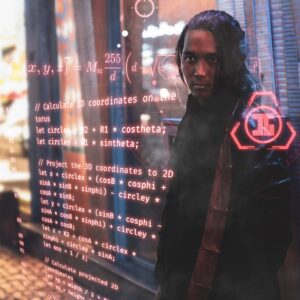
As below, my usual real life portraits will feature me wearing my Chinese traditional outfit, with floating glowing code in futuristic HUD (Head-up display), and some equations that either I derived, or some equations I use in my work frequently. And of course the Pi emblem. This concept perfectly “marries the traditions from the past with the technology of the future, and hence justifying my existence as the artistic engineer in 2024 at present.”

While doing this portrait, here are the constraints I would like to adhere to.

  • Implement the portrait purely in p5js without any external libraries, external files in a single sketch.js file – such that when you copy and paste and run, it will run without additional configuration.
  • Follow the rubrics of the course assignment (do not import any existing image or do not use mouse to draw, and must not be realistic – A manga style silhouette is ‘not’ realistic)
  • In addition to the portrait, have items around me that defines me.
2) ⚙️ Technical Plan of Attack & Implementation

Since this is a “self-portrait” it should contain all the elements that gives the viewer a super brief introduction about a fraction of my life. Hence, below are the individual components used for the composition of the portrait.

  • Portrait : I am a manga/anime artist and animator. The entire portrait is implemented using bezierVertex() functions to allow me greater control over the shapes, and obtain the sketchy graphic novel/manga style I want to achieve. This has to combine 1) the line art and the 2) color. Colors are added in between the bezier curves to fill the shape.  Therefore, a component of my portrait would look like
beginShape();
vertex(324, 76);
bezierVertex(323, 76, 322, 76, 321, 75);
...
bezierVertex(324, 76, 324, 76, 324, 76);
endShape(CLOSE);
fill("#010101");
  • Animated Gears : I am a roboticist, and very fond of gears and servos. The gears are nothing but circles with partial opacity, and rectangles rendered on the side of the circles programmatically.
  • Animated Cubes : I am an XR/VR/AR developer, a 3D artist and a mathematician. Hence, I want to do some maths to show some interactive floating 3D cubes around me to symbolize this aspect of my life. Just because p5 js is a 2D canvas technology does not mean I should not attempt my beloved 3D art here. And just because webGL is available in p5  does not mean I have to follow what everyone is doing. Who needs webGL when we can just do some readings in linear algebra, define the vertices of the cubes, and do some matrix multiplication through rotation matrices in 3D space, and project them to the 2D p5js canvas? The matrix multiplication, and the rendering the projection is coded in my single sketch.js file, a snapshot of the code is as follows.
// Rotation matrices for X, Y, and Z axes
let rotationZ = [
  [cos(angleCube), -sin(angleCube), 0],
  [sin(angleCube), cos(angleCube), 0],
  [0, 0, 1],
];

let rotationY = [
  [cos(angleCube), 0, sin(angleCube)],
  [0, 1, 0],
  [-sin(angleCube), 0, cos(angleCube)],
];

let rotationX = [
  [1, 0, 0],
  [0, cos(angleCube), -sin(angleCube)],
  [0, sin(angleCube), cos(angleCube)],
];
  • Personal Emblem : I am a citizen Sinologist, and have always been inspired by East Asian culture. Traditional Japanese clans have their own family emblems called Mon (紋). I also have one myself, visually designed similar to that used by Nakagawa clan. I can draw my emblem by defining the  (x,y) coordinates of my emblem through an array, and letting vertex function loop through the shape.
function drawPiEmblem(x, y, scale) {
  const points = [
    { x: 46.3, y: 72.7 },
    ...
    { x: 73.3, y: 72.7 },
  ];

  beginShape();
  fill("#903C37");
  for (let i = 0; i < points.length; i++) {
    vertex(x + points[i].x * scale, y + points[i].y * scale);
  }
  endShape(CLOSE);
}
  • Quine Code : I am a Computer Engineer, and quite fond of cool code tricks. In Computer Science, a quine is a computer program which takes no input and produces a copy of its own source code as its only output.  Since I usually put code in my real life portraits, I thought it would be cool for my self portrait to print out its own p5js code at my back. The approach is simple, I just copy the first a few lines of my code and just let it print like a terminal. This would have been a lot cooler if I can go under the hood of p5js, and overwrite its event loop + file reading permissions to read its own source code and print it out dynamically, rather than me hardcoding it.
  • Custom font without using a custom font : I also wanted to use a better font, but I do not want to import anything into my single sketch.js implementation, hence I just produced some other good looking unicode characters using Stylish Text Generator (https://lingojam.com/StylishTextGenerator), if it works it works.
  • Falling Pi Digits : My name is Pi, the infinite mathematical constant which never repeats. This means a lot to me since that name allows me to pull out infinite ideas from my brain, which never repeats (but pratically work, and aesthetically beautiful) at will. Hence, in my portrait, the mouse pointer will drop the digits of pi, as a particle system, in a repeated fashion (because you can’t hard code infinite Pi digits)… So, the mouse pointer at time intervals will drop the digits three, point, one, four, one , five , nine, two ….
  • Backpropagation Equations : I am a published machine learning researcher, and deep learning is my default weapon of choice. Therefore, I wanted to honor the basic four equations which allows me to do my everyday work (sorry Maxwell, your equations take the second priority in my heart). Hence, I have the equations floating around me in my portrait.
  • Accompanying music : I am a multi instrumentalist and a composer, and I wanted to give a background music to my portrait. However, since I am not using any external libraries, and I still want to implement a basic metal guitar riff, I ended up defining two oscillators to symbolize the top two guitar strings in dropped D tuning, and hard coding a metal riff  – but only using the simple waveforms 🙁 . I could have done the wave superpositions to simulate the acoustics and distortion pedal signal processing of the electric guitar, but let it be for now.
3) 🎨 Artistic Plan of Attack & Implementation

Vignette : The white background is bland, and as a big fan of Assassin’s Creed Animus Loading Screens, I wanted a pale vignette effect. However, since I am not importing anything, I just loop over the entire canvas and painting each of the background pixels the right intensity and alpha values.

Rule of third placement : A good rule of thumb in visual composition is to divide the entire canvas in three and place the subjects on these lines. My portrait is on the left line. Checklist checked.

Whitespace consideration : I could have added more because this portrait paints a very limited aspect of my life. I could have added more computational chemistry, professional Game Development, martial arts choreography, epidemiology simulation models, Web Dev , Dev Ops and linguistics and so on – but stopped, to keep the whitespace visually clear, I let the majority of dark colors sit on the left side, and right side of the portrait contains the main whitespace.

Mouse Interactivity : Also, I find my self portrait after coding to be very static, so I browsed through old archives of this Intro to IM blogs. My friend Naz did something cool and interactive with the mouse pointer to give a parallax effect, so I ended up stealing her idea from Self-Portrait by Naz (https://editor.p5js.org/iremnaz/sketches/oxRGnv701).

4) 💪 Challenges

There was zero challenge. I became one with the machine, and implemented the entire sketch.js in one sitting in one boring afternoon, sipping Jasmine tea.

5) 💡 Potential Improvements

One tricky thing is how quick my self portrait code runs (on computers which are slow). Since I am generating a lot of objects and doing a lot, I could have refactored my code more to run more smoothly. For instance, for the falling Pi digits, I can implement an Object pool pattern and reuse the previous particles as soon as they are out of frame. But these are just off the top of my head.

As a bonus, through obfuscation and clever syntax formatting, I could have made the source code of the program actually look like my portrait ascii art, just like how this donut generation code is in the shape of a donut (https://www.a1k0n.net/2006/09/15/obfuscated-c-donut.html). But let it be this time.

6) 🖥️ Source code

🖥️ Source code is just a single sketch.js file at : https://github.com/Pi-31415/Intro-To-IM/blob/main/Assignment-1/sketch.js

📖 References :

Rendering a rotating 3D cube in 2D (https://rosettacode.org/wiki/Draw_a_rotating_cube#JavaScript)

Backpropagation Equations (http://neuralnetworksanddeeplearning.com/chap2.html#the_four_fundamental_equations_behind_backpropagation)

Quine (https://cs.lmu.edu/~ray/notes/quineprograms/)

Stylish Text Generator (https://lingojam.com/StylishTextGenerator)

FREQUENCY CHARTS FOR NOTES ON THE GUITAR (https://douglasniedt.com/frequency-chart-for-notes-on-the-guitar.html)

Self-Portrait by Naz (https://editor.p5js.org/iremnaz/sketches/oxRGnv701)

Japanese crest Nakagawake kurusu (https://en.wikipedia.org/wiki/File:Japense_crest_Nakagawake_kurusu.svg)

Note: GPT-4 is utilized in the implementation of the code.


Assignment 1 (Self-Portrait) Shereena AlNuaimi

For this assignment, I aimed to incorporate one of my favorite things to do, that instantly fills my entire body with peace and happiness. Watching the sunset. The plan was ideally to make the background more ombre other than fading, however, as it’s my first time using p5js I found it difficult to implement that into my background. For future assignments, I’m hoping to create more interactive projects and master the ombre affect as well as getting more familiar with coding.

let rectWidth;
let rectHeight;
let rectX, rectY;
let eye1X = 170;
let eye2X = 230;
let speed = 8;

function setup() {
  createCanvas(400, 400);
  rectWidth = width/4;
  rectHeight = height/4;
  rectX = 0;
  rectY = height/2;
  angleMode(DEGREES);
}

function draw() {
  background(255, 255, 153, 10);

  //SUNSET BG
  
  rectMode(CENTER); //LIGHT ORANGE TOP
  stroke(255, 204, 0)
  fill(255,204, 0);
  rect(rectX, rectY-120, rectWidth+50, rectHeight+50);
  
  rectMode(CENTER); //D.ORANGE MID
  stroke(255, 153, 0)
  fill(255,153, 0);
  rect(rectX, rectY, rectWidth+50, rectHeight+50);

  rectMode(CENTER); //BOTTOM
  stroke(255, 102, 0)
  fill(255,102, 0);
  rect(rectX, rectY+120, rectWidth+50, rectHeight+50);


  rectX = rectX + speed;
  
  if (rectX > width){
  rectX = 0;
  }
  
  //hair
  fill(43, 28, 17);
  stroke(0, 0, 0);
  rect(200, 220, 205, 330, 90);
  
  //neck
  fill(240,190, 120);
  stroke(0,0, 0);
  rect(200, 239, 100, 100, 20);
  
  //face
  fill(240,190, 120);
  stroke(0,0, 0);
  ellipse(200, 150, 150, 175);
  
  //nose
  noFill();
  arc(198, 175, 20, 15, 270, 90);
  
  //shirt
  fill(136, 189, 242);
  rect(200, 380, 190, 270, 50);
  
  //bangs
  noStroke();
  fill(43, 28, 17);
  rect(200, 81, 100, 40, 58);
  strokeWeight(1.5);
  
  //right eye
  fill(255);
  ellipse(eye2X, 143, 40, 40)
  
  //left eye
  fill(255);
  ellipse(eye1X, 143, 40, 40);
  
  //right pupil
  fill(51, 0, 0);
  ellipse(eye2X, 143, 15, 20);
  
  //left pupil
  fill(51, 0, 0);
  ellipse(eye1X, 143, 15, 20);
  
  //mouth
  fill(0);
  arc(200, 192, 50, 50, 0 ,180);


}


☆Alexandra’s Self Portrait☆

For this assignment, since I am (very!) new to coding, I decided to take it easy and to simply explore the options available on p5 in order to create my self-portrait. I therefore opted for something rather realistic than creative so I could focus on the code itself.

However, I couldn’t help but go further and add some extra things that would make this portrait more like me. The main thing I added are the three stars in the background. My last name, “Najm”, means star in Arabic. Therefore, the star has become a very symbolic element in my life. Even as an artist, my signature is an eye with a star as a pupil. So, the star means a lot to me in my personal life, extending into my art.

 // star!
fill(255, 217, 102);
stroke(0, 10, 134);
strokeWeight(3);
beginShape();
vertex(470, 430);
vertex(500, 430);
vertex(510, 400);
vertex(520, 430);
vertex(550, 430);
vertex(530, 450);
vertex(540, 480);
vertex(510, 460);
vertex(480, 480);
vertex(490, 450);
vertex(470, 430);
endShape();

Above is my code for one of the stars. I particularly enjoyed coding this part as I had to figure out how to use the beginShape() function, and I found it fun. I then copied the code and simply changed the coordinates in order to play around with size and position. I would eventually like to learn how to animate them, although as of now I still can’t grasp the whole variable animation thing.

Here is what my self-portrait looked like in the end:

There are two things to note, which I would like to improve for next time:

  1. In the code itself, I repeat the fill() and stroke() functions unnecessarily. I understand that these functions will apply to the following ones until I want to create a new shape or element with different characteristics. However, I just found it easier for today to add the same color multiple times in a row. It did clutter my code a bit though.
  2. I really couldn’t figure out how the arguments for the curve function work. The anchor points made sense but the control points didn’t. I ended up just playing around with those (for the eyebrows, eyelashes, and necklace) until they looked satisfying; trial and error basically. I wanted to also do the front pieces of my hair with the curves but I couldn’t get it right for the life of me.

Assignment 1 (Self-Portrait) Shaikha Alkaabi

While working on this assignment, I wanted to recreate my middle school self. I had some experience with Processing so working with P5.js wasn’t so hard to navigate and work with. The thing I struggles with the most in this assignment was the bow. The idea is simple but I never worked with triangles in code before so it was quite difficult trying to figure out the right coordinates. For future assignments I’d like to make my projects much more interactive and fun.


function setup() {
  createCanvas(400, 400);
  background(250, 195, 231);
  rectMode(CENTER);
 

}

function draw() {
  
  //Hair
  fill(99, 64, 18, 20);
  rect(200, 235,160, 250, 70);

  //Dress
  fill(232, 133, 12);
  rect(200, 390, 190, 200,60);
    
  //Neck
  fill(250, 207, 150);
  rect(200, 245, 70, 150);

  //Face
  fill(250, 207, 150);
  ellipse(width/2, height/2, 130, 150);
  
  //right eye
  fill(255,255,255);
  ellipse(173, 200, 25, 25);
  //pupil color
  fill(0),
  ellipse(173, 200, 11, 20);

  //left eye
  fill(255,255,255);
  ellipse(226, 200, 25, 25);
  //pupil color
  fill(0);
  ellipse(226, 200, 11, 20);  

  // Eyebrows
  strokeWeight(3);
  noFill();
  //Left eyebrow
  arc(173, 183, 35, 20, PI, TWO_PI); 
  //Right eyebrow
  arc(226, 183, 35, 20, PI, TWO_PI); 
  
  //Nose
  fill(166, 128, 78);
  ellipse(200, 220, 10, 15);

  //Mouth
  fill(255,255,255);
  arc(200, 240, 40, 40, 0, PI + 0, CHORD);
  
  //Bow
  fill(171, 50, 66);
  ellipse(250, 120, 20, 20);
  triangle(240,120,210,90,230,150);
  triangle(260,120,270,90,300,145);

  
  //Earings
  fill(237, 192, 66);
  //right earing
  ellipse(134, 210, 10, 10);  
  //left earing
  ellipse(267, 210, 10, 10);  


}


Assignment 1 – “Self-Portrait” by Khalifa AlShamsi

Concept:

My initial Idea was to create a realistic picture of a self-portrait of how I look in the traditional clothes I would wear when I am out.

Reflection and ideas for future work or improvements:

I would say that in the future, I would truly write down the numbers I try when it comes to centering things on the sketch because I kept going around in circles trying to center everything and because I kept placing the same numbers for the different heights and length due to me constantly forgetting what numbers I already tried so It just unnecessarily prolonged the process.

Code Implementation:

I have never used Javascript before, and my understanding of coding is somewhat simple. I had a tough time managing to create hair that looked normal at first, so I tossed that Idea out and wanted to create something else without knowing it was going to be a more complex idea in terms of coding, which was the Ghutra, thinking I would have to create a rectangle and be done with it. However, it did not look like anything close to what I wanted it to be, so I had to use a circle to show that the portrait was wearing it while using three different rectangles layered at different heights so that it shows the way I would personally tie it around my head. But now, looking back at the finished sketch, I would say that I was glad to take the long road of creating a Ghutra to showcase a more realistic portrait of the whole look I have going on.

function setup() {
  createCanvas(400, 400);
  background(255);
}

function draw() {
  
  // Body
  fill("white")// Body base color.
  ellipse(200,420,240,300)// Body base.
  
  // Face
  fill(210, 180, 140); // skin color
  ellipse(200, 200, 160, 200); // head shape
  
  // Ghutra
  fill("white");
  arc(200, 130, 130, 90, PI, 0); 
  rect(125, 120, 150, 30); 
  rect(125, 110, 150, 25);
  rect(125, 130, 150, 10);
  
  // Eyebrows
  fill("black"); 
  rect(150, 160, 40, 10); // left eyebrow
  rect(215, 165, 40, 10); // right eyebrow
  
    // Eyes
  fill("white");
  ellipse(170, 190, 40, 20); // left eye white
  ellipse(230, 190, 40, 20); // right eye white
  fill("black");
  ellipse(170, 190, 20, 20); // left pupil
  ellipse(230, 190, 20, 20); // right pupil
  
  // Mustache
  fill("black");
  arc(200, 248, 80, 30, PI, TWO_PI);

  // Beard
  fill("black");
  arc(200, 245, 140, 120, 0, PI);
  
  // Mouth
  fill("white");
  arc(200, 250, 50, 20, 0, PI);

  // Hair
  fill("white");
  
  noLoop(); // Stops draw loop
}

Assignment1- Self Portrait

When I first heard about creating a self-portrait, my mind immediately gravitated towards something that truly defines me – cricket. As someone deeply passionate about the sport, I couldn’t think of a better way to portray myself than through a project that encapsulates the essence of my love for cricket.

In this self-portrait, I envisioned a scene where a girl, embodying my presence, stands proudly with a cricket bat in her hands. The cricket ball, symbolizing the constant motion and dynamism of the game, is placed on the ground, perpetually moving. To add an interactive element, I incorporated the ability for the ball to jump when the user presses the mouse. The subtle details matter, and in this digital representation of myself, the girl periodically opens and closes her eyes every two seconds.

Code:

// Initializing the variables

let ballX = 220;
let ballY = 525;
let ballSpeedX = 1; 
let ballSpeedY = 0; 
let isJumping = false;
let jumpHeight = 100; 
let eyeColor = '#FFFFFF'; 
let pupilcolour = '#E4DDDD';

function setup() {
  createCanvas(600, 550);
}


function draw(){
  background(200);
// sky
  fill("#E5F7FA");
// gorund
  rect(0,0,599,450);
  fill("rgb(21,144,21)");

  rect(0,442,599,600);
  noStroke();
  fill("#C3ECF1")
// clouds
  circle(70,70,50);
  circle(90,60,50);
  circle(110,55,50);
  circle(130,70,50);
  
  circle(300,100,50);
  circle(320,90,50);
  circle(340,85,50);
  circle(360,100,50);
  
  //   Thumbs of both the hands
  
  fill('#E8BEAC')
  ellipse(263,255,8,20);
  ellipse(504,231,8,15);
  
  
//   bat
  fill('#C29C65')
  ellipse(157,266,10,25);
  // cylinder(20, 50);
  rect(160,255,180,22);
  quad(317,256,326,241,326,288,317,276);
  rect(326,241,250,46);
  ellipse(575,260,20,55)
  stroke('#D5B78B')
  strokeWeight(3);
  quad(327,234,326,241,575,243,573,234)
  
//   face 
  noStroke();
  fill('#252423')
  ellipse(390,200,100,110);
  ellipse(410,200,100,110);
  
  fill('#E8BEAC')
  ellipse(400,200,95,105);
  
  // print(mouseX+ ","+ mouseY);
//   halmet
  rect(389,245,25,40)
  
// hair and head
  fill('#252423')
  arc(400, 190, 100, 100, PI, 0);
  
//   hair
  stroke(50);
  strokeWeight(2);
  line(360,166,360,189);
  line(366,166,366,189);
  line(372,166,372,189);
  line(380,166,380,189);
  line(386,166,386,189);
  line(392,166,392,189);
  line(400,166,400,189);
  line(406,166,406,189);
  line(412,166,412,189);
  line(418,166,418,189);
  line(424,166,424,189);
  line(430,166,430,189);
  line(436,166,436,189);
  line(442,166,442,189);
  
  // eyes
  if (frameCount % 120 == 0) { 
    eyeColor = (eyeColor === '#FFFFFF') ? '#000000' : '#FFFFFF'; 
   
  }
  if (frameCount % 120 == 0) { 

    pupilcolour=(pupilcolour === '#E4DDDD') ? '#000000' : '#E4DDDDF'; 
  }
  fill(eyeColor);
  circle(377, 195, 15); 
  circle(422, 195, 15); 
  fill(pupilcolour); 
  circle(377, 195, 5); 
  circle(422, 195, 5); 
//   lips
  noStroke(197,55,80);
  fill('rgb(228,10,48)')
  arc(400,223,30,15,0,PI)
  
//   body
  // rect(348,270,110,150);
  
  quad(388,270,344,276,458,276,415,270);
  rect(350,276,105,120);
//   left arm
  
  quad(350,274,350,309,287,330,287,300);
  quad(287,300,287,330, 232,279,260,278);
  
//   right aarm
  quad(455,277,455,308,515,330,510,302);
  quad(505,302,512,286,534,286,515,331);
  
//   skirt
  fill('#721781')
  quad(350,396,350,506,455,506,455,396);
  
  // fill('black')
  // arc(350, 396, 50, 200, 0, PI + QUARTER_PI, CHORD);
  // arc(350, 396,50, 100,  0, PI + QUARTER_PI, PIE);
  ellipse(350, 450,30,110);
  ellipse(454, 450,30,110);
  // ellipse(403, 490,115,30);
  ellipse(403, 400,115,30);
  fill('#E8BEAC')
  quad(359,505,368,550,397,550,390,505);
  quad(415,505,415,550,444,550,445,505);
  
//   fingers
  quad(264,282,269,277,224,277,239,286);
  // ellipse(263,255,8,20);
  quad(262,245,251,254,253,261,262,253);
  ellipse(252,257,7,7);
  rect(244,246,7,20);
  ellipse(247.5,266,7,7);
  ellipse(247.5,245,7,7);
  quad(247,241,260,247,253,253,249,248);
  rect(236,248,7,20);
  ellipse(239.5,249,7,7);
  ellipse(239.5,269,7,7);
  rect(228,249,7,18);
  ellipse(231.5,251,7,7);
  ellipse(231.5,267,7,7);
  rect(220,251,6,15);
  ellipse(223,254,7,7);
  ellipse(223,264,7,7);
  
  // right hand fingers
  rect(532,228,6,15);
  ellipse(535,228,6,6);
  ellipse(535,242,6,6);
  rect(524,227,6,20);
  ellipse(527,229,7,7);
  ellipse(527,247,7,7);
  rect(516,224,6,25);
  ellipse(519,225,7,7);
  ellipse(519,247,7,7);
  
  rect(509,220,6,25);
  ellipse(512,223,7,7);
  ellipse(512,246,7,7);
  
  quad(221,259,221,249,248,249,248,241);
  
  quad(536,226,535,235,512,230,512,220);
  
 // Check if mouse is pressed
  if (mouseIsPressed && !isJumping) {
    isJumping = true;
    ballSpeedY = -5; 
  }

  // Move the ball
  ballX += ballSpeedX;
  ballY += ballSpeedY;

  // apply gravity if not jumping
  if (!mouseIsPressed && ballY < 525) {
    ballSpeedY += 0.5; 
  } else if (ballY >= 525) {
    ballY = 525; 
    ballSpeedY = 0;
    isJumping = false;
  }

 
  if (ballX + 25 >= width || ballX - 25 <= 0) { 
    ballSpeedX *= -1; 
  }

  // Ball
  fill('#FFEB3B');
  circle(constrain(ballX, 25, width - 25), ballY, 50); 
  fill('#E91E63');
  ellipse(constrain(ballX, 25, width - 25), ballY, 20, 50);
  ellipse(constrain(ballX, 25, width - 25), ballY, 50, 20);
  
}

Reflection:

Despite my numerous attempts, the eye pupil stubbornly refuses to close along with the eyelids, leaving the eyes in a perpetual state of openness. I’m determined to address this issue and make the portrait more interactive by achieving a natural blink.

As I work through these challenges, I’ve developed a deep fondness for the project. The blend of my love for cricket and the creative process has made it a personal journey. Honestly, I find myself reluctant to see this assignment come to an end. The joy of refining and perfecting this interactive self-portrait has made it a labor of love, and I’m eager to continue the journey beyond the assigned timeframe.

Assignment 1- Self-Portrait (Recursive Card)

For this assignment, we had to create a self-portrait. As I did not hope to realistically picture myself using p5, I I went for a different approach to make the portrait relate to myself more. As I practice card magic, I decided to picture myself in a playing card, similarly how Jacks, Queens or Kings are illustrated. This meant the card has to have certain rectangular proportions, have a dividing line in the middle and have a mirror image of itself on the bottom and top halves of the card, reflecting by the axis of the dividing line. Similar to cards, the mirroring had to be done by the middle vertical axis, too. I simply had to create the individual elements of the body, such as the head, arms, eyes, mouth, then invert the x and y coordinates to mirror the elements on the opposite side of the card.

However, midway through the assignment I remembered that court cards normally hold some object in their hands, usually a royal artifact of some sort. As a magician, the most obvious thing I could hold in my self-portrait is a card itself! There began a long journey of trying to create a recursive image of me holding a card that depicts me holding a card… and so on. I had to take into account the right proportions, meaning instead of using numbers as coordinates and sizes for shapes, I had to use ratios of those numbers to the width and height of the card. I tried to make the recursion as flexible as possible, meaning that it will work on any canvas, with any number of recursions inside of the card. Currently, it works on any square canvas, where height and width are identical. I believe this can easily be fixed in future improvements, by setting the highest side of the canvas by cropping the canvas to use equal sides.

I truly enjoyed the project, partly because of the creative freedom it gives, but there are some important reflections and improvements left.
Firstly, I spent most of my time figuring out the recursion code. Even, then I only managed to create a partial recursion, where only the upper right and lower left extremes are being recursed. Moreover, the recursion effect is reached through a loop, so it is not truly a recursion yet, but I am working on perfecting it.Though, at this point, changing the loop max constraint gives a deeper recursion effect by creating more cards inside of cards.

Assignment 1 Self-portrait

The first assignment was different than any assignments I have done, it was a fun activity to me. I learned a lot from the past two classes and learned more by doing this task, using my skill of self learning and learning something new at the moment when i think of it.

The portrait itself, initially I tried to make a portrait of myself but I thought after that it would be cliche and everybody will do the same. I came up afterwards with the alien head which is an emoji that I always use and everyone knows me remembers me instantly, so it is me in another universe. I tried to make the same shape of the aliens head but It got challenging, and tried to shape the eyes with the big black pupils, with a tiny circle that shows the reflection of the light. Afterwards I got an idea of drawing some stars behind the head, I tried to draw the quad and shape it afterwards to look like a star but I found it hard fixing the dimensions and not the way I wanted it to be. I came up with an idea of making tiny points all over the canvas behind the head, going back to the reference page in P5 website, I created a starry universe by using the dots and with the command random() and made them infinite by using a loop function to create the starry effect.

Through this assignment I learnt a lot and loved the process of doing it. As a freshman I want to improve my self learning skills and this assignment is  helping me achieving this skill that will help me in my future courses throughout my four years at the university.


function drawAlien(x, y) {
  // Alien face
  fill(0, 200, 120, 50);
  ellipse(x, y, 100, 110); // Head

  // Eyes
  fill(0);
  ellipse(x - 20, y - 10, 30, 40); // Left eye
  ellipse(x + 20, y - 10, 30, 40); // Right eye

  // Pupils
  fill(255);
  ellipse(x - 29, y -17, 5, 10); // Left pupil
  ellipse(x + 29, y -17, 5, 10); // Right pupil

  // Smiling mouth
  noFill();
  stroke(0);
  strokeWeight(3);
  arc(x, y + 20, 10, 15, 0, PI);
}


Loss and Love- Self Portrait_Assignment #1

Concept: As a first time coder, I wanted to include as many shapes as possible in my self-portrait to get the know-how of how they work. During the ideation process, two things very relevant to my personality stood out to me: a) that I see the inherent good in the world, assuming positive intentions to people. I thought a good metaphor to represent this would be to show the character “seeing the world through rose colored glasses”. Secondly, I wanted to show that experiencing loss and love is a normal part of human life but what matters is having the spirit of acknowledging the loss, still smiling and moving forward. That’s why I coded a heart and incorporated motion into it giving the effect that it is shattering but my character’s smile remains undefeated. The rainbow color background just adds another happy go lucky element to the sketch. This sketch is aspirational in some ways too as it tells me to not take things too seriously and to remember to smile more often.

function setup() {
createCanvas(400, 400);
}
function draw() {
background(220);
//rainbow background
//violet: fill(148, 0, 211);
//indigo: fill(75, 0, 130);
//blue: fill(0, 0, 255);
//green: fill(0, 255, 0);
//yellow: fill(255, 255, 0);
//orange: fill(255, 127, 0)
//red: fill(255, 0 , 0);

fill(255, 0, 0);
rect(1, 0, 500, 30);
fill(255, 127, 0);
rect(1, 30, 500, 30);
fill(255, 255, 0);
rect(1, 60, 500, 30);
fill(0, 255, 0);
rect(1, 90, 500, 30);
fill(0, 0, 255);
rect(1, 120, 500, 30);
fill(75, 0, 130);
rect(1, 150, 500, 30);
fill(148, 0, 211);
rect(1, 180, 500, 30);
fill(255, 0, 0);
rect(1, 210, 500, 30);
fill(255, 127, 0);
rect(1, 240, 500, 30);
fill(255, 255, 0);
rect(1, 270, 500, 30);
fill(0, 255, 0);
rect(1, 300, 500, 30);
fill(0, 0, 255);
rect(1, 330, 500, 30);
fill(75, 0, 130);
rect(1, 360, 500, 30);
fill(75, 0, 130);
rect(1, 390, 500, 30);
fill("black");
stroke("green");
strokeWeight(2);
ellipse(200, 350, 250, 370);
fill("skyblue");
ellipse(200, 180, 155, 170);
fill("#F60959");
rect(160, 150, 30, 20);
rect(207, 150, 30, 20);
stroke("#FFEB3B");
strokeWeight(1);
line(191, 161, 207, 161);
line(160, 161, 134, 138);
line(238, 161, 268, 139);
fill("red");
strokeWeight(1);
stroke("red");
triangle(122, 306, 181, 307, 152, 351);

// Semi circles - Heart
arc(139, 307, 35, 50, PI, 0, OPEN);
arc(165, 307, 35, 50, PI, 0, OPEN);

//background

fill("rgb(248,71,102)");
// curve(176, 201, 176, 219, 237, 212, 248, 195);
arc(195, 220, 40, 40, 0, PI, CHORD);
fill("#A26B58");
strokeWeight(0);
ellipse(194, 98, 50, 30);
ellipse(159, 106, 50, 30);
ellipse(140, 125, 50, 30);
ellipse(226, 101, 50, 30);
ellipse(259, 110, 50, 30);
ellipse(271, 129, 50, 30);
ellipse(128, 145, 50, 30);
ellipse(121, 169, 50, 30);
ellipse(278, 150, 50, 30);
ellipse(281, 173, 50, 30);

let coordinates = "X:" + mouseX + " Y:" + mouseY;
text(coordinates, 10, 20);
}

A code that I am particularly proud of is using two arcs and a triangle to code the heart:
triangle(122, 306, 181, 307, 152, 351);

// Semi circles - Heart
arc(139, 307, 35, 50, PI, 0, OPEN);
arc(165, 307, 35, 50, PI, 0, OPEN);

My reflection from the self portrait is that I need to brush up on my geometry and revisit the PI system as I would just use trial and error for my arcs but knowing the radian system more precisely would have helped me code faster. Further, in the next iteration, I would like for the semi-circles of the heart and the triangle to come from opposite direction so that when the viewer sees the portrait first the heart is not visible but on interaction with the mouse, the elements come together and form the heart.