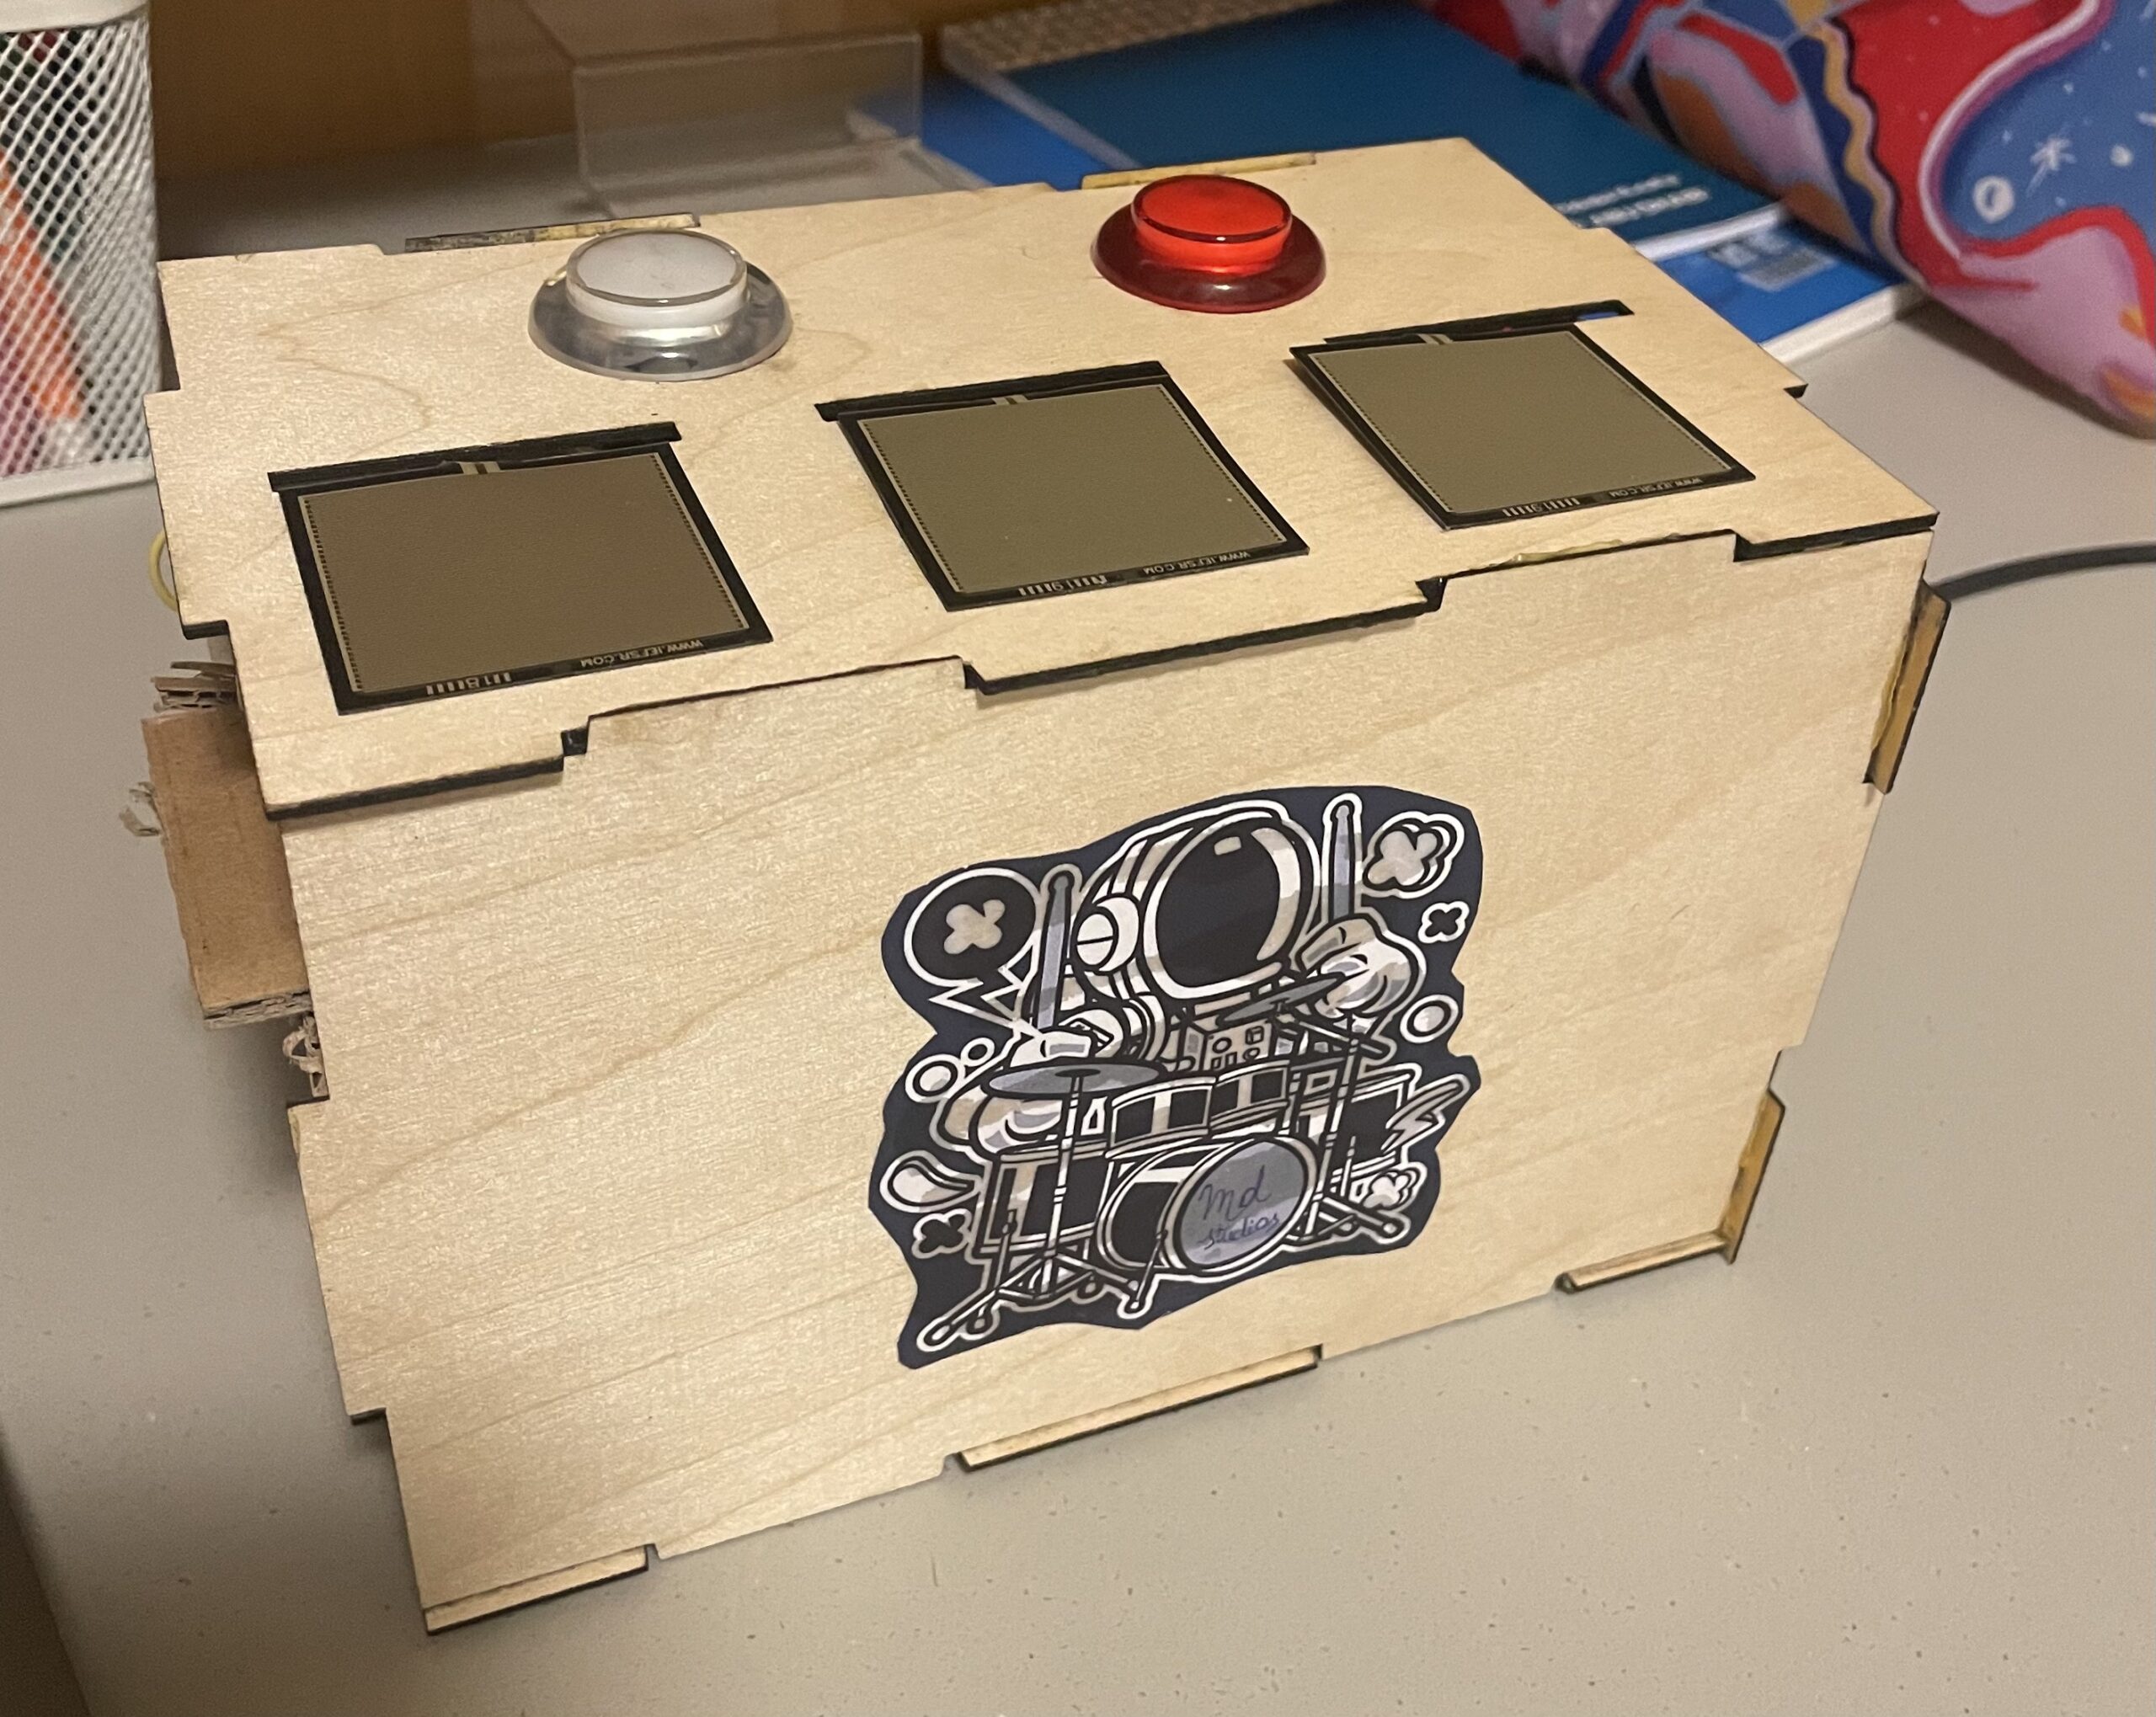
An Interactive drum kit with multiple rooms, each room has a different theme and different drum kit sounds. some of the themes are unusual everyday sounds. I have implemented a regular drum kit, an arabic percussion kit, a kitchen kit and a sci-fi kit. I wanted to give my users a new experience that they would not be able to get using traditional musical instruments, a small glimpse of the world of electronic music you may say.
Implementation design:
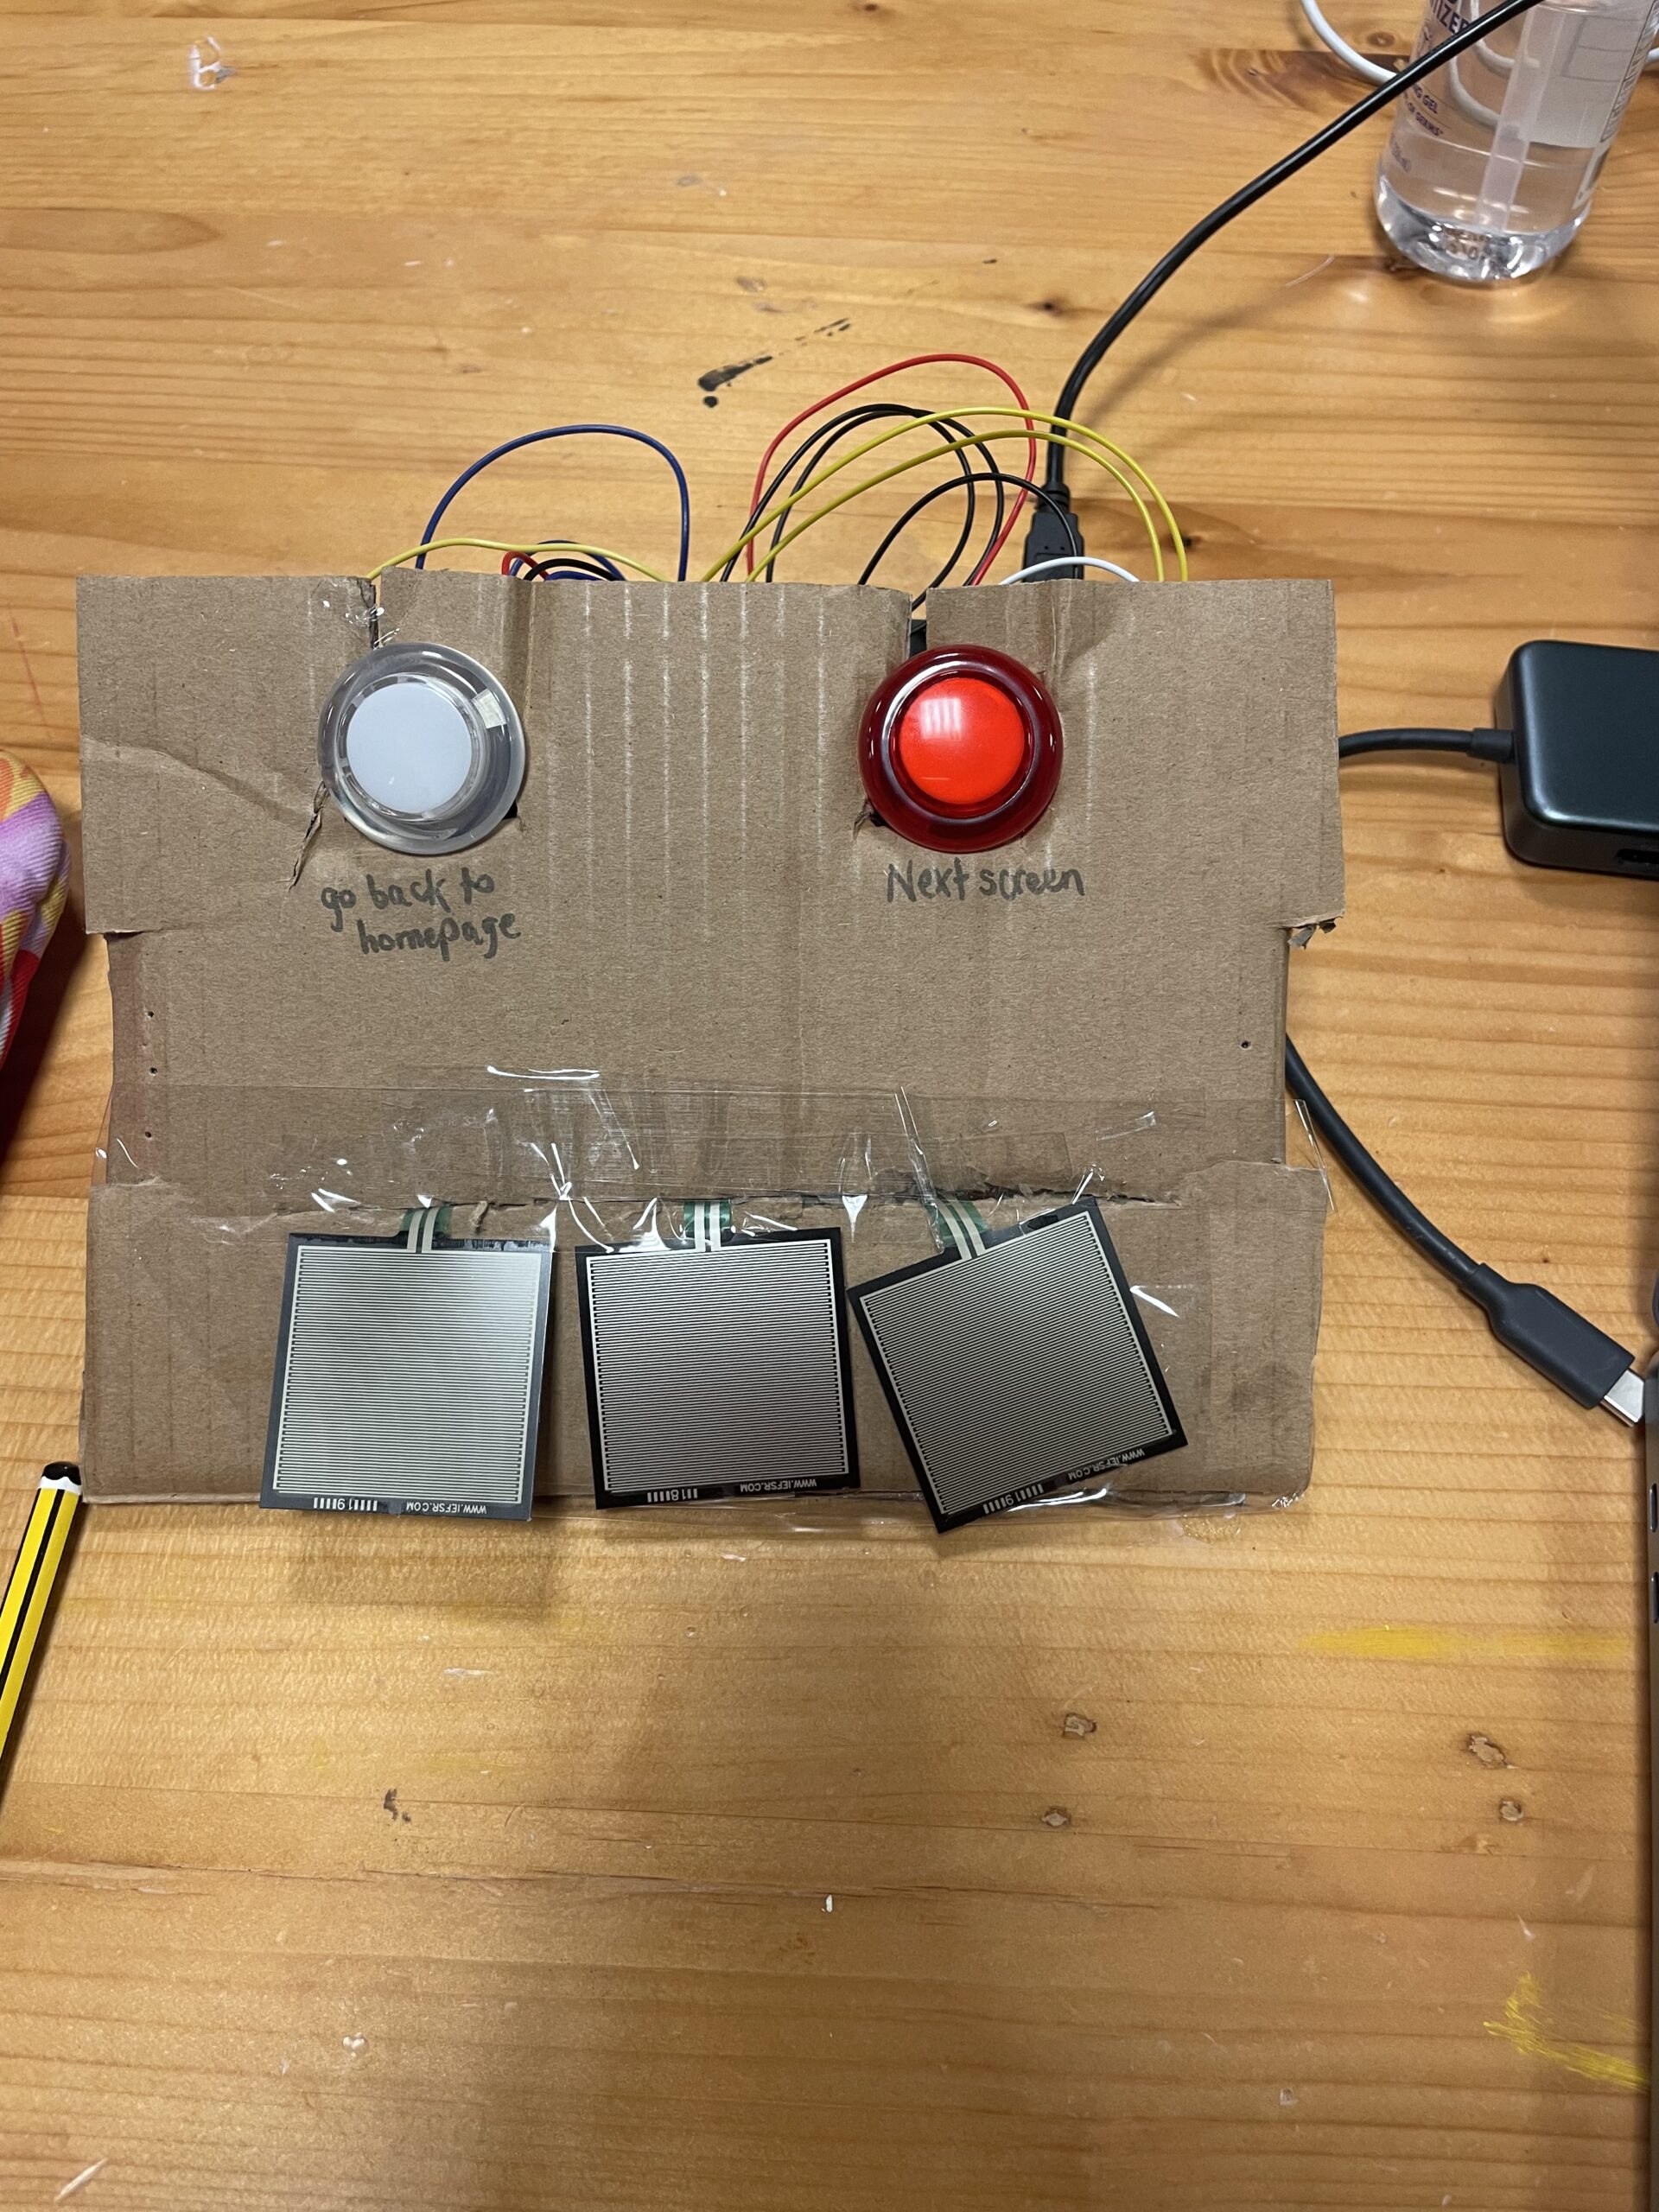
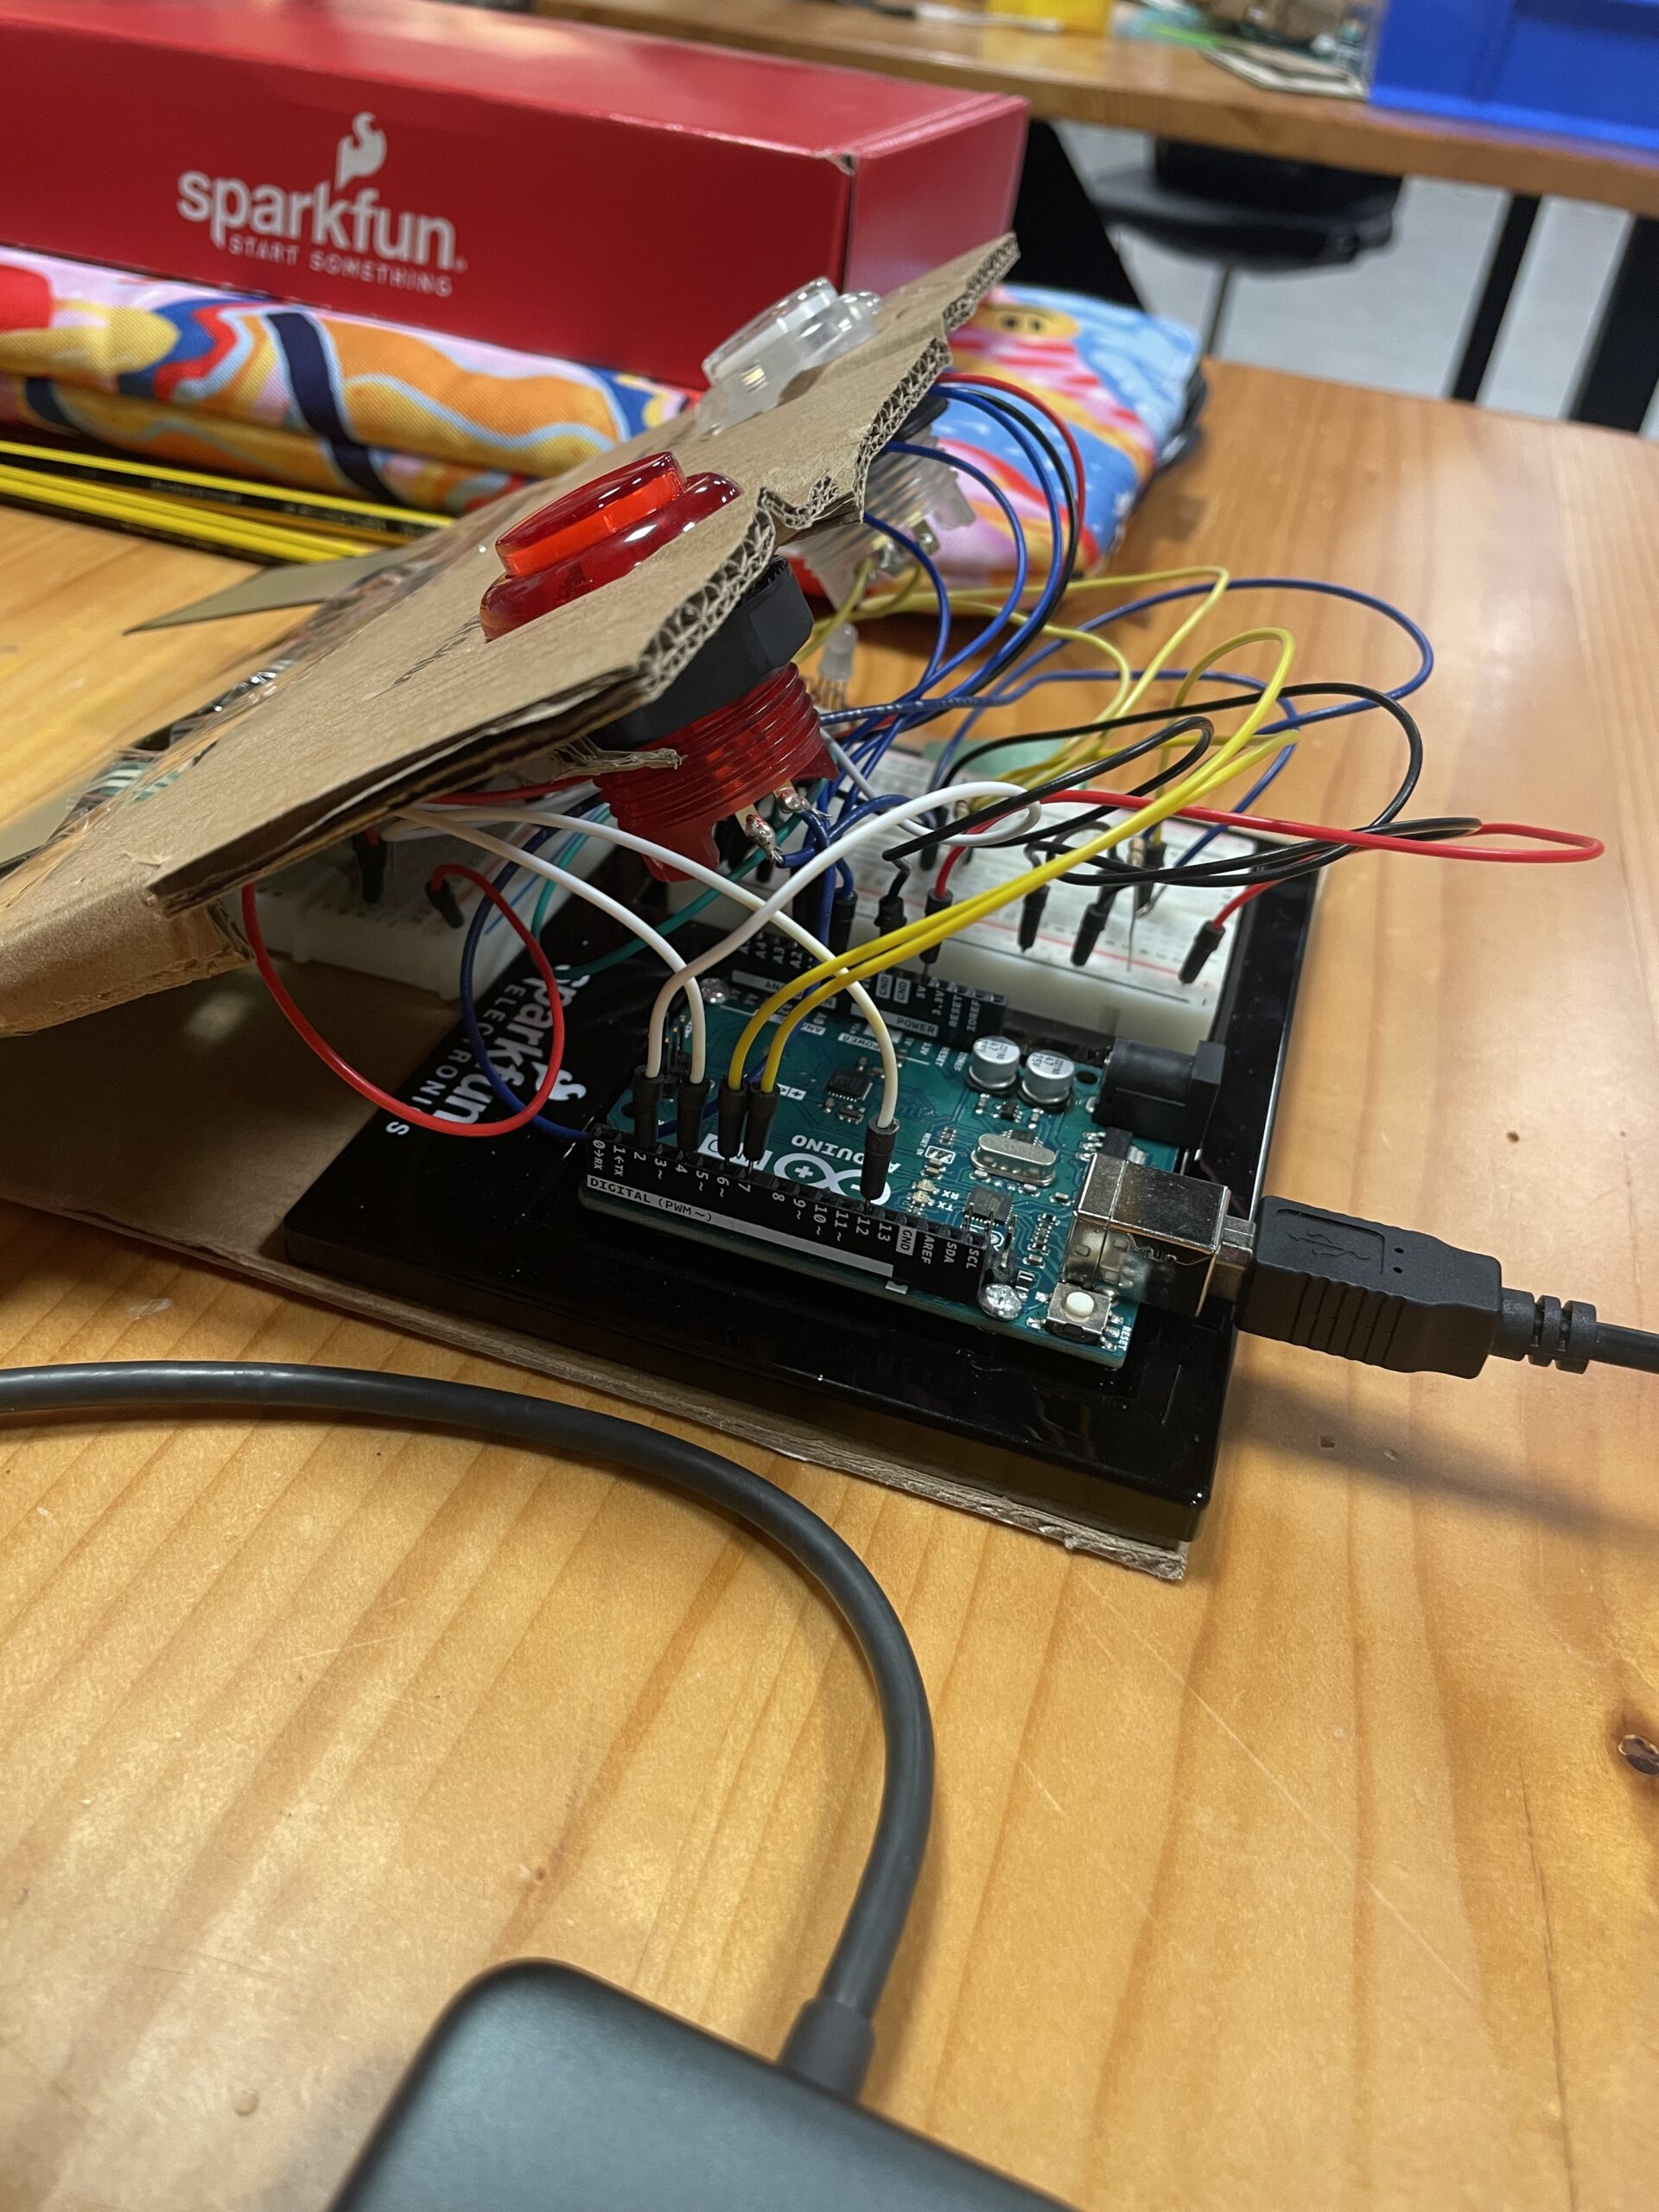
I used 3 force sensors for the drum plates and I used 2 buttons to loop between the themes and go back to home screen. I created screenshots of the themes and added a creative touch to each theme to make it more relevant to the theme.
Interaction between Arduino and P5js:
The only interaction between Arduino and p5js is reading the force sensors and buttons on Arduino and sending it to p5js to change the themes/sounds accordingly. To make my buttons and force sensors work as smooth as possible I have added a delay on reading certain inputs without using the delay() function so that other inputs work simultaneously
Arduino Code:
for the arduino code, I read the values from the sensors and sent them to the p5js through serial.print() by using commas to separate the values. to make the interaction smoother I used “delay without delay()” to ensure that the button is only read every few seconds whereas t
he force sensors are read on a continuous basis.
#define FORCE_SENSOR_PIN1 A0 // the FSR and 10K pulldown are connected to A0
#define FORCE_SENSOR_PIN2 A1 // the FSR and 10K pulldown are connected to A1
#define FORCE_SENSOR_PIN3 A2 // the FSR and 10K pulldown are connected to A2
#define Button1 7 //the switch in connected to D7 (Red button)
#define Button2 6 //the switch in connected to D6 (Yellow button)
#define Button3 5 //the switch in connected to D5 (Blue button)

unsigned long previousMillis = 0;
const long interval = 200;

void setup() {
  Serial.begin(9600);
}

void loop() {
    unsigned long currentMillis = millis();
    int analogReading1 = analogRead(FORCE_SENSOR_PIN1);
    int analogReading2 = analogRead(FORCE_SENSOR_PIN2);
    int analogReading3 = analogRead(FORCE_SENSOR_PIN3);
    int digitalReading1 = 1;
    int digitalReading2 = digitalRead(Button2);

    if (currentMillis - previousMillis >= interval) {
    // save the last time you read from the button
      previousMillis = currentMillis;
      digitalReading1 = digitalRead(Button1);
    }
    // print the raw analog readings seperated by commas

    Serial.print(analogReading1); //read without delay
    Serial.print(",");
    Serial.print(analogReading2); //read without delay
    Serial.print(",");
    Serial.print(analogReading3); //read without delay
    Serial.print(",");
    Serial.print(digitalReading1); //read with delay!!!!!!
    Serial.print(",");
    Serial.print(digitalReading2); // read without delay
    Serial.println();

}
p5js:
for my p5js code, I read the values from Arduino and split them at the comma and stored each value in a variable that I later used to create conditions on to make sure that the right sounds and the right themes are displayed depending on the user’s inputs.
The aspects of the project I am proud of:
I am proud that I managed to create the force sensors responsive to the touch so that the sounds are played right when the user presses on the force sensor, to make it smooth. I am also proud of the the
me designs I created, I put in extra thought to make sure the user can understand what the theme is without having to explain it.
Pictures of my project:
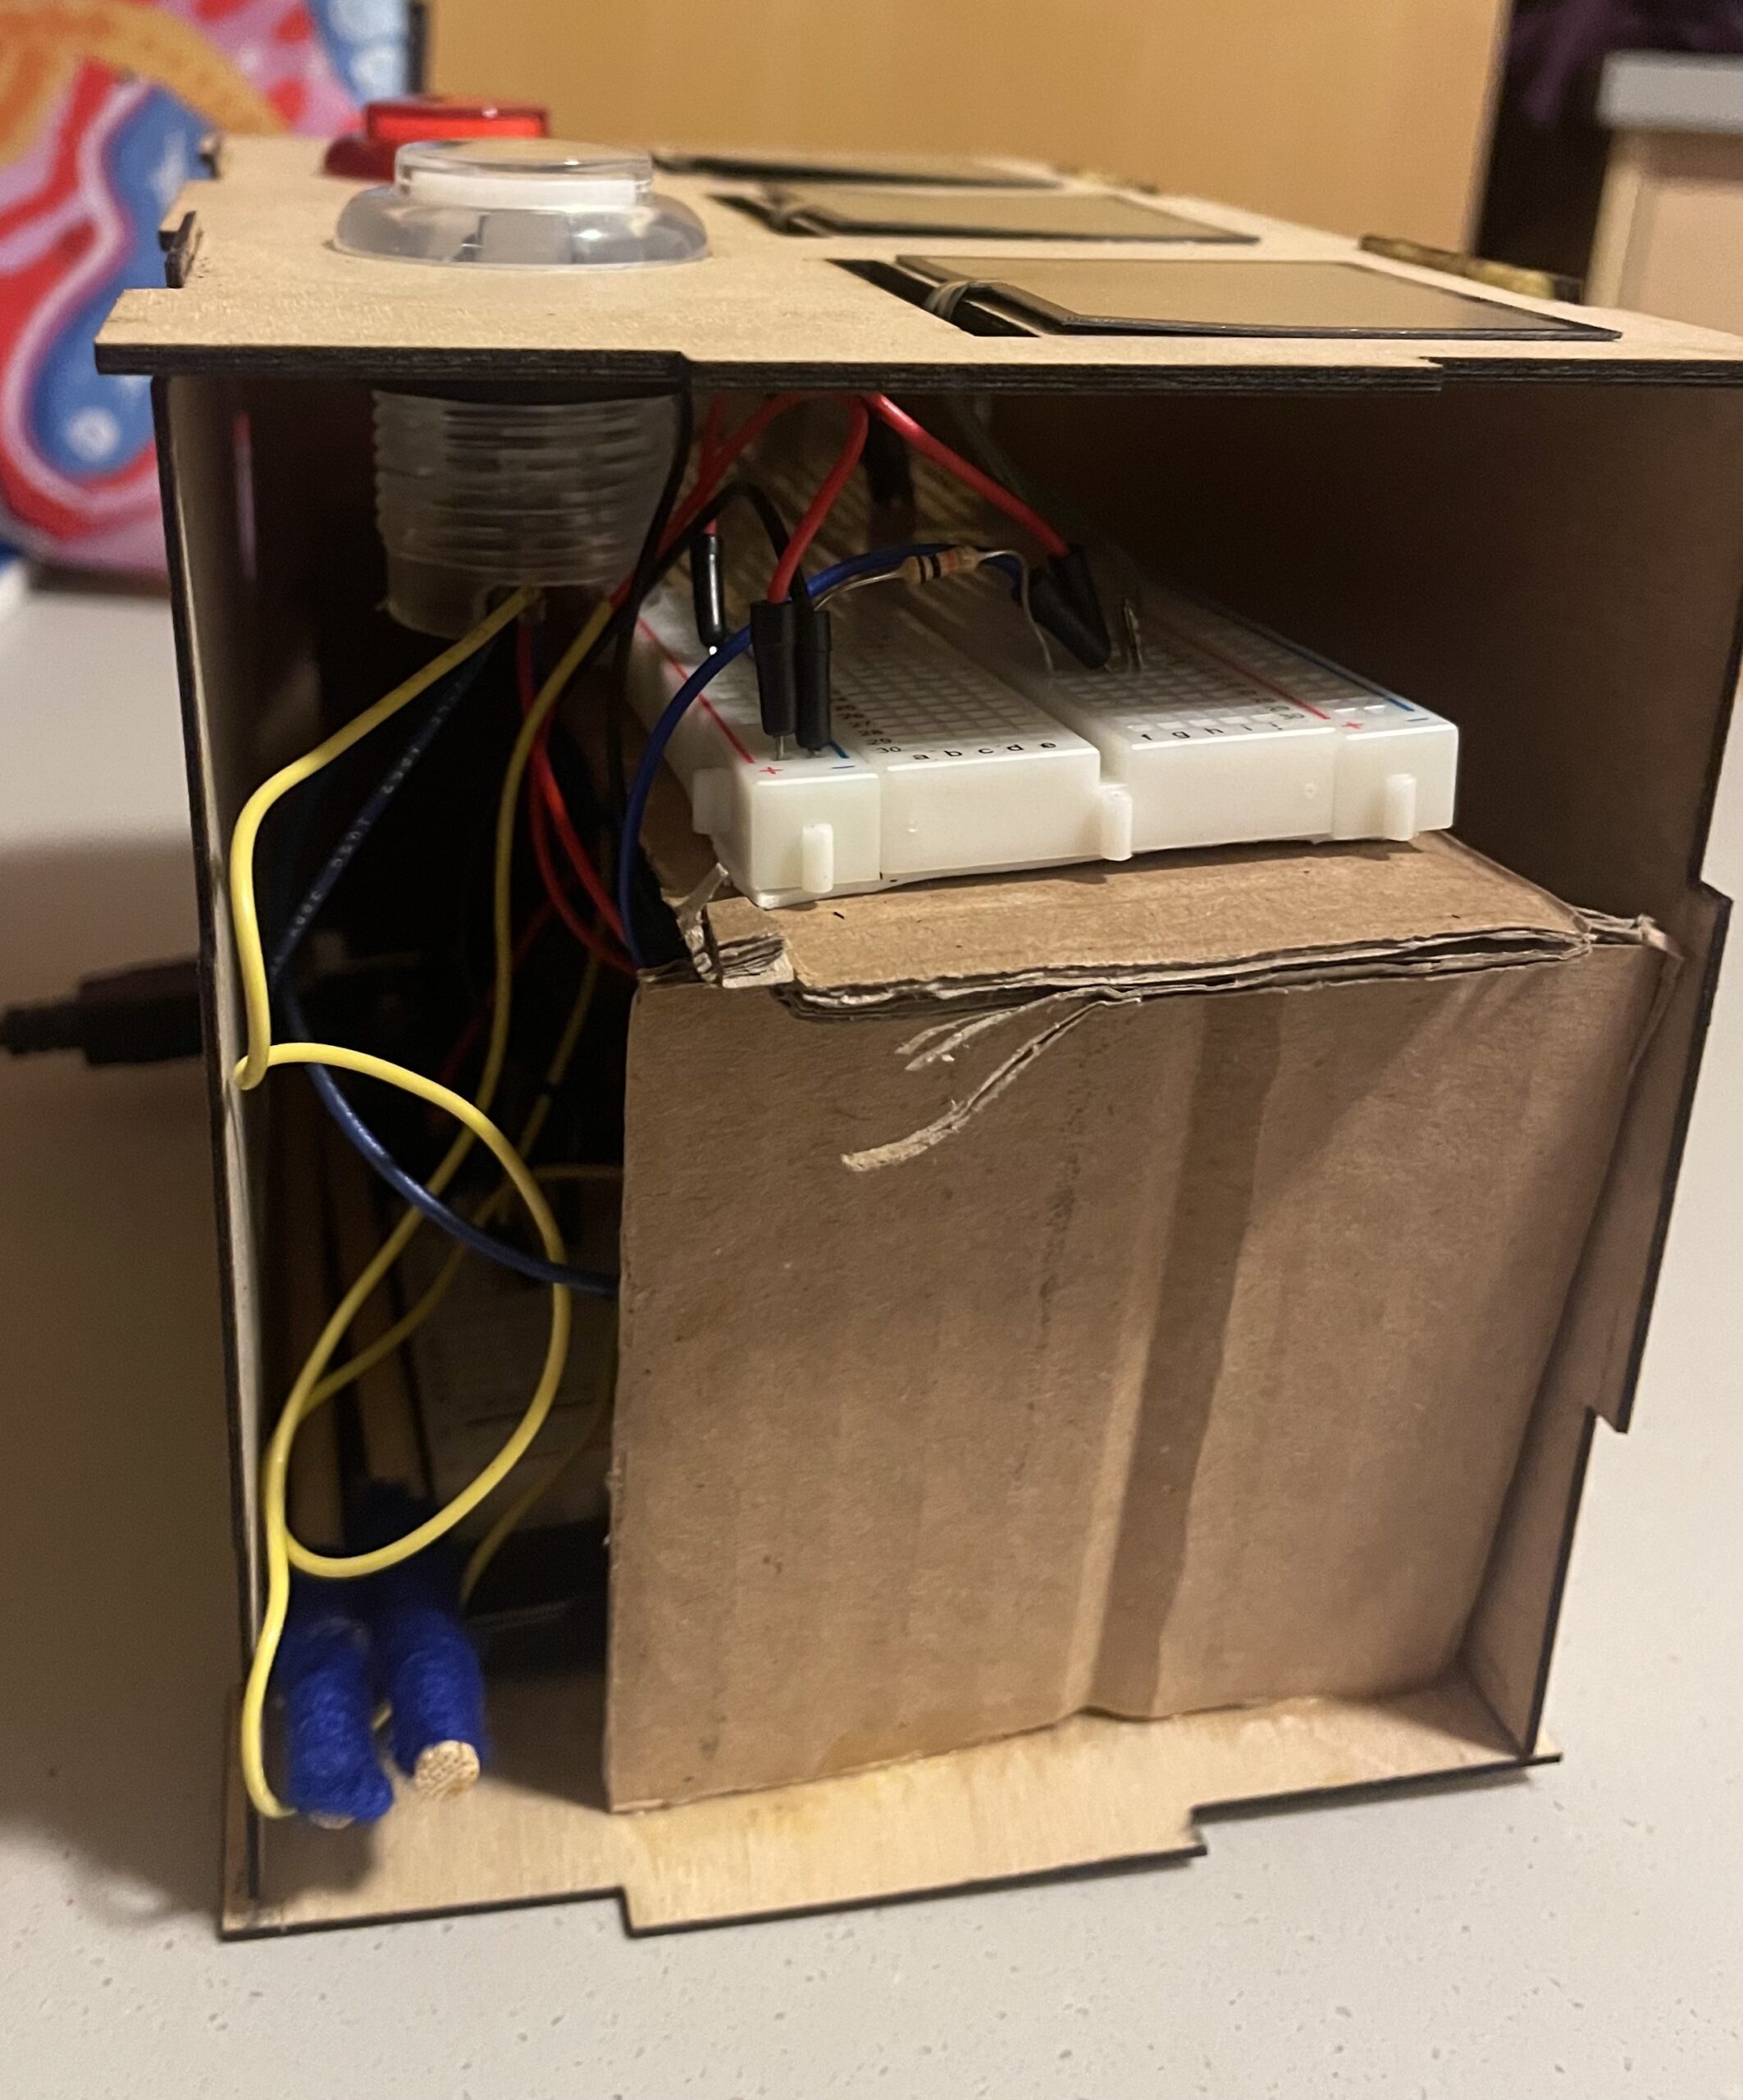
first prototype:
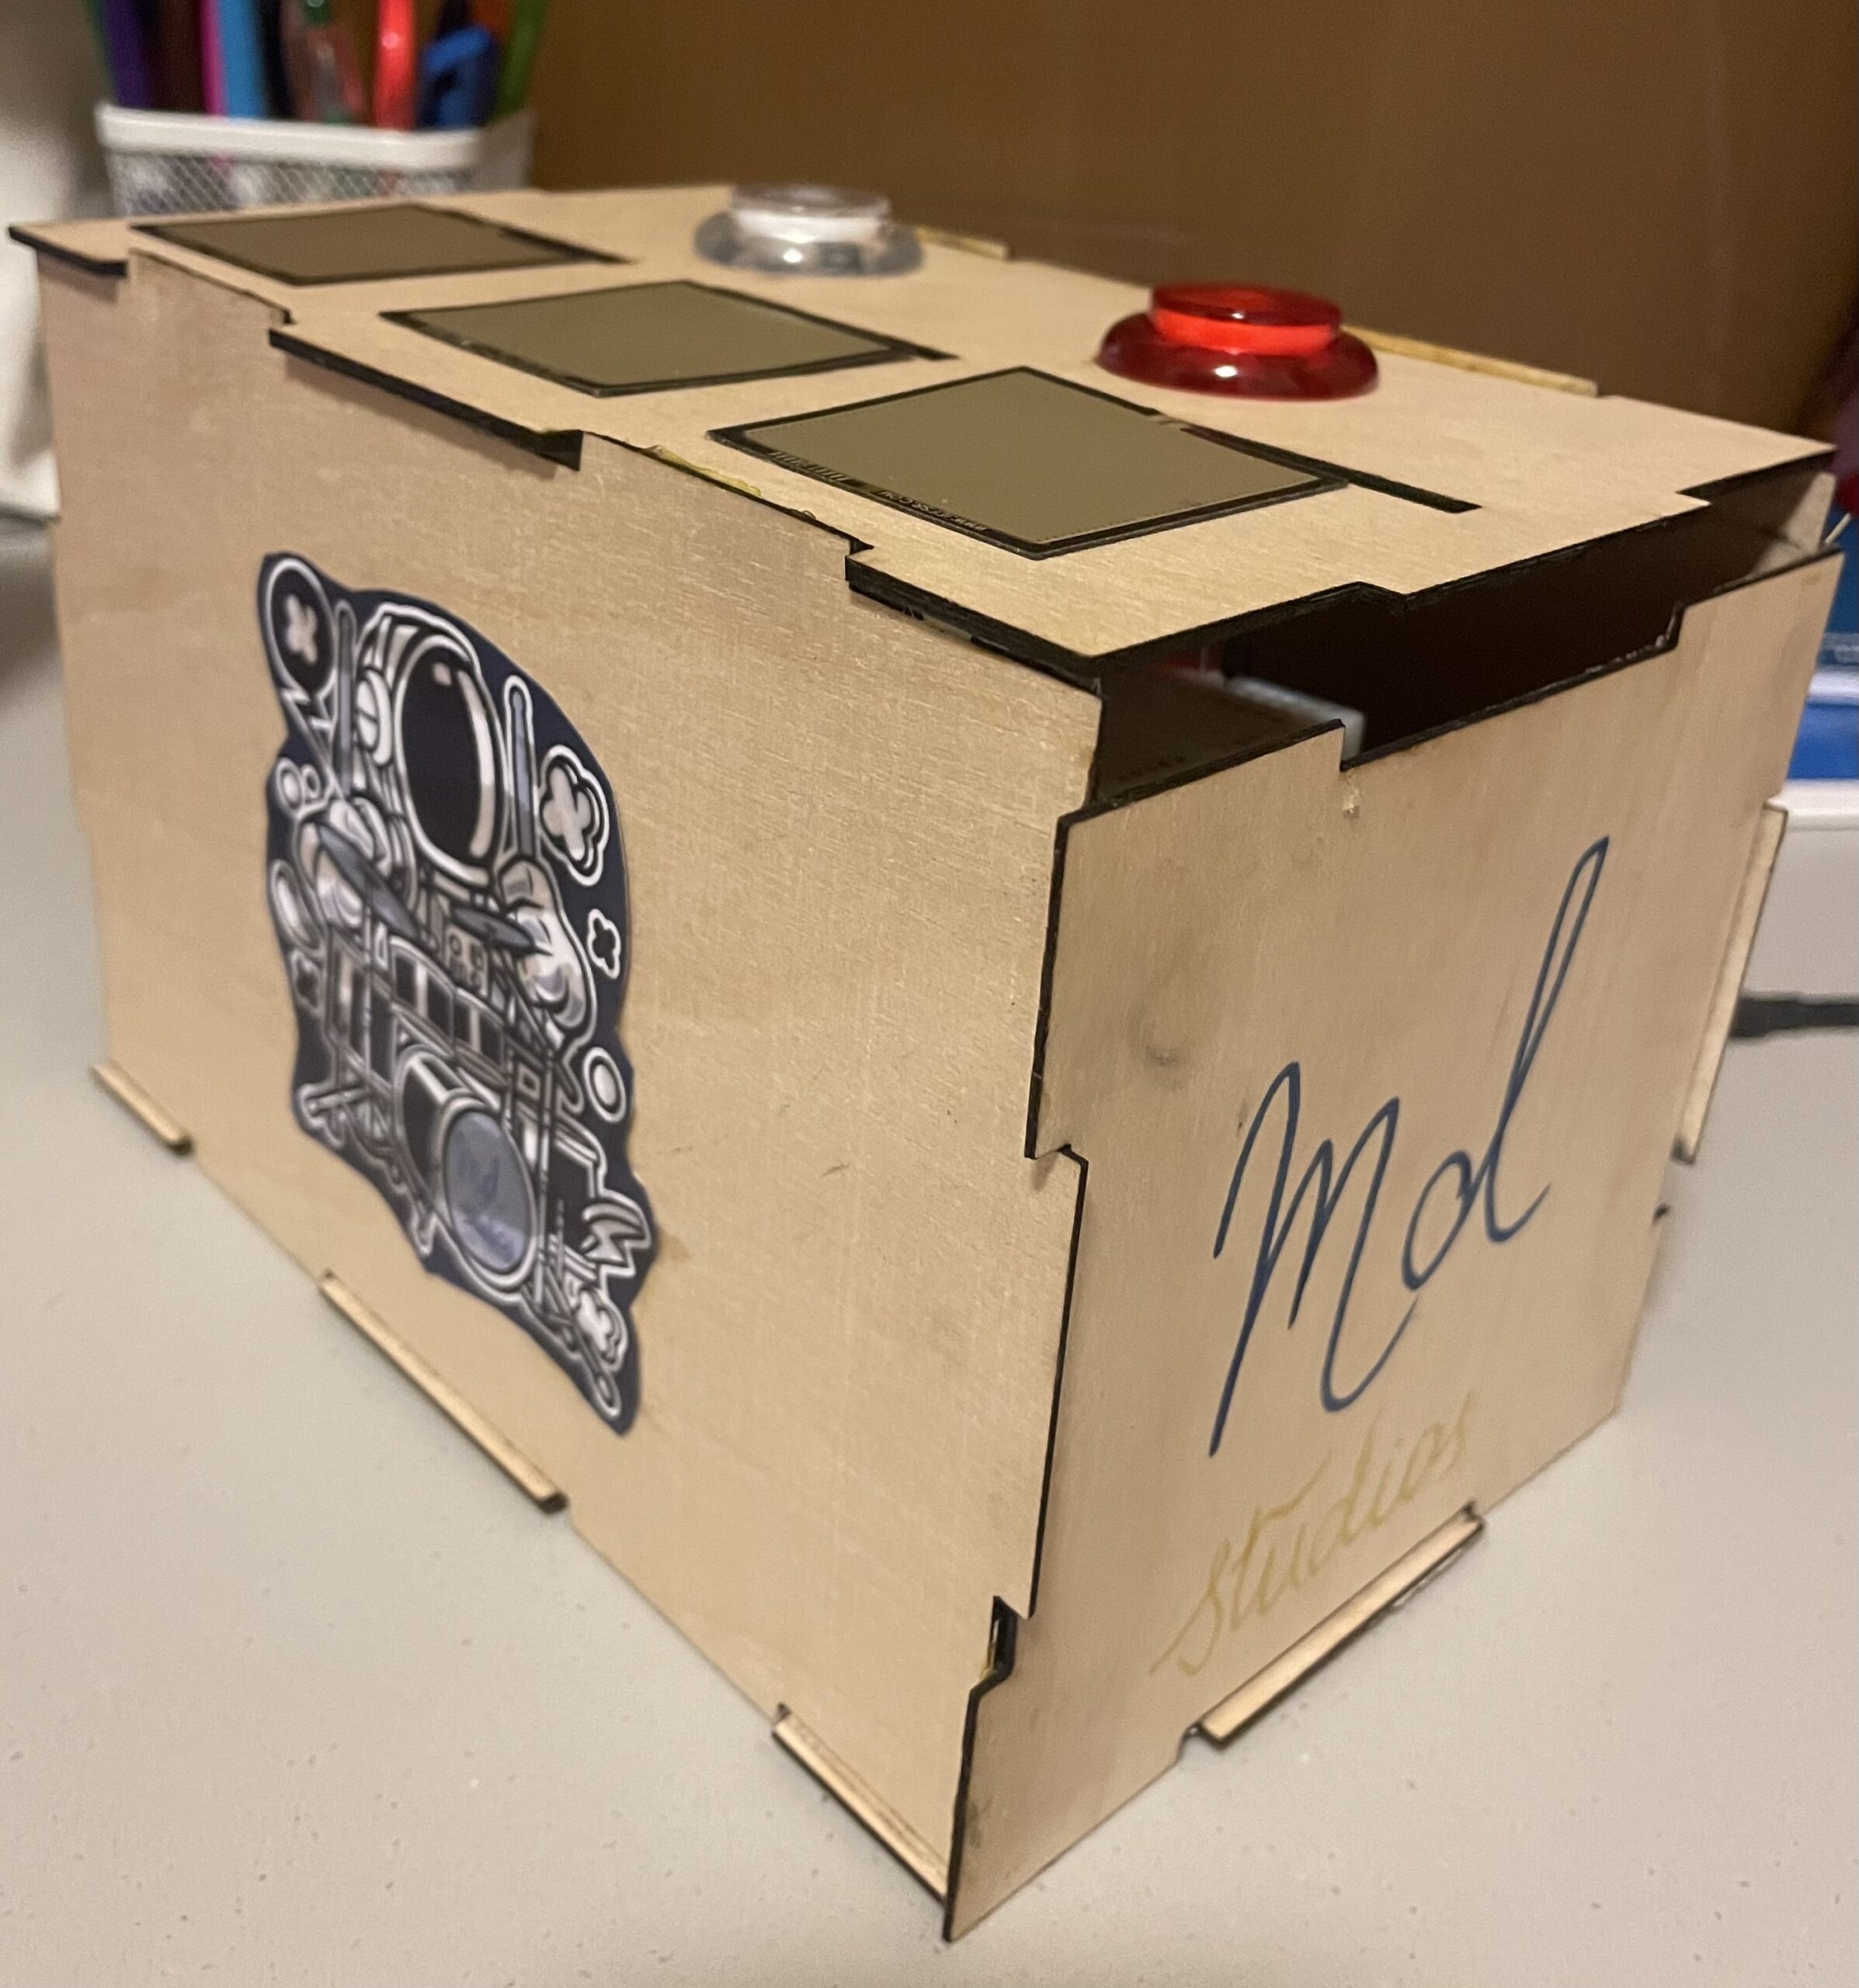
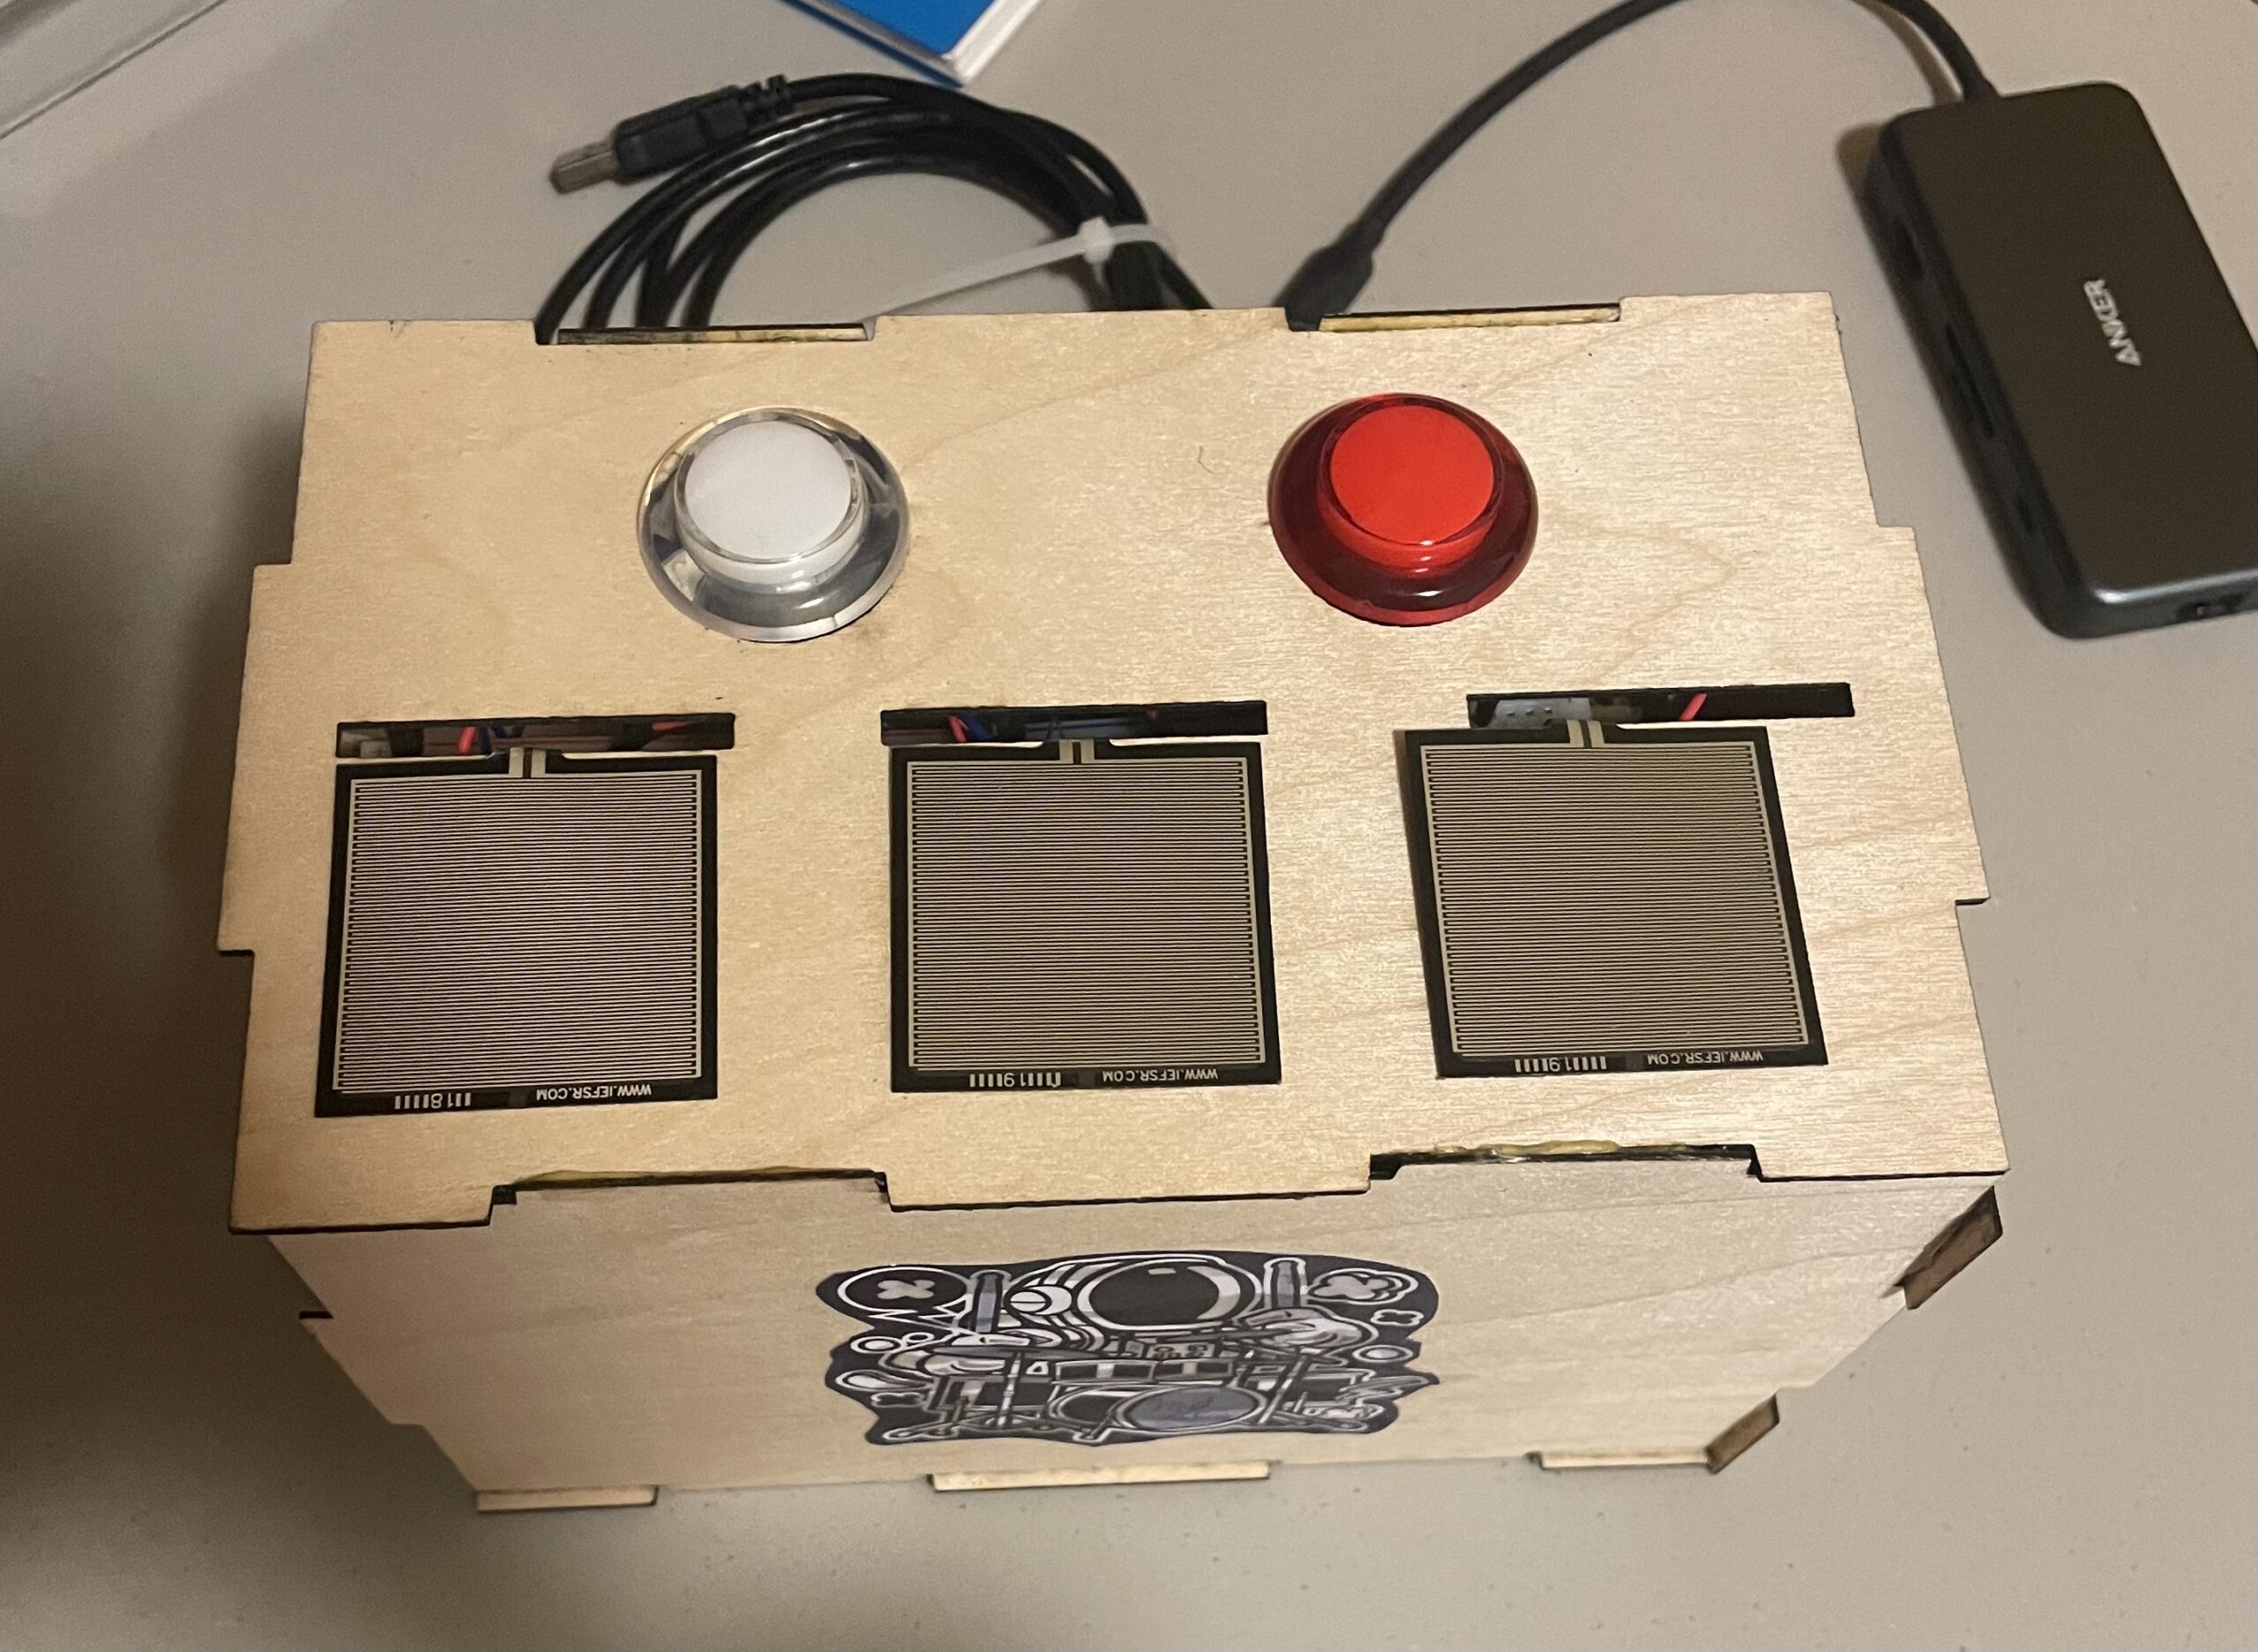
Final Version:
Future improvements:
I initially wanted to create a record button that records users’ jams and adds them all to one file to have a collective file of many users’ artistic touch, but the p5js sound. library was not working as expected and was causing so many bugs in my program so I decided to skip it for now, but I would love to add later on because I believe it makes the project much more interesting.
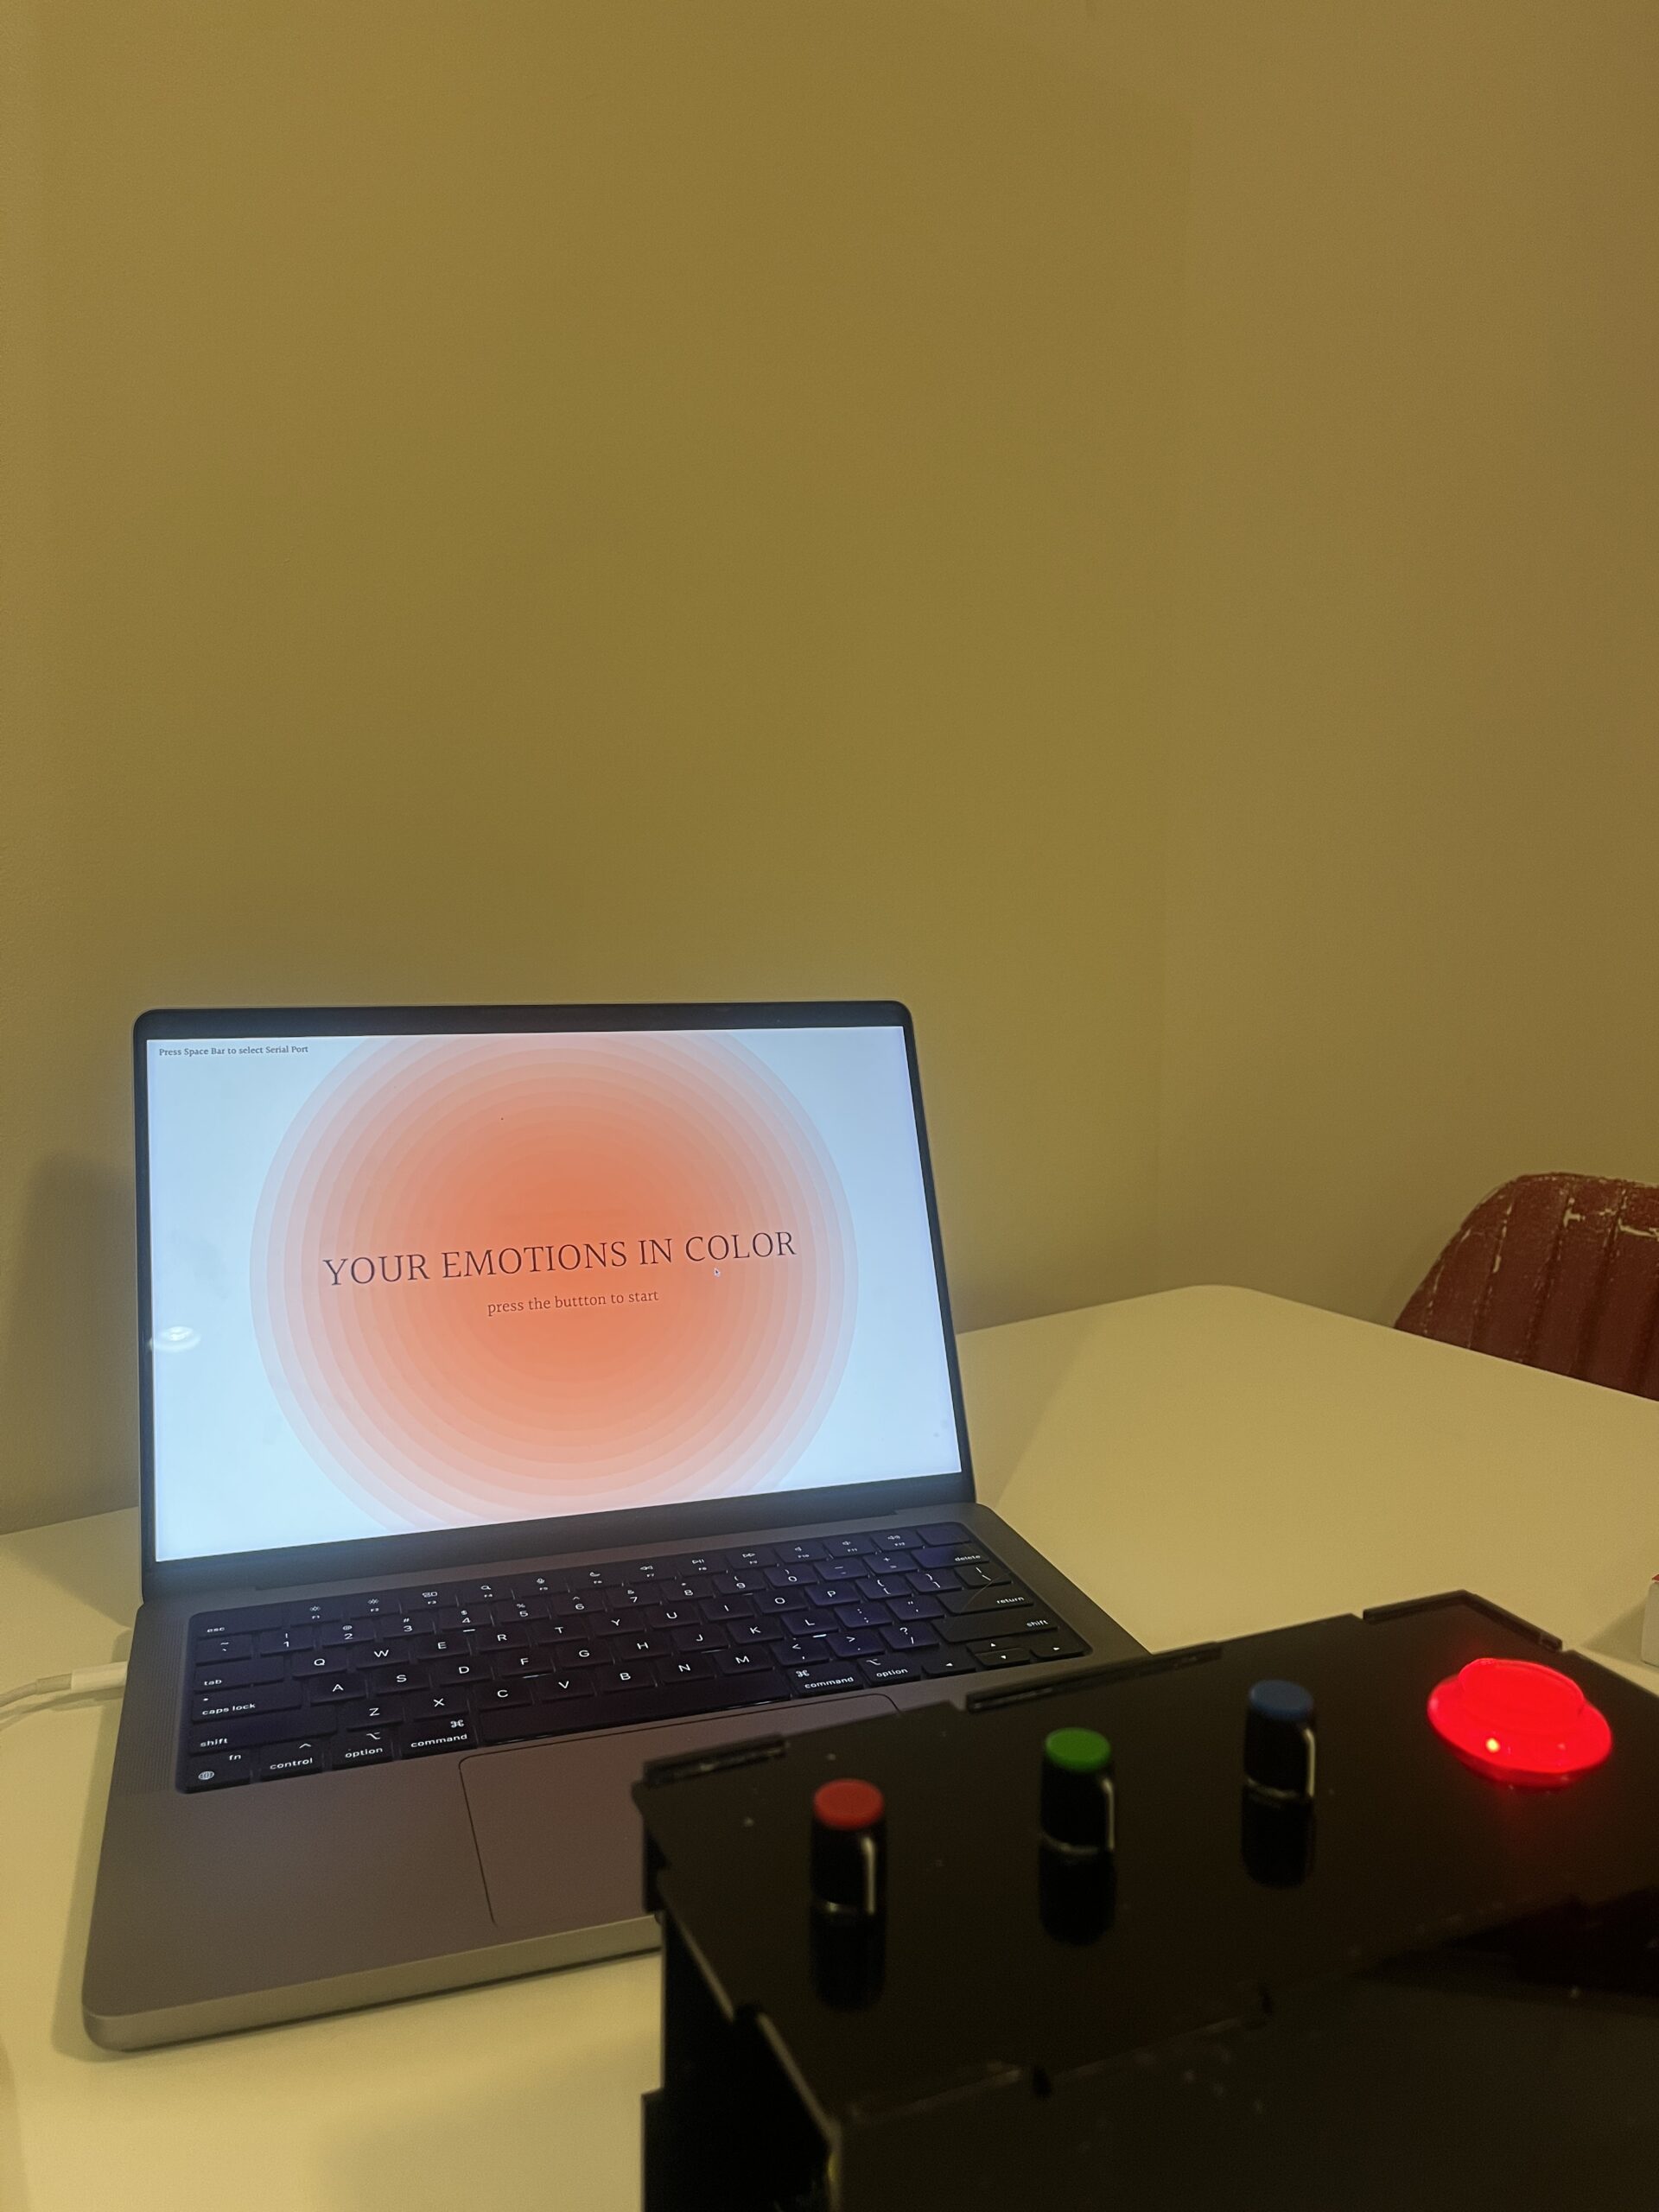
With my project I am attempting to translate human emotions into color. It is a personal experience during which a participant is asked to input 5 colors for 5 different emotions. The colors are then used to generate a personal generative artwork that portrays the unique color gradient of the participant.
In addition to its primary goal, the project carries an educational aspect. I aim to provide participants with a deeper understanding of the interplay between RGB values and the diverse outcomes arising from various color mixtures. This dual-purpose project invites individuals to explore their emotions creatively while gaining insights into the fascinating world of color.
Pictures and Videos
Interaction Design
Regarding the interaction design, I wanted the setup to be simple and minimalistic: 3 potentiometers and one button. The color input happens through the potentiometers each of which represent Red, Green and Blue color channel values (RGB). The button is used to progress through the experience.
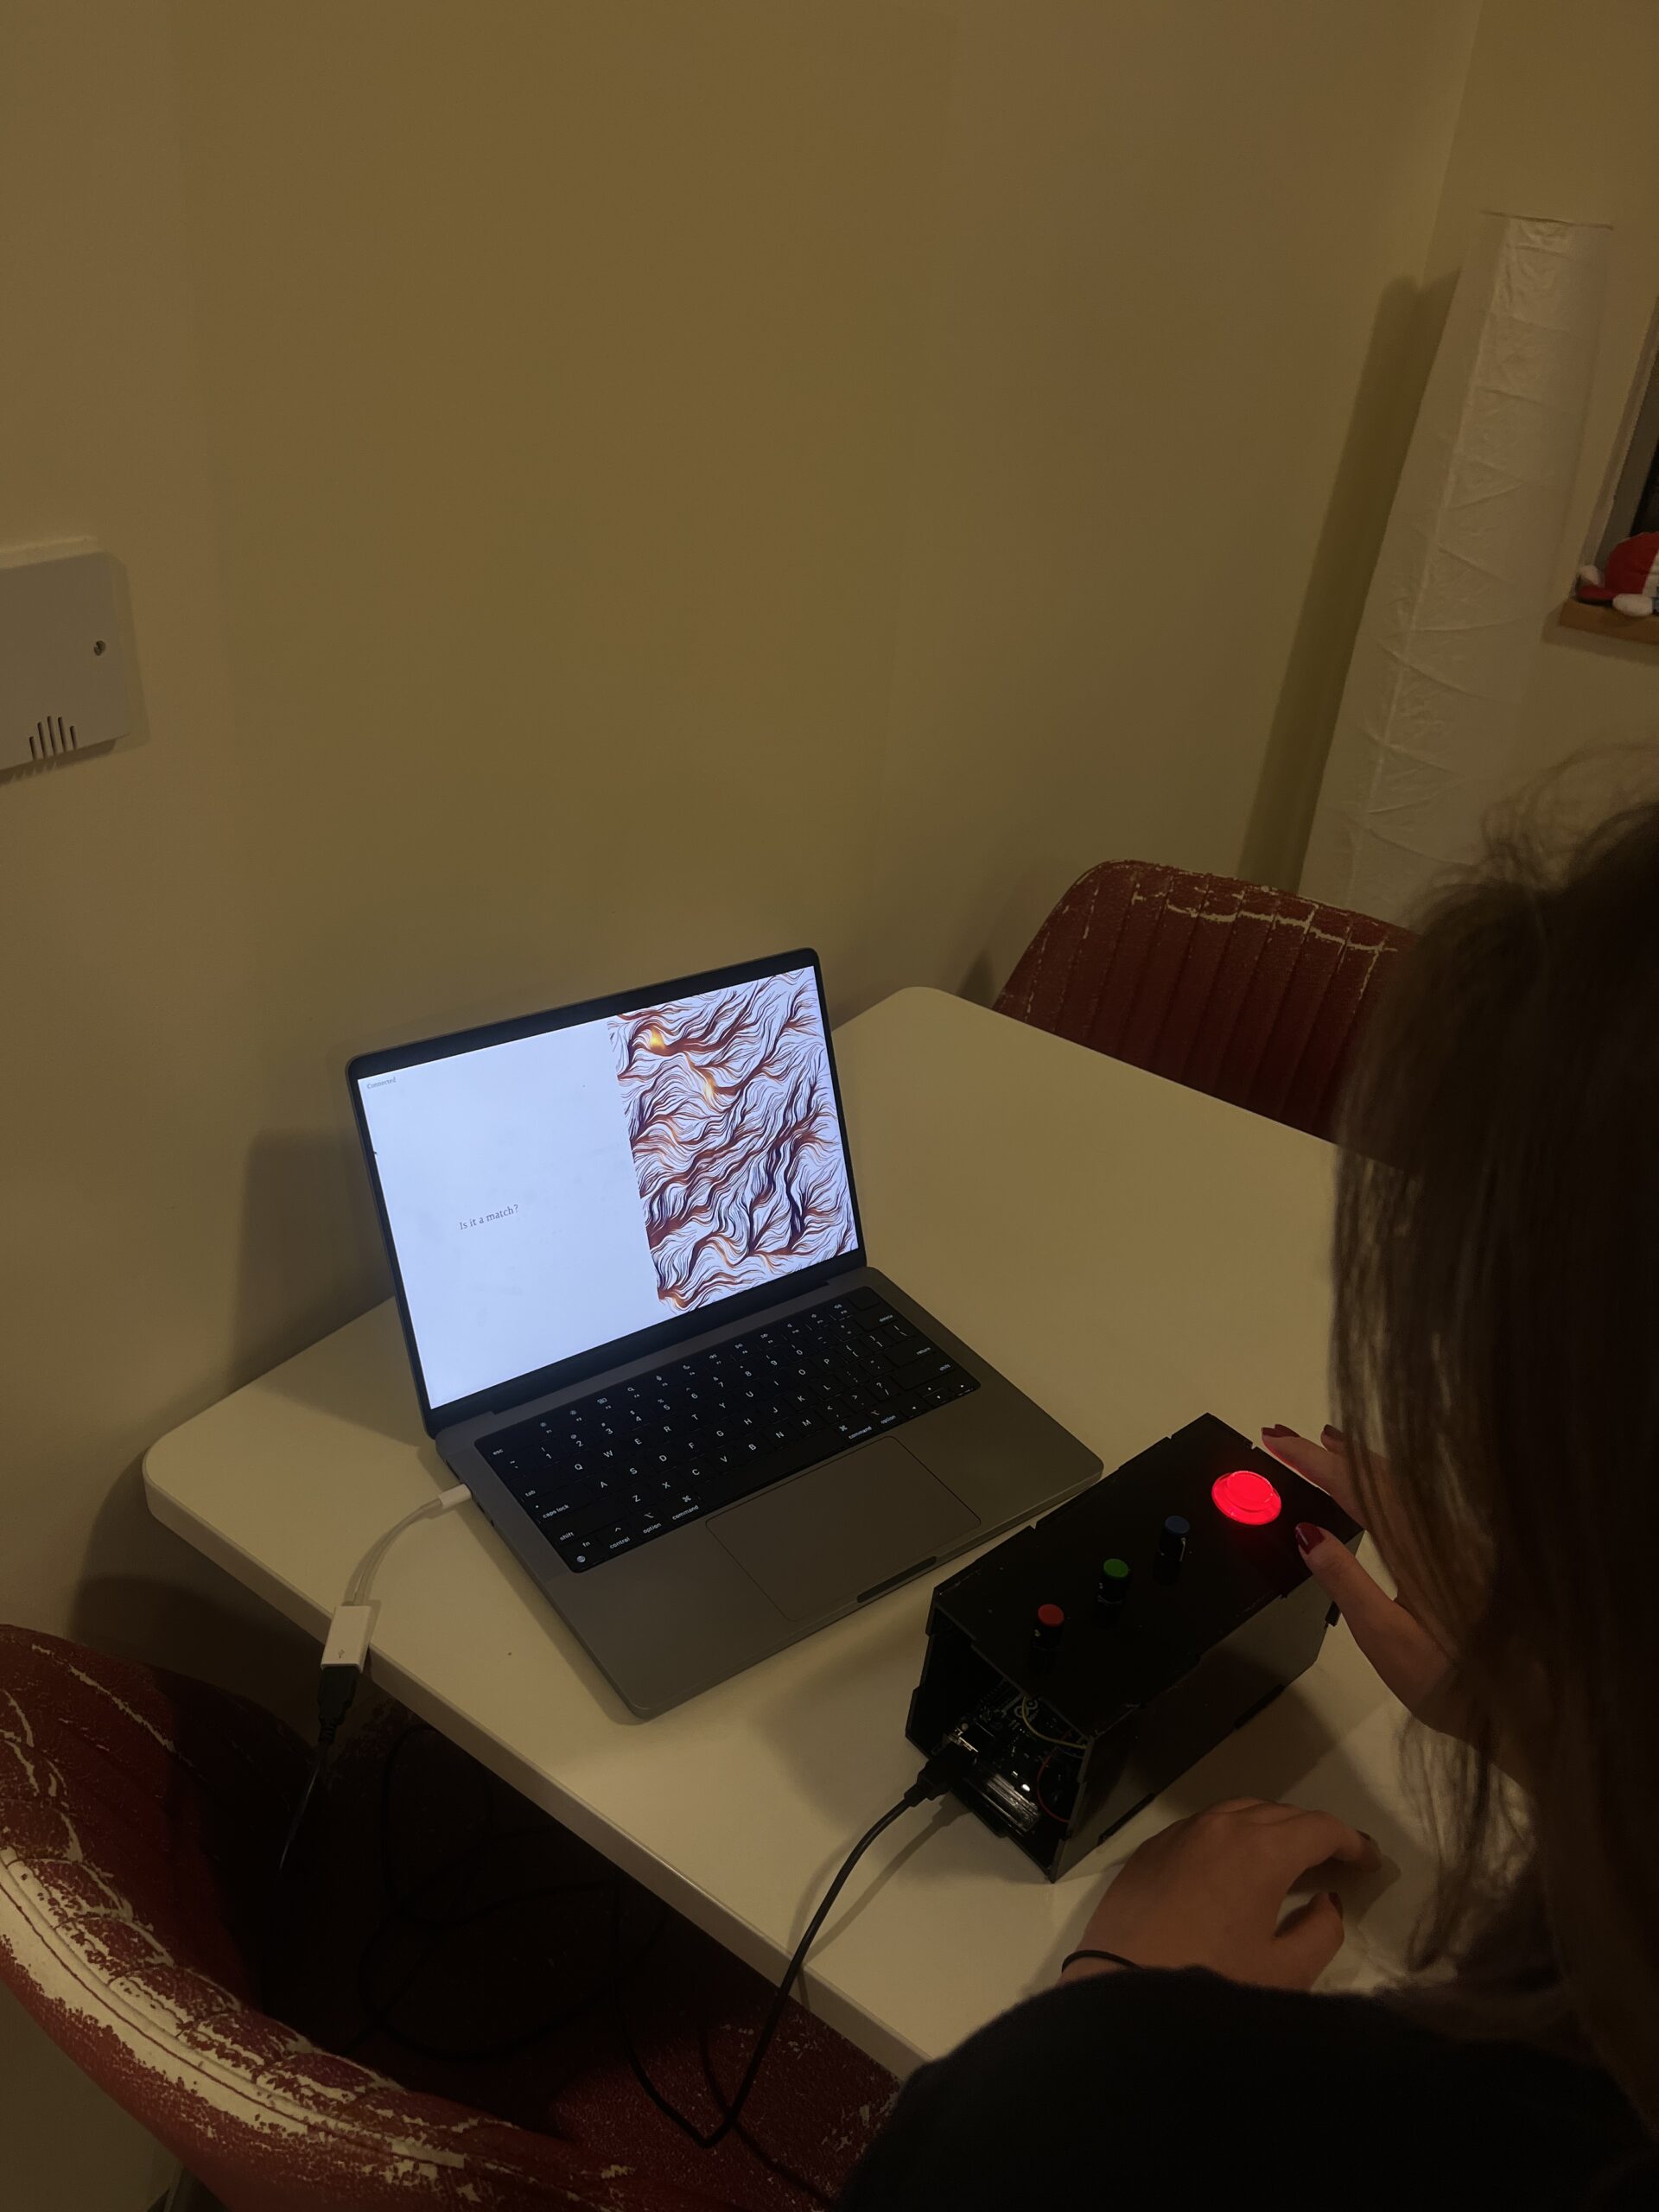
The visual design in P5 is also quite simple, following a simple color palette. It is structured and clean, guiding the participant through the experience. The feedback on the color input is provided instantly, ensuring a seamless and responsive interaction that enhances the overall engagement.
Arduino code
My Arduino code reads values from three potentiometers and a button and sends it to P5. The potentiometers provide analog input representing different color channels (Red, Green, and Blue) by measuring voltage. The button is used as a digital input.
const int potPin1 = A0;  // Potentiometer connected to A0
const int potPin2 = A1;  // Potentiometer connected to A1
const int potPin3 = A2;  // Potentiometer connected to A2
const int buttonPin = 4; // Button connected to digital pin 4

void setup() {
  Serial.begin(9600);  // Initialize serial communication at 9600 bps
  pinMode(buttonPin, INPUT_PULLUP); // Set the button pin as input with pull-up resistor
}

void loop() {
  // Read values from potentiometers
  int value1 = analogRead(potPin1);
  int value2 = analogRead(potPin2);
  int value3 = analogRead(potPin3);

  // Read the state of the button
  int buttonState = digitalRead(buttonPin);

  // If the button is pressed, send a button message
  if (buttonState == LOW) {
    Serial.println("BUTTON_PRESSED");
  } else {
    // Send potentiometer values as usual
    Serial.print(value1);
    Serial.print(',');
    Serial.print(value2);
    Serial.print(',');
    Serial.println(value3);
  }

  delay(500);  // Add a delay for stability, adjust as needed
}
P5 code
The P5 code controls the different stages of the experience. The project unfolds through different stages, each focusing on a specific emotion, such as nostalgia, serenity, courage, curiosity, and resilience. P5 is receiving the data from the Arduino, and the combined color choices are stored in an array, which is used to create a generative artwork based on the personalized color gradients.
One of the more challenging parts was the storing of the final input colors in an array. I had to create additional flag variables or else the storing would be continuous and the array would expand super quickly. However, with the flags I was able to store the last value before the press of the button:
hasPushedColors = false;
if (buttonPressed && !hasPushedColors) {
  // Add the last values of R, G, and B to the array
  p_colors.push([R, G, B]);
  console.log("!!!!!!!!!!!!!!!!!!!!!!!!!!!!!!!!!!!!");
  console.log("color" + p_colors);
  hasPushedColors = true; // Set the flag to true to prevent multiple pushes
  buttonPressed = false;
Parts I am proud of
I am particularly proud of my concept. I find it to be very simple, yet it has a sense of discoverability, anticipation and surprise, especially with the reveal of the gradient. Even after completing the experience multiple times, each time I am curious to put it different colors to see what final gradient will be generated. I am also happy that it has a deeper psychological context and how unconsciously we do tend to connect certain colors to certain feelings. I already made some observations, for instance, a big part of my participants tended to associate red with resilience.
I am also quite satisfied with my interaction design. It was a great learning experience for me to better understand color through color combinations, and the potentiometers are quite an accurate choice for input. They are easy to control and provide good precision.
Future Improvements
An improvement I would be most keen to explore would be to provide an interpretation for the color choices of participants. Either at every stage, or at with the final result. It would be interesting to perhaps incorporate machine learning into analysing the color selections and generating insights into the potential emotional or psychological significance behind each choice. This could involve training a machine learning model on a dataset of color-emotion associations, allowing the system to recognize patterns and correlations. By providing participants with personalized feedback on their color selections, the project could become a more insightful and introspective experience.
User testing is in a separate blog post. Here is the video of my final project-> FINAL PROJECT VIDEO
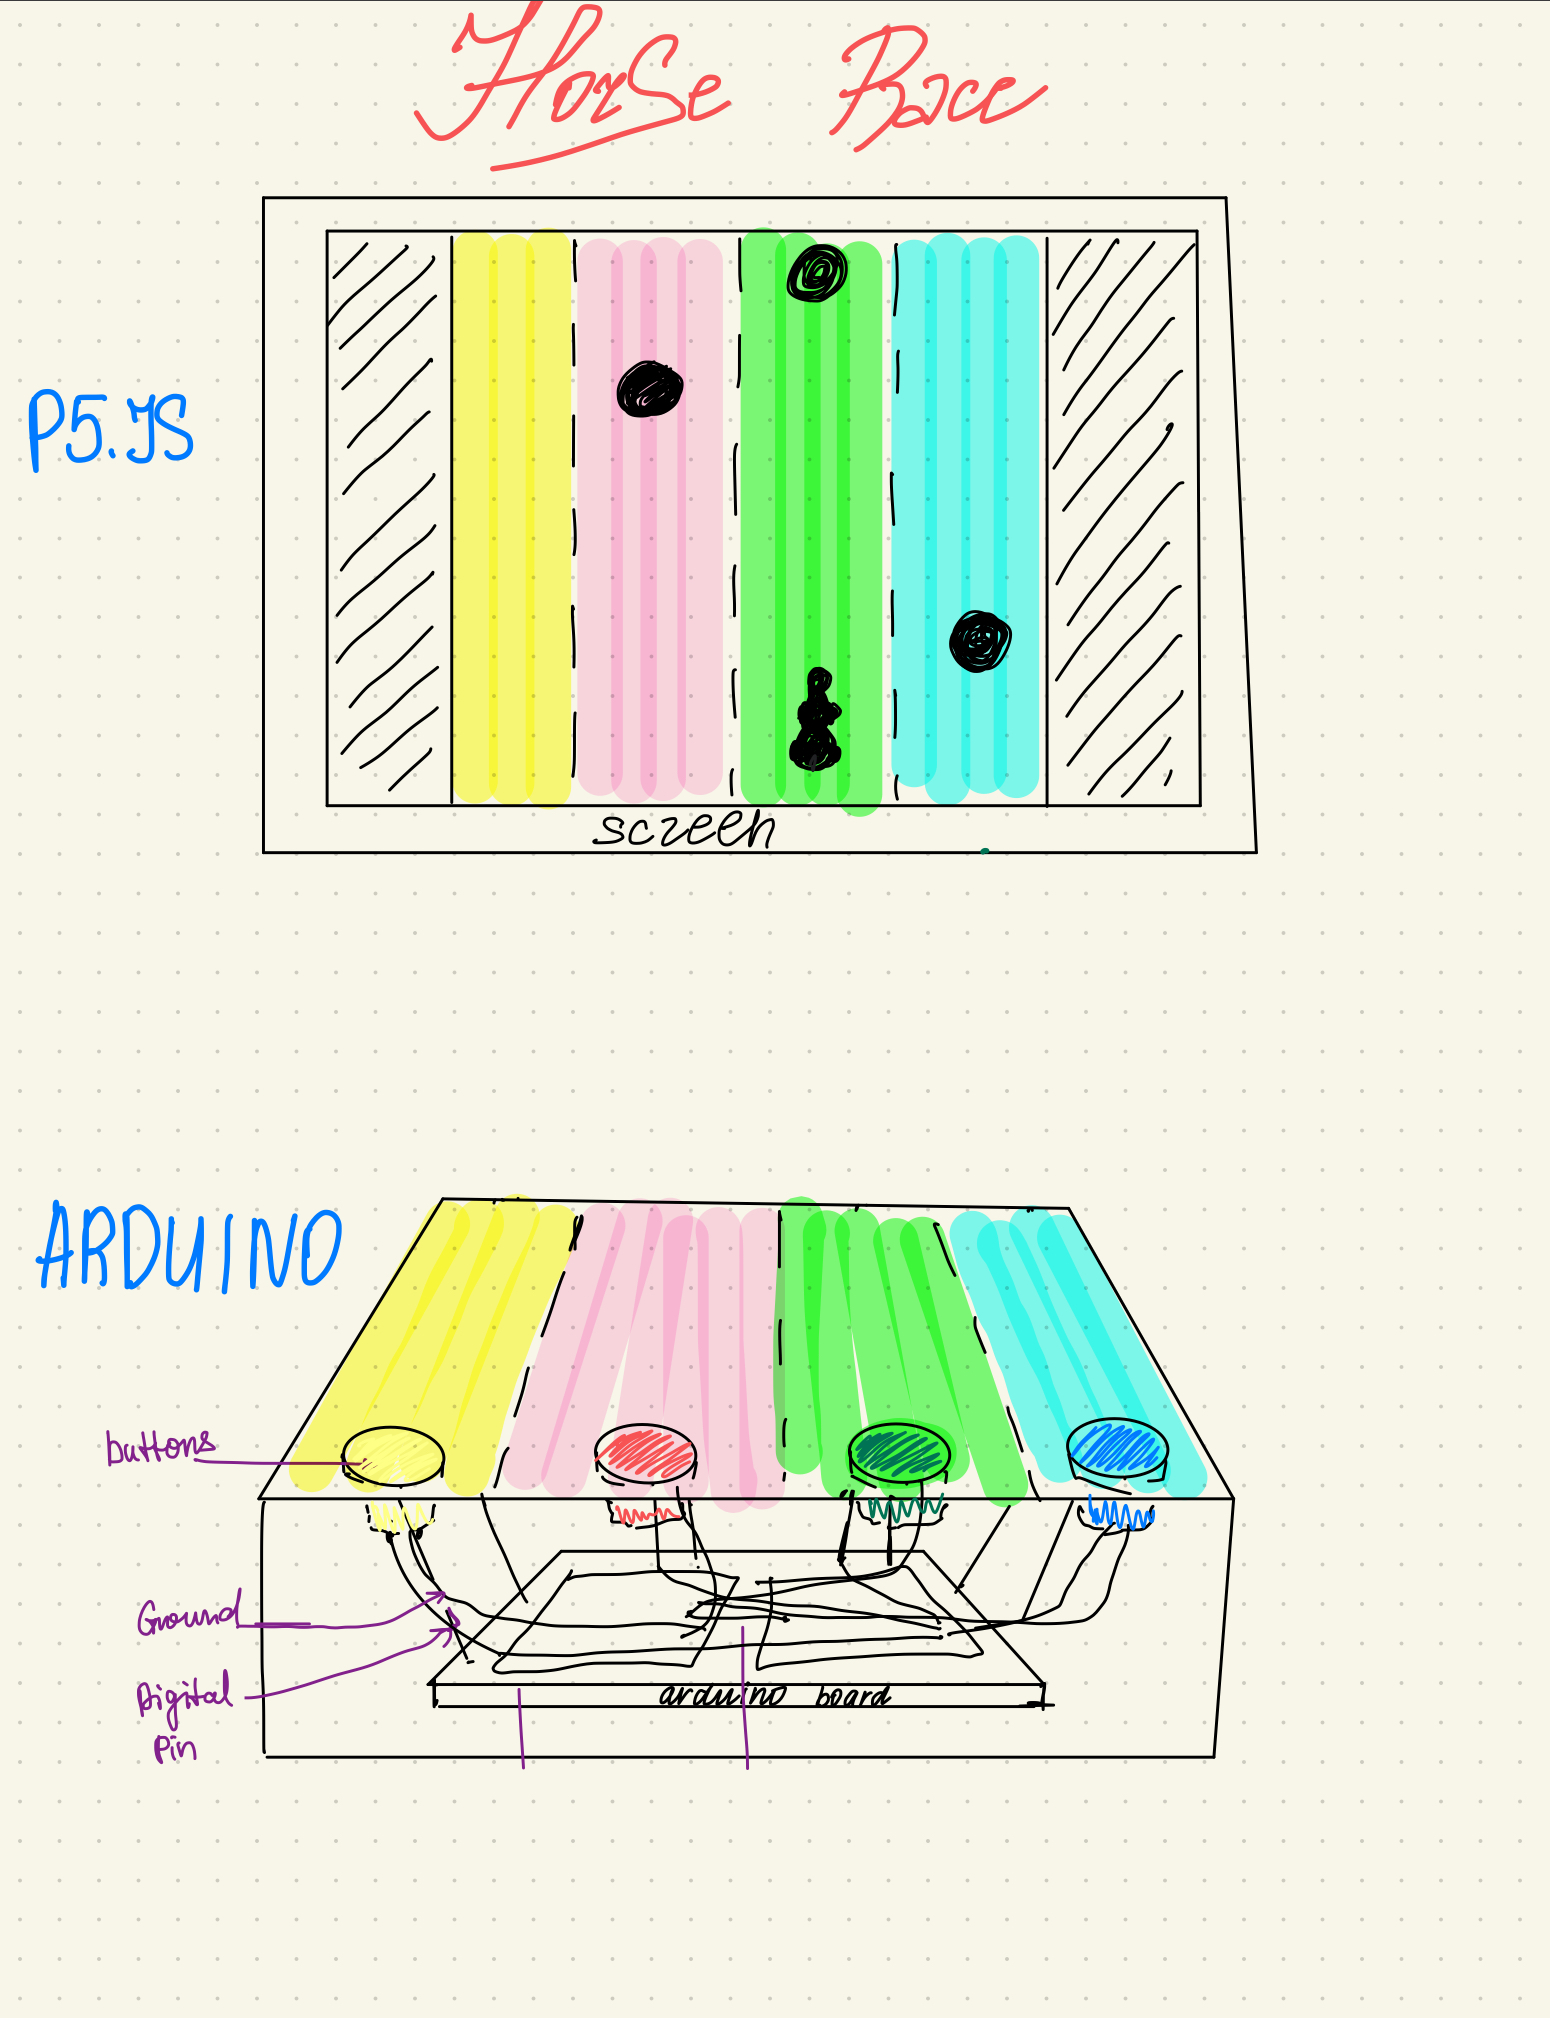
My Concept: The project is an interactive game about the horse race, one of the traditional games in Kazakh culture. As horse riding was a part of our nomadic lifestyle, we have a lot of games connected with horse riding. One of these games is called Båige as the name of this game, where the equestrians compete with each other while riding the horses and that might include overcoming some obstacles. I wanted to incorporate that into my game: the user is an equestrian, riding the horse and avoiding obstacles in the form of snakes while collecting the stars that add up extra points to the score. As the game progresses, the snakes move faster, making the game harder for the user.
The implementation of the idea: To implement the idea four main buttons were used, which are responsible for each of the lines in the racing game. When the button is pressed, the horse moves to the corresponding line. To make the experience of racing, the obstacles and the awards are added to the game, so the user should avoid the former and collect the latter, adding up to the score.
Description of interaction design: The user interacts with the game by pressing the physical buttons on the box, each of which is responsible for the corresponding line as shown in Fig 1. For instance, when the user presses the red button on Arduino, the equestrian on the p5.js moves to the red line. Hence, when the obstacles appear in the way of the user, the user will try to press the buttons of the lines with no obstacles. More obstacles are avoided, and more score is given to the user. Furthermore, the stars appear on the p5.js and by pressing the buttons of the lines with the stars, the user will be able to collect these stars and add extra points to the score. When the user collides with the snakes, the game is over and the score collected by the user shows up.
Description of Arduino code: The Arduino code declares the buttons as digital inputs with internal pull-up resistors. It checks if the buttons are pressed and sends the corresponding number through serial if they are pressed. For instance, if the white button is pressed, the number 1 is sent to the serial communication. The delay was added, so when the button is pressed once, only one number is printed and sent.
Link to full Arduino sketch:
// Intro To IM - Fall 2023
// Michael Ang
// Final Project - Baige- Horse Race!
// Diana Alibekova

// assigning pins to the buttons and declaring them as constant int, so their values will not be accidentally altered
const int greenbutton = 2;
const int yellowbutton = 3;
const int redbutton = 4;
const int whitebutton = 5;
const int startbutton = 6;

void setup() {
  //activating the serial communication
  Serial.begin(9600);
  //declaring the buttons as digital inputs with internal pull up resistors (the external resistors are not used)
  pinMode(greenbutton, INPUT_PULLUP);
  pinMode(yellowbutton, INPUT_PULLUP);
  pinMode(redbutton, INPUT_PULLUP);
  pinMode(whitebutton, INPUT_PULLUP);
  pinMode(startbutton, INPUT_PULLUP);
}

void loop() {
  // checking if the buttons are pressed and sending the corresponding number through serial if they are pressed
  if (digitalRead(whitebutton) == LOW) {
    Serial.println(1);
    // delay is needed because it pauses the program for a half a second, so only one press of the button is registered.
    delay(500);
  } else if (digitalRead(redbutton) == LOW) {
    Serial.println(2);
    delay(500);
  } else if (digitalRead(yellowbutton) == LOW) {
    Serial.println(3);
    delay(500);
  }
  else if (digitalRead(greenbutton) == LOW) {
    Serial.println(4);
    delay(500);
  }
  else if (digitalRead(startbutton) == LOW) {
    Serial.println(0);
    delay(500);
  }
}
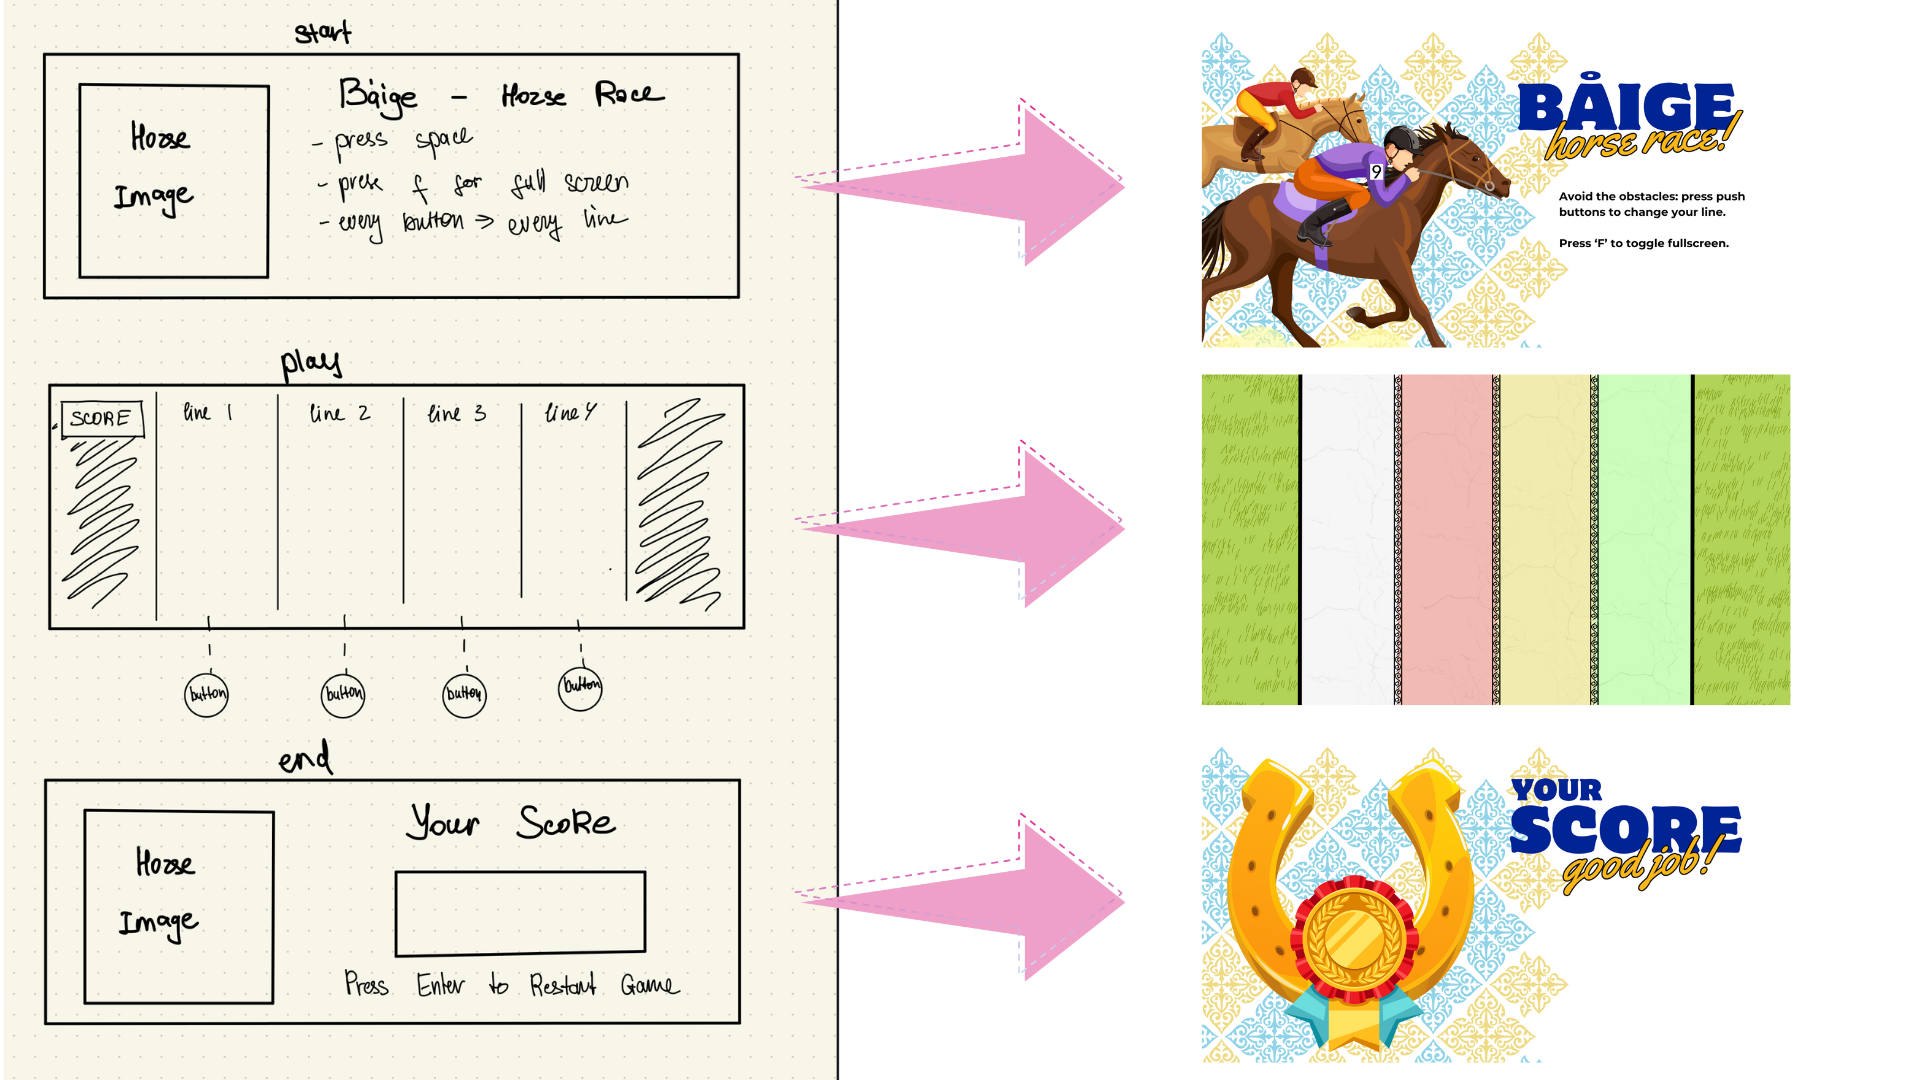
Description of p5.js code: The images and sounds are preloaded before the setup runs. The game has three states: start with instructions given, play with the game playing, and end with the score obtained as shown in Fig. 2. In the instructions, the image with the instructions is shown and the serial communication is set by pressing the space key button and choosing the serial port. By pressing the start button on Arduino, the number ‘0’ is sent to the p5.js, which is interpreted as the transition between the states. So, the game transitions to the game-playing state. In this state, the background image of the racing lines is displayed with the moving obstacles, bonus stars as well and the horse of the user. In the beginning, the horse is in the initial position given unless the number is sent to the p5.js by pressing one of the four buttons on Arduino. When the button is pressed, the number is sent to p5.js and the horse moves by x coordinate accordingly. Moreover, there are the moving obstacles, which appear randomly in the x coordinates of windowWidth * (3 / 12), windowWidth * (5 / 12), windowWidth * (7 / 12), windowWidth * (9 / 12) and move by y coordinate and increase the speed. Initially, these obstacles were identified as the circles as well as the horse, so the minimum distance between them was calculated as the obstacle.radius + (circleRadius / 2). The collision was identified when the distance between the obstacle radius and the circle (horse) radius was smaller than the minimum distance. When they collide, the game ends by freezing the image or sleeping for a second and then transiting to the end state. A similar approach was taken with the bonus stars, but the collision with them added extra points to the score. The score was calculated by every obstacle passing through the window, so the y coordinate of the obstacle circle is greater than the window height. In the end state, the end image is displayed with the score.
The code I am proud with: I am particularly proud with the code of calculating the distance between the obstacles and the circle (horse) to determine the collision.
// for loop accessing each obstacle in the array and calcilating the distance between the horse and obstacle as well as minimum distance for collision to occur
 for (let i = 0; i < obstacles.length; i++) {
  let obstacle = obstacles[i];
  let distance = dist(circleX, windowHeight * (2 / 3), obstacle.x, obstacle.y);
    let minDistance = obstacle.radius + (circleRadius / 2);

// if the horse collides with the obstacles, then the game is over, transitting to end game state and playing the winning sound
  if (distance < minDistance) {
    wonGame = false;
    // transitting to end game state
    gameState = 'end';
    level_win.play();
// if the horse doesn't collide with the obstacles, for each of the obstacles passed through the window height, the score is incremented.
  } else if (obstacle.y > windowHeight && !obstacle.passed) {
      obstacle.passed = true;
      score++;
    }
}
Embedded p5.js code:
Description of communication between Arduino and p5.js: there are five buttons on Arduino. Every time the button is pressed, the corresponding number is written down, which is sent to p5.js. For every one of these numbers, there are the x coordinates of the horse. Hence, the horse moves by x coordinate depending on the number taken. For instance, when the red button is pressed, the number 4 is sent to p5.js, meaning that the horse should move to the windowWidth*(3/12).
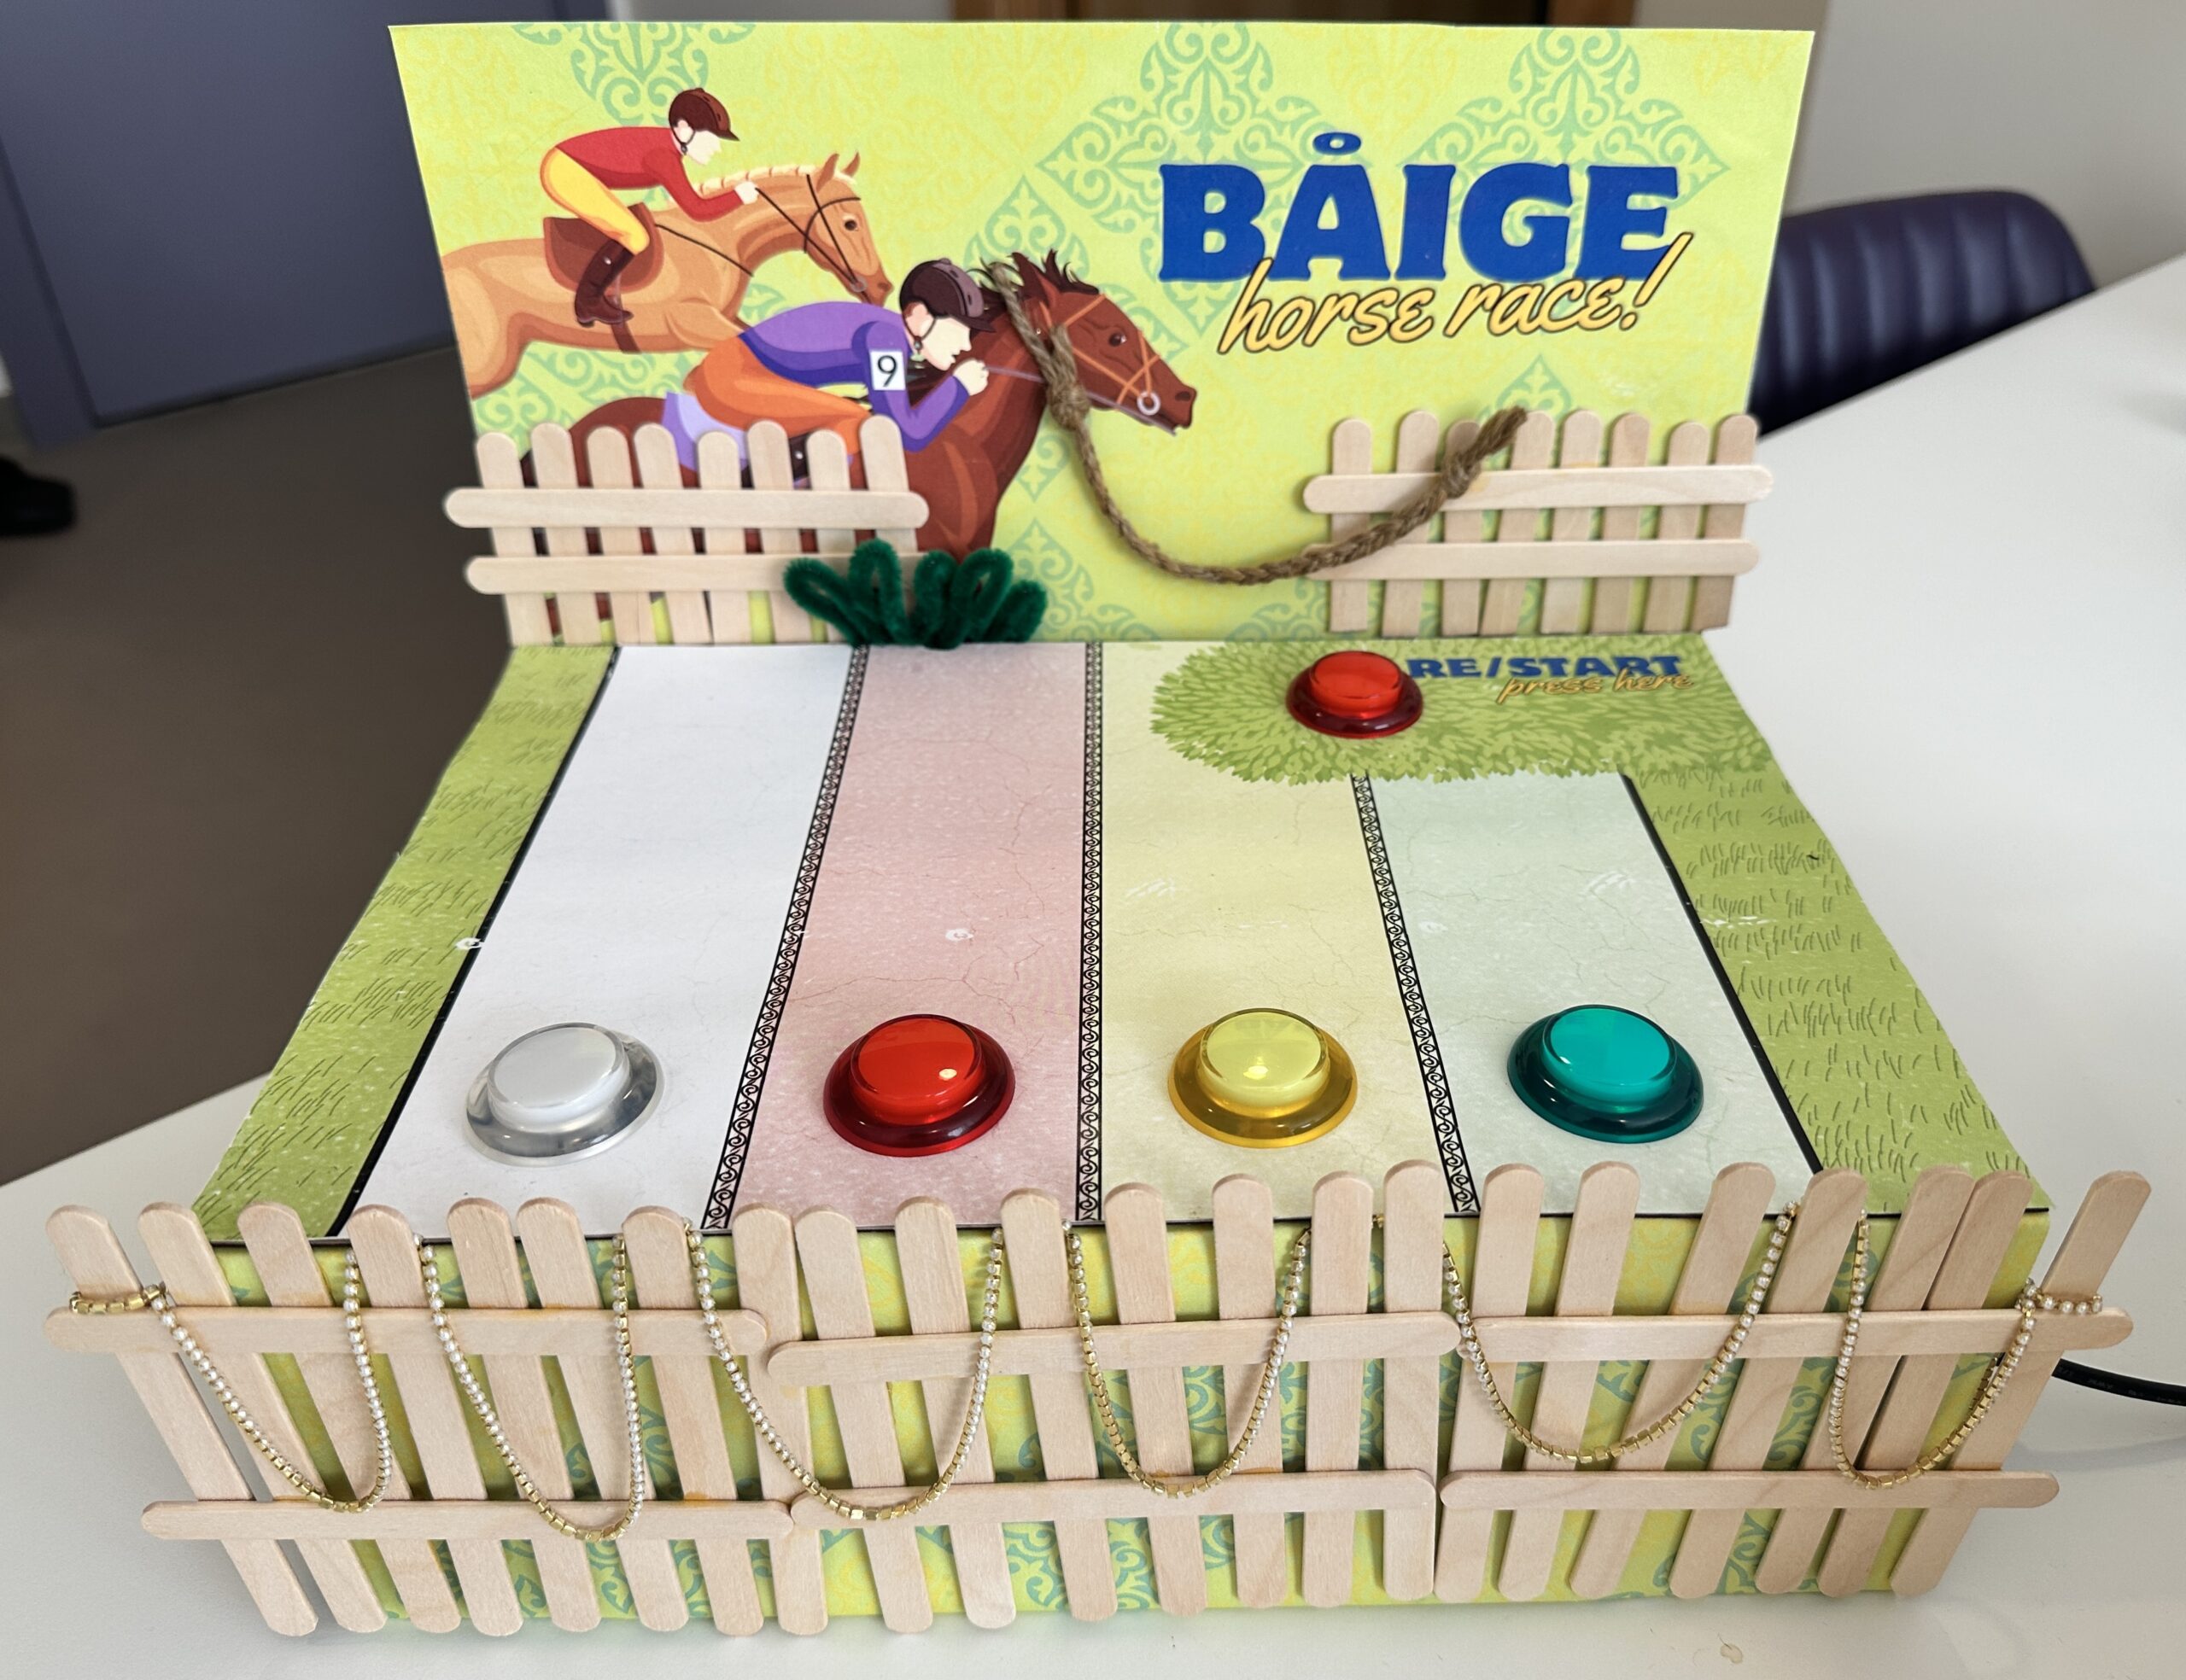
The aspects of the project I am proud of: Overall, I am very proud of the final product because I see the development of creative coding skills from absolute zero to something that can be presented in the IM Show. Specifically, I am proud of being able to correctly create the serial communication between Arduino and p5.js, so the Arduino sends the number every time the button is pressed and that number is rightly interpreted by p5.js and moves the horse by x coordinate. Moreover, as this is my very first dynamic game project, I am proud of being able to code the moving obstacles and awards as well as the collision between them. When the horse collides with an obstacle, the game is over, while when it collides with the award, bonus points are given to the score. Last but not least, I am very proud of the physical decoration I made shown in Fig. 3. because overall the project looks aesthetically pleasing and engaging.
The areas of improvement: There are some improvements to the project that I would like to add in the future. For instance, it would be great if the score of the users could be saved and created the list of users with the highest score in the game. This would create a sense of competition with others, making the game more interesting. Furthermore, there are minor details that would enhance the experience of playing the game such as whenever the collision with the snake happens, the image of the horse and snake changes as if the snake was biting the horse or something similar. I had that idea but I couldn’t find the image which would satisfy that. Hence, I think in the future, I might draw the images of the snake and horse and import them. Additionally, the moving trees and houses on the sides would be a great addition, enhancing the experience that the horse is moving. Moreover, as an improvement for the game, it would be great if two or more people could play the game together and compete with each other. In this case, the game would look like a horse race.
I conducted user testing twice with different people before improving the project and after improving it. Both of the times, I gave the users the game without explaining it, but they had a chance to read the short instructions on the game itself.
Before improving the project: The game didn’t have the physical decoration as the box with the lines, but the small push buttons on the Arduino. Overall, the game experience was good and the people asked to play again and again. Yet, there were several issues. First, because of the absence of the physical implementation of the lines with the decoration, it was hard for the users to immediately understand what each of the buttons does and is responsible for. As it is shown in video 1, small buttons have nothing except the colors, giving a hint that they are responsible for the position of each of the lines. Because of this, they had to play around with buttons and figure it out by themselves. As soon as they figured it out, it was much easier and more interesting to play. Second, sometimes when the users clash with the obstacles, it happens so fast that the users might not understand where it happened. Hence, it seems like the game finished out of nowhere. Third, in terms of user experience, it was a bit inconvenient for the users to always press the button “Enter” to start and restart the game.
After improving the project: All three points mentioned above were improved and implemented. First, the physical box with four colored lines with buttons of the same color on top of them and the decorations were added. Because of this, the users were able to figure out the functionality of the push buttons quickly. Second, the sleep function was added, so when the user clashes with the obstacle, the picture freezes for a second, showing the clash. In this case, no matter how fast was the clash, the user will be able to see that. Third, I added one more button responsible for starting and restarting the game, so the user doesn’t have to touch something outside of the buttons. After improving these things, the overall experience of playing the game was much better. Yet, there were times when the user didn’t hit the snake, but the game was over. This happened because the distance of collision was a bit more than the image, so I had to decrease that.
Concept Overview)
This post includes edits as there were some feature changes after presenting to the class before the IM showcase. This reflects the finalized version that was shown on the day of IM showcase.
To go over the basic format of the game, this is a bubble shooter game. The player shoots a bubble with a colour- if it hits another ball with the same colour, they pop, giving the player scores.
I made this a time-attack format: I gave each game 1 minute to make sure that the game doesn’t drag on for too long and the game is intense.
I also wanted to create something fun and stress relieving- so I used the actions ‘punching’ and ‘screaming.’
The shooter’s direction/angle is controlled by the joystick (rotate). This was created by glueing a sphere-shaped pencil sharpener to a potentiometer.
The shooter will shoot if the player hits the table with their hand with the glove on- this has a force sensor on it.
If the player shouts loud and long enough, the gauge at the bottom right corner will fill up- once filled, it will provide a black ball. A black ball is a bonus: this ball can pop any coloured balls if it hits them.
Challenges)
There were multiple challenges. The first was figuring out how to make sure there’s a reason for the player to shout. Another thing I had to figure out was how to make the game intense as the game is pretty simple.
Also, on the day of the IM showcase, there were multiple players that came to try the game. Eventually, after about an hour, the force sensor on the glove ripped. I had a back up in my code, that allowed the ENTER Key to work as a shooter too. So, from some point of the IM showcase, the glove was replaced by the ENTER key.
Code)
There are multiple pages like initializePage, startPage, gamePage, gameOverPage, leaderboard etc. Depending on conditions and button clicks, the currentPage variable is assigned as different pages.
Set Up / Draw:
function setup() {
  createCanvas(600, 700);
  nextBallColor = random(bubbleColors);
  shooter = new Shooter(width / 2, height - 50, nextBallColor);
  shooter.canShootFlag = true;
  leaderboard = new Leaderboard();
  mic = new p5.AudioIn();
  mic.start();
  timer = 60000; // set game timer to 60 seconds
  if (!serialActive) {
    currentPage = new InitializePage();
  }
  else {
    currentPage = new StartPage();
  }
}

function draw() {
  clear();
  background(220);

  currentPage.display();
  currentPage.handleKeyPress();


  if (currentPage instanceof GamePage) {
    // update timer
    if (timer > 0) {
      timer -= deltaTime;
    } else {
      currentPage.endGame();
    }
    volume = mic.getLevel() * 10000;
    //console.log('Volume: ', volume);

    //////////////////////////////////
    //SEND TO ARDUINO HERE (handshake)
    //////////////////////////////////
    let sendToArduino = score + "\n";
    writeSerial(sendToArduino);

    shooter.update();
    shooter.display();

    for (let i = balls.length - 1; i >= 0; i--) {
      balls[i].update();
      balls[i].display();

      // check if ball hits top border of game box
      if (balls[i].y - balls[i].radius <= 100) {
        balls[i].stop();
      }

      // check if ball hits another ball
      for (let j = 0; j < balls.length; j++) {
        if (i !== j && balls[i].intersects(balls[j])) {
          if ((balls[i].color === 'black' || balls[i].color === balls[j].color) && !balls[i].isPopping() && !balls[j].isPopping()) {
            balls[i].delayedPop();
            balls[j].delayedPop();
            shooter.setCanShoot(false);
            setAutoShootTimeout();
            autoShoot();
          } else {
            balls[i].stop();
          }
        }
      }
      // check if ball hits side border of game box
      if (balls[i].x - balls[i].radius <= 50 || balls[i].x + balls[i].radius >= 550) {
        balls[i].bounceOffWall();
      }
    }
    if (volume > 1000 && gaugeValue < maxGaugeValue){
      gaugeValue += 1;
    } else if (volume < 700 && gaugeValue > 0) {
      gaugeValue -= 1;
    }
    if (gaugeValue >= 100) {
      nextBallColor = 'black';
      shooter.setColor('black');
      gaugeValue = 0;
    }

    // set values & draw guage
    let gaugeX = width - 120;
    let gaugeY = height - 110;
    let gaugeWidth = 100;
    let gaugeHeight = 20;

    drawGauge(gaugeX, gaugeY, gaugeWidth, gaugeHeight, gaugeValue, maxGaugeValue);

  }
  //
}
In the setup function, I start the microphone input and set up the timer for the game. I also check if the serial port is connected and set the currentPage. (If not connected, we go to InitializePage and if connected, it goes to startPage.)
Draw function displays each display part of different pages. So, each page has a display function. It also does a few jobs when the currentPage is gamePage:
– communicate with arduino
– make the timer run
– calculate volume/gauge for display
gamePage:
class GamePage {
  constructor() {
    stroke('white');
    this.homeButton = new Button(188, 56, "Home", 138, 50, true);
    this.restartButton = new Button(410, 56, "Restart", 138, 50);
    setAutoShootTimeout();
  }

  score () {
    // show score
    textAlign(LEFT, TOP);
    textSize(20);
    fill(0);
    text('Score: ' + score, width - 130, 50);
  }


  display() {
    // bring border
    clear();
    background('black');
    image(gameBorderImage, -76, -10, 756, 750);

    shooter.update();
    shooter.display();

    // update & draw balls
    for (let i = balls.length - 1; i >= 0; i--) {
      // check if balls cross the bottom border of game box
        // shot value is used to make sure it doesn't consider newly shot balls
      if (balls[i].y + balls[i].radius >= height - 60 && balls[i].y - balls[i].radius <= height - 60 && balls[i].shot == 1 && !balls[i].isPopping()) {
        this.endGame();
      }

      balls[i].update();
      balls[i].display();

      // check if balls touch the top border of game box
      if (balls[i].y - balls[i].radius <= 100) {
        balls[i].stop();
      }

      // check if ball touches another ball
      for (let j = 0; j < balls.length; j++) {
        if (i !== j && balls[i].intersects(balls[j])) {
          if ((balls[i].color === 'black' || balls[i].color === balls[j].color) && !balls[i].isPopping() && !balls[j].isPopping()) {
            // if ball hits another ball of same colour, make them disappear after a short delay
            balls[i].delayedPop();
            balls[j].delayedPop();
            shooter.setCanShoot(false); // prevent shooting until the balls pop
            setAutoShootTimeout();
          } else {
            // ball hit another ball of different colour
            balls[i].stop();
          }
        }
      }
      // check if balls touch the side borders of game box
      if (balls[i].x - balls[i].radius <= 50 || balls[i].x + balls[i].radius >= 550) {
        balls[i].bounceOffWall();
      }
    }

    // display timer
    textAlign(LEFT, BOTTOM);
    textSize(20);
    fill('white');
    text("Time: " + Math.ceil(timer /  1000) + 's', 45, height - 10);

    this.homeButton.display();
    this.restartButton.display();
  }

  handleButton() {
    if (this.homeButton.isMouseOver()) {
      currentPage = new StartPage();
    } else if (this.restartButton.isMouseOver()) {
      this.handleRestartButton();
    }
  }

  handleKeyPress() {
    // nothing to do
  }

  handleRestartButton() {
    // reset variables
    timer = 60000;
    score = 0;
    balls = [];
    nextBallColor = random(bubbleColors);
    shooter.setColor(nextBallColor);
    shooter = new Shooter(width / 2, height - 50, nextBallColor);
    shooter.setCanShoot(true);
    setAutoShootTimeout();
  }

  endGame() {
    console.log("Game Over");
    currentPage = new GameOverPage(score);
  }

  reset() {
    // reset variables
    timer = 60000;
    score = 0;
    balls = [];
    nextBallColor = random(bubbleColors);
    shooter.setColor(random(bubbleColors));
    shooter = new Shooter(width / 2, height - 50, nextBallColor);
    shooter.setCanShoot(true);
    setAutoShootTimeout();
  }

}
gameoverPage:
class GameOverPage {
  constructor(score) {
    this.score = score;
    this.playerName = '';
    this.submitButton = new Button(354, height - 75, 'Submit', 180, 70);
    this.isSubmitting = false;
    this.minNameLength = 4;
  }

   display() {
    clear();
    background('black');
    stroke('white');
    image(gameOverImage, 0, 0, 600, 700);

    textSize(60);
    textAlign(CENTER, CENTER);
    text(this.score, 160, 590);

    // max number of characters for player name: 10
    this.playerName = this.playerName.substring(0, 10);
    textSize(32);
    text(this.playerName, width / 2, 405);

    this.submitButton.display();
  }

  handleButton() {
    if (this.submitButton.isMouseOver()) {
      this.isSubmitting = true;

      // validity check for player name
      if (this.isNameValid()) {
        leaderboard.addScore(this.playerName, this.score);
        currentPage = leaderboard;
      } else {
        console.log("Invalid player name");
      }
    }
  }

  isNameValid() {
    // validity check: length / taken or not
    return (
      this.playerName.length >= this.minNameLength &&
      this.playerName.length <= 10 &&
      !leaderboard.isNameTaken(this.playerName)
    );
  }

  handleKeyPress() {
    if (keyCode === BACKSPACE && keyIsPressed) {
      this.playerName = this.playerName.slice(0, -1);
      keyCode = -1;
    }
  }

  keyTyped() {
    if (keyCode >= 65 && keyCode <= 90 && this.playerName.length < 10) {
      this.playerName += key;
    }
  }
}
leaderBoard:
class Leaderboard {
  constructor() {
    this.scores = [];
    this.replayButton = new Button(390, 660, 'Replay', 105, 50);
    this.homeButton = new Button(210, 660, 'Home', 105, 50, true);
  }

  addScore(playerName, score) {
    // add score to leaderboard
    this.scores.push({ playerName, score });

    // store all scores if there are fewer than 'maxScores'(=max number of scores it can store) scores
      // if not, sort and only keep 'maxScores'(=max number of scores it can store) scores
    if (this.scores.length > this.maxScores) {
      // sort scores (highest to lowest)
      this.scores.sort((a, b) => b.score - a.score);
      this.scores = this.scores.slice(0, this.maxScores);
    }
  }

  isNameTaken(playerName) {
    // check if another player took the name (has the same name as typed name)
    return this.scores.some(entry => entry.playerName === playerName && entry.playerName.length === playerName.length);
  }

  display() {

    clear();
    background('black');
    stroke('white');
    image(leaderBoardImage, 0, 0, 600, 700);

    // sort scores (highest to lowest)
    this.scores.sort((a, b) => b.score - a.score); //needed? isn't it already sorted?

    // print all players + scores
    strokeWeight(1);
    for (let i = 0; i < this.scores.length; i++) {
      const entry = this.scores[i];
      let textSizeValue = 22; // default text size (ranks 3, 4, 5)
      let text_x;
      let text_y;

      // set x, y coordinates & text size for each ranker
      if (i === 0) {
        textSizeValue = 36;
        text_x = 90;
        text_y = 205;
      } else if (i === 1) {
        textSizeValue = 28;
        text_x = 110;
        text_y = 305;
      } else if (i == 2) {
        text_x = 135;
        text_y = 405;
      } else if (i == 3) {
        text_x = 135;
        text_y = 495;
      } else if (i == 4) {
        text_x = 135;
        text_y = 580;
      }

      textSize(textSizeValue);
      fill('white');

      // print player + score
      textAlign(LEFT, CENTER);
      text(`${entry.playerName}`, text_x, text_y);
      textAlign(RIGHT, CENTER);
      text(`${entry.score}`, width - text_x, text_y);
    }

    this.replayButton.display();
    this.homeButton.display();
  }

  handleButton() {
    if (this.replayButton.isMouseOver()) {
      // reset variables
      timer = 60000;
      score = 0;
      balls = [];
      shooter.setCanShoot(true);
      setAutoShootTimeout();
      currentPage = new GamePage();
    } else if (this.homeButton.isMouseOver()) {
      // reset variables
      timer = 60000;
      score = 0;
      balls = [];
      nextBallColor = random(bubbleColors);
      shooter.setColor(random(bubbleColors));
      shooter = new Shooter(width / 2, height - 50, nextBallColor);
      shooter.setCanShoot(true);
      setAutoShootTimeout();
      currentPage = new StartPage();
    }
  }

  handleKeyPress() {
    // nothing to do
  }
}
reading serial from arduino:
function readSerial(data) {
  ////////////////////////////////////
  //READ FROM ARDUINO HERE
  ////////////////////////////////////
  if (data != null) {
    //console.log(data);
    let fromArduino = split(trim(data), ",");
    if (fromArduino.length == 2) {
      potValue = int(fromArduino[0]);
      forceValue = int(fromArduino[1]);

      if (currentPage instanceof GamePage){
        const previousBallMoving = balls.length === 0 || !balls[balls.length - 1].isMoving();

        if (forceValue == 1 && shooter.canShoot() && previousBallMoving) {

        if (shooter.canShoot())
        console.log("shooting through force sensor");
        let ball = new Ball(shooter.x, shooter.y, shooter.angle, nextBallColor);
        balls.push(ball);
        nextBallColor = random(bubbleColors);
        shooter.setColor(nextBallColor);
        shooter.setCanShoot(true);
        setAutoShootTimeout();
      }

      }

    }
  }
}
class ball:
class Ball {
  constructor(x, y, angle, color) {
    this.x = x;
    this.y = y;
    this.diameter = 50;
    this.radius = this.diameter / 2;
    this.speed = 10;
    this.angle = angle;
    this.color = color;
    this.stopped = false;
    this.popping = false;
    this.popTimer = 0; // timer for delayed popping
    // value to check if it's newly shot ball or not
      // 0 means it's a new ball that's being shot / moving
      // 1 means it's a ball that was shot before
    this.shot = 0;
  }

  update() {
    if (!this.stopped && !this.popping) {
      this.x += cos(this.angle) * this.speed;
      this.y += sin(this.angle) * this.speed;
    }

    if (this.shot === 0) {
        for (let j = 0; j < balls.length; j++) {
          if (this !== balls[j] && this.intersects(balls[j])) {
            // ball hit another ball
            this.shot = 1;
            this.stop();
            break;
          }
        }
        if (this.y - this.radius <= 100) {
          // ball hit the top border
          this.shot = 1;
          this.stop();
        }
      }

    // update pop timer
    if (this.popTimer > 0) {
      this.popTimer -= deltaTime;
      if (this.popTimer <= 0) {
        this.pop();
        shooter.canShootFlag = 'true';
      }
    }
  }

  display() {
    fill(this.color);
    ellipse(this.x, this.y, this.diameter, this.diameter);
  }

  stop() {
    this.stopped = true;
    if (this.color === 'black') {
      // black ball: bonus ==> pop regarldess of colour
      for (let j = 0; j < balls.length; j++) {
        if (this !== balls[j] && this.intersects(balls[j]) && !balls[j].isPopping()) {
          balls[j].delayedPop();
          this.delayedPop();
        }
      }
    }
  }

  delayedPop() {
    this.popTimer = popDelay;
    this.popping = true;
  }

  pop() {
    this.x = -100; // moving it off screen
    this.y = -100;
    this.stopped = true;
    score += 1;
  }

  bounceOffWall() {
    this.angle = PI - this.angle;
  }
  intersects(otherBall) {
    // ball intersection must consider the strokewieght of the balls
      //otherwise, the balls are drawn in a seemingly overlapping way
    let thisEffectiveRadius = this.radius + this.diameter * 0.05;
    let otherEffectiveRadius = otherBall.radius + otherBall.diameter * 0.05; // Adjust the factor based on stroke weight

    let distance = dist(this.x, this.y, otherBall.x, otherBall.y);
    let minDistance = thisEffectiveRadius + otherEffectiveRadius;

    return distance < minDistance;

}

  isMoving() {
    return !this.stopped && !this.popping;
  }

  isPopping() {
    return this.popping;
  }
}
Below is the project:
Even without the console, the game works with left and right arrow keys and ENTER keys.
Below is a video of players trying the game:
Parts I’m Proud Of:
I think for this project, there was a lot of attention to detail. I had to take care of minor things like
– the check of balls hitting each other considering the stroke weight for non overlapping display of balls
– leaderboard keyboard input (had lots of errors)
– leaderboard name validity check (min/max length, duplicate)
– left/right arrow keys for shooter angle and enter key for shooter (for back up in case arduino is not connected etc)
– etc
Because the game was interactive, I though that it had to make sense and smooth in order for the player to not be distracted.
I also think the features of screaming and punching added a kick to the game. This is a fairly simple retro game and needed additional features to make it more fun and interactive. Last time, I used the screaming aspect but wasn’t the perfect use. I think this game gave good reason for players to scream. Also, I believe the punching (more of hitting the table) part made sense- hitting the table to shoot seems intuitive and understandable for the player.
Improvements / Future Expansions:
I think it’d be really nice if I can develop it to make it like the real bubble shooter. Right now, when I shoot a ball and hit another ball of the same colour, it only pops the ball it hit and the ball it shot. In original bubble shooter, all the connected balls with the same colours pop, and if certain parts are totally disconnected, they fall down all together.
This part wasn’t implemented in the project and I think this addition would be a nice add.
I just wanted to take a short moment to lay out the the details as some has changed.
As I finalized last time, I created a bubble shooter game. As inputs, I am using a potentiometer, force sensor and sound. For sound, I’m not getting it from the arduino but through p5js directly.
The sound is responsible for auto shoot speed. The player would need to shout and scream to slow down the auto shooter- otherwise, the auto shoot will go crazy.
The potentiometer works as the knob to adjust the angle of the shooter.
The force sensor is attached to a glove. The player would have the glove on one hand and hit the ground with their hand to shoot.
There is a leaderboard that shows the top 5 players.
I chose this prompt because I have always wanted a pet but my parents won’t let me have one. Therefore I am doing this prompt as sort of a make up for the thing that I always wanted but never got.
The whole concept is easy. The user as the owner of the pet, interacts with the pet by “talking” to it (typing in messages to “say” to the cat”). After the cat “hears” what the human says, it will evaluate whether the human is being mean or not. This evaluation is achieved through the GPT-3.5-Turbo API. If the cat thinks the human is being mean, it will become less happy, which is represented by decreasing her mood on a scale of 1 to 10, and vice versa. There are two main functions the user can do with the pet for now. One is to talk with it and observe its actions, and the other is an attempt to pet it. If the human chooses to talk with it, a buzzer on the physical CyberCat will start beeping as if responding. The happier the cat is, the slower and calmer the cat’s sound will be. However, if she is very pissed, her sound will be high-speed and rapid. On the other hand, when you try to pet her, it will choose based on its mood. If she is happy (mood 5 or above), she will come towards you until she senses you within 20 centimeters. But if she is not happy, she will back away from you until you are separated for at least 50 seconds.
I also put an “easter egg” in the project, that is if you type in “dance” in the message box, it will give you this sort of “dance” as if trying to catch her own tail.
Video Introduction to Interaction:
Implementation:
The Interaction design is very simple. For the talk function, it is a simple one way transmission. The user inputs through keyboard, and the p5 script processes the input and send message to the Arduino, which responds to the message by making the buzzer beep. For the other, there is a sort of data processing added on top of the other function. after command is given to the Arduino, it will check a condition first, and then act in response to the condition.
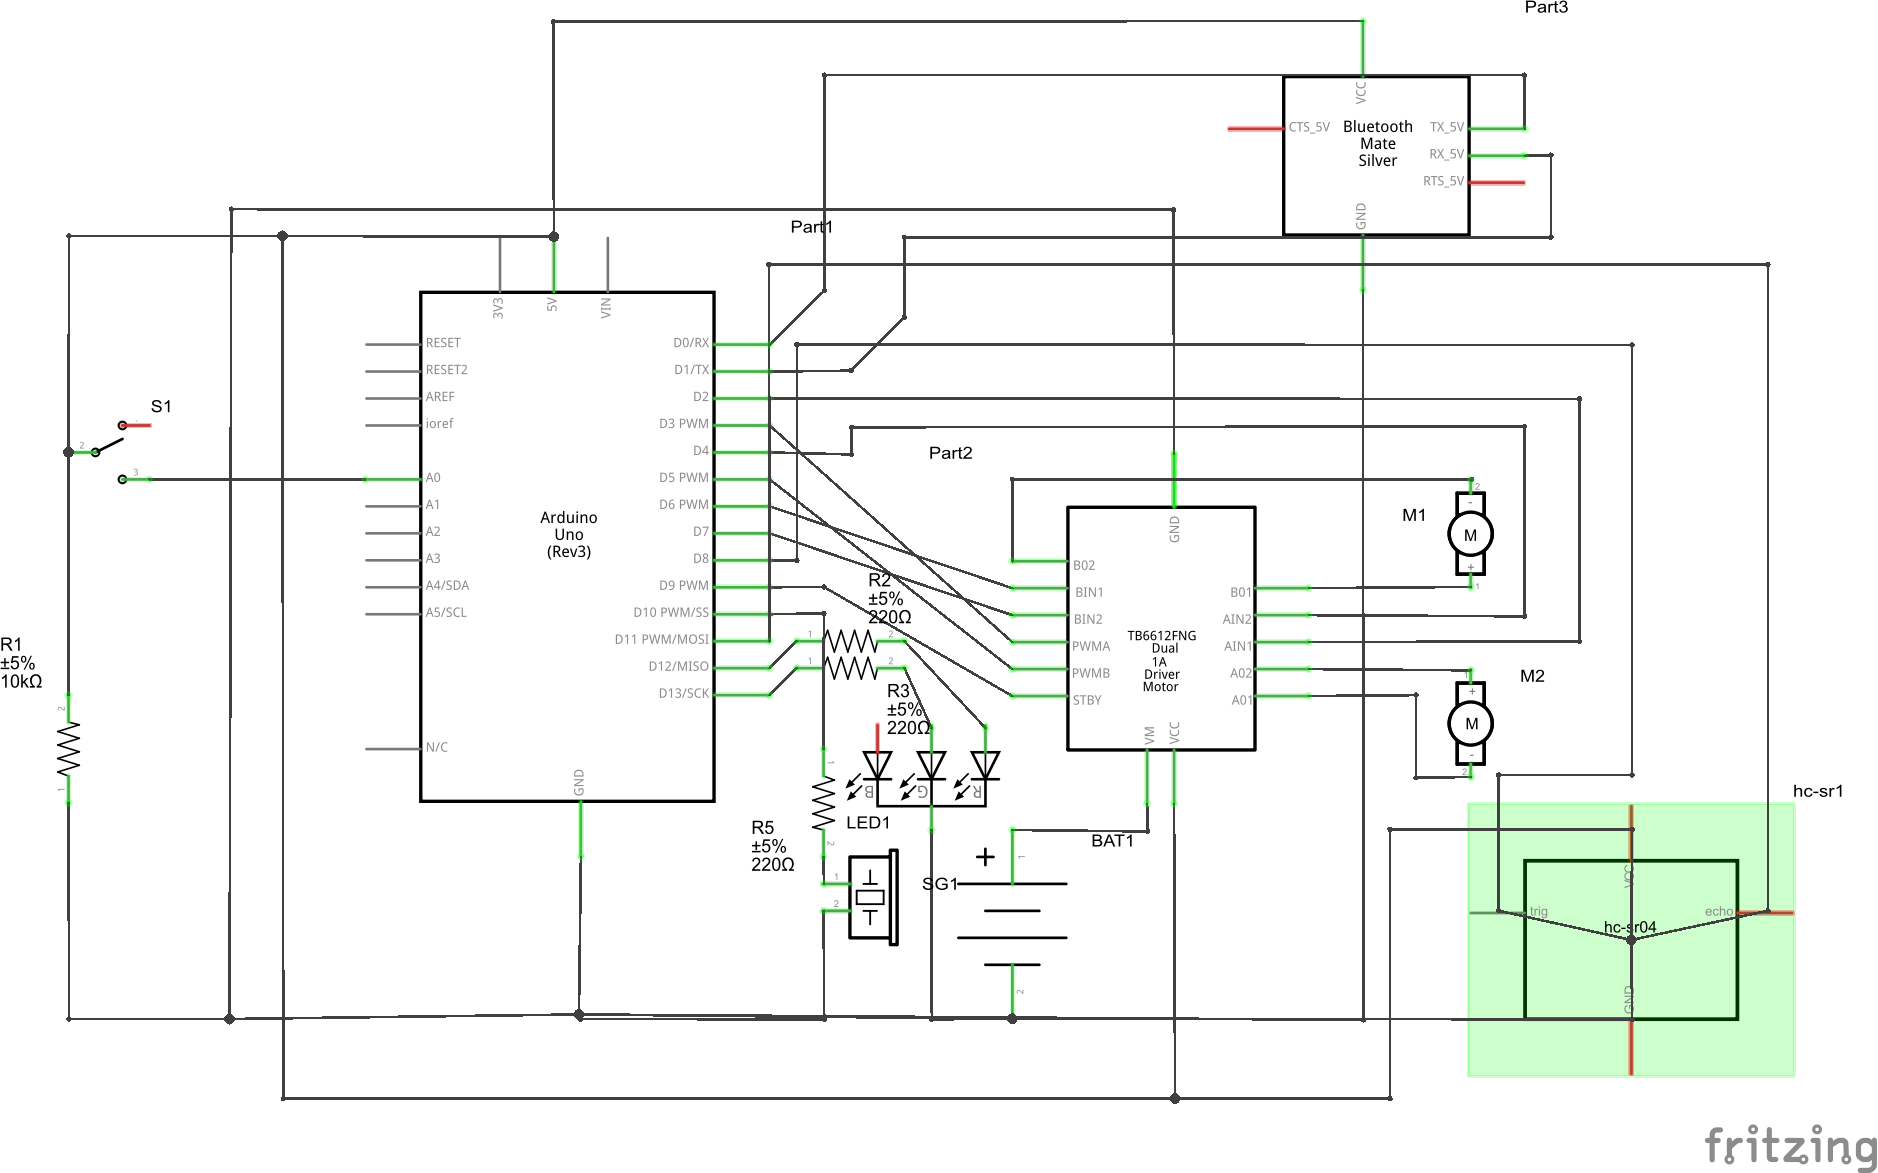
This is the schematic of the project. The pins do not necessarily correspond to the ones in the real implementation but the idea is the same. It includes 7 added parts, which are a BT module HC-06, a motor driver, 2 motors driven by the motor driver, a distance sensor, a buzzer, and an LED. The LED is for signifying the serial connection, the BT module is for wireless connection between Arduino and PC, and the other parts have their own obvious functions. there are many parts of the Arduino code I find worth mentioning, but I guess I will only mention one, that is the loop logic. The code goes like this:
void loop() {


  if (Serial.available() > 0) {
    state = 1;
    analogWrite(greenPin, 255);
    cmd = Serial.parseInt();
    mood = Serial.parseInt();
    if (Serial.read() == '\n') {
      if (cmd == 1) {
        state = 2;
        // beep according to mood
        delay(1000);
        talkResponse(mood);
        delay(1000);
        noTone(buzPin);
        state = 1;
        recieved = 1;
        Serial.println(recieved, state);
      } else if (cmd == 2) {
        state = 2;
        // move according to distance and mood
        delay(1000);
        petResponse(mood);
        state = 1;
        recieved = 1;
        Serial.println(recieved, state);
      } else if (cmd == 3) {
        state = 2;
        //dance
        for(int i = 0; i <3; i++){
          motorDrive(motor1, turnCW, 192);
          motorDrive(motor2, turnCW, 192);
          delay(1000);
          motorDrive(motor1, turnCCW, 192);
          motorDrive(motor2, turnCCW, 192);
          delay(1000);
        }
        motorBrake(motor1);
        motorBrake(motor2);
        state = 1;
        recieved = 1;
        Serial.println(recieved, state);
      } else {
        state = 1;
      }
    }
  }

}
This is also how I did the communication between p5 and Arduino. Usually, the p5 script will send a message to Arduino when an interaction button is pressed. The first number of the message will be the command the Arduino will execute, and it will go inside the if statement to execute the command. After execution, the Arduino will send back two parameters to inform p5 that it has been executed, and more commands can be sent.
Below is the P5 embed:
The p5 sketch has been made to recalculate positions whenever the canvas size is resized, so the full screen will also display perfectly. Basically, the main p5 sketch consists of a start screen, then the main page. on the main page, there is a text area and three buttons. Two of which connect to commands and one is the instructions. The thing that was hardest was the GPT-3.5-Turbo API. It took me a while to learn how to use it and what prompt should I give to make it respond as I want it to. The code is shown below:
let gpt3Endpoint = 'https://api.openai.com/v1/chat/completions';

async function makeOpenAIRequest(userInput) {
  const messages = [
    { role: 'user', content: userInput + "You are a pet, not an assistant. Evaluate my tone and give a response. Your mood is " + currentMood + ". Your mood fluctuates from a range of 1 to 10 where 1 is unhappy and 10 is happy. If the mood is already 10 or 1, no longer increase or decrease it. If you think I am being mean or unfriendly, decrease your mood. Otherwise, increase it. Respond with a format of 'Your cat felt ... and ..., and she ...(something a cat would do). pet mood: ...'. What comes after 'pet mood: ' should always be a number of your current mood." },
  ];

  try {
    const response = await fetch(gpt3Endpoint, {
      method: 'POST',
      headers: {
        'Content-Type': 'application/json',
        'Authorization': `Bearer ${apiKey}`,
      },
      body: JSON.stringify({
        model: 'gpt-3.5-turbo',
        messages: messages,
        max_tokens: 150,
      }),
    });

    const data = await response.json();

    if (data.choices && data.choices.length > 0 && data.choices[0].message && data.choices[0].message.content) {
      chatOutput = data.choices[0].message.content;
      let splitString = split(chatOutput, ':');
      currentMood = int(splitString[1]);
    } else {
      console.error('Invalid OpenAI response:', data);
      chatOutput = 'No valid response from OpenAI.';
    }
  } catch (error) {
    console.error('Error:', error);
    chatOutput = 'An error occurred while generating chat.';
  }
}

let isRequesting = false;

async function generateChat(typedText) {

  if (isRequesting) {
    return; // Don't initiate a new request if one is already ongoing
  }

  isRequesting = true;

  if (typedText!="") {
    await makeOpenAIRequest(typedText);
  } else {
    alert('Please enter a prompt before generating chat.');
  }

  isRequesting = false;
}
This is also the part I am particularly proud of since it is the first time ever I have included AI in one of my projects (Even though I didn’t train it myself).
Area for improvements:
There are many areas for improvement. First of all, The cat is moving on wheels only, making its movements very different from that of a real cat. Also, the current commands we have are very little. maybe in the future, I can add more commands. Another thing is that the AI model I used does not seem smart enough. Its responses sometimes are invalid and unpredictable. I might need to revise and update the prompt so that it does exactly what I asked.
Include some pictures / video of your project interaction
How does the implementation work?
Description of interaction design
Description of Arduino code and include or link to full Arduino sketch
Description of p5.js code and embed p5.js sketch in post
Description of communication between Arduino and p5.js
What are some aspects of the project that you’re particularly proud of?
What are some areas for future improvement?
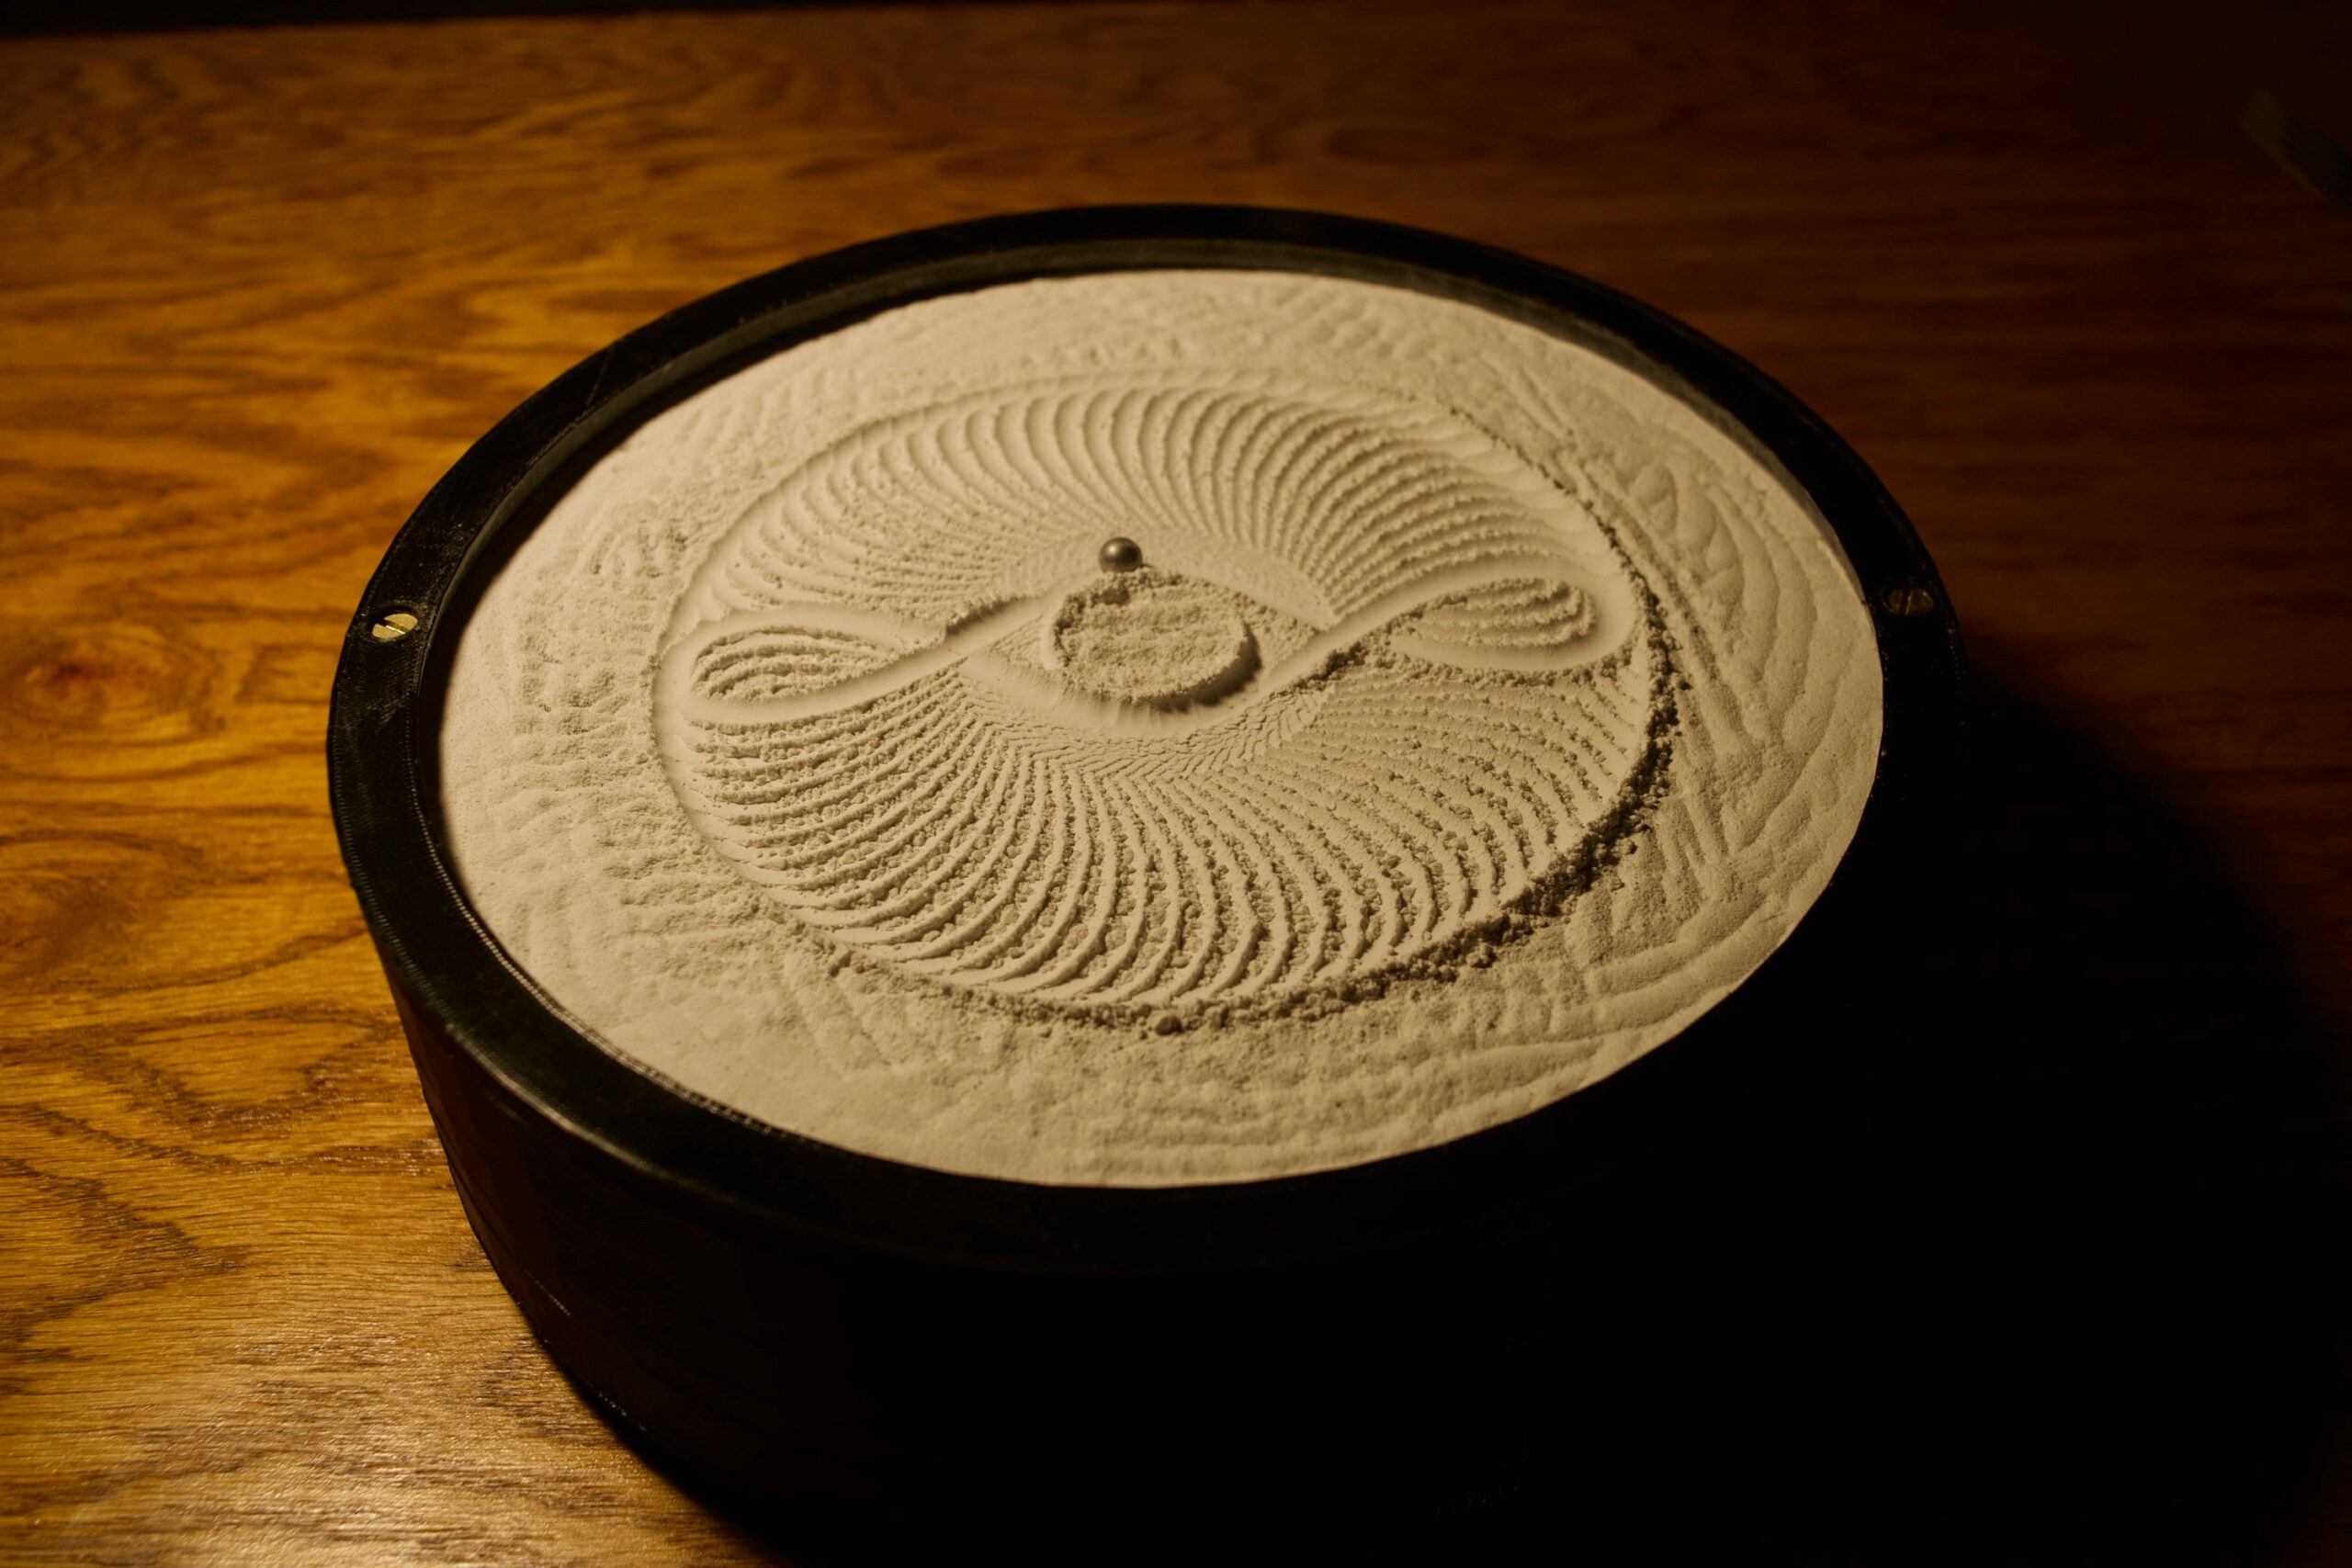
My idea was to creating an art piece using Arduino and p5 that lets user draw pattens on sand, something like this:
I was tempted to change my idea multiple times, because it just seemed too complicated to implement. But I’m glad I stuck with it!
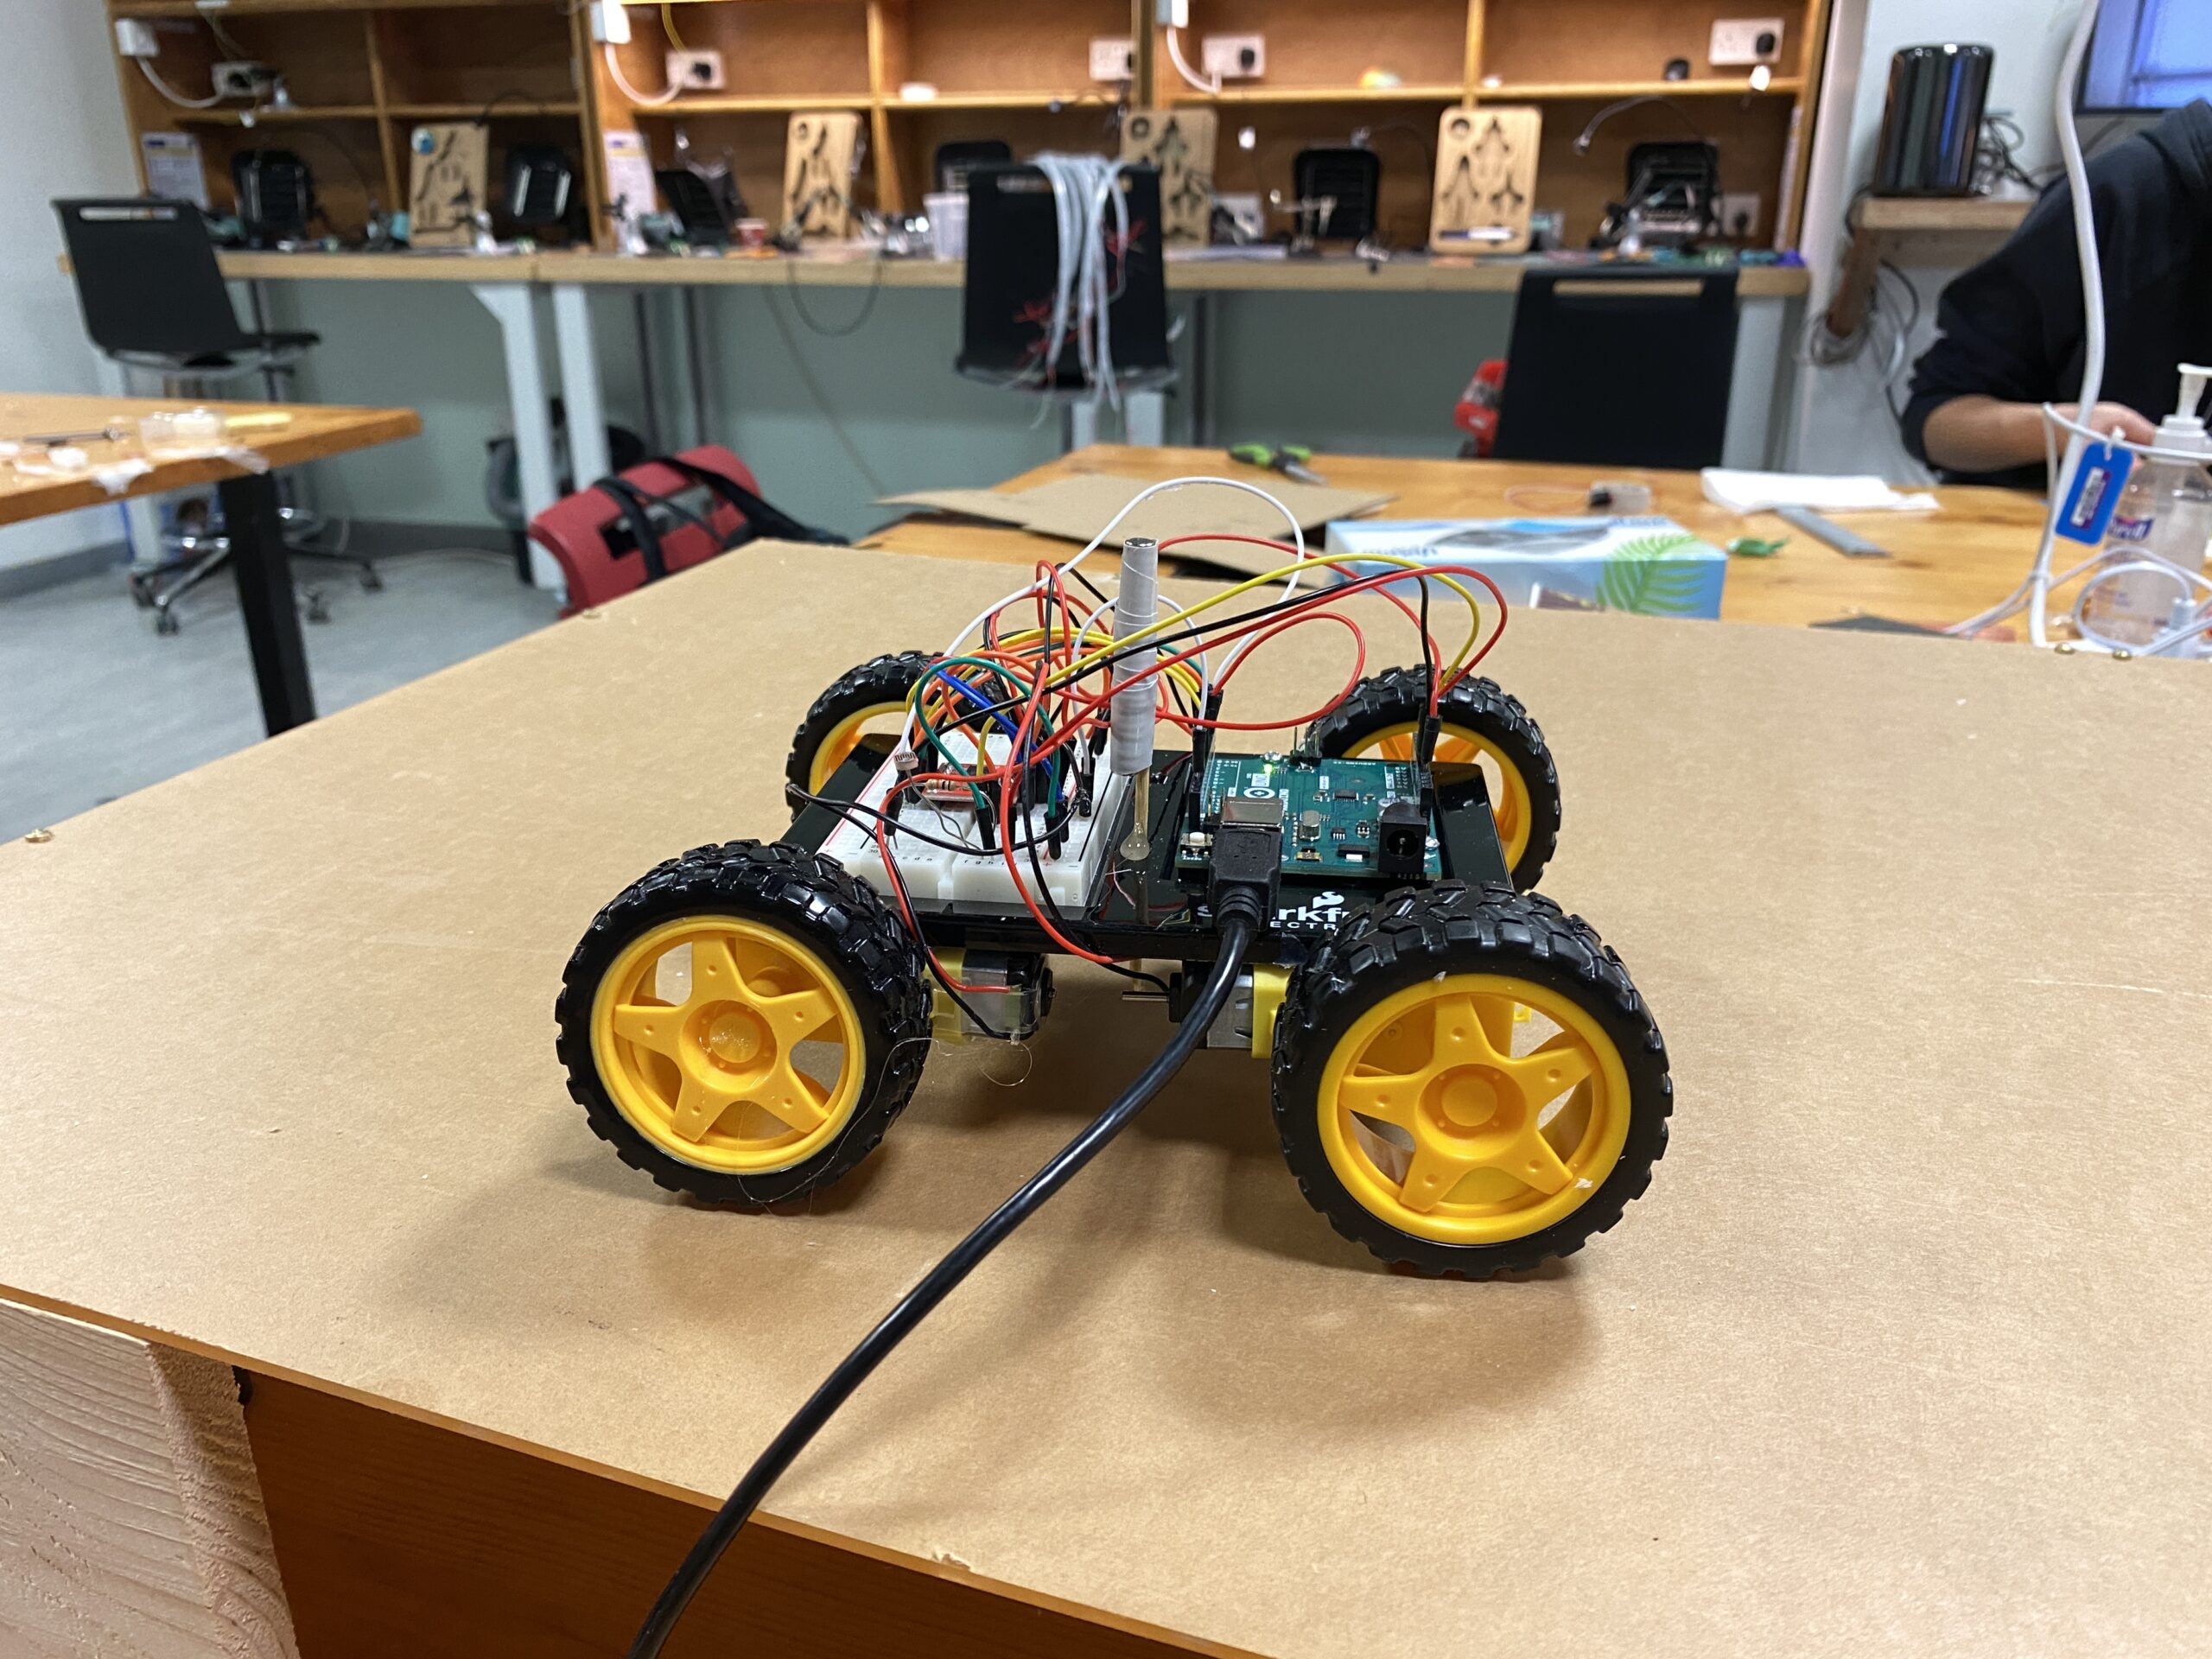
The idea is that there will be something magnetic underneath the platform, hidden from view, and users will be able to move it using an interface. When the magnet underneath the platform moves, the steel ball above will also move with it, leaving patterns on the sand in its wake. In my case, I’ve made a four wheel robot that can go front, back, left, and right.
The white thing sticking out of the robot is a stack of magnets, raised to a height just enough to scrape the bottom surface of the platform. Here’s the Arduino code:
const int ain1Pin = 3;
const int ain2Pin = 4;
const int pwmAPin = 5;

const int bin1Pin = 8;
const int bin2Pin = 7;
const int pwmBPin = 6;


void setup() {
  Serial.begin(9600);
  pinMode(ain1Pin, OUTPUT);
  pinMode(ain2Pin, OUTPUT);

  while (Serial.available() <= 0) {
    Serial.println("0,0");
    delay(300);
    digitalWrite(LED_BUILTIN, LOW);
    delay(50);
  }

  // set speed
  analogWrite(pwmAPin, 255);
  analogWrite(pwmBPin, 255);
}

void loop() {
  while (Serial.available()) {
    int left = Serial.parseInt();
    int right = Serial.parseInt();
    if (Serial.read() == '\n') {
      if (left == 1 && right == 0) {
        analogWrite(pwmAPin, 100);
        analogWrite(pwmBPin, 255);
        digitalWrite(ain1Pin, HIGH);
        digitalWrite(ain2Pin, LOW);
        digitalWrite(bin1Pin, HIGH);
        digitalWrite(bin2Pin, LOW);
      }
      if (left == 1 && right == 1) {
        analogWrite(pwmAPin, 255);
        analogWrite(pwmBPin, 255);
        digitalWrite(ain1Pin, HIGH);
        digitalWrite(ain2Pin, LOW);
        digitalWrite(bin1Pin, HIGH);
        digitalWrite(bin2Pin, LOW);
      }
      if (left == 0 && right == 1) {
        analogWrite(pwmAPin, 255);
        analogWrite(pwmBPin, 100);
        digitalWrite(ain1Pin, HIGH);
        digitalWrite(ain2Pin, LOW);
        digitalWrite(bin1Pin, HIGH);
        digitalWrite(bin2Pin, LOW);
      }
      if (left == -1 && right == -1) {
        analogWrite(pwmAPin, 255);
        analogWrite(pwmBPin, 255);
        digitalWrite(ain1Pin, LOW);
        digitalWrite(ain2Pin, HIGH);
        digitalWrite(bin1Pin, LOW);
        digitalWrite(bin2Pin, HIGH);
      } else if (left == 0 && right == 0) {
        digitalWrite(ain1Pin, LOW);
        digitalWrite(ain2Pin, LOW);
        digitalWrite(bin1Pin, LOW);
        digitalWrite(bin2Pin, LOW);
      }
      int sensor = analogRead(A0);
      delay(5);
      int sensor2 = analogRead(A0);
      delay(5);
      Serial.print(sensor);
      Serial.print(',');
      Serial.println(sensor2);
    }
  }
  digitalWrite(LED_BUILTIN, LOW);
}
Front and back motion is fairly simple — all wheels turn at full speed in the same direction. For left and right, I could’ve just made the wheels on one side turn. But I tried this out, and this created strange 360 degree motions. While the robot was turning, the ball on top of the plane wouldn’t move much. This created a strange user experience. So I thought of the velocity differential of each wheel with respect to the other. If the wheel on this side moves faster than the other side, the robot will turn nicely to this side. That’s how real cars work anyway. I ended up going with this logic, and the ball/robot’s motion is now much much smoother.
I was going to just use two wheels on each side. Two motors work fine with Arduino, as we’ve seen in class. In my first prototype, I had only two wheels, that wasn’t enough power, and the robot’s motion was very slow. So I tried to add two more, but it wouldn’t work, even with another motor driver. The Arduino wouldn’t turn on with four motors and two motor drivers connected. I realized that I didn’t need all four wheels to act independently — the front wheels could just imitate the pair at the back, or vice versa. So I plugged in each front wheel in series with the corresponding back wheel, and it worked great!
On the p5.side, things are much simpler. Here’s the link to the full code.
The user can control the robot’s motion by dragging the mouse, and it creates ripples like this:
I wish I could’ve made the magnet attachment better, though. Right now, it’s just taped to a bamboo skewer, stuck into one of the Sparkfun kit baseplates. A better way to do this would be to make an attachment specifically for this purpose.
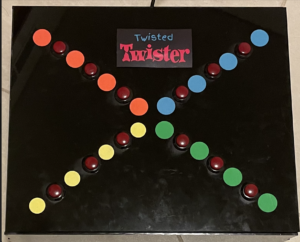
For my final project for this class, I have created Twisted Twister, a version of the popular game twister, that is played with fingers! The challenge is simple – a wheel spins, gives you a color and a hand(left or right) and you press that button with a finger of the respective hand. Every right press gives you a point and every wrong press instantly ends the game. If you manage to have all your fingers successfully on the board, you win!!
Implementation
P5.js : Most of my game is heavily reliant on the p5.js side since I use it to control the entire game logic and display. In the game I have a wheel that spins based on speech recognition. For this I’ve used the p5.speech library that does speech recognition using API functionality. The wheel in itself, is an array of equal divisions of 4 colors. While the wheel is static, there is a black spinner, that’s the one that moves and stops on a particular section and the center of the wheel displays the color. The hand the user has to use is also mentioned on the top with the same color with the intent of making it easier for the user without getting confused with so many bright colors on the screen.
Once the user presses the required switch, they have to continue holding it. I have created an array to track the switches which are already pressed and I compare it with the array of switch states I obtain from the arduino to compare the switch states at various points in the game. If a switch is correct and wasn’t already pressed, the score adds and for a wrong switch the game ends.
Arduino: From the arduino side, it is pretty simple. I have 12 switches, 3 of each of the 4 colors, whose states I obtain in the form of a string but then use it in p5js in the form of an array.
const int redSwitch1 = 13;
const int redSwitch2 = 12;
const int redSwitch3 = A0;
const int blueSwitch1 = 11;
const int blueSwitch2 = 10;
const int blueSwitch3 = A1;
const int greenSwitch1 = 9;
const int greenSwitch2 = 8;
const int greenSwitch3 = A2;
const int yellowSwitch1 = 7;
const int yellowSwitch2 = 6;
const int yellowSwitch3 = A3;

void setup() {
  Serial.begin(9600);
  pinMode(redSwitch1, INPUT_PULLUP);
  pinMode(redSwitch2, INPUT_PULLUP);
  pinMode(redSwitch3, INPUT_PULLUP);
  pinMode(blueSwitch1, INPUT_PULLUP);
  pinMode(blueSwitch2, INPUT_PULLUP);
  pinMode(blueSwitch3, INPUT_PULLUP);
  pinMode(greenSwitch1, INPUT_PULLUP);
  pinMode(greenSwitch2, INPUT_PULLUP);
  pinMode(greenSwitch3, INPUT_PULLUP);
  pinMode(yellowSwitch1, INPUT_PULLUP);
  pinMode(yellowSwitch2, INPUT_PULLUP);
  pinMode(yellowSwitch3, INPUT_PULLUP);
}

void loop() {
  // creating a comma-separated string to represent the states of all switches
  String switchStates = String(digitalRead(redSwitch1)) + "," +
                        String(digitalRead(redSwitch2)) + "," +
                        String(digitalRead(blueSwitch1)) + "," +
                        String(digitalRead(blueSwitch2)) + "," +
                        String(digitalRead(greenSwitch1)) + "," +
                        String(digitalRead(greenSwitch2)) + "," +
                        String(digitalRead(yellowSwitch1)) + "," +
                        String(digitalRead(yellowSwitch2)) + "," +
                        String(digitalRead(redSwitch3)) + "," +
                        String(digitalRead(blueSwitch3)) + "," +
                        String(digitalRead(greenSwitch3)) + "," +
                        String(digitalRead(yellowSwitch3));

  // sending the string data to p5.js
  Serial.println(switchStates);
  delay(500);

}
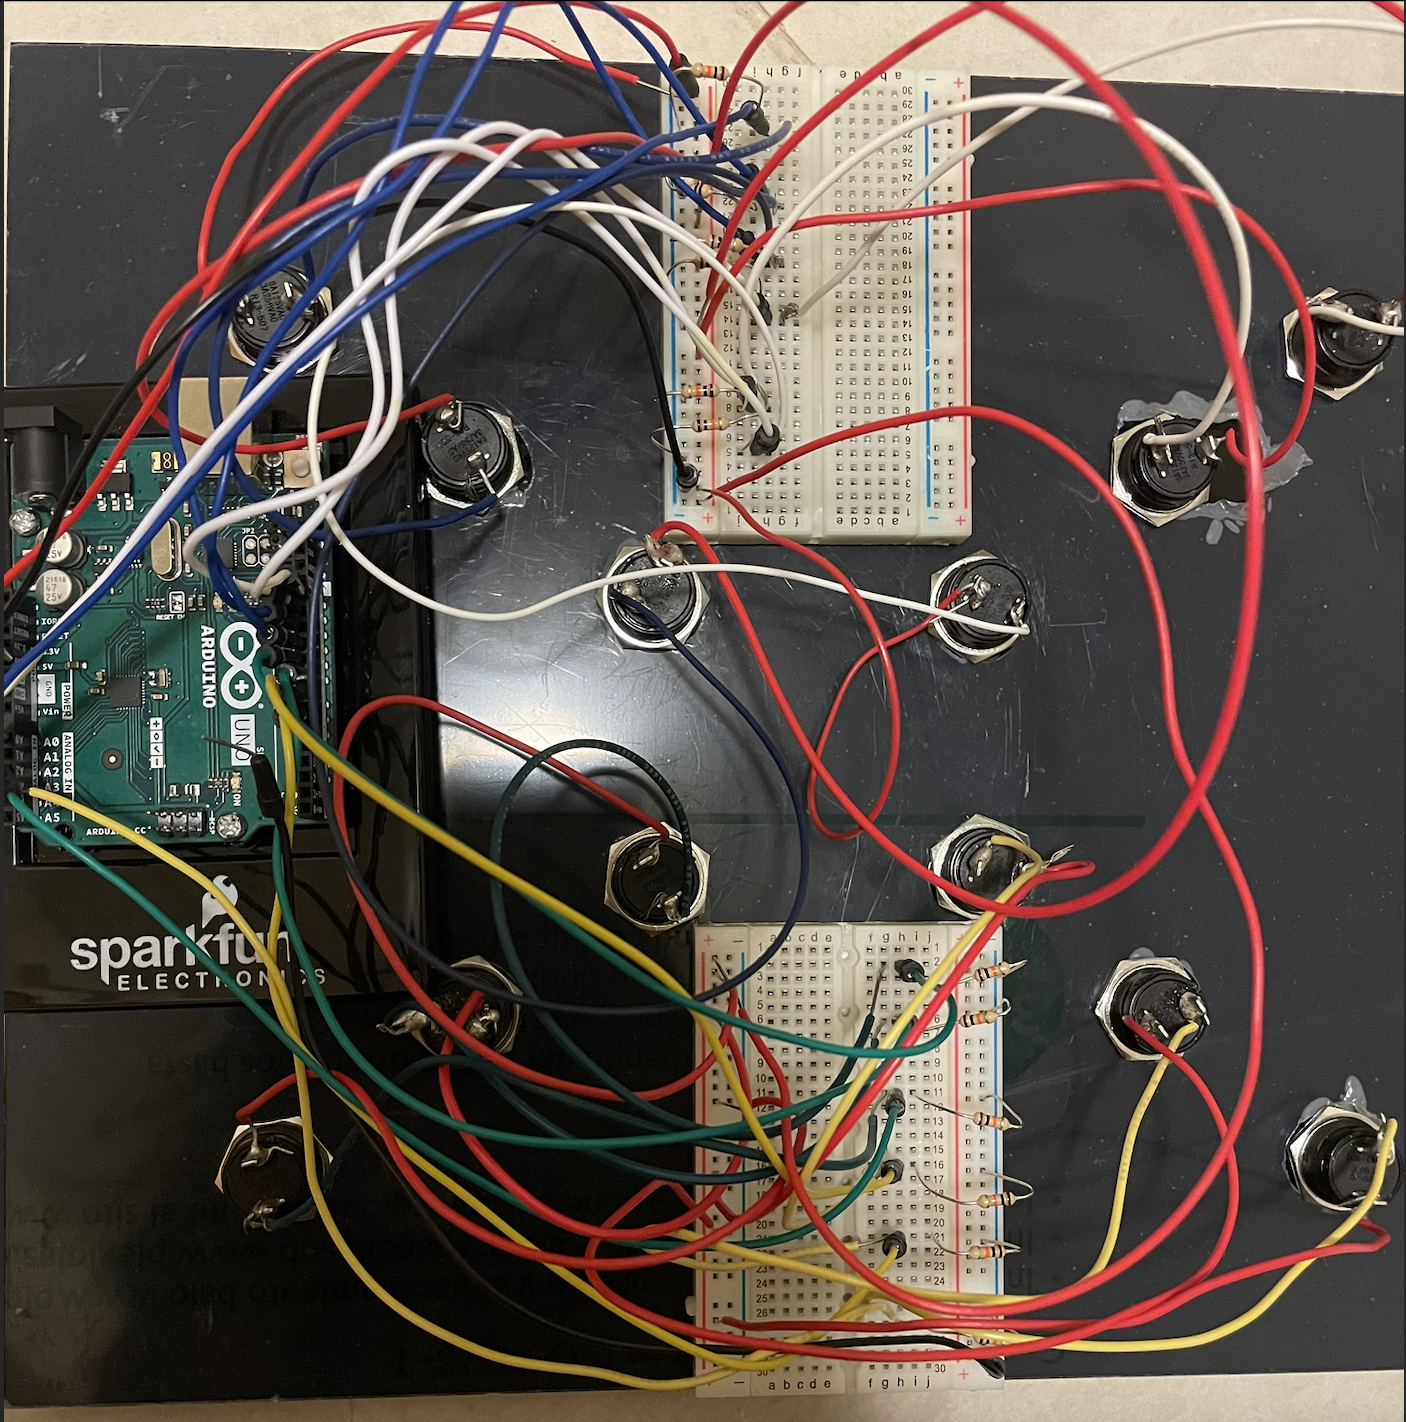
Interaction design: In terms of interaction design, constructing the physical aspects and combining p5js and arduino, it was somewhat frustrating because of the amount of errors but also my favorite part of the project (specifically soldering!! I found myself in the lab soldering my million wires at 8am in the morning and it was therapeutic!!).
I have chosen to place the 12 switches in diagonal rows onto an acrylic board. Since I had multiple wires, I decided to make a box so the wires can go inside without causing a visual mess. The laser cutting took a lot of time but eventually worked out (super grateful to all the lab assistants for helping me). I wanted to use switches bigger than the ones in our kit and couldn’t find as many with different colors, I put circle stickers beside these buttons indicating what color they belong to. Assembling and serial communication was easy. The only part of the interaction that took me the most time was the speech recognition. While the code worked perfectly sometimes, it would randomly get disconnected in the middle and it was difficult to come up with an alternative way to control spinning the wheel without speech recognition and hands.
Aspects that I’m proud of
One of my biggest challenges was coming up with an idea for this project. Either the idea was too vague or too ambitious. Once I decided on this game I had constant doubts of whether or not it would be fun but after the laughs during the user testing, I think it would pass off as good enough for a first timer.
In terms of code, I’m really happy with the speech recognition and while I did get a reference for how to make the wheel spin, I had to break the code down and modify it a lot to make it work with my game logic and I’m really happy it worked out finally!! I found a fix for the speech recognition disconnection and now it works almost all the time! I found it relaxing to keep stretching my fingers for playing this game as they’d become stiff from hours of typing!!
Future improvements
I would want to try to blackout the sections of the wheels that are already visited so the user wouldn’t have to pass it manually if the same color appears and there’s no switch of that color left. I want to make my circuit and code more organized that what I currently have. I could also consider adding a microphone closer to the user to make the speech recognition more efficient. Overall I’m really happy with the way it turned out but would love to make this more fun and engaging with more time in hand.
I just finished the prototype, so I haven’t added the sand on top of the platform yet. I’ll just add the sand on the day of the showcase.
I asked my friends to try it out, and I think they liked it (refer to the video above). I just told them how to control the robot (with arrow keys for now, just for testing, even though I have the mouse interaction already programmed). I think if I could incorporate a joystick in the project, it would really come together, and also its use would be very intuitive. But without mouse/keyboard input, there wouldn’t be any use for p5.js, so I had to keep it the way it is now.
Sometimes they would drive the ball off the edge of the platform, and so they suggested adding edges to the platform. I think the edges are important anyway because there’s going to be sand, and without edges the sand will just be everywhere.
