Concept:
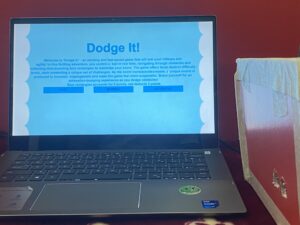
For my final project, I have created a game called “Dodge It!”. This game consists of moving rectangles- red and blue colored- on screen and there’s a ball that moves horizontally that the users control to navigate through these obstacles while dodging the red rectangles and picking up the blue ones to gain points. There’s a slight twist to it, instead of using just buttons to control the ball, users use their physical hands to swipe left and right to control the ball’s movement in the game. To increase the interaction, I also implemented a system where every score will produce a unique tone and as the user loses scores, the tone keeps getting deeper and deeper as if they’re reaching the end, and as the score gets higher and higher, the tone gets higher showcasing an increased suspense element. The motivation behind this game is from online games that I used to play back in elementary school. These games were similar to “Dodge it!” but were mostly used by keyboard buttons to control the ball. Whereas, my game can make things much more interactive by using your own physical hands to control the ball’s movement, which adds a whole new spectrum of excitement and adrenaline rush as we navigate through the obstacles. My game also has different difficulty levels for users to choose from to make things more balanced between the enjoyers and the competitors.
Prototype:
Pictures:
Video:
Implementation:
Description of Interaction Design:
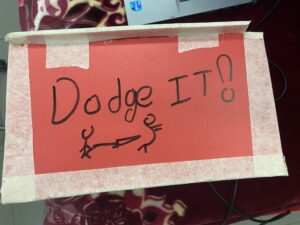
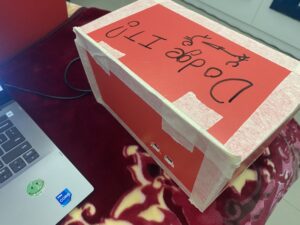
In order to balance out the lags that I was getting in between the code due to excessive elements being inputted by the Arduino and outputted to p5, I decided to make things much simpler and quite responsive by adding the necessary elements only. The prototype that I have created consists of an ultrasonic sensor incorporated within it and the users just need to put their hands in front of it and start playing straightforward. While I could have added more buttons to the prototype, this would have ruined the simplicity that I was aiming for. Also, more buttons would result in a bit more delay within the responsiveness of the ultrasonic sensor to the hand movement, and my goal was to make it as smooth as possible, so these changes were necessary.
Description of Arduino Code:
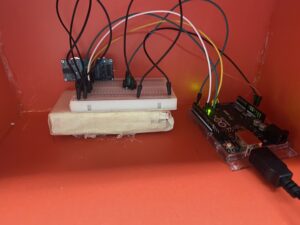
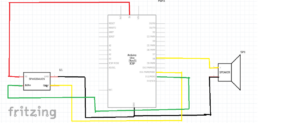
The Arduino part of the game is quite simple. I have added an ultrasonic sensor and a speaker. After connecting it to the digital pins, I utilized the send to p5 feature through serial print to send the outputted value of the ultrasonic sensor. The ultrasonic sensor outputs a value, which can be converted to distance through an equation, that distance is what I send to P5 which will later be reflected to the ball’s x coordinate. The Arduino receives the score value sent by p5; which will then be mapped and sent to the speaker to produce a tone. Additionally, I added an if condition to stop emitting a sound if the user is at the menu or endscreen.
//Define pins for speaker and ultrasonic sensor
const int trigPin = 11;
const int echoPin = 12;
const int speakerPin = 8;

void setup() {
  // Start serial communication so we can send data
  // over the USB connection to our p5js sketch
  Serial.begin(9600);
  pinMode(LED_BUILTIN, OUTPUT);

  // Outputs on these pins
  pinMode(trigPin, OUTPUT);
  pinMode(echoPin, INPUT);
  pinMode(speakerPin, OUTPUT);


}

void loop() {

  //GETS FROM P5
  int score = Serial.parseInt();

//if condition so that when score is 0 at menu and end screen, the sound doesnt emit and annoy us
if(score==0)
{
  noTone(speakerPin);
}
else
{
  // Map the score to a frequency for the speaker
  int frequency = map(score, 0, 200, 100, 4000);
  // Play the tone
  tone(speakerPin, frequency);
}

  // sends a short pulse of ultrasonic sensor and waits a bit then receives it
  digitalWrite(trigPin, LOW);
  delayMicroseconds(2);
  digitalWrite(trigPin, HIGH);
  delayMicroseconds(10);
  digitalWrite(trigPin, LOW);

  // Time it takes for the pulse to travel back from the object long
  int duration = pulseIn(echoPin, HIGH);
  // Universal conversion of time into distance in cm
  int distance = duration * 0.034 / 2;

  //SENDS TO P5
  Serial.println(distance);
  delay(50);

}
Description of P5.js code:
For my p5 side of the code, this took almost all of the time, designing an interactive interface that had aesthetic elements to it while also an interactive one. The p5 will receive values of distance from Arduino and input it towards the ball’s movements. One major factor that I had difficulty in would be smoothening the ultrasonic sensor’s reading. Initially, the ball was not as smooth, so I added a Lerp function to smoothen it out. Then the ball had abrupt changes in its distances, which is due to external issues from the ultrasonic sensor itself, so I fixed it by adding a maxPosChange variable to make sure that if the next reading is way greater than the previous one, the p5 will neglect that reading, ensuring a smoother path for the ball. As I set the foundation for my game in P5, I started working on the aesthetics, adding different difficulties and an end screen at the end. Each button also produces a hover sound and a click sound when clicked. I added texts explaining each difficulty. Finally, I also added a pause screen and exit to the main menu mid-game features to make things much faster and smoother to navigate.
While the code is long, I’ll only add the serial function where it sends and receives data to and from Arduino. You can navigate to the code by clicking on the P5 link above.
function readSerial(data) {
  ////////////////////////////////////
  // READ FROM ARDUINO HERE
  ////////////////////////////////////

  if (data != null) {
    // Parse the data received from Arduino
    let fromArduino = split(trim(data), ",");
    targetKnobValue = parseFloat(fromArduino[0]);
    print(targetKnobValue);

        // Check for abrupt changes in position and neglect them
    if (abs(targetKnobValue - knobValue) < maxPositionChange) {
      // Smooth the value we get from the Arduino using linear interpolation (lerp)
      knobValue = lerp(knobValue, targetKnobValue, easing);
    }
  }

  //////////////////////////////////
  // SEND TO ARDUINO HERE
  //////////////////////////////////

  //if at menu or end screen dont send score to arduino
  if(option== MAINMENU || option== ENDSCREEN)
    {
    let notone=0;
    let sendToArduino= notone + "\n";
    writeSerial(sendToArduino);
    }
  else
    {
    let sendToArduino= score + "\n";
    writeSerial(sendToArduino);
    }
}
-
Description of communication between Arduino and p5.js
As previously mentioned, both the P5 and Arduino complement and expand upon one another, where the Arduino receives the values of the changing score, and then maps that score to a a spectrum to produce a tone within the speaker. The Arduino will also send a distance value from the hand to the ultrasonic sensor to the P5 which is utilized in the ball class to control the ball’s movement. Of course, the distance is mapped to the Arduino’s dynamic canvas.
Some aspects of the project that I’m proud of
I’m mainly proud of the aesthetics and the beauty of the game. Adding a moving background for instance was not easy. I had to navigate through various websites to see how they did it. the implementation of various difficulties and how the screen changes everytime was also another aspect that I’m proud of. In addition to that, I’m also proud of how much I have decreased the errors in the ultrasonic sensor by adding proper lines of code to take care of the errors. Such as the abrupt changes in the ultrasonic sensor reading resulted in a big jump in the ball’s x coordinate, fixed by adding a tolerance which if the sensor exceeded from one reading to another, it disregards it. This made the game much more stable and I’m very proud of it.
Areas of Improvements
Some of the areas of improvement will most likely be towards the overall prototype and user interaction, due to issues with decreasing lag and delays I had to neglect certain buttons and elements that I could have added to the overall prototype while still achieving that simplistic look. For future improvements, more interactive elements can be added to the real-world prototype instead of just within the code. I could maybe also add a car that could be responsive to the scores, the higher the score results in the car moving at a higher speed and vice versa. I initially thought of doing that, but making a car was another big hassle, and adding it with the ultrasonic sensor would create multiple delays and issues within the execution of the ball’s movement.

this is cool