In order to gather feedback on the usability of my project, I conducted a user interaction test by having people try the project without any prompts or instructions. The purpose of this test was to evaluate how intuitive the design was and how well users were able to understand the mapping between the controls and the resulting experience.
Overall, the results of the test were mixed. Some users were able to figure out the controls quickly and enjoyed the experience, while others struggled to understand how the controls worked and what their effect on the project was. A common area of confusion was the use of the two potentiometers, as some users were unsure of which one controlled the horizontal and vertical movement of the line.
Despite the challenges some users faced, there were several areas of the project that worked well. Many users enjoyed the retro feel of the etch-a-sketch and appreciated the unique green and black design. The feedback on the physical controls was also positive, as users found them easy to use and responsive.
Based on the results of the user interaction test, there are several areas that could be improved in the project. One approach could be to provide more detailed instructions or visual aids to help users understand the controls and how they affect the project. Another potential improvement could be to add a feature that allows users to save and share their creations, adding a new level of engagement and creativity to the project. Also, the knobs of the potentiometers should be made bigger so the users can control them more easily.
I successfully integrated Arduino and p5js to create most of my project. Initially, I created the game on p5js and used keyboard input. Later, I modified the program to accept input from an Arduino flex sensor, which worked seamlessly.
Moeez tested the game without any instructions from me and found it to be smooth and playable. However, he had some confusion regarding the direction to tilt the flex sensor as the value of the sensor differs for each direction. Once I provided him with the correct direction, the game felt even smoother. Although the flex sensor was not in a fixed position during testing, it will be attached to a glove in the final version. This will ensure that the sensor is always in the correct position and can only be bent in one direction (towards the user’s clenched fist).
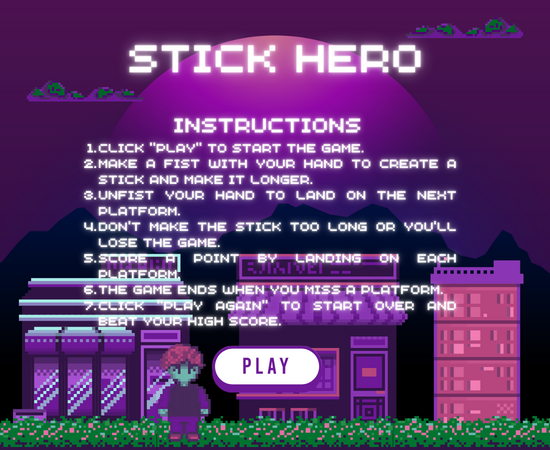
Currently, the game dynamics are working well and are quite smooth and playable. I have also designed a cover page for the as posted below:
However, I still need to add functionality that responds to feedback from p5js by using two LEDs: a green LED for successful bridge crossing and a red LED for failure. I also plan to fix the flex sensor into the glove to provide a better gaming experience.
Although I needed to provide instructions to Moeez regarding the direction to tilt the flex sensor during testing, this will be resolved once the sensor is fixed to the glove. Additionally, I have already added an instruction page to make the game easier to understand. Overall, the game is simple to play and requires minimal attention to instructions. Anyone can quickly learn to play and enjoy the game.
Progress so far
So far, I have developed the basis of my program in Arduino and P5. I have connected a single button. When pressed, a sound associated with that button is played in p5. An animation, associated with that specific sound is also displayed in p5 and then the canvas when the button is released has a randomly placed circle every time the button is pressed. This is to create a sound and p5 canvas that the user can design and control.
Next, I will add at least three more buttons in the same way. each will have a unique sound and animation attached to it and will allow the user to draw different things on the canvas. I will also add a flex sensor to control a background sound from a buzzer or from p5.
The project concept is based on traditional South Asian music so sound effects will be from instruments such as sitar, rubab, drums, and flute. Also, the background music will also complement these sounds. The project aims to promote accessibility therefore it visualizes sound for those who cannot hear so they can use it in their own unique way to design the canvas.
User Testing
So far, the project is running well. Due to several deadlines and a heavy workload, I could not do a lot of the work for this project but the basis of the idea is implemented and it will be easier to implement from here on.
The user was able to easily understand the interface and the circuit. However, I will add more elements to the interface such as instructions on how to use it for better understanding.
I am particularly proud that my project is accessible and will pay tribute to music from my home country Pakistan. That is why Im excited to further develop it to completion.
Here are details of the Arduino and P5 ends of the project:
Arduino
For the Arduino end, as mentioned, sensors and buttons will be arranged in a box. I might integrate a motor as well that moves something, for example, a music record, according to the sensor values.
Inputs and Outputs:
From light sensor – will send it to p5
From distance sensor/potentiometer – will send it to p5/use to control the volume of the buzzer
From buttons – will light up corresponding LEDs and send to p5
From P5 – indication if instrument turned on/off from p5 screen – use to turn corresponding power LED on/off
LEDs to indicate if the instrument is on or if any button is pressed (feedback)
Buzzer (to play background sound/button sounds)
P5
The P5 screen will first present instructions on how to use the instrument. Once the experience begins, the screen will show a visualization of the music created using input from the sensors. This way, every user will, in a way, create an art piece that is theirs. So, not only can the user change their motion/touch to change the output sound but also to add something to their sketch. Also, P5 will have some buttons that, when pressed, will send output to Arduino – for example, LEDs light up when the Start button is pressed or if the sensor value exceeds a threshold or maybe different tone/sound/volume options available on the screen that will be used to change the output melody.
Inputs and outputs
Use light sensor value from Arduino to change tone type and screen background color
Use inputs from buttons that Arduino sends to draw shapes/patterns on the screen
I had my friend try the game by just giving her a general idea of the game. I forgot to mention that she had to pair the Arduino board first by pressing the space bar so that is definitely something i will keep in mind when finalizing the user interface for the project. I had explained to her how to use the card against the ultrasonic sensor because I had not yet designed the board for it. I think it was working fine but the movement of the car was glitching a little bit due to the tilt of the card and unstable hand movements. Because of the random motion of the card against the ultrasonic sensor and lack of proper hardware, the car movement was haphazard and missing the ‘game end’ condition.
I think this is particular user testing helped me realize a lot of the issues with my design. I had not laid out clear instructions for the Arduino board connection which meant that for someone who was new to this sort of implementation, starting the game would not have been possible. The lack instructions on how to navigate the card and the limits of the card distance was also another factor I had not yet implemented which I had to verbally explain to my friend.
I am however happy with the serial output from Arduino because I was experiencing issues before with consistent output to p5.js and that has been sorted out now. I am also happy with the p5.js visuals as I was able to extensively work on that as well and make it fitting to the theme.
Further work:
I think the number one thing I will focus on for now is fixing the haphazard motion of the car due to the unstable card motion. I am thinking of limiting the movement of the card by placing it in slider that I have yet to design. This will make sure that the card does not tilt and stay within the limit of horizontal distance that I have chosen for the game.
I also need to add the LEDs so that there is a green light for when the game is in ‘game state’ and red for when it has not yet started. I need to refine the p5.js code by adding last final components. I have yet to add music, code to send data to Arduino for the LEDs, and edit the interfaces further.
I also need to add instructions for the Arduino board connection at the start of the game and then instructions to navigate the card holder and its movements as well.
I managed to build a prototype with focus on confirming whether my initial ideas worked or not. Unfortunately, I couldn’t build a completed physical hardware for my project just yet, so I had tin foils as my moles, but the circuit closing with hammer worked so all I need to do is build the physical hardware and polish the UI for the p5 side.
Sarthak was able to figure out the connection between the physical moles (tin foils) and the moles on the screen (the red, green, blue circles in UI) intuitively through the color assignment of the moles and the ordering/location of the moles. He also quickly figured that he had to time the hitting of the mole right correlating to the moving music notes on the UI where it coincides with the respective mole.
Since hardware was very lacking of physical shape, sometimes the wires coincided, causing a bug where another future note was recognized as hit while hitting only one note, causing confusion and error to the game play. This error will be fixed when I make a concrete hardware which will prevent such errors. Another improvement I really need to look into is correlation between node patterns and the musical notes/rhythms of the music to make the game play more interesting, challenging, and immersive.
While having an actual hardware with shapes of moles and hammer might make the game more intuitive, I feel like I should explain the connection between hitting the moles and the musical side of the game since it doesn’t have a clear apparent connection between the two elements of this project.
I changed my Final Project idea from the LED simulation to a space exploration simulation. This project enables user to interact with the p5js console using the Arduino controlled input devices. Through various buttons (subject to change), the user can navigate through space and explore various planets. The project features a aesthetic interface with liberty for the user to move around in space and explore. As of now, the user can only see the nine planets in the Solar System (including Pluto) and the Sun.
User Testing
Jun Lee and my roommate were my user testers (featured in the video: Jun). They had some difficulty navigating the buttons as they were not labelled, but they quickly learned the mechanic looking at what each of the buttons did. They were able to navigate the space quite easily after a few seconds of trying. The project is still not complete, so the only thing the players can do is move around and admire the heavenly objects and their surface mappings.
Areas that are working well
The navigation is working quite well. I had to adjust where the camera moves (spatial positioning) relative to where it is pointing, such that the left, right, forward, and backward movement are not static and can change depending on where the player is looking at.
There are a lot of areas that need improving. One of them is positioning. Since the background is completely back, it is hard to tell where the player is in space and where he could find planets. I tried adding in a pointer to the Earth, such that the player is not lost and can come back home anytime.
Another thing that needs improvement is the purpose of the project. I want this project to be educational, and at the same time adventurous and fun as the player explores various planets and stars.
Parts I had to explain
I had to explain what the project is and what it does, which is natural and necessary. However, for the controls, I did not explain anything, but the users caught up on it pretty quickly. I had to say what planet they were looking at when they explored, but this can be fixed with a pop-up on screen about such information.