Final Project – Stick Hero


Concept:

I was fascinated by the idea of creating a game that could be controlled using hand movements, and I successfully brought that idea to life using p5.js and Arduino. Inspired by the game ‘Stick Hero,’ I decided to recreate it with a unique twist. In this game, the player’s objective is to achieve a high score by helping their character cross platforms using a growing stick. By clenching their fist, the player can extend the stick to bridge the gap between platforms. The challenge lies in finding the perfect stick length—not too short to fall short of the other platform, and not too long to overshoot it.

p5.js:

The p5.js code represents a game where players navigate platforms by using a growing and rotating stick.

  1. Global variables are declared for images and sounds.
  2. Images and sounds are preloaded to ensure smooth gameplay.
  3. The Game class is defined, responsible for managing game objects and states.
  4. The class includes functions for start checking, score display, platform removal, game over detection, state management, platform and stick creation, and game display.
  5. The Player class represents the player character, incorporating functions for setting the destination, sticking to platforms, moving, and displaying.
  6. The Platform class represents the platforms and includes functions for movement and display.
  7. The Stick class represents the growing and rotating stick, featuring functions for growth and rotation.
  8. The setup and draw functions are defined for game initialization and updates.
  9. Event handlers for mouse clicks and releases are implemented to capture player interactions.
  10. The code also includes a callback function for reading serial data from an Arduino, enabling hand-controlled gameplay.

The code creates an engaging game where players maneuver their character across platforms using a stick, striving to reach the end without falling off. The game dynamically changes based on mouse interactions and player movements, and the score is constantly displayed during gameplay.

p5.js Code:

// Declaring the global variables
let bg_img;
let player_img;
let success;
let failure;

// prelaoding the images and sounds
function preload() {
  start_screen = loadImage("start_screen.png");
  bg_img = loadImage("bg1.jpeg");
  player_img = loadImage("sprite.png");
  success = loadSound("success-sound-effect.mp3");
  failure = loadSound("failure.mp3");
}

// Setting up the canvas and creating the game object
class Game {
// Declaring the variables
  constructor() {
    this.platforms = [];
    this.gaps = [];
    this.widths = [];
    this.stick = false;
    this.state = 0;
    this.score = 0;
    this.start_x = 217;
    this.start_y = 352;
    this.start_w = 98;
    this.start_h = 30;
// Making an array of all the possible gaps between the platforms
    for (let g = 4; g < 61; g++) {
      this.gaps.push(g * 5);
    }

// Making an array of all the possible widths of the platforms
    for (let w = 8; w < 31; w++) {
      this.widths.push(w * 5);
    }

    // Making the first three platforms
    let x = 0;
    for (let i = 0; i < 2; i++) {
      let gap = random(this.gaps);
      this.create_platform(x);
      x = x + this.platforms[this.platforms.length - 1].w + gap;
    }

    // Making the player
    this.player = new Player(
      this.platforms[0].x + this.platforms[0].w,
      this.platforms[0].y
    );
  }

  // Function to display the game
  check_start() {
    if (
      mouseX >= this.start_x &&
      mouseX <= this.start_x + this.start_w &&
      mouseY >= this.start_y &&
      mouseY <= this.start_y + this.start_h
    ) {
      this.state = 1;
    }
  }

// Function to display the start screen
  display_score() {
    textSize(20);
    noStroke();
    fill(0);
    text("Score: " + this.score, 20, 30);
  }

// remove the platform once it is out of the screen
  remove_platform() {
    if (this.platforms[0].x <= -this.platforms[0].w) {
      this.platforms.shift();
    }
  }

  // Function to check if the game is over
  check_game_over() {
    if (this.state === 8 && this.player.x === this.player.destination_x) {
      failure.play();
      this.state = 9;
    }
  }

  // Function to display the game over screen
  display_game_over() {
    background(bg_img);
    textSize(20);
    noStroke();
    fill(0);
     textSize(30);
    text("Score: " + this.score, width / 2 - 50, height / 2-50);
    text("Game Over", width / 2 - 70, height / 2);
    text("Click to restart", width / 2 - 88, height / 2 + 50);
  }

 state_manager() { // Function to manage the states of the game

    if (this.state === 0) { // State 0 displays the game instructions.
      image(start_screen,0,0);
    } else if (this.state === 2) { // State 2 detects a mouse click and grows the stick.
      this.create_stick();
      this.stick.grow();
    } else if (this.state === 3) { // State 3 detects a mouse release and rotates the stick.
      this.stick.rotate();
    } else if (this.state === 4) { // State 4 checks if the player has reached the platform after the stick has finished rotating, and transitions to state 5 or state 8 accordingly.
      this.player.set_destination();
    } else if (this.state === 5) { // State 5 moves the player towards their destination.
      this.player.move();
    } else if (this.state === 6) { // State 6 determines the new positions of the platforms and the player once the player reaches their destination platform.
      this.set_platforms_destination();
    } else if (this.state === 7) { // State 7 moves the platforms and the player towards their destination.
      for (var i = 0; i < this.platforms.length; i++) {
        this.platforms[i].move();
        this.player.stick_to_platform();
      }
      this.remove_platform(); 
    } else if (this.state === 8) { // State 8 moves the player towards the end of the stick and checks if they have reached it.
      this.player.move();
      this.check_game_over();
    } else if (this.state === 9) { // State 9 ends the game and displays the game over screen as soon as the player reaches the end of the stick that is not on the platform.
      this.display_game_over();
    }
  }

 // Function to create a new platform
 create_platform(x) {
    let w = random(this.widths);
    let y = height - 100;
    let p = new Platform(x, y, w, 100);
    this.platforms.push(p);
  }

// Function to set the destination of the platforms
  set_platforms_destination() {
    this.create_platform(width);
    this.platforms[0].destination_x = -this.platforms[0].width;
    this.platforms[1].destination_x = 0;
    this.platforms[2].destination_x = this.platforms[1].w + random(this.gaps);
    game.state = 7;
  }
    
// Function to create a new stick
  create_stick() {
    if (!this.stick) {
        this.stick = new Stick(
          this.platforms[0].x + this.platforms[0].w, this.platforms[0].y,3,0);
      }
  }

// Function to display the game
  display() {
    background(bg_img);
    this.state_manager();
    if (game.state != 9 && game.state != 0) {
      this.display_score();
      for (let j = 0; j < this.platforms.length; j++) {
        this.platforms[j].display();
        this.player.display();
        if (this.stick != false) {
          this.stick.display();
        }
      }
    }
  }
}

// class for player
class Player {
  constructor(x, y) {
    this.w = 30;
    this.h = 50;
    this.x = x - this.w;
    this.destination_x = x;
    this.v = 5;
    this.y = y - this.h;
    this.position = 0;
  }

  // Setting Destination of the player so that he moves after the stick is down
  set_destination() {
    if (
      game.stick.x_2 >= game.platforms[1].x &&
      game.stick.x_2 <= game.platforms[1].x + game.platforms[1].w
    ) {
      this.destination_x = game.platforms[1].x + game.platforms[1].w - this.w;
      game.score += 1;
      success.play();
      game.state = 5;
    } else {
      this.destination_x = game.stick.x_2;
      game.state = 8;
    }
  }

  // Setting player's x equal to the platform so it moves along with it
  stick_to_platform() {
    if (game.platforms.length === 2) {
      this.x = game.platforms[0].x + game.platforms[0].w - this.w;
      if (game.platforms[0].x === 0) {
        game.state = 1;
      }
    } else {
      this.x = game.platforms[1].x + game.platforms[1].w - this.w;
      if (game.platforms[1].x === 0) {
        game.state = 1;
      }
    }
  }

  // Function to move the player according to his destination
  move() {
    if (this.x < this.destination_x) {
      this.x += this.v;
      this.position = (this.position + 1) % 7;
    } else if (this.x > this.destination_x) {
      this.x -= this.v;
    } else if (
      this.x == this.destination_x &&
      this.x > game.platforms[0].x + game.platforms[0].w &&
      game.state === 5
    ) {
      game.stick = false;
      game.state = 6;
    }
  }

  // Display the player using the respective position from the sprite sheet
  display() {
    let c = player_img.get(this.position * 109, 0, 109, 120);
    image(c, this.x, this.y, this.w, this.h);
  }
}

// Declaring the platform class
class Platform {
  constructor(x, y, w, h) {
    this.x = x;
    this.destination_x = x;
    this.y = y;
    this.w = w;
    this.h = h;
    this.v = 5;
  }

  // Function to move the platform according to its destination
  move() {
    if (this.x != this.destination_x) {
      this.x = this.x - this.v;
    }
  }

  // Display the platform
  display() {
    noStroke();
    fill(color("#808080")); //"#6d4a3b"
    rect(this.x, this.y, this.w, this.h);
    stroke(0);
  }
}

// Declaring the Stick class
class Stick {
  constructor(x, y, w, h) {
    this.l = h;
    this.x_1 = x;
    this.y_1 = y;
    this.x_2 = x;
    this.y_2 = this.y_1 + this.l;
    this.angle = PI / 2;
  }

  // Function to grow the stick
  grow() {
    this.y_2 -= 5;
    this.l += 5;
  }

  // Rotate the Stick according when the mouse if released and check if the rotation is complete
  rotate() {
    this.angle -= PI / 64;
    this.x_2 = this.x_1 + this.l * cos(this.angle);
    this.y_2 = game.platforms[0].y - this.l * sin(this.angle);

    if (this.angle <= 0) {
      game.state = 4;
    }
  }

  // Display the stick
 display() {
  stroke("#808080"); 
  strokeWeight(2);
  line(this.x_1, this.y_1, this.x_2, this.y_2);
  strokeWeight(4);
  
}
}

function setup() {
  createCanvas(550, 450);
  game = new Game();
}

function draw() {
  clear();
  game.display();
}

// Perform functions when mouse is clicked according to the state of the game
function mousePressed() {
  if (game.state === 0) {
    game.check_start();
  } else if (game.state === 1) {
    game.state = 2;
  } else if (game.state === 9) {
    game = new Game();
    game.state = 1;
  }

}

function readSerial(data) //call back function
{
  if (data != null) //if the data received is not null
    {
      console.log(data);
      if (game.state === 0) {
    // game.check_start();
  } else if (game.state === 1 && data > 1008) {
    game.state = 2;
  } else if (game.state === 9) {
    // game = new Game();
    // game.state = 1;
  }
    else if( game.state ===2 && data < 1008)
    {
       game.state = 3;
    }
    
     
    }
  
  let redlight= 2;
  let greenlight = 1;
    if(game.state === 2) 
    {
      let sendToArduino = 1 + "\n";
      writeSerial(sendToArduino);
    }
    else if(game.state === 9) 
    {
      let sendToArduino = 2 + "\n";
      writeSerial(sendToArduino);
    }
    else
    {
      sendToArduino = 0 + "\n";
      writeSerial(sendToArduino);
    }
  
}

function keyPressed() //if any key is pressed, then set up serial
{
  setUpSerial();
}

// Shift the state when the mouse is released
function mouseReleased() {
  if (game.state === 2) {
    game.state = 3;
  }
}


Arduino:

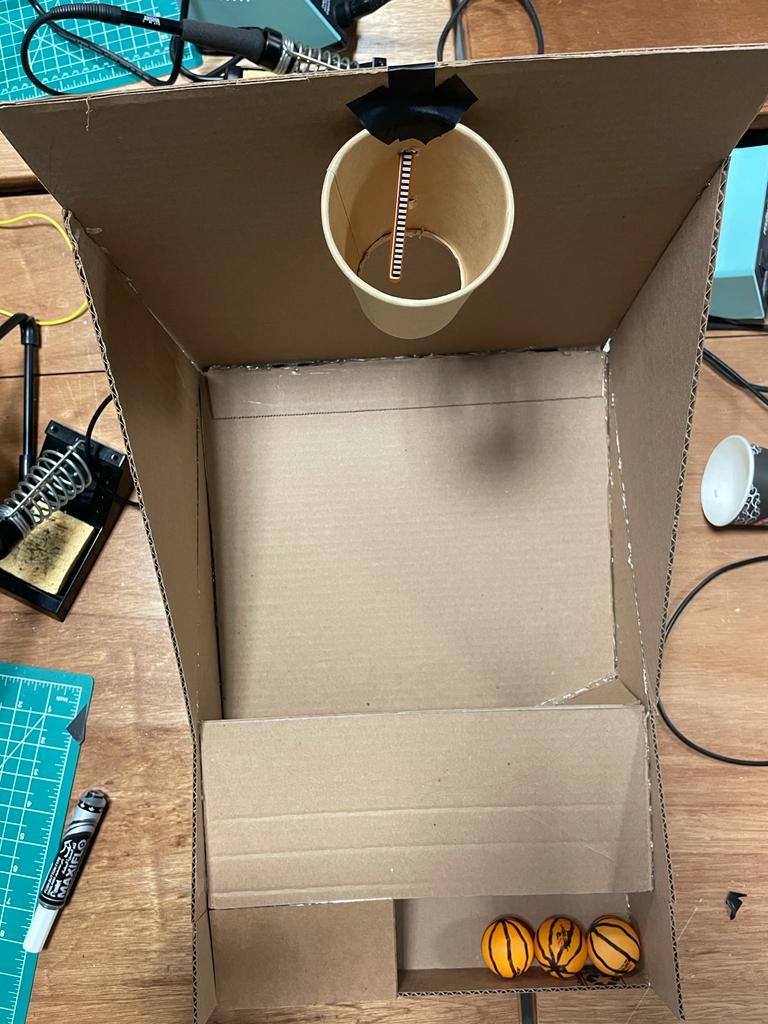
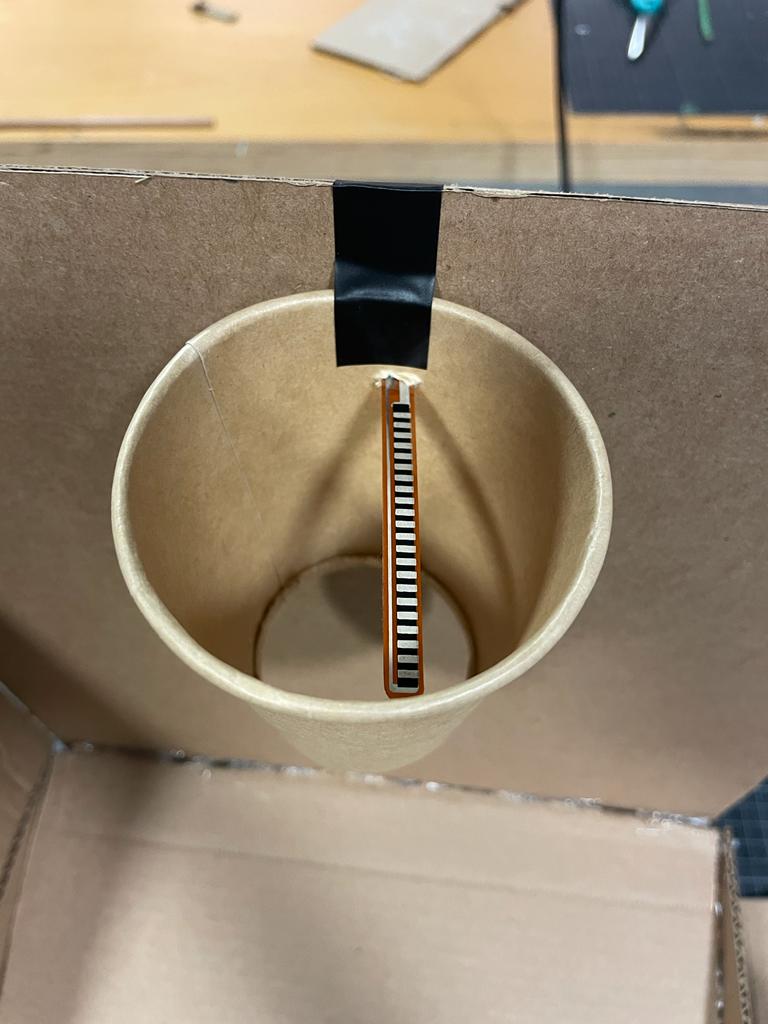
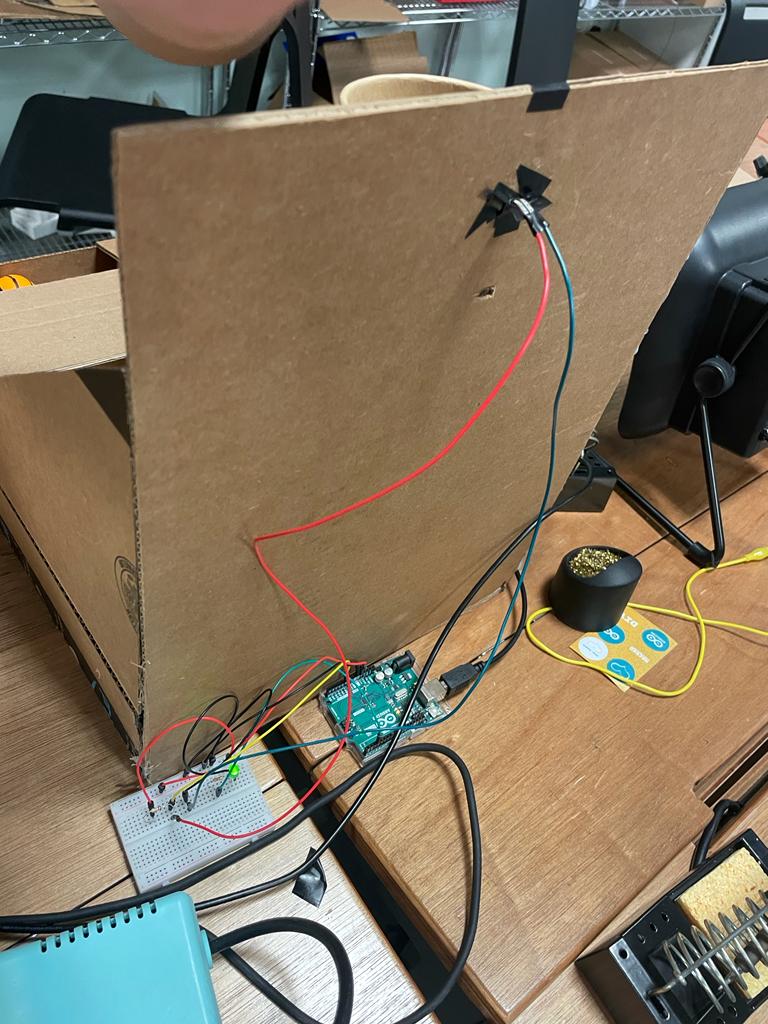
The code reads analog input from a flex sensor connected to pin A4 and controls two LEDs (green and red) connected to pins 8 and 2, respectively.

In the `loop()` function:

– The flex sensor’s analog value is read using `analogRead()` and stored in the `value` variable.

– The analog value is printed to the serial monitor using `Serial.println()`.

– If input is available from p5.js, the code reads the value and checks for specific conditions.

– Based on the brightness value, the green and red LEDs are controlled by turning them on or off using `digitalWrite()`.

The code utilizes analog input from a flex sensor to control the brightness of two LEDs connected to pins 8 and 2, based on input received from p5.js via serial communication.

Arduino Code:

//Constants:

const int flexPin = A4; // Pin A4 to read analog input
const int ledPin = 8; // Green LED pin
const int ledPin2 = 2; // Red LED pin

// Variables:
int value; // Save analog value

void setup() {
  Serial.begin(9600); // Begin serial communication
  pinMode(ledPin, OUTPUT);
  pinMode(ledPin2, OUTPUT);
}

void loop() {
  value = analogRead(flexPin); // Read analog input from flex sensor
  Serial.println(value); // Print the analog value to the serial monitor
  delay(100); // Small delay

  // Wait for input from p5.js
  while (Serial.available()) {
    int brightness = Serial.parseInt();

    if (Serial.read() == '\n') {
      // Control the LEDs based on the received brightness value
      if (brightness == 1) {
        digitalWrite(ledPin, HIGH);
        brightness = 0;
      } else {
        digitalWrite(ledPin, LOW);
      }

      if (brightness == 2) {
        digitalWrite(ledPin2, HIGH);
        brightness = 0;
      } else {
        digitalWrite(ledPin2, LOW);
      }
    }
  }
}


User Testing:


Improvements:

Difficulty Progression: Enhance the gameplay experience by implementing a progressive difficulty system. As the player progresses, introduce challenges such as faster platform movement, shorter time limits to place the stick, or additional obstacles. This will keep players engaged and provide a sense of accomplishment as they overcome increasingly difficult levels.

Power-ups: Introduce exciting power-ups or bonuses that players can collect during gameplay. These power-ups could temporarily slow down platform movement, extend the stick’s length, grant extra lives, or introduce other unique abilities. Power-ups add depth, strategy, and an element of surprise to the game, making it more enjoyable and rewarding.


What I am proud of:

I am proud in successfully bringing my initial concept to life. Creating a game that can be controlled by hand movements is truly amazing. I also quite like the game dynamic as it is very visually appealing. It has been a joy to see the enjoyment that people experience while playing the game, as it has been positively received during testing with various individuals.


Final Project – Submission Post

Group: Vladimir, Dariga

Concept

We initially proposed a Box Musician Game that was intended to be a rhythm game with a physical controller and notes to play. Though, during the implementation process we have decided to move away from the idea of making a project all about the music and use the physical controller for the Chill Adventure game to move across different game levels instead. The concept of moving across different levels while avoiding threats was also inspired by Vladimir’s midterm project.

Interaction design:

The main components behind interaction with the player are the physical board and the physical controller both made of wood. The controller is moved across the board and this movement is then reflected on the game screen. Player needs to use their hand to navigate through their game experience.

The concept behind using Arduino:

As proposed, we are using 2 ultrasonic sensors to detect the change in the position of the physical wooden controller and make the movement reflected in the p5js game screen. We use the speaker to play tones of different frequencies upon the collection of coins and we use a servo motor to rotate frequently to signal the unfortunate event of the player’s death.

Arduino Code

The concept behind p5.js:

p5.js code implementation handles most of the game design and implementation. Code implementation includes movement across the screen, collision detection, and change of screens when the player has completed a certain level to move to the next one/finish the game, with the possibility to restart the experience. p5.js handles graphics of the game, shapes, text displays, etc. p5.js overall uses the Entity-component system design pattern, which you can read more about in Vladimir’s Midterm Blog Post

The game has several “Scenes”: The Menu scene, the Play scene (the levels), and the End scene. Each scene is completely separate from the others and contains its own logic. The Play scene receives a level (a list of strings) as its parameter and loads every part of the level. This includes walls, tiles, the player, and NPCs. You can see the levels in the folder ‘levels’: ‘level1.txt’, ‘level2.txt’, and so on. These were generated using a Helper Level Generator Script (.py).

For the entities in the levels, we use sprite sheets and even animate some of them (e.g. coins). Also, we implemented an NPC AI that follows the player, as well as a random movement AI that uses Perlin noise to decide the velocity at each moment.

We paid special attention to designing the levels so that they are not too frustrating to complete, considering our unconventional play method. Doubly so after the user testing.

p5.js Full Code

The communication between Arduino and p5.js:

Arduino and p5.js communicate in several ways:

  1. Arduino sends X and Y coordinates mapped from the readings of ultrasonic sensors to p5.js so that position of the player is accurately reflected on the game screen
  2. p5.js send to Arduino info that the player has virtually died and this would trigger the action of rotating servo motor – with the goal of making sound.
  3. p5.js send to Arduino info about the tone and frequency to play from speaker whenever a coin is collected, or similar.

Some of the initial challenges we faced involved tracking the position of the controller. We first thought about placing two sensors in parallel and using the space between their waves to create a coordinate plane, like they do here: 2D tracking using Math. However, after trying this out, we found that we would need a very big area (more than 2 meters squared) and it was still very imprecise and buggy. Therefore we changed our approach to use two sensors which are perpendicular to each other, one tracking X and one tracking Y position.

The final Arduino implementation of how tracking position works in the project is presented below. X and Y from trackPosition () would be sent to p5.js for further processing.

void trackPosition() {
  float d1, d2;

  d1 = getSensorResult(trig1Pin, echo1Pin);
  delay(10);
  d2 = getSensorResult(trig2Pin, echo2Pin);
  
  d1 = constrain(d1, 10, 150);
  d2 = constrain(d2, 10, 150);

  X = mapFloat01((float)d1, 10.0f, 150.0f);
  Y = mapFloat01((float)d2, 10.0f, 150.0f);
}

float getSensorResult(int trigPin, int echoPin) {
  // Send pulse.
  digitalWrite(trigPin, LOW);
  delayMicroseconds(2);
  digitalWrite(trigPin, HIGH);
  delayMicroseconds(10);
  digitalWrite(trigPin, LOW);
  
  // Read pulse duration.
  long duration = pulseIn(echoPin, HIGH);
  
  // Calculate distance from duration.
  float distance = (float)duration * 343.0f / 2000.0f;

  return distance;
}

float mapFloat01(float x, float minX, float maxX) {
  return (x - minX) / (maxX - minX);
}

Code snippet from the communication of p5.js with Arduino from the p5 side:

// Send answer to Arduino.
const isPlayerAlive = this.entityManager.get("player").length > 0;
const collectionDelay = 0.3 * FRAME_RATE;

if (this.shouldSendPlayerDiedSignal) {
  // Send death signal.
  this.shouldSendPlayerDiedSignal = false;
  this.game.sendArduino("2\n");
} else if (
  this.lastNpcCollectionFrame + collectionDelay >
  this.currentFrame
) {
  // Send tone.
  const t = this.currentFrame - this.lastNpcCollectionFrame;
  const f = floor(map(t, 0, collectionDelay, 200, 1500));
  this.game.sendArduino(`3,${f}\n`);
} else {
  // Send OK signal.
  this.game.sendArduino("1\n");
}

The last challenge was to make sure that activation of the rotating servo motor, playing tones from the speaker, and tracking position worked well together. The adjustments were made for use of delay() to not make one operation prevent other ones from working properly for the purposes of the project. To check the final implementation in Arduino, you can refer to the Arduino Code

Embed sketch:


What are some aspects of the project that you’re particularly proud of?

We’re proud of how we made our unconventional controller. Our controller may initially be frustrating to play with, but there is a learning curve, and smooth precise movements are possible with enough practice. We’re also happy that we created an interesting enough, although possibly frustrating, game to play and keep the user’s attention.

Though, we should admit we found the experience of making the game slightly weird, unconventional and to some extent frustrating rewarding and creative in a sense. There are a lot of other games which are easy and relaxing, but for this project, we felt we would want our players to get challenged and driven to succeed through all the tough walls, confusing moves, and undefined threats they face in the game.

What are some areas for future improvement?

A bigger model can be made with better ultrasonic sensors and a larger area. This would enable easier and smoother control. Also, the possibilities in p5 are endless. We can expand our game with new levels, create a completely different type of game, or even create something that’s not a game.

We can also work on making the design of both p5.js start screens and physical components fancier and more appealing, though that was not the goal in our project experiences.

Week 14 – Final Project

Project ‘Pakistani Moseeqi’ (translates to Pakistani music)

Description: A Sound Visualizing Musical Instrument

Concept and corresponding elements

A sound visualization instrument that allows you to:

    1. mix and play sounds to make your own unique music and 
    2. visualize it on the p5js screen

An ode to Pakistani music

This project pays tribute to Pakistani music by incorporating sounds from instruments that are unique to Pakistani music such as the tabla, bansuri, sitar, and veena among others. This way, I wanted to expose the NYUAD community, who will use my project, to Pakistani music while also paying tribute to my culture. 

Accessibility

With buttons, this instrument gives one the opportunity to make their own music. To make it accessible to people who are blind/visually impaired, I used a simple design with an easy-to-use interface that does not require many instructions to read. This way, someone who cannot see can still enjoy it and make their music. 

Additionally, to make it accessible to people who cannot hear, I added the sound visualization element so that they can see a unique visualization of each sound and hence, enjoy the instrument in a different way – as a visualization tool. 

Interaction design, feedback, and implementation

    • 4 momentary LED-Buttons to play 4 different sounds when pressed
    • Each button has an LED light that turns off when the button is pressed to indicate to the user that it is working
    • Each button plays a different sound when pressed. 
    • When pressed, button sends a signal to the p5js to display the animation/visualization associated with that button and sound
    • More than one button can be pressed simultaneously.
    • Turned on/off indicator led light
    • The blue ‘power’ LED on the bottom left is an indicator. When the instrument is in use, it is turned on. When not, it is off. This way, it provides indication to the user when the instrument is working and when it is not. 
    • Arduino/physical elements – contained within a cardboard box
    • 5th non momentary button/switch – this button is not momentary – it, when pressed, plays a background music. The user can then add more sound effects on top of this music. When pressed again, the button stops the music. And this can be repeated. 

P5js elements:

    • Start page – this page displays the cover and brief instructions to keep everything simple and easy to use
    • The play button leads to the music creation and sound visualization page – here, whenever a physical button is pressed, a visualization associated with the sound appears while the button is pressed
    • A slider to control volume of the sound effects from the momentary buttons (not the background music – so that the user controls the volume of the sound they “add” to the background music.
    • Inspiration: https://patatap.com/ 

Arduino Code

For the Arduino end, as mentioned, buttons and LEDs are arranged in a box. 

Inputs and Outputs:

    • From LED buttons to Arduino, which process and send information to p5 

From P5: 

    • Indication if instrument turned on/off: power LED on/off
    • LEDs to indicate if instrument is on or if any button is pressed (feedback)
const int redButtonPin = A2;
const int greenButtonPin = A1; 
const int yellowButtonPin = A3;
const int blueButtonPin = A4;
const int ledPin = 8;
const int songButtonPin = 7; 

void setup() {
  // put your setup code here, to run once:
  Serial.begin(19200);
  //pinMode(blueLedPin, OUTPUT);
  pinMode(redButtonPin, INPUT);
  pinMode(greenButtonPin,INPUT);
  pinMode(yellowButtonPin,INPUT);
  pinMode(blueButtonPin,INPUT);
  pinMode(ledPin, OUTPUT);
  pinMode(songButtonPin, INPUT);

   // start the handshake
  while (Serial.available() <= 0) {
    digitalWrite(LED_BUILTIN, HIGH); // on/blink while waiting for serial data
    Serial.println("0,0"); // send a starting message
    delay(300);            // wait 1/3 second
    digitalWrite(LED_BUILTIN, LOW); 
    delay(50);
    digitalWrite(ledPin, LOW);
  }
}

void loop() 
{
  // put your main code here, to run repeatedly:
  while (Serial.available())
  {
    digitalWrite(LED_BUILTIN, HIGH);
    //if red button pushed
    
    int redButton = digitalRead(redButtonPin);
    int greenButton = digitalRead(greenButtonPin);
    int yellowButton = digitalRead(yellowButtonPin);
    int blueButton = digitalRead(blueButtonPin);
    int songButton = digitalRead(songButtonPin);
    Serial.print(redButton);
    Serial.print(",");
    Serial.print(greenButton);
    Serial.print(",");
    Serial.print(yellowButton);
    Serial.print(",");
    Serial.print(blueButton);
    Serial.print(",");
    Serial.println(songButton);
    //delay(100);


    int light = Serial.parseInt();
    if (light == 1)
    {
      digitalWrite(ledPin, HIGH);
    }
    if (light == 0)
    {
      digitalWrite(ledPin, LOW);
    }

  }
}


P5 Sketch and Code

The P5 screen will first present very brief instructions on how to use the instrument. Once the experience begins, the screen will show a visualization of the music created using input from the sensors. 

Inputs and outputs:

    • Use inputs from buttons that Arduino sends to draw shapes/patterns on the screen
    • Display details such as volume/start instruction on the screen


let incrementCircle = true;
let greenB=true;
let blueB=true;
let yellowB=true;
let playBg1 = true;
let playStart = true;
let start = true;
let numOfCircles = 0;
let circleX = [];
let circleY = [];
let circleWidth = []
let s = 0;
let alt = true;
let mode = 'pause';
let drum, flute, sitar, veena; 
let volumeSlider; 
let vol;
function setup() {
  startSound = loadSound('audio/bubbles.mp3');
  starting = loadSound('audio/start.mp3');
  volumeSlider = createSlider(0,100);
  volumeSlider.position(650, 20);
  drum = loadSound('audio/tabla.mp3');
  flute = loadSound('audio/bansuri.mp3');
  sitar = loadSound('audio/strike.mp3');
  veena = loadSound('audio/spiral.mp3');
  bgMusic = loadSound('audio/calmBg.mp3');
  //drumA=createAudio('audio/drum.wav');
  startImg = loadImage('images/pak music.png');
  displayImg = loadImage('images/display.png');
  startMusic = loadSound('audio/clay.mp3');
  createCanvas(800, 800);
  
  angleMode(DEGREES);
  rectMode(CENTER);
  
  
} 

function draw() {

  vol = volumeSlider.value();
  drum.setVolume(vol);
  flute.setVolume(vol);
  veena.setVolume(vol);
  sitar.setVolume(vol);
  
  if (mode == 'pause')
  {
    startPage();
    
  }
  
  
  if (mode == 'play')
    {
      background(0);
      for (i = 0; i < 10; i++)
      {
      fill('#F44336A5');
      //CAN DRAW PERMANENT CIRCLES
      noStroke();
      ellipse(width/2, height/2, s+15*i, s+15*i);
      fill('rgb(126,9,9)');
      ellipse(width/2, height/2, s-i*10, s-i*10);
      }
      s = s+10;
      if (playStart == true){
           startSound.play();
        playStart = false;
      }
   
    }
    if (mode == 'drums')
    { //if button pressed, random circles 
      if (incrementCircle == false)
      { 
        playDrums();
      }
      else 
      {
        drawCircles();
      }
    }
      
      
    if (mode == 'sitar')
      {
         if (blueB == false )
          {
            background(0);
          }
        else if (blueB == true)
          {
            playSitar();
          }
      }
  
      if (mode == 'flute')
       {
         console.log(mode);
         console.log(greenB);
        if (greenB == false)
          {
            background(0);
            playFlute();

          }
        else if (greenB == true)
          {
            console.log('calling playFlute')
            playFlute();
          }
      }
      if (mode == 'veena')
      {
        if (yellowB == false)
        {
          background(0);
        }
        else if (yellowB==true)
        {
          playVeena();
        }
      }
      
  textSize(12);
      if (!serialActive) 
      {
        text("Press Space Bar to select Serial Port", 20, 30);
      } else 
      {
        text("Connected", 20, 30);
        let volumeLabel = "Volume: " + vol;
        text(volumeLabel, 600, 20 );
        //everything else goes here

      }
    
}

function readSerial(data) {
    ////////////////////////////////////
    //READ FROM ARDUINO HERE
    ////////////////////////////////////
     if (data != null) 
     {
      //console.log("data:");
       console.log(data);
       // make sure there is actually a message
       let fromArduino = split(trim(data), ",");
       // if the right length, then proceed
       if (fromArduino.length == 5) 
       {
         let redButton = int(fromArduino[0]);
         if (redButton == 1)
         {
           mode = 'drums';
           if (incrementCircle == true)
           {
             numOfCircles = numOfCircles + 1;
             circleX[numOfCircles] = random(width);
             circleY[numOfCircles] = random(height);
             circleWidth[numOfCircles] = random(100);
             incrementCircle = false;
             drum.play();
           }
         }
         else if (redButton == 0)
           {
             incrementCircle = true;
           }
         
         let greenButton = int(fromArduino[1]);
         
         if (greenButton == 1)
         {
           mode = 'flute';
           if(greenB==true)
           {
             console.log("greenb set to false");
             flute.play();
             greenB = false;
           }
         }
        else if (greenButton == 0)
        {
            greenB = true;
            console.log("greenb set to true");
        }
         
         let yellowButton = int(fromArduino[2]);
          if (yellowButton == 1)
         {
           mode = 'sitar';
           if (yellowB == true)
           {
             sitar.play();
             yellowB=false;
           }
         }
         else if (yellowButton == 0)
           {
             yellowB = true;
           }
        
         let blueButton = int(fromArduino[3]);
           if (blueButton == 1)
         {
           mode = 'veena';
           if (blueB == true)
           {
             veena.play();
             blueB=false;
           }
         }
         else if (blueButton == 0)
           {
             blueB = true;
           }
         
         let songButton = int(fromArduino[4]);
         if (songButton ==1)
           {
             console.log('here');
             if (playBg1 == true && mode == 'play')
               {
                 console.log('here1');
                 bgMusic.play();
                 playBg1 = false;
               }
           }
          else if (bgMusic.isPlaying() == true && mode == 'play' && songButton == 0)
               {
                 console.log('here2');
                 bgMusic.stop();
                 playBg1 = true;
               }
      
         
    if (greenButton == 0 && blueButton ==0 && yellowButton == 0 && redButton == 0 && mode != 'pause')
           
      {
        mode = "play";
      }         
         
  // if (playBg1==true && mode == 'play')
  //   {
  //     startMusic.play();
  //     playBg1 = false;
  //   }
  // else {
  //   //calmBg.stop();
  // }         
         /////////////////////////////////////////////////////////
/////////////////////////////////////////////////////////
       }
          //////////////////////////////////
          //SEND TO ARDUINO HERE (handshake)
          //////////////////////////////////
       let light; 
      if (mode != 'pause')
      { 
        light = 1;
      }
       else if (mode =='pause')
         {
           light =0;
         }
        let sendToArduino = light + "\n";
        writeSerial(sendToArduino);
     }
}

function startPage()
{
  
  //background('white');
  image(startImg, 0, 0, width, height);
  //fill(255);
  // textSize(64);
  // text("موسیقی",60,120);
  // textSize(20);
  // fill(0);
  // rect(width/3-10,height-50,200,60);
  
  fill(255);
  let x = mouseX;
  let y = mouseY;
  let t = x+','+y;
  text(t, mouseX, mouseY);
  //text("Press 's' to play your own music", width/3-230, height-10); 
  textSize(14);
      textStyle(NORMAL);
      text("Play, mix, and visualize Pakistani music by pressing the buttons", width/4, 3*height/4+50);
  if (mouseX >= 242 && mouseX <=558 && mouseY >=679 && mouseY <= 764)
    {
      noStroke();
      fill('#503418')
      ellipse(390,720,120,75);
      fill(255);
      textSize(38);
      //fontWeight(200);
      textStyle(BOLD);
      text("PLAY",335,734);
      
      if (mouseIsPressed)
        {
          mode='play';
        }
    }
  
}

function keyPressed() 
{
  if (key == " ") 
  {
    // important to have in order to start the serial connection!!
    setUpSerial();
    
    if (playStart==true && mode == "play")
    {
      startMusic.play();
      playStart = false;
    }
    
    startMusic.play();
  }   
  if (key == 's')
  {
    mode = "play";
  }
//   if (key =='d')
//     {
//       mode = 'drums'
//       incrementCircle = false;
//       drum.play();
//     }
// if (key == 'f')
//     {
//       mode = 'flute';
//       flute.play();
//     }
//   if (key == 'g')
//     {
//       mode = 'sitar';
//       sitar.play();
//     }
//   if (key == 'v')
//     {
//       mode = 'veena';
//       veena.play();
//     }
  
  
}

function drawCircles()
{
  noStroke();
  //fill(random(255));
  fill(240);
  for (i =0; i < numOfCircles; i++)
    {
      circle(circleX[i], circleY[i], circleWidth[i]);
    }
}

function playDrums()
{ 
  if (alt== true)
    {alt = false}
  else
  {alt =true;}
 
   background('black');
  for (i = 23; i > 0; i--)
    {
      noStroke();
      if (alt == true)
      {
        if(i%2 == 0)
        { 
          fill('white');
        }
        else 
        {
          fill('black');
        }
      }
      else 
        {
          if(i%2 == 0)
        { 
          fill('black');
        }
        else 
        {
          fill('white');
        }
        }
      ellipse(width/2, height/2, random(50*i));
    }
   fill(0);
  //ellipse(width/2,height/2,40)
}

function playFlute()
{
  console.log("here ");
  background(0);
  noFill();
  push();
  translate(width/2, height/2);
  for (let i =0; i < 200; i++)
  {
    push();
    rotate(sin(frameCount+i)*100);
    
      let r = map(sin(frameCount), -1,1,50,255);
      let g = map(cos(frameCount/2),-1,1,50,255);
      let b = map(sin(frameCount/4),-1,1,50,255);
    noFill();
    stroke(r,g,b);

    rect(0,0,800-i*2,300-i);
    
    pop(); 
  }
  pop();
}

function playSitar()
{
  noStroke();
  for (i =30; i>0; i--)
 {
   if (i%2==0)
   {
     fill(0);
   }
   else
    {
     fill(255,150,0);
    }
   square(width/2, height/2, random(50*i));
 }
}
let direction = 1;

function playVeena()
{
  background(0);
  noStroke();
  let x=random(width);
  let y=0;
  direction = random(-1,1);
    //random(0,width);
  
  //y=random(0,height);
  for (i =0; i < 3*width;i++)
    {
      x=x+direction;
      y=y+1;
      fill(random(x,x+30),random(y-20,y+10),random(y-30,y+20));
      circle(x,y,30);
    }
}

function displayScreen()
{
  image(displayImg, 0,0, width, height);
}

User testing

For the most part, the design was simple to understand for the users. The simple instruction to use buttons to play music for users to understand how to begin. Then, as they pressed each, they easily saw its connection to sound and the visualization on the p5 and used this information to improvise and process the information.  

Things that can be improved: 

The slider for volume is not as visible or clear so we can replace it with clearer labels in the future.

More buttons can be added to create an array of different sounds.

More western music can ALSO be integrated to add a cultural diversity angle to the project.

Bigger box can be used so wires and Arduino can easily be places inside

The 5th red button was, in a way, ignored by the user due to its small size and because it looked small and unimportant alongside all the led lights and buttons. This button can be replaced with something better. 

What I am proud of:

I am particularly proud of my sound visualizations. They add a dynamism and motion to the project that makes listening to each sound even more fun and interesting. The visualizations are very appealing to the eye. I am also proud that I attempted to make the instrument more accessible as this reinforced the importance of keeping accessibility in mind when designing things. 

Final Project + User Testing – Mini Basketball Arcade Game

Concept of the Game

The aim of this Final Project is to build an interactive multimedia system that involves physical interaction and relies on a multimedia computer for processing or data analysis. To create a Mini Basketball Arcade Machine, I am using BOTH P5 AND Arduino. The mini Basketball Arcade Machine will be a tabletop-sized arcade game that will allow users to play basketball by shooting miniature basketballs into a hoop. Whenever the ball successfully passes through the hoop, it makes contact with the flex sensor causing alterations in its readings. As soon as a modification is identified in the flex sensor’s values, the player is credited with certain amount of points. Failing to score does not lead to a decrease in points. The game has a time limit, and when the time is up, a buzzer goes off to signify the end of the game. Players can see their score and the highest score achieved and can choose to play again. The machine utilizes Arduino to detect when the player shoots the basketball and p5.js to present the score and time on the scoreboard.

Implementation

INTERACTION DESIGN

The interaction design of the Mini Basketball Arcade Game is centered around the physical act of shooting a miniature basketball into the hoop, which is the primary user input. The flex sensor provides an accurate and responsive way to detect when the ball passes through the hoop, and the Arduino board processes this data and communicates it to the P5.js program. This allows the user to receive immediate feedback on their performance in the form of an updated score on the computer screen.

The P5.js program provides a visually appealing and intuitive interface for the user, with a scoreboard that displays the current score and time remaining in the game. The program also displays the basketball hoop and basketballs for the user to shoot, creating a realistic and immersive experience. When the user successfully shoots the ball through the hoop, the program responds with a satisfying feedback sound and updates the score accordingly.

The time limit of the game adds an additional layer of challenge and excitement to the interaction design, encouraging the user to stay engaged and focused. When the time runs out, a buzzer sounds, signaling the end of the game and allowing the user to view their final score and compare it to the highest score achieved.

Overall, the Mini Basketball Arcade Game is a well-designed and engaging interactive system that combines hardware and software to create a realistic and immersive basketball arcade experience.

P5.JS CODE

The code starts by defining the necessary variables and objects such as the background music, spritesheets, and sounds. The program also sets up the serial connection to the Arduino. The “preload()” function is used to load all the necessary assets such as the images and sounds. The “setup()” function initializes the canvas and sets up the game by creating instances of the “Game” class, loading the spritesheets and setting the font. The “draw()” function is used to draw all the different screens of the game, and it also determines which screen to display based on the game’s state.

// Set up the canvas with width and height of 600 pixels
function setup() {
  createCanvas(600, 600);

  // Set the text size to 18 pixels
  textSize(18);

  // Set up the serial port for communication with external devices
  setUpSerial();

  // Create a new instance of the Game class
  game = new Game();

  // Set text alignment to center
  textAlign(CENTER);

  // Set rectangle mode to center
  rectMode(CENTER);

  // Resize the spritesheet to half its original size
  spritesheet.resize(spritesheet.width / 2, spritesheet.height / 2);

  // Set the width and height of the individual basketball sprite
  w = spritesheet.width / 6;
  h = spritesheet.height;

  // Create an array of basketball sprites by extracting them from the spritesheet
  for (let i = 0; i < 6; i++) {
    bballSprite[i] = spritesheet.get(i * w, 0, w, h);
  }

  // Set the font to be used for text rendering
  textFont(font);
}
function draw() {
  // If the serial port is not active
  if (!serialActive) {
    fill(255);
    text("Press Space Bar to select Serial Port", 20, 30);
  }
  // If the serial port is active
  else {
    background(255);
    // If the game state is 0, call the click function
    if (game.state == 0) {
      game.click();
    }
    // If the game state is 1, call the menu function
    else if (game.state == 1) {
      game.menu();
    }
    // If the game state is 2, call the countdown function
    else if (game.state == 2) {
      game.countdown();
    }
    // If the game state is 3, call the game function
    else if (game.state == 3) {
      game.game();
    }
    // If the game state is 4, call the endScreen function
    else if (game.state == 4) {
      game.endScreen();
    }
  }
}


The game is a basketball shooting game where the objective is to score as many points as possible within the time limit of 45 seconds. The game is broken down into different states based on the stage of the game. The game has a starting screen, a menu, a countdown screen, the actual game screen, and the end screen. The program also uses sounds to add to the user experience. The program uses the p5.web-serial.js library to interact with the Arduino to receive data.

The game logic is handled by the “Game” class. The class constructor initializes the state of the game, and it has methods to handle each state of the game. The “click()” method displays a starting screen with instructions, and the “menu()” method displays the menu where the user can start the game. The “countdown()” method handles the countdown before the game starts. The “game()” method handles the actual game where the user interacts with the Arduino to shoot the basketball. The “endScreen()” method handles the display of the final score and provides an option to restart the game.

class Game {
  constructor() {
    // Initializes game state, score, time, and high score
    this.state = 0;
    this.score = 0;
    this.highScore = 0;
    this.time = 45;
  }

  click() {
    // Displays start message on click
    push();
    background(255,159,159);
    fill(0);
    textSize(width / 10);
    text("Click to start", width / 2, height / 2);
    pop();
  }

  menu() {
    // Animates the basketball sprite and displays the menu
    if (frameCount % 5 == 0) {
      step++;
      if (step == 6) {
        x += w;
        step = 0;
      }
      if (x >= width) {
        x = 0;
      }
    }
    push();
    imageMode(CORNER);
    image(menu, 0, 0, width, height);
    pop();
    push();
    // Displays the basketball sprite, fade animation, and start button
    image(bballSprite[step], x, (2 * height) / 3);
    if (fade < 255) {
      fade += 2;
    }
    fill(0, 150);
    rect(width / 2, (4.9 * height) / 9, width / 4, height / 7, 20);
    fill(178, fade);
    textSize(width / 10);
    textFont(font);
    text("Start", width / 2, (3 * height) / 5);
    pop();
  }

  countdown() {
    // Displays countdown before starting the game
    push();
    background(0);
    fill(255);
    textSize(width / 12);
    text(cd, width / 2, height / 2);
    if ((frameCount - startTime) % 45 == 0) {
      cd--;
    }
    if (cd == 0) {
      // Plays crowd sound and updates game state when countdown is over
      crowdSound.setVolume(0.5);
      crowdSound.loop();
      this.state++;
      startTime = frameCount;
    }
    pop();
  }

  game() {
    push();
    // Displays game background and score/time counters
    imageMode(CORNER);
    image(crowd, 0, 0, width, height);
    pop();
    push();
    textSize(width / 15);
    if ((frameCount - startTime) % 45 == 0) {
      gameTime--;
    }
    fill(0);
    text("Time left: " + gameTime, width / 4, height / 8);
    text("Score: " + this.score, width / 4, (10 * height) / 11);
    if (newVal < prevVal - 7 && time < frameCount - 30){
      // Plays a random sound effect and increases score when a shot is detected
      let rand = int(random(6));
      sounds[rand].play();
      this.score+=3;
      time = frameCount;
    }
    if (gameTime == 0) {
      // Plays buzzer sound and updates game state when time is up
      buzzer.play();
      this.state++;
      if (this.score > this.highScore) {
        this.highScore = this.score;
      }
    }
    pop();
  }

  endScreen() {
    push();
    // Displays game background and score/high score
    imageMode(CORNER);
    imageMode(CORNER);
    image(crowd, 0, 0, width, height);
    pop();
    push();
    fill(0);
    textSize(width / 14);
    text("Game Over", width / 4, height / 2);
    text("Score: " + this.score, (1.5 * width) / 7, height / 4);
    text("High Score: " + this.highScore, (5 * width) / 7, height / 4);
    fill(0);
    text("Play Again", width / 4, (7 * height) / 9);
    pop();
  }
}

Next, I implemented the feature to make the game fullscreen when the user clicks the start screen. I accomplished this by resizing the canvas and using the fullscreen() function.

// This function is triggered when the mouse is pressed
function mousePressed() {
// Check if game state is 0 (menu screen)
if (game.state == 0) {
// Play music and set canvas to fullscreen
music.setVolume(0.5);
music.loop();
let fs = fullscreen();
fullscreen(!fs);
resizeCanvas(displayWidth, displayHeight);
// Change game state
game.state++;
}
// Check if game state is 1 (countdown screen)
else if (
game.state == 1 &&
mouseX < width / 2 + width / 8 &&
mouseX > width / 2 - width / 8 &&
mouseY < (5 * height) / 9 + height / 14 &&
mouseY > (5 * height) / 9 - height / 14
) {
// Stop music and change game state
music.stop();
game.state++;
startTime = frameCount;
}
// Check if game state is 4 (end screen)
else if (
game.state == 4 &&
mouseX < width / 4 + width / 4 &&
mouseX > width / 4 - width / 4 &&
mouseY < (7 * height) / 9 + height / 5 &&
mouseY > (7 * height) / 9 - height / 5
) {
// Reset game state, score, countdown timer and game timer
game.state = 2;
game.score = 0;
cd = 3;
gameTime = 45;
}
}

ARDUINO CODE

The Arduino program will read the sensor input to determine when the ball has been shot and passed through the hoop. The circuit will consist of a flex sensor and a resistor, with the flex sensor connected to an analog input on the Arduino board. The Arduino program will read the analog input to determine the current value of the flex sensor, which will change whenever a basketball passes through the hoop and contacts the sensor.

This Arduino code is designed to read analog input from a flex sensor connected to pin A0. In this case I built a sample circuit with LED to monitor if the flex sensor is working properly. The code begins by declaring constants for the LED pin (3) and the flex sensor pin (A0), and a variable to store the analog input value. In the setup function, the LED pin is set as an output pin, and serial communication is initialized at a baud rate of 9600.

The loop function continuously reads the analog value from the flex sensor using analogRead(), and then prints this value to the serial monitor using Serial.println(). The analog value is then mapped from the range 700-900 to the range 0-255 using the map() function. The resulting value is then used to control the brightness of the LED using analogWrite(), which sends a PWM signal to the LED pin. Finally, there is a small delay of 100ms before the loop starts again.

//Constants:
const int ledPin = 3;   //pin 3 has PWM funtion
const int flexPin = A0; //pin A0 to read analog input
//Variables:
int value; //save analog value
void setup(){
  
  pinMode(ledPin, OUTPUT);  //Set pin 3 as 'output'
  Serial.begin(9600);       //Begin serial communication
  while(Serial.available() <= 0) {
     Serial.println("0,0");
    }
}
void loop(){
  
  value = analogRead(flexPin);         //Read and save analog value
  Serial.println(value);               //Print value
  value = map(value, 700, 900, 0, 255);//Map value 0-1023 to 0-255 (PWM)
  analogWrite(ledPin, value);          //Send PWM value to led
  delay(100);                          //Small delay
  
}

Additionally, I tested photoresistor and infrared distance measurer as potential types of sensors for detecting when the basketball passes through the hoop. Based on my testing I determined that flex sensor is the most accurate and well-designed option.

COMMUNICATION BETWEEN ARDUINO/ P5.JS

The communication between Arduino and P5.js in the Mini Basketball Arcade Game is crucial for the game to function properly. The Arduino program reads the analog input from the flex sensor, which detects when the basketball passes through the hoop. Once the flex sensor value changes, the Arduino program sends this data to the P5.js program for processing and display on the scoreboard.

In order to establish communication between the two programs, the Arduino program uses the Serial communication protocol to send the sensor data to the P5.js program. The data is transmitted as a series of bytes that represent the flex sensor value. The P5.js program receives this data using the Serial communication library, which provides a way for the P5.js program to listen to the serial port and read the incoming data.

Once the P5.js program receives the flex sensor data from the Arduino program, it uses this data to update the score on the scoreboard. When data is received, the P5.js program reads the data and stores it in a variable. The P5.js program then uses this variable to update the player’s score based on the successful shots made by the player. The P5.js program also keeps track of the time remaining in the game and displays this information on the scoreboard.

What are some aspects of the project that you’re particularly proud of?

The main aspect I am very proud of in this project is the Mini Basketball Arcade Gaming Box that I created.  I did not expect it to take so much time to build and design a game box, but I still enjoyed the process and came up with really user-friendly solution. I constructed a rectangular frame to support the basketball hoop, which also featured a ramp for the ball to return to the user, making it more convenient for the users to collect the balls after shooting. Following the initial user testing, I decided to enlarge the size of the frame, allowing more space for missed shots to fall onto the ramp and roll back to the user.


As you can observe from pictures above, I specifically created a path for the basketball to slide because in the first cases of user-testing I received a feedback about balls being stuck in the frame so I designed a path and additional section where used balls are stored.

To create the hoop, I repurposed a paper coffee container, and the ball was a ping pong ball that I borrowed from the Fitness Center.

What are some areas for future improvement?

  • One potential area is to improve the accuracy and precision of the flex sensor readings. The flex sensor used in the project is known to be sensitive to changes in temperature, humidity, and other environmental factors. Also the right positioning of the flex sensor is crucial because it needs to be centered so that it would 100% detect the falling ball. Because I used tennis balls the attachment to the hoop also caused substantial issues resulting in faulty detections.
  • Another potential game level could involve increasing the difficulty of the shots required to score points. For example, the basket could be moved to different locations or the size of the basket could be decreased. To implement this, the code would need to randomly generate new positions for the basket and adjust the size of the basket accordingly. The code would also need to calculate the trajectory of the ball and determine whether it goes through the basket.

User Testing


For the final user testing, I asked Aaron and Symbat to test my  game without giving them any prompts/instructions . User testing was important to identifying what to work on in my project.

Are they able to figure it out? Where do they get confused and why? Do they understand the mapping between the controls and what happens in the experience?

It was very straightforward because I made the design of the game box and even tennis balls obviously basketball themed and there was not any confusion in figuring out the interaction design. They both immediately understood how to play the game and the mapping between the controls and what happens in the experience. Physical act of shooting a miniature basketball into the hoop, which is the primary user input was well implemented and tested.

What parts of the experience are working well? What areas could be improved?

The whole interaction design part is working surprisingly well.  P5.js program offers an interactive and immersive basketball game, featuring a visually appealing interface with a scoreboard showing the current score and time remaining. Users can shoot basketballs through the hoop, and the program responds with feedback sounds and updates the score. The game also includes a time limit, adding an extra layer of excitement and challenge. A buzzer sounds when the time runs out, and the user can view their final score and compare it with the highest score achieved.

As mentioned before, one potential area is to improve the accuracy and precision of the flex sensor readings because sometimes when the flex sensor is tilted from its position it might count faulty results. Additionally, because I am using very light tennis ball it compromises the best positioning of sensor by getting a bit heavier ball of same size the accuracy would be perfect.

What parts of your project did you feel the need to explain? How could you make these areas more clear to someone that is experiencing your project for the first time?

I received some questions about how the shoots are detected and what sensors I used. I could provide more information about the different types of sensors being tested (photoresistor and infrared distance measurer) and how they work. This would help the user understand the reasoning behind using a flex sensor and how it compares to other potential sensor options. I can also explain about the materials and components required to build the physical arcade machine. This would give the user a better understanding of the physical aspects of the project and how they fit together.

Final Project

Main Concept

For the final project, I created a California themed car game. The physical hardware consists of a box with an arduino installed inside along with an ultrasonic sensor. There is a long road panel in front of it where the player places their NYU card keys and slides it along the road lanes to mimic the movement of a car on the road. The ultrasonic sensor detects the motion of the card along the lanes and causes the actual car in p5.js to move as well. On the screen, I decided to design the UI on a californian theme so I went with pictures and elements which depicted that concept. When the game begins, there are cars approaching the player from each lane and the player needs to move their key on the physical road to change the lane of the car on screen. With time the car speed increases and becomes more difficult. As it is a high score based game, every incoming car that is avoided is counted as one point so the ending page shows the high score and individual player score as well. As an indication of when the game has started, the green LED lights up on the box labeled “gas station” and similarly when the car crashes, red LED lights up or yellow goes off when the player is reading instructions, almost to imitate real life traffic lights. 

P5.js

In the p5.js code, I have created a game using different classes. There is the player class which deals with the movement of the player by receiving values from arduino and then mapping it according to the canvas and player position. Then there is a class for the incoming cars, which deals with the downward motion of the cars and is also passed as an argument to the player class to check if the x or y coordinates of the player coincide with those of the incoming cars, in which case the game ends as the cars crash. I created an array for the incoming cars so that they are added at a certain frameRate count and are removed from the array as soon as they go out of the canvas.

//variable declarations


let h = 600;
let w = 400;
let count = 0;
let pos = [55, 165, 270];
let charsize = 80 ; //defines size of player
let charheight = 100
let player; //variable for the player class object
let newcarssize = 100; 
let newcarswidth = 80;
let newcars = [];
let score=0;
let highscore=0;
let bonusarr = []; //array to store bonus objects
let caught = false; 
let bonuscaught = []; //
let scorebool = false;
let newchar = false; //boolean variable to help in creating new character when game starts again
let foodnum = 0; //to iterate over food array
let speedincr = 1; //for the vertical motion of newcarss
let carimg = 0;
let carspeeds = 2;

let r1=0;
let r2 =-600;
let r3 = 0;

let food = []; //array for food images

let gamestate = 'start'; //gamestate for changes in display
framewidth = 20; 

let a = 150;
let b = 300;
let c= 450;
let d = 550;

//image variables
var gif_loadImg, gif_createImg;
let pixelfont;
let startimg;
let startbutton;
let instructbutton;
let instructpage;
let endimg;
let road1, road2, road3;
let car1, car2, car3, car4, car5;
let cars = [];
let endsound, crash, backsound;
let tree;

//arduino variables
let rVal = 0;


//preload function for all the images and sound
function preload() {
    startimg = loadImage('2.png');
    startbutton = loadImage('startbutton.png');
    instructpage = loadImage('3.png');
    instructbutton = loadImage('instruct.png');
    endimg = loadImage('1.png');
    road1 = loadImage('road.png');
    road2 = loadImage('road.png');
    road3 = loadImage('road.png');
    car1 = loadImage('car1.png');
    car2 = loadImage('car2.png');
    car3 = loadImage('car3.png');
    car4 = loadImage('car4.png');
    car5 = loadImage('car5.png');
    tree = loadImage('tree.png');
  
    endsound = loadSound('endsound.mp3');
    crash = loadSound('crash.mp3');
    backsound = loadSound('background.mp3');
    

}


//====================================================
//class for the player object
class Character{
  constructor(){
    this.x = 5+ width/2-(charsize/2);
    this.y = height - ((charsize));
    this.speed = 4; //speed for the movement of player horizontally

  }
  
  display(){

    image(car2, this.x, this.y-10, charsize, charheight ); 


  }
  moveleft(){ //if left key is pressed, causes player to move left
    this.x -= this.speed;

    if (this.x < 0) {
      this.x = 0; //so player does not go beyond the canvas
    }
  }
  moveright(){ //if right key is pressed, causes player to move left
    this.x+=this.speed;

    if (this.x+charsize > width) {
      this.x = width-charsize; //so player does not go beyond the canvas
    }
  }
  update(newcars){
    
    if(rVal < 7){
      this.x = 55;
    }
    else if(rVal>=7 && rVal<14 ){
      this.x = 165;
    }
    else if(rVal >= 14){
      this.x = 270;
    }


        if(this.x>=newcars.x && this.x <= newcars.x+(newcars.pwidth) && this.y>=newcars.y &&  this.y<=newcars.y+ newcars.pheight){
          count++;

      console.log("Loss:" , count);
          crash.play();
          gamestate = 'over';
        

    }
    else if(this.x+charsize >=newcars.x && this.x+charsize <= newcars.x+(newcars.pwidth) && this.y>=newcars.y &&  this.y<=newcars.y+ newcars.pheight){
      count++;

      console.log("Loss:" , count);
      crash.play();
      gamestate = 'over';
            
            }
    
    else if(this.x>=newcars.x && this.x <= newcars.x+(newcars.pwidth) && this.y+charheight>=newcars.y &&  this.y+charheight<=newcars.y+newcars.pheight){
      
          count++;
      crash.play();

          console.log("Loss:" , count);
      gamestate = 'over';
            }


  }


}
//====================================================
//class to create newcarss
class incars{
  constructor(carimg, carspeeds){
    this.x = random(pos);
    this.y = 0;
    this.pwidth = newcarswidth;
    this.pheight = newcarssize;
    this.speed = carspeeds;
    this.num = carimg
    
  }
  
  displaynewcars(){
 
     image(cars[this.num], this.x, this.y , this.pwidth, this.pheight);
  }


  //causes newcars to move upwards
  update(){
    this.y += this.speed;

  }
  
  
}


function setup() {
  
  createCanvas(w,h);
  
  background(220);
  player = new Character();
  cars = [car1, car2, car3, car4, car5];


}

function draw() {
  if(frameCount == 1){
    backsound.play();
  }
  background(220);
   if (!serialActive) 
  {
    text("Press Space Bar to select Serial Port", 20, 30);
  } else 
  {

  }


  if(gamestate == 'start'){ //if game is at start page then display homepage


    startpage();


  }
  //if gamestate is of 'game' then plays the game through thegame() function
  else if(gamestate == 'game'){
        image(road1,  0,r1, width, height, 0, 0, road1.width, road1.height); //homepage image displayed
    image(road1, 0,r2,  width, height, 0, 0, road1.width, road1.height);
    
    r1+=2;
    r2+=2;

    if(r1 >= height){
      r1 = r2- height ;
    }
    if(r2>= height){
      r2 = r1-height ;
    }


  thegame(); //plays game through this function
    a++;
    b++;
    c++;
    d++;
    
       image(tree,  -75,a, 150, 150, 0, 0, tree.width, tree.height);
        image(tree,  -75,b, 150, 150, 0, 0, tree.width, tree.height);
            image(tree,  width-60,c, 150, 150, 0, 0, tree.width, tree.height);
        image(tree,  width-60,d, 150, 150, 0, 0, tree.width, tree.height);
    
    if(a > height+150){
      a = -150;
    }
    else if(b> height+150){
      b = -150;
    }
    else if(c> height+150){
      c = -150;
    }
        else if(d> height+150){
      d = -150;
    }


  }
  
  else if(gamestate == 'over'){ //if gamestate is over then end page displayed 


    image(endimg, 0, 0, width, height, 0, 0, endimg.width, endimg.height);

  endpage();
   
    
  }
  else if(gamestate == 'instructions'){ //displays instructions 
    instructionspage();

  }
}
//========================
function thegame(){ 

 
   //checks if game is started again and creates a new player to play the game again
    if(newchar == true){
     player = new Character();
    newchar = false;
  }


  //for keys to move the player
  if(keyIsDown(LEFT_ARROW)){
    player.moveleft();
  }
  else if (keyIsDown(RIGHT_ARROW)){
    player.moveright();
  }


  //for new newcars and elements to be created and added to their arrays
  if(frameCount%150 == 0){

    newcars.push(new incars(carimg, carspeeds));

    score++;
    console.log(score);
    carimg++;
    if(carimg>4){
      carimg = 0;
    }
    
 
  }


  //FOR LOOP
  for(let i = 0 ; i<newcars.length ; i++){
    //shows newcarss and updates their positions by decreasing y coordinated to move them up
    newcars[i].displaynewcars();
    
    newcars[i].update();


    //when newcars and food goes beyond the roof, they are removed from their arrays 
    if (newcars[i].y > height+400 ){
      newcars.splice(i, 1);
      // bonusarr.splice(i, 1);
      // bonuscaught.splice(i,1);
 

    }
    
    //Player's position checked against newcars and ladder's position
    player.update(newcars[i]);

    newcars[i].update();//moves it up
    
    
  }
  
  player.display(); 
  
  //END of FOR


}

//==============================

function startpage(){ //function to display the images of starting page
    image(startimg, 0, 0, width, height, 0, 0, startimg.width, startimg.height);


    imageMode(CENTER);
      image(startbutton, width/2, height/2, map(startbutton.width, 0, startbutton.width, 0, width/4), map(startbutton.height, 0, startbutton.height, 0, height/6));

    imageMode(CORNER);

    //checks if mouse pressed on the button and directs to instructions
    if(mouseX < width/2 + (width/(width/100)/2) && mouseX > width/2 - (width/(width/100)/2) && mouseY > height/2 - (height/(height/100)/2) && mouseY < height/2 + (height/(height/100)/2) && mouseIsPressed){
      gamestate = 'instructions';
      // success.play();
    }
  
}


function endpage(){ //function to display score and highscore and 'game over' page


  for(let i = 0 ; i<newcars.length ; i++){
      newcars.pop();
      bonusarr.pop();
      bonuscaught.pop();
  }
  newchar = true;
  
  if(score>highscore){ //updates the highscore with each previous score 
    highscore = score;
  }

  textAlign(CENTER);
  textFont('Times New Roman');
  fill("#FAF8F4");
  textSize(0.05*width);
  text('Score: '+score , width/2, (height/2)-58);
  text('High Score: '+highscore , width/2, ((height/2))-40);

  
  if(keyIsDown(ENTER)){ //when ENTER is pressed, gamestate changed so that game starts again
    gamestate = 'start';
    score= 0 ;
  }

}

function instructionspage(){ //displays instruction images 
  
  image(instructpage, 0, 0, width, height, 0, 0, instructpage.width, instructpage.height);
  

  image(instructbutton, (2.3*width)/4, (3.3*height)/3.7, map(instructbutton.width, 0, instructbutton.width, 0, 150), map(instructbutton.height, 0, instructbutton.height, 0, 50));
  
  //checks if mouse clicked on the button and continues to game state of playing the game
  if(mouseX>(2.3*width)/4 && mouseX < width && mouseY > (3.3*height)/3.7 && mouseY < height && mouseIsPressed){
    gamestate = 'game';
    //success.play();
  }


}


//====================
//ARDUINO


function keyPressed() {
  if (key == " ") 
  {
    // important to have in order to start the serial connection!!
    setUpSerial();
  }
}
function mouseIsPressed()
{
  readSerial();
}

// This function will be called by the web-serial library
// with each new line of data. The serial library reads
// the data until the newline and then gives it to us through
// this callback function
function readSerial(data) {
  ////////////////////////////////////
  //READ FROM ARDUINO HERE
  ////////////////////////////////////

  if (data != null) 
  {
    rVal = data;
  }
  
  //=============
  let sendToArduino=0;
  if(gamestate == 'game'){
    sendToArduino = 1;
  }
    else if(gamestate == 'instructions' || gamestate == 'start'){
    sendToArduino = 2;
  }
      else if(gamestate == 'over'){
    sendToArduino = 3;
  }
  sendToArduino = sendToArduino+"\n";
    
    writeSerial(sendToArduino);
}


Arduino

In arduino, the main component is the ultrasonic sensor and then the LEDs. I have set the trig and echo pins as well as the LED pins initially. The connection between arduino and p5.js is in sending data from the ultrasonic sensor when the card is moved in front of it. The data is read by p5.js and is then used to control the x-coordinate of the player car. The p5.js sends the data regarding the game states which controls the LED pins. The data is sent as an integer, each indicating the game state, and is then used to control the respective LEDs. I soldered the LEDs so I could fix it on top of the box. 


I was facing an issue with consistent readings from the ultrasonic sensor. As it sends out signals in a more spread out manner and reads very minor changes, the car was glitching because slightest tilt of the card was also causing the ultrasonic sensor to change values. I had to add a bit more delay to make sure the card movement has stabilized before the sensor reads its distance.

const int trigPin = 9;
const int echoPin = 10;
const int ledgreen = 2;
const int ledyellow= 4;
const int ledred = 7;
// defines variables
long duration;
int distance;
void setup() {
  pinMode(trigPin, OUTPUT); // Sets the trigPin as an Output
  pinMode(echoPin, INPUT); // Sets the echoPin as an Input
  Serial.begin(9600); // Starts the serial communication
  pinMode(ledgreen, OUTPUT);
  pinMode(ledyellow, OUTPUT);
  pinMode(ledred, OUTPUT);
}
void loop() {
  // Clears the trigPin
  digitalWrite(trigPin, LOW);
  delayMicroseconds(2);
  // Sets the trigPin on HIGH state for 10 micro seconds
  digitalWrite(trigPin, HIGH);
  delayMicroseconds(10);
  digitalWrite(trigPin, LOW);
  // Reads the echoPin, returns the sound wave travel time in microseconds
  duration = pulseIn(echoPin, HIGH);
  // Calculating the distance
  distance = duration * 0.034 / 2;
  // Prints the distance on the Serial Monitor
  //Serial.print("Distance: ");
  Serial.println(distance);
  
  //Serial.write(distance);


    int brightness = Serial.parseInt();
    if(Serial.read() == '\n')
{
      //Serial.println(brightness);
      if(brightness == 1){
        digitalWrite(ledgreen, HIGH);
        digitalWrite(ledyellow, LOW);
        digitalWrite(ledred, LOW);
      }
      else if(brightness == 2){
        digitalWrite(ledyellow, HIGH);
        digitalWrite(ledgreen, LOW);
        digitalWrite(ledred, LOW);
      }
      else if(brightness == 3){
        digitalWrite(ledred, HIGH);
        digitalWrite(ledgreen, LOW);
        digitalWrite(ledyellow, LOW);
      }
    
    
    }
    delay(300);
    //analogWrite(ledgreen, brightness);
  }


Future improvements

I feel like there is a lot that could still be improved. I think the first thing would be to add vertical motion to the car, I was unable to implement it because the ultrasonic sensor detects horizontal distance changes only so it was a bit difficult to manage both the axes. Another factor would be to change the sensor to infrared which would solve the problem of inconsistent readings because infrared sensors send signals in a direct line while ultrasonic sensors send them spread out so the accuracy of readings would be improved. I would also like to add button to the Arduino such as buttons to turn the music on or off and also for the port selection, which I was unable to implement as well.


FINAL PROJECT: “Togyzkumalak”

TO VIEW THE P5 CANVAS FULLSCREEN CLICK HERE.

To view the code click here.

CONCEPT

For my final project, I created a version of the Kazakh traditional two-player board game, Togyzkumalak (transl. “nine pebbles”). The game board is visualized on a p5 window, which is displayed to players through a laptop screen. The board consists of two halves, each half features 9 playing pits, 1 storehouse, and a score display.

At the beginning of the game, each pit contains 9 pebbles. Players control their moves by using a set of three buttons (left, right, enter), featured on the arcade cabinet. Each player is given a minute to choose a pit to play. If the “select” button is not pressed by the end of the timer, the last active pit will be played. The active pit is indicated by a thick contrast frame around the pit. The pebbles from the chosen pit are spread in an anti-clockwise direction, one pebble per pit. If there is more than 1 pebble in the pit, the first pebble is put back into the pit it was taken from. If there is only 1 pebble in the pit, the first pebble is moved to the next pit. If the last pebble to be moved is put into one of the opponent’s pits and the total of the pebbles in that pit is an even number, all of the pebbles from that pit get moved to the player’s storehouse and add to their total score.

The opponent’s pit can be “conquered”, meaning that all the pebbles that ever fall on that pit will move to the player’s storehouse. However, there are some more conditions that need to be followed to do that (checked by p5 automatically):

        • the total of the pebbles in the last pit you’ve visited must be 3 (2 old +1 new);
        • the pit shouldn’t be the last pit of the player (pit #9);
        • you must not already have a “conquered” pit;
        • if your opponent already has “conquered” a pit on your side, you can’t “conquer” a pit that is opposite to it;

If one of the players doesn’t have any more pebbles in any of their 9 pits, the opponent’s pits are emptied into their storehouse, incrementing their score. The game ends and the player with the highest score wins.

IMPLEMENTATION

INTERACTION DESIGN

The game is hosted on a 30*40 acrylic arcade cabinet, which features two sets of game control buttons, a menu button, and an instructions button. For the screen, I am using a 13-inch laptop, the keyboard part of which is hidden in the cabinet, so that only the screen can be seen and accessed by the players. Along with the lower part of the laptop, the Arduino setup is also neatly organized inside the cabinet. To fit both without the size of the cabinet, I have put a small box inside the cabinet. The box plays two roles, it is both a home for the Arduino kit and a pedestal for the laptop. I have used a laser cutter, duct tape, bolts, and acrylic glue to assemble the cabinet. Below the cabinet, there is a box the pure function of which is to lift up the cabinet and make the whole setup look less disproportionate.

The biggest challenge at this stage was cutting the elements individually. The laser cutting machine died in the process multiple times, which made the process very time-consuming.

ARDUINO CODE

Setting up the Arduino code was pretty intuitive. It is fully based on the example provided by the professor in class. The code consists of the declaration of 8 buttons and their states. The state of each button is read and sent to p5. An empty line is sent from p5.js to Arduino.

To view the code scroll to the end of the sketch.js file in p5. Click here to view the p5 code.

P5.JS CODE

Most time was spent on setting up p5 canvas. There are four game states (start, playing, end, and instructions) that constitute the window displayed. The title page features a blinking text to serve as a sort of warning that the game requires two players. I found it necessary to add this warning and make it visible because my midterm project was also a two-player game and despite stating in class that it is multiplayer, my fellow classmates would still attempt to play it individually, which really breaks the experience. I decided to feature instructions on a separate page because (a) I didn’t find a way to make them concise enough to feature on the title page, and (b) I believe that there will be some people who know the instructions of the game. For the end screen, I have adopted the confetti display to make it feel less empty and more festive.

The arcade style of the game was dictated by the arcade cabinet and my general liking of this style. I find the arcade art style to be fitting for whatever game idea. It is easy to implement, not too difficult to modify if needed, and makes the game look more put together.

To explain the code in a more organized way, I will be focusing on each of the major functions of the game.

Turn mechanics

The turn mechanics in the game involve managing the timer, checking if a selected pit is empty, and handling situations where a selection is not made within the allotted time.

The game utilizes the frameCount variable to keep track of the elapsed time. The timeStart variable is set to the current frameCount value at the start of a player’s turn. The timer bar is displayed, indicating the remaining time for the player’s turn. If the timer reaches the time set for a turn, the turn is automatically ended.

If the player does not make a selection within the allowed time (e.g., before the timer reaches the threshold), the turn is automatically ended and whatever pit their selection window was on, would be played. If the last selected pit is empty, pit index + 1 would be played. This is achieved by comparing the current frameCount value with the timeStart value and determining if the time limit has been exceeded. When the turn times out, the game proceeds to the next player’s turn.

Pebble movement

When there are multiple pebbles in a pit, the game determines the number of pebbles to be moved. If the pit has more than one pebble, the ballCount variable is set to the number of pebbles in the pit minus one. The pebbles are then moved one by one to the subsequent pits in an anti-clockwise direction. If there is only one pebble in the pit, a specific rule is applied. The ballCount variable is set to 1. If a player selects an empty pit, no pebbles are moved, and the player is forced to choose a pit that has pebbles in it.

Capturing opponent’s pebbles

After moving the pebbles to their respective pits, the game checks whether the total number of pebbles in the last pit visited on the opponent’s side is even. This is done by checking the index of the pit using modulo division (%), which checks if the remainder of the division by 2 is 0, indicating that the pit is even. If the final pit has an even amount of pebbles, the player’s score is incremented by the number of pebbles in the opponent’s pit. The player’s storehouse and the opponent’s pit are updated to reflect new values.

End of game

After each move, the game checks if the current player has any remaining pebbles in their pits. This is done by iterating through all nine pits of the current player and summing up the number of pebbles in each pit. If the total count of pebbles in the player’s pits is zero, it indicates that the player has no more pebbles to play with. The game state changes to “end” and the end window is displayed. The scores are compared to choose which ending message to display. An alternative way of finishing the game is by pressing the right white button.

FUTURE IMPROVEMENTS

There are a few. For a better experience of the game, it would be nice to have sound effects, music, and animations. I am an advocate for adding sound to whatever experience that doesn’t require a complete lack of sound. Especially if it’s a game. However, this time I really didn’t have the time to add by the project submission deadline. I may add it by the time of the showcase if I have some free time. As for animations, I just couldn’t figure it out. Perhaps if the distribution of the pebbles was slower and more emphasized, it would be easier to figure out the game flow for those, who didn’t understand it from instructions.

In the original game, there is also a different kind of pebble, but I don’t remember what rule is associated with it and surprisingly can’t find anything online. I do believe that it added more complexity to the game, however, it is currently difficult to explain instructions in simpler terms as it is. So for the starters, I wanted to focus on making the game’s logic and objective as understandable as possible without taking away from the strategic aspect of it.

Coming back to the display of the instructions, I feel like right now it is the biggest challenge of the game. While after user testing I was planning to have some visuals to accompany the rules, I realized that it would be more effective to explain the game in as many details as required to make the game make sense. In case players at any point want to clarify something about the rules, they can always press the button allocated specifically for this purpose. The game timer pauses for the duration of the instructions display so that players wouldn’t feel in a hurry and could actually focus on understanding the game.

One other thing is that even though it is written that to start the game players must press the yellow buttons simultaneously, most lack the group coordination to do so. I implemented this rule as one way of ensuring that there are two players at the start of the game. Maybe there is some condition I could add to make it so that as long as the other player presses within some brief time window from the first player to press the yellow button on the title screen, the game could be started.

Final Project: User Testing (Togyzkumalak)

For the user testing, I have asked a person outside of this class to test what I have so far. This includes the p5 screen only, as I was yet to have the physical part of the game and didn’t yet connect the Arduino to p5. On the p5 screen, there is an interactive board with pebbles distribution animation. The information about the order of turns, scores, and presence of any conquered pits is logged to the console and not yet displayed on the board. The turns are not timed yet.

The user was not given any instructions besides the p5 screen, so they navigated the game on their own. They have focused on using mouse clicks mainly, which correlates to the type of control that I had for p5 so far (players’ turns are played through mouse clicks on pits correlating to their side of the board). This observation indicates that it is only intuitive to want to interact with pits. I believe that the control will be even more intuitive when the physical aspect of the game will be built.

It could have been more effective if I asked two people to test the game instead of one because it is a two-player game. However, it could be observed that the user got a sense of it from the clear visual division of the board and the text from the console logs.

The tester was confused about the rules and the goal of the game. I believe that with well-written instructions, it would be an easy fix. My concern, however, is that people don’t like to read, especially when it comes to instructions. So if I make the instructions more than a few dozen of words long, people may skip through them, be confused through the game, and come to a conclusion that they don’t like it, when it’s actually very fun (like me with chess). I will try to add images where appropriate, however, I am not sure if images alone will suffice.

The video of the user testing is attached below. If the video window doesn’t show, use this link to view it.

Final Project – User Testing

Group: Vladimir, Dariga

For user testing, we asked Aaron to test our game without giving him any prompts/instructions (thank you, Aaron!). User testing was important to highlight 2 major issues with the project at the moment:

  1. We did not make instructions super clear and eye-catching. Aaron skipped through reading them.
  2. The complexity of the game levels was a bit too much. It was challenging to complete some of them and car movements made it sometimes impossible.

The interesting part of our project involves not so standard way of controlling the movement across screens in p5js. We use a physical wooden piece – controller labelled C. User testing showed that players can get confused and use arrows instead and then use hands, instead of the controller, to move.

After some explanation on the controller part, the experiences with navigating through levels were working well. Some areas of improvement included reducing the complexity. At some levels, the door was not wide enough to be easily passed, or cars made the player die too often and it got annoying quickly.

Post-user testing edits on the project included:

  1. We added more instructions. We have even changed the text colour to include some contrast. The image of the physical component – the board and controller – was included in the p5js entry screen as well.
  2. The complexity of game levels was reduced to make the game experience more enjoyable while intentionally leaving this feeling of being a bit frustrated.

Some demo videos are included below.

Demo video 1:


Demo video 2:

Final Project: Whack-A-Note

Concept:

My project is a whack-a-mole game with a rhythm game element where users have to hit the mole at a specific time when a mole’s shadow(a node) aligns with the mole. Users, while the song is playing, must hit the mole whenever the shadow of it

Implementation:

My hardware part of the project is basically a giant system of three switches. Each wire of the circuit connected to its respective digital inputs are attached to an tin foil and left as an uncompleted circuit. The circuit is only closed when the hammer, connected to power, hits the tin foil and completes the circuit, sending a HIGH signal through the digital input. In the UI, the p5 reads a music score and randomly generates nodes related to the notes and rhythm and creates an array. Each node in that array will move towards the designated hit zone, and if the node is aligned with the hit zone, then users can connect the physical circuit to send the signal that the mole was whacked. If the correct mole was whacked, then the user will win points, but if mole was not whacked or the incorrect mole was whacked, then users will lose points. Each song has its specific array of nodes, so the users can achieve a certain max score, and if the user loses more than -1000 points, then the game will be over.

Codes:

-p5js

let musicOne;
let musicTwo;
let musicThree;
let noteImg;
let bg;
let title;
let gameOverSign;
let moleSize = 100;
let shadowImg = [];
let moleImg;
let musicDelay = [4.8, 3.3, 5];
let gameOver = false;
let musicArr = [];
let mole = [];
let colorMole = ["red", "yellow","blue"];
let hit = false;
let score = 0;
let noteArr = [];
let shadowsArr = []
let hitArr = [0, 0, 0];
let firstrun = true;
let startGame = false;
let choice;


function preload(){
  bg = loadImage('bg.png');
  moleImg = loadImage("download.png");
  shadowImg[0] = loadImage("shadowRed.png");
  shadowImg[1] = loadImage("shadowYellow.png");
  shadowImg[2] = loadImage("shadowBlue.png"); 
  shadowImg[3] = loadImage("download.png");
  noteImg = loadImage("note.png");
  gameOverSign = loadImage("gameOver.png")
  title = loadImage("title.png")
  
  musicOne = loadSound("starWars.mp3");
  musicTwo = loadSound("zelda.mp3");
  musicThree = loadSound("canon.mp3");
  
  musicArr.push(musicOne);
  musicArr.push(musicTwo);
  musicArr.push(musicThree);
}

function setup() {
  createCanvas(windowWidth, windowHeight);
  textFont("Comic Sans MS");
  textSize(20);
}

function windowResized() {
  resizeCanvas(windowWidth, windowHeight);
}

function draw() {
  //background image of the game
  //choose a song to play
  background(bg);
  if(!startGame){
    image(title, (windowWidth/2) - windowWidth/16 * 7, (windowHeight/4) - windowHeight/8, windowWidth/8 * 7, windowHeight/3 * 2);
    let stringOne = "Star Wars Theme";
    let stringTwo = "Zelda Theme";
    let stringThree = "Canon";
    fill("white");
    text(stringOne, (windowWidth/4) - (textWidth(stringOne)/2), (windowHeight/18) * 11);
    text(stringTwo, (windowWidth/2) - (textWidth(stringTwo)/2), (windowHeight/18) * 11);
    text(stringThree, (windowWidth/4) * 3 - (textWidth(stringThree)/2), (windowHeight/18) * 11);
    
    image(noteImg, (windowWidth/4) - 55, (windowHeight/10) * 7, 100, 100)
    image(noteImg, (windowWidth/2) - 55, (windowHeight/10) * 7, 100, 100)
    image(noteImg, (windowWidth/4) * 3 - 55, (windowHeight/10) * 7, 100, 100)
  }
  else{
    displayGame();
  }
}

function displayGame(){
  if (!serialActive) {
    text("Press Z to select Serial Port", 20, 30);
  }
  else{
    if(!musicArr[choice].isPlaying() && firstRun){
      musicArr[choice].play(musicDelay[choice]);
      firstRun = false;
    }
    
    if(shadowsArr.length > 0 && score > -1000){
      if(gameOver){
        gameOver = false;
      }
      for(let i = 0; i < 3; i++){
        mole[i].display();
      }
      
      strokeWeight(5);
      
      //setLineDash([5, 10, 30, 10]);
      //line(100, 0, 100, windowHeight);
      text("Score: " + score, windowWidth/5 * 4, windowHeight/40 * 3);
      for(let i = 0; i < shadowsArr.length; i++){
        shadowsArr[i].display();
      }
      //console.log(shadowsArr.length)
    }
    else{
      fill("white");
      musicArr[choice].stop();
      firstRun = false;
      let scoreText = "Score: " + score;
      image(gameOverSign, windowWidth/2 - windowWidth/16 * 5, windowHeight/4 - windowWidth/16 * 2, windowWidth/8 * 5, windowWidth/8 * 3);
      let longText = "Press R to Play Again!";
      //text(shortText, 200 - textWidth(shortText)/2, 100);
      text(longText, windowWidth/2 - textWidth(longText)/2, windowHeight/8 * 7)
      text(scoreText, windowWidth/2 - textWidth(scoreText)/2, windowHeight/4 * 3);
      for(let i = 0; i < shadowsArr.length; i++){
        shadowsArr.splice(i,1);
      }
      gameOver = true;
    }
  }
  
  
  killShadow();

}

function keyPressed(){
  if (keyCode == 90) {
    setUpSerial();
  }
  if (keyCode == 82){
    if(gameOver == true){
      startGame = false;
      score = 0;
    }
  }
  if (keyCode == 70) {
    toggleFullscreen();
  }
}

function readSerial(data) {
  if (data != null) {
    let fromArduino = split(trim(data), ",");
    if (fromArduino.length == 3) {
      for(let i = 0; i < 3; i++){
        hitArr[i] = int(fromArduino[i]);
      }
    }
  }
}


function killShadow(){
  for(let i = 0; i < shadowsArr.length; i++){
    if(shadowsArr[i].x < 40){
      shadowsArr.splice(i, 1);
      score -= 100; 
    }
  }
}

class shadow{
  constructor(x, y){
    this.x = x;
    this.y = (windowHeight/4) * y;
    this.id = y;
    this.hitVal = false;
  }
  
  display(){
    fill("white");
    if(this.x > 50){
      image(shadowImg[this.id - 1], this.x - moleSize/2, this.y - moleSize/2, moleSize, moleSize);
      if(this.x <100){
        this.hitVal = true;
        image(shadowImg[3], this.x - moleSize/2, this.y - moleSize/2, moleSize, moleSize);
      }
      
    }
    this.x -= 2;
  }
}

class Mole{
  constructor(y){
    this.x = 50;
    this.y = (windowHeight/4) * y;
    this.id = y;
  }
  
  search(){
    if(shadowsArr[0].hitVal == true && shadowsArr[0].id == this.id)
      return true;
    else
      return false;
  }
  
  checkHit(){
    if(hitArr[this.id - 1] == 1){
      if(this.search()){
        score += 100;
        hitArr[this.id - 1] = 0;
        shadowsArr.splice(0, 1);
      }
      else{
        score -= 100;
        hitArr[this.id - 1] = 0;
      }
    }
  }
  
  display(){
    if(!gameOver){
      //image(moleImg, this.x - moleSize/2, this.y - moleSize/2, moleSize, moleSize);
      setLineDash[0];
      fill("black")
      ellipse(this.x, this.y + 20, 70, 40)
    }
    this.checkHit();
  }
}

function mouseClicked(){
  if(!startGame){
    for(let i = 1; i < 4; i++){
      mole.push(new Mole(i));
    }
    if(mouseY > (windowHeight/10) * 7 && mouseY < (windowHeight/10) * 7 + 100){
      if(mouseX > (windowWidth/4) - 55 && mouseX < (windowWidth/4) + 55){
        choice = 0;
        loadNotes(choice);
        startGame = true;
      }
      else if(mouseX > (windowWidth/2) - 55 && mouseX < (windowWidth/2) + 55){
        choice = 1;
        loadNotes(choice);
        startGame = true;
      }
      else if(mouseX > (windowWidth/4) * 3 - 55 && mouseX < (windowWidth/4) * 3 + 55){
        choice = 2;
        loadNotes(choice);
        startGame = true;
      }
    }
  }
}

function loadNotes(x){
  let xCo = windowWidth; 
  firstRun = true;
  let datas = [];
  let notes = [];
  let rhythm = [];
  if(x == 0){
    datas = data1;
  }
  if(x == 1){
    datas = data2;
  }
  if(x == 2){
    datas = data3;
  }
  for(let i = 0; i < datas.length; i++){
    if(i % 2 == 0){
      let temp = 0;
      for(let j = 0; j < datas[i].length; j++){
        temp += datas[i].charCodeAt(j);
      }
      temp = (temp % 3) + 1;
      notes.push(temp);
    }
    else{
      if(datas[i] > 0){
        rhythm.push(datas[i] * 20);
      }
      else{
        rhythm.push(datas[i] * 15);
      }
    }
  }
  
  for(let i = 0; i < notes.length; i++){
    shadowsArr.push(new shadow(xCo, notes[i]));
    xCo += rhythm[i];
  }
}

function toggleFullscreen() {
  let fs = fullscreen(); // Get the current state
  fullscreen(!fs); // Flip it!
}

function setLineDash(list) {
  drawingContext.setLineDash(list);
}


-arduino

int lastButton1State = LOW;
int lastButton2State = LOW;
int lastButton3State = LOW;

int buttonState1;
int buttonState2;
int buttonState3;

unsigned long lastDebounceTime1 = 0;
unsigned long lastDebounceTime2 = 0;
unsigned long lastDebounceTime3 = 0;
unsigned long debounceDelay = 20;


void setup() {
  Serial.begin(57600);
  pinMode(10, INPUT);
  pinMode(9, INPUT);
  pinMode(8, INPUT);
}

void loop() {

  int readingOne = digitalRead(10);
  int readingTwo = digitalRead(9);
  int readingThree = digitalRead(8);

  // check to see if you just pressed the button
  // (i.e. the input went from LOW to HIGH), and you've waited long enough
  // since the last press to ignore any noise:

  // If the switch changed, due to noise or pressing:
  if (readingOne != lastButton1State) {
    // reset the debouncing timer
    lastDebounceTime1 = millis();
  }
  if (readingTwo != lastButton2State) {
    // reset the debouncing timer
    lastDebounceTime2 = millis();
  }
  if (readingThree != lastButton3State) {
    // reset the debouncing timer
    lastDebounceTime3 = millis();
  }

  if ((millis() - lastDebounceTime1) > debounceDelay) {
    // whatever the reading is at, it's been there for longer than the debounce
    // delay, so take it as the actual current state:

    // if the button state has changed:
    if (readingOne != buttonState1) {
      buttonState1 = readingOne;

      // only toggle the LED if the new button state is HIGH
      if (buttonState1 == HIGH) {
        Serial.print(readingOne);
        Serial.print(",");
        Serial.print(readingTwo);
        Serial.print(",");
        Serial.println(readingThree);
      }
    }
    
  }

  if ((millis() - lastDebounceTime2) > debounceDelay) {
    // whatever the reading is at, it's been there for longer than the debounce
    // delay, so take it as the actual current state:

    // if the button state has changed:
    if (readingTwo != buttonState2) {
      buttonState2 = readingTwo;

      // only toggle the LED if the new button state is HIGH
      if (buttonState2 == HIGH) {
        Serial.print(readingOne);
        Serial.print(",");
        Serial.print(readingTwo);
        Serial.print(",");
        Serial.println(readingThree);
      }
    }
    
  }

  if ((millis() - lastDebounceTime3) > debounceDelay) {
    // whatever the reading is at, it's been there for longer than the debounce
    // delay, so take it as the actual current state:

    // if the button state has changed:
    if (readingThree != buttonState3) {
      buttonState3 = readingThree;

      // only toggle the LED if the new button state is HIGH
      if (buttonState3 == HIGH) {
        Serial.print(readingOne);
        Serial.print(",");
        Serial.print(readingTwo);
        Serial.print(",");
        Serial.println(readingThree);
      }
    }
    
  }
  lastButton1State = readingOne;
  lastButton2State = readingTwo;
  lastButton3State = readingThree;
}


Communication:

Whenever the user whacks a mole, the arduino, through serial communication, sends an array with three elements. In that array, the element with the array position that correlates to the mole number that was hit will be 1 and the rest that wasn’t hit will be 0. P5, constantly reading for this data, will take the data and update the targetHit array which will contain exactly that same data from arduino. When a shadow note reaches the designated hit zone, the mole instance will automatically check for the targetHit array and if the targetHit array matches the the id of the shadow mole, then the user will score a point. If the targetHit array does not match the id, then the user will lose a point. If the targetHit array was not updated at all, then p5 will recognize that the user didn’t hit any moles and user will lose a point. The communication from p5 to arduino was not necessary for my project, so there is none.

Aspects I am proud of:

Overall, I generally like the idea that physically completing a circuit with a non-traditional switch to make a serial communication since this was an activity we started the arduino chapter with. Also for some unexplainable reason, I really like the idea of whacking something to make something work. I am also very proud of my object orienting programming of the shadow node instance and mole instance interacting with each other to check whether the shadow node is within the designated hit zone and confirming whether the arduino’s sent information matches with the shadow id. That part took some time coming up with the mechanism that worked, but once I did, throughout the project, the mechanism worked like a charm. Lastly, I really like the arrangement of the nodes correlating to the music since I specifically used an algorithm that took the music score and translated the notes to either 1, 2, or 3 by changing the note to its ASCII code and remainder dividing it by 4. Then, I used the length of that note to decide the distance between it and its next node to match the rhythm of the node and the music, and last but not least, I manually tweaked some of the nodes and rhythms so that it specifically matched to some parts of the song. To be honest, this manual peaking took a huge portion of my time spent in this project.

Improvements:

Originally, I wanted to add more to this project by having more hittable nodes, adding another hitting element to use gloves instead of hammers to make the  game more dynamic and interesting, but unfortunately, the technical difficulties of having two hitting objects made it almost impossible to implement, and adding more hittable objects required too much time and resources. The technical difficulty was that the methodology of adding another hitting object was to add another power connected circuit differentiated by different level of resistance, which would then require analog reading instead of digital reading, and this didn’t work out with my existing switch debouncing mechanism and therefore I had to give up on this improvement. However, given more time and information, I would like to add this improvement which would add a whole new spectrum of dynamicness of the game.

Final Project: Final Report

Concept:

To summarize, my final project is a game I like to call Treasure Hunt! In this game there is a pile of random items all over the desk, among these random items is one piece of TREASURE. Your goal is to retrieve that treasure. However, there is a radar sensor moving back and forth constantly trying to detect you. The goal is to get this treasure before the radar detects you and before the time runs out! Hence, you got to hide or run away to avoid the radar’s range.

Implementation:

Arduino:

For the arduino aspect of my final project, I used several components:

  • A servo motor which would be the radar sensor moving back and forth consistently.
  • An ultrasonic sensor which would be mounted on the servo motor and this would be used to detect the distance of the user from the radar sensor.
  • A force sensor to detect whether the treasure has been picked up or not. If it was 0 for 1 second, that indicates that the treasure has been found and that you won the game!
  • Three arcade LED switches to change the difficulty of the game. Depending on which buttons were pressed, that would change the speed of the servo motor, hence the radar sensor would move much faster and would be harder to avoid the radar’s range in time.
  • I also added an LED which is used for debugging and also managing whether the treasure has been set on the force sensor before starting the game. This is because if we started the game and the treasure wasn’t on the force sensor properly, then the game would simply declare the user has won and it wouldn’t make sense.

p5js:

The main aspect of p5js was the map out a visual aid for the radar sensor and to also map out the different stages of the game to Arduino, whether than being the main menu, losing screen, winning screen or the main game screen.

For the main radar screen, it would have the entire mapping of the radar sensor moving back and forth. It also contains details such as whether the object is in range or out of range, the degree of rotation, the distance from the sensor so the user can see how the radar maps them out.

It spins and maps out a green line attempting to detect the user, if the user is detected, it would map out a red line to indicate this and if they are detected for 1 second, then they lose. Else if there were to pick up the treasure then they win!

They can also go back to the menu from this screen to change their difficulty if they wish

Arduino and p5js Interactivity:

I made a little map of how Arduino and p5js map together:

Aspects I’m Proud of:

I would say i’m very proud of how the mapping between the radar sensor through the Arduino and p5js turned out. Visually on the p5js it looks very cool, especially with a really cool blur effect I added on p5js. That way it makes it seem like an actual radar sensor. The mapping between all the different phases of the game are really well done especially through all the values from the Arduino to p5js.

I would say I’m also very proud of how the actual radar sensor box looks like, it looks very cool and the design is very awesome in my opinion. I would also say that the arcade buttons are a very nice touch to display the difficulty of the game. This is because when pressed it lights up indicating which difficulty it is, making it easy for the user to understand what difficulty they have.

Aspects I would Improve:

As per the improvement aspect of the entire project, there are several:

  • I would have loved to implement a physical computing aspect for the win/lose stage of the project. My initial ideas were that if you won, then it would activate a servo motor waving a white flag to signify that the radar sensor admits defeat. Also if they lost, then another servo motor would be activated which would unwind a scroll with a picture saying you lost or something. These ideas would’ve been really cool however, because of the time, I was not able to implement these ideas and was forced to simply put a “you lose” or “you win” screen through p5js. However, next time if possible, will definitely implement.
  • I would have loved to also improve the quality of the box, perhaps use wood or acrylic or something or stronger material so that the entire product looks much nicer to look at rather than cardboard.
  • There is this bug where suppose you lost or won a game, then you would have to wait for the Servo motor to map back to the beginning before you can do anything again. I couldn’t find a solution for this and I think this could also be improved.

Video – Testing on my Own:

Video – User Testing Video:

Video – User Testing #2:

Link to p5js Code:

https://editor.p5js.org/awesomeadi00/sketches/KGKN8f8wE

Arduino Code:

#include <Servo.h>. 

//PINS: 
const int Radar_ServoPin = 10;   

const int echoPin = 9;    
const int trigPin = 8;

const int w_switch = A3;
const int g_switch = A2;
const int y_switch = A1;

const int w_led = 4;
const int g_led = 5;
const int y_led = 6;    

const int pressurePin = A0;
const int pressureLED = 2;

//Global Variables: 
int w_switchVal;
int g_switchVal;
int y_switchVal;
int pressureVal;
unsigned long duration;
int distance;
int difficulty = 1;
int loseBool = 0;

//All game states below are exactly as shown in p5js
int gameState;
int menuState = 0;
int radarState = 1;
int winState = 2;
int loseState = 3;

//Servo object for controlling the servo motor
Servo RadarServo; 

//====================================================================================================================================
void setup() {
  //Begin the serial monitor to p5js at 9600 baud
  Serial.begin(9600);

  //Setting the pinmodes for the ultrasonic sensor
  pinMode(trigPin, OUTPUT);  
  pinMode(echoPin, INPUT);   
  
  //Seting the pinmodes for the arcade switch pins
  pinMode(w_switch, INPUT);
  pinMode(g_switch, INPUT);
  pinMode(y_switch, INPUT);
  
  //Setting the pinmodes for the LEDs in the arcade buttons
  pinMode(w_led, OUTPUT);
  pinMode(g_led, OUTPUT);
  pinMode(y_led, OUTPUT);

  //Output mode for the pressureLED, this will check whether the pressure sensor is active or not.
  pinMode(pressureLED, OUTPUT);

  //Attaching the servos to arduino 
  RadarServo.attach(Radar_ServoPin);  
  RadarServo.write(0);

  //Setup for the game, sets the easy difficulty on by default (difficulty = 1) and sets up the menu screen.
  digitalWrite(w_led, HIGH);
  gameState = 1;

  // Blinks the pressureLED in case the Serial Connection between p5js and Arduino has not been made (debugging)
  while (Serial.available() <= 0) {
    digitalWrite(pressureLED, HIGH);
    Serial.println("0,0"); 
    delay(300);     
    digitalWrite(pressureLED, LOW);
    delay(50);
  }
}

//====================================================================================================================================
void loop() {
  // This checks while the serial connection is available from p5js, then it will parse the gamestate from p5js to arduino. 
  while(Serial.available()) {
    int p5js_gameState = Serial.parseInt();
    if(Serial.read() == '\n') {
      gameState = p5js_gameState;
    }
  }

  //Based on the gamestate from p5js, it will map out exactly what to do on Arduino.
  if(gameState == menuState) {setDifficulty();}
  else if(gameState == radarState) {radarActivate();}
  Serial.println();
}

//====================================================================================================================================
//This functions is only called during the Main Menu. It checks which buttons are pressed to map the speed of the radar, hence setting the difficulty.
void setDifficulty() {
  //If the pressure is greater than 50, then it will switch on the pressureLED to indicate that the user still needs to find it. Else it will switch off indicating they won.
  pressureVal = analogRead(pressurePin);
  if(pressureVal > 200) {digitalWrite(pressureLED, HIGH); }
  else {digitalWrite(pressureLED, LOW); }

  //Reads all the values for all three buttons
  int y_sstate = digitalRead(y_switch);
  int g_sstate = digitalRead(g_switch);
  int w_sstate = digitalRead(w_switch);

  //If the yellow button is pressed, it will switch that on and set hard difficulty to 3
  if(y_sstate == HIGH) {
    digitalWrite(y_led, HIGH);
    digitalWrite(g_led, LOW);
    digitalWrite(w_led, LOW);
    difficulty = 3;
  }

  //If the green button is pressed, it will switch that on and set medium difficulty to 2
  else if(g_sstate == HIGH) {
    digitalWrite(y_led, LOW);
    digitalWrite(g_led, HIGH);
    digitalWrite(w_led, LOW);
    difficulty = 2;           
  }

  //If the white button is pressed, it will switch that on and set easy difficulty to 1
  else if(w_sstate == HIGH) {
    digitalWrite(y_led, LOW);
    digitalWrite(g_led, LOW);
    digitalWrite(w_led, HIGH);
    difficulty = 1;
  }
  Serial.println(difficulty);
}

//====================================================================================================================================
//This function will only be called if the game has started and thus the radar will become active. 
void radarActivate() {
  //Rotates the servo motor from 0 to 180 degrees
  for(int i = 0; i <= 180; i+=difficulty){ 
    pressureVal = analogRead(pressurePin);    //Reads the pressure value to determine if the user has won or not.
    if(pressureVal > 200) {digitalWrite(pressureLED, HIGH); }
    else {digitalWrite(pressureLED, LOW); }
    
    if(gameState == winState || gameState == loseState) {
      RadarServo.write(0); 
      break; 
    }

    RadarServo.write(i);                      
    delay(30);
    distance = calculateDistance();           //Calculates the distance measured by the ultrasonic sensor for each degree. 

    //Sending p5js the degree of rotation of the servo, the distance and the pressure value from the Arduino.
    Serial.print(i+difficulty);              //Sends the current degree to p5js
    Serial.print(",");                  //Sends comma character for indexing in p5js
    Serial.print(distance);             //Sends the distance value to p5js
    Serial.print(",");                  //Sends comma character for indexing in p5js
    Serial.println(pressureVal);          //Sends the pressure value to p5js
  }

  // Repeats the previous lines from 180 to 0 degrees (moving it backwards)
  for(int i = 180; i > 0; i-=difficulty){ 
    pressureVal = analogRead(pressurePin); 
    if(pressureVal > 200) {digitalWrite(pressureLED, HIGH); }
    else {digitalWrite(pressureLED, LOW); }

    if(gameState == winState || gameState == loseState) {
      RadarServo.write(0); 
      break; 
    }

    RadarServo.write(i);
    delay(30);
    distance = calculateDistance();

    Serial.print(i-difficulty);
    Serial.print(",");
    Serial.print(distance);
    Serial.print(",");
    Serial.println(pressureVal);
  }
  Serial.println();
}

//====================================================================================================================================
//Function for calculating the distance measured by the Ultrasonic sensor
//Issue with the sensor is that for objects extremely far away, it takes virtually 69ms to come back and translate to distance
//This is way too long hence, for each increment on the Radar Servo, it would take 69ms.
//Perhaps wrap some board 90cm away from the sensor around in 180˚ so it maps that out and nothing else that's far.
int calculateDistance(){ 
  //Sets the trigPin on LOW for 2 microseceonds.
  digitalWrite(trigPin, LOW); 
  delayMicroseconds(2);
  //Sends a signal from the triggering transducer for 10 microsends.
  digitalWrite(trigPin, HIGH); 
  delayMicroseconds(10);
  digitalWrite(trigPin, LOW);
  
  //Reads the echoPin and returns the sound wave travel time in microseconds. 
  duration = pulseIn(echoPin, HIGH); 

  //The distance will be calculated in cm, hence cm = (microseconds/2)/29
  distance = (duration/2)/29;
  return distance;
}