
Where has the time gone? The semester is nearly over, and Christmas so close. The incomprehensible specter of 2023 peeks around the corner, and I again lament the graying of memories. Yet there is a gift that has been granted unto humanity that can color in even the most ashen of memories: music. For they say that music is the vessel of memory, and memory the muse of music.
Concept & Description
The original concept—an Arduino-powered musical instrument that users can physically interact with to play songs that activate certain effects in p5js—has fortunately withstood the tides of reality! I was also able to write up an overarching mini-narrative of sorts that serves as a framing device that ties the project together and allows for the user to have a more immersive experience.
Explained at the beginning of the p5js sketch before the main game, the premise of the project is that the user plays as an amnesiac who recovers pieces of their memory through 6 songs that are tied to certain memories and emotions of the past. The user is then presented with a list of six songs, with each one having a combination of buttons/notes—playing a song correctly on the Arduino instrument triggers an according scene of remembrance, which is represented by a short video of said memory being played together with a text box.
The project is heavily inspired by the Legend of Zelda video game series, owing to it not just the initial inspiration but also much of the assets. All 6 songs are actual songs from Legend of Zelda: Ocarina of Time, and the aesthetic direction + images and videos are from Legend of Zelda: Breath of the Wild.
Implementation & Highlights
Building upon the progress made in the last post—in which I assembled and coded the Arduino instrument, with the value corresponding to the pressed button/played note being sent to p5js—the next main step was to work on writing code in p5js that 1) gathers and holds on to the data from Arduino and 2) checks if the combination of said incoming data corresponds to one of the six songs 3) plays a number of effects corresponding to the song that has been played (if there is any). The following block of code is the method I used to achieve the first part of this step:
//Method for Collecting Arduino Data//

//Make Array to Gather Notes
const notesArray = [];

function readSerial(data) {
  ////////////////////////////////////
  /////  READ FROM ARDUINO HERE  /////
  ////////////////////////////////////
// Make sure there is actually a message
  if (data != null) {
    let fromArduino = data;
//Reset Array If It's Full (6 Notes)
    if (notesNum >= 6){
      for (i = 0; i < notesNum; i++){
        notesArray.pop();
      }
    }
//Add Played Note to the Array
    notesArray.push(data);
  }
}
As each song is an arrangement of six notes, the array needs to be able to hold onto the notes until it reaches a total of six. If a note is played after the sixth has been recorded, the array is reset to make way for a new combination. When an array is full, the second part of the step is carried out through the following code:
//Song is Stated as Array
const stormsSong = [0, 1, 4, 0, 1, 4];

//Function Used to Compare User Input to Songs
function songCheck(s1, s2){
  return s1.toString() == s2.toString();
}

//The Code Below is in Draw()
//Example: If Song is Played, Effects Activate
if ((songCheck(notesArray, timeSong)) == true){
 if (songPlaying() == false){
 //Audio File Played
  timeAudio.play();
 //Trigger Variable Set to True
  timeTrigger = true;
 }
}
//True Trigger Variable Activates Function Containing Effects
if (timeTrigger == true){
 timeMemory();
}
The function songCheck() uses the .toString() method to convert two chosen arrays into two string objects, which it then uses to compare and return whether the two are the same. As demonstrated in the example, an if() loop containing this function is used to compare notesArray with one of the six preexisting songs, which are also arrays (in this case, timeSong, an array for the Song of Time)—and if the song played on the Arduino instrument matches the song, a set of effects corresponding to the song are played.
A little explanation on the “effects”: playing each tune triggers an audio file from Ocarina of Time of the in-game ocarina playing said tune (this is prompted by the timeAudio.play() line of code), a video or gif of a scene from Breath of the Wild that corresponds with the song (which represents a memory), and a text box above it that contains a short, sentimentally written passage. Playing the Song of Time results in a trigger variable named timeTrigger being set to true, which in turn activates a function named timeMemory that contains the code for the video and text:
//Function Containing Video and Text for Song of Time
function timeMemory(){
//Video is Mapped to Image and Played
  let timeImg = timeVid.get();
  image(timeImg, 0, 0, 960, 540);
  timeVid.play();
//Make Text Box
  tint(255, 150);
  image(memoryBG, 40, 308, 880, 182);
  noTint();
//Write Text; TypeWriter Effect
  fill(185, 159, 102);
  textSize(40);
  let currentString = timeString.substring(0, currentCharacter);
  push();
  text(currentString, pageMargin + 10, 313, width - pageMargin*2, height - pageMargin);
  pop();
  currentCharacter += random(0.3, 0.5);
}
Thus is the general pattern for all 6 of the songs and the overall gameplay loop—each song has an array containing the notes; the tune last played by the user on the Arduino instrument is checked against each song; if there is a match, the effects bound to the song are played; after the song and video has played once, the screen returns back to the scene that shows the songlist; users can then play another song again and see its effects.
For the physical part of the project, I decided to make a nifty box of a controller-instrument with buttons and a speaker that are connected to the Arduino housed within. With help from the Lab Assistants, I was fortunate enough to be able to use the laser cutter in the IM Lab to acquire six wooden panels (the top panel having five circular holes for the buttons and one rectangular hole for the speaker, and the side panel on the right having a little hole through which the USB cable runs) that I taped together to make a rectangular prism.
One major step that I was worried about was soldering wires onto the big buttons that I chose to use (they’re so much more satisfying to press than the little ones that come in the kit). Despite having watched Professor Shiloh give a clear demonstration in class, I was nervous about trying my own hand at it. After watching a few tutorials as a refresher, I booted on the soldering station and clenched the iron in my hand—and to my surprise, it came rather easily! By the time I was soldering the wires onto the fifth and last button, I felt that I had gotten the hang of it and was somewhat successful at making the drops look nice and neat.
With the buttons all wired up and the wooden box complete, I was ready to assemble my controller-instrument. The original circuit looked like this:
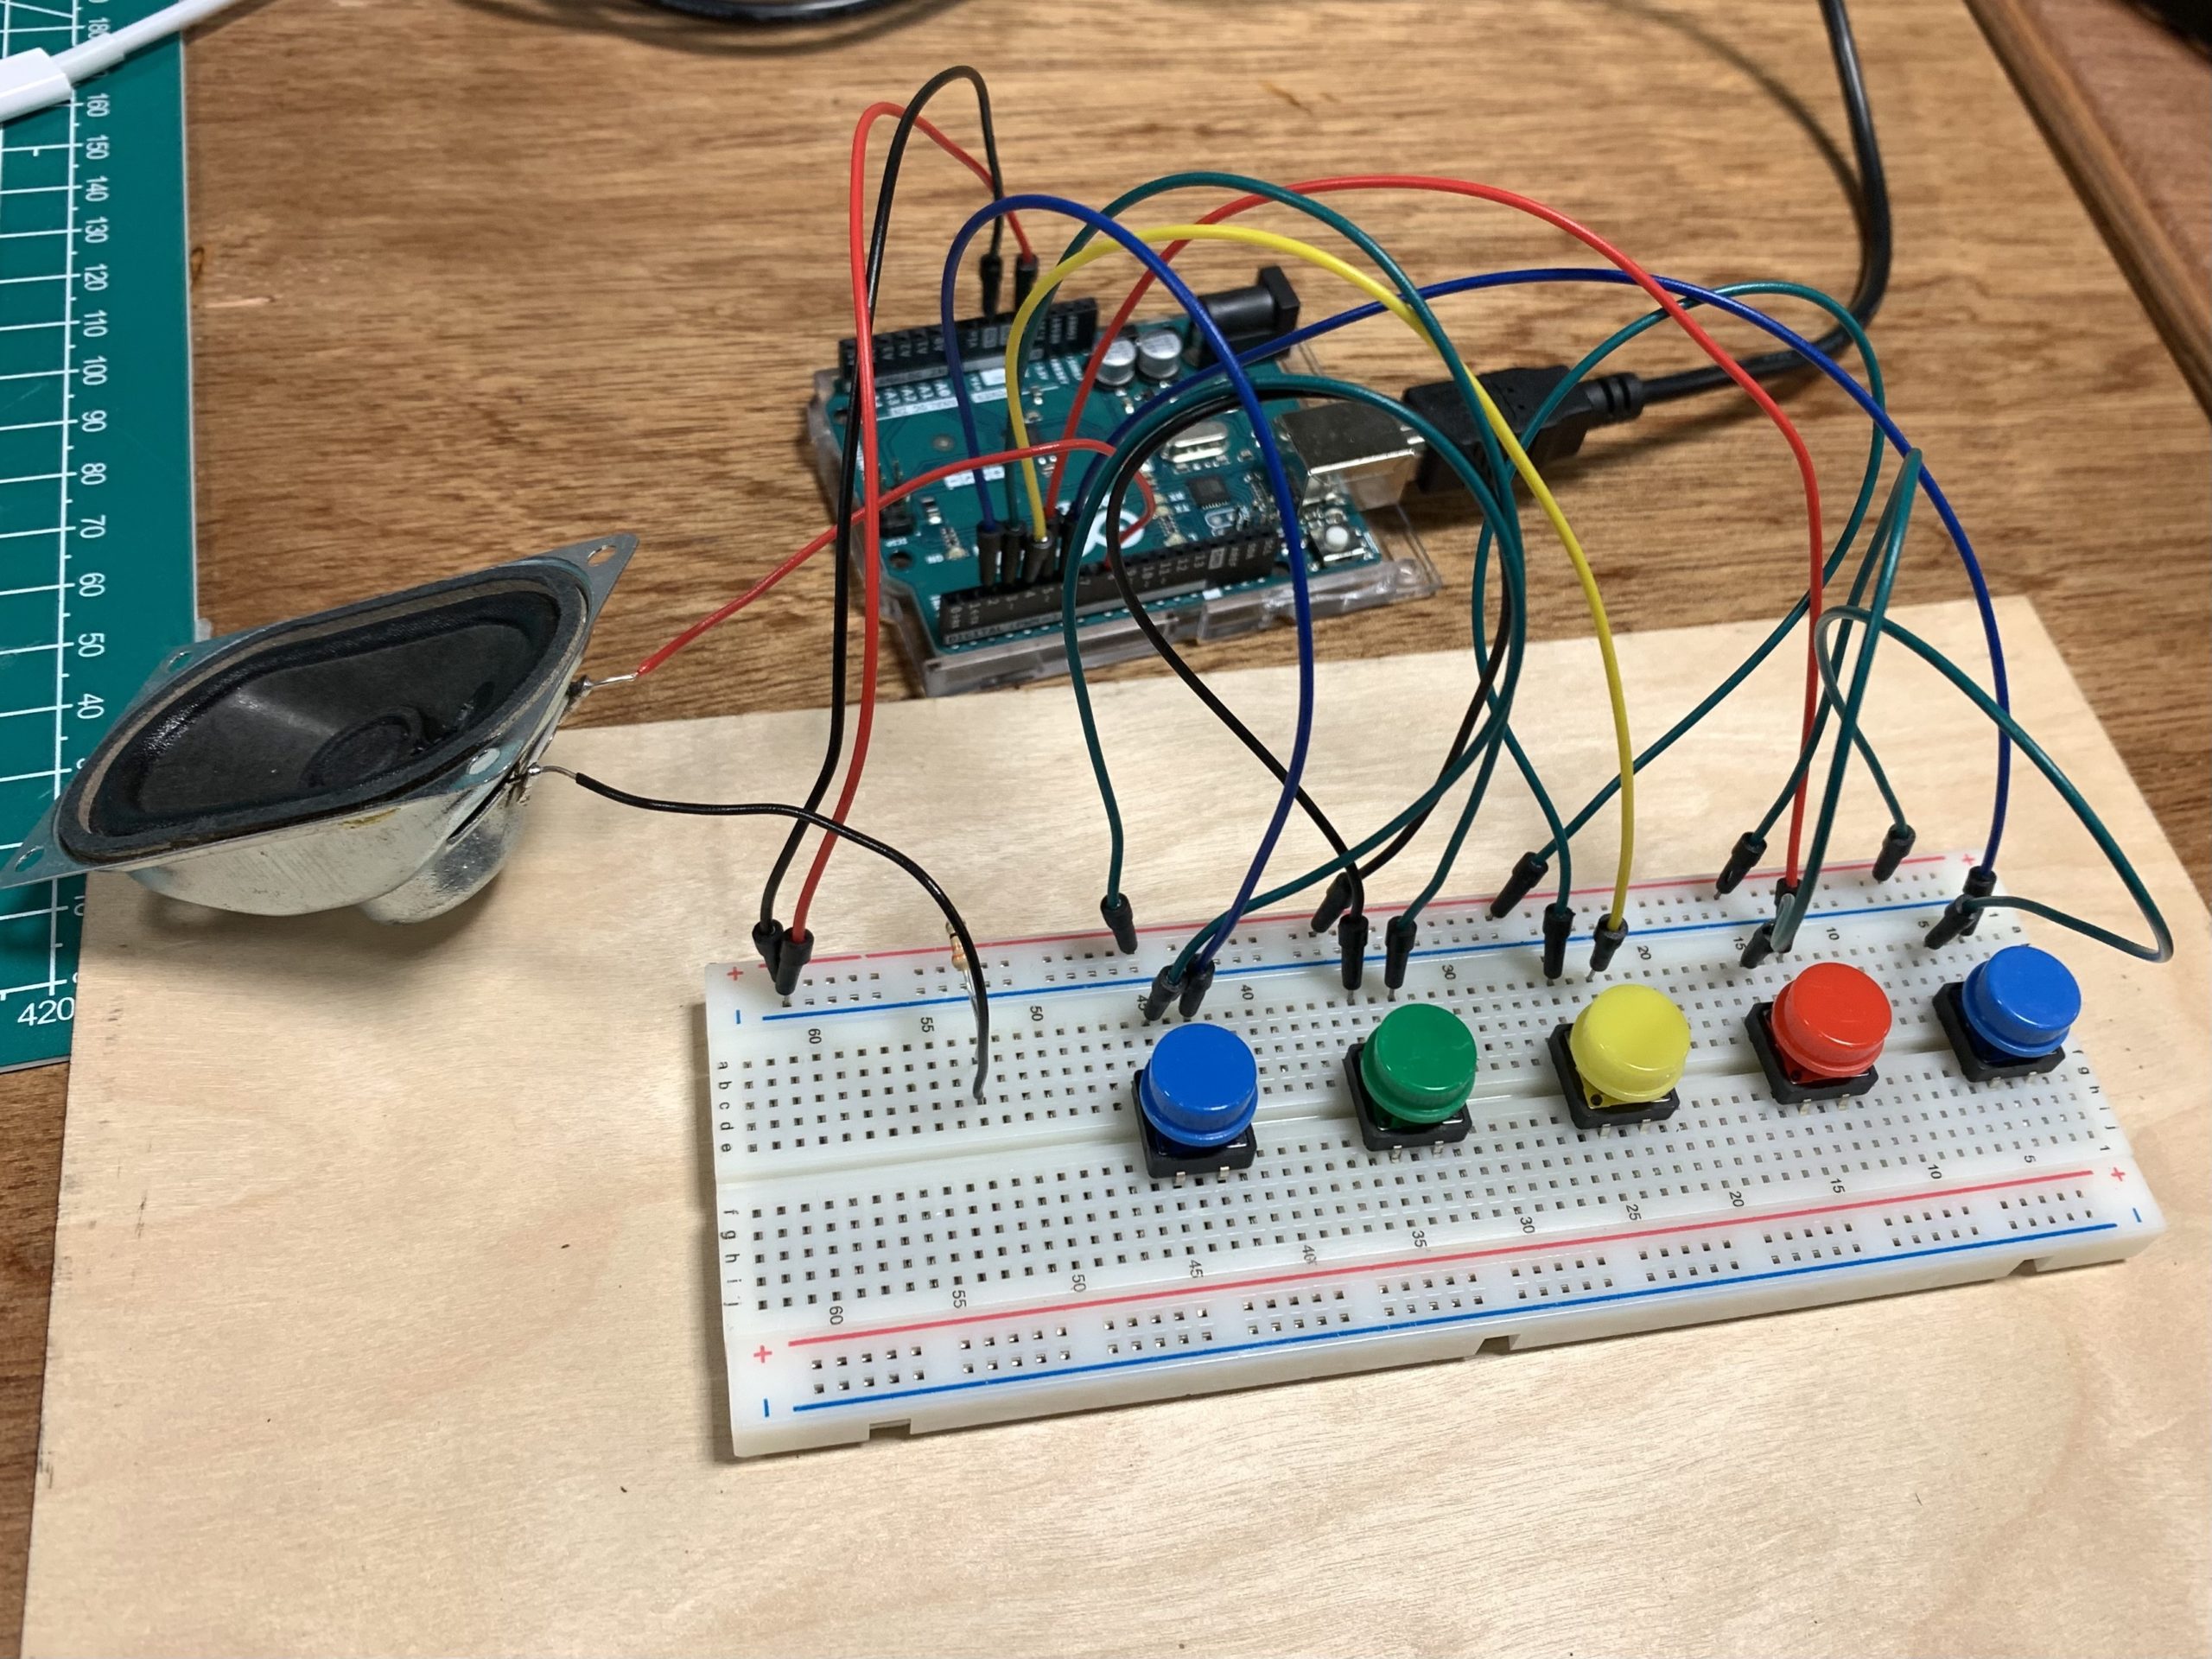
Placing the Arduino and breadboard inside the box, I carefully deconstructed the parts of the circuit that needed to be adjusted and hooked the buttons to the breadboard one by one…and voila!
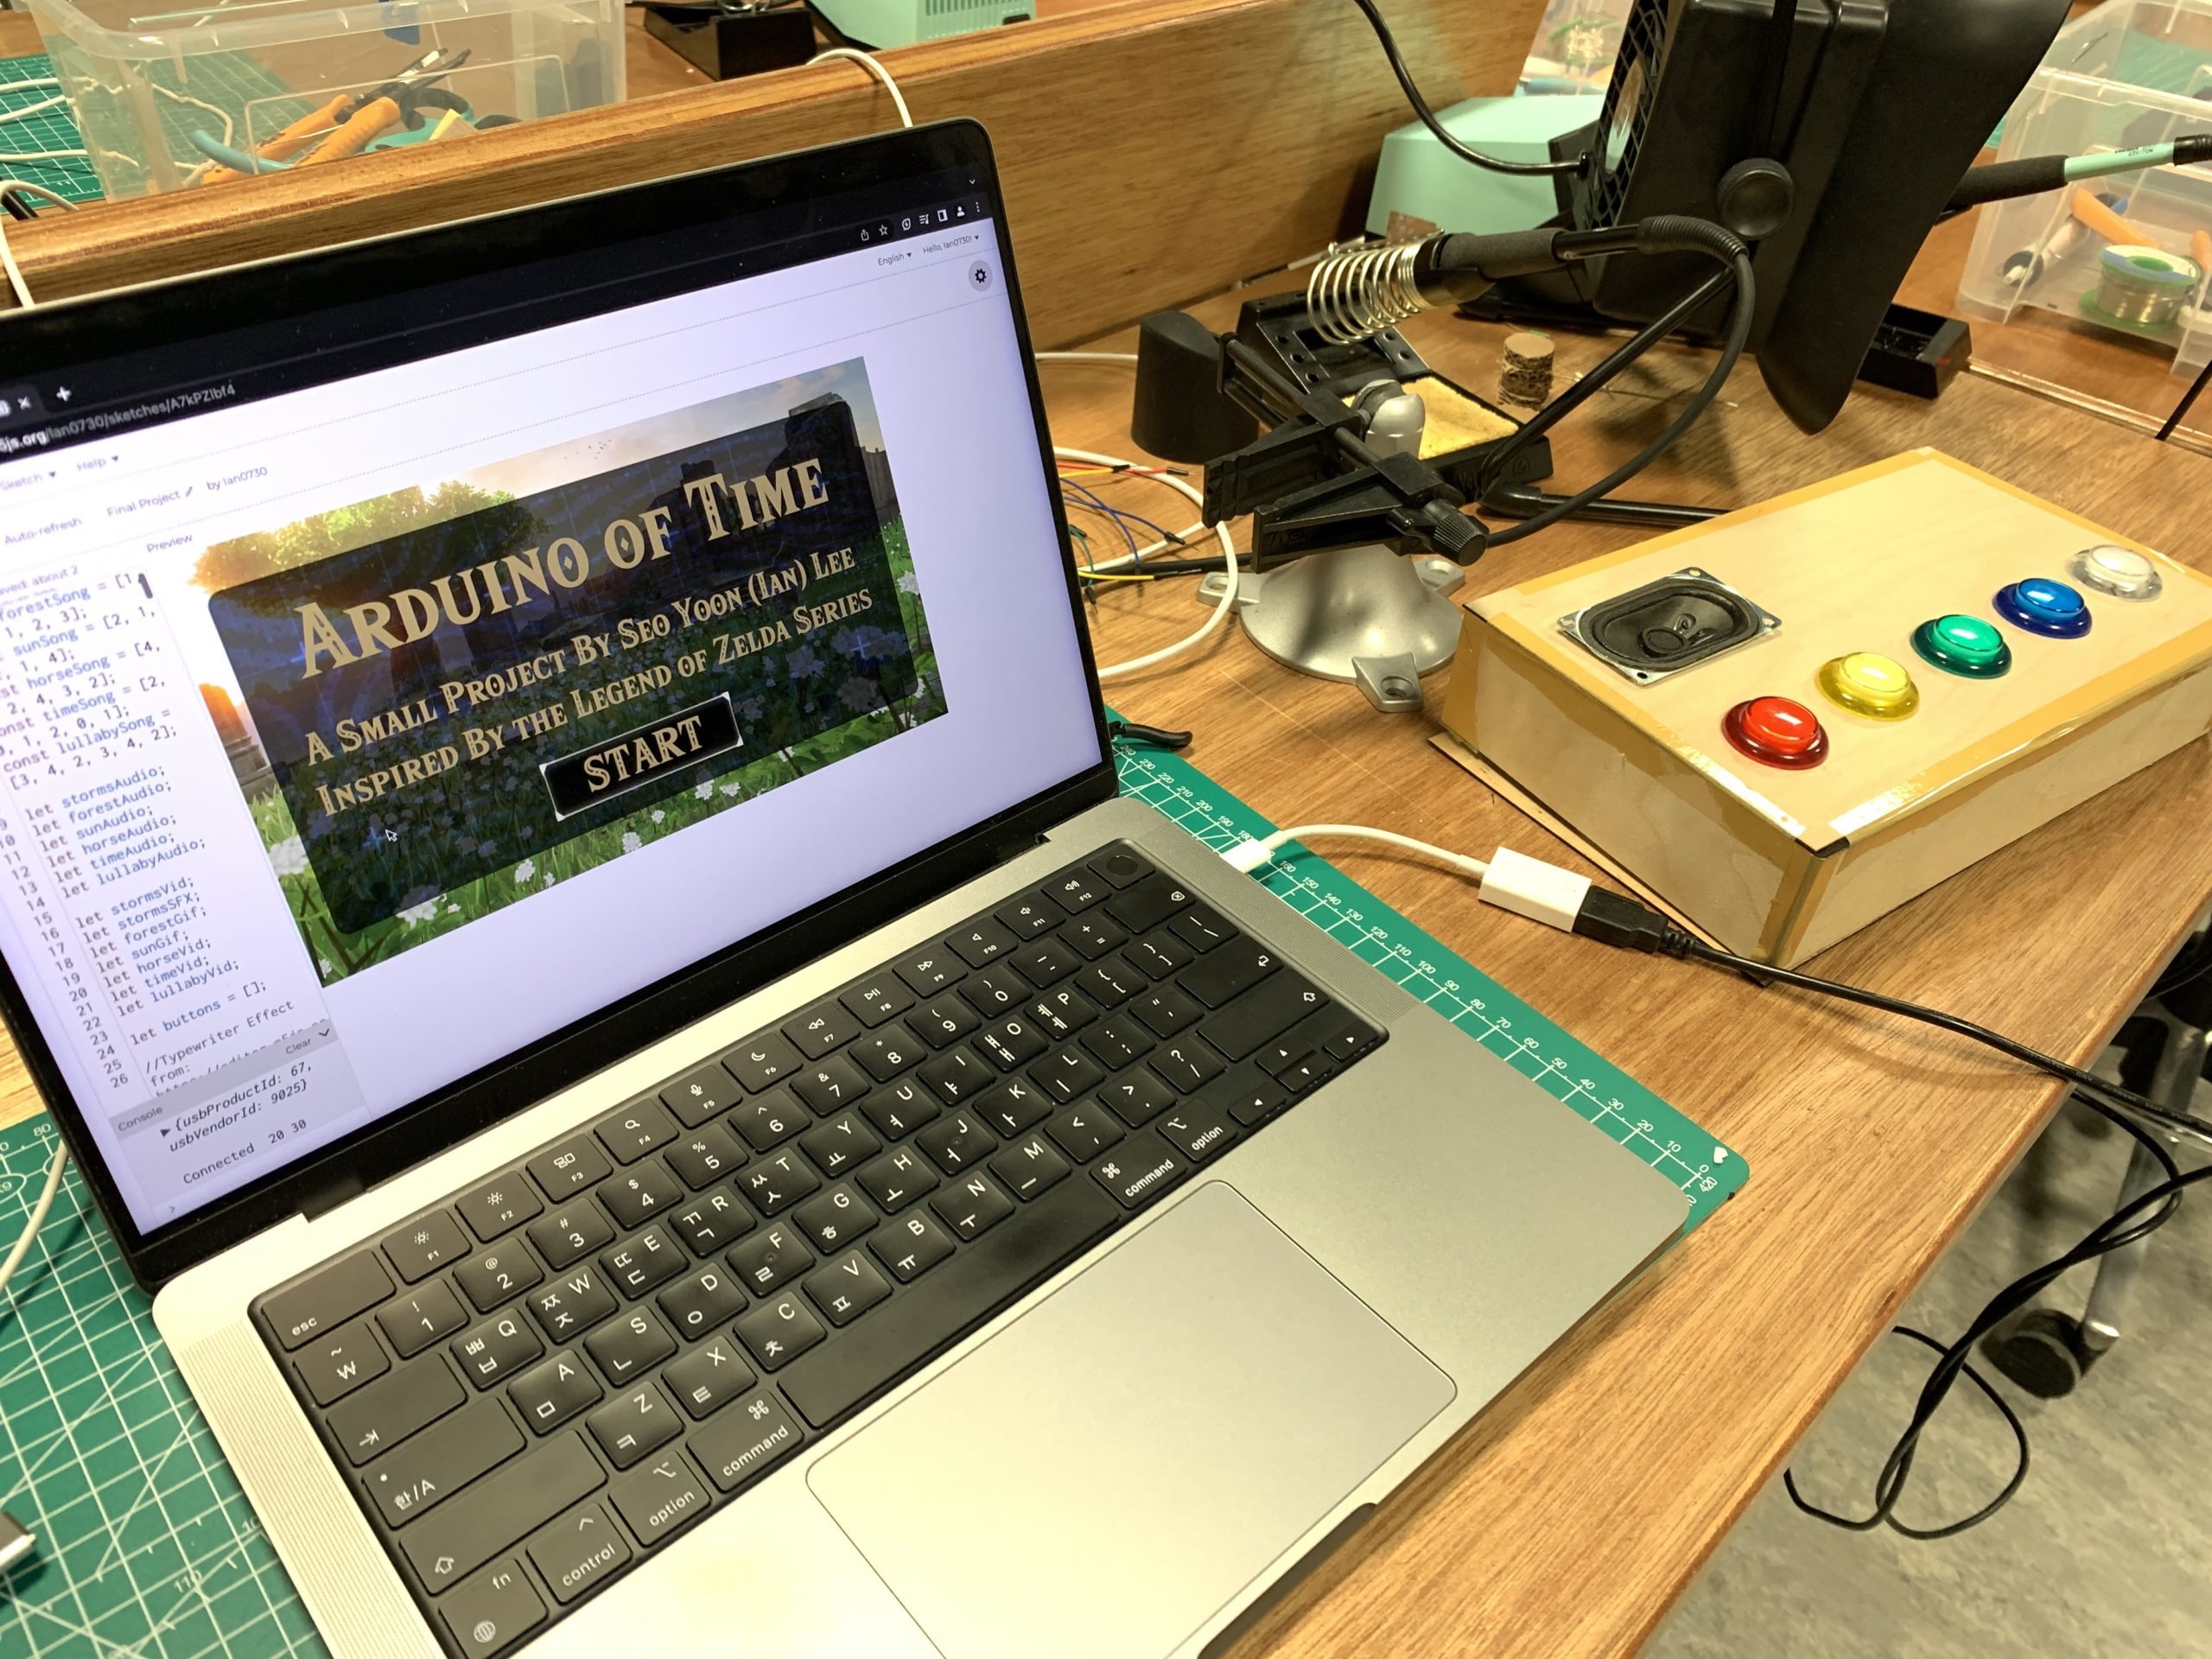
The fabled Arduino of Time.
Video Demonstration
Reflections
It’s been an amazing journey, and I’m very proud 0f what I was able to achieve for this final project! I’ve said it time and time again on this blog, but it really is a wondrous experience to fish an idea out of your mind, build upon it, and create something palpable. This course has not only taught me the basics of p5js and Arduino, but also inducted me into the realm of IM thinking—a space that encourages one to act upon creative ideas and engage with them in meaningful ways. And so the semester comes to a close…but I will continue to hold on to what I have learned.