
DESIGN
For this project, I created a touch-less switch that turns on when the user blows a metal ball onto another metal plate. A demo of the switch is shown below:
I wanted my switch to be fun and have a game/challenge aspect to it, and I feel like I satisfied this, since the person turning on the switch must blow from the right angle and direction to ensure the ball touches the metal plate. Moreover, depending on how hard the user blows, the LED can go from a flickering/flashing light to a constant light, so the harder and more direct the air is blown, the brighter the LED. I also think that this aspect of the switch helps the user better understand how the circuit is working, because they can clearly see (and feel) that when not enough air is applied to the ball, the circuit is very loosely connected and doesn’t work as well.
Originally, I wanted to create a tumble weed made of wire; however, after some experimentation, I realized the shape I had created didn’t roll as well unless the user was blowing extremely hard, so I switched to using something that was perfectly spherical.
MATERIALS
The materials I used to create the switch included:
- 1 LED
- 4 wires
- 1 330 ohm resistor
- electrical tape
- duct tape
- copper tape
- 1 ping pong ball
- 1 metal plate
- scrap block of metal
BUILDING THE SWITCH
A close up of what my Arduino board looks like is shown below:
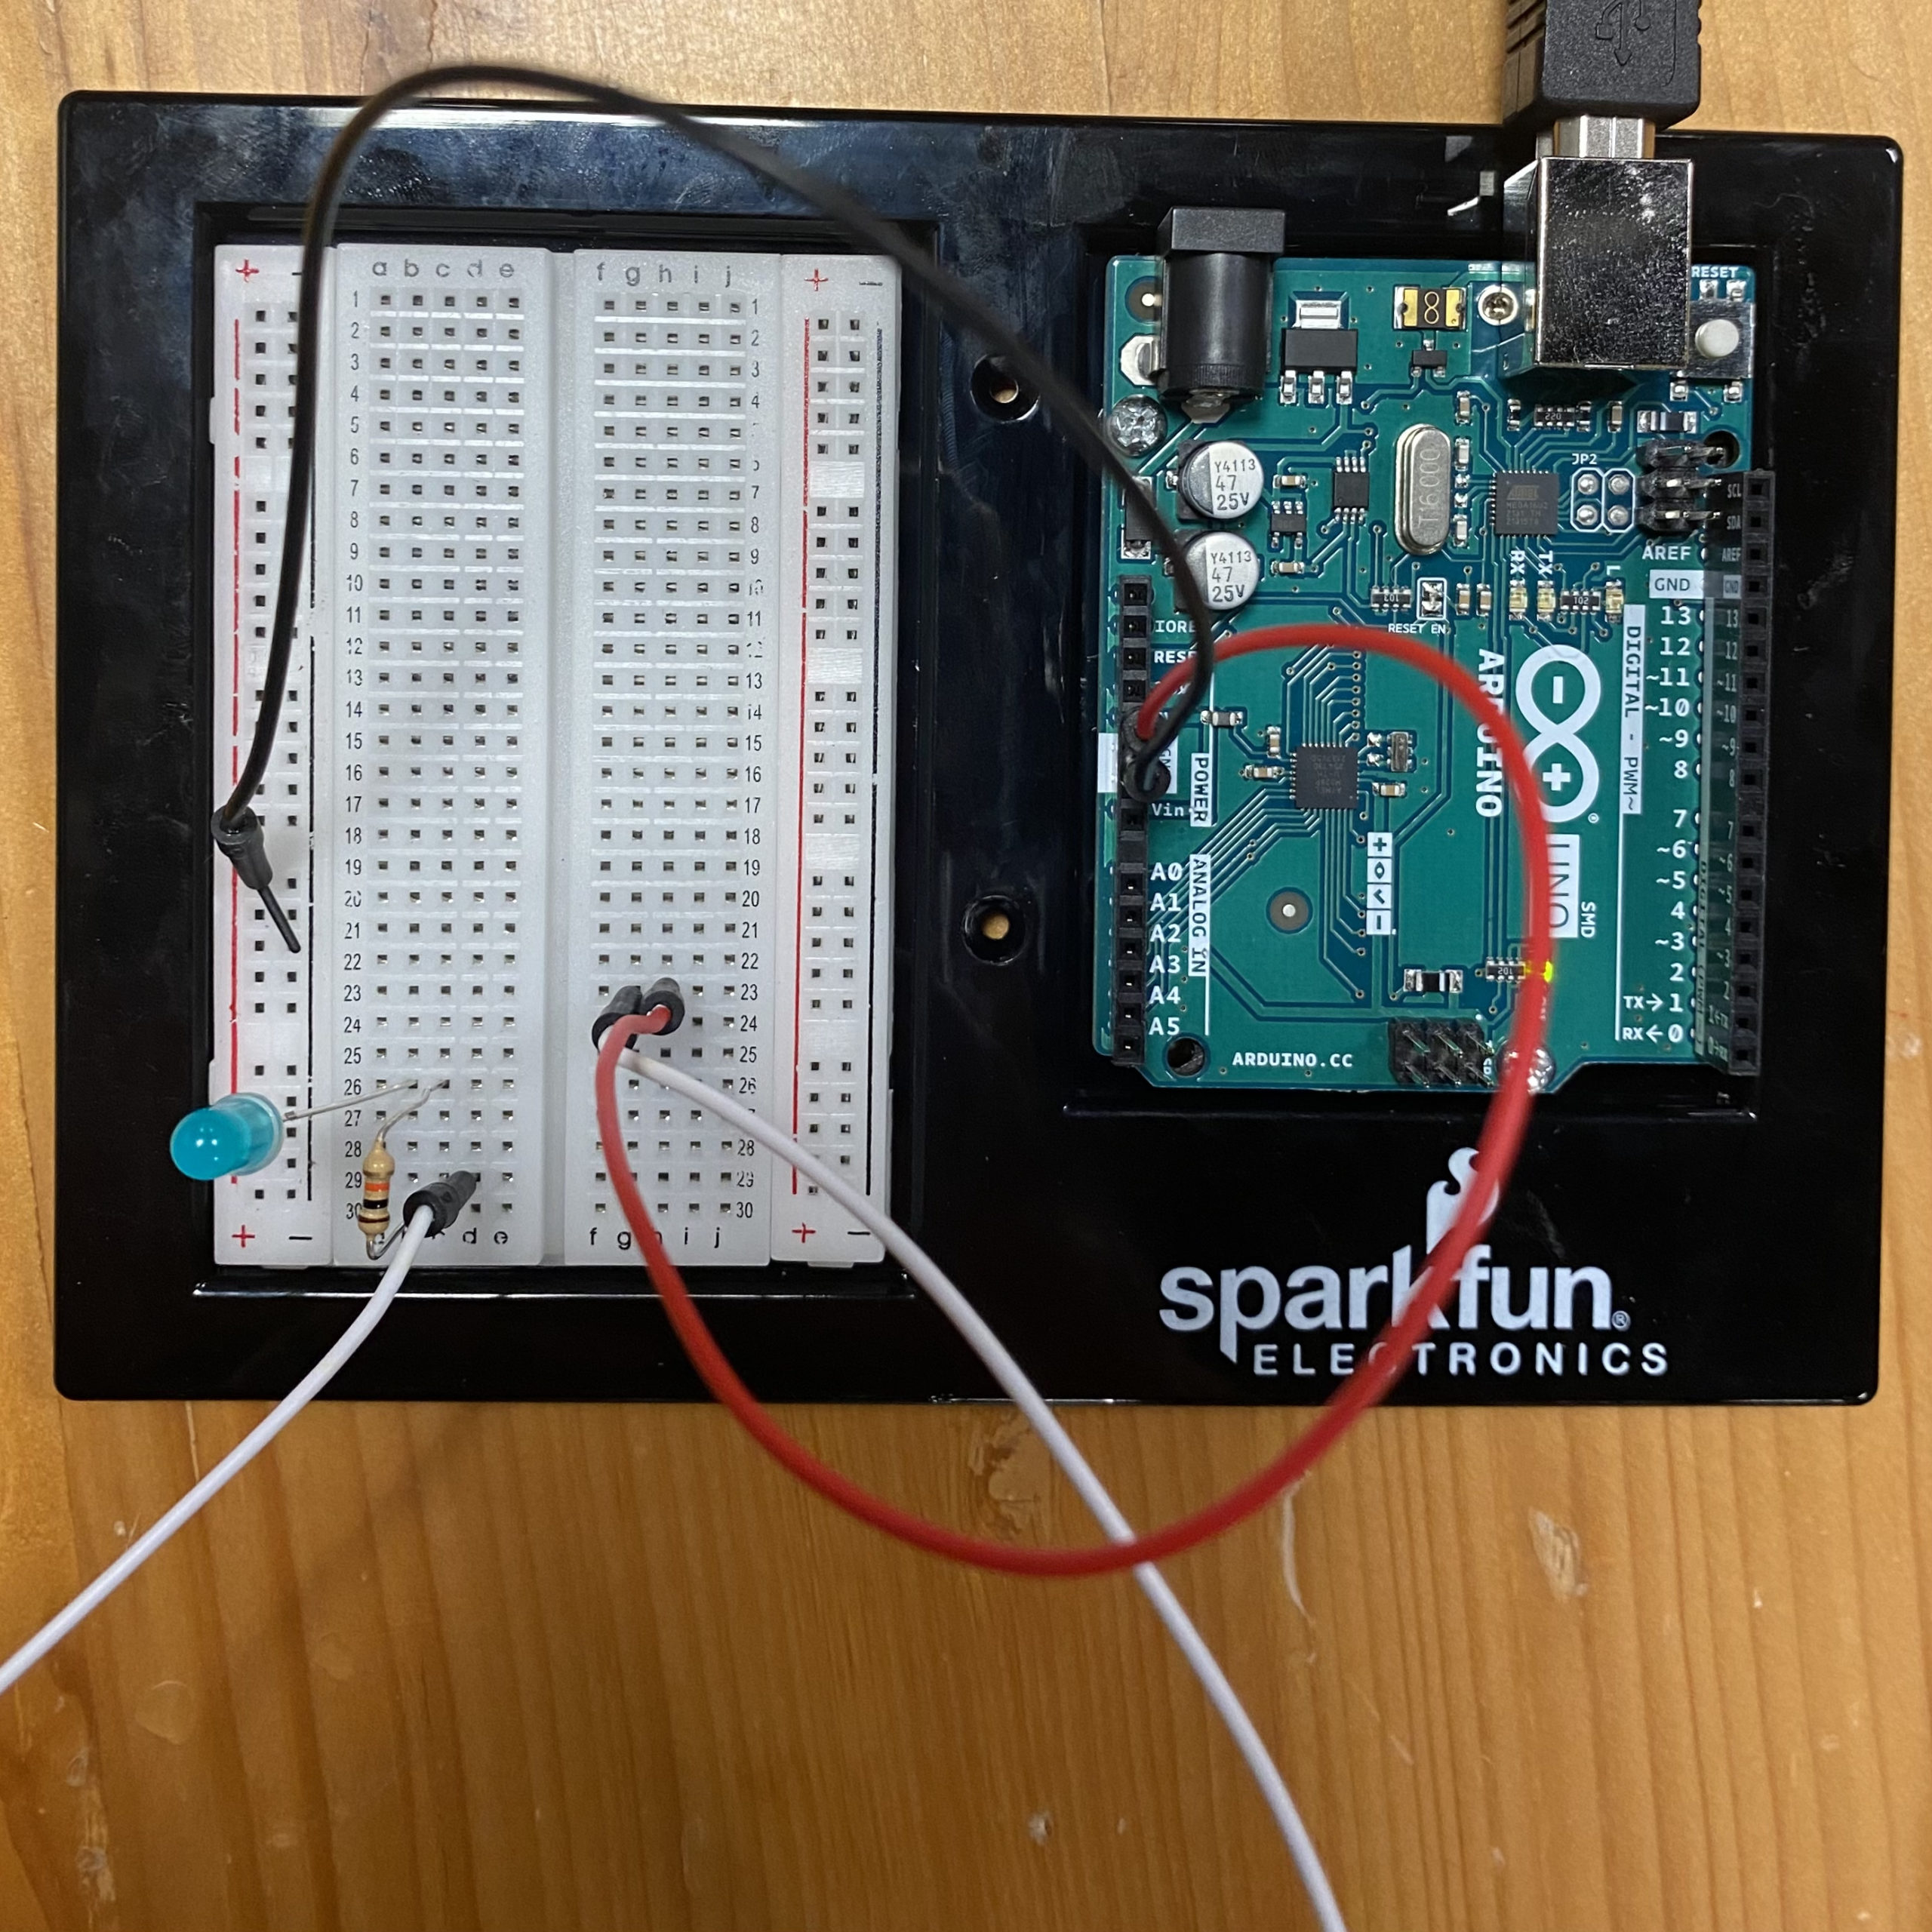
I began by building the most elementary circuit that we had worked on in class. For this I used an LED, resistor, and 1 black and red wire each. After completing this, I then added two wires (in white) in the “middle” of the circuit, which I would then use to extend the circuit outside the Arduino board and integrate my touch-less switch.
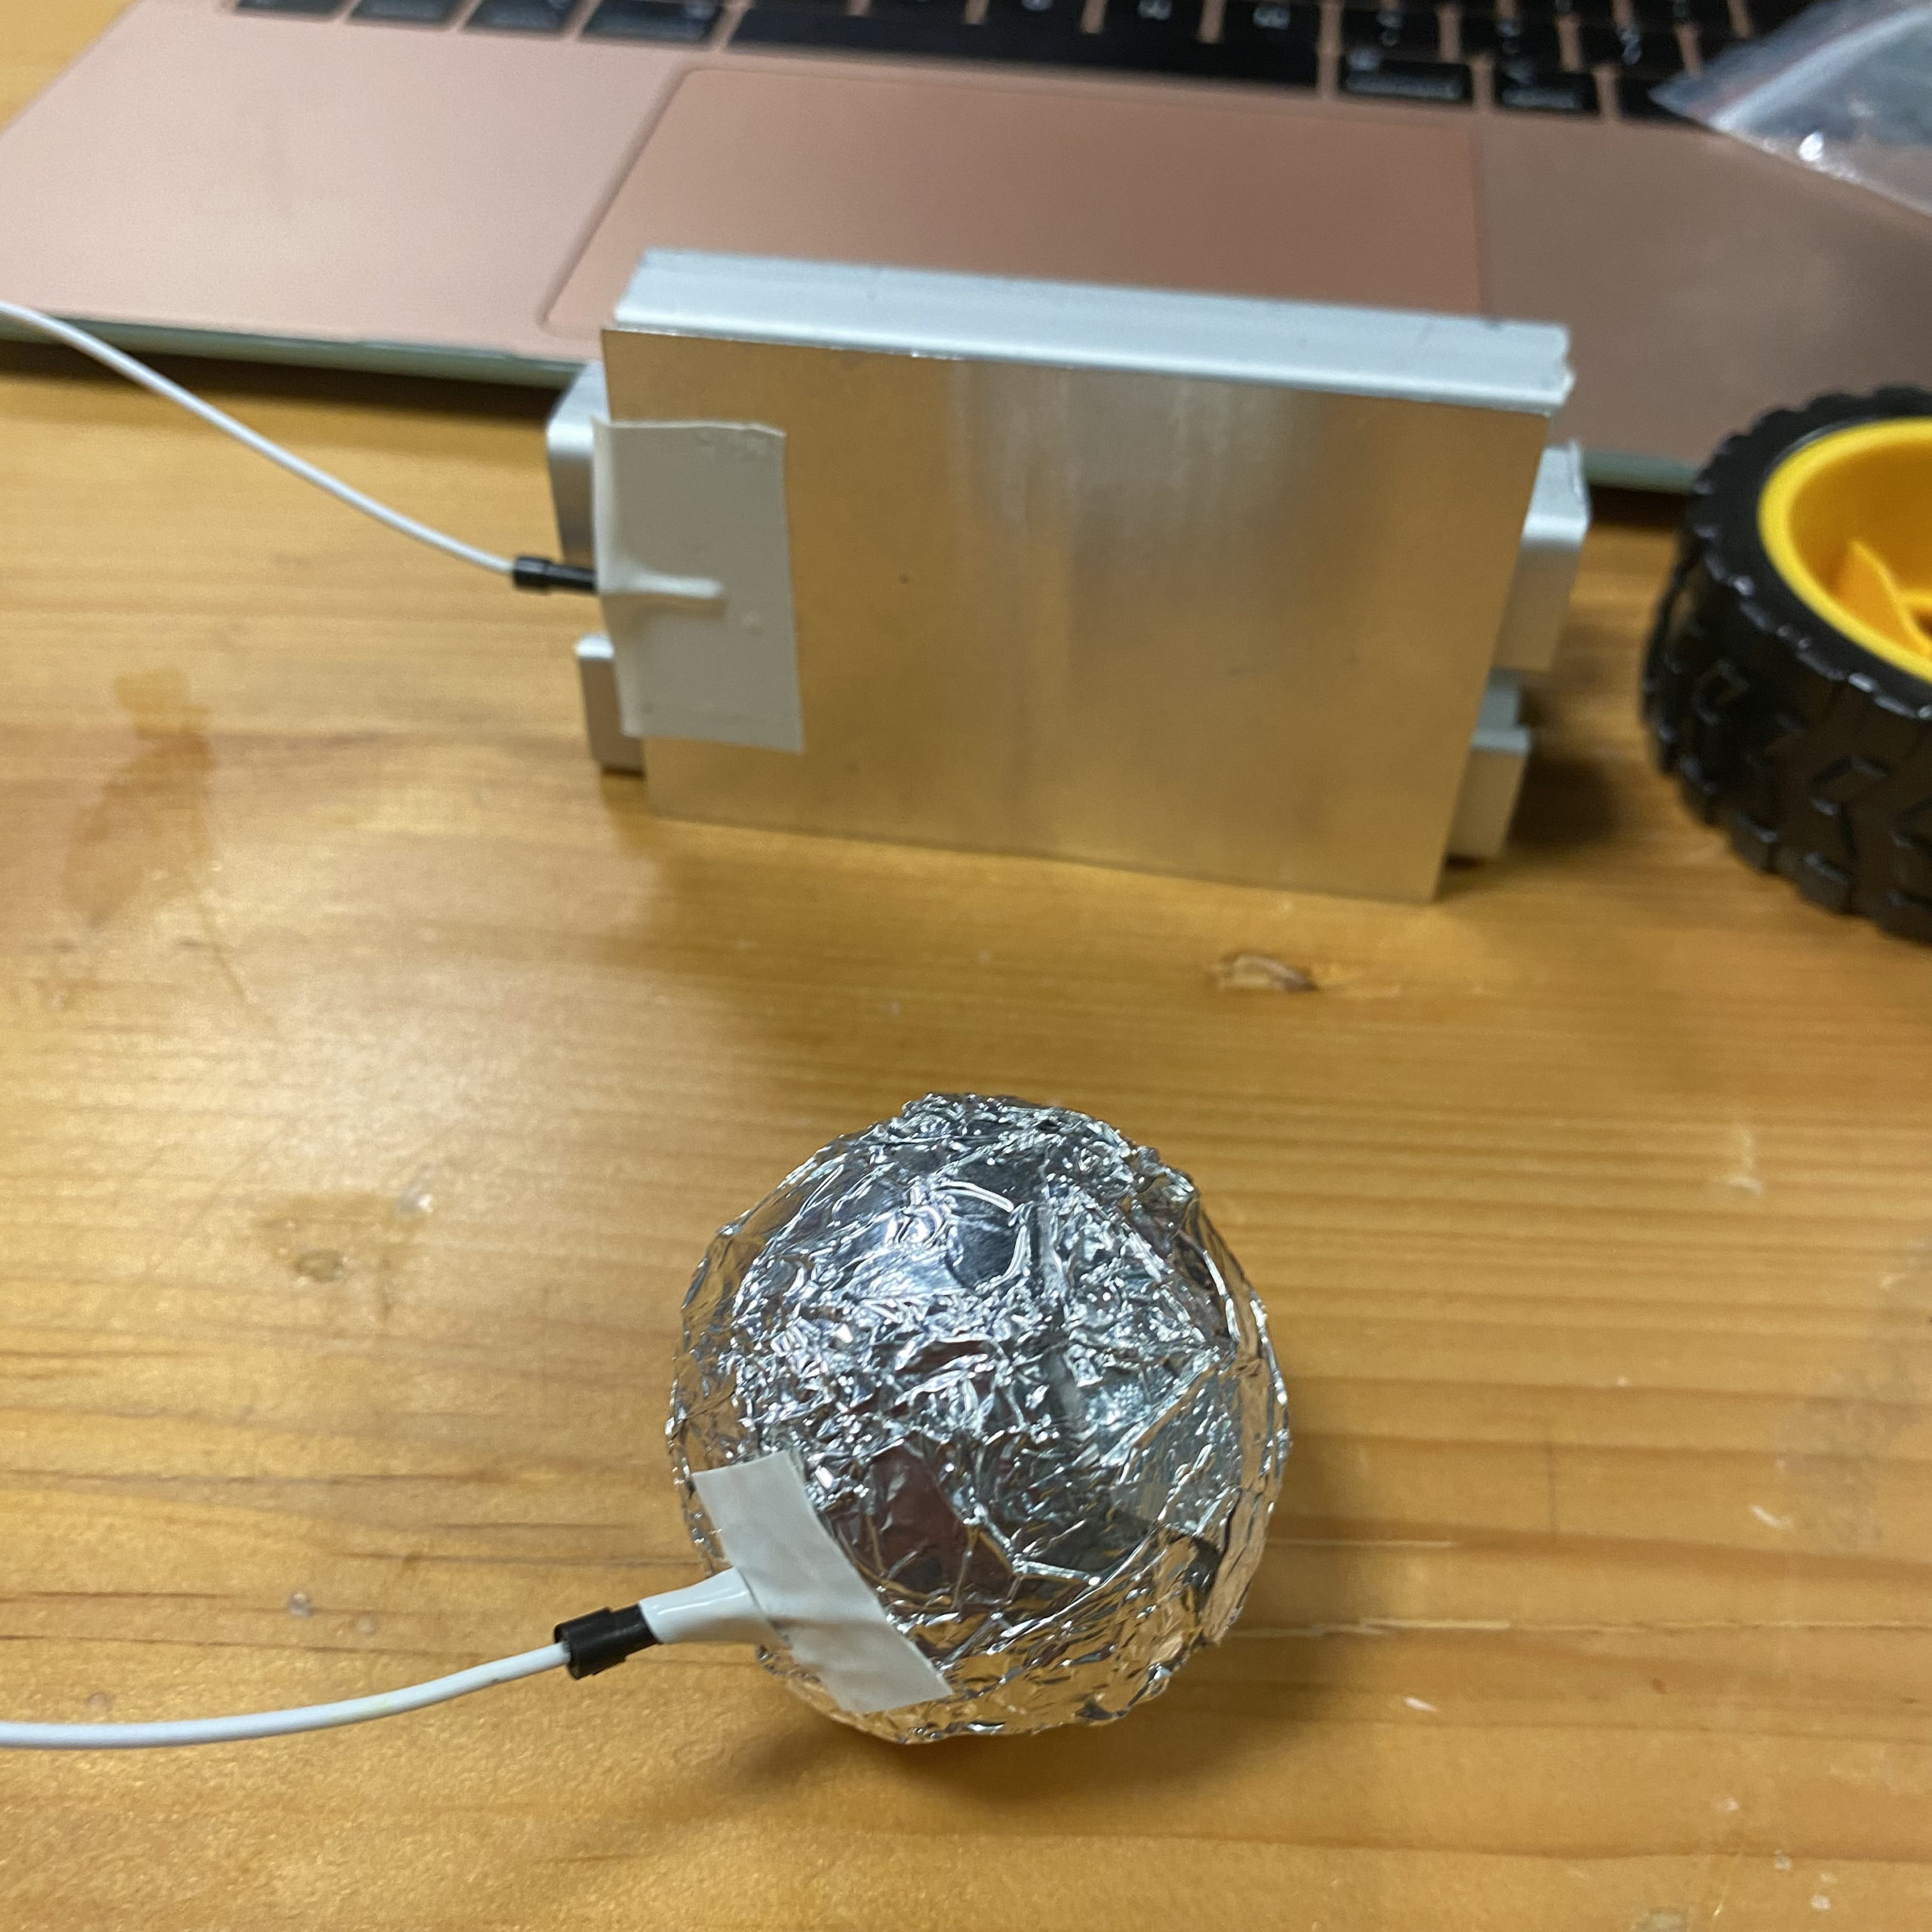
The next step was building the components of the switch. For the metal ball, I knew I needed something light enough to be able to be moved by someone blowing on it, so I opted for a tin foil covered ping pong ball. The other side of the switch was constructed by duct-taping a metal plate onto a scrap piece of metal. This step was important to ensure that the other end of the switch was heavy enough to not move as the user blew on the metal ball. A close up of the switch is shown below:
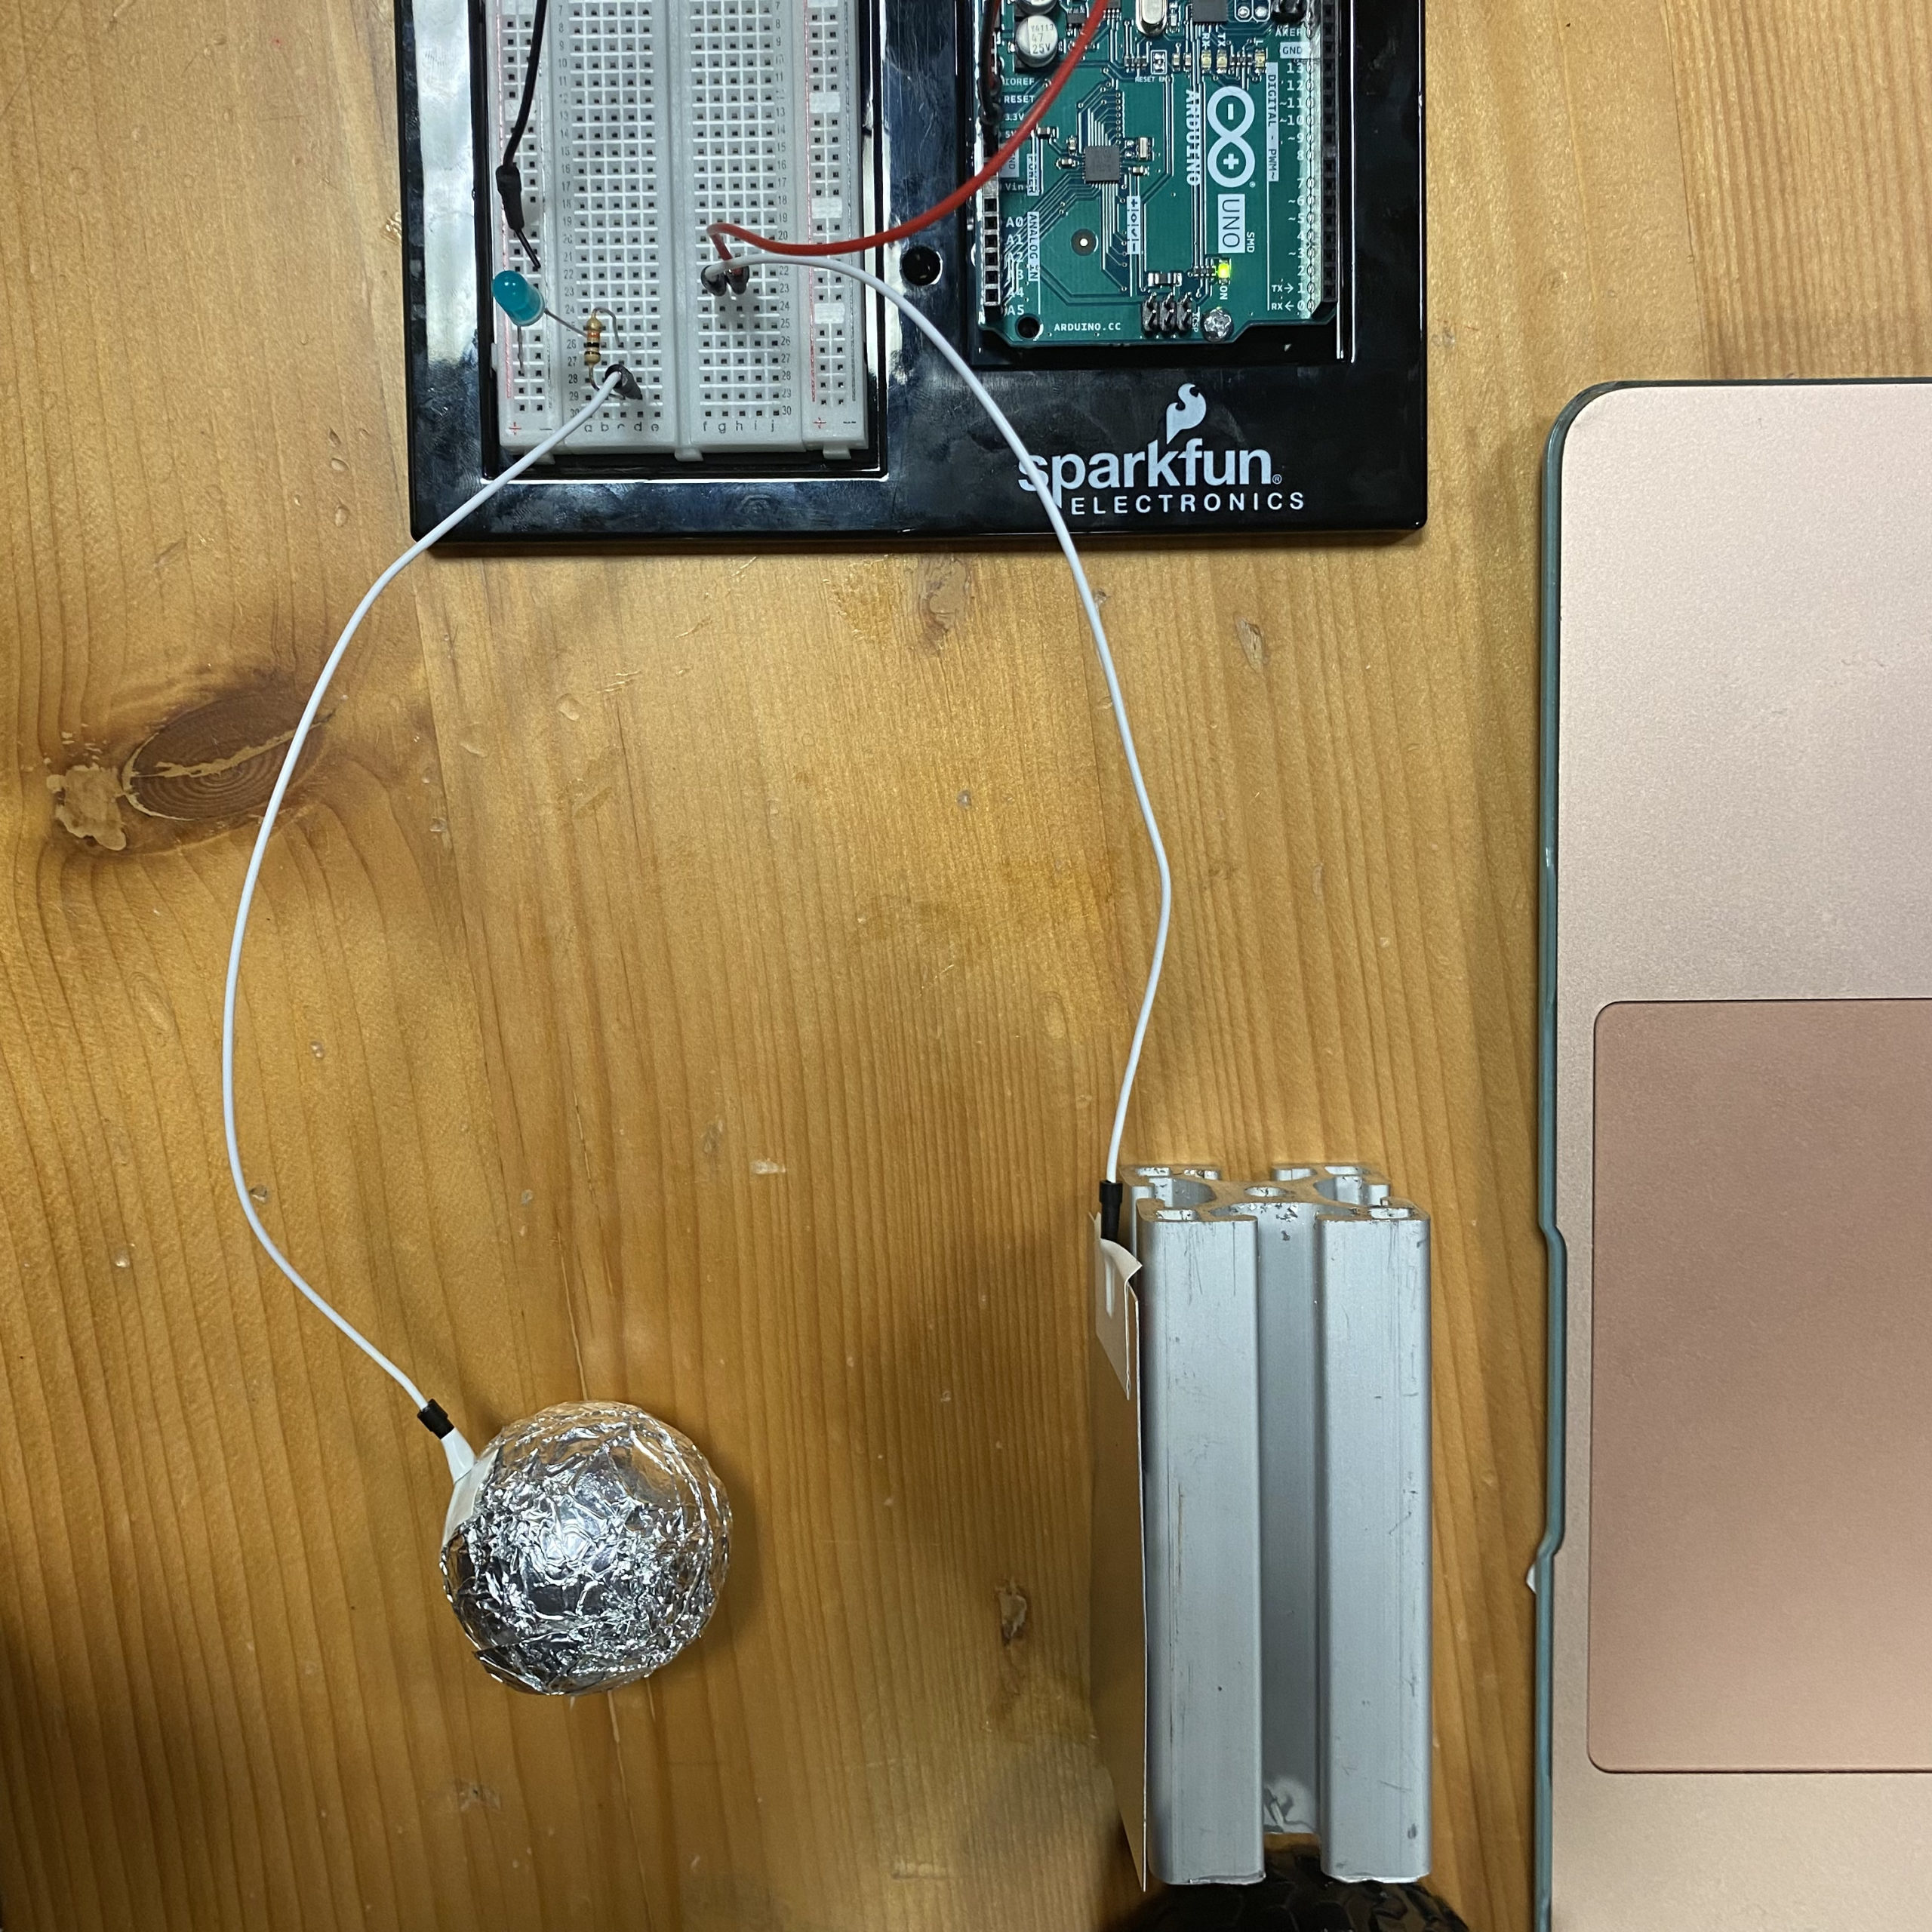
Finally, I secured each side of the switch to each of the white wires using some electrical and copper tape. The entire circuit is shown below:
CHALLENGES WITH ADHESIVES
The biggest challenge of this project was honestly attaching the components of the switch to the wires. I experimented a lot with the copper tape, as it had been recommended to me by another student. However, I found that the tape is barely adhesive and not flexible enough to wrap around curved objects like the ping pong ball or thin objects like the head of the wires. On the other hand, the electrical tape, while much more sticky and elastic, didn’t stick very well to metal objects. My solution was to use copper tape as a base layer to stick the wires to the metal ball/plate and then cover it with electrical tape to secure it in place. I found that duct tape worked best on metal, but because it is an insulator, I only used it to attach the metal plate to the scrap metal.
ALTERNATIVE SWITCH
Finally, one alternative version to this touch-less switch is instead of having the metal plate standing up vertically, having it lay flat on the table. In this way, the user does not need to continuously blow on the ball to keep the light on; instead they need only to blow at the right angle and speed so that the ball rolls on top of the plate.
Creative! Great write up