Self-Portrait

Context/ Inspiration:

The primary reason I was drawn toward Mathematics, ultimately toward Computer Science, was symmetry — whether that be the pattern of infinity or the Kanizsa triangle. The habit persists; irrespective of the discipline I am currently involved in, I tend to experiment with said patterns. That’s why, for this assignment, I have chosen to implement Bézier curves as I create a self-portrait using pre-defined functions of p5.js.


Project Idea:

A Bézier curve is used to produce smooth curves with the help of two ‘anchor points’ (which determine the initial and the final points of the curve) and two ‘control/ handle points’ (which determine the pull of the curve). In other words, it can be understood as “a linear interpolation of a linear interpolation” of a curve.  I have incorporated the idea of the Bézier curve as a background of my self-portrait, which I consider to be the highlight of my project too. 

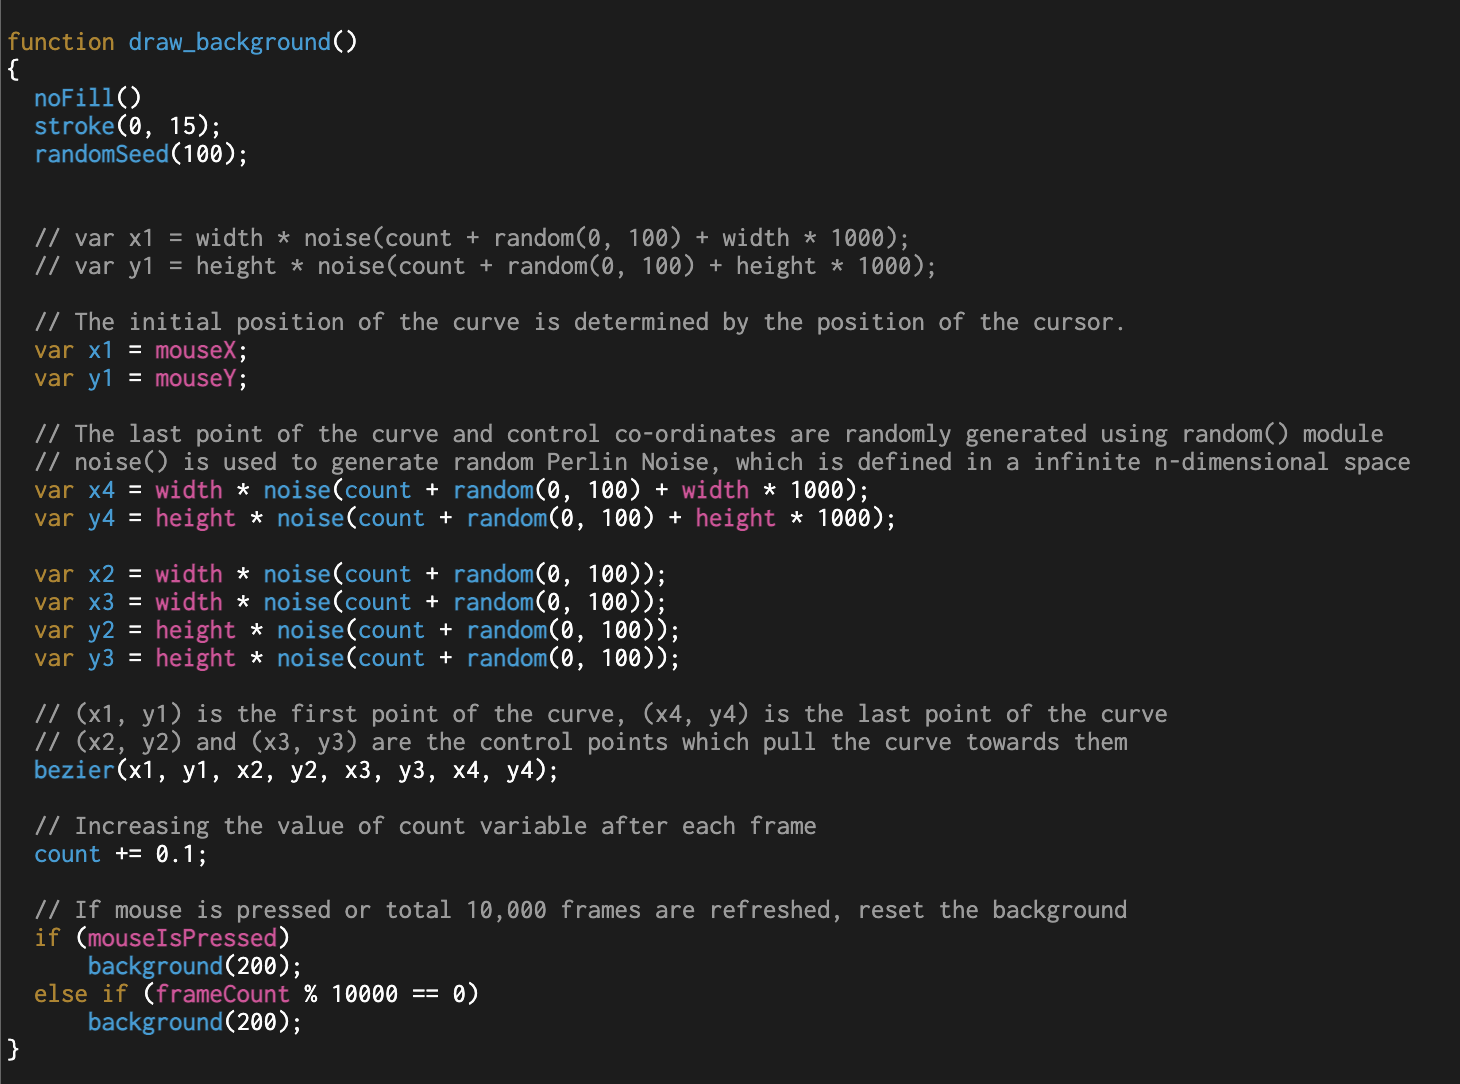
I started with a canvas of “900×900” pixels, and my first focus was on the creation of Bézier curves. The project is divided into numerous functions; one of which is ‘draw_background’ which produces Bézier curves. For the starting point, I initially used the random() function to generate unique values (almost!). However, I changed it to mouseX and mouseY so that the starting point of each curve is determined by the position of the cursor. Even if the cursor remains static, the initial point is set to be (0,0). Similarly, for the remaining points (final anchor point and control points), I combined noise() function to create Perlin noise, which essentially extends to infinite n-dimensional space unlike random() function, and randomly generated numbers with some algebraic manipulations. This YouTube video introduced me to the noise() function, while for more technical information, I relied on the reference page of p5.js. Thus, a series of Bézier curves are generated. The value of ‘counter’ is increased after each frame to produce a unique curve. In addition, the function includes two additional functionalities: (1) after 10,000 frames or (2) when the user clicks on the screen, whichever occurs first will reset the background to its predetermined stage. 

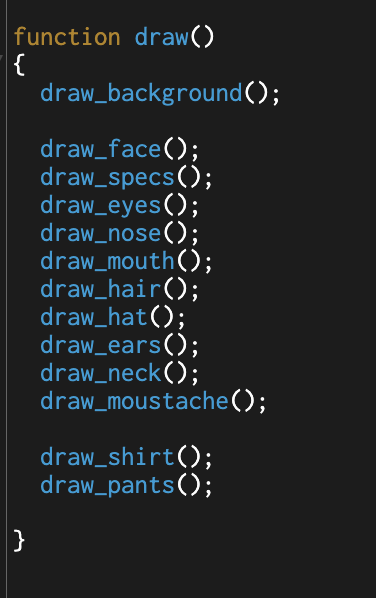
In addition to the default setup() and draw() functions, the actual self-portrait is categorized into twelve additional functions that are included in the draw() function in the order of positioning. Each of these functions utilizes the fundamental idea of primitive shapes taught in the lecture.

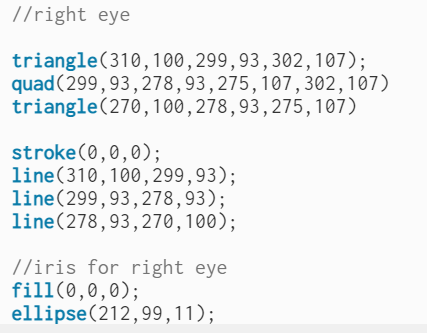
After implementing the background function, I moved to draw the face of the character. To pick the desired RGB value, I used a color-picker extension, fired up Google to open a real person’s image and copied the RGB value that I found appropriate; thus, I had the color of the character’s skin. Then, I used arc() function to create the upper and the lower section of the head while feeding the required parameters into the function. Similarly, the draw_eyes() function was implemented using the arc() and the circle() modules to create the outline of the eyes and pupil respectively, while draw_ears() required the use of arc() and ellipse() functions. This way, the remaining functions utilized a combination of existing functions like line(), rectangle(), arc() and ellipse() to draw an outline of different parts of the character’s body. 

Another unique function was draw_hair() function, which required the use of beginShape() and endShape() functionality. Using this combination, I was able to plot a number of vertices using curveVertex(), thus a curve was created and filled with RGB values to replicate the structure of human hair. The function itself is positioned such that it appears on the bottom of the draw_hat() function. 

This way, I kept on coding and the project is programmed to represent my self-portrait. 


Reflection:

Overall, I am satisfied with my project. But, there are a few things I could have definitely restructured to come up with an efficient final product:

  1. The canvas design is determined by two variables — w and h — set at the very beginning of the program: the target was to create a dynamic canvas size. However, with a number of shapes included, small tweaks (for instance: width/2 + some number) had to be implemented to position those shapes. Thus, changing the value of w and h create a chaotic design. 
  2. While implementing beginShape() and endShape() functions, the value of vertices had to be hard-coded, which felt quite limiting. Thus, proper pre-planning combined with object-oriented and reading from local file methods could have improved the project. 

In short, it was an interesting project — the project itself felt like a unique amalgamation of ‘generative’ art (in some ways) and elementary art. It was a fresh experience for me, and I look forward to completing such creative projects in the days to come. 

That said, what could be more interesting than integrating ‘randomness’ in fixed lines of computer code?

Self-portrait

Concept

My portrait is inspired from the show BoJack Horseman. I tried drawing one of the characters – Todd Chavez. Along with this I tried to combine some aspects of psychedelic art – something I find extremely fascinating. The character was made using simple shape including triangle, ellipses, arcs, and lines. As an additional element for interactivity, the visuals get more intense as the mouse is moved towards the right side.

Code

I found it a little difficult to understand the algorithm behind the movement of the visuals. I spent majority of the time trying to understand how movement of the mouse affects the visuals. The visuals have been inspired from https://openprocessing.org/sketch/601793 by Misha Rabinovich. After understanding the code, I simply made the movement of visuals more intense and set the changing of the colours of the elements to random.

(ps: move mouse towards right to control the intensity of the visuals)

Reflections

I enjoyed making the portrait. For further assignments, I would like to explore psychedelic art and make visuals. What I appreciate about such visuals is how strange or foreign they feel. They have the power to make you feel overwhelmed. What I want to improve on is making the sketch of Todd look more realistic. Overall, I am satisfied with the portrait, but I would love to continue learning more about producing similar art.


Self Portrait – Janindu

Concept

I was taken back to the time when my younger self began to learn to draw on MS Paint. So, I decided to pay tribute to those carefree days and draw a very simplified self-portrait.  The drawing utilizes intuitive shapes such as ellipses to represent soft features and triangles and rectangles to define much more defined features. In the artwork, I wanted to create a warm and playful atmosphere through the sun and a smile.

Implementation

First I implemented Owen Roberts coordinate display system template to my sketch. This helped me gain some sort of positional awareness about the placing the shapes.  This is the link to Roberts’ work.

The following code was then implemented:

function setup() {
    createCanvas(400, 400);
}

function draw() {
//background
    fill("brown");
    rect(0,260,400,140);
    fill(82, 157, 227);
    rect(0,0,400,260);
    fill("yellow");
    circle(0,0,100);
    line(0,260,400,260);
    
  //Ears
    fill(232, 176, 72);
    ellipse(110,200,20,30);
    ellipse(290,200,20,30);
  //Face 
    fill(235, 194, 117); 
    noStroke();
    rect(160, 300, 80, 20);
    rect(50, 320, 300, 150);
  //V-neck
    fill("green");
    rect(50, 320, 100, 150);
    triangle(150,318, 150, 400,200,400 );
    rect(250, 320, 100, 150);
    triangle(250,320, 250, 400,200,400 );
    fill(235, 194, 117);
    stroke("Black");
    ellipse(200,200,90*2,110*2);
  //Eyes
    fill("white");
    ellipse(160,170,30,20);
    ellipse(240,170,30,20);
    ellipse(240,170,30,20);
  //Hair
    fill("black");
    ellipse(160,170,10,10);
    ellipse(240,170,10,10);
    ellipse(200,100,170,90);
    triangle (110,180, 115, 100, 150,110);
    triangle (290,180, 285, 100, 250,110);

    arc(200, 250, 80, 80, 0, PI , CHORD);
  //teeth
    fill("white");
    rect(170,250, 60, 10);
  //tongue
    fill("red");
    arc(200, 270, 180/4, 180/4, 0, PI , CHORD);
  //nose
    fill(232, 176, 72);
    triangle(200,180,180, 215, 215, 215);
  //arms
    line(90,355,90,400);
    line(310,355,310,400);    
}


Here I tried to use multiple shapes to create the hair (I tried to replicate a fade:)). I created the background using two rectangles that span over the entire canvas.

I found that the order in which the code was compiled to be quite interesting. You could simply layer different shapes over each other by writing the code for that shape over another.

I played around with the parameters of the shapes such as their starting point and sizes to create the facial features. Specifically, I used the fill() function before creating each feature to shade it in a different color. I also experimented with using the noStroke() function to remove and implement borders.

Sketch

Here is the simulated sketch of what the code produced:

Reflections

The next steps for this assignment would be to increase the complexity of colors being used. Specifically using the lerpColor() function to create a gradient background. Furthermore, I could also use the mouse tracking functions in P5.js to make interactive features such as opening and closing eyes and hand movement. I feel like I used most of the simple shapes available to use.  Something I really struggled with during the assignment was using and manipulating curves in a sketch. I also feel like some improvements can be made in how the features blended in with each other.

Overall, the portrait was a lot of going back and forth changing values to the parameters of the shapes. Regardless, it was very enjoyable.


Self Portrait – Daniel Basurto

CONCEPT

I wanted to create a self-portrait based on my current self with basic shapes and colors.

CODE

The code consists of simple shapes and lines in order to form the picture. The biggest challenge with coding was my lack of knowledge as this is my first time doing so. It took a long time to understand how the coordinates and positions work but eventually I managed to pull through.  

I created a grid to find myself on the canvas, as well as doubling it as a background by lowering the thickness of the stroke.

function setup() {
  createCanvas(400, 450);
}

function draw() {
  background(84, 202, 108);
  
  // Grid for helping with locating myself and background //
  strokeWeight(.1) //added at the end to make seem more like a background //
  line(0, 50, 1000, 50);
  line(0, 100,1000,100);
  line(0,150,1000,150);
  line(0,200,1000,200);
  line(0,250,1000,250);
  line(0,300,1000,300);
  line(0,350,1000,350);
  line(0,400,1000,400);
  line(50,0,50,1000)
  line(100,0,100,1000)
  line(150,0,150,10000)
  line(200,0,200,1000)
  line(250,0,250,1000);
  line(300,0,300,1000);
  line(350,0,350,1000);
  line(400,0,400,1000)
  

  // Hair color and shape//
  strokeWeight(1) // make the strokes thick again //
  fill (0)
  ellipse(200, 200, 275, 350)
  ellipse(100, 300, 60, 100)
  ellipse(300, 300, 60, 100)
  ellipse(125, 325, 70, 100)
  ellipse(160, 325, 70, 100)
  ellipse(250, 325, 70, 100)
  ellipse(260, 325, 70, 100)
  
  // Face, nose, ears, mouth and neck //
  fill(225, 172, 149)
  rect(165, 325, 75, 75)
  ellipse(85, 200, 50, 100) ;
  ellipse(315, 200, 50, 100) 
  ellipse(200, 200, 250, 290)
  arc(200, 215, 30, 20, 10, PI);
  arc(200, 250, 80, 80, 0, PI);
 
  // Eyes //
  fill(255, 255, 255)
  ellipse(150, 150, 50, 75)
  ellipse(250, 150, 50, 75)
  
  // Pupils //
  fill(56, 16, 28)
  ellipse(150,150,20,30)
  ellipse(250,150,20,30)
  
 // torso, shoulders and shirt //
  fill(246, 133, 211)
  rect(45, 400, 100, 100)  
  rect(260, 400, 100, 100)
  rect(75, 375, 250, 250);
  
  //shirt lines //
  fill(0)
  line(125, 375, 200, 450)
  line(275, 375, 200, 450)
}


COMPLETED SELF PORTRAIT


REFLECTION/FUTURE WORK

This portrait shows my lack of familiarity with coding and creativity due to said lack of experience. In the future I would like to learn how to apply the concepts discussed in class better. Hopefully add some animations in the future. Maybe add text and more complex figures later haha!

Self-Portrait by Aya

Hello! I’m Aya

Concept

I love flowers and also recently I changed my hair color, that’s why I wanted to use these traits as interactive components for this self-portrait concept. I included a property that changes the color of the hair when the mouse moves, which I think is an interesting way to see the new possible future hair colors on myself beforehand! In the beginning, I was overcomplicating my task by willing to add an RGB color palette and make flower rain by trying to create an array of shapes that form one flower. However, I struggled to create a static object which will have to move later, that’s why I came to the idea of using the ready picture as a variable instead of creating flowers in the editor. As a result, this solution helped me to move on with the process. I would like to point out that this practice was a really fun and easy way to discover the scope of the possible projects that can be done in p5.js.

Code features

I am including code snippets for the interactive parts of my code:

  1. adding an image to the code and using mouseX and mouseY, so it can be moved by mouse coordinates
    function preload(){
      flower=loadImage('flower.png');
    }
    function draw(){
     //moving flowery background
      image(flower,mouseX, mouseY, 50,50);
    }
  2. filling the shape with variables, which are changing values when mouseMoved()
    //variables for color changing property
    let r=240;
    let g=230;
    let b=87;
    
    function draw() {
      //hair
      fill(r,g,b);
      ellipse(200,300, 200, 500);
    }
    
    //function that will change rgb code whenever mouse moves
    function mouseMoved(){
      r=r+5;
      g=g+10;
      b=b+50;
      
      //to not exceed the rgb limit, so colors will keep changing 
      if(r>255){
        r=0;
      }
      if(g>255){
        g=0;
      }
        if(b>255){
        b=0;
      }
    }
    Reflection

As I finished this self-portrait, I once again understood that I overthink a lot and also that not all concepts don’t have to be executed in the most intricate way. It would be a pleasant addition, but a simple implementation also works in the message delivery and is enough (at least for now). Nevertheless, I still would like to learn to do moving backgrounds and find out whether it will be possible to create my own object and make it move, and don’t forget about the palette where the user can choose any color haha!


Self Portrait (with background)

The portrait makes use of simple shapes such as ellipse, triangle and lines, and coloring with the RGB color code. My idea was to code up a simple human face and the upper body on a cool background of the sky, clouds, sun, mountains and trees. The shapes are layered on each other which creates the illusion of perspective and depth.

I’m particular happy with the implementation of human hair and clouds which both make use of ellipse. After thinking through how to implement them, I simply decided to use ellipse and interlay them on each other to create my desired shape.

The code for the cloud is shown below:

The implementation of the assignment:

Reflection:

In future, I intend to explore ways to make the portrait more interactive and dynamic. I intend make the eyes move relative to the position of the mouse, the sun and clouds move across the sky and the face more animated.

Assignment 1 – self portrait

Concept

I used p5js to make a self-portrait for this project. Although no prior experience in that sort of coding, I drew a portrait of myself using ellipses, triangles, and arcs among other shapes. The color-changing rows in the background were made to make the illustration more fun, making it user interactive. When the cursor moves over a certain block in the background it changes color from blue to pink. This portrait seems to be taken at an Egyptian wedding in which the colors are pink and blue and rhythms with the suites.

Code

The most challenging part of the code was understanding and modifying code that I brought from the internet. The background was split into various cells and blocks; However, I wanted it to be in rows instead of blocks. Hence, I tried to figure out what code does what by hiding some of the codes and see the changes it does and sometimes manipulate the numbers to explore even further.


There are two main parts that needed to be changed:

The first one was in the setting up function. I wanted the color pink to appear on different sites randomly in the rows form. I realized that instead of assigning a random value to each column in a certain row, I can assign the same random value to all columns in the same row, making the blocks seem like a one-piece although it is cut into numerous parts.

for (let r = 0; r < rows; r++) {
    cells[r] = [];
    let ran = random(255)
    for (let c = 0; c < columns; c++) {
      cells[r][c] = ran;
    }
  }

On the other hand, in the drawing function, I need to know the Y coordinate (row) and highlight all the blocks in that row by the pink color, and that can be done by a for loop that goes through all of the blocks in the row and changing them all.

if (mouseX > 0 && mouseX < width &&
    mouseY > 0 && mouseY < height) {
  const mouseR = floor(rows * (mouseY / height));
  const mouseC = floor(columns * (mouseX / width));
  for(let i = 0; i < columns;i++){
    cells[mouseR][i] = 255;
  }
  
}

One of the most challenging things in coding as well was to understand how arcs work and how to manipulate them while coding the eyebrows and the mouse. By watching youtube videos, I figured out which coordinate does what and how can I use them to fill full my desires.

//eyebrows
 arc(245, 202,50,20,PI,TWO_PI,OPEN);
 arc(345, 202,50,20,PI,TWO_PI,OPEN);
//mouth
  arc(295,330,70,70,0,PI);

The whole code:

const rows = 20;
const columns = 20;
const fadeSpeed = 2;
let cells = [];


function setup() {
  createCanvas(600, 600);
  
  for (let r = 0; r < rows; r++) {
    cells[r] = [];
    let ran = random(255)
    for (let c = 0; c < columns; c++) {
      cells[r][c] = ran;
    }
  }
  
}

function draw() {
  background(255);
  
  //modified from: https://happycoding.io/examples/p5js/arrays/fading-grid 
  cellWidth = width / columns;
  cellHeight = height / rows;

  if (mouseX > 0 && mouseX < width &&
      mouseY > 0 && mouseY < height) {
    const mouseR = floor(rows * (mouseY / height));
    const mouseC = floor(columns * (mouseX / width));
    for(let i = 0; i < columns;i++){
      cells[mouseR][i] = 255;
    }
    
  }

  for (let r = 0; r < rows; r++) {
    for (let c = 0; c < columns; c++) {
      cells[r][c] -= fadeSpeed;
      cells[r][c] = constrain(cells[r][c], 0, 255);

      const y = height * (r / rows);
      const x = width * (c / columns);

      fill(cells[r][c], 0, 128);
      noStroke()
      rect(x, y, cellWidth, height);
    }
  }
  
  
  // faces basis  
  noStroke();
  fill(240, 220, 215);
  arc(295,250,230,350, radians(-50), radians(-130),OPEN);
  
  //hair
  fill(35, 20, 20);
  ellipse(300,110,100);
  ellipse(300,90,100);
  ellipse(250,100,110);
  ellipse(330,90,110);
  ellipse(220,120,110);
  ellipse(370,100,110);
  
  //Eyes
  ellipse(245, 240, 35, 40);
  ellipse(345, 240, 35, 40);
  fill(255);
  ellipse(240, 230, 10, 15);
  ellipse(340, 230, 10, 15);
  stroke(35, 20, 20);
  strokeWeight(5);
  noFill();
  arc(245, 202,50,20,PI,TWO_PI,OPEN);
  arc(345, 202,50,20,PI,TWO_PI,OPEN);
  
  //nose
  fill(140, 120, 115);
  noStroke();
  triangle(295, 270, 305, 300, 285, 300);
  
  //mouth
  fill(255, 50, 50);
  arc(295,330,70,70,0,PI);
  
  //neck
  fill(240, 220, 215);
  rectMode(CENTER);
  rect(295,435,40,60);
  
  //suite
  fill(0);
  rect(295,580,250,300,30);
  
  fill(150);
  triangle(275,430,315,430,295,580);
  
  fill(255);
  ellipse(310,465,10,10);
  ellipse(308,497,10,10);
  ellipse(304,530,10,10);
  
  stroke(255);
  strokeWeight(6);
  line(200, 490, 240,490);
  
  //glass
  stroke(0);
  strokeWeight(4);
  noFill();
  ellipse(245, 240, 75, 80);
  ellipse(345, 240, 75, 80);
  line(282,240,307,240);
  
  
  rectMode(CORNER);
  noStroke();
}

Reflections:

Overall, I’m pleased with this initial design since I feel like I was able to exercise my creativity and produce something that was distinctly me. Even though my portrait isn’t flawless, I’m still happy with the project and eager to work on this course’s more challenging coding in the future, and I believe that using this approach helped me to focus less on the details and more on my favorite aspects, like the form of my eyes, the suite, the harmony of the colors, and the basic shapes. Although making the static sketch and manipulating the background aspect was a challenge for me, I would have loved to try to make the illustration even more dynamic like what I saw with my classmates or even make the illustration more detailed, and I wished I could have made the whole background by myself as It would have boosted my self-confidence in coding drastically, But I think we all have to start somewhere.

The sketch


Cool Self-portrait

Concept

For the first assignment, I was eager to play around and discover different capabilities of p5.js.

Code

The sketch was good practice to figure out how things work with p5.js and play around with shapes, coordinates and colors. Albeit the most challenging part was drawing the beard, but it was enjoyable seeing it come together and work in the end. Among the most important things I learnt was the power of breaking down a bigger task into many smaller tasks and focussing on one at a time to eventually create a masterpiece. Organization and clarity of code also cannot be overemphasized given how simpler it makes to figure out and cater for any changes in the sketch.

Reflection / Takeaway

Among the things I appreciate about design is that there is always room to make better art. I believe this sketch still has a lot of room for growth both visually and technically. With regard to the code, a lot of hardcoding was used to specify the numbers, which could have been made better with automatic calculations. Visually, I would also like to add more features in the background and give the sketch a bit more life to it.

Assignment 1 – Self Portrait

Concept

After getting introduced to p5.js I was excited to dive more into this program and try out new things. I decided to come up with a self-portrait that also depicts an important hobby in my life. I like playing football. It is a sport that relieves my stress and makes me excited. Therefore, I felt the need to include a soccer ball in my self-portrait which you can see below.


When I first started with the drawing I was so confused about how am I going to draw the main features of the face. I do not have a background in art and art was never a passion for me. However, I found this task an opportunity to explore art even more and find out how can I represent complicated things using simple objects. Therefore, I started playing with the different shapes in p5.js and was able to combine them in a way to create a face and an upper body. I had to explore new features in the reference page like the quad function to be able to draw my hair, eyes, and arms.


Code for Right Eye

I liked how the eyes of my portrait look. I could have done the eyes in a much simpler way by creating an ellipse. However,I decided to try out new shapes and see what I could get. Therefore, as seen in this code above I used two triangles and a quad to represent each eye. Furthermore, I only added a black stroke to the upper half of the eyes to represent the eyelid. To create the Iris for each eye, I used the ellipse feature with 3 parameters and this way I was able to create circles.

Ideas for Improvements

After completing my self-portrait, I was so happy with how it looked but I still that it needs some improvement to look better. I believe that I could have done the ball to look more realistic. This would be by creating more pentagons inside the ball and connecting them in a better way. Furthermore, in the future, I would like to make my full body portrait and show all my body features. In addition to this, I would like to make the drawing dynamic and make it move  by putting the ball on portrait’s foot and start juggling with the ball.


Self-Portrait

Concept—

Outline:

For my first assignment, I utilized the coding information we learned about in class to use simple shapes to create a self-portrait. I used ellipses, circles, squares, rectangles, lines, arcs, and triangles to create an image that looks like a cartoonish version of myself, while also recoloring specific parts, modifying the stroke weight, and removing the stroke completely for some elements of my portrait.

Inspiration:

The inspiration for my self-portrait was based on the animated characters from the game Animal Crossing. I borrowed elements from the human characters’ physical appearance, notably the reddish-orange triangle-shaped nose, the white glimmer in the pupils, and the circular blush under the eyes for a ‘cutesy’ effect:

Here’s a cute gif of my inspo for the sketch, the final product can be found below

Code highlight—

I made sure to section the different elements of my portrait in order to easily locate them in case I wanted to tweak something specific in one of the features. My favorite lines of code were the ones I used to make the eyes because I made them look cartoonish using the white glimmer + they were a bit more detailed in comparison to the other elements of my portrait as I added a code for the eye movement:

// movement of eyes -- used this tutorial to figure it out https://youtu.be/dcxmJtioamg?t=1033
// right and left
let e_x1 = map(mouseX, 0, 200, 148, 150)
let e_x2 = map(mouseX, 0, 200, 248, 250)
let e_x3 = map(mouseX, 0, 200, 148, 150)
let e_x4 = map(mouseX, 0, 200, 248, 250)
// up and down
let e_y1 = map(mouseX, 0, 200, 183, 185)
let e_y2 = map(mouseX, 0, 200, 183, 185)
let e_y3 = map(mouseX, 0, 200, 183, 185)
let e_y4 = map(mouseX, 0, 200, 183, 185)

// eyes
ellipseMode(CENTER);
stroke (200) // color of white eyes' outline
strokeWeight (2)
fill (255, 255, 255)
ellipse(150, 185, 40, 40) // (x1, y1, width, height) 
ellipse(250,185, 40, 40)
fill (122, 65, 44)
stroke (110, 60, 42) // colour of brown pupils' outline
strokeWeight (2)
ellipse(e_x3, e_y3, 20, 20) // colored right pupil
ellipse(e_x4,e_y4, 20, 20) // colored left pupil
fill (0, 0, 0)
stroke(0) // color of stroke/ outline (color of glasses)
strokeWeight (2)
ellipse(e_x1, e_y1, 8, 8) // right pupil
ellipse(e_x2,e_y2, 8, 8) // left pupil
stroke (180) // color of white eyes' outline
strokeWeight (2)
fill (255, 255, 255)
ellipse(158, 180, 6, 6) // right white glow
ellipse(258, 180, 6, 6) // left white glow
// x: right or left, y: up or down

Embedded sketch—

(p.s. the pupils move with a very limited range of movement)

Reflections and improvements—

I struggled with a few things when trying to design my portrait. This includes:

  • Trying to get the noStroke effect to work without removing the strokes on every shape. I tried to remove the strokes off of every shape in my image except the glasses and eyebrows, but even after I put the noStroke code after where I wrote the code for the eyebrows and glasses, it still removed their stroke. I realized later that I had to specify the stroke color as well as the strokeWeight for the glasses and eyebrows before I could put the noStroke effect for anything underneath. I then realized I liked the strokes surrounding the shapes, just not in black—hence why most of the features in my portrait are outlined with a darker shade of their respective color rather than black.
  • Forgetting to center the rectangle shapes for the glasses—which made it take much longer because I had to figure out where to plot the coordinates. This also caused a domino effect because if I had to type another code for a rectangle element below the code for the glasses and tried to center it, it would also center the glasses and mess up their coordinates completely.
  • Not having many shapes to work with. I felt very limited by the shapes, and in some cases, I wanted a semi-circle (like for the mouth), but I didn’t know the code for it. I had to look up a video on how to draw an arc, and this solved my problem—until I realized a 180° arc doesn’t have an outline on top. This meant that I had to place an outlined ellipse underneath the arc to make the mouth look complete and fully outlined (ref. to mouth section of code).
  • Trying to figure out how to give the pupils a full range of movement. I only figured out how to move them diagonally through a YouTube video.