Starting off with this week's project , me and Toomie have teamed up to create an interactive music instrument, which brought us joy, and we hope you would enjoy watching it. As far as planned, our scope for what we were initially planning to do changed due to the difficulties with some of its components. On account of that, we had the courage to dump that idea and start all over by yesterday - a day till the deadline . Stressful ? YES. Yet we still managed to incorporate the piano in a distinct way and for that we present to you Scattered Piano - Music in the Air.
INSPIRATION:
The initial idea for our project was to create an Arduino-based piano where the notes are controlled by specific keys on the board. Yet, it didn't work. In particular, trying to get the piano keys sensor to work when we connected them with the conductive tape and wires, some keys would just work while others wouldn't. The piano, though, inspired the notion of creating music in the air using the Ultrasonic, which controls the frequency of the buzzer according to the distance between the object and the board. The character, which I named Pianair (pian-air: piano in the air), used to denote the sounds is a toy I brought from home to provide the project with some sort of lightheartedness and cheeriness to resemble the project’s purpose.
IDEA OVERVIEW:
The idea was to interface a distance sensor or ultrasonic sensor with Arduino, measure the distance of the sensor from an obstacle and accordingly play different frequencies using the buzzer. We also used a switch to control how to turn the sensor on and off. So, we went ahead and created our musical Instrument where we can move our hand in front of the sensor and according to the distance of our hand in front of the sensor, the buzzer will play different tones. So, we can change the tone based on the distance from the sensor. A switch and led were used to indicate if our musical instrument were active or not. It was an alternate on/off logic where you can press once to turn on and press again to turn off.
PROCEDURE:
As always, our first target was to interface the distance sensor & Arduino and we gathered the following hardware for our project:
Arduino Uno R3 board with USB cable

Push Button (switch)

Breadboard

Buzzer

Jumper wires to complete the connections.

 Ultrasonic or Distance Sensor (analog to be used later)
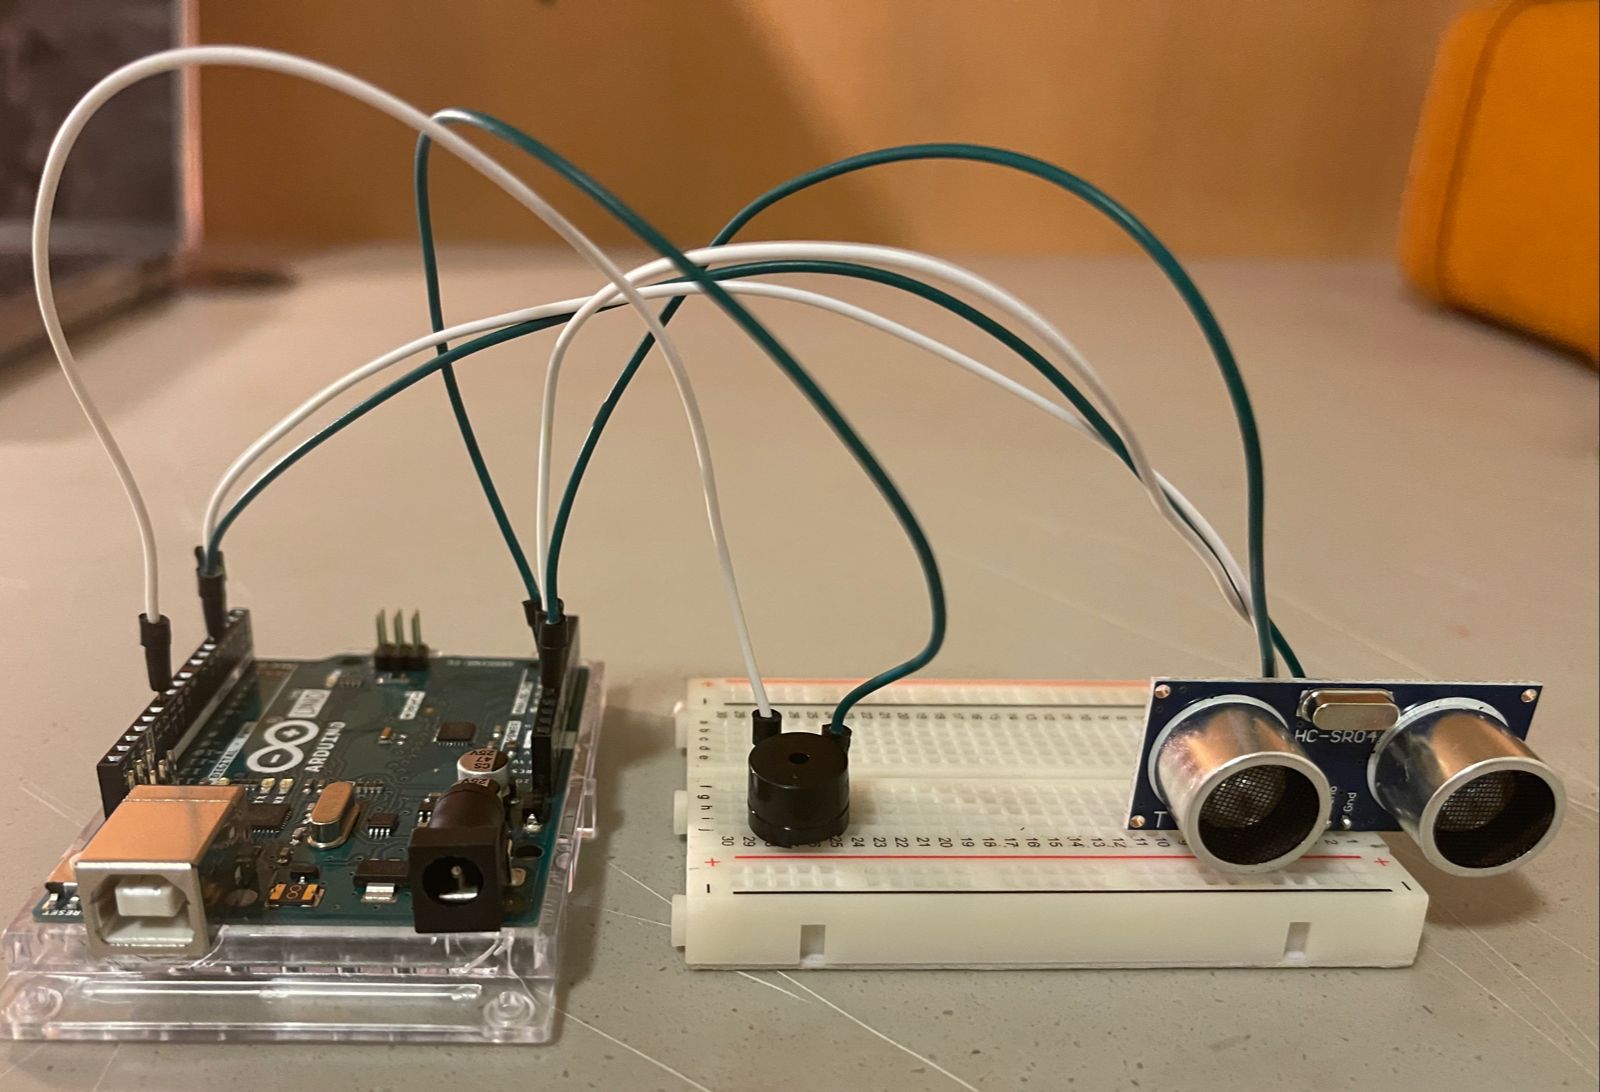
Firstly, we just attached the ultrasonic sensor to the board. We connect it as following so that we can access all 4 pins of the ultrasonic sensor.
Next, we connected 4 wires to the ultrasonic sensor as seen. One from Vcc to 5V, other from TRIG to PIN 3 in Arduino, then echo to pin 4 in Arduino, and at last ground to ground.
Moving forward, the buzzer has been placed taking into consideration its plus and minus sides.
Then, the buzzer has been connected. We use 2 jumper wires behind the buzzer, one from the buzzer's positive side to pin 11, and the other from buzzer's negative side to ground in Arduino board.
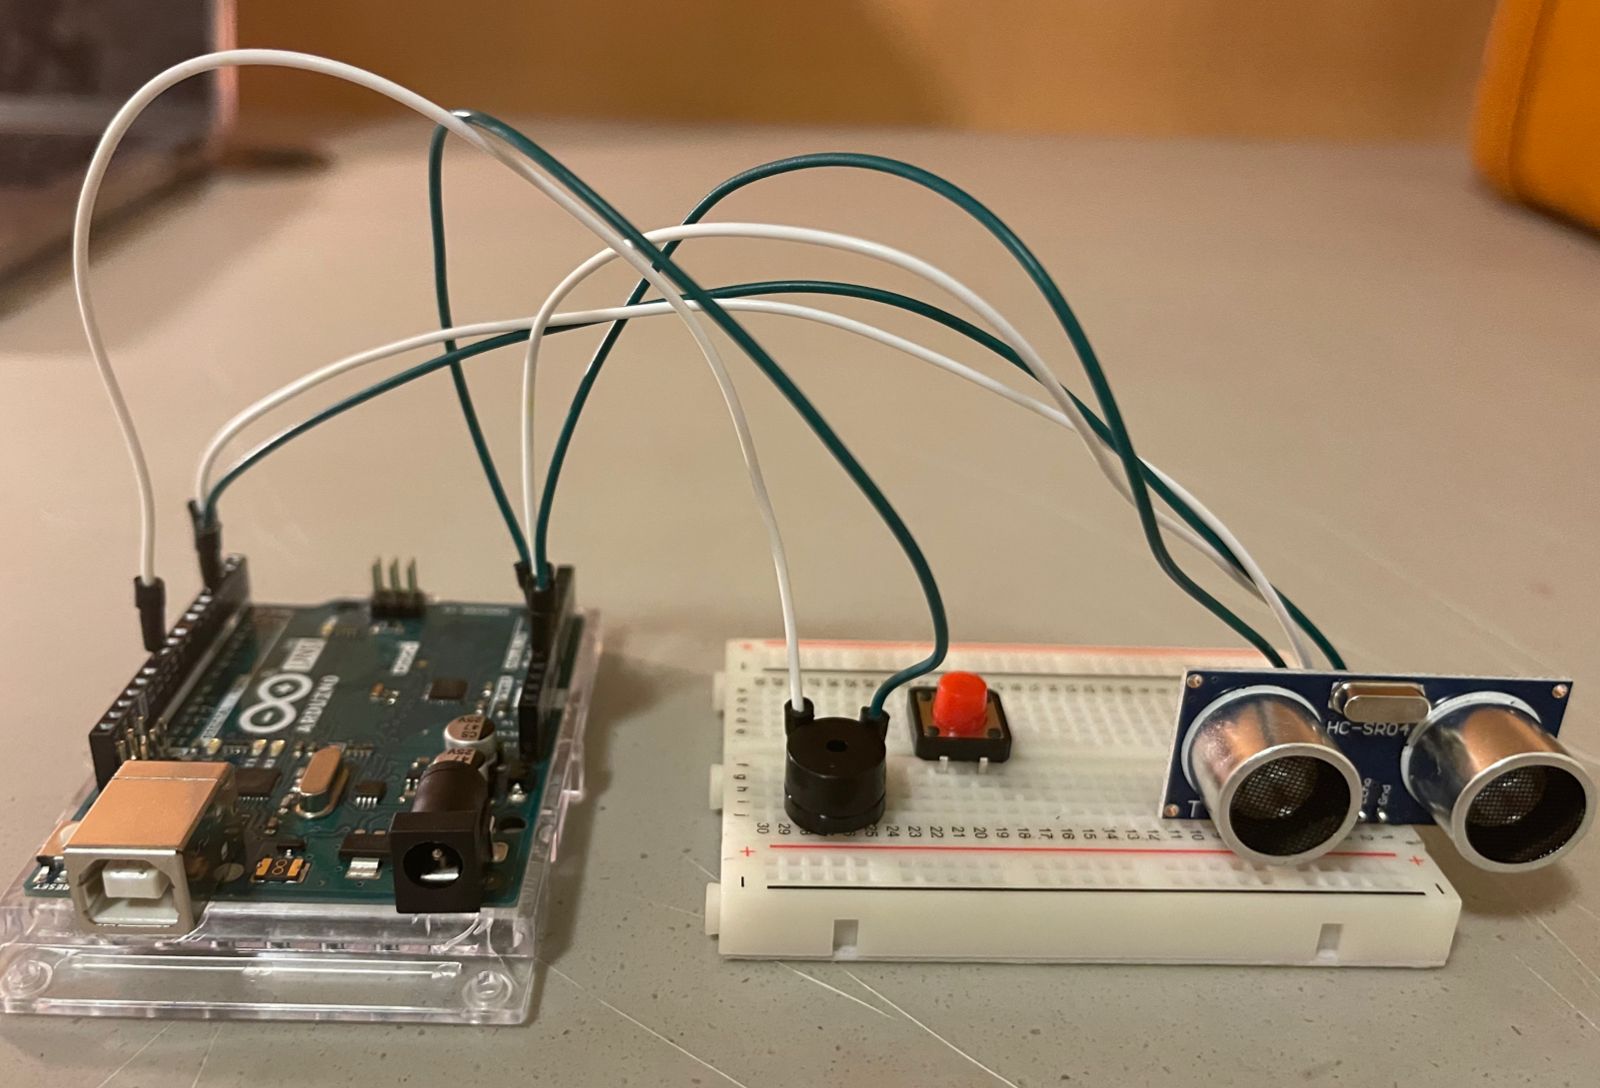
The push button was placed in the middle where there is a split as it connects to points on a circuit when pressed. We need the two diagonal ends of the switches which are shorted once the switch is pressed.
2 extra jumper wires were placed diagonally for the push button (switch), one end of the button to pin 5 , and the other end from button to ground in Arduino.
CHALLENGES AND PROBLEMS:
We discussed and brainstormed how can we build a unique musical instrument using sensors. Initially we thought of making a piano using conductive tape but after hours of trial and error we were unfortunately unable to complete it so we decided to build something else. Instead, we decided to use ultrasonic which is a distance sensor and a switch to make our instrument. It was very engaging to learn on how they could both work together.
FINAL WORK:
CONCLUSION:
Overall, despite the fact that we began the project with high hopes and a determination to outperform our prior efforts, we were confronted with the harsh reality of our initial concept failing when being implemented. After a long night of trial and error, we were compelled to change our whole project in a matter of hours. But it's fine, as without trial and error, nothing comes to being. Fortunately, we came up with another concept during our brainstorming session which later came handy as we could put into action as our final idea. It was basically that we used a distance sensor to monitor the distance from an obstacle and accordingly play different tones using different frequencies in the tone() function. To show whether our musical instrument was active or not, we used a switch and the led on Arduino. What we both learned is that one shall always take their chances and trust the process with its ups and downs. Have alternatives as you never know what will go wrong. However, don't forget that ...
– AFTER EVERY STORM COMES A RAINBOW –
FINAL CODE:
//Defined the pins
int SW=5;// connect switch to 5
int LED=13; // connect led to 13
//Variables that are capturing the values of different parameters
long duration, cm;
// this is to implement the switch logic
int count;

//we initialize pins as our input and output
void setup()
{
  pinMode(LED, OUTPUT);// configure led as output
  pinMode(3, OUTPUT);// configure pin 3 of ultrasonic sensor as output, this is PING
  pinMode (4, INPUT);//attach pin 4 to Echo and congiure as input
  pinMode (SW,INPUT_PULLUP);//configure switch as input, pull up resistor on to read  switch properly

  digitalWrite(LED,LOW);// led off by default


}

//Infinite loop which will run forever, contains main logic

void loop()
{
  //read input from switch and store it as variable
  bool switch_status = digitalRead(SW);

//press switch, becomes low , in other words it says switch has been pressed

  if(switch_status == LOW)
  {
    //if we press first time, value is 1
    count++;
    // if switch is pressed twice , make the value go back to default which is zero
    if(count == 2)
    {

      count = 0;
    }
  }

// true case if count is 1 , it means switch was pressed for first time
  if(count == 1) // Sensor ON
  {
    digitalWrite(LED,HIGH);


  // Give a short LOW pulse beforehand to ensure a clean HIGH pulse:
  // here just sending a pulse to trigger pin in the ultrasonic
  // the transmittor

  digitalWrite(3, LOW);  delayMicroseconds(2);
  digitalWrite(3, HIGH);  delayMicroseconds(5);
  digitalWrite(3, LOW);

  // the recievor
  // we calculate time taken by pulse to come back
  duration = pulseIn(4, HIGH);


  // convert the time into a distance
  //inches = microsecondsToInches(duration);
  // getting the direct value of the distance which is calculated by microsecond to centimeters
  cm = microsecondsToCentimeters(duration);


//initialize a variable Tonetoplay

  int toneToPlay = 0;

//according to different distance, we give different values

// Standard values , each if statemnet represents a different note on a piano

  // different distance range from ultrasonic sensor
  if(cm <= 160 && cm > 140)
  {
    // here it stores the frequency that will be played in hertz
     toneToPlay = 523;
  }
  if(cm <= 140 && cm > 120)
  {
     toneToPlay = 493;
  }
  if(cm <= 120 && cm > 100)
  {
     toneToPlay = 440;
  }
  if(cm > 100)
  {
    toneToPlay = 0;
  }
  if(cm <= 100 && cm > 80)
  {
     toneToPlay = 392;
  }
  if(cm <= 80 && cm > 60)
  {
     toneToPlay = 349;
  }
  if(cm <= 60 && cm > 40)
  {
     toneToPlay = 329;
  }
  if(cm <= 40 && cm > 20)
  {
     toneToPlay = 294;
  }
  if(cm <= 20)
  {
     toneToPlay = 261;
  }

  if(toneToPlay == 0)
  {
    //noTone means dont generate any frequency by the sound , basically switch off the buzer
    noTone(11);
  }
  else
  {
    //Here generate frequency of value equal to Tonetoplay
    //syntax is tone(pin, frequency, duration)
    tone(11, toneToPlay, 200);
  }


  }

  else if(count == 0)
  {
    digitalWrite(LED,LOW);
  }

  delay(250);
}


long microsecondsToCentimeters(long microseconds)
{
  // The speed of sound is 340 m/s or 29 microseconds per centimeter.
  // The ping travels out and back, so to find the distance of the
  // object we take half of the distance travelled.
  // distance is being calcualted from the time taken by pulse to come back
  return microseconds / 29 / 2;
}