Art-Work using Loops

INSPIRATION AND EXECUTION

My second week’s project was to create an artwork using loops. Although this sounded very exciting to me initially and I was all charged up to work for it, it took me a long time to think about what I actually wanted to make. Art is relative. There is nothing fixed nor definite. It is one’s imagination driven by creativity and inspiration. I could do anything; the topic was so open-ended that it was difficult to come up with an idea.

I read through some old computer art magazines and was very fascinated by the following picture from the book Computer_Graphics_and_Art_May1976  (p. 6):
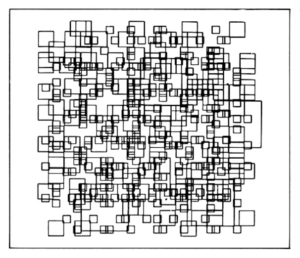
“Random Squares” by Herbert Franke

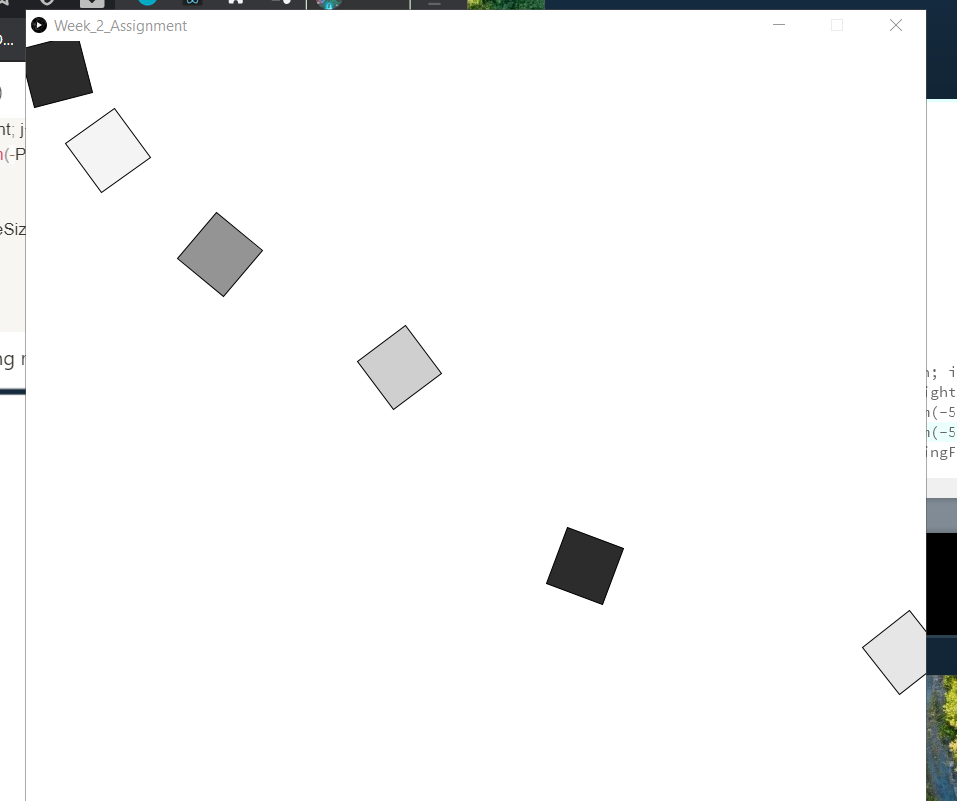
This picture, though simple, conveys the beauty of different blocks co-existing and still being peaceful in chaos. I wanted to create something similar in my art piece which could evoke such a feeling. Thus I started playing with squares on my canvas. To give an effect of chaos, I decided to have squares of different sizes to begin with and then make them move somehow, or rather change their size, to depict the different sizes as seen in the picture above. There was a little problem when I first coded this (see below). Since my width of the rectangle was dependent on frame count, it seemed like the rectangles were growing and shrinking faster and faster with each iteration which created a sense of panic or anxiety rather than calmness.

I solved this using the sine function which gave me a value between 1 and -1 and hence made it easier to reverse direction without affecting the speed (prof. Aaron Sherwood helped me with this). The consistency looked much better and pleasing. It also gave a smooth transition for changing direction. I then decided to add colors in the shades of blue and red to give a bright, happening, yet calming effect (not choosing pastel colors because the sense of chaos and happening still had to be maintained).

However, I still wasn’t fully satisfied with what I was seeing. The white spaces left a void that I wanted to cover. So, I started playing with background colors. In doing so, I accidentally removed the background altogether and what I saw, very well captured the emotion I was trying to bring about. The colors from different origins, each being startling and bright, having their own individuality, growing and shrinking in size, blended with each other so beautifully, producing a soothing effect in its dynamism. I then just tweaked the speed and colors a bit after that to make it look just right.

This is how my final art piece has turned out!

DIFFICULTIES

Besides facing difficulties controlling the speed of my moving boxes, I faced some difficulties initially when coding my boxes. It took me some time to understand how to use loops to code this project. What I was missing was the understanding that whichever loop I use inside my draw() function, would be an additional loop to the draw() loop which is an infinite loop. So, the way to go about it was thinking of it as ‘nested loops’ and exploiting the draw() loop to base the movement of my boxes on it. I first used nested for() loop to position my boxes on the canvas. Then, to move the boxes, I based the rectangle width on the frame count of the draw() loop. It took me sometime to understand that the transition should be based on the draw() loop count because I am not used to thinking of functions as loops and thus initially, I wasn’t using the draw() loop at all to code my assignment.

CODE

float h, w; //to rename height and width
float rectW; //size of square -- changes throught the exxecution
float rectW0; //initial square size
int numBox; //number of boxes

void setup()
{
  background(150);
  size(600, 600);
  h = height;
  w = width;

  rectMode(CENTER);
  rectW = 100;
  rectW0 = rectW;
  numBox = int(w/rectW0);
  //noLoop();
}

void draw()
{
  noFill();
  strokeWeight(0.3);

  int k=0;
  for (int i=0; i<numBox; i++)
  {
    for (int j=0; j<numBox; j++)
    {
      stroke(250-(i+j)*30, (0*i+j)*30, (i+j)*20);
      rect(rectW0/2+rectW0*i, rectW0/2+rectW0*j, rectW-k, rectW-k);
      k=k-1;
    } //close inner for
  } //close outer for
  
  rectW = sin(frameCount*.008)*width/2.2; 
}

[Week 2] Recreating computer art

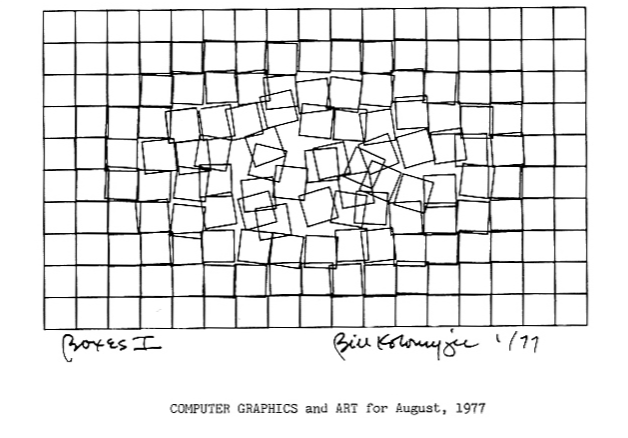
The assignment for week 2 involves using for() and/or while() loops to create a work of art. I looked through the sources of computer arts and they are very fascinating. I particularly like this following art and decided to try and recreate it with Processing.

My workflow for this piece is as following:

  1. Create the basic construction of grid-like squares (which makes good use of loops)
  2. Add interaction by randomizing the movement of the squares according to mouse movement
  3. Extra: experiment with colors

My final product is the following and the code can be found at the end of this post:

Basic construction

The grid-like foundation of the art is pretty straightforward and problem-free. I use two nested for() loops to draw the rectangles.

Interactive movement

To create the randomized movements of the squares, I make extensive use of the random() function.

Randomizing the shifting of the squares (moving slightly in the horizontal and vertical direction) is also straightforward, but I ran into an issue when trying to slightly rotate the squares. The rotate() function is usually used in tandem with translate() because the shape will be rotated relative to the origin. The problem is that translate() only gets reset after each loop of draw(), so when I want to rotate all of the squares within a single draw() loop, the positions of the squares are mixed up because they get translated further and further from the initial origin.

I found that a good solution to this issue is to use the pair of functions pushMatrix() and popMatrix(). Using these two functions to enclose translate() and rotate() ensures that the coordinate system is restored to its original state before the next square is drawn, making sure all the squares are correctly positioned and rotated.

I also want to have some user interaction with the art so that as the user moves the mouse around the canvas, the closest squares to the mouse will have greatest movements. For this, I use the dist() function to calculate how far a square is from the current mouse position and give each square a distFactor based on the calculated distance. This distFactor will then be used to calculate rotatingFactor and movingFactors to decide the movements of the squares. With this, the piece of art is finished.

Extra: Coloring

I add an extra function to the code so that when the user clicks on the canvas, coloring mode will be on and instead of black border with no fill, the squares will have no border and random colors. The coloring mode part has nothing to do with recreating the original art; I just want to experiment around with random() and colors.

Code

int numOfSquares = 15;
int mouseRadius = 3;
int squareSize;
float movingRange;
boolean colorOn = false;

void setup() {
  frameRate(10);

  size(900, 900);
  squareSize = width/numOfSquares;
  movingRange = squareSize*.1;
  rectMode(CENTER);
}

void draw() {
  background(255);

  for (int i=squareSize/2; i<width; i+=squareSize) {
    for (int j=squareSize/2; j<height; j+=squareSize) {
      float distance = dist(i, j, mouseX, mouseY);
      float distFactor = 1/distance * 100;
      if (distance > squareSize*mouseRadius) {
        distFactor *= .01;
      }
      float rotatingFactor = random(-PI/10, PI/10) * distFactor;
      float movingFactorX = random(-movingRange, movingRange) * distFactor;
      float movingFactorY = random(-movingRange, movingRange) * distFactor;
      
      if (colorOn) {
        noStroke();
        color squareColor = color(random(0, 255), random(0, 255), random(0, 255));
        float alpha = map(distance, 0, width, 0, 255/2);
        fill(squareColor, alpha + random(-10, 10));
      }
      else {
        noFill();
        stroke(0);
      }
      pushMatrix();
      translate(i+movingFactorX, j+movingFactorY);
      rotate(rotatingFactor);
      rect(0, 0, squareSize, squareSize);
      popMatrix();
    }
  }
}

void mouseClicked() {
  colorOn = !colorOn;
}


Cole Beasley – Loop Art

Overview:

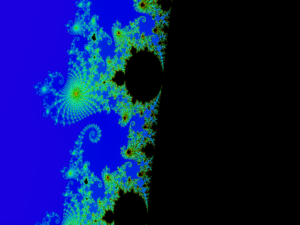
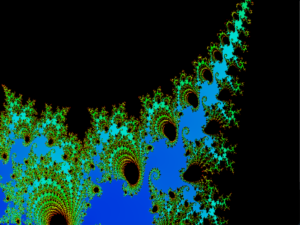
This week’s task was to make some sort of artwork from the types of loops we had learned in class this week (for() and while()). To give us some inspiration, we were given some magazines on early forms of computer generated art coming out of the 1980s and 90s. Google searches yielded lots of examples to choose from in addition. Many were reminiscent of old Windows screen savers, and often featured bright colors. My favorite of several were the fractals that came up. Some were fairly simple, and others were complex using tricky mathematical formulas. I decided to go ahead and try one that pushed me to understand hard mathematical concepts such as imaginary numbers, and see if I could translate to Java.

Mandelbrot Set:

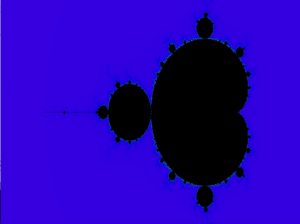
The Mandelbrot Set is a set of complex numbers that for each complex number, ‘c‘, does not diverge when the value for ‘z’ is iterated in the below formula.

This math was tricky for me as it involved the revolution around a point in a complex plane. Luckily this topic is well documented and this page had great explanations and even a sudocode algorithm to get me started in plotting the phenomena.

I was able to convert the code into similar Java code, and then make changes so that processing could do what it needed.

Problems:

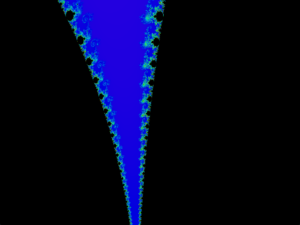
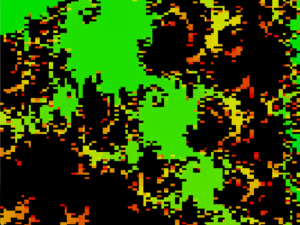
Besides complex math formulas, some problems that were tricky to overcome included converting values to colors on a scale to iterate through with a loop, and a self created extra challenge of animating a zoom functionality to better demonstrate the fractal’s impressive effects.

To translate the value of the algorithm to color in processing, I had to use map() to take a wide range of numbers and make it understandable to a color value. I also decided to use HSB color as it would allow me to use a single variable that could be iterated for hue, rather than three separate values for RGB. This was new to me and took some experimentation to get right.

For zooming, it took me a long time to figure out how to scale to a certain coordinate in the plane, while not distorting in the width or height directions. Eventually I derived the formula on line 38,39 of the code below which involves taking the width and height times a zoom factor with the correct offsets.

Code:

The code for this took several attempts to get right. The initial variables defined are mostly for the animation of the zoom, but also include adjustable parameters for the formulas. I utilized the timeout algorithm which provides a good approximation if a number is or is not in the set. This value could be adjusted to make to the depiction more detailed, at the expense of computational difficulty. I then initialize a workspace with a 1.333 aspect ratio, and set the color mode to HSB for the reasons described previously. I then begin looping. Using nested for loops I iterate over each pixel in the graphic and determine its timeout value using the above mathematical process in a loop. With the timeout value ranging from 0-timeout max value, with 1000 being the one used in this instance, these values need to map to a hue. Since anything above the max timeout value is considered part of the set, they are assigned black, otherwise the value is mapped reversely onto a range from red to violet.

//PSEUDOCODE TAKEN FROM WIKIPEDIA ESCAPE TIME ALGO
//x0 := scaled x coordinate of pixel (scaled to lie in the Mandelbrot X scale (-2.5, 1))
//y0 := scaled y coordinate of pixel (scaled to lie in the Mandelbrot Y scale (-1, 1))
//x := 0.0
//y := 0.0
//iteration := 0
//max_iteration := 1000
//while (x*x + y*y ≤ 2*2 AND iteration < max_iteration) do
//  xtemp := x*x - y*y + x0
//  y := 2*x*y + y0
//  x := xtemp
//  iteration := iteration + 1
    
//color := palette[iteration]
//plot(Px, Py, color)


int WIDTH;
int HEIGHT;
int maxIteration = 10000;  //level of detail
float zoom = 0;  //Can't zoom much past 100,000
float xOffset = 0.004; //(-1 - 1) (-1 zooms in on far left edge, 1 on far right)
float yOffset = -.1; //(-1 - 1) (-1 zooms in on top edge, 1 on bottom)   (0.004, -0.1 is an interesting cord set)

void setup() {
  size(1066, 800);
  WIDTH = width;
  HEIGHT = height;
  colorMode(HSB, 360);
}

void draw() {
  background(0);
  for (int i = 0; i < WIDTH; i++) {
    for (int j = 0; j < HEIGHT; j++) {
      //float x0 = map (i, (zoom*WIDTH/2), (WIDTH-((WIDTH/2)*zoom)), -2.5, 1);
      //float y0 = map (j, (zoom*HEIGHT/2), (HEIGHT-((HEIGHT/2)*zoom)), -1, 1);
      float x0 = map (i, (-WIDTH*zoom)-(xOffset*zoom*WIDTH), (zoom*WIDTH)+WIDTH-(xOffset*zoom*WIDTH), -2.5, 1);
      float y0 = map (j, (-HEIGHT*zoom)-(yOffset*zoom*HEIGHT), (zoom*HEIGHT)+HEIGHT-(yOffset*zoom*HEIGHT), -1, 1);
      float x = 0.0;
      float y = 0.0;
      int iteration = 0;
      while(x*x + y*y <= 2*2 && iteration < maxIteration){
        float xtemp = x*x - y*y + x0;
        y = 2*x*y + y0;
        x = xtemp;
        iteration++;
      }
      if(iteration == maxIteration){
        stroke(0, 0, 0);
      }
      else{
        float hue = map(iteration, maxIteration, 0, 0, 255);
        stroke(hue, 360, 360);
      }
      point(i, j);
    }
  }
  if(zoom == 100000){
    noLoop();
  }
  if(zoom == 0){
    zoom++;
  }
  //println("ran");
  zoom = zoom * 10;
}

Results:

I am happy with how these images came out. It took a lot of time and tweaking of the code but the results were as I was hoping. I played with certain variables such as level of detail at higher levels, and quickly ran out of memory to work with. At high details the variables for the math become so large that they can’t really be stored or have no rounding errors.

Other Recursion Tests:

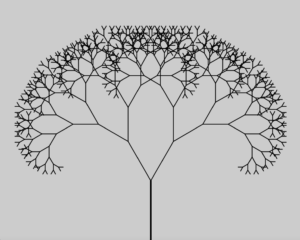
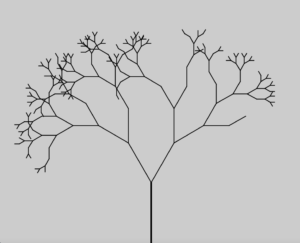
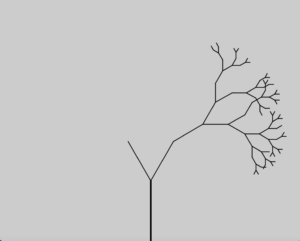
I enjoyed making this example of a fractal and went forward trying more simple images using polar coordinates and recursion. This one did not use any loops however so it does not count directly for this assignment, just a fun example. I played with some randomization to try and make it look more realistic too.


//Recursion parameters
int maxIterations = 9; //Number of iterations

//Tree parameters
int angle = 30; //Angle the branches spread;
float treeStroke = 5; //Starting stroke line
float treeStrokeShrink = 0.5; //Fraction lost every time
float percentDestroy = 1.0; //0-1 how much shorter the branches get with each iteration, 1 is 100%, 0 is no chance
float shorteningPercent = 0.75; // 0-1, How much shorter the branches get
float branchLength;

//Drawing variables

void setup() {
  size(1000, 800);
  branchLength = height/4;
}

void draw() {
  drawTree(0, maxIterations, width/2, height, branchLength, 270, treeStroke);
}

// Iteration that its on, max iterations, x, y, length of line, stroke size
void drawTree(int i, int m, float x, float y, float l, float o, float s){
  translate(x,y);
  
  // Convert polar to cartesian
  float x1 = l * cos(radians(o));
  float y1 = l * sin(radians(o));
  
  // Draw the line and set stroke
  strokeWeight(s);
  line(0, 0, x1, y1);
  
  //Recursion
  if(i < m){
    float randOne = random(0,1);
    if(randOne < percentDestroy){
      pushMatrix();
      drawTree(i + 1, m, x1, y1, l*shorteningPercent, o+angle, treeStroke*treeStrokeShrink);
      popMatrix();
    }
    float randTwo = random(0,1);
    if(randTwo < percentDestroy){
      drawTree(i + 1, m, x1, y1, l*shorteningPercent, o-angle, treeStroke*treeStrokeShrink);
    }
  }
  noLoop();
}


Conclussions:

I enjoyed this weeks tasks and pushed myself to try something new to me. It made the assignment more challenging and more rewarding when it finally worked out the way I was hoping. The variables and iterative programming allowed me tot week the code and write minimal amounts once I had an algorithm that worked.


Week 2: Using For Loops

This week, I’ve been feeling a lot of chaotic energy with balancing my professional commitments, class deadlines, friends, capstone, and job interviews. Thus, I wanted my sketch to reflect the seemingly segmented aspects of my life going a bit berserk.

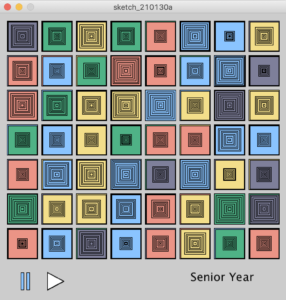
Processing Sketch of colored squares within squares tiled across sketch

Because the squares ended up moving so quickly and brightly, I wanted to make the default option be a paused version of a sketch with the option to play in case the quick movements bothered anyone. Thus, I ended up adding a pause and play button. I had considered just using a space bar to toggle between pause and play, but wanted to use more visual instructions.

Video of Sketch (Warning: Bright Flashing Lights)

My code is pretty straightforward. I created a function that created each “tile.” I didn’t want each tile to be uniform so I randomly changed the color and number of internal squares when drawing each tile. From there, I simply used a double for loop to create the grid of tiles.

I used an array of colors to store my palette which I created using coolors.co (my go to palette inspiration site).

Something I messed up and fixed: originally, I created a String array, having the hex colors in strings. However, this was not compatible with the fill method so after looking at the Processing documentation, I realized that color was a data type in Processing and was able to create an array using the color primitive.

If I were to repeat this sketch creation again, I would try to avoid having so many nested for loops and do the mousePressed function in a less hard-coded way.

Here’s my code!

//color palette
color[] colors = {#8ac4ff, #7e7f9a, #4FB286, #F3DE8A, #Eb9486};
boolean pause = true;

void setup() {
  size(500, 500);
  rectMode(CENTER);
  //play button
  triangle(width/6, height -50, width/6,  height - 20, width/4.5, height-35);
  fill(colors[0]);
  //pause button
  rect(width/10, height - 35, 5, 30);
  rect(width/10 - 10, height - 35, 5, 30);
  //title
  textSize(20);
  fill(0);
  text("Senior Year", width/3 * 2, height - 35);
}

void draw() {
  //looping through width
  for (int i = 40; i < width; i += 60) {
    //looping through height
    for (int j = 40; j < height- 50; j += 60) {
      drawSquare(i, j);
    }
  }
  //sketch starts paused
  if(pause) {
    noLoop();
  }
}

 void drawSquare(int x,int y) {
  int w = 5;
  //changes number of internal squares within a tile
  float count = random(5,9);
  //picks a color randomly from palette
  color c = colors[int(random(colors.length))];
  fill(c);
  rect(x,y, 10 * w, 10 * w);
  for (float i = count; i > 0; i--) {
    fill(c);
    rect(x,y, i * (count/1.5), i* (count/1.5));
  }
}

void mouseClicked() {
  //if pause button is clicked, toggle button colors and stop loop
  if(mouseX < (width/10 + 5) && mouseX >= (width/10 -15) && mouseY > height - 50 && mouseY <= height -20) {
    pause = true;
    fill(255);
    triangle(width/6, height -50, width/6,  height - 20, width/4.5, height-35);
    fill(colors[0]);
    rect(width/10, height - 35, 5, 30);
    rect(width/10 - 10, height - 35, 5, 30);
    noLoop();
    //if play button is clicked, toggle button colors and start loop

  } else if (mouseX > width/6 && mouseX <= width/4.5 && mouseY > height - 50 && mouseY <= height -20) {
    pause = false;
    loop();
    fill(colors[0]);
    triangle(width/6, height -50, width/6,  height - 20, width/4.5, height-35);
    fill(255);
    rect(width/10, height - 35, 5, 30);
    rect(width/10 - 10, height - 35, 5, 30);
  }
}


How to add code to your documentation

Click the <> button to add code to your post:

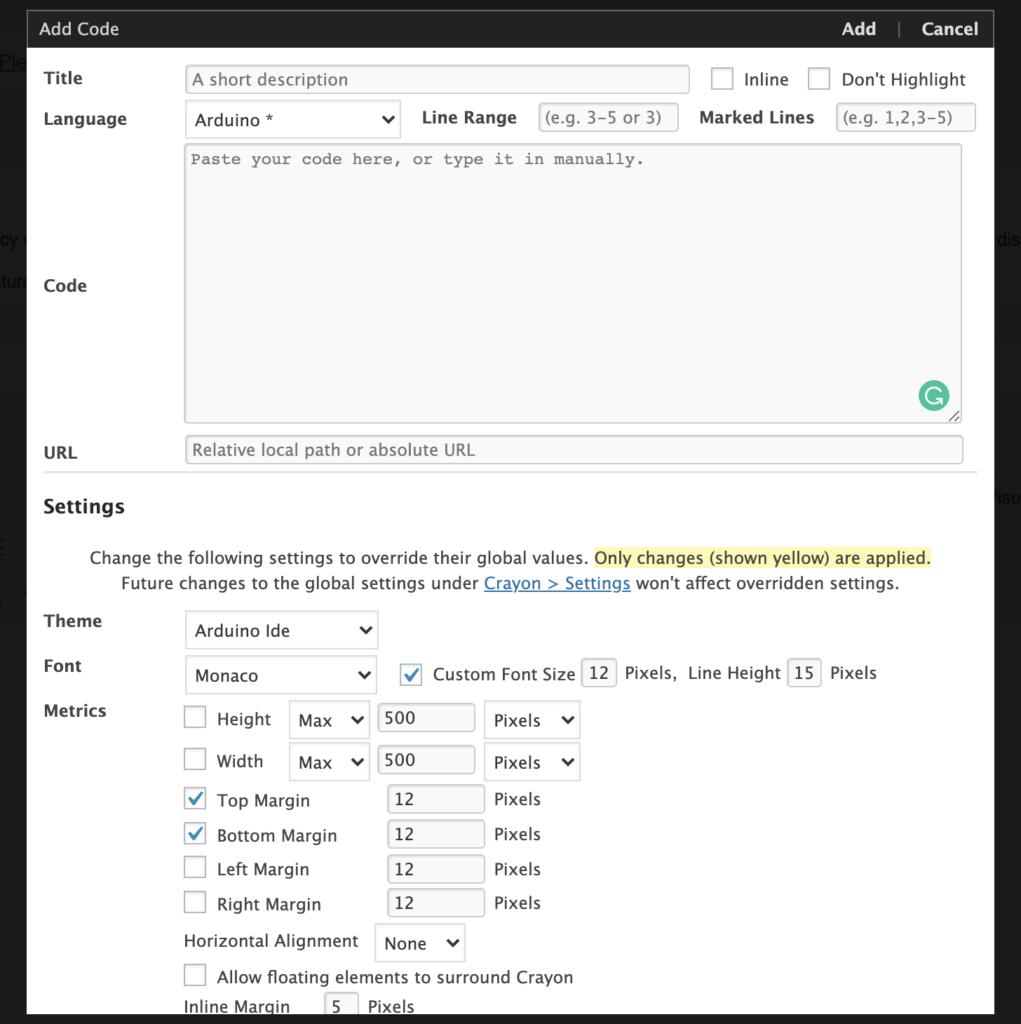
You’ll then see this screen where you can paste your code in:

For Processing code change the language to Java:

Once you’re done click Add and you’re all set. Easy!

int x;
int y;
int backgroundColor = 255;
float r = 255;
float g = 0;
float b = 0;
int rectWidth = 100;
int rectHeight = 100;

void setup() {
  size(640, 480);
  x = width/2;
  y = height/2;
}

void draw() {
  background(backgroundColor);
  noStroke();
  fill(r, g, b);
  rect(x, y, rectWidth, rectHeight);
}

void mousePressed() {
  if (mouseX > x && mouseX < x+rectWidth && mouseY > y && mouseY < y+rectHeight) {
    r = random(255);
    g = random(255);
    b = random(255);
  }
}

void keyPressed() {
  if (key=='b') {
    backgroundColor = 255 - backgroundColor;
  }
}


Github for the class

https://github.com/aaronsherwood/introduction_interactive_media

Git is a powerful way to manage code, and we’ll use only a tiny bit of its power to update the weekly examples folder on our computers. It’s super easy.

Usage

Initialization (you only need to do these steps once):

If you haven’t installed git on your computer, install git on your computer (or optionally here’s a different set of instructions).

Change directory (cd on the command line) into the location where you want the class repository to live.

Clone the repo to your computer: git clone https://github.com/aaronsherwood/introduction_interactive_media.git

Regular Use:

If working off any example, copy that example somewhere outside of the repo to mitigate any merge conflicts later on.

To get new examples: git pull

If you’re unsure if you’ve been working in examples directly in the repo you can stash everything before pulling:

  • git stash
  • git pull

To get stashed code back: git stash pop

To see what’s been stashed: git stash list

To remove all stashes: git stash clear

To reset everything to be just like the repo online:

  • git fetch origin
  • git reset --hard origin/master

1st week – shae not shae


Shaikha Alshehhi

Professor Aaron Sherwood

Assignment 1: Self-Portrait

January 25, 2021

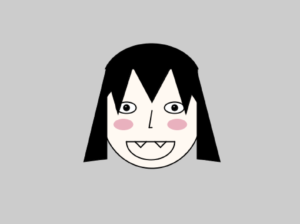
Masterpiece (not really) :


Objective:

1. To practice the usage of basic processing functions.

2. To explore the functionalities that processing offers

3. To have fun!


What I did: 

The plan was to draw a vampire using the tools learned in class. I wanted to take a step further and use functions we did not take. I used the arc function for the mouth and hair. The ellipse functions helped with the eyes, face and blush. I used the circle function for the pupils and the triangle function for the hair. I tried putting on eyelashes, but I was not able to work the eyelashes of the left eye so I erased it :'(


Code:

size (640, 480);

//background(0, 0, 119);

//face shape
fill(255, 249, 242);
strokeWeight(2);
ellipse(width/2, (height/2)-16, 175, 187);


//left eye
fill(255);
ellipse(275, 210, 35, 20);
fill(0);
circle(275, 210, 10);
fill(255);
circle(274,208, 4);


//right eye
fill(255);
ellipse(360, 210, 35, 20);
fill(0);
circle(360, 210, 10);
fill(255);
circle(359,208, 4);

//hair
fill(0);
triangle(280, 125, 360, 125, 320, 200);
triangle(285, 140, 240, 150, 260, 220);
triangle(240, 140, 240, 300, 200, 305);

triangle(355, 140, 400, 150, 380, 220);
triangle(400, 150, 400, 300, 440, 305);


stroke(0);
fill(0);
arc(320, 165, 173, 135, radians(200), radians(340), CHORD);


triangle(240, 140, 280, 140, 240, 190);
triangle(400, 140, 360, 140, 400, 200);

//nose
line(width/2, 215, (width/2)-5, 245);
line((width/2)-5, 245, width/2, 245);


//teeth
line(290, 270, 300, 280);
line(300, 280, 310, 270);

line(345, 270, 335, 280);
line(335, 280, 325, 270);

//mouth
fill(0,0);
arc(318, 270, 85, 65, 0, PI, 30);
line(275, 270, 360, 270);


//blush right
noStroke();
fill(200, 67, 110, 100);
ellipse(270, 240, 35, 20);
//blush left
noStroke();
fill(200, 67, 110, 100);
ellipse(365, 240, 35, 20);


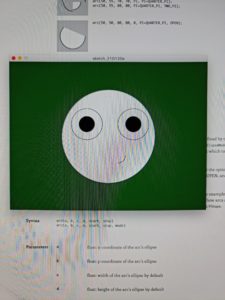
Green

void setup() {
  size(640, 480);
};

void draw () {

  background(60, 100, 55);

int MainFaceX = width/2;
int MainFaceY = height/2;
int FaceSize = 300;

  //mainhead
  fill(255);
  ellipse(MainFaceX, MainFaceY, FaceSize, FaceSize);

  //lefteyeball
  fill(255);
  ellipse(FaceSize-50, MainFaceY-40, FaceSize-200, FaceSize-200);

  //right eyeball
  fill(255);
  ellipse(MainFaceX+80, MainFaceY-40, FaceSize-200, FaceSize-200);

  //mouth
  noFill();
  arc(350, 300, 50, 50, 0, HALF_PI);

  //pupil right
  fill(0);
  ellipse(MainFaceX-70, MainFaceY-40, FaceSize-250, FaceSize-250);

  //pupil left
  fill(0);
  ellipse(MainFaceX+80, MainFaceY-40, FaceSize-250, FaceSize-250);
};

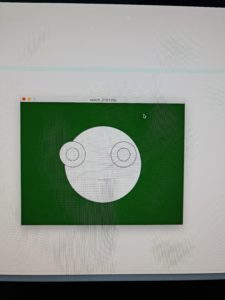
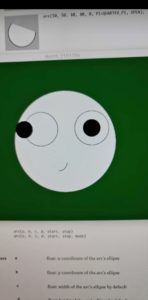
Spend a lot of time to remember which part is what variable, what it affects and how to do properly the line and coordination of everything.

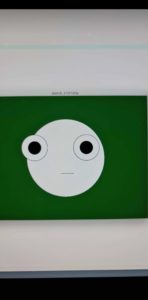
the version I liked the best


#when you have to look discreetly at someone

confusing code:

  • deletes the line, eyeballs and mouth

smooth();
noStroke();
fill(255,0,0);
beginShape();
vertex(50, 15);
bezierVertex(50, -5, 90, 5, 50, 40);
vertex(50, 15);
bezierVertex(50, -5, 10, 5, 50, 40);
endShape();

https://www.processing.org/discourse/beta/num_1246205739.html - credit


Assignment 1, self-portrait

Inspiration

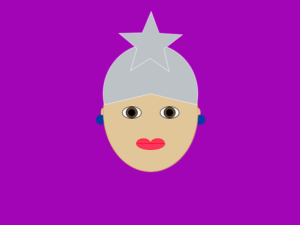
The idea of this assignment was to understand how to use basic shapes commands and make a self-portrait. It means a shape associated with the face or body in general. This little project has enabled me to combain reality and dream. It was inspired by famous artist Verka Serduchka, a Ukrainian comedian, pop and dance singer. This person represented Ukraine in the Eurovision Song Contest 2007 as Verka Serduchka and finished in second place. The reason of my inspiration is the hat Verka uses on her concerts. I decided to visualize myself in this hat and style as flashback from childhood.

Code and Process

Firstly, I had different ideas, but couldn’t give them life due to the limits of straight shapes. However, I tried to explore and find something special to alive crazy image from my head.  The assignment does not make us animate the picture, but in this case star makes the hole atmosphere of holidays, fun and joy. I added comments to easily navigate the code.

 New facts

To be honest, I didn’t know much about face proportions. After some research I got a lot of new information about golden ratio for face and some other applications to make picture more pleasant. For example, eyes level is the center of the head, length of the face equals the length of three noses. or length of the eye is width of the face divided by 5.

void setup() {
  size(640, 480);
  }
void draw() {
 background(162, 5, 182);
 int faceCenterX = width/2;
 int faceCenterY = height/2;
 int faceLenX = 200;
 int faceLenY = 250;
  //ears
stroke(214, 158, 81);
fill(225, 198, 153);
ellipse(faceCenterX-faceLenX/2, faceCenterY, faceLenX/20, faceLenX/10);
ellipse(faceCenterX+100, faceCenterY, faceLenX/20, faceLenX/10);
fill(4,60, 164);
stroke(4,60, 164);
circle(faceCenterX-105, faceCenterY+15, faceLenX/10);
circle(faceCenterX+105, faceCenterY+15, faceLenX/10);
  //face
stroke(214, 158, 81);
fill(225, 198, 153);
ellipse(faceCenterX, faceCenterY, faceLenX, faceLenY);
  //eyes 
fill(250);
stroke(1, 2, 3);
ellipse(faceCenterX-faceLenX/5, faceCenterY, faceLenX/5, faceLenY/10);
ellipse(faceCenterX+faceLenX/5, faceCenterY, faceLenX/5, faceLenY/10);
fill(109,77, 48);
ellipse(faceCenterX-faceLenX/5, faceCenterY, faceLenX*.12, faceLenY*.09);
ellipse(faceCenterX+faceLenX/5, faceCenterY, faceLenX*.12, faceLenY*.09);
fill(1,2,3);
ellipse(faceCenterX-faceLenX/5, faceCenterY, faceLenX*.07, faceLenX*.07);
ellipse(faceCenterX+faceLenX/5, faceCenterY, faceLenX*.07, faceLenX*.07);
 // mouth
fill(254, 51, 95);
stroke(255, 0, 0);
arc(faceCenterX-15, faceCenterY+65, 29, faceLenX/10, PI, TWO_PI, OPEN);
arc(faceCenterX+15, faceCenterY+65, 29, faceLenX/10, PI, TWO_PI, OPEN);
arc(faceCenterX, faceCenterY+65, 60, 27, 0, 3.14, CHORD);
  //hat
stroke(1, 2, 3);
fill(189, 194, 199);
arc(faceCenterX, faceCenterY-faceLenX/5, faceLenX, 210, PI-PI/14, TWO_PI+PI/14, PIE);
 //Micro
fill(1,2,3);
rect(width*.73, height*.5, 26, 90);
fill(189, 194, 199);
circle( width*.75, height*.5, 40); 
 
  //star  
  pushMatrix();
  translate(width*0.5, height*0.20);
  rotate(frameCount / -100.0);
  star(0, 0, 30, 70, 5); 
  popMatrix();
}

void star(float x, float y, float radius1, float radius2, int npoints) {
  float angle = TWO_PI / npoints;
  float halfAngle = angle/2.0;
  beginShape();
  for (float a = 0; a < TWO_PI; a += angle) {
    float sx = x + cos(a) * radius2;
    float sy = y + sin(a) * radius2;
    vertex(sx, sy);
    sx = x + cos(a+halfAngle) * radius1;
    sy = y + sin(a+halfAngle) * radius1;
    vertex(sx, sy);
  }
  endShape(CLOSE);
}


Conclusion

I still have a lot of thoughts how to improve this project, getting new skills. Hope to explore further and  get better results. This assignment helped me realize how much time it takes to create simple images (a lot) and be familiar with size and numbers and how they move objects.

self-portrait [week 1]

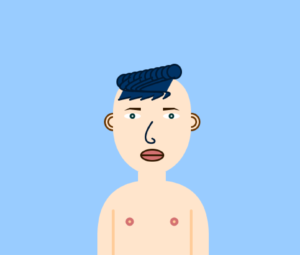
Before starting to code and draw geometrical shapes for my portrait I had so many crazy ideas to make the portrait abstract and artsy. I literally spent an hour trying to find some ideas from artists like Matisse, Picasso, Paul Klee. But once I started searching about many ways how to do curves and went to processing reference, I gave up my hopes on pursuing my initial idea. Not gonna lie, I’m deep down disappointed that I played safe and went with the conventional style of writing a self-portrait.

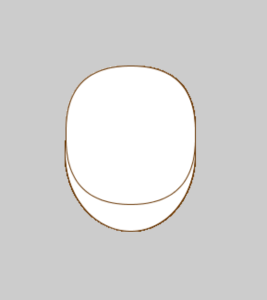
I started off coding the head shape which could potentially resemble mine. To do that, I used a combination of ellipse and rectangle with rounded angles. To escape those two figures overlapping, I got rid of the stroke line and filled them with one color.

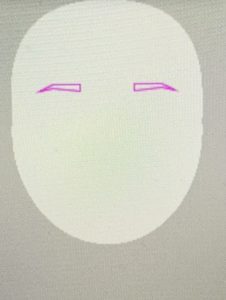
The thing that took most of my time and effort was the eyebrows. It was a complex process of trials and errors where I used different vertexes to recreate the eyebrows. I had to use beginShape() and endShape() functions to make the vertex complete, and by putting CLOSE inside the endShape i wrapped the whole figure and connected the points together

To make a nose shape I had to use a bezier curve and learn the logistics behind creating one. Basically what I did to learn how to do it was to put random numbers as arguments first and then change the arguments to mouseX and mouseY respectively and wherever my cursor landed, I imagined the scape in mind and put it according to coordinates.

int faceCenterX= width/2;
int faceCenterY= height/2;
int faceSize= 100; //global variables

void setup() { //for smth static, initiliazing global variables 

  size(640, 460);
  faceCenterX= width/2;
  faceCenterY= height/2;
  faceSize= 150; //global variables
}
void draw() { //looping many times drawing over and over
  background(153,204,255);
  stroke(102,51,0);

  
  fill(255,229,204);
  circle(390,220,30);
  circle(390,220,18);//left ear
  circle(250,220,30);
  circle(250,220,18);//right ear
  
  noStroke();
  rect(295,310,50,50);
  rect(222,325,200,300,150);//body
  
  noStroke();
  ellipse(faceCenterX, faceCenterY, faceSize/1.07, faceSize*1.13);
  rect(faceCenterX-70, faceCenterY-95, faceSize/1.07, faceSize,100);//last argument gives round corners
   //head structure
  
  noStroke();
  fill(212,113,113);
  circle(280,400,15);
  circle(360,400,15);//breast
  fill(255,204,153);
  circle(280,400,5);
  circle(360,400,5);//breast inner circles
  
  stroke(255,204,153);
  strokeWeight(5);
  
  line(250,380,250,460);
  line(390,380,390,460);//armpits
  
  fill(212,113,113);
  strokeWeight(3);
  stroke(51,25,0);
  ellipse(faceCenterX, faceCenterY+50, 40,20);
  stroke(51,25,0);
  line(faceCenterX-20, faceCenterY+50, faceCenterX+20, faceCenterY+50);//lips
 
  noStroke();
  fill(51,25,0);
  beginShape();
  vertex(300, 200);
  vertex(300,195);
  vertex(280,195);
  vertex(270,200);
  vertex(280,198);
  endShape(CLOSE); //eyebrow left
  
  noStroke();
  fill(51,25,0);
  beginShape();
  vertex(340, 200);
  vertex(340,195);
  vertex(360,195);
  vertex(370,200);
  vertex(360,198);
  endShape(CLOSE); //eyebrow right
  
  fill(255);
  ellipse(285,210, 30,10);
  fill(0,51,51);
  circle(285,210,10);
  fill(255);
  circle(285,210,3);//eye left

  fill(255);
  ellipse(355,210, 30,10);
  fill(0,51,51);
  circle(355,210,10);
  fill(255);
  circle(355,210,3);//eye right
  fill(255,229,204);
  stroke(0,25,51);
  bezier(faceCenterX,250,340,260,285,270,faceCenterX,220);//nose
  
 
  fill(0,51,102);
  circle(270,148,25);
  circle(280,146,25);
  circle(290,144,25);
  circle(300,142,25);
  circle(310,140,25);
  circle(320,138,25);
  circle(330,136,25);
  circle(340,134,25);
  circle(350,132,25);
  circle(360,130,25);//hair structure
  
  
  bezier(faceCenterX-60,180,400,150,204,184,faceCenterX-40,140);
  bezier(faceCenterX-40,180,400,150,204,184,faceCenterX-20,140);
  bezier(faceCenterX-20,180,400,150,204,184,faceCenterX,140);
  bezier(faceCenterX,180,400,150,204,184,faceCenterX+20,140);
  bezier(faceCenterX+20,178,400,150,204,184,faceCenterX+40,140); //hair waves


}

I know that it’s our very first project in a making, so I’m very excited to learn more on how to make my 2D portrait more interactive and dynamic. I might try doing portrait and update the post once I’m done!!!💖