
- This week I thought about how to incorporate the physical components first into Arduino so that I can get the mechanisms working first before I go into creating a more artistic design.
- I plan to create a keyboard like design of aluminum tape keys that resemble the piano keys. Each key is a capacitative sensor that also trigger a different musical note.
- At the moment when the key is pressed, the duration of how long it is pressed will display an image on screen with the respective sound(synthesizer scale). Each key acts like a switch to activate the image.
- For now the images on screen are simple to make sure it works first.
- The composition of the visuals is the next part. Despite this being Phase 2 ,I managed to experiment on processing the different effects I can achieve with sound and shapes. These aren’t guaranteed to be used in the final version but it allowed me to familiarize myself with the minim library in processing.
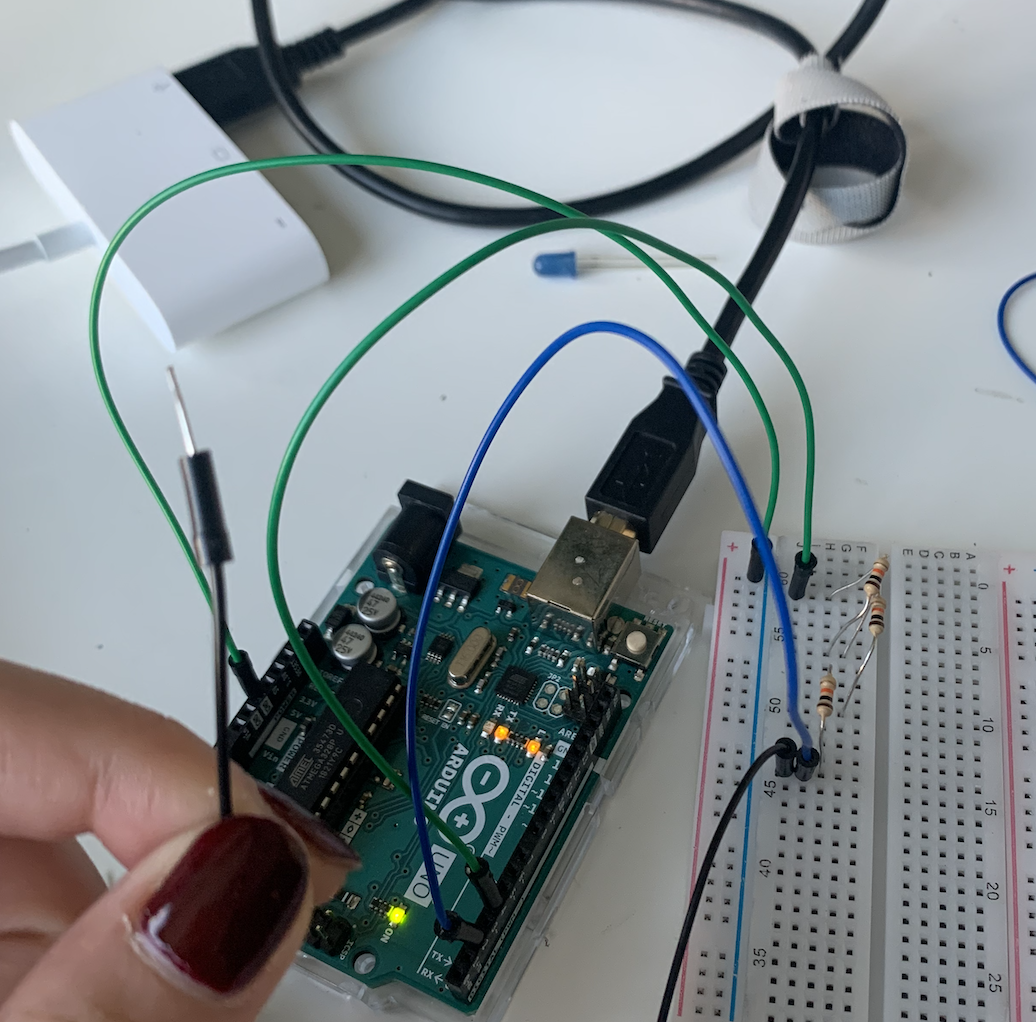
Troubles creating the capacitative sensor:
This was arguably a tricky part to fix because of the limited number of Ohms in our resistor, in order for a capacitive sensor to work you need a higher number, so after trial and error, I lined up the resistor in a series form and finally could get a reading from the serial port.
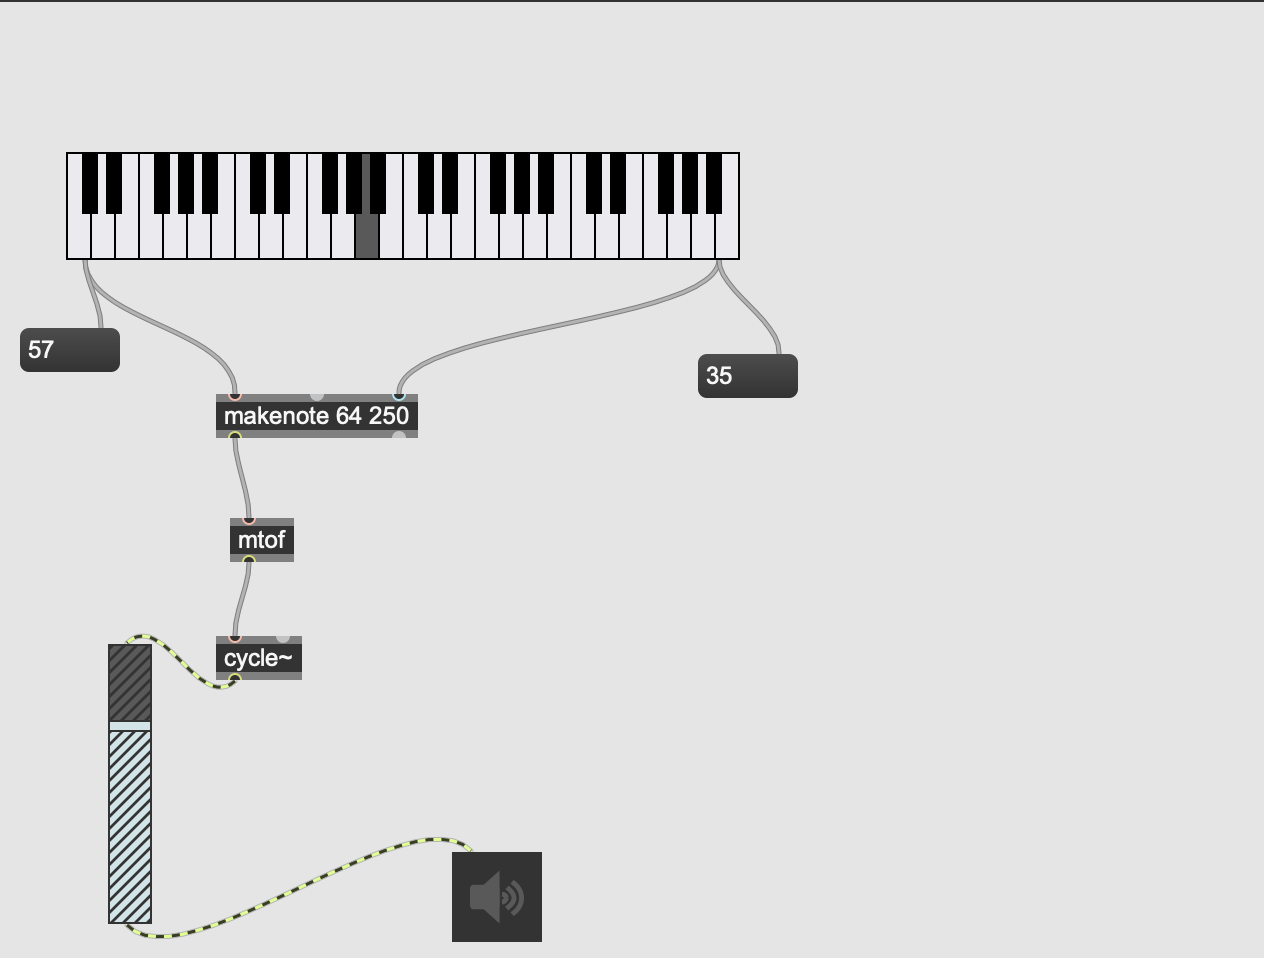
Screenshot from Max msp real time audio software that I am considering using with processing as a library exists for it. In this patcher image I created a synth with a virtual keyboard.
#include <CapacitiveSensor.h>

/*
   CapitiveSense Library Demo Sketch
   Paul Badger 2008
   Uses a high value resistor e.g. 10M between send pin and receive pin
   Resistor effects sensitivity, experiment with values, 50K - 50M. Larger resistor values yield larger sensor values.
   Receive pin is the sensor pin - try different amounts of foil/metal on this pin
*/


CapacitiveSensor   cs_4_2 = CapacitiveSensor(4, 2); // 10M resistor between pins 4 & 2, pin 2 is sensor pin, add a wire and or foil if desired

int ledPin = 12;
void setup()
{
  cs_4_2.set_CS_AutocaL_Millis(0xFFFFFFFF);
 // turn off autocalibrate on channel 1 - just as an example
  Serial.begin(9600);

}

void loop()
{

  long start = millis();
  long total1 =  cs_4_2.capacitiveSensor(30);


  //    Serial.print(millis() - start);        // check on performance in milliseconds
  //    Serial.print("\t");                    // tab character for debug windown spacing

  Serial.println(total1);                  // print sensor output 1

  //    Serial.print("\t");

  //  delay(10);
  // if (total1 > 0) {
  //    digitalWrite(ledPin, HIGH);
  //  }
  //  else {
  //    digitalWrite(ledPin, LOW);
  //  } worked to turn LED on

  // arbitrary delay to limit data to serial port
}
import processing.sound.*;
import ddf.minim.*;
Minim minim;
AudioPlayer song;
int spacing = 100;
import processing.serial.*;
Serial myPort;
int signal=0;
int border = spacing*2;
int amplification = 50;
int y = spacing;
float ySteps;
void setup() {
  printArray(Serial.list());
  String portname=Serial.list()[4];
  println(portname);
  myPort = new Serial(this, portname, 9600);
  size(800, 800);
  background(255);
  strokeWeight(1);
  stroke(0);
  noFill();
  minim = new Minim(this);
  song = minim.loadFile("song.mp3");
}
void draw() {
  if (signal>0) {
    song.play();
    float amplitude = song.mix.level();
    noStroke();
    fill(random(255), amplitude*155);
    int x = int(map(song.position(), 0, song.length(), 0, width/2));
    float frequency = song.mix.get(int(x))*spacing*amplification;
    ellipse(width/2, height/2, frequency, frequency);
  }
}

void serialEvent(Serial myPort) {
  signal=myPort.read();
}