Midterm Project

Concept:

My midterm project sheds light on the issue of space debris and how there is a lot of space junk resulting from the satellites and other objects in space that are no longer functioning. It is a very important issue as we need to take care of outer space and keep it sustainable as we are using it for so many different aspects such as GPS, weather forecasting, and other important technologies.

How to play:

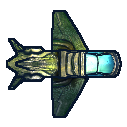
To play this game, you can control the spaceship with your head movement to shift it either up or down and catch as many space debris as possible. Make sure not to hit any dwarf planets coming your way.

https://editor.p5js.org/alreem/full/aXQa2BjsH

Challenges & solutions:

My biggest struggle for this was having to mirror the createCapture, which eventually worked but I ended up removing it as it affected other parts of the code and would lag very much if it is played as multiplayer. I fixed this problem by removing the control of the x-axis (right or left movement) and keeping the direction moving up and down only. Even if I removed that aspect, it still seems as if the user is moving sideways due to the moving background.

for(let i=0; i<people.length; i++){
    let pose = people[i].pose;
    
    let nose = pose.nose;
  
    image (imgss, width/2,nose.y, 30, 30); 
    
    
    if(debris.contains(nose.x, nose.y)) {
      debris.pop();
      score++; }
    if(planet.contains(nose.x, nose.y)) {
      gameState = 'end';
    }
  }

Overall logic:

For the game itself, I mainly used OOP to control the planet and the debris. The parameters included the size, speed, x and y position, collision detection, and moving the object. For the poseNet, I used it to detect the person’s nose and move the spaceship accordingly.

Improvements:

For future improvements, I would want to let the user move in all four directions and have it as a multiplayer game where more people can join. I would also want the game to keep moving faster as time goes by.

References:

Music: https://www.youtube.com/watch?v=AzL10r8AeQ8

Photos: Google search

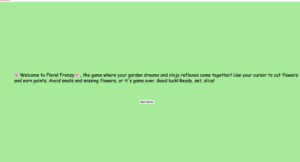
Intro page & Instructions:

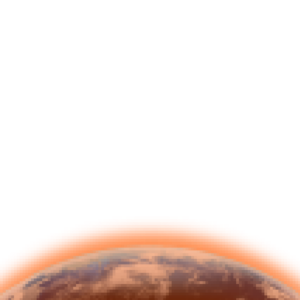
Dwarf planet (what you have to avoid):

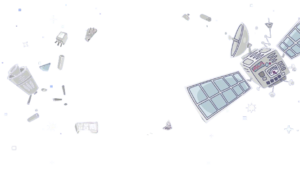
Space debris (what you have to collect):

Final Page (where your score is shown):

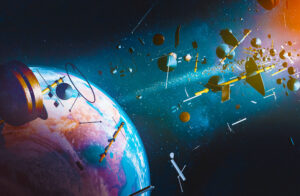
Aerial view of Earth surrounded by space junk from space ships and satellites; 3D; 3D Illustration

Code help: mainly from https://p5js.org/reference/

Midterm Project- Catch the Fish 。˚ 。˚

Link to sketch: https://editor.p5js.org/Hazpaz/full/H-g4lq8jJ

Concept and inspiration

Amazon.com: Haktoys Fishing Game Play Set Includes 21 Fish and 4 Fishing Poles on Rotating Board with Music On/Off Switch for Quiet Play | Board Game for 1-4 Players : CDs & Vinyl

For this project, I’ve drawn inspiration from a childhood game my brother used to play, called the “Fishing game.” It involved catching fish with a fishing hook within a time limit. I’ve adapted this concept into my own version of the game, adding some twists and modifications. Instead of a traditional fishing game with a box of fish, my game features fish scattered randomly across the canvas. The objective remains the same: capture each fish individually using a fishing hook (the mouse) and deposit them into a fish bowl before time runs out. This adaptation allows for a unique gameplay experience while still capturing the essence of the original game.

How it works

1. Starting:

– When you first open the game, you’ll see a logo on the screen.

– To start playing, you just need to click anywhere on the logo.

2. Instructions Screen:

– After clicking the logo, you’ll see some instructions on how to play the game.

– These instructions include how to choose the number of fish in the game and how to start playing.

3. Gameplay:

– Once you’re ready, the game starts.

– You’ll see a background with a fishbowl and some fish swimming around.

– Your goal is to catch all the fish and put them in the fishbowl before time runs out.

4. Catching Fish:

– To catch a fish, you just need to move your mouse cursor close to it.

– When you’re close enough, the fish will be caught on your fishing hook.

5. Ending the Game:

– The game ends when either you catch all the fish and put them in the fishbowl or the timer runs out.

– If you catch all the fish in time, you win!

– If time runs out before you catch all the fish, you lose.

6. Restarting the Game:

– If you want to play again, you can press the Enter key to restart the game.

– If you want to go to the home page (instructions page) click on any key.

7. Music:

-Throughout the game, there’s background music to enhance the gaming experience.

-There’s different music for when you win or lose, adding to the atmosphere of the game.

8. Fullscreen Mode:

– You can also toggle fullscreen mode by pressing the ‘f’ key.

9. Game Elements:

-The game includes various elements such as shapes (the ellipses behind the slider), images (fish, fishing hook, fish bowl, backgrounds), text, and sound to create an immersive experience.

– The game is also developed using Object Oriented Programming, with classes called “Fish.js” and “Timer.js”.

Highlights of some code that I’m particularly proud of

The playGame() function is responsible for handling the main gameplay dynamics such as the timer, fishbowl, fishing hook and music. I’m proud of how I tackled most of the logics of the game in this function. Here is the code snippet of the function.

// Play the game function
function playGame() {
  
  image(gameBg, 0, 0, windowWidth, windowHeight); // The background of the game 
  timer.update(); // Update timer  
  
  numFishiesSlider.hide(); //hides the slider
  
  // Draw time left at the top center of the screen
  textSize(50);
  textAlign(CENTER, CENTER);
  fill(0);
  text("Time left: " + timer.getTime() + " seconds", windowWidth / 2, 100);
  
  // Draw fish bowl
  image(fishBowl, windowWidth / 2 - 50, windowHeight / 2 - 50, 200, 200);
  
  // Draw fishing hook
  image(fishingHook, mouseX - 25, mouseY - 25, 70, 70);
  
  // Display and update fishies
  for (let fish of fishies) { // Checks each element of the "fishies" array
    
    fish.display();
    
    // Hooking the fishies to the hook
    if (dist(mouseX, mouseY, fish.x, fish.y) < 25) {
      
      fish.hooked = true;
      
    }
    
    if (fish.hooked) {
      
      fish.move(mouseX, mouseY); // The fish is hooked to the hook
      
    }
  }
  

  // Check if all fishies are inside fish bowl
  let allFishiesInside = true;
  for (let fish of fishies) {
    
    if (!fish.insideBowl) {
      
      allFishiesInside = false;
      break;
      
    }
  }
  
  
  if (allFishiesInside) {
    
    gameFinished = true;
    timer.stop();
    
    //play music
    if (timer.timeLeft > 0) {
      
      victoryMusic.play(); // Play victory music if game finished before countdown ends
      gameMusic.stop(); // Stop background music
      
    } 
    
    else {
      
      losingMusic.play(); // Play losing music if countdown ends before game finished
      gameMusic.stop(); // Stop background music
      
    }
    
    gameState = 'end';    // Change to end game state

  }

  // Check if time is up
  if (timer.getTime() === 0) {
    gameFinished = false; // Player loses if time is up
    gameState = 'end';
    losingMusic.play(); // Play losing music
    gameMusic.stop(); // Stop background music
  }
}


The continuation of the playGame() function is the displayEndscreen() function which displays the end screen on the basis of winning or loosing the game. At first, I had trouble understanding how this code worked, but eventually, I figured it out and got it to function properly.

//function for the endscreen
function displayEndScreen() {
  
  fill(255);
  textSize(50);
  textAlign(CENTER, CENTER);
  
  if (gameFinished == false) {
    
    //displaying that the player lost the game
    fill('#F44336');
    background(gameOver)
    // text("Game Over!", windowWidth / 2, windowHeight / 2);
    text("Time left: " + timer.getTime() + " seconds", windowWidth / 2, windowHeight / 2 + 280 + 60);
    
  } 
  
  else {
    
    //displaying that the player won the game
    fill('rgb(16,96,16)');
    background(win)
    // text("You WIN!", windowWidth / 2, windowHeight / 2);
    
  }
  
  // instructing the player on how to restart the game
  textSize(50);
  fill('#710404');
  text("Click Enter key to restart", windowWidth / 2, windowHeight / 2 + 570);
  text("Click any key to go to Home page", windowWidth / 2, windowHeight / 2 + 620);


}

Challenges with the project

1. Implementing the functionality to drag and drop each fish individually to the fish bowl has posed a significant challenge.

2. Providing users with the ability to select their preferred difficulty level by choosing the number of fishes in the game: I initially attempted to let users input the number of fish they wanted using a text box, but it didn’t work as expected. So, I switched to using a slider instead. Although it was challenging to code initially, I refined the logic and eventually got it to work.

3. Difficulty in adjusting the timer according to the number of fish that the player inputed.

4. Making the whole experience of the game in full screen posed a significant challenge for me, forcing me to change some design choices for the game.

Future Improvements

1. Allow players to customize their fishing hook or fishbowl with different designs or colors.

2. High scores boards for each levels.

3. Enable users to drag the fishes individually to the fish bowl for a more interactive experience.

4- Make the game a bit more responsive to the screen size.

5. Add more colors and deigns to the overall design of the game to make it more aesthetic.


Luke Nguyen – Midterm


Overall concept:

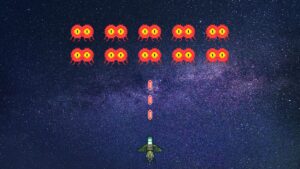
When I was a kid, I was obsessed with the game Chicken Invaders. I remembered spending 2-3 hours playing it every time I was free from school and homework. It was a way of life for my PC back then. And so, I wanted to emulate the engine of that game for this mid-term project and have fun creating it. I call my interactive game “Alien Slayer.”This is my initial sketch/design for the game. I ended up not following up in terms of arranging the aliens. This is because I approached designing the game using arrays and randomness. And creating lines of aliens did not feel realistic at all.
 

How the project works:

Here are the images of the game that use:

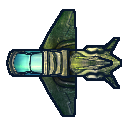
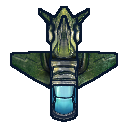
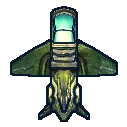
I found a sprite sheet for the spaceship and edited it down into just 4 basic movement directions.

The rules of the game are very intuitive: to kill all the aliens. That said, the number of aliens generated and the speeds at which they ascend down the screen are randomized using this:

if (random(1) < 0.008) {
    aliens.push(
      new alien(
        width / 10,
        width / 10,
        random(width - 40),
        random(-10, 0),
        random(1, 3)
      )
    );
  }

So the difficulty of the game is randomized throughout the game.

The spaceship is first created and placed at the starting position using the class:

class spaceship {
  constructor(w, h, x, y, direction, speed) {
    this.w = width/10;
    this.h = height/10;
    this.x = width/2;
    this.y = height - 60;
    this.direction = 0;
    this.speed = 5;
  }

  move() {
    if (keyIsPressed) {
      if (keyCode == UP_ARROW) {
        if (0 < this.y) {
          this.direction = 0;
          this.y -= this.speed;
        }
      }

      if (keyCode == DOWN_ARROW) {
        if (this.y < height - this.h) {
          this.direction = 1;
          this.y += this.speed;
        }
      }

      if (keyCode == LEFT_ARROW) {
        if (0 < this.x) {
          this.direction = 2;
          this.x -= this.speed;
        }
      }

      if (keyCode == RIGHT_ARROW) {
        if (this.x < width - this.w) {
          this.direction = 3;
          this.x += this.speed;
        }
      }
    }
  }

  display() {
    if (this.direction == 0) {
      image(spaceshipUP, this.x, this.y, this.w, this.h);
    }

    if (this.direction == 1) {
      image(spaceshipDOWN, this.x, this.y, this.w, this.h);
    }

    if (this.direction == 2) {
      image(spaceshipLEFT, this.x, this.y, this.w, this.h);
    }

    if (this.direction == 3) {
      image(spaceshipRIGHT, this.x, this.y, this.w, this.h);
    }
  }
  
  setW(w){
    this.w=w;
  }
  
  setH(h){
    this.h=h;
  }
  
  setX(x){
    this.x=x;
  }
  setY(y){
    this.y=y;}
  
  setDir(direction){
    this.direction = direction;
  }
}

The laser beams are also created using class:

class laser {
  constructor(w, h, x, y, direction) {
    this.w = w;
    this.h = h;
    this.x = x;
    this.y = y;
    this.direction = direction;
    this.speed = 5;
  }

  display() {
    if (this.direction == 0) {
      image(laservertical, this.x, this.y, this.w, this.h);
    }

    if (this.direction == 1) {
      image(laservertical, this.x, this.y, this.w, this.h);
    }
  }

  move() {
    if (this.direction == 0) {
      this.y -= this.speed;
    }
    if (this.direction == 1) {
      this.y += this.speed;
    }
  }
}

And the aliens are also PRE-created using class:

class alien {
  constructor(w, h, x, y, speed) {
    this.w = w;
    this.h = h;
    this.x = x;
    this.y = y;
    this.speed = random(1, 3);
  }

  move() {
    this.y += this.speed;
  }

  display() {
    image(alien_image, this.x, this.y, this.w, this.h);
  }

  hits(obj) {
    return (
      obj && 
      obj.x > (this.x - obj.w) + 10 &&
      obj.x < (this.x + this.w) - 10 &&
      obj.y > (this.y - obj.h) + 12 &&
      obj.y < (this.y + this.h) - 15 
    );
  }
}

When the user presses the space bar, a laser beam is released. The user can press the space bar multiple times. The number of laser beams released correspond to the number of times the space bar is hit.

//   Display laser beams
  for (let i = lasers.length - 1; i >= 0; i--) {
    drawingContext.shadowBlur = 10;
    drawingContext.shadowColor = color("rgb(181,0,255))");
    lasers[i].display();
    drawingContext.shadowBlur = 0;
    lasers[i].move();

  }
}

// Add the laser beams to an array to shoot with sound
function keyPressed() {
  if (key == " ") {
    lasers.push(
      new laser(
        width / 12,
        width / 12,
        spaceship1.x + spaceship1.w / 10,
        spaceship1.y - spaceship1.h / 1.4,
        spaceship1.direction
      )
    );
    beam.play();
  }
}

When the laser beam hits the alien:

for (let j = 0; j < lasers.length; j++) {
      if (aliens[i].hits(lasers[j])) {
        aliens.splice(i, 1);
        lasers.splice(j, 1);
        counter_scores++;
        break;
      }
    }

When the alien hits the spaceship:

if (aliens[i].hits(spaceship1)) {
      counter_lives--;
      aliens.splice(i, 1);
      continue;
    }

I am particularly proud of these two code snippets because I had such a hard time figuring out how to slice and make either the laser beam or the obliterated alien disappear on the screen. The hardest part was to figure out the loop using continue() and break so as the game can continue. I spent a lot of time fixing the errors relating to this.

The final rule is when the alien hits the Earth, at which point there is no return and the player will automatically lose:

if (aliens[i].y > height) {
      console.log("Game Over");
      textStyle(BOLD);
      textAlign(CENTER);
      aliens.splice(i, 1);
      gameState = "stop";
      continue;
    }

In terms of statistics, there is a score counter and a lives counter. Lives counter determines how the player progresses through out the game.

Besides checking the hit conditions, other parts that I’m proud of include coding the movement of the spaceship, coding the reset of the game, figuring out the coordinates where the spaceship meets the alien and the coordinates where the laser beam hits the alien, and creating the backgrounds and images that I use:

Creating the game start, instructions, and game restart screens also took me a lot of time. I had to refer the example sketch “Ramsha Bilal” by Save the Ocean from last year given by you to figure it out. It took me a lot of time until I could do it right, ie. creating user input before starting and creating a new session start after the previous session is completed.

Areas for improvement and problems:

In terms of using arrays, I want to make some aliens appear next to one another and move down the screen at the same time. It will vary the difficulty of the game even more. I also wanted to make the buttons for getting user’s input more aesthetic and varied, instead of what I have now.

Problems I ran into:

I couldn’t generate the stars properly so I had to refer to this YouTube tutorial from Back to Code: https://www.youtube.com/watch?v=xbmwfg5U9-s

I couldn’t make the game run in full screen properly without the elements shifting around although it still run:

https://editor.p5js.org/luke.s.ng/full/g7Hnh5lV4

There was a minor break error. If the user shoots many lasers at the same time to kill the alien, sometimes this error will pop up. During testing, the error appeared with a random number of lasers, REGARDLESS of the high score (or number of aliens killed) and the number of aliens on screen. It was a random bug while playing. But I figured out I had to add “break” to the checking condition when the laser beam hits the alien.
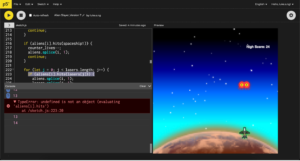

The lives counter initially didn’t display the number of lives when it reaches 0 properly.

I also had a lot of problems creating the starting/restarting user input pages mainly because of the buttons’ coordinates. It took me a lot of time to figure out.

Overall, it has been a fun process with lots of trial and error. I learned a lot about Object-Oriented Programming as well as debugging.
Midterm – NYUAD Ideal Food Tournament

https://editor.p5js.org/hk3863/full/bszj5rkSJ

Concept

One of the games that went viral in South Korea is the Ideal Type World Cup. I have tried this game several times, and it seemed quite simple but also very interesting in the way that it makes the user think of their preferences. Another similar game is the “Balance Game,” which requires the user to choose between two extreme situations, for example, getting 10 million dollars after 10 years or one million dollars immediately. I think what makes this game interesting is that it presents situations that people can relate to.

When I decided to create an Ideal Type World Cup, I started wondering about something that could make this game much more relatable to students. So, I came up with an idea to make this game using campus food. All NYUAD students get campus dirhams, flex dirhams, and meal swipes, which could be used on campus. I think our campus offers a vast variety of food. Each student probably has a preference for certain types of food and dining places. So, my final concept for the project is to make the NYUAD Ideal Food Tournament, which will feature different campus foods.

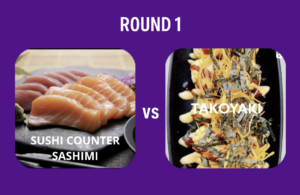
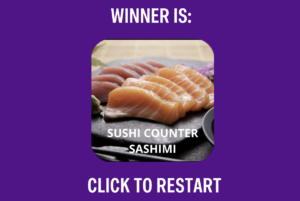
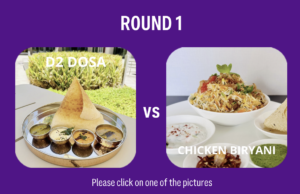
My game contains 32 candidates, which are campus foods. The game is in the form of a tournament where the game contains overall 5 rounds. The user has to choose between the two foods that they like more. Then, the winners of each round pass to the next round until there is a winner.

How My Project Works

My code contains four game states: “OPENING,” “CAMPUS_MAP,” and “GAME.”

  1. “OPENING”

The first thing users see is the opening page. The OpeningScreen class in my code is designed to manage and display the initial screen of my project, typically shown when the game or application first starts.

The constructor of the OpeningScreen class takes three parameters: schoolInfo, logoImage, and diningInfo. These parameters are stored as properties of the class and represent the textual information about the school, the graphical logo image, and the information about dining options available on campus, respectively.

The display method is responsible for rendering the content to the screen. It dynamically adjusts the sizes and positions of the text and logo based on the current window size, ensuring that the visuals adapt nicely to different screen dimensions.

  1. “CAMPUS_MAP”

The next page that appears after clicking on the canvas is the Campus Map page. The CampusMap class in this code snippet is designed to provide users with detailed information about dining options available at a university campus. This class contains images of dining halls, marketplaces, and other food outlets, accompanied by informative labels and detailed descriptions.

  1. “GAME”

When the user clicks on the screen again, the gameState changes to “GAME.” During this gameState, the code displays two candidates, updates the winner, and runs the logic for making this game.

4. “ENDING”

What I am Proud of

I am particularly proud of the design for this project. Since the project is related to our campus, I exclusively used NYU colors and also downloaded the official NYU font. The game looks aesthetically pleasing. Additionally, I really like the design of the Campus Map page. I have masked the three campus images displayed on that page into a circular shape so that they look pleasing to the eye. Also, for the background, I used our campus map to design the page in a way that the images are located where they actually are in real life.

let campusmappicturesSize = width / 5
  let campusmask = createGraphics(campusmappicturesSize, campusmappicturesSize) 
  campusmask.ellipse(campusmappicturesSize / 2, campusmappicturesSize / 2, campusmappicturesSize, campusmappicturesSize); // Create a circular mask

    diningHallsImage.mask(campusmask);
    marketplaceImage.mask(campusmask);
    outletsImage.mask(campusmask);

I am also particularly proud of the logic I have created for updating candidates for each round.

function handleGameClicks(candidate1Position, candidate2Position, imageSize) {
  // Check if click is within candidate 1 image bounds
  if (mouseX > candidate1Position.x - imageSize / 2 && mouseX < candidate1Position.x + imageSize / 2 &&
      mouseY > candidate1Position.y - imageSize / 2 && mouseY < candidate1Position.y + imageSize / 2) {
    nextRoundCandidates.push(currentPair[0]);
    updateCurrentPair();
  } 
  // Check if click is within candidate 2 image bounds
  else if (mouseX > candidate2Position.x - imageSize / 2 && mouseX < candidate2Position.x + imageSize / 2 &&
           mouseY > candidate2Position.y - imageSize / 2 && mouseY < candidate2Position.y + imageSize / 2) {
    nextRoundCandidates.push(currentPair[1]);
    updateCurrentPair();
  } else {
    showMessage = true;
    messageStartFrame = frameCount; // Reset message timer
  }
}

This function, ‘handleGameClicks’, is designed to process mouse clicks within the game, specifically to determine if a click occurred on one of the two candidate images. It checks if the mouse’s X and Y positions fall within the bounds of either candidate 1’s or candidate 2’s image by comparing the mouse coordinates against the images’ positions and sizes. If the click is within the bounds of candidate 1’s image, that candidate is added to the ‘nextRoundCandidates’ array, and a function to update the current pair of candidates is called. Similarly, if the click is within candidate 2’s bounds, that candidate is added to the array, and the pair update function is called. If the click doesn’t fall within the bounds of either image, a message is triggered to show by setting ‘showMessage’ to true and resetting a timer for how long the message should be displayed.

The ‘showMessage’ variable triggers the display of the text “Please click on one of the pictures” when a user’s click does not fall within the bounds of either candidate 1’s or candidate 2’s image.

if (showMessage) {
      displayMessage("Please click on one of the pictures");
function updateCurrentPair() {
  if (nextRoundCandidates.length === 1 && currentRoundCandidates.length === 0) {
    // Only one candidate left, game should end
    gameIsOver = true;
    gameState = "ENDING";
    
    
  } else if (currentRoundCandidates.length > 0) {
    // There are still candidates in the current round to be paired
    currentPair = [currentRoundCandidates.shift(), currentRoundCandidates.shift()];
  } else if (nextRoundCandidates.length > 1) {
    // Current round is empty but there are enough candidates for another round
    currentRoundCandidates = shuffle(nextRoundCandidates.slice()); // Create a new round from remaining candidates
    nextRoundCandidates = []; // Reset for the next round
    roundNumber++;
    currentPair = [currentRoundCandidates.shift(), currentRoundCandidates.shift()];
  } else {
    
  }
}

‘updateCurrentPair()’ manages the transition of game states and the setup of candidates for comparison in each round of the game. If there is exactly one candidate left and no more in the current round, it signifies the end of the game by setting ‘gameIsOver’ to true and changing the ‘gameState’ to “ENDING,” indicating a winner has been determined. If there are candidates still available in the current round, it forms a new pair for comparison by removing the first two candidates from ‘currentRoundCandidates’ and assigning them to ‘currentPair.’ In cases where the current round has ended but there are multiple candidates left for the next round (‘nextRoundCandidates.length > 1’), it shuffles the ‘nextRoundCandidates’ to start a new round, empties the ‘nextRoundCandidates’ for future use, increments the round number, and assigns a new pair to ‘currentPair’.

Improvements and Problems

In the Campus Map page, I was thinking of making the page more interactive. My initial thought was to display text about the dining place in a rectangle if the mouse is located over one of the three images. However, I had some difficulties making the description appear when the mouse is located inside the circle. My code was detecting the wrong location for images, thus, showing the rectangular description at the wrong timing. So, for further improvements, I would like to add this feature. Also, I would like to add some buttons instead of requiring users to just click on the screen to start the game.

Overall, this midterm experience helped me to figure out how to build logics for projects, and I learned a lot of new skills to make what I have imagined.

Midterm Project: Brick Breaker Game – Help the Wolf Break the House

Concept and Guide of the Game

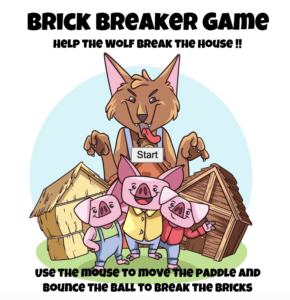
The original story of three little pigs ends with the wolf failing to break into the brick house. The concept of my game is the opposite of this. The aim of the game is to help the wolf break the brick wall of the house and encounter the pigs. I wanted to give a twist to the original story and help the wolf win over the three little pigs. 

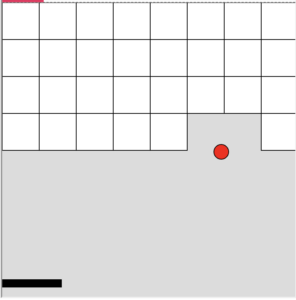
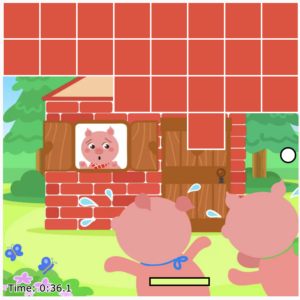
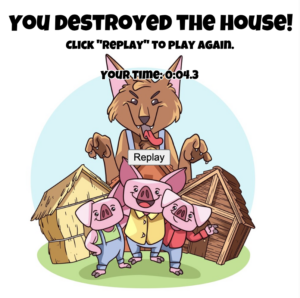
The game follows the same rules of the brick breaker game. But the idea is to break all the bricks using the bouncing ball so that the wolf can meet up with the pigs. Playing the game is simple. When the user clicks on the start button on the opening page, the game starts immediately. The user must use the mouse to move the paddle to bounce off the balls and break the bricks. Simultaneously, a timer runs to measure the time it takes the user to break all the bricks. The aim of this game is to break all the bricks in the shortest time possible. The timer is displayed throughout the game at the bottom left corner and the final time is displayed at the ending page that appears when the bricks are all gone. The user can replay the game by simply clicking on the replay button that navigates the user back to the opening page. 

Understanding the Overall Code

I created three classes for the game: ball, paddle, and brick. 

First, in the class Ball, I have three smaller functions: draw, move, and bounce. The functions instruct the ball to be drawn on the canvas, to animate across the canvas, and to change directions. 

Second, in the class Paddle, I drew the paddle and made it so that the ball bounces off the paddle when in contact. 

Lastly, in the class Brick, I drew the brick and used ‘if and else’ to detect the four edges of the brick. Also, I used ‘if and else’ to test if the ball and the brick collided. 

With these three classes, I called them in the main sketch and operated the game. In the main sketch, there are 9 other functions: preload, setup, startGame, draw, drawStartPage, allBricksGone, endGame, replayGame, and createTimer. There are specific instructions under each function that controls the behavior of the game. 

What I am Proud Of 

The first part of the code that I am proud of is the function for the timer. At first, I had no timer and hence the goal of the game was to simply break all the bricks. However, I realized that if there is no timer, the user is not put under any pressure to play the game well. Therefore, I decided to place a timer so that the user is pushed to play and finish the game faster. 

function createTimer() {
  //timer object with update and display methods
  let timerObject = {
    startTime: 0,
    elapsed: 0,

    update: function () {
      this.elapsed = millis() - this.startTime;
    },

    display: function () {
      textSize(13);
      textAlign(CENTER, CENTER);
      fill('black');
      stroke('white');
      textFont('Verdana');
      text('Time: ' + this.format(), width / 2 - 150, height - 10);
    },

    format: function () {
      //convert milliseconds to a readable time format (mm:ss)
      let minutes = Math.floor(this.elapsed / 60000);
      let seconds = ((this.elapsed % 60000) / 1000).toFixed(1);
      return minutes + ':' + (seconds < 10 ? '0' : '') + seconds;
    },
  };

  return timerObject;
}

Another part of the code that I am proud of is the function for endGame. Under this function, I created a button that allows the user to replay the game. So when the endButton, which is the button used to replay the game, is pressed, the function for replayGame is operated. When the endGame function runs, the time it took the user to finish the game is displayed for the user. 

function endGame() {
  //show the end page with replay button
  background(255);

  push();
  translate(10, 50);
  scale(0.4);
  image(startImg, 0, 0);
  pop();

  //create a replay button
  endButton.show();
  endButton.position(width / 2 - endButton.width / 2, height / 2);
  
  textSize(30);
  textAlign(CENTER, CENTER);
  fill(0);
  textFont(myFont);
  text('You destroyed the house!', width / 2, height / 4 - 70);
  textSize(16);
  text('Click "Replay" to play again.', width / 2, height / 2 - 140);
  
  endButton.mousePressed(replayGame);

  //display the final time
  textSize(16);
  text('Your Time: ' + timer.format(), width / 2, height / 2 - 100);
}

Also, I am very pleased with the look of the game. The theme or the design fits well into the concept of the game and adds to the experience of the user. The picture below is the the initial design of the game. From that design, I added colors and images to add aesthetics.

Difficulty & How I Overcame It 

The hardest part of coding was using the ‘if and else’ statement to change the pages of the game (opening, game, and ending). As shown below, the code itself is simple: I just have to call the classes and functions that I created previously and use the ‘if and else’ statement to create conditions. However, for some reason I could not navigate from one page to another. Through trial and error, I was able to get it to work. 

function draw() {
  //draw the start page if the game hasn't started or if it's replaying
  if ((!ball || allBricksGone())&& start== true ) {
    drawStartPage();
  } else {
    //draw the game elements
    push();
    translate(-15, 0);
    scale(0.34);
    image(backgroundImg, 0, 0);
    pop();

    paddle.x = mouseX;

    //nested loop for creating bricks when not collided with the ball
    for (let i = 0; i < cols; i++) {
      for (let j = 0; j < rows; j++) {
        if (bricks[i][j].val == 0) {
          bricks[i][j].drawBrick();
          bricks[i][j].collided(ball);
        }
      }
    }

    //check if all bricks are gone
    if (allBricksGone()) {
      endGame();
    } else {
      //update the timer
      timer.update();

      ball.moveBall();
      ball.bounceBall();
      ball.drawBall();

      paddle.hitPaddle(ball);
      paddle.drawPaddle();

      //display the timer
      timer.display();
    }
  }
}

These are the pages in the order of opening, game, and ending.

Improvement

For improvement, I would like to enable fullscreen. As of now, the game screen is too small and the game experience would be enhanced when the game screen is larger. 

Another improvement I would like to make is displaying the record of the 5 fastest times on the ending page. In this way, the user would be more motivated to play better and faster.

Lastly, it would be more entertaining if I create a losing condition. For instance, I could make the ball not bounce off the bottom wall so that when the ball passes through the bottom wall, the time increases by 3 seconds. In this way, it would take longer and be harder for the user to complete the game.

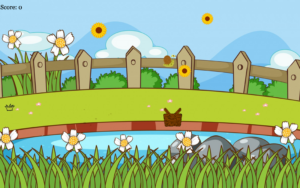
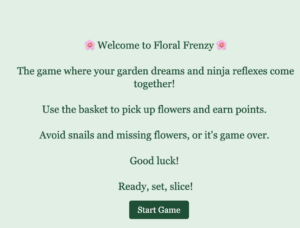
Midterm Project- Floral Frenzy!!

Project concept: “Floral Frenzy”

“Floral Frenzy” is a digital tribute to one of my favorite activities—picking flowers—which is a calm and fascinating experience that I share with my mom. This game attempts to capture the feeling of serenity and beauty that the act of picking and collecting flowers gives. It is inspired by the tranquil times spent in nature. In contrast to conventional fast-paced slicing games, “Floral Frenzy” offers players a more relaxing and pleasant gaming experience.

In “Floral Frenzy,” players take a virtual trip through a blossom garden, where they must pick flowers with care. Like the therapeutic experience of actually choosing flowers, every kind of flower and cut has a unique relaxing effect.

This project is a dedication to the peaceful and nature-connected moments that flower picking offers, rather than just a simple game. It’s intended for anyone looking for a break from the daily grind, providing a little peace and a reminder of the basic joys that nature has to give.

With “Floral Frenzy,” I hope to let players feel the calm serenity of floral beauty and to spread the joy and relaxation that comes from being surrounded by flowers.

Steps:

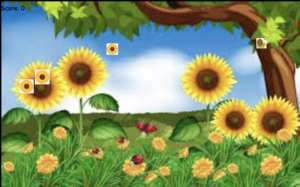
First I decided that I was going to start by coding the most basic functions of the game. Making ellipses that resembled the flowers and triangles that resembled the snails. The cursor poped/sliced the flowers.

After that, I gave these shapes functions and added the score system. Once I had the skeleton of my game, I incorporated the images, and sounds and worked on the aesthetics of the instruction and game over page.

Difficulties: 

I encountered a lot of challenges along the way. I don’t even want to think about how many hours this game took me to program. What matters is that in the end, it was worth it.

One of the most challenging parts of the game was to figure out the scoring system and the collisions. I spent quite a lot of time in the p5 library trying to figure out how this worked. Another quite challenging thing but it ended up simplifying a lot of my code was to add the GameObject class.

Using the GameObject class made my code much simpler as I didn’t have to write the same code repeatedly for each object in my game, such as snails and flowers. I just set up this class with the basics (speed, position…) After that, I used this blueprint every time I needed a new object, like a sunflower, and it already knew how to move and check to see if it went off the screen. Since all of those objects only need to be set up once in the GameObject class, they all share the same starting point and set of rules, which allowed me to save time and write cleaner code.

It was very exciting to figure out the game speed multiplier that I introduced in the GameObject class.

this.y += this.speed * speedMultiplier;

Getting the area of the basket to intercept the snail or flower image was challenging.
One last thing that was complicated was to add the bonuses (+2)points ellipses. I wanted to program that for every time the score reached 5 a +2 bonus appeared. The problem was that every time the game reached 5 it froze. Later on, every time it reached 5 a tone of +2 ellipses flooded the screen. It took me a while to figure out and achieve the balance.

Code that I am proud of: 

// Update and display each Bonus object
for (let i = bonuses.length - 1; i >= 0; i--) {
  bonuses[i].update();
  bonuses[i].display();

  // Remove the Bonus object if it goes off screen, is popped, or has been visible for more than 2 seconds
  if (millis() - bonuses[i].timestamp > 2000) { // Check if 2 seconds have passed since creation
    bonuses[i].toDelete = true; // Mark for deletion
  }

  if (bonuses[i].offScreen() || bonuses[i].toDelete) {
    bonuses.splice(i, 1); // Remove the Bonus object from the array
  }
}

// Generate Bonus objects when score is a multiple of 5 and no bonus is currently displayed
if (score % 5 === 0 && score !== 0 && bonuses.length === 0) {
  bonuses.push(new Bonus()); // Add a new Bonus object
}
function handleSunflower() {
  // Generate new Sunflower instances periodically
  if (frameCount % 60 === 0) { // Adjust according to your game's difficulty
    sunflower.push(new Sunflower()); // Use Sunflower class
  }

  // Update and display each sunflower
  for (let i = sunflower.length - 1; i >= 0; i--) {
    sunflower[i].update();
    sunflower[i].display();

    // Check if the sunflower goes off-screen
    if (sunflower[i].offScreen()) {
      gameOver = true;
      break;
    }
  }
}

GAME!! 

Future improvements: 

or future improvements of my game I would like that every time a flower is sliced there was a calm sound in the background. (scissors sound)

Another thing that I wanted to add but had no time for was that every X points a new background and a new flower would display. This would give the game more dynamism.

Evolution:

Final Result: 

Bibliography: 

https://p5js.org/es/reference/#/p5.PeakDetect/update

https://p5js.org/es/reference/#/p5/createButton

https://p5js.org/es/reference/#/p5.Score

https://p5js.org/es/reference/#/p5/keyIsPressed

https://p5js.org/es/reference/#/p5/pop

https://www.freepik.es/

Mid-Term Project: Star Chaser ˗ˏˋ ★ ˎˊ˗ by Aysha AlMheiri

Link to Sketch (Please Press Space Bar for it to be in Full Screen): https://editor.p5js.org/am.almh/full/7XY6Q1OrX

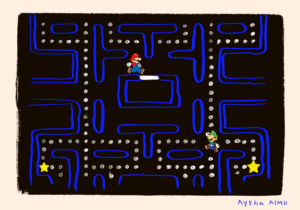
Before actually developing my game, my initial idea was to create  a Mario-inspired pac man game, in which Mario and Luigi go around a maze to collect stars while being chased by ghosts. In my eyes, the game would be a perfect blend of two retro games, creating a very nostalgic experience for users, particularly those who played both games growing up. However, as I was attempting to implement such a game in p5, I realized that such a project would be too advanced for my skill level and given the time constraints, I would not be able to create a fleshed out version of the game. 

Initial Game Design

After countless hours of thinking of another idea, I came up with a simple, yet exciting, game in which the player chases stars across the sketch in order to win the game, which is why I called the game, Star Chaser. Ultimately, the focus shifted into a much simpler game centered around chasing stars and avoiding shells, still retaining the essence of retro Nintendo games that I was initially going for. It ensured that even with the changes to the game I was creating, the main concept of classic Nintendo games remained prominent. Thus, while the project may have evolved from its original idea, the concept of celebrating retro Nintendo games still remains. 

Final Game Design 

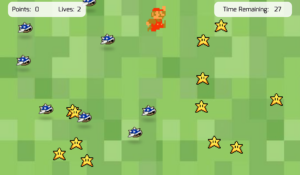
In my game, Star Chaser,  players are able to control a Mario character using the arrows on the keyboard in order to collect stars and avoid incoming shells. The objective of the game is to catch all the stars within the given time limit, 30 seconds, trying to preserve Mario’s lives. Each time Mario gets hit by a shell, he loses one of his two lives. To win the game, the player must avoid the shells and achieve the maximum score of 60 points. This is done by maneuvering Mario around the sketch to collect all the stars. 

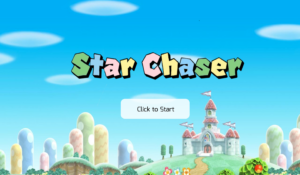
Screen 1- Landing Page

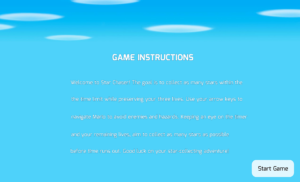
Screen 2- Instructions Page

Screen 3- Game Page

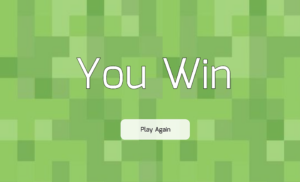
Screen 4- Win Page

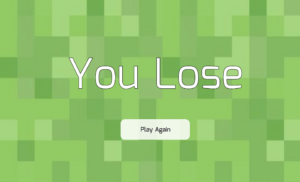
Screen 5- Lose Page

The aspect of my project I am particularly proud of is the actual game design. Initially, it was incredibly difficult for me to get things to move for the game, set up the lives and scores board, and even simply get the character to move. Although we did discuss some of these things in class, it was still quite difficult to do it myself given the fact that as I was attempting to put the game together, there were a lot of bugs and errors that kept occurring. Due to the fact that this was my first time creating a game, I had to sit for hours trying to figure out what kept causing the errors. However, after countless hours of attempting to understand the root cause of the problems, I was able to figure out that it was due to the order of the code and wrongly declaring variables. Although this was frustrating, I am proud that I was able to fix this issue and implement somewhat smooth controls for the game, which can be seen in the code below: 
// Function to display the game screen
function gameScreen(){
// Sets background color to Green
  background('#92CA5B');
  
// Displays grass images
  //Right Side
  image(grass, 0, 0, 1500, 1800);
  //Left Side
   image(grass, 780, 0, 1500, 1800);
  
 // Displays stars
  for (let i = 0; i < stars.length; i++) { // Loop through stars array
    stars[i].display();
  }
  
 // Displays shells and handle their movement
   for (let i = 0; i < shells.length; i++) { // Loop through shells array
    shells[i].move(); //Moves Shells
    shells[i].bounce(); //Helps Shells Bounce around Sketch
    shells[i].display(); //Helps Display Shells on Sketch
  }
  
//Draws a Rectangle for Information Boxes on Top of Sketch
  //Right Box
  fill('rgba(255,255,255,0.83)');
  stroke('rgba(255,255,255,0.83)')
  rect(40, 35 , 370, 70, 20);
  
  //Left Box
  fill('rgba(255,255,255,0.83)');
  stroke('rgba(255,255,255,0.83)')
  rect(1030, 35 , 370, 70, 20);
  

// Ensures in-game music is looping
  if (!inGameMusic.isPlaying()) {
    inGameMusic.loop(); 
  }
  
// Ensures in-game music is playing
   if (!inGameMusic.isPlaying()) {
        inGameMusic.play();
    }
  
// Displays the Player's Score
  textFont("Mina");
  fill('black');
  stroke('white');
  strokeWeight(3);
  textSize(30);
  text('Points:', 58, 80);
  text(score, 168, 80);
  
// Displays the Player's Remaining Lives
  textFont("Mina");
  fill('black');
  stroke('white');
  strokeWeight(4);
  textSize(30);
  text('Lives:', 280,80 );
  text(lives, 370, 80);
  
// Calculates and display the remaining time
  landingTime = landingTime;
  
//Calculates the Game Time by Subtracting the Landing Time from the Current Total Time to then Converting the Results to Seconds by Dividing by 1000 and rounding down using the int() function.
  gameTime = int((totalTime-landingTime)/1000);
  
// Displays text indicating time remaining
  textFont("Mina");
  fill('black');
  stroke('white');
  strokeWeight(3);
  textSize(30);
  text('Time Remaining:', 1070, 80);
  
//Displays the calculated remaining time
  text(timeLimit - gameTime, 1316, 80);
  
//Game Outcomes
//If the score reaches 60 (maximum number of points) then the game will stop and take you to the win screen
  if (score>=60){
    inGameMusic.stop();
    gameStage = 3;
    winSong.play();
  }
  
//If lives reach 0 then the game will stop and take you to the lose screen
  if (lives<=0){
    inGameMusic.stop();
    gameStage = 4;
    loseSong.play();
  }
  
//If time reaches 0 then the game will stop and take you to the lose screen
  if (gameTime>=timeLimit){
    inGameMusic.stop();
    gameStage = 4;
    loseSong.play();
  }

// Arrow keys pressed to move the player accordingly
//Left Arrow
if (keyIsDown(LEFT_ARROW)) {
  playerDirection = -1; // Set direction to left
  p1X -= 12; // Move left
//Right Arrow
} else if (keyIsDown(RIGHT_ARROW)) {
  playerDirection = 1; // Set direction to right
  p1X += 12; // Move right
}
  
//Up Arrow
if (keyIsDown(UP_ARROW)) {
  p1Y -= 12; // Move up
} 
//Down Arrow
else if (keyIsDown(DOWN_ARROW)) {
  p1Y += 12; // Move down
}

// Moves the player within canvas boundaries
  p1X = constrain(p1X, pWidth / 2, width - pWidth / 2); // Constrain x position
  p1Y = constrain(p1Y, 0, height - pHeight); // Constrain y position


// Draws the image based on player direction
if (playerDirection === -1) {
  // Flips the image horizontally when moving left
  scale(-1, 1); // Flips horizontally
  image(mario, -p1X, p1Y, pWidth, pHeight); // Draws image
  scale(-1, 1); // Resets scale
} else {
  // Otherwise, draws the image normally
  image(mario, p1X, p1Y, pWidth, pHeight); // Draw image 
}

// Check for collision between player and stars
    for (let i = 0; i < stars.length; i++) {
        if (stars[i].checkCollision(p1X, p1Y, pWidth, pHeight)) {
            // Remove the collided star from the array
            stars.splice(i, 1);
            // Increase the score by 5 points
            score += 5;
        }
    }
   
}

Another aspect that I am proud of is the visual and auditory elements of the game. I have incorporated hand drawn elements and sound effects from different Mario games in order to create a holistic experience for users and immerse them into the nostalgic game I created. 

Hand Drawn Title 

I believe doing this successfully captured the concept of Nintendo games I was trying to showcase to users and offers users an engaging experience. The code for this can be seen below: 

//Helps transition back to the landing page when the button is pressed
  if (mouseX >= 580 && mouseX <= 910 && mouseY >= 500 && mouseY <= 695 && mouseIsPressed == true){
  //Moves to gameStage 0, which is landing page page
  gameStage = 0;
    
  //When button is pressed mainButtonSound will play
  mainButtonSound.play();
}

Example of Where I Used Audio in my Game

In terms of improvements, I feel like I can incorporate more audio and visual elements to create a more immersive experience. I could potentially add a loading or waiting screen in between the game and instruction screens to make the game design more comprehensive. I also could have added some form of computer vision. I feel like it would make the design complex and creative, which can make it an engaging, unique, and enjoyable experience for users.

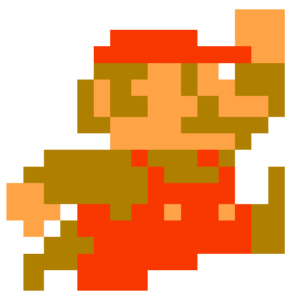
In regards to problems, I feel like my main issue, although quite silly, is the sprite sheet. I could not find any sprite sheet online that worked well with my game concept. Although that is the case, I tried finding anything just so I could get started with my game design. When I found one that could work as a placeholder, p5 would not load the image onto the sketch. I kept getting an error message from p5. I then tried to draw my own sprite sheets, which also did not work on p5. This problem was very frustrating because it was essentially the most important element of the game. Therefore, I had to stick to using a singular image to help move the character around. The image was of the character facing the right. Thus, I  made the character flip horizontally when the left arrow key was pressed to add more movement to the character and the game experience as a whole.

Initial Sprite Sheet

Final Character Design

Overall, this project pushed me to learn more about p5 programming and how I am able to manipulate code to create what I wanted. This project, although difficult, was one of the most rewarding thing I have ever done. I am proud of how far I have come with p5 and I genuinely believe that this project shows my progress thus far.

Week 5 Midterm Progress

For the midterm, I wanted to create a simple game using OOP concepts. The basic concept of the game is similar to that of Super Mario: a character moves and tries to avoid dangers. Rather than using sprites, I wanted to create all the aspects of the game fully using code. During the other assignments, I didn’t try out the createVector function. However, going through Daniel Shifman’s THE NATURE OF CODE book’s first chapter, “Vector,” and his videos on Vector on YouTube (1, 2, 3) I am fully convinced I can build all the game elements using the createVector function. My plan is to rely on vector shapes for complex game elements. This will also make my calculations easier.

I’m designing a game with multiple scenes or screens, each offering a different part of the game experience. Here’s how I’m planning to structure it:

  1. Title Screen: Initially, the game will open to a title screen (scene 1), where players can see the game’s title and interact with inkdrop animations. I’ll include a play button and an options button, making sure to check for player interactions to navigate to other parts of the game.
  2. Game Play Screen: Moving onto this scene (Scene 2), I plan to have the main character move, attack, and be displayed on the screen. The gameplay will involve navigating through jump blocks, floors, jelbys (damage elements), and other elements, with the camera following the character to keep them in focus. I’ll implement a jumping function for character movement, and as players progress, they’ll encounter a moving door and health items that affect the character’s health, which will be displayed and updated on the screen. If the character’s position falls below a certain threshold, it’ll trigger a transition to the dead screen (scene 3), whereas reaching a higher position will lead to the winner screen (scene 4).
  3. Dead Screen: If the character dies (scene 3), I’ll display a game over screen where players can see their failure and have options to interact with, possibly to retry the level or go back to the main menu.
  4. Winner Screen: For those who conquer the levels (scene 4), I’ll cover the screen with a rectangle and display a winner message, indicating their success. This screen will also include interactions, possibly to proceed to the next level or return to the main menu, marking the `won` variable as true to track the player’s progress.
  5. Options Menu: Lastly, an options menu (scene 5) will be included to allow players to customize their game experience. I’ll handle this functionality through an `optionsStuff()` function, providing various settings for players to adjust according to their preferences.

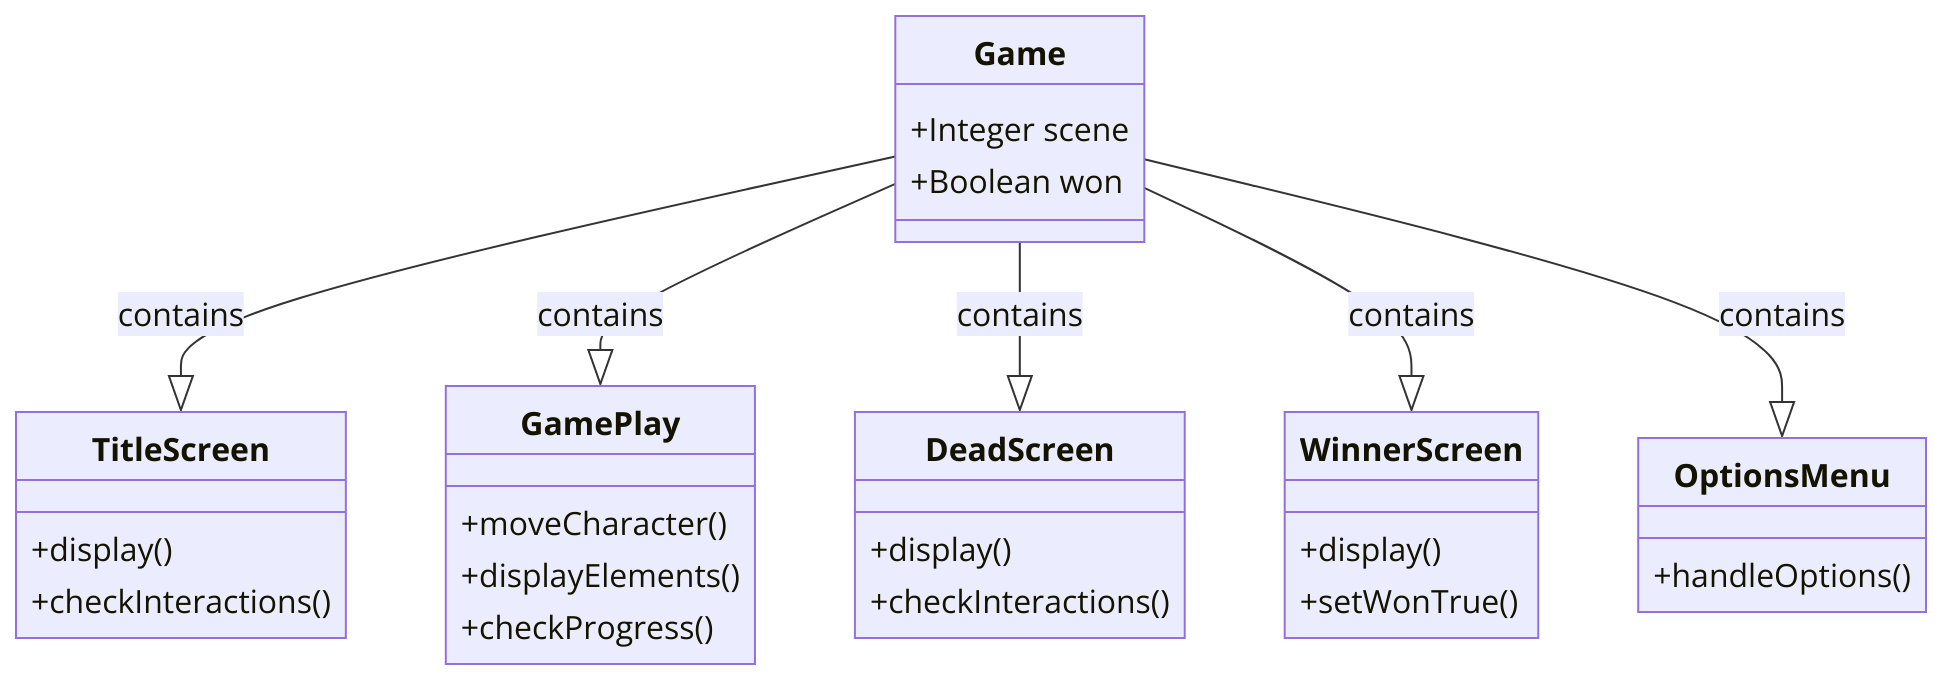
The UML diagram would be something like this:

// Preload function to load images
function preload() {
  title = loadImage('title0.jpg')

  imgs[0] = loadImage('imgs0.jpg')
  imgs[1] = loadImage('imgs1.jpg')
  imgs[2] = loadImage('imgs2.jpg')
  imgs[3] = loadImage('imgs3.jpg')
}

// Variables
let scene // 1=title, 2=level, 3=dead, 4=winner, 5=options
let title
let imgs = []
let play
let options
let winner
let optionsmenu
let won
let buttonTO;

// Arrays
let chars = []
let cameras = []
let jump
let healths = []
let floors = []
let triggers = []
let healthItems = []
let jelbys = []
let jumpBlocks = []
let inkdrop = []
let pipeParts = []

// Setup function to initialize the canvas and objects
function setup() {
  createCanvas(windowWidth, windowHeight);
  scene = 1

  play = new PlayButton()

  options = new OptionsButton()

  gameOver = new gameOverScreen()

  winner = new Winner()

  optionsmenu = new OptionsMenu()

  won = false

  buttonTO = 1

  jump = new Jump()

  for (let i = 0; i < 2; i++) {
    inkdrop.push(new Dropplet(198, 220, 3, 3, 7))
  }

  inkdrop.push(new Dropplet(282, random(320, 350), 1, 4, 3))

  inkdrop.push(new Dropplet(435, 530, 2, 4, 7))
}

// Draw function to render the game
function draw() {
  noStroke()
  background(200, 200, 200)

  buttoning()

  // This is the code for the Title screen.
  if (scene === 1) {

    image(title, 0, 0)
    noStroke()

    for (let i = inkdrop.length - 1; i > 0; i--) {
      inkdrop[i].draw()
      inkdrop[i].move()
      if (inkdrop[i].isDone()) {
        inkdrop.splice(i, 1);
        inkdrop.push(new Dropplet(198, 220, 3, 3, 7))
      }
      if (inkdrop[i].isDone2()) {
        inkdrop.splice(i, 1);
        inkdrop.push(new Dropplet(282, random(320, 350), 1, 4, 3))
      }
      if (inkdrop[i].isDone3()) {
        inkdrop.splice(i, 1);
        inkdrop.push(new Dropplet(435, 530, 2, 4, 7))
      }
    }

    play.dis()
    play.check()

    options.dis()
    options.check()

  }

  // This is the code for the 1st level.
  if (scene === 2) {

    if (!triggers[4].triggeredy()) {
      chars[0].move();
      chars[0].attack();
      chars[0].disAttackUn()
    }
    chars[0].histo();
    chars[0].dis();

    for (let i = 0; i < jumpBlocks.length; i++) {
      jumpBlocks[i].dis()
    }

    for (let i = 0; i < floors.length; i++) {
      floors[i].dis();
    }

    for (let i = 0; i < jelbys.length; i++) {
      jelbys[i].dis();
      jelbys[i].damaging(chars[0], healths[0])
      jelbys[i].move(jelbys[i].P1, jelbys[i].P2);
      jelbys[i].hitpoints();
    }

    if (!triggers[4].triggeredy()) {
      chars[0].disAttackOv()
    }

    cameras[0].cameraMan(floors, chars[0])

    if (!triggers[4].triggeredy()) {
      jump.jumping(floors, chars[0])
    }

    pipeParts[0].dis()

    movingDoor()

    if (triggers[0].triggered(chars[0])) {
      triggers[0].trigged = true
    }

    for (let i = 0; i < healthItems.length; i++) {
      healthItems[i].dis();
      healthItems[i].counter()
      healthItems[i].healthup(chars[0], healths[0])
    }

    healths[0].dis()
    healths[0].damage()

    if (chars[0].pos.y + chars[0].h > height * 1.5) {
      scene = 3
    }

    if (chars[0].pos.y + chars[0].h < -100) {
      scene = 4
    }

  }

  // This is the code for the Dead screen
  if (scene === 3) {
    gameOver.dis()
    gameOver.check()
  }

  // This is the code for the Winner screen
  if (scene === 4) {
    fill(227, 227, 227);
    rect(0, 0, width, height)
    winner.dis()
    winner.check()
    won = true
  }

  // This is the code for the Options menu
  if (scene === 5) {
    optionsStuff()
  }

}


So far, I am done with the different scenes. Since the beginning, I have started coding the different scenes separately. I will focus on the gameplay now. As I am using vector elements, I am confident that creating the gameplay will not be difficult. However, I realized if I can create the game with something like infinite level with each level creating different pattern for the floor would be more challenging.  So, I will try to work on this later.
Week 5 Reading Reflection

The exploration of computer vision in interactive art, as discussed in the article, highlights its transformative impact on the way artists recreate, manipulate, and explore physical reality. What struck me most was the early adoption of computer vision, dating back to the late 1960s, underscoring the longstanding curiosity and experimentation within the art community towards integrating technology with creative expression. The article not only provides a historical overview but also introduces simple algorithms and multimedia tools that democratize computer vision for novice users unfamiliar with the field.

The potential of computer vision to convey complex sociopolitical themes was both surprising and occasionally unsettling. For instance, Rafael Lozano-Hemmer’s “Standards and Double Standards” uses this technology to critique surveillance culture, illustrating the power of computer vision to metaphorize our realities. Conversely, the “Suicide Box” project reveals the ethical considerations inherent in employing such powerful tools, highlighting the necessity of thoughtful engagement with technology’s capabilities and impacts.
I was particularly intrigued by the emphasis on adapting computer vision techniques to the physical environment. This approach not only challenges creators to think critically about the interaction between technology and space but also broadens the concept of interactivity in digital creation. Learning about the specific strategies employed by artists to optimize their work for different environments reinforced my appreciation for the nuanced relationship between art, technology, and the physical world.

Week 5: Midterm Progress

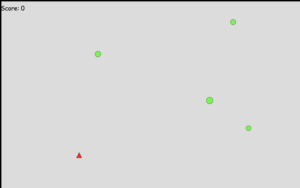
For my midterm, I initially drew inspiration from the no internet dinosaur game in which it entertains the user until their wifi works again. The dinosaur game has a main object, obstacles, and keeps moving faster as the game moves on. As for my iteration of the game, I wanted to make it space-themed where the main object is a rocket-ship and the obstacles would be the planets from both sides, top and bottom. For the user to gain points, they must collect items which will be space debris or space junk in order to “clean” outer space. The game will also have a feature in which it would keep moving faster.

For my progress, I was able to get the object moving in all directions. There is currently a problem with loading the rocket-ship image, but it should be there instead of the square.

One of the other challenges is getting the background and obstacles to continuously move while detecting collisions. For this, I will be using an algorithm in which the game would be over every time the object touches an obstacle.