W8 Reading Reflections

Norman’s book delves into the relationship between aesthetics and user-usability in design. As he delves into such a relationship, we come to understand the importance of merging both aesthetics and usability when designing projects, ensuring that one element is not prioritized over the other. What I found really interesting is that in his discussion of the relationship between both aesthetics and usability, he brings up the concept of affect and emotion. Although some might find this cliche, we tend to forget how much a design’s aesthetic or look can impact our reactions or emotions. We can find pleasure while looking at a design, filling us with a sense of comfort. However, there are times when a design can make us strongly uncomfortable. This, in a sense, showcases the extent in which you can use design to ‘manipulate’ or bring out certain emotions in people. That being said, I believe that the author’s message of going beyond mere aesthetics and emphasizing both design and functionality when creating any project is important and is something I am definitely taking with me as we go through the second part of the semester. 

Hamilton’s legacy as a pioneer in the field of software engineering created what we know today as the Apollo mission. It was really exciting to see how software developed to what it is today, especially given that its beginnings came from one of the most ambitious human projects at the time. However, something I reflected on a lot after reading this was the importance of user-experience and usability. Hamilton warned others about PO1 and the dangers that would ensue if touched by astronauts. They touched it anyway and data was lost. This reminded me of two things: Norman’s emphasis on usability and functionality in design, and the ways in which we can utilize design and aesthetics to ensure errors do not occur. Although many might say that a better solution would be utilizing code to ensure errors do not happen, I truly believe that with a combination of design, we can ensure that errors do not occur. This can be through certain design choices, emotional language, specific color and text choices. All of these things, although many might not admit it, have an impact on the ways people perceive something, which can ultimately help ensure human errors do not occur when a design is utilized. 

MIDTERM PROJECT – Music Emotions and words

Concept:

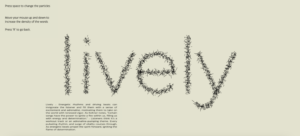
My project takes inspiration from one of the psychology study that I recently came across, which discussed how many emotions people feel when they hear a particular sound, they distilled them into 13 distinct feelings. Although I had a different concept when I started working on my midterm project, I thought it would be interesting to incorporate this idea somehow. So I tried to translate this into a digital canvas of P5js. The user encounters random sounds and is prompted to articulate the emotions/feelings about that song. I planned to create something that interconnects the sound and the sentiment that is felt from it. And then also allows users to interact with the words by implementing some transitions to the words they entered.
Link to my project: https://editor.p5js.org/ib2419/full/DcHdGgor5

How does it work:

As I described a bit about my project above, aiming to engage users in exploring the relationship between sound and visual art.

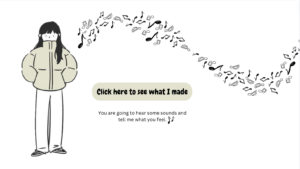
  1.  It starts with the display of users encountering a main Menu page where the user is asked to click anywhere on the screen and describe the project.


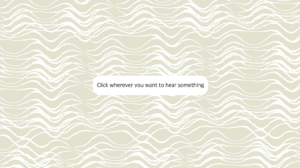
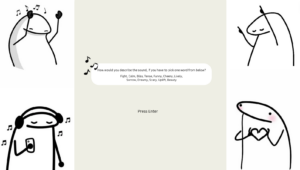
2. When clicked,  an invisible grid of sound objects is displayed, each representing a distinct sound, and the display message of  ‘Click wherever you want to hear something‘. After the user clicks anywhere on the screen a sound object triggers the playback of its associated sound. Once a sound is selected, users are prompted to input ‘How would you describe the sound?’


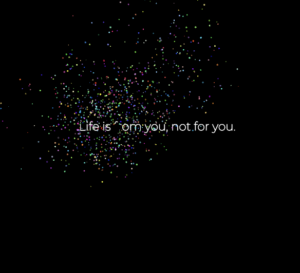
3. And then initiating the generation of visual representations of the input. These visuals are created using bubbles or strokes, depending on the mode selected by the user. Additionally, an image – which displays the message about that type of song and why people feel that corresponds to the chosen sound is displayed alongside the generated visuals. Users can interact further by switching between bubble and stroke modes using the spacebar and returning to the main menu by pressing ‘R’.

Code that I am proud of:

One aspect I’m particularly proud of is the implementation of object-oriented programming (OOP) principles. By structuring the code into classes like soundBoard and bubbleArt, I aimed to encapsulate related functionality and data, fostering code modularity and reusability. This approach not only enhances the readability of the code but also facilitates easier maintenance and future expansion of the project.

Class for sound Board –  The ‘soundBoard’ class defines sound buttons with properties like index, position, and dimensions. Each button instance maintains an association between its index and a corresponding sound object. The ‘boxClicked’  method detects mouse clicks within button boundaries, facilitating user interaction. This class encapsulates functionality for managing interactive sound buttons, enhancing user experience through intuitive audio control.

// Class for sound button
class soundBoard {
  constructor(index, xstart, ystart, boxWidth, boxHeight) {
    this.index = index;
    this.xPos = xstart;
    this.yPos = ystart;
    this.boxWidth = boxWidth;
    this.boxHeight = boxHeight;
    this.soundIndex = this.index;
    this.sound = "";
  }

  // Check if the button is clicked
  boxClicked(mouseXPos, mouseYPos) {
    if (
      mouseXPos >= this.xPos &&
      mouseXPos <= this.xPos + this.boxWidth &&
      mouseYPos >= this.yPos &&
      mouseYPos <= this.yPos + this.boxHeight
    ) {
      return this.index;
    } else {
      return -1;
    }
  }
}

Class for bubbleArt –  I made a ‘bubbleArt’ class to facilitate the creation of bubble text with customizable parameters such as word, position, font size, and style. The ‘wordToBubble’ method converts the text into a series of points, enabling the creation of bubble-shaped characters. Using the ‘brush’ method, individual bubbles or strokes are drawn based on the chosen mode (bubbles or strokes). The ‘moveBubbles’ method adjusts the position of the bubbles based on mouse input, allowing for dynamic interaction with the text. Overall, the class encapsulates functionality for generating visually appealing and interactive bubble text elements within the application.

// Class for creating bubble text
class bubbleArt {
  constructor(
    word,
    xPos,
    yPos,
    fontsize,
    sampleFactor,
    sizeW,
    sizeH,
    mode,
    bubbleMode
  ) {
    this.word = word;
    this.posX = xPos;
    this.posY = yPos;
    this.fontSize = fontsize;
    this.samplefactor = sampleFactor;
    this.sizeW = sizeW;
    this.sizeH = sizeH;
    this.mode = mode;
    this.bubble = bubbleMode;
  }

  // Convert word to bubble text
  wordToBubble() {
    let points;
    points = font.textToPoints(this.word, this.xPos, this.yPos, this.fontSize, {
      sampleFactor: this.sampleFactor,
      simplifyThreshold: 0,
    });
    return points;
  }
  // Get bounding box for text
  boundBox() {
    return font.textBounds(this.word, this.xPos, this.yPos, this.fontSize);
  }

  // Draw bubble text
  drawPoints() {
    let points;
    points = this.wordToBubble();
    if (points) {
      for (let i = 0; i < points.length; i++) {
        this.brush(points[i].x * this.sizeW, points[i].y * this.sizeH);
      }
    }
  }

  // Draw individual bubbles or strokes
  brush(x, y) {

    for (let i = 0; i < 1; i++) {
      let posX = randomGaussian(0, 5);
      let posY = randomGaussian(0, 5);

      if (fontMode == "bubbles") {
        // Drawing bubbles
        let size = randomGaussian(5, 5);
        ellipse(x + posX, y + posY, size, size);
      } else {
        // Drawing lines
        let angle = random(TWO_PI);
        let lineLength = randomGaussian(5, 5);
        let endX = cos(angle) * lineLength + x + posX;
        let endY = sin(angle) * lineLength + y + posY;
        line(x + posX, y + posY, endX, endY);
      }
    }
  }
  
  // Move bubbles based on mouse position
  moveBubbles() {
    let bounds = this.boundBox();
    let adjustedSampleFactor = map(mouseY, 0, windowHeight, 0.1, 3); // Adjusting sampleFactor based on mouseY position
    translate(
      -bounds.x * this.sizeW - (bounds.w / 2) * this.sizeW + windowWidth / 2,
      -bounds.y * this.sizeH + 50 + windowHeight / 5
    );
    translateWidth = -(
      -bounds.x * this.sizeW -
      (bounds.w / 2) * this.sizeW +
      windowWidth / 2
    );
    translateHeight = -(-bounds.y * this.sizeH + 50 + windowHeight / 5);

    this.sampleFactor = adjustedSampleFactor; // Update sampleFactor
    this.drawPoints();
  }
}

Another highlight of the project is the integration of multimedia elements. Using preloaded assets and libraries like p5.js, I incorporated a diverse range of visual and sound files into the user experience (which was a hard task for me, I had to make sure that the files were not too heavy, and I was not aware of it before). Also while I was struggling in the start to create the sound objects for each button and associated them with their respective sound files. I was able to generate a grid layout for sound buttons by using nested loops to iterate over rows and columns. So it calculates the position of each button based on the current row and column, creating instances of the ‘soundBoard’ class and adding them to an array. I think that this approach organized the sound buttons systematically, and helped me establish the connection by assigning the sound files to the sound property of each sound object.

let index = 0;
 for (let row = 0; row < 3; row++) {
   for (let col = 0; col < 4; col++) {
     let xstart = col * boxWidth;
     let ystart = row * totalHeight;
     soundObjects.push(
       new soundBoard(index, xstart, ystart, boxWidth, boxHeight)
     );
     index++;
   }
 }

 soundObjects[0].sound = sound1; // Associate sound object 0 with sound1
 soundObjects[1].sound = sound2; // Associate sound object 1 with sound

One of the key design considerations that I wanted was the emphasis on user interaction and customization. And I was able to do it by providing users with control over sound playback and visual effects, the whole point was to personalize their experience and delve into the creative possibilities of the project.

Improvements:

While developing my sketch, I noticed that it lacked responsiveness. I realized that I relied heavily on fixed dimensions like ‘windowHeight’ and ‘windowWidth’, restricting how my visuals adapt to different screen sizes. This oversight should be addressed for future improvements to ensure a more adaptable layout. Additionally, I believe there’s room to enhance the interaction with the bubble art and lines. Currently, they serve as visual elements without meaningful interaction. In a previous project, I explored integrating them with sound generation, where mouse movements influenced the density of both sounds and visual elements. Exploring similar interactive possibilities could elevate the engagement level of the sketch. Moreover, I’m interested in learning how to integrate text directly with sound, rather than relying on images, which could further enrich the sound-visual part of my project.

Problems:

My main challenge was settling on a single idea for my project. Initially, I experimented with various concepts, aiming to recreate interactive art gifs that inspired me. After discussing ideas with friends, I finally settled on a concept. When I started making this project I encountered difficulty integrating object-oriented programming (OOP) principles into my project, so I opted to start with a simpler sketch using functions in different files. However, I faced hurdles when attempting to connect sounds with messages as I had envisioned. My original plan revolved around particle motion, which I learned about through tutorials. Later, I explored additional references to refine my understanding. Integrating user input functions proved problematic, with errors arising during execution, particularly with transitioning between different states such as ‘main Menu’, ‘sections’, ‘input’, and ‘display’.

Pictures of previous project displays:


References:

https://p5js.org/reference/#/p5/randomGaussian

https://youtu.be/E2UWkCp3zbo?si=kgW-z1VSCtkdoFNR

Midterm Project: Greenhaven

Inspiration

I grew up in a village without a park, a place where families, friends, and pets gather to enjoy nature and each other’s company. To experience the joy of a park, I had to travel to nearby villages or cities. This sparked my love for parks and inspired my midterm project: creating a virtual park. My goal is to recreate the sense of community and fun found in a park, from children playing on swings to people walking their dogs and old friends catching up. This project is my way of bringing the park experience to those who, like me, have always admired it from afar.

Concept

My project begins with a start screen that warmly welcomes users to the virtual park experience, featuring a “Start” button that leads them into the park scene upon interaction. The journey into the virtual park commences with a meticulously designed background, setting the stage for the vibrant park life that unfolds.

Central to the park are two swings, each with figures seated and in motion, bringing a dynamic element of playfulness. These swings, animated to sway, add a lively atmosphere to the park scene. Adding to the ambiance is a bird, animated using a sprite sheet to simulate realistic motion. A click from the user sends the bird flying off the canvas, illustrating the interactive nature of this digital environment.

Music enriches the park experience through a jukebox feature. Clicking on the jukebox transitions the scene from the park to a Radio view, magnifying the jukebox and revealing its controls. The jukebox offers three buttons: one to stop the music, providing users control over the ambiance, and two others to navigate through the playlist, enhancing the immersive experience with auditory choices.

The park’s inhabitants include a sprite-sheet-based man, whom users can direct around the park. Movement is thoughtfully restricted, and the character is scaled dynamically to create a depth effect, simulating closer or further distance from the viewer as he moves vertically across the screen. This effect adds a layer of realism to the virtual exploration. A girl performing yoga serves as another point of interest. Her form transitions every 2 seconds.

Full Screen Canvas:

https://editor.p5js.org/gg2713/full/9wcrgqffm

Code I’m Proud of:

This code is my favorite part of the project because it encapsulates a significant learning curve and represents a turning point in the development process. Mastering the use of the lerp function for scaling the swing wasn’t straightforward; it took a considerable amount of time and experimentation to get right. However, once I figured it out, everything else seemed to fall into place more easily.


// Oscillate the scale between 0.5 and 1.2 to simulate forward and backward motion
  this.swingScale = lerp(0.4, 0.7, (sin(this.angle) + 1) / 2);
  this.angle += this.angleVelocity;
}

display() {
  // Swing frame
  stroke(139, 69, 19); 
  strokeWeight(10); 
// Left side of the frame
  line(this.x -50, this.y - this.frameHeight, this.x -50, this.y); 
  // Right side of the frame
  line(this.x + 50, this.y - this.frameHeight, this.x+ 50, this.y); 
// Top of the frame
  line(this.x -50, this.y - this.frameHeight, this.x +50, this.y - this.frameHeight); 

// Start a new drawing state
  push(); 
// Translate to the position of the swing seat
  translate(this.x, this.y-15); 
// Apply scale transformation
  scale(this.swingScale); 
  fill(160, 82, 45); 
// Seat
  rect(0, 0, this.width, this.height); 
  pop(); 
  
// Swing ropes 
  stroke(160, 82, 45); 
// Scale the stroke weight to simulate depth
  strokeWeight(2 * this.swingScale); 
// Left rope
  line(this.x-20, this.y - this.frameHeight, this.x -20 * this.swingScale, this.y - this.height/2-10 * this.swingScale); 
 // Right rope
  line(this.x + this.width/2, this.y - this.frameHeight, this.x + this.width/2 * this.swingScale, this.y-10 - this.height/2 * this.swingScale);
  if (this.figure) {
    this.figure.display();
  }
}

Another piece of code that I take great pride in is the function for handling mouse interactions, specifically the logic that enables switching between scenes. Although the code now appears straightforward, reaching this level of simplicity and effectiveness was a journey marked by significant effort and learning. Here’s the code:

function mousePressed() {
  
  if (scene === 'start') {
    // Check if the Start button is clicked
    if (mouseX >= width / 2 - 50 && mouseX <= width / 2 + 50 &&
        mouseY >= height / 2+180 && mouseY <= height / 2 + 250) {
      scene = 'park'; // Change the scene to the park
    }
  } else if (scene === 'park') {
    radio.click(mouseX, mouseY);
    // Check if the bird is clicked
    if (mouseX >= bird.x && mouseX <= bird.x + 64 && mouseY >= bird.y && mouseY <= bird.y + 64) {
      bird.fly(); // Make the bird fly
    }
  } else if (scene === 'radio') {
    if (mouseX >= 10 && mouseX <= 110 && mouseY >= height - 60 && mouseY <= height - 10) {
      scene = 'park'; 
      radio.isClicked = false;
    }
  
    if (mouseX > 523 && mouseX < 578 && mouseY > 372 && mouseY < 407) {
      radio.stopSong(); 
    }
    

    if (mouseX > 611 && mouseX <667 &&
        mouseY > 372 && mouseY < 407) {
      radio.changeSong();
    }
  }
  
}

Key Challenges Faced 

  1. Swing Depth Effect: One of the initial challenges was to create a depth effect for the swings. My first approach involved altering the coordinates, which did not yield the desired outcome. Eventually, the use of the lerp function for scaling the swings provided the solution.
  2. Scene Transitions: Transitioning between scenes (start to park, park to radio) was difficult. It took numerous trials to manage application states effectively for smooth transitions.
  3. Jukebox Functionality: The jukebox component was a multifaceted challenge. Initially, assembling its structure and design was time-intensive, requiring attention to detail to accurately represent its features. Beyond its appearance, integrating interactive functions, such as changing songs and stopping playback through radio buttons, added another layer of complexity.
  4. Animating a Running Girl: I wanted to incorporate a running girl to the park. However I was not able to achieve smooth transitions between frames. The frames for the running motion changed too abruptly, leading to an unnatural appearance.

Future Aspects:

The journey of crafting the virtual park has been incredibly fulfilling, yet I see so much more potential for it. Right now, the park feels a bit too quiet for my liking; it’s missing the hustle and bustle of daily park life. I’m dreaming of adding animations of families spreading out picnic blankets, kids chasing each other around, and elderly couples enjoying quiet conversations on benches. These little touches, I believe, will truly breathe life into the park.

One of my initial ambitions was to animate a girl running through the park. Sadly, getting her movement just right turned out to be trickier than I expected, and I had to set that idea aside. But, it’s still something I’m passionate about tackling. Seeing the project come to life has been incredibly rewarding, and it’s only fueled my desire to dive back in and add even more depth and interaction to this virtual space. The feedback has been heartening, and honestly, I can’t wait to get started on bringing these new ideas to life. The virtual park project isn’t just a task for me; it’s a passion project that I’m excited to develop further.

REFERENCES:

https://intro.nyuadim.com/author/mk7592/


Midterm Project – Inkling of Life

For the midterm project, my inspiration was the “Bounce” game. The game play is similar to the original Bounce game: the character moves and tries to avoid the dangers. I wanted to challenge myself, so the whole game is built using “Vector” shapes. I went through Daniel Shifman’s THE NATURE OF CODE book’s first chapter, “Vector,” and his videos on Vector on YouTube (1, 2, 3) to grasp the basic understanding of the vector shape. As I used vector for all the shapes, all the shapes were preplanned, and it took a good amount of time to figure out the exact configuration.

The game is designed with multiple screens, each offering a different part of the game experience. The game structure is as follows:

  1. Title Screen: Initially, the game will open to a title screen (scene 1), where players can see the game’s title and interact with inkdrop animations. I’ll include a play button and an options button, making sure to check for player interactions to navigate to other parts of the game.
  2. Game Play Screen: Moving onto this scene (Scene 2), I plan to have the main character move, attack, and be displayed on the screen. The gameplay will involve navigating through jump blocks, floors, jelbys (damage elements), and other elements, with the camera following the character to keep them in focus. I’ll implement a jumping function for character movement, and as players progress, they’ll encounter a moving door and health items that affect the character’s health, which will be displayed and updated on the screen. If the character’s position falls below a certain threshold, it’ll trigger a transition to the dead screen (scene 3), whereas reaching a higher position will lead to the winner screen (scene 4).
  3. Dead Screen: If the character dies (scene 3), I’ll display a game over screen where players can see their failure and have options to interact with, possibly to retry the level or go back to the main menu.
  4. Winner Screen: For those who conquer the levels (scene 4), I’ll cover the screen with a rectangle and display a winner message, indicating their success. This screen will also include interactions, possibly to proceed to the next level or return to the main menu, marking the `won` variable as true to track the player’s progress.
  5. Options Menu: Lastly, an options menu (scene 5) will be included to allow players to customize their game experience. I’ll handle this functionality through an `optionsStuff()` function, providing various settings for players to adjust according to their preferences.

The UML diagram:


I wanted to highlight the code for the floor design of the game. It was really challenging to find the sweet spot, as it could have made the game too easy or too hard. For this, I could not find any references. So I played the game itself to understand where to put the holes and hills.

//Normal Floors
function setupFloor() {
  floors.push(new Floor(-500, 0, 525, 600));   //0
  floors.push(new Floor(0, 500, 605, 100));    //1
  floors.push(new Floor(600, 425, 250, 400));  //2
  floors.push(new Floor(849, 325, 150, 500));  //3
  floors.push(new Floor(995, 500, 1000, 1000));//4
  floors.push(new Floor(1850, 375, 100, 500)); //5
  floors.push(new Floor(1950, 500, 300, 500)); //6
  floors.push(new Floor(2249, 370, 200, 500)); //7
  floors.push(new Floor(2448, 500, 200, 500)); //8
  floors.push(new Floor(2647, 240, 150, 500)); //9
  floors.push(new Floor(2796, 500, 450, 500)); //10
  floors.push(new Floor(3245, 400, 200, 500)); //11
  floors.push(new Floor(3444, 500, 400, 500)); //12 
  floors.push(new Floor(4050, 500, 500, 500)); //13
  floors.push(new Floor(4549, 380, 150, 500)); //14
  floors.push(new Floor(5050, 480, 100, 500)); //15
  floors.push(new Floor(5149, 500, 1000, 500));//16
  floors.push(new Floor(6148, 365, 200, 500)); //17
  floors.push(new Floor(6550, 400, 150, 500)); //18
  floors.push(new Floor(7100, 550, 900, 500)); //19
  floors.push(new Floor(7999, 150, 200, 500)); //20
  floors.push(new Floor(8198, 500, 880, 500)); //21
  floors.push(new Floor(8977, 400, 150, 500)); //22
  floors.push(new Floor(9126, 450, 570, 500)); //23
  floors.push(new Floor(9825, 0, 20, 700));    //24
  floors.push(new Floor(9844, 450, 900, 500)); //25
  floors.push(new Floor(9705, 0, 20, 300));    //26
  floors.push(new Floor(9687, 430, 175, 500)); //27
  //This One is Special
  floors.push(new Floor(9705, 200, 20, 150));   //28
}

function Floor(x, y, w, h) {
  this.pos = createVector(x, y);
  this.w = w;
  this.h = h;
  this.dis = function() {
    fill(100, 100, 100);
    rect(this.pos.x, this.pos.y, this.w, this.h);
  }
}

//Pipes
function PipeParts() {
  this.pos = createVector(0, 0);
  this.dis = function() {
    //Pipe1 down
    fill(100, 100, 100);
    rect(this.pos.x, this.pos.y, 180, 30);
    rect(this.pos.x + 300, this.pos.y, 140, 30);
    rect(this.pos.x + 439, this.pos.y, 20, 20);
    rect(this.pos.x + 459, this.pos.y, 20, 10);
    fill(220, 100);
    rect(this.pos.x + 180, this.pos.y, 120, 100);
    fill(250, 200);
    rect(this.pos.x + 270, this.pos.y + 10, 5, 35);
    rect(this.pos.x + 270, this.pos.y + 50, 5, 15);
    rect(this.pos.x + 200, this.pos.y + 70, 5, 15);
    rect(this.pos.x + 200, this.pos.y + 85, 15, 5);
    fill(100, 100, 100);
    rect(this.pos.x + 170, this.pos.y, 20, 100);
    rect(this.pos.x + 290, this.pos.y + 0, 20, 100);
    rect(this.pos.x + 160, this.pos.y + 100, 160, 20);
    rect(this.pos.x + 156, this.pos.y + 103, 10, 14);
    rect(this.pos.x + 319, this.pos.y + 103, 5, 14);
    //Pipe2 up right
    //rect(this.pos.x + 9687,this.pos.y + 430,175,30);
    //rect(this.pos.x + 9825,this.pos.y + 200,20,500)
    fill(220, 50);
    rect(this.pos.x + 9725, this.pos.y, 100, 430);
    fill(250, 200);
    rect(this.pos.x + 9735, this.pos.y + 300, 5, 20);
    rect(this.pos.x + 9735, this.pos.y + 330, 5, 10);
    rect(this.pos.x + 9810, this.pos.y + 400, 5, 20);
    rect(this.pos.x + 9800, this.pos.y + 417, 15, 5);
    rect(this.pos.x + 9735, this.pos.y + 50, 5, 50);
    rect(this.pos.x + 9735, this.pos.y + 120, 5, 20);
  }
}

function movingDoor() {
  if (triggers[3].triggering() && floors[28].pos.y < 300) {
    floors[28].pos.y += 2;
  } else if (floors[28].pos.y > 200) {
    floors[28].pos.y += -2;
  }
  if (triggers[4].triggeredy()) {
    chars[0].pos.y += -6.5;
    triggers[4].trigged = true;
  }
}


I had the chance to do play testing with 3 users due to time constraints. The most common feedback was that I should have added sound effects for the damages. Two of the users felt the level was hard considering it’s the first and only level. They liked the vector animation for the jumps and movements.

As I played along to create the game, I lost sight of the difficulty. I should have play-tested while designing the floors. I wanted to make the game have infinite levels. Unfortunately, I could not finish it. The current gameplay is limited to only 1 level. In the future, I want to make the floors and scene more generative. Based on the feedback, I also want to improve the sound.

Midterm Project Beatly

My midterm project is centered around an idea of a digital drum kit. As a drummer, I sometimes want to test new beats and patterns when I am not around a physical kit, and in such times I like to use the “musicca” website(https://www.musicca.com/drums), and this is the website that I got the inspiration for my project from. Each sound on the drum kit is tied to a specific key and the digital drum kit is played just like a physical one would, by combining sequences of keys corresponding to the notes. I have found all the essential sounds for each key from the website “freesound” (https://freesound.org/), including the cheering sound.
Next, I made the project more visual so that besides the audio feedback, users can also get a visual feedback corresponding to the sound that has been played. For that I have implemented circle waves of different color, each corresponding to a certain drum/cymbal, that arise from the center of the drum/cymbal that has been played and propagate across the screen. To mark a milestone in the user’s drumming session, after a certain number of notes played, a crowd cheers for you and colorful confetti pop up. This was the hardest part of the project as besides using the relevant classes and finding information on how to implement it, I had to make sure the timing and duration of the confetti was precise and simultaneous with the cheer sound. The implementation of that tricky part is the following.

if (counter%60 == 0 && counter !=0) { //60 bets till cheer
isDisplaying = 1; //bool for confetti
start = millis(); //timer start
interval = 0; //should be 5 seconds
isCheering = 1; //cheer sound bool
if (isCheering == 1 && cheer.isPlaying()==false){
cheer.play();
isCheering = 0; //so it does not loop again
print("isCheering is:" + isCheering);
}
}
if (isDisplaying == 1){
for (let i = 0; i < confetti.length; i++) {
if (interval < 5000){ confetti[i].confettiDisplay(); finish = millis(); interval = finish - start; } else{ isDisplaying = 0; }

if (confetti[i].y > height) {
confetti[i] = new Confetti(random(0, width), random(-height, 0), random(-1, 1)); //generate confetti instead of the ones that have disappeared
print("in the if");
}
}

The starting page contains instructions to which key produces which sound, but it is always fun to experiment if you do not know the names of the drums and cymbals! For the main page, I have cut the background off of the drum image and placed it on a stage surrounded by people – a choice to justify the cheering and confetti. Here is the photo of the background stage I used.

To play the drums, the user clicks on the “Start” button and after the user is done he can click “Restart”, so that the new user can play the drums. Restarting simply erases the counter for how many notes have been played and places the user back on the intro screen. I chose not to include any background music as the rhythm of the background music would interfere with and limit what the user wants to play. To enter or exit fullscreen, the user needs to press the “F” key.
In the future, I would like to implement more artistic waves that propogate from the circles or have a music choice that the user can play into. For improvements, the fullscreen mode needs to be improved to fit the actual full size of the screen.

Berry Berry Game (Midterm project)


Introduction 

From the original idea of a “Hot Pursuit” driving game to “Berry Berry,” a fruit-chopping score-based game. This change draws attention to the difficulties faced in creating the Hot Pursuit game and how those difficulties influenced the idea and creation of Berry Berry. These strategies which include using sounds, images, object-oriented programming to produce an interesting gameplay experience.

The concept

The initial game concept focused on a high speed chase, where players navigated a vehicle to avoid or crash through obstacles such as roadblocks and cones. The primary goal was to create a thrilling experience, reminiscent of classic arcade racing games, where players would dodge obstacles at increasing speeds.

Challenges

Obstacle Identification: A significant challenge arose in dynamically generating and identifying obstacles on the road. The process involved incrementing obstacles in the game’s road image, which proved to be complex and cumbersome for real-time gameplay.

Gameplay Complexity: The mechanics of avoiding or interacting with obstacles from the downloaded image introduced a difficulty in balancing gameplay, making unenjoyable to the audience similarly with the Dino Game in google chrome.

Berry Berry

I shifted the idea due to the challenges with the Hot pursuit game, the development focus shifted towards creating a more straightforward and universally enjoyable game. This shift led to the conception of “Berry Berry,” a fruit-chopping game inspired by Fruit Ninja. The idea behind Berry Berry is straightforward: fruits fall from the top of the screen, and the player slices them with a knife controlled by the cursor. Every chop that is successful earns points, but a fruit that is missed counts against the player. The game is over when five fruits are lost, which ups the difficulty and motivates players to get better at accuracy and reaction times. The creation of my game utilizes OOP to manage game elements and interactions efficiently. Both fruits and the knife are defined as objects, each with properties, and methods such as updating positions and detect when intersecting with the fruit. A method within the fruit objects checks for intersections with the knife object. When a collision is detected, it triggers a chopping action, accompanied by the chopping sound effect to enhance the gameplay experience.

The switch from Hot Pursuit to Berry Berry was for both, me and the player. for me it was time consuming to identify every obsticle in the road image. For the players, it might not catch everyone’s interests considering it is a car game and not everyone likes cars. So I ended up choosing to create a game that anyone can enjoy and gain scores in it. My goals for developing Berry Berry more is to create a scoreboard to save the players scores, and to create a more eye catching interface in the game and more levels to it.

https://editor.p5js.org/Lemarri/full/LkIJrWVCd

function Fruit() {
  this.x = random(width);
  this.y = 0;
  this.speed = 3 + score / 20;
  this.sliced = false;

  this.update = function() {
    this.y += this.speed;
    if (dist(mouseX, mouseY, this.x, this.y) < 50 && mouseIsPressed && gameState === 'playing') {
      this.sliced = true;
      score++;
      chopSound.play();
    }
  };


Midterm Project – Musical Brick Breaker Game

Concept: Recreating one of my favorite childhood game – The Musical Brick Breaker Game

So I chose to have the concept for this project, is to create a musical soothing classical Brick Breaker game using the p5.js library. The game involves controlling a paddle to bounce a ball and break bricks at the top of the screen. The user interacts with the game by moving the paddle horizontally using the left and right arrow keys. The goal is to break all the bricks without letting the ball fall below the paddle. The game provides feedback through visual cues such as the ball bouncing off objects, disappearing bricks, and a scoring system. Moreover, sound effects further enhance the user experience.

Designing the Code: Elaborating important areas

1) Ball Behavior: Within the Ball class, I define the behavior of the ball. This includes its movement across the screen, detection of collisions with other objects (such as the paddle and bricks), and rendering on the canvas. This encapsulation allows for clear organization and modularization of ball-related functionality.

2) Paddle Control: The Paddle class covers the movement and display of the paddle. It handles user input from the keyboard to move the paddle horizontally across the screen, ensuring precise control for the player.

3) Brick Management: Each brick in the game is represented by the Brick class. This class manages the display of individual bricks on the canvas and provides methods for their creation, rendering, and removal during gameplay.

4) User Interaction: The mousePressed function responds to user input by triggering specific game actions, such as starting or resetting the game. This function enhances the interactivity of the game and provides a seamless user experience.

Additional functions, such as createBricks and resetGame, are responsible for initializing game elements (such as bricks) and resetting the game state, respectively. These functions streamline the codebase and improve readability by encapsulating repetitive tasks.

By breaking down the code into these specific components, I ensured a clear and organized structure, facilitating easier maintenance.

Minimizing Risk: Code I’m proud of,

display() {
    fill(255, 0, 0);
    ellipse(this.x, this.y, this.radius * 2);
  }
  
  checkCollision() {
    if (this.x > paddle.x && this.x < paddle.x + paddle.width && this.y + this.radius > paddle.y) {
      this.speedY *= -1;
      paddleHitSound.play();
    }
  }
  
  bounce() {
    this.speedY *= -1;
    ballHitSound.play();
  }
  
  hits(brick) {
    let closestX = constrain(this.x, brick.x, brick.x + brick.width);
    let closestY = constrain(this.y, brick.y, brick.y + brick.height);
    let distance = dist(this.x, this.y, closestX, closestY);
    return distance < this.radius;
  }
}

One major complex aspect of the project is implementing collision detection between the ball and other game objects (paddle, bricks, walls). Ensuring accurate collision detection is crucial for the game’s mechanics and overall user experience. To minimize the risk of errors in this area, I employed two  strategies:

1) Collision Detection Algorithm: Implementing this collision detection algorithms is essential because, for example in the Ball class, I used a method called hits(brick) to check if the ball collided with a brick. This method calculates the distance between the ball and the brick’s edges to determine if a collision occurred. Moreover, By using the dist() function in favor with appropriate ball coordinates, I ensured this accurate collision detection is perfectly executed.

2) Testing with Edge Cases: To validate the accuracy of this collision detection algorithm, I conducted repeated testing with various edge cases. This includes scenarios where the ball collides with the corners of bricks or with multiple objects simultaneously. By systematically testing these cases and analyzing the results, I came to conclusion that the collision detection behaves as expected under different conditions.

Prototypes (wire-frame notes) :

Here’s the Game:

Features & Game Mechanics:
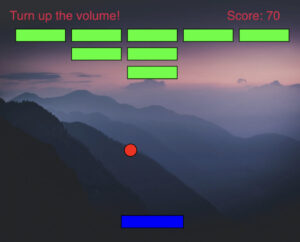
– Game initializes with a start screen displaying “Musical Brick Breaker Game” and along with three themes to choose.
– The player controls the paddle using the left and right arrow keys.
– The ball bounces off the paddle, walls, and bricks.
– When the ball hits a brick, it disappears, and the player earns points.
– If the ball falls below the paddle, the game ends.
– Once game ends, it displays either “Game Over” or “Congrats” message along with the score and a feature for click to return Home.
– Clicking on the canvas after the game ends resets the game, allowing the player to replay.

Additional Features:
– Sound effects are played when the ball hits the paddle and when it hits a brick.
– The player earns points for each brick broken, and the score is displayed on the screen.
– Background music plays throughout the game to enhance the gaming experience, moreover different sound tracks were added to different themes selected.

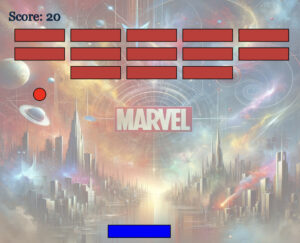
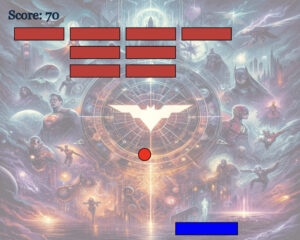
Here’s a snapshot taken during the game-play of all the themes:

Complete Code Snippet (With Comments):

// Variables to hold background images for different themes
let backgroundImage;
let marvelBackgroundImage;
let dcBackgroundImage;

// Game objects
let ball;
let paddle;
let bricks = [];

// Brick layout parameters
let brickRowCount = 3;
let brickColumnCount = 5;
let brickWidth = 80;
let brickHeight = 20;
let brickPadding = 10;
let brickOffsetTop = 50;
let brickOffsetLeft = 30;

// Game score
let score = 0;

// Sound effects and background music variables
let ballHitSound;
let paddleHitSound;
let backgroundMusic;
let marvelSoundtrack;
let dcSoundtrack;

// Game state management variables
let gameState = 'home'; // Possible states: 'home', 'playing', 'gameOver'
let theme = 'default'; // Current theme: 'default', 'marvel', 'dc'
let gameStarted = false; // Flag to indicate if the game has started

// Preload function to load images and sounds before the game starts
function preload() {
  backgroundImage = loadImage('background_image.jpg');
  marvelBackgroundImage = loadImage('marvel_background.jpg');
  dcBackgroundImage = loadImage('dc_background.jpg');
  ballHitSound = loadSound('ball_hit.mp3');
  paddleHitSound = loadSound('paddle_hit.mp3');
  backgroundMusic = loadSound('background_music.mp3');
  marvelSoundtrack = loadSound('marvel_soundtrack.mp3');
  dcSoundtrack = loadSound('dc_soundtrack.mp3');
}

// Setup function to initialize game elements
function setup() {
  createCanvas(500, 400); // Set canvas size
  paddle = new Paddle(); // Initialize paddle
  ball = new Ball(); // Initialize ball
  createBricks(); // Create brick layout
}

// Main draw loop to render the game frame by frame
function draw() {
  background(255); // Clear the canvas with a white background
  // Apply background image based on the current theme with opacity
  if (theme === 'default') {
    tint(255, 127); // Half opacity
    image(backgroundImage, 0, 0, width, height);
  } else if (theme === 'marvel') {
    tint(255, 127); // Half opacity
    image(marvelBackgroundImage, 0, 0, width, height);
  } else if (theme === 'dc') {
    tint(255, 127); // Half opacity
    image(dcBackgroundImage, 0, 0, width, height);
  }
  noTint(); // Reset tint effect for drawing other elements without opacity

  // Display the appropriate screen based on the game state
  if (gameState === 'home') {
    displayHomeScreen(); // Display home screen with theme options
  } else if (gameState === 'playing') {
    playGame(); // Main game logic
  } else if (gameState === 'gameOver') {
    displayGameOver(); // Display game over screen
  }
}

// Handler for mouse press events to interact with the game
function mousePressed() {
  if (gameState === 'home') {
    checkButtonPressed(); // Check if any theme button was pressed
  } else if (gameState === 'gameOver') {
    resetGame(); // Reset game to initial state
    gameState = 'home'; // Return to home screen
  } else {
    if (!gameStarted) {
      gameStarted = true; // Start the game
    }
  }
}

// Function to check if a theme button was pressed and change the game state accordingly
function checkButtonPressed() {
  const buttonWidth = 200;
  const buttonHeight = 50;
  const startY = height / 2 - 75;
  const gap = 60;

  // Detect button press based on mouse coordinates
  if (mouseX >= width / 2 - buttonWidth / 2 && mouseX <= width / 2 + buttonWidth / 2) {
    stopAllMusic(); // Stop any currently playing music
    // Check which button was pressed and update the theme and game state
    if (mouseY >= startY && mouseY <= startY + buttonHeight) {
      theme = 'default';
      gameState = 'playing';
      backgroundMusic.loop(); // Start playing default background music
    } else if (mouseY >= startY + gap && mouseY <= startY + gap + buttonHeight) {
      theme = 'marvel';
      gameState = 'playing';
      marvelSoundtrack.loop(); // Start playing Marvel soundtrack
    } else if (mouseY >= startY + 2 * gap && mouseY <= startY + 2 * gap + buttonHeight) {
      theme = 'dc';
      gameState = 'playing';
      dcSoundtrack.loop(); // Start playing DC soundtrack
    }
  }
}

// Function to display the home screen with game title and theme selection buttons
function displayHomeScreen() {
  fill('black');
  textSize(32);
  textAlign(CENTER, CENTER);
  textFont('Georgia');
  text("Musical Brick Breaker Game", width / 2, 100); // Game title
  
  // Display theme selection buttons
  textSize(20);
  const buttonWidth = 200;
  const buttonHeight = 50;
  const startY = height / 2 - 75;
  const gap = 60;

  // Default theme button
  stroke(0);
  strokeWeight(2);
  fill(255, 0, 0, 200); // Semi-transparent red
  rect(width / 2 - buttonWidth / 2, startY, buttonWidth, buttonHeight, 20); // Rounded corners
  fill(0); // Black text
  noStroke();
  text("Default", width / 2, startY + 28);

  // Marvel theme button
  fill(0, 0, 255, 200); // Semi-transparent blue
  stroke(0);
  strokeWeight(2);
  rect(width / 2 - buttonWidth / 2, startY + gap, buttonWidth, buttonHeight, 20); // Rounded corners
  fill(255); // White text
  noStroke();
  text("Marvel Universe", width / 2, startY + gap + 25);

  // DC theme button
  fill(255, 255, 0, 200); // Semi-transparent yellow
  stroke(0);
  strokeWeight(2);
  rect(width / 2 - buttonWidth / 2, startY + 2 * gap, buttonWidth, buttonHeight, 20); // Rounded corners
  fill(0); // Black text
  noStroke();
  text("DC Universe", width / 2, startY + 2 * gap + 28);
}

// Function to handle gameplay logic
function playGame() {
  ball.update();
  ball.checkCollision();
  ball.display();
  
  paddle.display();
  paddle.update();
  
  // Loop through and display all bricks, check for collisions
  for (let i = bricks.length - 1; i >= 0; i--) {
    bricks[i].display();
    if (ball.hits(bricks[i])) {
      ball.bounce();
      bricks.splice(i, 1); // Remove hit brick from array
      score += 10; // Increase score
    }
  }
  
  // Check if game is over (no bricks left)
  if (bricks.length === 0) {
    gameState = 'gameOver';
  }
  
  // Display current score
  fill('rgb(2,46,82)');
  textSize(20);
  textAlign(LEFT);
  text("Score: " + score, 20, 30);
}

// Function to display game over screen
function displayGameOver() {
  fill('rgb(24,21,21)');
  textSize(32);
  textAlign(CENTER, CENTER);
  if (score >= 150) {
   text("Congratss! Score: " + score, width / 2, height / 2+50);
   textSize(18);
   text("You mastered this universe, click to win others", width / 2, height / 2 + 90);
  }
  else{
  text("Game Over!! Score: " + score, width / 2, height / 2+50);
  textSize(20);
  text("Click to return Home", width / 2, height / 2 + 90);
  }
}

// Function to reset the game to initial state
function resetGame() {
  gameStarted = false;
  score = 0;
  ball.reset();
  createBricks(); // Re-initialize bricks
}

// Function to stop all music tracks
function stopAllMusic() {
  backgroundMusic.stop();
  marvelSoundtrack.stop();
  dcSoundtrack.stop();
}

// Function to initialize bricks based on row and column counts
function createBricks() {
  bricks = [];
  for (let c = 0; c < brickColumnCount; c++) {
    for (let r = 0; r < brickRowCount; r++) {
      let brickX = c * (brickWidth + brickPadding) + brickOffsetLeft;
      let brickY = r * (brickHeight + brickPadding) + brickOffsetTop;
      bricks.push(new Brick(brickX, brickY));
    }
  }
}
// Class representing the ball object
class Ball {
  constructor() {
    this.radius = 10; // Radius of the ball
    this.reset(); // Reset ball position and speed
  }

  // Reset ball position and speed
  reset() {
    this.x = width / 2; // Initial x position at the center of the canvas
    this.y = paddle.y - 10; // Initial y position above the paddle
    this.speedX = 5; // Initial speed along the x-axis
    this.speedY = -5; // Initial speed along the y-axis
  }

  // Update ball position
  update() {
    this.x += this.speedX; // Update x position
    this.y += this.speedY; // Update y position
    // Bounce off the sides of the canvas
    if (this.x < this.radius || this.x > width - this.radius) {
      this.speedX *= -1; // Reverse speed along the x-axis
    }
    // Bounce off the top of the canvas
    if (this.y < this.radius) {
      this.speedY *= -1; // Reverse speed along the y-axis
    } 
    // Check if ball falls below the canvas
    else if (this.y > height - this.radius) {
      gameState = 'gameOver'; // Set game state to 'gameOver'
    }
  }

  // Check collision with the paddle
  checkCollision() {
    // Check if ball collides with paddle
    if (this.x > paddle.x && this.x < paddle.x + paddle.width && this.y + this.radius > paddle.y) {
      this.speedY *= -1; // Reverse speed along the y-axis
      paddleHitSound.play(); // Play paddle hit sound
    }
  }

  // Display the ball
  display() {
    fill(255, 0, 0); // Red fill color
    stroke(0); // Black thin outline
    strokeWeight(1); // Thin outline weight
    ellipse(this.x, this.y, this.radius * 2); // Draw ball as circle
  }

  // Bounce the ball (reverse speed along y-axis)
  bounce() {
    this.speedY *= -1; // Reverse speed along the y-axis
    ballHitSound.play(); // Play ball hit sound
  }

  // Check if ball hits a brick
  hits(brick) {
    // Calculate distance between ball center and brick center
    let distX = Math.abs(this.x - brick.x - brick.width / 2);
    let distY = Math.abs(this.y - brick.y - brick.height / 2);
    // Check if distance is less than combined radii of ball and brick
    if (distX > (brick.width / 2 + this.radius) || distY > (brick.height / 2 + this.radius)) {
      return false; // No collision
    }
    return true; // Collision detected
  }
}

// Class representing the paddle object
class Paddle {
  constructor() {
    this.width = 100; // Width of the paddle
    this.height = 20; // Height of the paddle
    this.x = (width - this.width) / 2; // Initial x position at the center of the canvas
    this.y = height - 35; // Initial y position near the bottom of the canvas
    this.speed = 10; // Speed of the paddle
  }

  // Display the paddle
  display() {
    fill(0, 0, 255); // Blue fill color
    stroke(0); // Black thin outline
    strokeWeight(1); // Thin outline weight
    rect(this.x, this.y, this.width, this.height); // Draw paddle as rectangle
  }

  // Update paddle position based on keyboard input
  update() {
    // Move paddle left
    if (keyIsDown(LEFT_ARROW) && this.x > 0) {
      this.x -= this.speed;
    } 
    // Move paddle right
    else if (keyIsDown(RIGHT_ARROW) && this.x < width - this.width) {
      this.x += this.speed;
    }
  }
}

// Class representing a brick object
class Brick {
  constructor(x, y) {
    this.x = x; // x position of the brick
    this.y = y; // y position of the brick
    this.width = brickWidth; // Width of the brick
    this.height = brickHeight; // Height of the brick
  }

  // Display the brick
  display() {
    fill(200, 50, 50); // Red fill color
    stroke(0); // Black thin outline
    strokeWeight(1); // Thin outline weight
    rect(this.x, this.y, this.width, this.height); // Draw brick as rectangle
  }
}


Reflection: Ideas added to this Final Midterm

1) User Experience: I’ve incorporated different themes so that the user won’t be limited to play in one environment. In addition, all the three themes have their separate backgrounds and soundtracks.

2) End Card Message:  I’ve implemented a conditional statement to display “Congrats” message if the user wins and “Game Over” message if the player losses along with the displaying scores on a side.

3) Immersive Audio Design: To ensure that the soundtrack and the paddle hit sound doesn’t overlap, I first reduced the volume (decibels) of the soundtrack using Audacity software before importing it into P5.js.

4) Areas I can Improve Further: Firstly, I aim to introduce difficulty levels to enhance the game’s complexity. Currently, players have three themes to choose from. By adding difficulty levels, players would face nine different variations (3 themes x 3 levels), offering a certain complex gaming experience.

Secondly, I plan to implement full-screen gameplay. However, attempting to switch to full-screen mode has caused disruptions in the game’s initial phase. It has affected the ball’s movement, needed adjustments in the number of bricks, required an increase in paddle size, and led to a decline in background quality. Additionally, P5.js has been slow in loading and executing the code, posing further challenges.

Conclusion: I’m very much satisfied with the output of my game, I never imagined I can implement complex algorithms and great features of P5.js programming: OOPS and Functions to recreate my favorite childhood game. For further learning experience, I’ll try to incorporate the changes I mentioned earlier.

Reference: Used Tools/ Software
1) Dall-E for background images : https://openai.com/dall-e-3
2) Audacity Software for sound editing. https://www.audacityteam.org
3) Coding Garder (Youtube Channel): https://www.youtube.com/watch?v=3GLirU3SkDM

Midterm Project – Space

This project combines the thrill of techno music with the interactivity of hand gestures, providing players with a unique gaming experience. Using a webcam, players can control the spaceship’s movement with simple hand gestures, making the game both engaging and intuitive.

The game environment features a spaceship navigating through a field of objects. The objective is to avoid colliding with the objects while collecting points. The game utilizes the hand pose machine learning model to detect hand gestures, allowing players to control the spaceship’s movement by opening or closing their hand. Additionally, players can make a fist to pause or resume the game, adding an extra layer of interaction.

One aspect of the project that I’m particularly proud of is the seamless integration of hand gestures for controlling the spaceship. By leveraging the hand pose model provided by the ml5.js library, I was able to accurately detect and interpret hand movements in real time, providing players with responsive and intuitive controls. Additionally, the dynamic gameplay, with objects spawning randomly and increasing in speed over time, keeps players engaged and challenged throughout the game.

function detectHands() {
  if (predictions.length > 0) {
    const landmarks = predictions[0].landmarks;
    // highlightHand(landmarks, 'green'); // Optional: Uncomment to see hand landmarks

    if (isClosedFist(landmarks)) {
      let currentTime = millis();
      if (currentTime - fistDetectedTime > fistToggleDelay) {
        isGamePaused = !isGamePaused;
        console.log(isGamePaused ? "Game Paused" : "Game Resumed");
        fistDetectedTime = currentTime;
      }
    } else if (isOpenHand(landmarks)) {
      let averageX = landmarks.reduce((acc, val) => acc + val[0], 0) / landmarks.length;
      if (averageX < width / 2) {
        spaceship.setDir(-1);
      } else {
        spaceship.setDir(1);
      }
    } else {
      spaceship.setDir(0);
    }
  }
}

// Check if the hand is open 
function isOpenHand(landmarks) {
  let minDist = Infinity;
  for (let i = 4; i <= 20; i += 4) {
    for (let j = i + 4; j <= 20; j += 4) {
      let dist = distanceBetweenPoints(landmarks[i], landmarks[j]);
      if (dist < minDist) {
        minDist = dist;
      }
    }
  }
  return minDist > 50;
}

Also, another key element that enhances the immersive experience of the Gesture-Controlled Game is the synchronization of the music with the background elements. By integrating dynamic sound effects and music, the game creates a cohesive audio-visual experience that engages players on multiple sensory levels.

function drawGameElements() {
    let level = amplitude.getLevel();
    let size = map(level, 0, 1, 5, 20); //size for more impact

    // Cycle through HSB colors 
    colorMode(HSB, 360, 100, 100, 100);
    colorPhase = (colorPhase + 1) % 360;

    for (let i = 0; i < 400; i++) {
        let x = noise(i * 0.1, frameCount * 0.01) * width;
        let y = noise((i + 100) * 0.1, frameCount * 0.01 + level * 5) * height;

        // Dynamic stroke color
        let hue = (colorPhase + i * 2) % 360;
        let alpha = map(level, 0, 1, 50, 100); //alpha based on volume for dynamic visibility

        // Simulated glow effect
        for (let glowSize = size; glowSize > 0; glowSize -= 4) {
            let glowAlpha = map(glowSize, size, 0, 0, alpha); 
            stroke(hue, 80, 100, glowAlpha);
            strokeWeight(glowSize);
            point(x, y);
        }
    }

    colorMode(RGB, 255);
    spaceship.show();
    spaceship.move();
    handleParticles();
}

Improvements:

Optimization and Performance: Consider optimizing the game’s performance, especially when dealing with graphics and rendering. This includes minimizing unnecessary calculations and rendering, especially within loops like drawGameElements().

Game Mechanics Refinement: Assess and refine the game mechanics for a better gameplay experience. This could involve adjusting spaceship movement controls, particle spawning rates, or particle effects to enhance engagement and challenge.

Midterm Project | Space Adventure | Aadil

Concept

I had initially intended to make an automated generative kaleidoscope but there were lots of issues with it and the sketch would lag a lot because of the large amount of random numbers generated. So, I decided to make a fun 2-Player game .

I used to play this game on my phone called 2 Player Games that had a variety of games in it that could be played by 2 players. One of them was Star Catcher, which is what inspired me to make this project.

Star Catcher is a game where you have two spaceships each controlled by a player and stars randomly appear on the screen . The player who collects a required number of stars first wins the game . There are asteroids that the spaceships can collide with and also collision between the spaceships of the players. I could not find an online version of this game for PC so I thought that it would be great if I could build something like this .

I had do something’s differently for the keyboard control and Fullscreen options as compared to the mobile version which just relies on touch . I came up with the following rules and specifications for the game :

  1. There has to be a start scene ,  a game scene and a final winning scene
  2. The game starts after spacebar is pressed from the start scene, the first spaceship is controlled by WASD and the second spaceship is controlled by arrow keys. The movement must be smooth and there must be acceleration and deceleration rather than just velocity. The spaceships must rotate and be capable of moving in all directions.
  3. The goal is to collect 10 stars before the opponent.
  4. There are asteroids generated randomly that can collide with the player spaceship to make them bounce
  5. There is sound interaction for collisions, start screen, star collection and winning scene.

Sketch

Please run the sketch in p5 (it does not enter into Fullscreen mode properly in WordPress) . The Project contains 3 classes in addition to the sketch.js files . If using a browser that has esc as default key for exiting Fullscreen , make sure to use ‘e’ instead of esc to exit fullscreen.

Link to the sketch –p5.js Web Editor | IMMidtermProjectSpaceDodge (p5js.org)

How the Project works/ some Implementation details

The Project has 3 classes :

  1. Player Class:
    • Represents the players in the game.
    • Handles player movement based on keyboard input.
    • Updates player position, velocity, and angle.
    • Detects collisions with other players and asteroids.
  2. Asteroid Class:
    • Represents the asteroids in the game.
    • Updates asteroid position and rotation.
    • Displays asteroids on the canvas.
  3. Star Class:
    • Represents the stars that players can collect for points.
    • Updates star position and detects collisions with players.
    • Displays stars on the canvas.

The movement is smoothened out by adding acceleration and friction which are two variables defined in the beginning of the code .

I also have the following helper functions :

Helper Functions:

  • Functions for handling asteroid generation, resetting the game state, toggling Fullscreen mode, and resetting sound flags.
      1. handleAsteroidGeneration(): Generates a new set of asteroids based on the current game mode (Fullscreen or windowed) with random positions, speeds, sizes, and rotation speeds.
      2. handlePlayerAsteroidCollision(player): Checks for collisions between a player and asteroids and adjusts player velocity accordingly upon collision.
      3. handleCollision(): Detects and handles collisions between players in the game.
      4. resetGame(): Resets game variables and objects to their initial state for starting a new game.
      5. toggleFullscreen(): Toggles the game between Fullscreen and windowed mode.
      6. exitFullscreen(): Exits Fullscreen mode and adjusts game elements accordingly.
      7. resetSoundFlags(): Resets flags related to sound effects to their initial state.
      8. drawStartMenu(): Draws the start menu interface on the start canvas.
      9. drawEndScreen():
        • Draws the end screen interface when the game is over.

and an event handler:

  • key Pressed: Handles key presses for starting the game, toggling Fullscreen, and exiting Fullscreen.
Assets Used

Assets used for making the game are :

Images:

  1. Asteroid image: ‘Images/asteroid.png’
  2. Star image: ‘Images/star2.png’
  3. Background image: ‘Images/Space_background.jpg’

Audio:

(All audio used was found from Pixabay and trimmed to fit the game sound needed)

  1. Start menu background music: ‘AudioFiles/start_menu.mp3’
  2. Winner music: ‘AudioFiles/win_sound.mp3’
  3. Collision spacecraft sound: ‘AudioFiles/bump.mp3’
  4. Collect star sound: ‘AudioFiles/star_collect.mp3’

Font:

    1. Font file: ‘Roboto-Regular.ttf’

Key Challenges Faced 

  1. The movement implementation was quite challenging , I had to make sure to implement acceleration , deceleration and collision and make sure it looks realistic . I experimented with values to determine what looks good for the canvas size and full screen.
  2. Sounds- I faced difficulty implementing audio and spent a lot of time making sure that audio did not overlap. At the end, I decided to use Boolean flags to check whether an audio is being played or not.
  3. Switch to Fullscreen- I had some issues switching back to full screen, of course when going in full screen you need to change the speed of the spaceships and the number of asteroids to make the game fun.


Code that I am Proud Of

Implementing the movement mechanism was a bit difficult , as it had to be smooth and the spaceship had to change direction , this is implemented in the player class as follows:

  class Player{
//..........
update() {
    // Apply friction to the acceleration
    this.acceleration.mult(1 - friction);

    // Apply friction to the velocity
    this.velocity.mult(1 - friction);

    // Update velocity based on acceleration
    this.velocity.add(this.acceleration);

    // Limit the velocity to the maximum speed
    this.velocity.limit(maxSpeed);

    // Check if maximum speed is reached
    this.maxSpeedReached = this.velocity.mag() >= maxSpeed;

    // Update position based on velocity
    this.x += this.velocity.x;
    this.y += this.velocity.y;

    // Wrap around the canvas boundaries
    if (this.x < 0) {
      this.x = width;
    } else if (this.x > width) {
      this.x = 0;
    }
    if (this.y < 0) {
      this.y = height;
    } else if (this.y > height) {
      this.y = 0;
    }

    // Calculate angle
    if (this.velocity.x !== 0 || this.velocity.y !== 0) {
      this.angle = PI / 2 - atan2(-this.velocity.y, this.velocity.x);
    }
/* ........*/
}

This code brings acceleration and friction to the player movement, the calculate angle part changes the orientation of the spaceship with respect to its velocity vectors.

The collision mechanism was implemented in the two functions below :

 function handleCollision() {
  // Check for collision between players
   // Check for collision between players
    if (player1.collides(player2) && !player1Collision && !player2Collision){
        // Set collision state for both players
        player1Collision = true;
        player2Collision = true;

        // Record the time of collision
        lastCollisionTimePlayer1 = millis();
        lastCollisionTimePlayer2 = millis();}
  if (player1.collides(player2)) {
    // Calculate direction vector between the centers of the players
    let collisionVector = createVector(player2.x - player1.x, player2.y - player1.y).normalize(); //gives unit vector in direction of centeres and stores it in collision vector

    // Calculate the magnitude of the velocity components along the collision vector
    let velocity1AlongCollision = player1.velocity.dot(collisionVector);
    let velocity2AlongCollision = player2.velocity.dot(collisionVector);
    
    // Calculate the new velocities after the collision ,swaps the velocities
    let newVelocity1AlongCollision = velocity2AlongCollision;
    let newVelocity2AlongCollision = velocity1AlongCollision;


    // Update velocities with the new components
    let newVelocity1 = p5.Vector.add(player1.velocity, p5.Vector.mult(collisionVector, newVelocity1AlongCollision - velocity1AlongCollision));
    let newVelocity2 = p5.Vector.add(player2.velocity, p5.Vector.mult(collisionVector, newVelocity2AlongCollision - velocity2AlongCollision));

    player1.velocity.set(newVelocity1.x, newVelocity1.y);
    player2.velocity.set(newVelocity2.x, newVelocity2.y);

    // Play collision sound when spacecraft collides with another spacecraft
    if (!collisionSpacecraftSoundIsPlaying) {
      collisionSpacecraftSound.play();
      collisionSpacecraftSoundIsPlaying = true;
    }
  } else {
    // Reset collision sound flag when no collision occurs
    collisionSpacecraftSoundIsPlaying = false;
  }
}


function handlePlayerAsteroidCollision(player) {
  // Determine which player is being checked
  let isPlayer1 = player === player1;

  // Check if the player is in a collision state
  let playerCollision = isPlayer1 ? player1Collision : player2Collision;
  let lastCollisionTime = isPlayer1 ? lastCollisionTimePlayer1 : lastCollisionTimePlayer2;

  if (!playerCollision) {
    for (let asteroid of asteroids) {
      if (player.collides(asteroid)) {
        // Calculate collision angle
        let angle = atan2(player.y - asteroid.y, player.x - asteroid.x);

        // Calculate the relative velocity of the player with respect to the asteroid
        let relativeVelocity = p5.Vector.sub(player.velocity, createVector(asteroid.speed * cos(angle), asteroid.speed * sin(angle)));

        // Reflect player's velocity based on collision angle and asteroid's speed
        let velocityMagnitude = relativeVelocity.mag();
        let reflectionAngle = atan2(-relativeVelocity.y, -relativeVelocity.x);
        let newVelocity = p5.Vector.fromAngle(reflectionAngle);
        newVelocity.setMag(velocityMagnitude);

        player.velocity.set(newVelocity);

        // Set collision state for the player
        if (isPlayer1) {
          player1Collision = true;
          lastCollisionTimePlayer1 = millis();
        } else {
          player2Collision = true;
          lastCollisionTimePlayer2 = millis();
        }

        // Play collision sound when spacecraft collides with a rock
        if (!collisionSpacecraftSoundIsPlaying) {
          collisionSpacecraftSound.play();
          collisionSpacecraftSoundIsPlaying = true;
        }
      }
    }
  }
}


Another piece of code that is interesting is to solve the challenge I faced to change the asteroid count and speed of asteroids when the screen is made Fullscreen. This is implemented in the function below:

function handleAsteroidGeneration() {
  asteroids = []; // Clear existing asteroids
  let count = isFullscreen ? fullscreenAsteroidCount : defaultAsteroidCount;
  let speedMin = isFullscreen ? fullscreenAsteroidSpeedMin : defaultAsteroidSpeedMin;
  let speedMax = isFullscreen ? fullscreenAsteroidSpeedMax : defaultAsteroidSpeedMax;
  
  // Generate new asteroids based on the mode (fullscreen/windowed)
  for (let i = 0; i < count; i++) {
    let x = random(windowWidth); // Random x position
    let y = random(windowHeight); // Random y position
    let speed = random(speedMin, speedMax); // Random speed within the specified range
    let angle = random(TWO_PI); // Random initial rotation angle
    let rotationSpeed = random(-0.05, 0.05); // Random rotation speed
    let size = random(60,120); // Random size
    asteroids.push(new Asteroid(x, y, size, speed, angle, rotationSpeed));
  }
}

I have also implemented a similar switch for acceleration as indicated in the variable declarations that is modified in the toggle and exit Fullscreen functions.

let accelerationFullscreen = 0.7; // Acceleration value for fullscreen mode
let accelerationWindowed = 0.3; // Acceleration value for windowed mode
let acceleration = isFullscreen ? accelerationFullscreen : accelerationWindowed; // Set initial acceleration value based on current mode 
function toggleFullscreen() {
  fullscreen(true); // Switch to fullscreen
  isFullscreen = true;
  handleAsteroidGeneration(); // Handle asteroid generation for fullscreen
  acceleration = accelerationFullscreen; // Set acceleration for fullscreen mode
}

function exitFullscreen() {
  fullscreen(false); // Exit fullscreen
  isFullscreen = false;
  handleAsteroidGeneration(); // Handle asteroid generation for windowed mode
  resizeCanvas(600, 600); // Resize canvas back to original size
  acceleration = accelerationWindowed; // Set acceleration for fullscreen mode
}


This changes the speed as well as number of asteroids spawned according to the screen mode so that the user encounters roughly the same amount of challenge in both cases. Since these variables have been defined at top, they can be changed anytime .

Reflection

Overall, I am pretty happy with the final game I created. I learnt a lot of new things in p5 and realized how the organization of the code into classes representing various types of objects made it much easier to understand and develop. There is some scope for improvement that could be done in the future such as :

  1. Adding more Players to the game (The player class is already implemented).
  2. Adding more sounds to the game.
  3. Adding extra fun objects and classes such as a ‘black hole’ that pulls the spaceship towards it for some time and or a ‘super star’ that gives more points than usual but stays only for a certain duration of time.
  4. Changing the sprite of the spaceship? Right now, it’s just simple triangles but the code would also work for better sprites.
  5. Experimenting with different trails. I have a simple spacecraft booster with one large and two small ellipses but its possible to make more sophisticated ones and attach it to player class.

Crafting “Garden Guardian”: The Journey of My Midterm Project

When coming up with the idea for “Garden Guardian,” I wanted to make a charming, aesthetic game that had a challenging twist. A basic garden planting game didn’t seem very exciting on its own. I needed to add something to it.

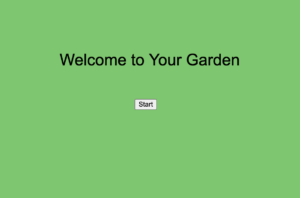
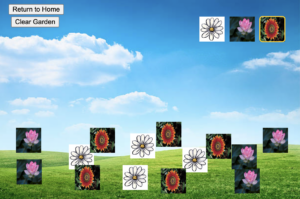
However, this wasn’t always the case. In the very beginning, this project was pretty basic and boring. My first draft was just a game where you could plant flowers in a field, and that’s all it did. I didn’t focus much on how it looked during this early phase. It was pretty simple and not very attractive. This is what it looked like at first.

With the core functionality in place, I could now turn my attention to the aesthetics. To enhance the visuals, I utilized a combination of images generated by Dall-E and icons sourced from Google images. This allowed me to give the project a more polished and appealing look while retaining the foundational code I had already developed.

The game was pretty, but I wasn’t satisfied. That’s when I decided to throw in some pests causing trouble for the player’s garden. These pest invasions make the simple act of growing flowers into more of a defensive mission. Cultivating a colourful garden is still the main goal, but now you have to protect it as well.

Imagine this: you start with a blank canvas, ready to transform it into a breathtaking field of blooms. With a simple click, you can choose between flowers to add splashes of colour. 

But just when you think you’ve mastered the game, the real fun begins! Pesky pests appear out of nowhere, trying their best to kill your floral babies. That’s when your skills as a true Garden Guardian will be put to the test.

With this project, I really wanted to challenge my coding skills. One of the first challenges I faced was designing a game state management system. I wanted smooth transitions between the introduction screen, gameplay, and instructions. Through trial and error, I eventually settled on a streamlined approach, with the draw() function acting as the game’s heartbeat, constantly updating and rendering all the visuals used in the game (icons, buttons and backgrounds) based on the current state.

The drawGame() function became the centrepiece of my code, responsible for orchestrating the entire garden experience. I spent SO MANY hours refining this function, ensuring that the rendering of the garden background, the placement of icons, and the display of planted flowers all worked seamlessly together. I’m particularly proud of the highlighting technique I implemented, which draws attention to the currently selected icon, enhancing the overall user experience.

// Highlight the selected icon
noFill();
stroke(255, 204, 0); 
strokeWeight(2); 
let selectedIconIndex = selectedFlowerType - 1;
if (selectedIconIndex >= 0 && selectedIconIndex < iconPositions.length) {
  let pos = iconPositions[selectedIconIndex];
  rect(pos.x, pos.y, 50, 50, 10);

One of the most rewarding aspects of this project was creating the Flower class. Building a system to manage the lifecycle of each flower, from planting to potential infestation and treatment, was a true test of my object-oriented programming skills. The introducePest() method, which simulates the arrival of a pest and sets a timer for the flower’s demise if left untreated, was a particularly satisfying challenge to overcome. This took way too much time but as my mother would say, it felt like eating a ladoo (a delicious Indian dessert) when I could finally get it to work!

class Flower {
  constructor(x, y, type) {
    this.x = x;
    this.y = y;
    this.type = type;
    this.size = 50;
    this.hasPest = false;
    this.pestTimer = null;
  }

  display() {
    let img = [flowerImg1, flowerImg2, flowerImg3][this.type - 1];
    image(img, this.x - this.size / 2, this.y - this.size / 2, this.size, this.size);
    if (this.hasPest) {
      image(pestImg, this.x - this.size / 2, this.y - this.size / 2, this.size, this.size);
    }
  }

  introducePest() {
    if (!this.hasPest) {
      this.hasPest = true;
      this.pestTimer = setTimeout(() => this.die(), map(targetFlowers.planted, 0, targetFlowers.total, 4000, 3000));
    }
  }

  treatWithPesticide() {
    if (this.hasPest) {
      clearTimeout(this.pestTimer);
      this.hasPest = false;
      gameTime += 3;
    }
  }

  die() {
    let index = flowers.indexOf(this);
    if (index !== -1) {
      flowers.splice(index, 1);
      targetFlowers.planted = max(0, targetFlowers.planted - 1);
    }
  }
}

The Flower class encapsulates all the properties and behaviours of each flower in the garden. From managing the flower’s position, type, and size to handling pest infestations and treatment, this class is the backbone of the game’s core mechanics.

The introducePest() method is a prime example of the thought process behind crafting engaging gameplay. When a pest is introduced, a timer is set to simulate the potential demise of the flower if left untreated. The duration of this timer is dynamically adjusted based on the number of flowers already planted, increasing the difficulty as the game progresses. I had to do a lot of research (and some help from ChatGPT) to get this section working.  

Conversely, the treatWithPesticide() method allows players to counter the pest threat by using the pesticide icon. When a flower is treated, the pest timer is cleared, the hasPest flag is reset, and the player is rewarded with a few extra seconds on the game timer, encouraging strategic decision-making.

The die() method handles the removal of a flower from the game when it succumbs to a pest infestation. By splicing the flower from the flowers array and adjusting the targetFlowers.planted count, the game state is seamlessly updated, reflecting the player’s progress towards the target.

Throughout the development process, I encountered numerous roadblocks and debugging nightmares. However, each obstacle was an opportunity to learn and grow. I quickly realised the importance of modular code, which led me to create separate functions and classes for specific tasks, improving the overall readability and maintainability of my code.

Looking back on this journey, I’m filled with a sense of accomplishment and gratitude. “Garden Guardian” not only allowed me to create an entertaining game but also served as a valuable learning experience. I gained a deeper understanding of game mechanics, object-oriented programming, and the intricacies of creative coding with p5.js. Most importantly, I discovered the joy of problem-solving and the satisfaction of seeing my code come to life in the form of an engaging interactive experience.

However, there are still so many areas where I can improve and expand “Garden Guardian”: The scoring system needs work. Right now, you just win by planting enough flowers before time runs out. But I want a better system that scores you based on things like how many pests you treated, the variety of flowers planted, and maybe even keeping your garden completely pest-free. 

The difficulty progression could be better too. I think having the difficulty adapt based on the player’s performance would make it more engaging. If someone is struggling, the game could spawn fewer pests or give more time.

Visually, while the current look is charming, adding more detailed graphics, animations and effects could really enhance the overall aesthetic appeal. And new gameplay elements like power-ups, special abilities or different game modes could add lots of replay value.

During development, I ran into some tough challenges. Managing all the different timers and making sure the countdown was accurate when players gained extra time was really tricky. Weird edge cases, like planting flowers outside the garden area still need some work. 

Working through the issues I faced was a huge learning experience for me. It really emphasised the importance of thorough testing, keeping my code organised, and anticipating potential problems. Moving forward, I’ll apply those lessons to make my games even more polished.

“Garden Guardian” may be a small project, but it represents a big milestone in my coding journey. I had so much fun tackling challenges and adding and improving features and I cannot wait to experiment with game dev more!