Assignment 2 – Rainbow Ripples

For this assignment, I had wanted to create something colorful. I began with a gradient of “pixels” whose color was mapped to their x and y location. This was not enough, so I decided to add a ripple effect. The ripples are their own class and are displayed above the pixel background. I made it so the ripples would have their color be the inverse of the color of the background pixels. The ripples appear based on a random interval and at random locations.

I am particularly proud of my creation of a dedicated class for the ripples, as well as the calculation that takes place within them. I ran into some issues with performance as if too many ripples appeared at once, the program would slow down. I did my best to optimize the calculations and remove any redundant math.

display() {
    for (let i = 0; i < pixelGrid.length; i++) {
      let pixelColor = pixelGrid[i];
      let px = (i % gridSizeX) * pixelSize;
      let py = Math.floor(i / gridSizeX) * pixelSize;
      let distance = dist(px, py, this.x, this.y);
      
      if (distance < this.radius) {
        let inverseColor = color(
          255 - red(pixelColor),
          255 - green(pixelColor),
          255 - blue(pixelColor)
        );
        fill(
          inverseColor.levels[0],
          inverseColor.levels[1],
          inverseColor.levels[2],
          this.alpha
        );
        square(px, py, pixelSize);
      }
    }

More work can certainly be done to further optimize the code, as I understand that drawing pixels on top of already existing pixels is slower than simply modifying their color for the ripples.

Assignment #2 – Soulless trails surrounded by optimism

For this assignment, I wanted to make something not so elaborate, but with a bit of randomness. After watching Casey Reas’ Eyeo talk, I find the concept of creating art with random elements interesting. One of the first ideas I had was to create a ball that multiplied each time it hit the wall. Despite wanting to do this, I realize that it would not have been possible due to the fact that I wanted to keep myself limited by the current knowledge taught in class. Yes, as students, we should find more information on how to do things, but in the same philosophy of designing video games, often creativity is found under restrictions.

Therefore, I decided to make something continuous, something that would fill the entire canvas with elements. For this, I particularly added the background code outside the draw() function and put it in the setup(), as I would create the illusion that many figures are being drawn at the same time. After I decided this, I wanted to create a simple algorithm that would dictate what type of ellipse, where, what color, shape and X and Y coordinates it would be. There are many variations to allow for a colorful variety of ellipses to be drawn rapidly on the canvas. Although, despite having most of the homework “finished,” I knew that it would not have been enough.

So, after a bit of thought on how to do it, I decided to add a circle that would bounce after detecting a collision with the canvas boundaries. It is similar to a practice we did in class, but that I could not finish on time due to working a bit slower than the rest of the class. The bouncing circle (or ball) was the trickiest part because I did not want to make something static, but rather entirely random to allow for different generative art.

I only used for() loops for this code as I did not find any use for while(), at least, in what I wanted to do. Also, if you click on the canvas, it will clean and reset everything. Likewise, the ball will always start on random positions, axis and at random speeds.

Particularly, I feel happy because I could figure out how to make the ball bounce every time in hits the walls. Here is the code behind it:

//Bouncing ball.
 fill(0) //The ball in black color, in this canvas, looks the best (at least in my opinion).
 
 //Check if the ball is passing the boundaries. If yes, determine the wall and assign a random X velocity and Y velocity value that keeps the ball inside the canvas.
 if(cx+vx+cw>=0 && cx+vx+cw<=width && cy+vy+cw>=0 && cy+vy+cw<=height){
   print("It works.");
 } else if (cx+vx+cw>=width){
   randomdecision = int(random(0,2))
   if (randomdecision==0){
     boundaryc = 2;
   } else {
     boundaryc = 3;
   }
 } else if (cx+vx+cw<=0){
   randomdecision = int(random(0,2))
   if (randomdecision==0){
     boundaryc = 1;
   } else {
     boundaryc = 4;
   }
 } else if (cy+vy+cw<=0){
   randomdecision = int(random(0,2))
   if (randomdecision==0){
     boundaryc = 1;
   } else {
     boundaryc = 3;
   }
 } else if (cy+vy+cw>=height){
   randomdecision = int(random(0,2))
   if (randomdecision==0){
     boundaryc = 2;
   } else {
     boundaryc = 4;
   }
 }
 
 //Once the wall is detected, and a decision is made as to which direction it should go, the ball will bounce according to the side, and will be randomly assigned an X and Y velocity.
 if (boundaryc == 1){
   vx+=random(1,5);
   vy+=random(1,5);
   
 } else if (boundaryc == 2){
   vx-=random(1,10);
   vy-=random(1,10);
   
 } else if (boundaryc == 3){
   vx-=random(1,10);
   vy+=random(1,10);
   
 } else if (boundaryc == 4){
   vx+=random(1,10);
   vy-=random(1,10);
 }
   
 circle(cx+vx,cy+vy,cw) //Once all the randomness is applied, the circle is drawn following the established rules.

This task, at least personally, was not that challenging, although I felt I could do more. For future projects, I would like for my art to have a system that allows creating certain patterns randomly.

Assignment 2: Reading Response to Casey Reas’ Eyeo Talk on Chance Operations

Looking through the catalogs of the works, it seems that the depicted motion seems to become more randomized as it progresses, illustrating more chaos in these works. Specifically the description of element 5 piqued my interest. The way in which it starts in ordered fashion but from step B7 it starts deviate from original path, therefore initiating disorder. This made me think about the ultimate process of chaos to order and vice versa. The way in which chaos changes to order is based on the degree of randomness within the set behavior. From a programming perspective, I believe this reemphasizes the importance of non-deterministic attribute of functions. In a usual sense, one would desire controlled environment, but non-deterministic functions, for instance in sql server returns necessary outputs although having a certain degree of randomness.

There have been many works demonstrated in the video that seemed to show patterns and sequences, previously hidden for individual randomized elements, when in a large interconnected body. In a sense, it can be inferred that order cannot come from individuality but from groups. The intricate interplay between chaos and order in these artistic representations prompts reflection on the broader dynamics of systems, emphasizing the emergent properties that materialize when diverse elements interact within a unified framework.

Assignment – 2: Optical illusion

For this assignment, I have decided to use for loops to make a type of black and white optical illusion. I used one global variable to animate both the lines and the circles. Calculating the rotations using the angles were bit difficult at first. Furthermore, used map method for each lines and circles to change the position of the points and the color hues respectively. Particular section that I am proud of is computing the x and y positions of the line using cos and sin to move the lines.

For further improvement, adding user interaction based on mouse clicking or mouse position could be a viable direction. Moreover, randomizing the user interaction to a certain extent is an area that I am trying to improve.

let angle = 0;

function setup() {
  createCanvas(400, 400);
}

function draw() {
  background(0);

  let circles = 10;
  let diameter = width / 2 + cos(angle) * 50; 

  for (let i = 0; i < circles; i++) {
    let gray = map(i, 0, circles - 1, 0, 255);
    fill(gray);

    ellipse(width / 2, height / 2, diameter, diameter);
    diameter -= 20;
  }

  drawLines();

  angle += 0.04;
}

function drawLines() {
  let numLines = 12;
  let lineLength = 200;

  for (let i = 0; i < numLines; i++) {
    let rotatingAngle = map(i, 0, numLines, 0, TWO_PI);
    let x1 = width / 2 + cos(rotatingAngle + angle) * (width /6 );
    let y1 = height / 2 + sin(rotatingAngle + angle) * (width /6);
    let x2 = x1 + cos(rotatingAngle) * lineLength;
    let y2 = y1 + sin(rotatingAngle) * lineLength;

    stroke(255);
    strokeWeight(2);
    line(x1, y1, x2, y2);
  }
}


Assignment 2: Chaos and Creativity- Reading Response to Casey Reas’ Eyeo Talk on Chance Operations

At the start of the video, when Casey Reas said that chaos was thought to exist before creation and order was thought to be brought by god or gods, I found his statement very interesting. I was thinking of the fact that artworks focused on the beauty of structured, rational, and ordered things for centuries before randomness, chaos, and unplanned things started to be the themes of the artworks. Then, I realized that randomness, chaos, and unplanned things started to be the themes of artworks after the age of the god-centered community slowly lost its focus on ‘god’ and ‘gods,’ while the focus on ‘science’ increased. This fact made me think that perhaps the reason for the focus on structured and ordered things might be related to the god-centered focus of that time. Here, I felt like the reason why unstructured things were not the theme of artworks was that they were not considered worth drawing, as ordered things – thought to be of god – were considered beautiful. And this made me think that, in a sense, the artwork reflects society’s beliefs.

The video made me realize that chance operation essentially involves adding a touch of randomness to the set of rules governing the generation of colors, shapes, or patterns. When I think of programming, I always associate it with a rational process of structured and ordered code, as it requires precise and logical input of rules to be executed. Using programming—which is typically associated with structured and ordered things—as a medium for creating seemingly unstructured artwork was particularly fascinating. I think the beauty of chance operation lies in creating something seemingly unstructured and irrational through a structured and ordered medium. Moreover, I think the best term to describe chance operation is ‘planned randomness.’ While watching the video, I understood that this process of making artwork is not based on blind randomness, where everything is unknown and based purely on luck. Instead, it is a type of planned randomness, carefully calculated and determined, offering several choices, yet the output remains unpredictable.

After learning about the chance operation through the video, I perceived it as a method of creating artwork in collaboration with the computer. Adding a touch of ‘randomness’ to ordered codes felt like giving the computer free will to choose what to draw independently. By incorporating randomness into the process, the artist and the computer engage in a unique collaboration. I found this aspect very intriguing, as the computer, typically seen as a tool for precise and predictable outcomes, becomes an active participant in the creative process. It was like giving the machine a degree of ‘creative freedom’ within the boundaries set by the artist.

Assignment 2: City of Stars by Sihyun Kim

Concept

In this assignment, I used for loops, if-statements, and some basic functions to depict the busy and vibrant nightlife of a city and starry night. I wanted to express something that cannot coexist yet imaginable. Then I thought of a starry night in the city, Sometimes, even a single star is hard to find in the city, because of the brightness of a vibrant city.

First of all, for the starry night background, I was inspired by the photo attached below which was taken by Ryan Hutton. When I first saw this image I was amazed at the tons of stars in different sizes that were twinking in the sky. So, in my artwork, which is also attached below, I decided to depict tons of twinkling stars in different sizes too.

The Photo Taken by Ryan Hutton that I Was Inspired by


The Output

For the depiction of a city in the foreground, I do not have a specific image that I was inspired by. I just wanted to express the “busy city” by changing the light color of the windows continually. I have let the color of the windows change randomly between 4 neon colors. The reason why I chose to let the window change by 4 neon colors was that I wanted to express vibrance through the neon colors.

Highlight of Code

I am particularly proud of the code attached below. This section of the code is responsible for the generation of the stars. As shown in the snippet of the code, I have utilized for loops to create the stars. The for loop iterates 50 times to create 50 stars at random positions on the canvas with random sizes. I am particularly proud of this code because of the way I have coded it to give the “twinkling effect”. I was contemplating of a way to give a twinkling effect to the stars by giving the fade-out effect. Then, I realized that I could perhaps adjust the transparency of the background to give that twinkling effect. By letting the stars drawn previously fade out progressively as the backgrounds with adjusted transparency overlap, I have achieved the twinkling effect that I wanted. I was just so proud of myself for coming up with this idea of adjusting the transparency of the background to make the stars twinkle.

function draw() {
  background(0, 25); //transparency for the "twinkling" effect

  for (let i = 0;
    i < 50;
    i++ //50 == number of stars to be generated
  ) {
    let starX = random(0, width); // randomizing x position of the generated star
    let starY = random(0, height); // randomizing y position of the generated star
    let star_size = random(1, 3); //randomizing size of the generated star
    stroke(255);
    strokeWeight(star_size);
    point(starX, starY);
  }

Reflection and Ideas for Future Work

Overall I am very satisfied with the output of my codes. I honestly found my artwork visually pleasing. While some parts of the codes, such as the creation of the windows, were challenging. I genuinely enjoyed doing this assignment. I think I could further improve my artwork in several ways. For example, I could add some animation of buildings moving up and down to further express the “busy and vibrant city”. Also, I could add more complex shapes of buildings. Next time, I think I would also add some interactions, such as buildings changing when the mouse is pressed, to make my artwork more interesting.

Assignment 2 (production 2) – Liquid Floor

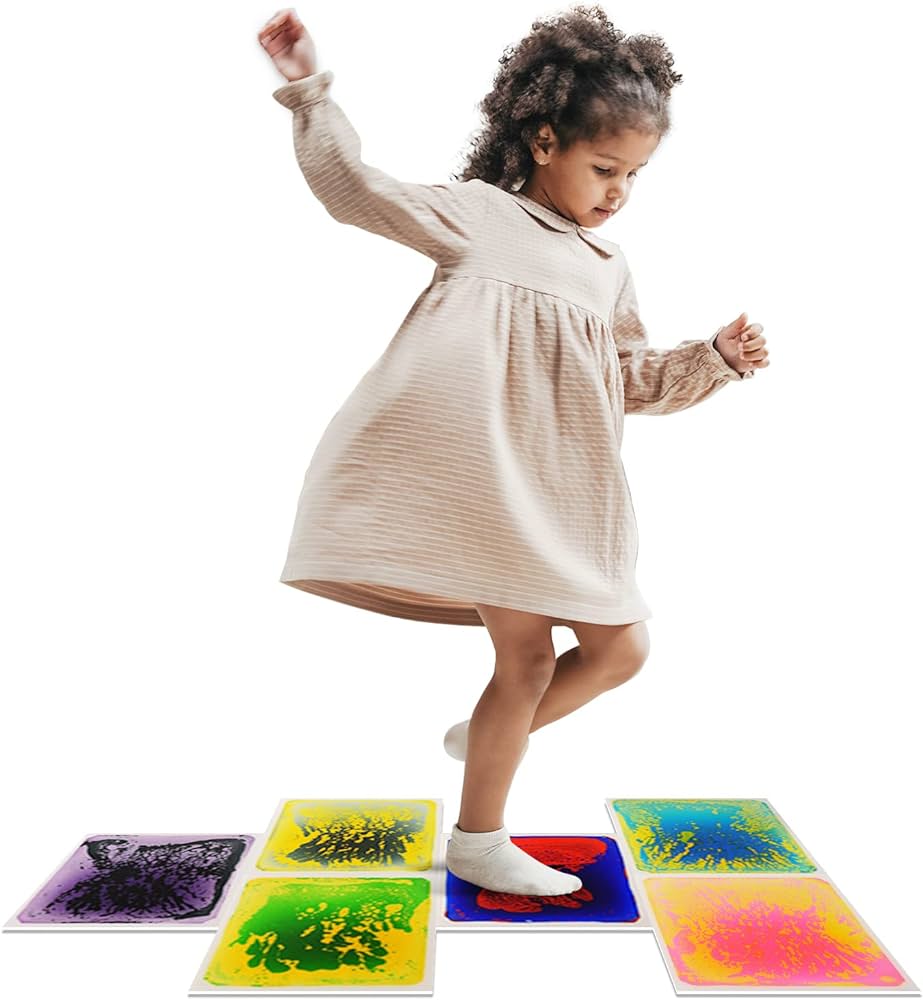
The concept for this piece was inspired by the kids toy, “Sensory Liquid Floor” which creates a nice colorful aesthetic. The same concept was applied on the canvas making the mouse be the “kid” and when moving, the mouse acts as if there is movement on the floor, changing the color of the screen to the background color. Another function a “mouse pressed” function that changes the color of the screen to the background color when the mouse is pressed.

Figure 1 – Liquid Floor Toy: 

Move the mouse around! Mouse click!

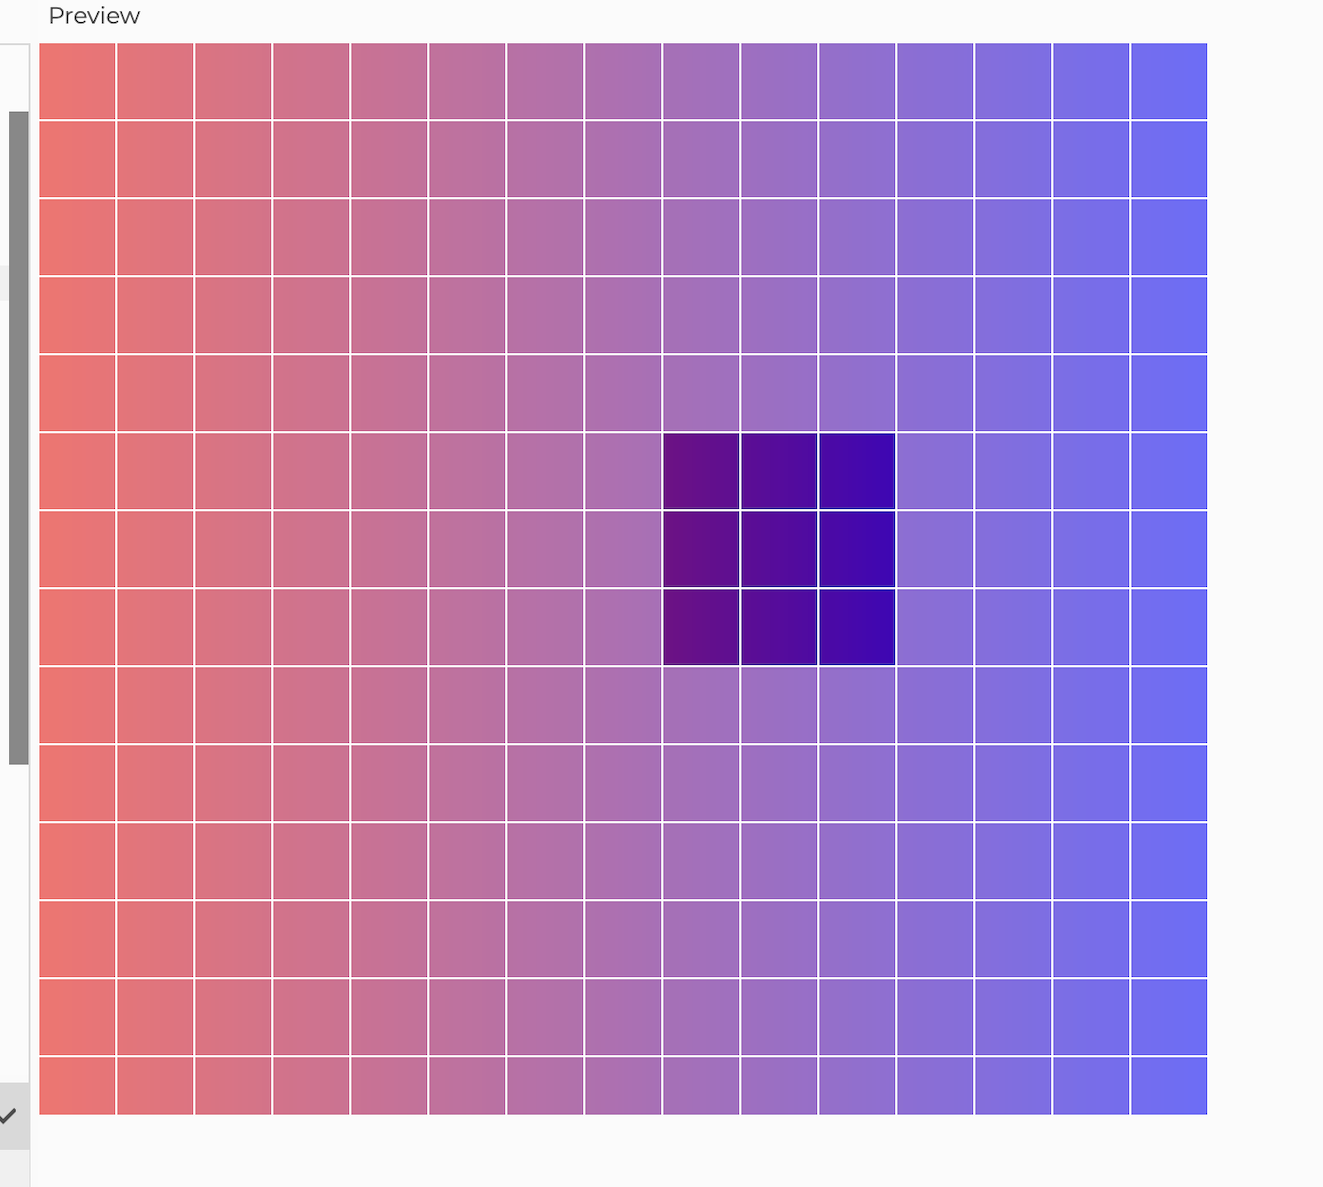
The first notable layer was a grid made of squares just as figure 2 shows. Then, a colorful gradient background with rainbow highlights that was painstakingly created using color interpolation to guarantee a fluid, flawless movement across the spectrum. Then, each square was programmed to react to the mouse cursor’s proximity, giving the piece its interactive quality. The vibrant colors beneath the squares were gradually revealed as the cursor traveled over them; the color blending and visibility were expertly calibrated to produce a fluid, organic interaction. The hard edges of the grid were softened, which improved the harmony of the squares against the background. The strokes of the squares were matched with the rainbow background to give it a smooth look and also hide the grid that was created using the loops. By doing this, the piece looked more interactive as the user is now able to move the mouse around and see colors appear without seeing the color of the whole background or the grid itself.

Figure 2:

I am proud of two parts of my code. The first part being:

// Calculate grid cell of current mouse position
    let hoverX = Math.floor(mouseX / spacing) * spacing;
    let hoverY = Math.floor(mouseY / spacing) * spacing;

    // Loop through grid of squares
    for (let x = 0; x <= width; x += spacing) {
      for (let y = 0; y <= height; y += spacing) {
        // Calculate distance from current square to mouse square
        let distance = max(abs(hoverX - x), abs(hoverY - y)) / spacing;

        // Decide transparency based on distance from mouse
        if (distance === 0) {
          // Directly under mouse
          noFill();
        } else if (distance === 1) {
          // Immediately adjacent to the selected square
          fill(255, 128);
        } else if (distance === 2) {
          // Set of squares after adjacent ones
          fill(255, 192);
        } else {
          // Squares further away are completely white.
          fill(255);
        }

This part of the code is responsible for creating an interactive grid where the color and transparency of each square dynamically respond to the position of the mouse cursor. The purpose is to provide a visual representation of proximity, with the nearest square to the cursor revealing the background color and the surrounding squares fading out based on their distance from the cursor. First, hoverX and hoverY variables are calculated by dividing the mouse’s x and y coordinates (mouseX and mouseY) by the spacing between the squares, using Math.floor to round down to the nearest whole number, then multiplying by spacing again. This snaps the mouse position to the nearest top-left corner of the grid squares, effectively determining which square the mouse is hovering over. Two nested loops run through each square in the grid. The outer loop (x) runs across the width of the canvas, and the inner loop (y) runs down the height of the canvas. The loops use spacing to step from one square to the next. For each square, the code calculates its distance from the square the mouse is over (hoverX, hoverY). This is done by finding the maximum of the absolute differences in x and y coordinates (max(abs(hoverX – x), abs(hoverY – y)) and dividing by spacing to get the distance in terms of squares, not pixels.

The second part was the function that created the rainbow background:

// Function to draw rainbow background
function drawRainbowBackground() {
  noFill(); 
  // Loop through the width of canvas to create gradient effect
  for (let i = 0; i < width; i++) {
    // Map position to range between 0 and 1 for color interpolation
    let inter = map(i, 0, width, 0, 1);
    // Interpolate between two colors based on current position
    let c = lerpColor(color(255, 0, 0), color(0, 0, 255), inter);
    // Set stroke color for line
    stroke(c);
    // Draw vertical line at position 'i' spanning height of canvas
    line(i, 0, i, height);
  }
}

This part of the code is responsible for creating a visually appealing rainbow gradient background across the canvas. The gradient smoothly transitions between two colors horizontally, providing a vibrant backdrop for the interactive squares. First, ‘for (let i = 0; i <width; i++)’ is a loop that runs once for every pixel along the canvas’s width. ‘i’ represents the current x-coordinate. It starts at 0 and increases by 1 until it reaches the canvas’s width, ensuring that the gradient effect spans the entire horizontal width of the canvas. Then, ‘let inter = map(i, 0, width, 0, 1)’ re-maps the x-coordinate (i) from the range of 0 to width (the canvas’s width) to a new range of 0 to 1. Finally, let c = lerpColor(color(255, 0, 0), color(0, 0, 255), inter) blends two colors together. Here, it’s used to create a transition between red and blue.

Assignment 2 – reading response – structured chaos

When we talk about chaos, we often mention computers, wars, or art. We see a lot of chaos in our lives happening but we never notice it. Chaos usually should be random, unexpected, and sometimes even destructive. Some of the art seen in the video show complete chaos and random movements that would lead the public to say: “I can do that”. They theoretically can recreate this simple random piece, but in reality, chaos cannot be re-experienced or regenerated. No matter the tries we won’t get the same art piece; there will be always details that only chaos created.

What we forget when talking about chaos and randomness is that they both are actually not random. Chaos and randomness are both very structured and calculated. For example, when playing the game Minecraft, the game creates a “random” map for each player, while still looking as if everything is connected and makes sense. And it is actually both, it’s pure randomness that was structured in a way to be random using particular math equations to randomize everything in an interconnected way. And we saw that also in some of the artwork generated that looked like pure random shapes, but it was just a class of lines that moved in a specific way away from each other, using math, that after a certain time, they generated that “random” pattern. Chaos was never random, and random was never random, but we always have control over how much chaos we want, in what direction, and how much.

Assignment 1: The More I Smile, The Less I See

I have always been a happy and smiley person. Perhaps more now that I’m doing something I thoroughly enjoy: coding. How do I put this simply? It makes me happy to be happy.  And funnily enough, I get the most compliments when I radiate joy and have a toothy smile on. And my top priority? Make sure my happiness is contagious.


Hence, I chose to make this funny, interactive self-portrait in which I am seen to be miserable but seen to be smiling when my body is clicked on. The idea is that the person is tickling me by clicking on my body, which makes me laugh.

My sketch is fairly simple, but I profusely enjoyed making it! The concept behind had me excited because I can incorporate my personality into my work, which isn’t relatively easy while coding. A particular code I’m proud to share is where I was able to limit the click of the mouse to only a certain place on the sketch. One can’t just click anywhere and make me smile, you have to tickle me at the right spot to make me laugh.

let currentView; //defining a variable, which is going to decide what is going to be displayed

function setup() {
  createCanvas(570, 400); //making a landscape scene
  currentView = noLaugh(); //the initial view is set to my resting face, variable is defined to a value
}

function mousePressed() //when the mouse is clicked
{
  if (mouseX > 212 && mouseX < 350 && mouseY > 285 && mouseY < 400) //setting limits to where you can click to make the view change
  {
    currentView = meLaugh(); //initial view changes because the variable is defined to another value
  }
}

function mouseReleased() //when the mouse is released
{
  currentView = noLaugh(); //view changes to initial setting
}

Above is the work that went into defining variables, setting limits on mouse-clicking-places, and lastly the changes that occur. As much as I tried to be as efficient as possible in my codes, I still missed out on important details. There are places on the body which when clicked, don’t cause a change. That is because I couldn’t accurately put in the coordinates of the body. I hope to improve this aspect of my work and make my sketch more interactive in the future. Moreover, I believe I can work more on the rotation and angling of my shapes, and get more familiar with the calculations with radians and degrees.


Assignment 1 (Production 1) – Smiley Face

MOUSE CLICK! MOVE THE MOUSE AROUND!

I had so much fun creating this piece and I was inspired by the “smiley face” or the concept of “emojis” for this production. What makes this a self portrait is that it has a little of touches that I added to it like the cap, the hair and the lipstick that makes it seem more like myself. I made the portrait interactive by having the skin tone change into different colors just like the emojis with different skin tones. I also made it a bit more fun by adding little circles that appear when the mouse is clicked. This was a bit challenging to me because, even with my coding experience, using P5 was not something that I usually do since I only have beginner experience with processing.

Creating a class and new functions to make the production more interactive was the most challenging part. This function:

function mousePressed() {
  let r = random(30, 70); // Make bubbles bigger
  let newColor = color(random(255), random(255), random(255)); // Generate a random color
  let b = new Circle(mouseX, mouseY, r, newColor); // Pass the random color to the Circle
  bubbles.push(b);
}
class Circle {
 // Constructor is called when a new Circle object is created
  constructor(x, y, r, color) {
    this.x = x; // x position of the bubble
    this.y = y; // y position of the bubble
    this.r = r; // radius of the bubble 
    this.color = color;
  }

 // Method to add a random motion to the bubble's current position
  move() {
    this.x = this.x + random(-2, 2); // Randomly move the x position
    this.y = this.y + random(-2, 2); // Randomly move the y position
  }

 // Method to display the bubble on the canvas
  show() {
    stroke(255); // Set the color of the bubble's stroke (outline)
    fill(this.color); // Set the fill color of the bubble
    ellipse(this.x, this.y, this.r * 2); // Draw the bubble as an ellipse at (x, y) with diameter of r*2
  }
}

Was created for the mouse pressed function that generates randomly colored bubbles (circles) all around the screen. The Circle class was created  to easily manage and organize the properties and behaviors of the bubbles that appear when the mouse is pressed. By using a class, we can create many Circle objects (bubbles), each with its own position, size, and color, and easily call their move and show methods to update and display them on the canvas. It’s a neat way to encapsulate (wrap up) properties and behaviors related to the bubbles.

I think this was a really interesting way to start with P5 and adapt to it.