Concept
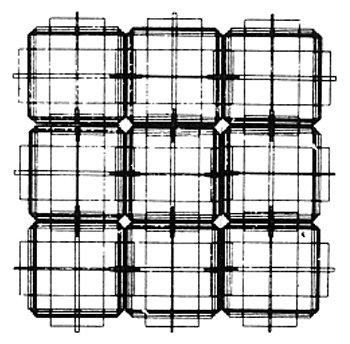
I have started my implementation of the art work from one of the works from Programm-Information21 suggested by Professor Shiloh. It is shown below. 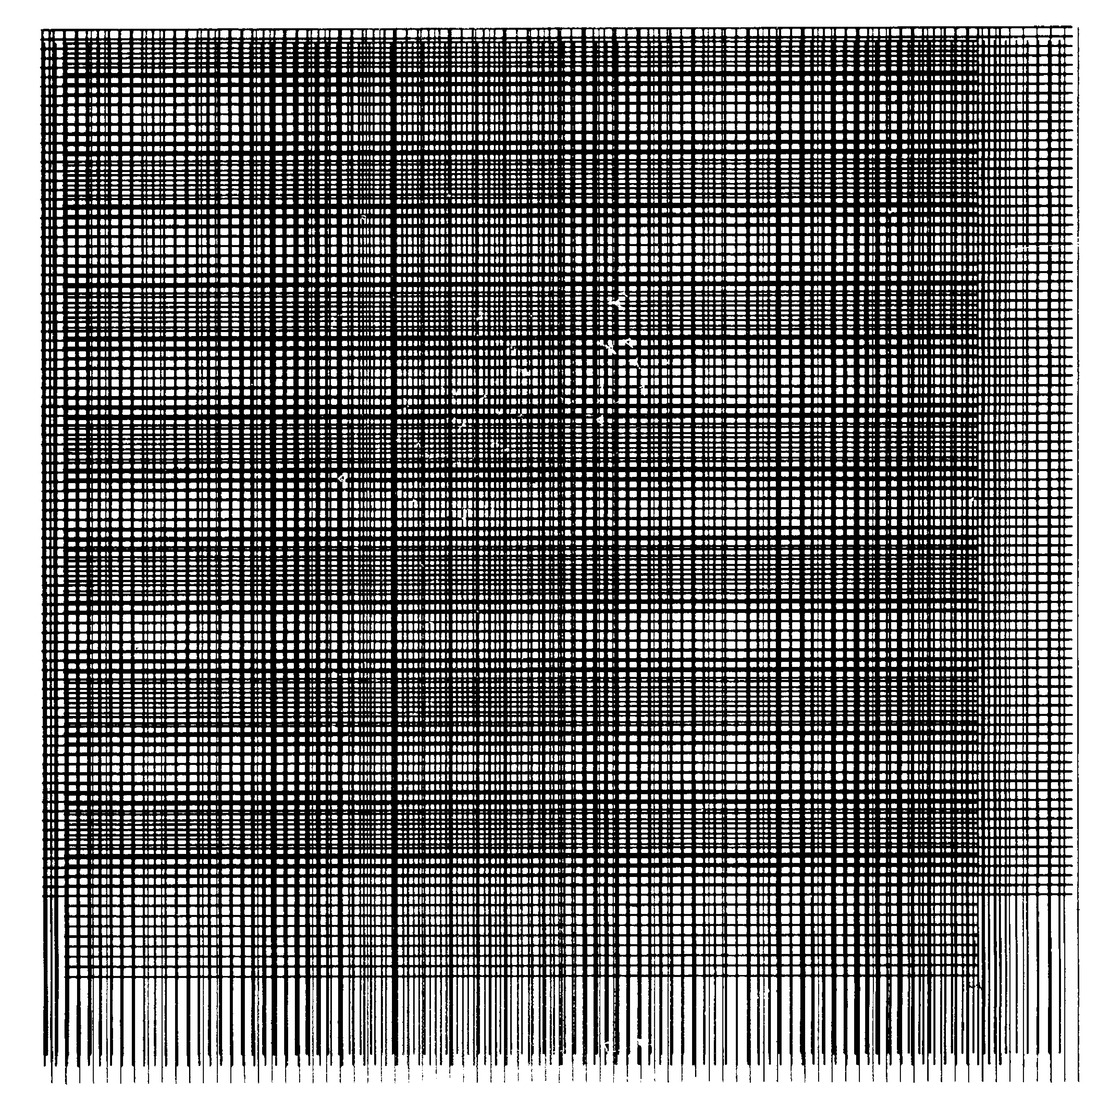
At first, I replicated it trying to copy the idea of squares populating my canva with various density. It turned out to not be so exciting, so I have decided to play around with shapes and then I sticked to the idea to use ellipses. My final sketch uses only ellipses.
Different parameters for ellipses gave different visuals, and for my primary part of sketch I attempted to replicate ongoing flames. Background color is set to orange and a number of black ellipses with different parameters moving in a random fashion are responsible for the final effect.
Code for the Fire Imitation
background(249, 94, 4);
fill(0);
for (let x = 0; x < width; x = x + 5) {
  for (let y = 0; y < height; y = y + 5) {
    if (y < height / 4 + 10) {
      ellipse(x + random(width / 20, -width / 20), y, 8, 10);
    } else if (y < height / 2 - 30) {
      ellipse(x + random(width / 20, -width / 20), y, 6, 10);
    } else if (y < (3 * height) / 4) {
      ellipse(x + random(width / 20, -width / 20), y, 4, 10);
    } else {
      ellipse(x + random(width / 20, -width / 20), y, 3, 10);
    }
  }
}
As I mostly implemented the fire animation in class and just changed it a bit at home, I have decided to add something using key controls as well. So, to introduce a bit of contrast to fire, I coded falling rain drops to imitate rain to some extent. I did some quick research on p5js to use Classes and functions to code behavior for each rain drop as an object. It is again ellipses.
Code for Rain using OOP
class Rain {
  constructor() {
    this.x = random(0, width);
    this.y = random(0, -height);
  }
  create() {
    noStroke();
    fill(140, 223, 232);
    ellipse(this.x, this.y, random(3, 6), random(3, 10));
  }
  fall() {
    this.y += random(10, 30);
    if (this.y > height) {
      this.x = random(0, width);
      this.y = random(0, -height);
    }
  }
}
“Rain” activates when a user presses the mouse and stops upon its release. You can check the full sketch below.
Reflection
My final sketch is nowhere near close to the work I got inspiration from. For me, it shows that we may start at one point and end up deviating from our designed path yet enjoy the process. It is certainly exciting that such simple code may produce interesting results.
Future Improvements
I am quite satisfied with the flame animation, yet for the rain part I feel it can be improved further and there it may make sense to add ground, sky, and other attributes to give it a look of something more real, rather than completely artificial.