For this week we had to use the artwork from last year and incorporate classes into the code. Since I already explained my concept I will write it down very briefly here:
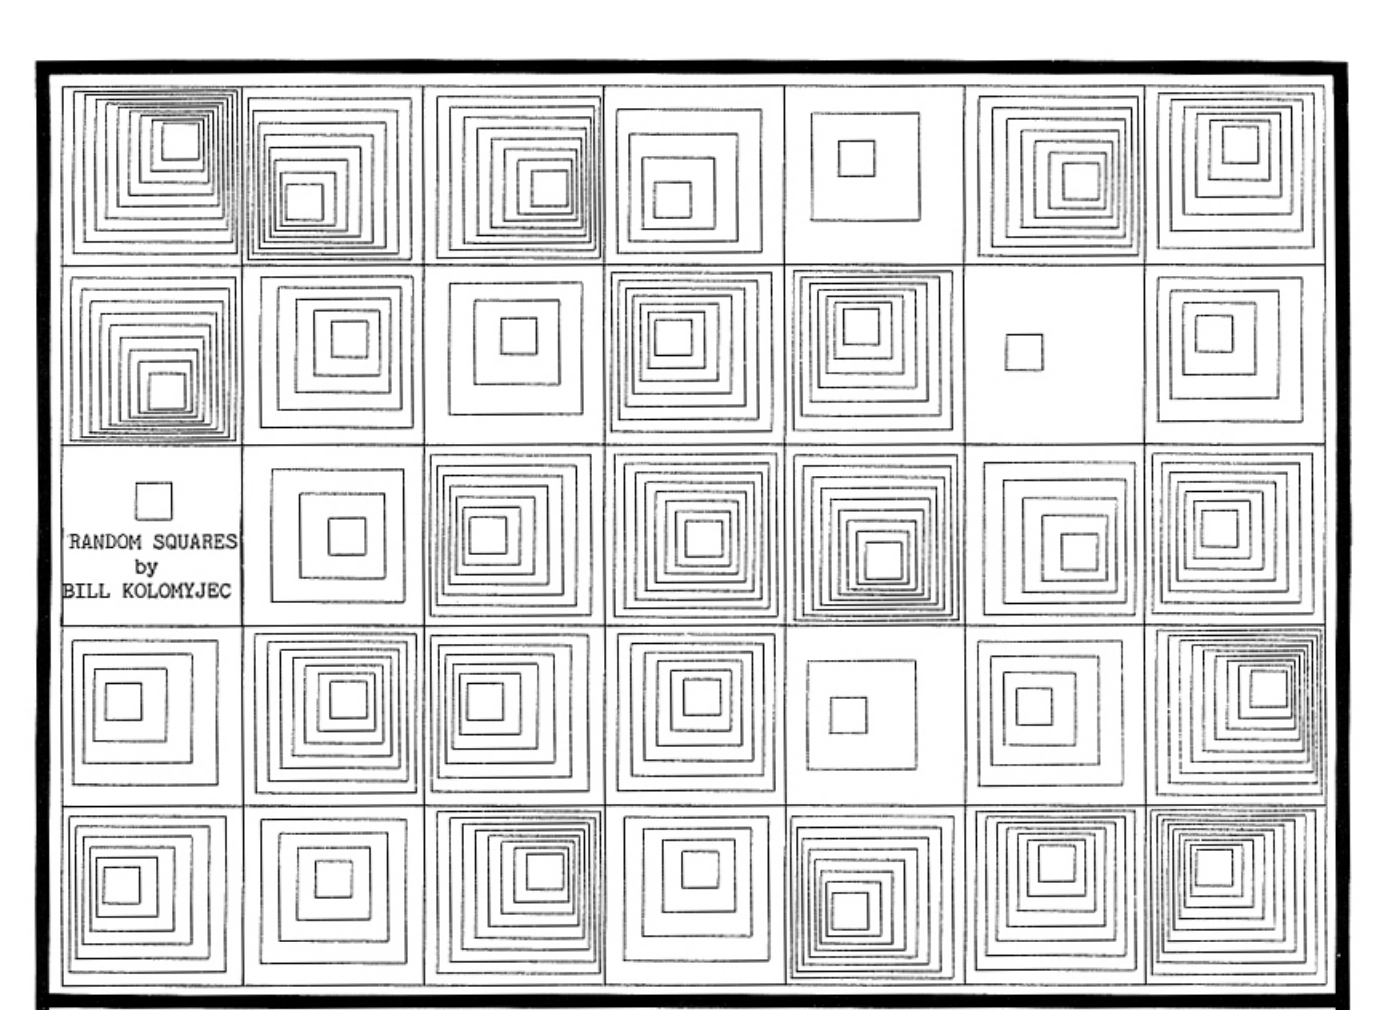
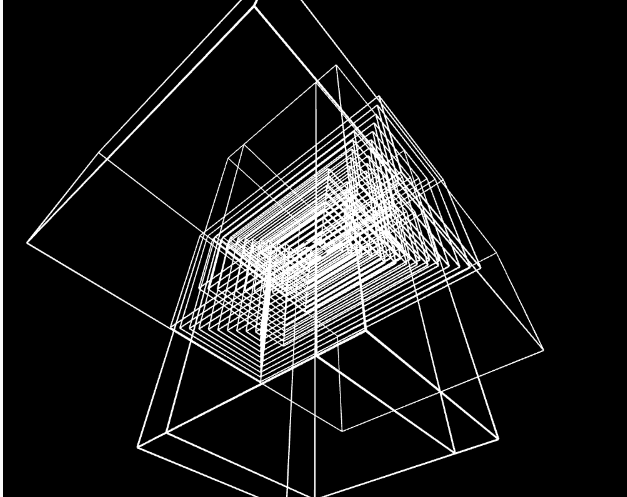
I was inspired to recreate one of the examples shown in class, and I did a series of 4 pieces of art which related to geometric patterns and symmetry as the one below. This one shows a different pattern each time the code is run, hence creating a new piece of art each time.
Since I revised last weeks’ work, there was no difference in the artwork (because that was the intention), there was, however, quite a difference in the code. I am a lot more pleased with the revised code, as it is easier to read and looks cleaner – grouping most of the repetitive things under the class, creating the squares in an array and keeping the setup() function cleaner.
class squareFiller {
  //constructor consists of the x and y coordinates
  constructor(x, y) {
    this.x = x;
    this.y = y;
  }
The constructor is very simple with just the coordinates as attributes.
//the first option of a pattern
  //the x and y coordinates are parameters as they will
  //be determined later in setup()
  //k variable determines how spaced each square will be
  //from each other
  //the while loop determines the pattern by incrementing
  //and decrementing respectively each of the variables
  //the rest of the fillers have the same idea but with
  //different spacing and corners which they approach
  filler1(x, y) {
    var i = x;
    var j = y;
    var k = 100;
    while (i < x + 60) {
      square(i, j, k);
      i += 10;
      j += 10;
      k -= 15;
    }
  }
This is the first of 12 similar filler pattern functions.
randomizer() {
    let num = floor(random(12)) + 1;

    print(num);
    if (num == 1) {
      this.filler1(this.x, this.y);
    } else if (num == 2) {
      this.filler2(this.x, this.y);
    } else if (num == 3) {
      this.filler3(this.x, this.y);
    } else if (num == 4) {
      this.filler4(this.x, this.y);
    } else if (num == 5) {
      this.filler5(this.x, this.y);
    } else if (num == 6) {
      this.filler6(this.x, this.y);
    } else if (num == 7) {
      this.filler7(this.x, this.y);
    } else if (num == 8) {
      this.filler8(this.x, this.y);
    } else if (num == 9) {
      this.filler9(this.x, this.y);
    } else if (num == 10) {
      this.filler10(this.x, this.y);
    } else if (num == 11) {
      this.filler11(this.x, this.y);
    } else {
      this.filler12(this.x, this.y);
    }
  }
The randomizer function randomly chooses one of the patterns for the square at hand.
//instantiating the objects in the array for
 //each square in the grid
 for(let i = 0; i<601; i+=100)
   {
     for(let j =0; j<301; j+=100)
       {
         arr.push(new squareFiller(i,j));
       }
   }
 //calling the randomizer function for each
 //square in the array
 for(let i=0; i<arr.length; i++)
   {
     arr[i].randomizer();
   }
The setup() function is quite simple, with these lines being the most important as they instantiate the SquareFiller objects in an array, then there is another for loop which calls the randomizer function for each of the objects – hence choosing a pattern for each square in the canvas.
The biggest challenge for me was thinking about how I was going to incorporate a class into this code. But after a bit of pondering and experimenting I decided to create a SquareFiller class, which determined the pattern of each square.
Furthermore, I faced the challenges of writing a class in JavaScript as I had never done that before. To solve this, I referred to the class notes, used the Reference of P5 and the internet and figured everything out.