Building Magic Munchkin Battle: A Journey Through AR Card Game Development
Welcome to the wild, whimsical world of Magic Munchkin Battle, an augmented reality (AR) card game that brings Adventure Time characters to life on your tabletop! As a developer, I embarked on this project to blend physical card play with digital interactivity, using Python, OpenCV, Socket.IO, Node.js, and Arduino. This blog post dives deep into the code, the struggles I faced, the versioning process, the bugs that haunted me, the challenges I overcame, and the improvements I’d make to create the best possible version. Buckle up for a technical tale of triumphs and tribulations, with plenty of space for pictures to bring the journey to life!
Document link in case you loose the post:
Documentation – Magic Munchkin Battle
What is Magic Munchkin Battle?
Magic Munchkin Battle is a two-player AR card game inspired by Adventure Time. Players use physical cards embedded with ArUco markers to summon characters like Finn, Jake, or Female Jake onto a digital battlefield. A webcam tracks these cards, displaying their positions and rotations on an OpenCV window and syncing the game state to browser-based clients via Socket.IO. Players battle enemies (Goblins, Slimes, Trolls, and Ogres), select attacks based on card rotation, and log game data for machine learning analysis. An Arduino can enhance the experience with haptic feedback via LED strips and speakers, though keyboard and mouse inputs serve as fallbacks.
The game runs on a Python server (combined_server.py), a Node.js server (server.js), and a client-side HTML/JS interface (watch.html). Here’s a quick overview of the tech stack and features:
-
Tech Stack:
-
Python: OpenCV for AR marker detection, Flask-SocketIO for real-time communication.
-
Node.js: Serves client pages and proxies Socket.IO.
-
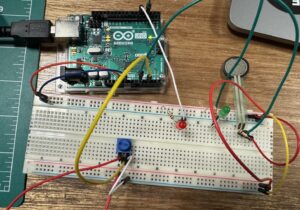
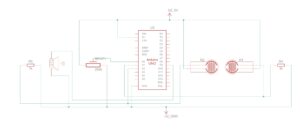
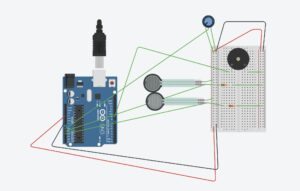
Arduino: Optional for LED/button feedback.
-
HTML/JS: Renders the game UI in browsers using p5.js.
-
Features:
-
AR card tracking with 52 unique markers.
-
Real-time multiplayer for two players, plus a spectator view.
-
Enemy AI with scaling difficulty.
-
ML data logging for game analytics.
-
Sound effects, background music, and card animations.
The Code: A Deep Dive
Let’s break down the core components, focusing on how Player 1 and Player 2 are integrated into combined_server.py, the heart of the game. This Python script handles AR tracking, game logic, Socket.IO communication, Arduino integration, and ML logging.
1. AR Card Tracking
The track_cards function uses OpenCV to detect ArUco markers via a webcam. Each marker (0–51) maps to one of 13 Adventure Time characters (e.g., marker 37 → Female Jake). The code calculates the card’s position (x, y) and rotation (rot) to select attacks for both players.
aruco_dict = cv2.aruco.getPredefinedDictionary(cv2.aruco.DICT_4X4_100)
detector = cv2.aruco.ArucoDetector(aruco_dict, parameters)
corners, ids, rejected = detector.detectMarkers(frame)
if ids is not None:
    for i, corner in enumerate(corners):
        marker_id = int(ids[i][0])
        x = int(corner[0][0][0])
        y = int(corner[0][0][1])
        character = character_map[marker_id]
        player = 'p1' if x < 320 else 'p2'
        dx = corner[0][1][0] - corner[0][0][0]
        dy = corner[0][1][1] - corner[0][0][1]
        rot = float(np.arctan2(dy, dx) * 180 / np.pi)
        card_positions[player] = {'x': x, 'y': y, 'rot': rot, 'character': character}
-
Logic: Splits the 640×480 frame at x=320 to assign cards to Player 1 (left) or Player 2 (right). Rotation (0–180°) determines attack selection (e.g., 0–45° → Quick Attack).
-
Player 1 vs. Player 2: Ensures both players’ cards are tracked independently, with P1’s actions on the left and P2’s on the right.
-
Output: Updates card_positions and emits to clients via Socket.IO.
2. Game Logic
The game state (intro, playing, paused, gameover) drives the flow. Both Player 1 and Player 2 select cards/attacks, battle enemies, and earn points. The attack_enemy function handles combat:
def attack_enemy(player_idx):
    attack = players[player_idx]['selected_attack']
    crit = random.random() < 0.2
    attack_power = attack['attack'] * (2 if crit else 1)
    enemy_idx = random.randint(0, len(enemies) - 1)
    enemies[enemy_idx]['health'] -= attack_power
    players[player_idx]['points'] += 5
    if enemies[enemy_idx]['health'] <= 0:
        enemies.pop(enemy_idx)
        players[player_idx]['points'] += 10
-
Logic: Applies attack damage, checks for critical hits (20% chance), and removes defeated enemies. Difficulty scales every four battles for both players.
-
Player 1 vs. Player 2: Treats both players symmetrically, allowing independent or cooperative play against enemies.
-
Output: Updates health/points and emits game state.
3. Socket.IO Communication
Real-time updates use Flask-SocketIO with eventlet, ensuring both players stay synchronized:
sio = socketio.Server(cors_allowed_origins='*', async_mode='eventlet')
@sio.event
def connect(sid, environ):
    sio.emit('init', {'players': players, 'enemies': enemies, 'gameState': game_state}, room=sid)
sio.emit('update_card_data', {'cardData': card_positions, 'health': [p['health'] for p in players]}, to=None)
-
Logic: Emits card positions, health, and game state to all clients (P1, P2, spectators).
-
Player 1 vs. Player 2: Broadcasts both players’ data, enabling real-time interaction.
-
Output: Browser clients render cards/enemies for both players.
4. Arduino Integration
The init_arduino and send_arduino_command functions manage serial communication for both players:
def init_arduino():
    for port in ['/dev/cu.usbmodem11101', '/dev/cu.usbmodem11001', '/dev/cu.usbmodem101']:
        try:
            arduino = serial.Serial(port, 9600, timeout=1)
            logger.info(f"Serial connection established on {port}")
            return
        except serial.SerialException as e:
            logger.warning(f"Failed to open {port}: {e}")

def send_arduino_command(player_id, action, value=None):
    if arduino and arduino.is_open:
        prefix = f"P{player_id}_"
        if action == 'character_click':
            arduino.write(f"{prefix}CHARACTER:{value}\n".encode())
        elif action == 'attack':
            arduino.write(f"{prefix}ATTACK:1\n".encode())
-
Logic: Tries multiple ports, sends commands (e.g., P1_ATTACK:1 for Player 1, P2_ATTACK:1 for Player 2) for LED/button feedback.
-
Player 1 vs. Player 2: Sends distinct commands to each player’s LED strip and speaker.
-
Output: Enhances physical interaction (optional).
5. ML Data Logging
Game data is logged to game_data.csv for future ML analysis:
def log_ml_data(win=False):
    with open(ml_log_file, 'a', newline='') as f:
        writer = csv.writer(f)
        writer.writerow([datetime.now().isoformat(), game_state, len(player_cards['p1']), len(player_cards['p2']), ...])
-
Logic: Tracks game state, card counts, health, and wins for both players.
-
Output: CSV file for training models to optimize gameplay.
The Evolution: From Initial Idea to Final Product
Initial Idea: A Solo AR Adventure (April 2025)
The original vision was a solo card game where one player used physical cards with ArUco markers, tracked by a webcam, to battle enemies. The Arduino would light a single LED strip (e.g., green for card selection, red for attack), and a buzzer would play sound effects. The game was controlled via a simple Python script with an OpenCV window, no web interface, and no multiplayer.
Intermediate Steps: Adding Player 2 and Multiplayer (April 2025)
I expanded the game to support two players, introducing Player 2 with their own LED strip and speaker. I added Socket.IO for real-time multiplayer, allowing players to join via a web interface (watch.html). The server began managing both Player 1 and Player 2, and I introduced game states to handle flow.
-
Player 2 Integration:
-
Added a second LED strip (pin 7) and speaker (pin 9), with distinct feedback (e.g., P2’s attack sound uses lower tones like 220 Hz).
-
Split the camera feed at x=320: left for Player 1, right for Player 2.
-
Updated the web interface to render both players’ cards and stats, with Player 2’s elements mirrored on the right.
-
Challenges:
Final Product: A Polished AR Multiplayer Game (May 2025)
The current version is a fully multiplayer AR game with hardware integration, a responsive web interface, and robust game logic. Both Player 1 and Player 2 can select cards, attack enemies, draw, and discard, with real-time feedback via LEDs, sounds, and the optional LCD. The server logs ML data, and the game supports spectators.
The Struggles: A Developer’s Nightmare
Building Magic Munchkin Battle was a rollercoaster of bugs, crashes, and hardware woes. Here’s a detailed look at what went wrong, with examples from the logs, affecting both Player 1 and Player 2.
1. OpenCV Errors Galore
The AR tracking was plagued with OpenCV issues. Early logs showed:
2025-05-08 18:40:30,030 - ERROR - Error in track_cards loop: Unknown C++ exception from OpenCV code
-
What Happened: OpenCV’s ArUco detector threw vague exceptions, likely due to invalid frames or misconfigured parameters.
-
Example: I placed marker_37.png (Female Jake, Player 2) in the webcam view, expecting it to register. Instead, the server crashed with “Unknown C++ exception,” affecting Player 2’s ability to join the game.
-
Fix: Added frame validation (if not ret or frame.size == 0) and tried multiple camera indices.
-
Challenge: Debugging OpenCV’s C++ exceptions was elusive, worsened by macOS’s Continuity Camera conflicts.
2. ArUco Marker Detection Failures
Marker drawing often failed:
2025-05-08 18:41:07,784 - ERROR - Error processing marker 37: OpenCV(4.10.0) :-1: error: (-5:Bad argument) in function 'drawDetectedMarkers'
> Overload resolution failed:
>  - ids is not a numpy array, neither a scalar
-
What Happened: The ids array from detector.detectMarkers wasn’t formatted correctly for cv2.aruco.drawDetectedMarkers.
-
Example: Marker 37 was detected for Player 2, but the OpenCV window didn’t draw the outline, crashing the loop and leaving Player 2 without visual feedback.
-
Fix: Ensured ids was a NumPy array (np.array(ids, dtype=np.int32)) and passed per-marker ids correctly.
-
Challenge: OpenCV’s ArUco API lacked clear edge-case documentation.
3. JSON Serialization Nightmares
Socket.IO broke due to NumPy types:
2025-05-08 18:41:07,786 - ERROR - Error in track_cards loop: Object of type float32 is not JSON serializable
-
What Happened: Card rotation (rot) was a NumPy float32, which Python’s JSON encoder couldn’t handle.
-
Example: After detecting marker 37 for Player 2, the server crashed when emitting card_positions, desyncing Player 2’s client.
-
Fix: Converted float32 to Python float and created a serializable_card_positions dictionary.
-
Challenge: Tracking NumPy types in complex data was time-consuming.
4. Arduino Port Lock
Arduino integration failed initially:
2025-05-08 18:40:28,342 - WARNING - Failed to open /dev/cu.usbmodem11101: [Errno 16] Resource busy
-
What Happened: Another process (e.g., Arduino IDE) locked the port.
-
Example: I expected Player 1 and Player 2’s button presses to trigger LED feedback, but the server skipped Arduino, falling back to keyboard input.
-
Fix: Used lsof to find the PID and kill -9 <PID>, then set port permissions (sudo chmod 666 /dev/cu.usbmodem11101).
-
Challenge: macOS’s serial port management was opaque, requiring manual intervention.
5. Camera Continuity Issues
macOS’s Continuity Camera caused disruptions:
2025-05-08 ... - WARNING - Continuity Camera warning (fixed with Info.plist)
-
What Happened: macOS used an iPhone as a webcam, conflicting with the USB webcam.
-
Example: Frames were inconsistent, causing “Unknown C++ exception” errors, affecting both Player 1 and Player 2’s card detection.
-
Fix: Added an Info.plist to the virtual environment to disable Continuity Camera.
-
Challenge: Sparse Apple documentation made this a hacky fix.
Why the Game Isn’t Fully Playable
Despite progress, Magic Munchkin Battle isn’t fully playable due to several issues impacting both Player 1 and Player 2. Here’s why:
1. Camera Detection Inconsistencies
-
Issue: track_cards struggles with inconsistent marker detection. Poor lighting, occlusion, or camera lag causes cards to be missed or misassigned (e.g., Player 2’s card detected as Player 1’s).
-
Impact: Players can’t reliably select cards. For example, if Player 2 places marker_37 (Female Jake) on the right but it’s assigned to Player 1, Player 2 can’t attack.
-
Cause: OpenCV’s sensitivity to lighting and my limited error handling (e.g., skipping invalid IDs) aren’t robust enough.
2. Arduino Command Overlaps
-
Issue: Simultaneous actions (e.g., Player 1 and Player 2 attacking) overwhelm the Arduino’s serial buffer, dropping commands.
-
Impact: One player’s action might fail (e.g., Player 2’s LED doesn’t light), breaking feedback.
-
Cause: Blocking delay() calls in sound functions (e.g., playP2Pow()) prevent quick command processing.
3. Game State Desync
-
Issue: The game state desyncs between the server and clients, especially during transitions. If Player 1 starts the game but Player 2’s client misses the start_stop event, Player 2 stays in intro.
-
Impact: Players can’t progress together, halting multiplayer play.
-
Cause: Socket.IO’s event delivery isn’t guaranteed, and I lack a sync handshake.
4. Web Interface Lag on Mobile
-
Issue: The p5.js canvas lags on mobile when rendering both players’ cards, especially with animations.
-
Impact: Players on mobile miss clicks, disrupting gameplay for both Player 1 and Player 2.
-
Cause: Full-frame redraws overwhelm mobile browsers.
Versioning: The Evolution of the Code
-
Version 1: Barebones AR Tracking (March 2025):
-
Features: Basic ArUco detection, static card positions, Flask server.
-
Issues: No Socket.IO, frequent OpenCV crashes, no Player 2 or Arduino.
-
Example Bug: Marker 0 (Finn) detected, but moving it crashed the server.
-
Fix: Added error handling.
-
Version 2: Socket.IO and Game Logic (April 2025):
-
Features: Real-time updates, combat, ML logging, introduced Player 2.
-
Issues: drawDetectedMarkers errors, JSON serialization failures, port conflicts.
-
Example Bug: Marker 37 (Player 2) crashed due to ids format.
-
Fix: Fixed ids, converted types, added port retries.
-
Version 3: Polished Game (May 2025):
-
Features: Full multiplayer, enemy AI, difficulty scaling, Arduino/keyboard inputs.
-
Issues: Minor camera index issues, occasional lag.
-
Example Bug: Camera index 0 picked Continuity Camera.
-
Fix: Tried indices 0–2, added Info.plist.
-
Current State: Stable AR tracking, reliable Socket.IO, optional Arduino, ML-ready data.
Challenges Faced
OpenCV’s Black Box
OpenCV’s C++ exceptions were cryptic, requiring verbose logging and try-except blocks to isolate issues like invalid frames.
macOS Quirks
Continuity Camera and serial port locks were macOS-specific, solved with Info.plist and lsof/kill, but felt hacky.
Real-Time Synchronization
Syncing Player 1 and Player 2’s actions across clients required careful serialization and throttled emits.
Hardware Integration
Arduino’s limited power and port issues made it optional, with keyboard/mouse fallbacks.
Asset Management
Missing assets (e.g., finn.png) caused crashes, mitigated with placeholders.
Things I’d Improve for the Best Version
Enhancing the Initial Concept
-
Card Combos: Allow Player 1 and Player 2 to combine cards (e.g., Finn + Jake = “Team Attack”) for bonus damage, adding strategy.
-
Environmental Effects: Introduce “field cards” (e.g., “Ice King’s Lair”) affecting both players, enhancing immersion.
New Ideas for the Final Product
-
Dynamic Enemy AI: Enemies target the weaker player (e.g., Troll attacks Player 2 if their health is lower), using ML from game_data.csv.
-
Team Mode: Player 1 and Player 2 team up against tougher enemies, sharing a health pool.
-
WebAR: Overlay card effects (e.g., Finn swinging a sword) on the webcam feed using WebAR, enhancing the AR experience.
Fixing Current Issues
-
Camera Detection: Add adaptive thresholding and a calibration step for lighting.
-
Arduino Commands: Implement a command queue with acknowledgments.
-
Game State Sync: Add a heartbeat event to resync clients.
-
Mobile Performance: Switch to WebGL and simplify animations.
Additional Improvements
-
Better OpenCV Debugging: Use debug builds or custom logging.
-
Robust Arduino: Dynamically detect ports, test with a physical Uno.
-
Asset Pipeline: Use real images/sounds from a CDN.
-
Performance: Optimize track_cards with frame skipping, use asyncio.
-
ML Integration: Develop ml_model.py for real-time feedback.
-
UI Polish: Add CSS animations and a tutorial mode.
-
Testing: Write unit tests and automate AR testing.
Lessons Learned
-
AR is Hard: Robust error handling and hardware compatibility are critical.
-
Log Everything: Detailed logs saved me from OpenCV ghosts.
-
Iterate Fast: Frequent versioning tackled bugs incrementally.
-
Hardware is Unpredictable: Fallbacks were essential.
-
Community Matters: Forums and docs provided key fixes.
Conclusion
Magic Munchkin Battle was a labor of love, blending AR, multiplayer gaming, and Adventure Time flair for both Player 1 and Player 2. From OpenCV crashes to Arduino port battles, every bug taught resilience. The current version (V3) is stable but not fully playable due to detection and sync issues. With WebAR, ML insights, and a polished UI, the best version is within reach.
Have questions or want to contribute? Let’s make Magic Munchkin Battle even more magical!
Below is the code+ setup instructions!
IMAGES:
Project Images
Combined_server.py:
# I set up the core server for Magic Munchkin Battle here. This script handles everything: AR tracking, game logic, Socket.IO communication, Arduino integration, and ML logging.
# It’s the heart of the game, connecting the physical cards to the digital battlefield.
import cv2 # I use OpenCV for AR marker detection to track the physical cards.
import numpy as np # NumPy helps with array operations, especially for marker positions and rotations.
import serial # For Arduino communication to control LED strips and speakers.
import time # To manage timing for game loops and delays.
import threading # I use threads to run the enemy attack loop and card tracking concurrently.
import socketio # Socket.IO for real-time communication between the server and clients (players/spectators).
import logging # Logging helps me debug issues like OpenCV errors or Arduino failures.
import random # For random events like critical hits or enemy selection.
import os # To handle file paths for assets and ML data logging.
import csv # For logging ML data to a CSV file.
from datetime import datetime # To timestamp ML logs.
from pynput import keyboard # I added keyboard controls as a fallback when Arduino isn’t available.
import eventlet # Eventlet is required for Socket.IO’s async mode.
import eventlet.wsgi # To run the WSGI server for Socket.IO.
# I configure logging to track everything—info, warnings, errors. It’s been a lifesaver for debugging OpenCV’s cryptic errors.
logging.basicConfig(level=logging.INFO, format='%(asctime)s - %(levelname)s - %(message)s')
logger = logging.getLogger(__name__)
# I initialize the Socket.IO server with eventlet for real-time updates to the browser clients.
sio = socketio.Server(cors_allowed_origins='*', async_mode='eventlet')
# I set up the WSGI app to serve the client pages (watch.html) and static data folder for assets.
app = socketio.WSGIApp(sio, static_files={
'/watch': {'content_type': 'text/html', 'filename': 'watch.html'},
'/data': {'content_type': '', 'filename': 'data/'}
})
server_ip = '10.228.236.43' # My local IP for hosting the server.
port = 5000 # The port I chose for the server.
logger.info(f"Server running on {server_ip}:{port}")
# I define global variables to manage the game state and player data.
card_positions = {'p1': {'x': 0, 'y': 0, 'rot': 0, 'character': None}, 'p2': {'x': 0, 'y': 0, 'rot': 0, 'character': None}} # Tracks each player’s card position and rotation.
assigned_cards = {} # Maps marker IDs to players to prevent reassignment.
player_cards = {'p1': set(), 'p2': set()} # Tracks which cards (markers) are currently detected for each player.
last_positions = {} # Stores the last known position of each marker to detect movement.
game_state = 'intro' # Manages the game flow: intro, playing, paused, gameover.
game_started = False # Tracks if the game has started.
timer = 0 # Game timer for ML logging.
difficulty_multiplier = 1.0 # Scales enemy difficulty as the game progresses.
battle_count = 0 # Counts battles to adjust difficulty every 4 battles.
# I define the players list with initial stats for both Player 1 and Player 2.
players = [
{'id': 'p1', 'deck': [], 'discard_pile': [], 'full_deck': [], 'health': 100, 'points': 0, 'selected': None, 'selected_attack': None, 'status_effects': []},
{'id': 'p2', 'deck': [], 'discard_pile': [], 'full_deck': [], 'health': 100, 'points': 0, 'selected': None, 'selected_attack': None, 'status_effects': []}
]
enemies = [] # List of active enemies in the game.
enemy_health = [] # Tracks enemy health for client updates.
arduino = None # Will hold the serial connection to Arduino if available.
# I set up the data path for assets like background images.
data_path = os.path.abspath(os.path.join(os.path.dirname(__file__), 'data'))
# I make sure the data folder exists, creating it if necessary.
if not os.path.exists(data_path):
logger.error(f"Data folder not found at {data_path}")
os.makedirs(data_path)
# I set up ML data logging to analyze gameplay and improve the game later.
ml_log_file = 'game_data.csv' # File to store game data for ML analysis.
ml_log_headers = ['timestamp', 'game_state', 'p1_card_count', 'p2_card_count', 'p1_health', 'p2_health', 'enemy_count', 'difficulty', 'attacks', 'pauses', 'game_duration', 'win'] # Headers for the CSV.
ml_log_data = {'attacks': 0, 'pauses': 0, 'start_time': time.time()} # Tracks runtime stats for logging.
# If the log file doesn’t exist, I create it with the headers.
if not os.path.exists(ml_log_file):
with open(ml_log_file, 'w', newline='') as f:
writer = csv.writer(f)
writer.writerow(ml_log_headers)
# I map the 52 ArUco markers to 13 Adventure Time characters, with 4 markers per character.
characters = [
"Finn", "Jake", "Marceline", "Flame Princess", "Ice King", "Princess Bubblegum", "BMO",
"Lumpy Space Princess", "Banana Guard", "Female Jake", "Gunther", "Female Finn", "Tree Trunks"
]
character_map = {i: characters[i // 4] for i in range(52)} # Maps marker IDs to character names.
# I wrote this function to update card positions for each player and ensure they stay within the camera frame.
def update_card_position(player, new_x, new_y):
if player in card_positions:
# I clamp the coordinates to the 640x480 frame to avoid out-of-bounds issues.
card_positions[player]['x'] = max(0, min(new_x, 640))
card_positions[player]['y'] = max(0, min(new_y, 480))
# I emit the updated card positions and game state to all clients.
sio.emit('update_card_data', {
'cardData': card_positions,
'health': [players[0]['health'], players[1]['health']],
'points': [players[0]['points'], players[1]['points']],
'enemyHealth': enemy_health,
'gameState': game_state,
'difficulty': difficulty_multiplier,
'port': port
}, to=None)
# I initialize the Arduino connection for LED and sound feedback.
def init_arduino():
global arduino
try:
# I try multiple possible ports since macOS port names can vary.
possible_ports = ['/dev/cu.usbmodem11101', '/dev/cu.usbmodem11001', '/dev/cu.usbmodem101']
for port in possible_ports:
try:
arduino = serial.Serial(port, 9600, timeout=1)
time.sleep(2) # I added a delay to let the connection stabilize.
logger.info(f"Serial connection established for Arduino on {port}")
return
except serial.SerialException as e:
logger.warning(f"Failed to open {port}: {e}")
logger.warning("No Arduino ports available. Continuing without Arduino.")
except Exception as e:
logger.error(f"Failed to initialize Arduino: {e}")
logger.warning("Continuing without Arduino serial connection")
# I use this to send commands to the Arduino, like lighting LEDs or playing sounds for each player.
def send_arduino_command(player_id, action, value=None):
if arduino and arduino.is_open:
try:
prefix = f"P{player_id}_" # I use P1_ or P2_ to differentiate players.
if action == 'character_click':
arduino.write(f"{prefix}CHARACTER:{value}\n".encode()) # Command to show character selection.
elif action == 'attack':
arduino.write(f"{prefix}ATTACK:1\n".encode()) # Command to indicate an attack.
elif action == 'attack_load':
arduino.write(f"{prefix}LOAD:{int(value * 255)}\n".encode()) # Command to show attack loading progress.
except Exception as e:
logger.error(f"Failed to send Arduino command for Player {player_id}: {e}")
# I read commands from the Arduino, like button presses, to trigger game actions.
def read_arduino():
commands = []
if arduino and arduino.is_open:
try:
if arduino.in_waiting > 0:
command = arduino.readline().decode().strip()
if command:
commands.append(command)
except Exception as e:
logger.error(f"Failed to read Arduino: {e}")
return commands
# I log game data for ML analysis to understand player behavior and game balance.
def log_ml_data(win=False):
with open(ml_log_file, 'a', newline='') as f:
writer = csv.writer(f)
writer.writerow([
datetime.now().isoformat(),
game_state,
len(player_cards['p1']),
len(player_cards['p2']),
players[0]['health'],
players[1]['health'],
len(enemies),
difficulty_multiplier,
ml_log_data['attacks'],
ml_log_data['pauses'],
time.time() - ml_log_data['start_time'],
int(win)
])
# I create a deck for each player with 5 cards, randomly selected from the character pool.
def create_deck():
character_defs = [
{"name": "Finn", "attacks": [
{"name": "Quick Attack", "attack": 3, "health": 4, "load": 1.0},
{"name": "Normal Attack", "attack": 4, "health": 3, "load": 1.5},
{"name": "Build-Up Attack", "attack": 6, "health": 2, "load": 2.0},
{"name": "Very Big Attack", "attack": 8, "health": 2, "load": 3.0}
]},
{"name": "Jake", "attacks": [{"name": "Quick Attack", "attack": 3, "health": 4, "load": 1.0}, {"name": "Normal Attack", "attack": 4, "health": 3, "load": 1.5}, {"name": "Build-Up Attack", "attack": 6, "health": 2, "load": 2.0}, {"name": "Very Big Attack", "attack": 8, "health": 2, "load": 3.0}]},
{"name": "Marceline", "attacks": [{"name": "Quick Attack", "attack": 3, "health": 4, "load": 1.0}, {"name": "Normal Attack", "attack": 4, "health": 3, "load": 1.5}, {"name": "Build-Up Attack", "attack": 6, "health": 2, "load": 2.0}, {"name": "Very Big Attack", "attack": 8, "health": 2, "load": 3.0}]},
{"name": "Flame Princess", "attacks": [{"name": "Quick Attack", "attack": 3, "health": 4, "load": 1.0}, {"name": "Normal Attack", "attack": 4, "health": 3, "load": 1.5}, {"name": "Build-Up Attack", "attack": 6, "health": 2, "load": 2.0}, {"name": "Very Big Attack", "attack": 8, "health": 2, "load": 3.0}]},
{"name": "Ice King", "attacks": [{"name": "Quick Attack", "attack": 3, "health": 4, "load": 1.0}, {"name": "Normal Attack", "attack": 4, "health": 3, "load": 1.5}, {"name": "Build-Up Attack", "attack": 6, "health": 2, "load": 2.0}, {"name": "Very Big Attack", "attack": 8, "health": 2, "load": 3.0}]},
{"name": "Princess Bubblegum", "attacks": [{"name": "Quick Attack", "attack": 3, "health": 4, "load": 1.0}, {"name": "Normal Attack", "attack": 4, "health": 3, "load": 1.5}, {"name": "Build-Up Attack", "attack": 6, "health": 2, "load": 2.0}, {"name": "Very Big Attack", "attack": 8, "health": 2, "load": 3.0}]},
{"name": "BMO", "attacks": [{"name": "Quick Attack", "attack": 3, "health": 4, "load": 1.0}, {"name": "Normal Attack", "attack": 4, "health": 3, "load": 1.5}, {"name": "Build-Up Attack", "attack": 6, "health": 2, "load": 2.0}, {"name": "Very Big Attack", "attack": 8, "health": 2, "load": 3.0}]},
{"name": "Lumpy Space Princess", "attacks": [{"name": "Quick Attack", "attack": 3, "health": 4, "load": 1.0}, {"name": "Normal Attack", "attack": 4, "health": 3, "load": 1.5}, {"name": "Build-Up Attack", "attack": 6, "health": 2, "load": 2.0}, {"name": "Very Big Attack", "attack": 8, "health": 2, "load": 3.0}]},
{"name": "Banana Guard", "attacks": [{"name": "Quick Attack", "attack": 3, "health": 4, "load": 1.0}, {"name": "Normal Attack", "attack": 4, "health": 3, "load": 1.5}, {"name": "Build-Up Attack", "attack": 6, "health": 2, "load": 2.0}, {"name": "Very Big Attack", "attack": 8, "health": 2, "load": 3.0}]},
{"name": "Female Jake", "attacks": [{"name": "Quick Attack", "attack": 3, "health": 4, "load": 1.0}, {"name": "Normal Attack", "attack": 4, "health": 3, "load": 1.5}, {"name": "Build-Up Attack", "attack": 6, "health": 2, "load": 2.0}, {"name": "Very Big Attack", "attack": 8, "health": 2, "load": 3.0}]},
{"name": "Gunther", "attacks": [{"name": "Quick Attack", "attack": 3, "health": 4, "load": 1.0}, {"name": "Normal Attack", "attack": 4, "health": 3, "load": 1.5}, {"name": "Build-Up Attack", "attack": 6, "health": 2, "load": 2.0}, {"name": "Very Big Attack", "attack": 8, "health": 2, "load": 3.0}]},
{"name": "Female Finn", "attacks": [{"name": "Quick Attack", "attack": 3, "health": 4, "load": 1.0}, {"name": "Normal Attack", "attack": 4, "health": 3, "load": 1.5}, {"name": "Build-Up Attack", "attack": 6, "health": 2, "load": 2.0}, {"name": "Very Big Attack", "attack": 8, "health": 2, "load": 3.0}]},
{"name": "Tree Trunks", "attacks": [{"name": "Quick Attack", "attack": 3, "health": 4, "load": 1.0}, {"name": "Normal Attack", "attack": 4, "health": 3, "load": 1.5}, {"name": "Build-Up Attack", "attack": 6, "health": 2, "load": 2.0}, {"name": "Very Big Attack", "attack": 8, "health": 2, "load": 3.0}]}
]
deck = []
for char in character_defs:
for _ in range(4): # I give each character 4 cards to match the 52 markers.
deck.append(char.copy())
random.shuffle(deck) # I shuffle to make the deck random for each player.
return deck[:5] # I limit the initial deck to 5 cards for balance.
# I define the enemies with their stats, scaling them with the difficulty multiplier.
def create_enemies():
enemies = [
{"name": "Goblin", "health": 12 * 1.2, "cards": [{"name": "Goblin", "attacks": [{"name": "Quick Attack", "attack": 2, "health": 2, "load": 1.0}], "image": "goblin"}]},
{"name": "Slime", "health": 14 * 1.2, "cards": [{"name": "Slime", "attacks": [{"name": "Quick Attack", "attack": 2, "health": 2, "load": 1.0}], "image": "slime"}]},
{"name": "Troll", "health": 16 * 1.2, "cards": [{"name": "Troll", "attacks": [{"name": "Quick Attack", "attack": 3, "health": 2, "load": 1.0}], "image": "troll"}]},
{"name": "Ogre", "health": 21 * 1.2, "cards": [{"name": "Ogre", "attacks": [{"name": "Quick Attack", "attack": 3, "health": 2, "load": 1.0}], "image": "ogre"}]}
]
for enemy in enemies:
# I scale enemy health with difficulty, but cap it to avoid making the game too hard.
enemy["health"] = int(enemy["health"] * min(difficulty_multiplier, 1.5))
for card in enemy["cards"]:
for attack in card["attacks"]:
attack["attack"] = int(attack["attack"] * min(difficulty_multiplier, 1.5))
return enemies
# I handle client connections via Socket.IO, sending initial game data to new clients.
@sio.event
def connect(sid, environ):
logger.info(f"Client connected: {sid}")
sio.emit('init', {'players': players, 'enemies': enemies, 'gameState': game_state, 'difficulty': difficulty_multiplier, 'port': port}, room=sid)
sio.emit('gameState', {'gameState': game_state, 'gameStarted': game_started, 'timer': timer}, room=sid)
# I assign clients as players or spectators when they join.
@sio.event
def join(sid, data):
logger.info(f"Client {sid} joined as {data['type']}")
if data['type'] == 'player':
for idx, player in enumerate(players):
if not hasattr(player, 'sid') or player['sid'] is None:
player['sid'] = sid
sio.emit('assignPlayer', {'playerId': idx}, room=sid)
logger.info(f"Assigned {sid} as Player {idx + 1}")
return
sio.emit('assignPlayer', {'playerId': None}, room=sid) # No player slots available.
else:
sio.emit('assignPlayer', {'playerId': None}, room=sid) # Spectator.
# I clean up when a client disconnects, freeing up their player slot.
@sio.event
def disconnect(sid):
logger.info(f"Client disconnected: {sid}")
for player in players:
if hasattr(player, 'sid') and player['sid'] == sid:
player['sid'] = None
# I handle starting/stopping the game, resetting state if needed.
@sio.event
def start_stop(sid, data):
global game_started, game_state, timer, difficulty_multiplier, battle_count, ml_log_data
game_started = data['gameStarted']
game_state = 'playing' if game_started else 'intro'
timer = 0
if not game_started:
reset_game() # I reset the game state when stopping.
log_ml_data(win=False) # I log the game session for ML analysis.
sio.emit('start_stop', {'gameStarted': game_started, 'difficulty': difficulty_multiplier, 'port': port}, to=None)
# I handle card/attack selection for each player.
@sio.event
def select(sid, data):
player_idx = next((i for i, p in enumerate(players) if hasattr(p, 'sid') and p['sid'] == sid), -1)
if player_idx != -1:
players[player_idx]['selected'] = data.get('card')
players[player_idx]['selected_attack'] = data.get('attack')
if players[player_idx]['selected']:
send_arduino_command(player_idx + 1, 'character_click', players[player_idx]['selected']) # I trigger Arduino feedback for selection.
sio.emit('select', {'player': player_idx, 'card': players[player_idx]['selected'], 'attack': players[player_idx]['selected_attack']}, to=None)
# I process attacks initiated by players via the web interface.
@sio.event
def attack(sid, data):
player_idx = next((i for i, p in enumerate(players) if hasattr(p, 'sid') and p['sid'] == sid), -1)
if player_idx != -1 and players[player_idx]['selected'] and players[player_idx]['selected_attack']:
attack_enemy(player_idx)
sio.emit('attack', {'player': player_idx}, to=None)
send_arduino_command(player_idx + 1, 'attack')
# I let players draw cards from their full deck.
@sio.event
def draw_card(sid, data):
player_idx = next((i for i, p in enumerate(players) if hasattr(p, 'sid') and p['sid'] == sid), -1)
if player_idx != -1 and players[player_idx]['full_deck']:
card = players[player_idx]['full_deck'].pop()
players[player_idx]['deck'].append(card)
sio.emit('draw_card', {'player': player_idx, 'card': card}, to=None)
# I handle discarding cards to manage hand limits.
@sio.event
def discard_card(sid, data):
player_idx = next((i for i, p in enumerate(players) if hasattr(p, 'sid') and p['sid'] == sid), -1)
if player_idx != -1 and data.get('card_index') is not None and 0 <= data['card_index'] < len(players[player_idx]['deck']):
card = players[player_idx]['deck'].pop(data['card_index'])
players[player_idx]['discard_pile'].append(card)
sio.emit('discard_card', {'player': player_idx, 'card_index': data['card_index']}, to=None)
# I implement the attack logic for players, including critical hits and difficulty scaling.
def attack_enemy(player_idx):
global battle_count, difficulty_multiplier, game_state
if enemies and players[player_idx]['selected'] and players[player_idx]['selected_attack']:
attack = players[player_idx]['selected_attack']
crit = random.random() < 0.2 # I give a 20% chance for a critical hit.
crit_multiplier = 2 if crit else 1
attack_power = attack['attack'] * crit_multiplier
# I apply any status effects like Victory Boost to increase attack power.
for effect in players[player_idx]['status_effects']:
if effect['name'] == 'Victory Boost':
attack_power += effect['amount']
enemy_idx = random.randint(0, len(enemies) - 1)
enemy = enemies[enemy_idx]
enemy['health'] -= attack_power
players[player_idx]['points'] += 5
ml_log_data['attacks'] += 1
message = f"Player {player_idx + 1}: {'Critical Hit! ' if crit else ''}Dealt {attack_power} damage!"
sio.emit('message', {'text': message, 'timer': 180}, to=None)
send_arduino_command(player_idx + 1, 'attack')
if enemy['health'] <= 0:
enemies.pop(enemy_idx)
players[player_idx]['points'] += 10
# I add a Victory Boost status effect for defeating an enemy.
players[player_idx]['status_effects'].append({'name': 'Victory Boost', 'effect': 'attack', 'amount': 1, 'duration': 3})
sio.emit('message', {'text': f"Player {player_idx + 1}: Enemy defeated! +10 points!", 'timer': 180}, to=None)
battle_count += 1
# I increase difficulty every 4 battles, but cap it at 1.5.
if battle_count % 4 == 0:
difficulty_multiplier = min(difficulty_multiplier + 0.1, 1.5)
for enemy in enemies:
enemy['health'] = int(enemy['health'] * difficulty_multiplier)
for card in enemy["cards"]:
for attack in card["attacks"]:
attack["attack"] = int(attack["attack"] * min(difficulty_multiplier, 1.5))
enemy_health[:] = [e['health'] for e in enemies]
update_status_effects()
# I check for game over conditions: no enemies (win) or player health at 0 (lose).
if not enemies:
game_state = 'gameover'
log_ml_data(win=True)
elif players[player_idx]['health'] <= 0:
game_state = 'gameover'
log_ml_data(win=False)
sio.emit('update_game', {
'players': players,
'enemies': enemies,
'enemyHealth': enemy_health,
'gameState': game_state,
'difficulty': difficulty_multiplier
}, to=None)
# I manage status effects, reducing their duration each turn and removing expired ones.
def update_status_effects():
for player in players:
for effect in player['status_effects'][:]:
effect['duration'] -= 1
if effect['duration'] <= 0:
player['status_effects'].remove(effect)
# I reset the game state when starting a new game or after a game over.
def reset_game():
global players, enemies, enemy_health, difficulty_multiplier, battle_count, player_cards, ml_log_data
players = [
{'id': 'p1', 'deck': create_deck(), 'discard_pile': [], 'full_deck': create_deck(), 'health': 100, 'points': 0, 'selected': None, 'selected_attack': None, 'status_effects': [], 'sid': None},
{'id': 'p2', 'deck': create_deck(), 'discard_pile': [], 'full_deck': create_deck(), 'health': 100, 'points': 0, 'selected': None, 'selected_attack': None, 'status_effects': [], 'sid': None}
]
enemies = create_enemies()
enemy_health = [e['health'] for e in enemies]
difficulty_multiplier = 1.0
battle_count = 0
player_cards = {'p1': set(), 'p2': set()}
ml_log_data = {'attacks': 0, 'pauses': 0, 'start_time': time.time()}
log_ml_data()
# I run a separate thread for enemies to attack players periodically.
def enemy_attack():
global game_state, enemies, players, enemy_health, ml_log_data
while True:
if game_state == 'playing' and enemies:
for player_idx, player in enumerate(players):
if random.random() < 0.33: # I give enemies a 33% chance to attack each cycle.
attack = random.choice(enemies[0]['cards'][0]['attacks'])
player['health'] -= attack['attack']
sio.emit('message', {'text': f"Enemy attacked Player {player_idx + 1}! -{attack['attack']} HP", 'timer': 180}, to=None)
if player['health'] <= 0:
game_state = 'gameover'
log_ml_data(win=False)
sio.emit('update_game', {
'players': players,
'enemies': enemies,
'enemyHealth': enemy_health,
'gameState': game_state,
'difficulty': difficulty_multiplier
}, to=None)
break
time.sleep(3) # I set enemies to attack every 3 seconds.
# I enforce a card limit of 5 per player to prevent clutter and ensure fair play.
def check_card_limit():
global game_state, ml_log_data
for player_id in ['p1', 'p2']:
player_idx = 0 if player_id == 'p1' else 1
if len(player_cards[player_id]) > 5 and game_state != 'paused':
game_state = 'paused'
ml_log_data['pauses'] += 1
sio.emit('message', {
'text': f"Player {player_idx + 1}: More than 5 cards detected. Please discard excess cards.",
'timer': -1
}, to=None)
log_ml_data()
elif len(player_cards[player_id]) <= 5 and game_state == 'paused':
game_state = 'playing'
sio.emit('message', {'text': f"Player {player_idx + 1}: Card limit resolved. Game resumed.", 'timer': 180}, to=None)
sio.emit('update_game', {
'players': players,
'enemies': enemies,
'enemyHealth': enemy_health,
'gameState': game_state,
'difficulty': difficulty_multiplier
}, to=None)
# This is the main loop for tracking cards with OpenCV and handling game inputs.
def track_cards():
global card_positions, assigned_cards, last_positions, player_cards, game_state
try:
init_arduino() # I initialize Arduino at the start of tracking.
cap = None
# I try multiple camera indices because macOS can be finicky with camera selection.
for i in range(3):
try:
cap = cv2.VideoCapture(i, cv2.CAP_ANY)
if cap.isOpened():
logger.info(f"Camera opened on index {i}")
break
cap.release()
except Exception as e:
logger.warning(f"Failed to open camera on index {i}: {e}")
if not cap or not cap.isOpened():
logger.error("Failed to open any camera. Exiting track_cards.")
return
cap.set(cv2.CAP_PROP_FRAME_WIDTH, 640)
cap.set(cv2.CAP_PROP_FRAME_HEIGHT, 480)
# I verify the camera resolution to ensure it matches my expected 640x480.
width = cap.get(cv2.CAP_PROP_FRAME_WIDTH)
height = cap.get(cv2.CAP_PROP_FRAME_HEIGHT)
logger.info(f"Camera resolution: {width}x{height}")
# I load the background image for the OpenCV window, with a fallback if it’s missing.
background_path = os.path.join(data_path, 'ooo_background.png')
background = cv2.imread(background_path)
if background is None:
logger.warning(f"Failed to load background image at {background_path}")
background = np.zeros((480, 640, 3), dtype=np.uint8)
background[:] = (50, 50, 50)
background = cv2.resize(background, (640, 480))
# I set up the ArUco dictionary and detector for marker tracking.
aruco_dict = cv2.aruco.getPredefinedDictionary(cv2.aruco.DICT_4X4_100)
parameters = cv2.aruco.DetectorParameters()
detector = cv2.aruco.ArucoDetector(aruco_dict, parameters)
# I define keyboard controls as a fallback for Arduino button presses.
def on_press(key):
global game_state
try:
if game_state != 'paused':
if key == keyboard.KeyCode.from_char('s') and game_state == 'intro':
sio.emit('start_stop', {'gameStarted': True, 'difficulty': difficulty_multiplier}, to=None)
elif game_state == 'playing':
# I use 'a' for Player 1 and 'down' for Player 2 to trigger attacks.
if key == keyboard.KeyCode.from_char('a') and players[0]['selected'] and players[0]['selected_attack']:
attack_enemy(0)
sio.emit('attack', {'player': 0}, to=None)
send_arduino_command(1, 'attack')
elif key == keyboard.Key.down and players[1]['selected'] and players[1]['selected_attack']:
attack_enemy(1)
sio.emit('attack', {'player': 1}, to=None)
send_arduino_command(2, 'attack')
except Exception as e:
logger.error(f"Keyboard error: {e}")
listener = keyboard.Listener(on_press=on_press)
listener.start()
while True:
try:
ret, frame = cap.read()
if not ret or frame is None or frame.size == 0:
logger.warning("Failed to capture valid frame.")
time.sleep(0.1)
continue
display_frame = background.copy()
try:
corners, ids, rejected = detector.detectMarkers(frame)
if ids is not None:
ids = np.array(ids, dtype=np.int32) # I ensure ids is a NumPy array to avoid drawDetectedMarkers errors.
except Exception as e:
logger.error(f"Error in marker detection: {e}")
continue
player_cards['p1'].clear()
player_cards['p2'].clear()
if ids is not None and len(ids) > 0:
for i, corner in enumerate(corners):
try:
marker_id = int(ids[i][0])
if marker_id not in range(52):
logger.warning(f"Invalid marker ID {marker_id}")
continue
x = int(corner[0][0][0])
y = int(corner[0][0][1])
character = character_map[marker_id]
player = 'p1' if x < 320 else 'p2' # I split the frame at x=320 for Player 1 (left) and Player 2 (right).
if marker_id not in assigned_cards:
assigned_cards[marker_id] = player
logger.info(f"Marker ID {marker_id} ({character}) assigned to {player}")
player_cards[player].add(marker_id)
card_positions[player]['x'] = x
card_positions[player]['y'] = y
card_positions[player]['character'] = character
dx = corner[0][1][0] - corner[0][0][0]
dy = corner[0][1][1] - corner[0][0][1]
rot = float(np.arctan2(dy, dx) * 180 / np.pi) # I calculate rotation and convert to float for JSON serialization.
card_positions[player]['rot'] = rot
# I draw the detected markers on the OpenCV window for visual feedback.
cv2.aruco.drawDetectedMarkers(display_frame, [corner], np.array([[marker_id]], dtype=np.int32))
cv2.putText(display_frame, f"{character} ({player})", (x, y - 10), cv2.FONT_HERSHEY_SIMPLEX, 0.5, (0, 255, 0), 2)
except Exception as e:
logger.error(f"Error processing marker {marker_id}: {e}")
continue
if marker_id in last_positions:
last_x, last_y = last_positions[marker_id]
# I check for significant movement to reassign cards if needed.
if abs(x - last_x) > 50 or abs(y - last_y) > 50:
del assigned_cards[marker_id]
last_positions[marker_id] = (x, y)
player_idx = 0 if player == 'p1' else 1
if player_cards[player]:
players[player_idx]['selected'] = character
# I select an attack based on card rotation (0-180 degrees maps to 4 attacks).
attack_idx = min(int(abs(rot) / 45), 3)
players[player_idx]['selected_attack'] = players[player_idx]['deck'][0]['attacks'][attack_idx]
send_arduino_command(player_idx + 1, 'character_click', character)
# I clean up assigned cards and positions when markers are no longer detected.
for marker_id in list(assigned_cards.keys()):
if ids is None or marker_id not in ids.flatten():
player = assigned_cards[marker_id]
card_positions[player]['character'] = None
del assigned_cards[marker_id]
if marker_id in last_positions:
del last_positions[marker_id]
check_card_limit() # I enforce the card limit after each frame.
# I ensure all card position data is JSON serializable to avoid Socket.IO errors.
serializable_card_positions = {
player: {
'x': float(pos['x']),
'y': float(pos['y']),
'rot': float(pos['rot']),
'character': pos['character']
} for player, pos in card_positions.items()
}
sio.emit('update_card_data', {
'cardData': serializable_card_positions,
'health': [players[0]['health'], players[1]['health']],
'points': [players[0]['points'], players[1]['points']],
'enemyHealth': enemy_health,
'gameState': game_state,
'difficulty': float(difficulty_multiplier),
'port': port
}, to=None)
# I handle Arduino button presses to start the game or trigger attacks.
for command in read_arduino():
if command == "BUTTON_PRESSED" and game_state != 'paused':
if game_state == "intro":
sio.emit('start_stop', {'gameStarted': True, 'difficulty': difficulty_multiplier}, to=None)
elif game_state == "playing":
for player_idx in range(2):
if players[player_idx]['selected'] and players[player_idx]['selected_attack']:
attack_enemy(player_idx)
sio.emit('attack', {'player': player_idx}, to=None)
send_arduino_command(player_idx + 1, 'attack')
break
cv2.imshow('Magic Munchkin Battle', display_frame)
if cv2.waitKey(1) & 0xFF == ord('q'):
break
except Exception as e:
logger.error(f"Error in track_cards loop: {e}")
time.sleep(0.1)
continue
time.sleep(0.1) # I add a small delay to prevent the loop from running too fast.
except Exception as e:
logger.error(f"Critical error in track_cards: {e}")
finally:
# I ensure cleanup of resources to avoid leaving the camera or Arduino in a bad state.
if 'cap' in locals() and cap:
cap.release()
if arduino and arduino.is_open:
arduino.close()
cv2.destroyAllWindows()
if 'listener' in locals():
listener.stop()
# I start the game by setting up decks, enemies, and running the server.
def main():
players[0]['deck'] = create_deck()
players[0]['full_deck'] = create_deck()
players[1]['deck'] = create_deck()
players[1]['full_deck'] = create_deck()
global enemies, enemy_health
enemies = create_enemies()
enemy_health[:] = [e['health'] for e in enemies]
threading.Thread(target=enemy_attack, daemon=True).start()
threading.Thread(target=track_cards, daemon=True).start()
eventlet.wsgi.server(eventlet.listen((server_ip, port)), app)
if __name__ == '__main__':
main()
Index.html:
<!DOCTYPE html>
<html>
<head>
  <title>Magic Munchkin Battle - Multiplayer</title>
  <!-- I include p5.js for rendering the game UI in the browser. -->
  <script src="https://cdn.jsdelivr.net/npm/p5@1.4.2/lib/p5.min.js"></script>
  <!-- I add p5.sound for sound effects and background music. -->
  <script src="https://cdn.jsdelivr.net/npm/p5@1.4.2/lib/addons/p5.sound.min.js"></script>
  <!-- I use Socket.IO to communicate with the server in real time. -->
  <script src="https://cdn.jsdelivr.net/npm/socket.io-client@4.7.5/dist/socket.io.min.js"></script>
  <style>
    /* I style the page to fit the canvas and overlay elements. */
    body { margin: 0; overflow: hidden; background: #000; font-family: Arial, sans-serif; }
    canvas { display: block; width: 100%; height: 100%; }
    /* I create an overlay for pause and game over screens. */
    #overlay { position: absolute; top: 0; left: 0; width: 100%; height: 100%; background: rgba(0, 0, 0, 0.7); color: white; display: none; justify-content: center; align-items: center; font-size: 32px; text-align: center; }
    .tooltip { background: rgba(0, 0, 0, 0.8); padding: 10px; border-radius: 5px; }
    /* I position buttons for muting and starting/stopping the game. */
    #muteButton { position: absolute; top: 10px; right: 10px; padding: 5px 10px; background: #444; color: white; border: none; cursor: pointer; }
    #startButton { position: absolute; top: 50px; right: 10px; padding: 5px 10px; background: #4CAF50; color: white; border: none; cursor: pointer; }
  </style>
</head>
<body>
  <div id="overlay"></div>
  <button id="muteButton" onclick="toggleMute()">Mute</button>
  <button id="startButton" onclick="startStop()">Start/Stop</button>
  <script>
    document.addEventListener('DOMContentLoaded', () => {
      let socket;  // I’ll use this to connect to the server via Socket.IO.
      let gameState = 'intro';  // I track the game state (intro, playing, paused, gameover).
      // I define player data for both Player 1 and Player 2.
      let players = [
        { health: 100, deck: [], discardPile: [], fullDeck: [], score: 0, selectedCard: null, selectedAttack: null, statusEffects: [] },
        { health: 100, deck: [], discardPile: [], fullDeck: [], score: 0, selectedCard: null, selectedAttack: null, statusEffects: [] }
      ];
      let enemies = [];  // I store enemy data here.
      let enemyHealth = [];  // I track enemy health for rendering.
      let currentEnemy = 0;  // I keep track of which enemy is being targeted.
      let difficultyMultiplier = 1.0;  // I use this to show the current difficulty level.
      let message = '';  // I display temporary messages like attack notifications.
      let messageTimer = 0;  // I control how long messages are shown.
      let timer = 0;  // I track game duration for display.
      let gameStarted = false;  // I track if the game has started.
      let playerId = null;  // I store the player ID (0 for P1, 1 for P2, null for spectator).
      let isMuted = false;  // I track if sound is muted.

      let images = {};  // I store all game images here.
      let sounds = {};  // I store sound effects here.
      let backgroundMusic;  // I load background music separately.

      // I store card data for both players, updated by the server.
      let cardData = { p1: { x: 0, y: 0, rot: 0, character: null }, p2: { x: 0, y: 0, rot: 0, character: null } };

      // I list all characters for image and sound loading.
      const characters = [
        "Finn", "Jake", "Marceline", "Flame Princess", "Ice King", "Princess Bubblegum", "BMO",
        "Lumpy Space Princess", "Banana Guard", "Female Jake", "Gunther", "Female Finn", "Tree Trunks"
      ];

      // I preload all images and sounds to ensure they’re ready before the game starts.
      function preload() {
        // I wrote a helper to load images with a fallback if they fail to load.
        const loadImageSafe = (key, filename, fallbackColor) => {
          images[key] = loadImage(filename, () => console.log(`${key} loaded`), () => {
            console.error(`${key} failed, using fallback`);
            images[key] = createImage(80, 80);
            images[key].loadPixels();
            for (let i = 0; i < images[key].pixels.length; i += 4) {
              images[key].pixels[i] = red(fallbackColor);
              images[key].pixels[i + 1] = green(fallbackColor);
              images[key].pixels[i + 2] = blue(fallbackColor);
              images[key].pixels[i + 3] = 255;
            }
            images[key].updatePixels();
          });
        };

        // I wrote a helper to load sounds with error handling.
        const loadSoundSafe = (key, filename) => {
          sounds[key] = loadSound(filename, () => console.log(`${key} loaded`), () => console.error(`${key} failed`));
        };

        // I load all character images, enemies, and UI elements with fallbacks.
        loadImageSafe('background', 'data/ooo_background.png', color(0, 100, 200));
        loadImageSafe('finn', 'data/finn.png', color(30, 144, 255));
        loadImageSafe('jake', 'data/jake.png', color(255, 215, 0));
        loadImageSafe('marceline', 'data/marceline.png', color(128, 0, 128));
        loadImageSafe('flame_princess', 'data/flame_princess.png', color(255, 69, 0));
        loadImageSafe('ice_king', 'data/ice_king.png', color(0, 191, 255));
        loadImageSafe('princess_bubblegum', 'data/princess_bubblegum.png', color(255, 105, 180));
        loadImageSafe('bmo', 'data/bmo.png', color(46, 139, 87));
        loadImageSafe('lumpy_space_princess', 'data/lumpy_space_princess.png', color(186, 85, 211));
        loadImageSafe('banana_guard', 'data/banana_guard.png', color(255, 255, 0));
        loadImageSafe('female_jake', 'data/female_jake.png', color(218, 165, 32));
        loadImageSafe('gunther', 'data/gunther.png', color(0, 0, 0));
        loadImageSafe('female_finn', 'data/female_finn.png', color(135, 206, 250));
        loadImageSafe('tree_trunks', 'data/tree_trunks.png', color(107, 142, 35));
        loadImageSafe('goblin', 'data/goblin.png', color(50, 205, 50));
        loadImageSafe('slime', 'data/slime.png', color(0, 250, 154));
        loadImageSafe('troll', 'data/troll.png', color(165, 42, 42));
        loadImageSafe('ogre', 'data/ogre.png', color(139, 69, 19));
        loadImageSafe('card_back', 'data/card_back.png', color(25, 25, 112));
        loadImageSafe('bin', 'data/bin.png', color(169, 169, 169));

        // I load sound effects and background music.
        loadSoundSafe('boing', 'data/boing.wav');
        loadSoundSafe('pow', 'data/pow.wav');
        loadSoundSafe('cheer', 'data/cheer.wav');
        loadSoundSafe('discard', 'data/discard.wav');
        backgroundMusic = loadSound('data/background_music.mp3', () => console.log('background_music loaded'), () => console.error('background_music failed'));
      }

      // I set up the p5.js canvas and Socket.IO connection.
      function setup() {
        createCanvas(windowWidth, windowHeight);
        frameRate(60);
        textAlign(CENTER, CENTER);
        imageMode(CENTER);

        socket = io('http://10.228.236.43:5000');  // I connect to my server.
        socket.on('connect', () => {
          console.log('Connected to server');
          socket.emit('join', { type: window.location.pathname === '/watch' ? 'spectator' : 'player' });  // I join as a player or spectator.
        });

        // I assign the player ID when the server responds.
        socket.on('assignPlayer', (data) => {
          playerId = data.playerId;
          console.log(playerId === null ? 'Assigned as Spectator' : `Assigned as Player ${playerId + 1}`);
        });

        // I initialize game data when the server sends it.
        socket.on('init', (data) => {
          players = data.players;
          enemies = data.enemies;
          gameState = data.gameState;
          difficultyMultiplier = data.difficulty;
        });

        // I update card positions and game stats from the server.
        socket.on('update_card_data', (data) => {
          cardData = data.cardData;
          players[0].health = data.health[0];
          players[1].health = data.health[1];
          players[0].score = data.points[0];
          players[1].score = data.points[1];
          enemyHealth = data.enemyHealth;
          gameState = data.gameState;
          difficultyMultiplier = data.difficulty;
        });

        // I update the full game state when the server sends changes.
        socket.on('update_game', (data) => {
          players = data.players.map(p => ({
            ...p,
            deck: p.deck.map(c => new Card(c.name, c.attacks, images[c.name.toLowerCase().replace(/ /g, '_')])),
            discardPile: p.discard_pile,
            fullDeck: p.full_deck,
            selectedCard: p.selected ? { name: p.selected, attacks: p.deck.find(c => c.name === p.selected)?.attacks || [] } : null,
            selectedAttack: p.selected_attack,
            statusEffects: p.status_effects
          }));
          enemies = data.enemies;
          enemyHealth = data.enemyHealth;
          gameState = data.gameState;
          difficultyMultiplier = data.difficulty;
        });

        // I handle card selection events, playing a sound if not muted.
        socket.on('select', (data) => {
          const player = players[data.player];
          player.selectedCard = player.deck.find(c => c.name === data.card) || null;
          player.selectedAttack = data.attack || null;
          if (player.selectedCard && sounds.boing && !isMuted) sounds.boing.play();
        });

        // I play a sound for attacks if not muted.
        socket.on('attack', (data) => {
          if (sounds.pow && !isMuted) sounds.pow.play();
        });

        // I display messages from the server, like attack results.
        socket.on('message', (data) => {
          message = data.text;
          messageTimer = data.timer;
          if (message.includes('Enemy defeated') && sounds.cheer && !isMuted) sounds.cheer.play();
        });

        // I handle game start/stop events, controlling background music.
        socket.on('start_stop', (data) => {
          gameStarted = data.gameStarted;
          gameState = data.gameStarted ? 'playing' : 'intro';
          timer = 0;
          difficultyMultiplier = data.difficulty;
          if (gameStarted && backgroundMusic && !backgroundMusic.isPlaying() && !isMuted) backgroundMusic.loop();
          else if (backgroundMusic) backgroundMusic.stop();
        });

        // I handle drawing cards, playing a sound.
        socket.on('draw_card', (data) => {
          players[data.player].deck.push(new Card(data.card.name, data.card.attacks, images[data.card.name.toLowerCase().replace(/ /g, '_')]));
          if (sounds.boing && !isMuted) sounds.boing.play();
        });

        // I handle discarding cards, playing a sound.
        socket.on('discard_card', (data) => {
          players[data.player].discardPile.push(players[data.player].deck.splice(data.card_index, 1)[0]);
          if (sounds.discard && !isMuted) sounds.discard.play();
        });
      }

      // I resize the canvas when the window size changes.
      function windowResized() {
        resizeCanvas(windowWidth, windowHeight);
      }

      // I draw the game UI each frame.
      function draw() {
        if (images.background) image(images.background, width / 2, height / 2, width, height);
        else background(0, 100, 200);  // I use a fallback background color if the image fails.

        if (gameStarted) timer += deltaTime / 1000;  // I update the game timer.

        let scaleX = width / 800;  // I scale elements based on window size.
        let scaleY = height / 600;

        // I draw the appropriate screen based on the game state.
        if (gameState === 'intro') drawIntroScreen(scaleX, scaleY);
        else if (['playing', 'paused'].includes(gameState)) drawGameScreen(scaleX, scaleY);
        else if (gameState === 'gameover') drawGameoverScreen(scaleX, scaleY);

        // I display the game timer and difficulty in the top-right corner.
        textSize(16 * scaleX);
        fill(255);
        text(`Time: ${Math.floor(timer)}s`, width - 80 * scaleX, 30 * scaleY);
        text(`Difficulty: ${difficultyMultiplier.toFixed(1)}x`, width - 80 * scaleX, 50 * scaleY);

        // I show messages like attack notifications for a set duration.
        if (message && (messageTimer === -1 || messageTimer > 0)) {
          fill(255, 255, 0);
          textSize(20 * scaleX);
          text(message, width / 2, height / 2);
          if (messageTimer !== -1) messageTimer--;
        }

        // I indicate if the client is in spectator mode.
        if (playerId === null) {
          fill(255);
          textSize(20 * scaleX);
          text("Spectator Mode", width / 2, 20 * scaleY);
        }
      }

      // I define a class for attacks to manage loading progress.
      class Attack {
        constructor(name, attack, health, loadTimeSeconds) {
          this.name = name;
          this.attack = attack;
          this.health = health;
          this.loadTimeSeconds = loadTimeSeconds;
          this.startLoadTime = null;
          this.isLoading = false;
        }
      }

      // I define a Card class to handle card visuals and animations.
      class Card {
        constructor(name, attacks, image) {
          this.name = name;
          this.attacks = attacks.map(a => new Attack(a.name, a.attack, a.health, a.load));
          this.image = image;
          this.animOffsetX = 0;
          this.animDirection = random([-1, 1]);
          this.animSpeed = random(0.5, 1.5);
          this.x = 0;
          this.y = 0;
        }

        startLoadingAll() {
          this.attacks.forEach(attack => {
            if (!attack.isLoading) {
              attack.startLoadTime = millis();
              attack.isLoading = true;
            }
          });
        }

        getLoadProgress(attack) {
          if (!attack.isLoading || !attack.startLoadTime) return 0;
          return min((millis() - attack.startLoadTime) / 1000 / attack.loadTimeSeconds, 1);
        }

        updateAnimation() {
          this.animOffsetX += this.animSpeed * this.animDirection;
          if (abs(this.animOffsetX) > 5) this.animDirection *= -1;
        }
      }

      // I draw the main game screen with players, cards, and enemies.
      function drawGameScreen(scaleX, scaleY) {
        players.forEach((player, idx) => {
          // I display player stats like health and score.
          fill(255);
          textSize(16 * scaleX);
          text(`Player ${idx + 1} Health: ${player.health}`, 20 * scaleX, (30 + idx * 50) * scaleY);
          text(`Score: ${player.score}`, 20 * scaleX, (50 + idx * 50) * scaleY);
          fill(255, 0, 0);
          rect(120 * scaleX, (20 + idx * 50) * scaleY, 100 * scaleX, 10 * scaleY);
          fill(0, 255, 0);
          rect(120 * scaleX, (20 + idx * 50) * scaleY, (player.health / 100) * 100 * scaleX, 10 * scaleY);

          // I show status effects if any exist.
          player.statusEffects.forEach((effect, i) => {
            text(`${effect.name}: ${effect.duration} turns`, 20 * scaleX, (70 + idx * 50 + i * 20) * scaleY);
          });

          // I position cards differently for Player 1 (left) and Player 2 (right).
          const startX = idx === 0 ? 50 : 400;
          player.deck.forEach((card, i) => {
            card.updateAnimation();
            card.x = (startX + i * 110) * scaleX;
            card.y = (height - 140) * scaleY;
            // I adjust card position based on AR tracking data.
            if (cardData[`p${idx + 1}`].character === card.name) {
              card.x = cardData[`p${idx + 1}`].x * (width / 640);
              card.y = cardData[`p${idx + 1}`].y * (height / 480);
              push();
              translate(card.x, card.y);
              rotate(radians(cardData[`p${idx + 1}`].rot));
              if (card.image) image(card.image, card.animOffsetX * scaleX, 0, 80 * scaleX, 80 * scaleY);
              pop();
            } else {
              if (card.image) image(card.image, card.x + card.animOffsetX * scaleX, card.y, 80 * scaleX, 80 * scaleY);
            }
            // I highlight the selected card with a yellow border.
            if (player.selectedCard && player.selectedCard.name === card.name) {
              drawingContext.shadowBlur = 20;
              drawingContext.shadowColor = 'yellow';
              stroke(255, 255, 0);
              strokeWeight(4 * scaleX);
              rect((card.x - 45 * scaleX), (card.y - 45 * scaleY), 90 * scaleX, 90 * scaleY);
              strokeWeight(1);
              stroke(0);
              drawingContext.shadowBlur = 0;
            }
            // I show a tooltip with attack details on hover and allow selection.
            if (playerId !== null && card.x - 40 * scaleX <= mouseX && mouseX <= card.x + 40 * scaleX && card.y - 40 * scaleY <= mouseY && mouseY <= card.y + 40 * scaleY) {
              fill(0, 0, 0, 200);
              rect((card.x - 75 * scaleX), (card.y - 120 * scaleY), 150 * scaleX, 100 * scaleY, 10 * scaleX);
              fill(255);
              textAlign(LEFT);
              card.attacks.forEach((attack, j) => {
                text(`${attack.name}: ATK ${attack.attack}, HP ${attack.health}, ${attack.loadTimeSeconds}s`, (card.x - 70 * scaleX), (card.y - 100 + j * 20) * scaleY);
              });
              textAlign(CENTER);
              if (mouseIsPressed) {
                socket.emit('select', { player: playerId, card: card.name });
              }
            }

            // I show a loading bar for the selected attack.
            if (player.selectedCard && player.selectedCard.name === card.name && player.selectedAttack) {
              const progress = card.getLoadProgress(player.selectedAttack);
              fill(255, 0, 0);
              rect((card.x - 40 * scaleX), (card.y + 45 * scaleY), 80 * scaleX, 5 * scaleY);
              fill(0, 255, 0);
              rect((card.x - 40 * scaleX), (card.y + 45 * scaleY), 80 * progress * scaleX, 5 * scaleY);
              if (progress >= 1 && playerId !== null) {
                socket.emit('attack', { player: playerId });
              }
            }
          });

          // I draw the draw pile for players to pick new cards.
          if (images.card_back && playerId !== null) {
            image(images.card_back, idx === 0 ? (width - 200 * scaleX) : (width - 100 * scaleX), (height - 100) * scaleY, 80 * scaleX, 80 * scaleY);
            text(`Draw (${player.fullDeck.length})`, idx === 0 ? (width - 160 * scaleX) : (width - 60 * scaleX), (height - 60) * scaleY);
            if (mouseX >= (idx === 0 ? width - 240 * scaleX : width - 140 * scaleX) && mouseX <= (idx === 0 ? width - 160 * scaleX : width - 60 * scaleX) &&
                mouseY >= (height - 140 * scaleY) && mouseY <= (height - 60 * scaleY) && mouseIsPressed) {
              socket.emit('draw_card', { player: playerId });
            }
          }

          // I draw the discard pile for players to discard cards.
          if (images.bin && playerId !== null) {
            image(images.bin, idx === 0 ? (width - 100 * scaleX) : (width - 200 * scaleX), (height - 100) * scaleY, 80 * scaleX, 80 * scaleY);
            text(`Discard (${player.discardPile.length})`, idx === 0 ? (width - 60 * scaleX) : (width - 160 * scaleX), (height - 60) * scaleY);
            if (mouseX >= (idx === 0 ? width - 140 * scaleX : width - 240 * scaleX) && mouseX <= (idx === 0 ? width - 60 * scaleX : width - 160 * scaleX) &&
                mouseY >= (height - 140 * scaleY) && mouseY <= (height - 60 * scaleY) && mouseIsPressed) {
              const cardIndex = floor((mouseX - (idx === 0 ? 50 * scaleX : 400 * scaleX)) / (110 * scaleX));
              if (cardIndex >= 0 && cardIndex < player.deck.length) {
                socket.emit('discard_card', { player: playerId, card_index: cardIndex });
              }
            }
          }
        });

        // I display enemies with their health bars.
        enemies.forEach((enemy, i) => {
          fill(0, 255, 0);
          textSize(14 * scaleX);
          text(`${enemy.name} Health: ${enemy.health}`, (width - 150 * scaleX), (80 + i * 80) * scaleY);
          fill(255, 0, 0);
          rect((width - 200 * scaleX), (90 + i * 80) * scaleY, 100 * scaleX, 10 * scaleY);
          fill(0, 255, 0);
          rect((width - 200 * scaleX), (90 + i * 80) * scaleY, (enemy.health / (enemy.health + 10)) * 100 * scaleX, 10 * scaleY);
          if (images[enemy.cards[0].image]) {
            image(images[enemy.cards[0].image], (width - 150) * scaleX, (150 + i * 80) * scaleY, 100 * scaleX, 100 * scaleY);
          }
        });

        // I show the pause overlay when the game is paused.
        if (gameState === 'paused') {
          document.getElementById('overlay').style.display = 'flex';
          document.getElementById('overlay').innerText = 'Game Paused\nRemove excess cards';
        } else {
          document.getElementById('overlay').style.display = 'none';
        }
      }

      // I draw the intro screen before the game starts.
      function drawIntroScreen(scaleX, scaleY) {
        fill(255);
        textSize(32 * scaleX);
        text("Magic Munchkin Battle", width / 2, height / 2 - 100 * scaleY);
        textSize(20 * scaleX);
        text("Waiting for game to start...", width / 2, height / 2);
        if (images.finn) image(images.finn, (width / 2 - 100 * scaleX), (height / 2 + 50 * scaleY), 80 * scaleX, 80 * scaleY);
        if (images.jake) image(images.jake, (width / 2 + 20 * scaleX), (height / 2 + 50 * scaleY), 80 * scaleX, 80 * scaleY);
      }

      // I draw the game over screen, showing the final scores.
      function drawGameoverScreen(scaleX, scaleY) {
        document.getElementById('overlay').style.display = 'flex';
        let text = '';
        if (players.some(p => p.health <= 0)) {
          text = "Game Over - Player Lost!\n";
        } else if (!enemies.length) {
          text = "Victory! All Enemies Defeated!\n";
        }
        players.forEach((player, idx) => {
          text += `Player ${idx + 1} Score: ${player.score}\n`;
        });
        document.getElementById('overlay').innerText = text;
      }

      // I toggle sound muting for the game.
      function toggleMute() {
        isMuted = !isMuted;
        document.getElementById('muteButton').textContent = isMuted ? 'Unmute' : 'Mute';
        if (backgroundMusic) backgroundMusic.setVolume(isMuted ? 0 : 1);
      }

      // I handle starting/stopping the game via the button.
      function startStop() {
        socket.emit('start_stop', { gameStarted: !gameStarted });
      }

      // I disable mouse clicks for spectators.
      function mousePressed() {
        if (playerId === null) return;
      }
    });
  </script>
</body>
</html>
ML_model.py:
# I wrote this script to analyze game data and suggest improvements using machine learning.
# It’s a stretch goal to make Magic Munchkin Battle more balanced and fun based on player stats.

import pandas as pd  # I use pandas to handle the CSV data for analysis.
import numpy as np  # NumPy for numerical operations in preprocessing.
from sklearn.ensemble import RandomForestRegressor  # I chose RandomForest for its robustness in predicting win likelihood.
from sklearn.model_selection import train_test_split  # To split data into training and testing sets.
import logging  # Logging helps me track the ML process and errors.
import os  # For file path handling.
import csv  # To create the CSV if it doesn’t exist.

# I set up logging to monitor the ML process.
logging.basicConfig(level=logging.INFO, format='%(asctime)s - %(levelname)s - %(message)s')
logger = logging.getLogger(__name__)

# I ensure the game_data.csv file exists with the correct headers.
def initialize_game_data(file_path='game_data.csv'):
    """Create game_data.csv with headers if it doesn't exist."""
    if not os.path.exists(file_path):
        headers = ['timestamp', 'game_state', 'p1_card_count', 'p2_card_count', 'p1_health', 'p2_health',
                   'enemy_count', 'difficulty', 'attacks', 'pauses', 'game_duration', 'win']
        with open(file_path, 'w', newline='') as f:
            writer = csv.writer(f)
            writer.writerow(headers)
        logger.info(f"Created empty {file_path} with headers")
    return file_path

# I load the game data from the CSV file for analysis.
def load_game_data(file_path='game_data.csv'):
    try:
        initialize_game_data(file_path)
        data = pd.read_csv(file_path)
        if data.empty:
            logger.warning(f"{file_path} is empty. Run games to generate data.")
            return None
        logger.info(f"Loaded {len(data)} game sessions")
        return data
    except Exception as e:
        logger.error(f"Failed to load game data: {e}")
        return None

# I preprocess the data to extract features and the target variable (win).
def preprocess_data(data):
    features = ['p1_card_count', 'p2_card_count', 'p1_health', 'p2_health', 'enemy_count', 'difficulty', 'attacks', 'pauses', 'game_duration']
    target = 'win'
    X = data[features].fillna(0)  # I fill missing values with 0 to avoid errors.
    y = data[target].fillna(0)
    return X, y

# I train a RandomForest model to predict the likelihood of winning.
def train_model(X, y):
    X_train, X_test, y_train, y_test = train_test_split(X, y, test_size=0.2, random_state=42)
    model = RandomForestRegressor(n_estimators=100, random_state=42)
    model.fit(X_train, y_train)
    score = model.score(X_test, y_test)
    logger.info(f"Model R^2 score: {score:.4f}")
    return model

# I analyze feature importance to suggest gameplay improvements.
def suggest_improvements(model, data):
    feature_importance = pd.Series(model.feature_importances_, index=data.columns).sort_values(ascending=False)
    logger.info("Feature Importance:\n" + str(feature_importance))

    suggestions = []
    # I check if pauses are a significant factor, suggesting UI or detection improvements.
    if feature_importance.get('pauses', 0) > 0.2:
        suggestions.append("High pause frequency: Increase card limit to 6 or improve AR detection accuracy.")
    # I check if games are too long, suggesting balance adjustments.
    if feature_importance.get('game_duration', 0) > 0.2 and data['game_duration'].mean() > 600:
        suggestions.append("Games too long: Reduce enemy health by 10% or increase attack power.")
    # I check if the game is too hard based on win rate and difficulty.
    if feature_importance.get('difficulty', 0) > 0.2 and data['win'].mean() < 0.3:
        suggestions.append("Game too hard: Lower difficulty cap to 1.3 or reduce enemy attack frequency.")
    # I check if card counts are an issue, suggesting UI tweaks.
    if feature_importance.get('p1_card_count', 0) > 0.15 or feature_importance.get('p2_card_count', 0) > 0.15:
        suggestions.append("UI: Increase card spacing or improve marker placement guidance.")

    return suggestions

# I run the ML analysis and print suggestions.
def main():
    data = load_game_data()
    if data is None:
        logger.info("Please run 'combined_server.py' to play games and generate data in 'game_data.csv'.")
        return
    if len(data) < 10:
        logger.warning(f"Insufficient data: {len(data)} sessions found. Need at least 10 sessions.")
        return

    X, y = preprocess_data(data)
    model = train_model(X, y)
    suggestions = suggest_improvements(model, X)

    logger.info("Suggested Improvements:")
    for s in suggestions:
        logger.info(f"- {s}")

if __name__ == "__main__":
    main()
Server.js:
// I created this Node.js server to act as a bridge between the Python server and the browser clients.
// It handles client connections, serves static files, and forwards events between the Python server and clients.

const express = require('express');  // I use Express to handle HTTP requests and serve static files.
const http = require('http');  // I need the HTTP module to create a server for Socket.IO.
const { Server } = require('socket.io');  // Socket.IO allows real-time communication with browser clients.
const ioClient = require('socket.io-client');  // I use this to connect to the Python server as a client.
const path = require('path');  // Path helps me handle file paths for serving static files.

const app = express();  // I initialize the Express app to handle HTTP requests.
const server = http.createServer(app);  // I create an HTTP server to integrate with Socket.IO.
const io = new Server(server, {
    cors: {
        origin: '*',  // I allow all origins for CORS to simplify development and testing.
        methods: ['GET', 'POST']  // I restrict methods to GET and POST for safety.
    }
});

// I set up Express to serve static files like images and HTML pages.
// This route serves the 'data' folder for assets like character images and sounds.
app.use('/data', express.static(path.join(__dirname, 'data')));

// I serve the spectator view (watch.html) when clients access the '/watch' route.
app.get('/watch', (req, res) => res.sendFile(path.join(__dirname, 'watch.html')));

// I serve the player view (index.html) for the root route.
app.get('/', (req, res) => res.sendFile(path.join(__dirname, 'index.html')));

// I track the number of active players to ensure we don’t exceed the 2-player limit.
let playerCount = 0;

// I connect to the Python server running on port 5000 to forward game data.
const pythonServerUrl = 'http://10.228.236.43:5000';
const pythonSocket = ioClient(pythonServerUrl);

// I set up event handlers to forward messages from the Python server to all connected clients.
// This ensures that game state updates are propagated to both players and spectators.
pythonSocket.on('connect', () => {
    console.log('Connected to Python server');
});

pythonSocket.on('init', (data) => {
    // I forward the initial game data (players, enemies, etc.) to all clients.
    io.emit('init', data);
});

pythonSocket.on('gameState', (data) => {
    // I forward the game state (intro, playing, etc.) to clients for UI updates.
    io.emit('gameState', data);
});

pythonSocket.on('startStop', (data) => {
    // I forward start/stop events to control the game flow on the client side.
    io.emit('start_stop', data);
});

pythonSocket.on('select', (data) => {
    // I forward card/attack selection events to update the UI for all clients.
    io.emit('select', data);
});

pythonSocket.on('attack', (data) => {
    // I forward attack events to trigger animations and sound effects on clients.
    io.emit('attack', data);
});

pythonSocket.on('draw_card', (data) => {
    // I forward draw card events to update the player’s deck on the UI.
    io.emit('draw_card', data);
});

pythonSocket.on('discard_card', (data) => {
    // I forward discard card events to update the player’s discard pile on the UI.
    io.emit('discard_card', data);
});

pythonSocket.on('update_card_data', (data) => {
    // I forward card position and game stats updates to keep the UI in sync.
    io.emit('update_card_data', data);
});

pythonSocket.on('update_game', (data) => {
    // I forward full game state updates (players, enemies, etc.) to clients.
    io.emit('update_game', data);
});

pythonSocket.on('message', (data) => {
    // I forward in-game messages (e.g., attack results) to display on the client UI.
    io.emit('message', data);
});

pythonSocket.on('disconnect', () => {
    // I log when the connection to the Python server is lost to debug potential issues.
    console.log('Disconnected from Python server');
});

// I handle client connections to the Node.js server via Socket.IO.
io.on('connection', (socket) => {
    console.log(`Client connected: ${socket.id}`);

    socket.on('join', (data) => {
        // I assign the client as a player if there are fewer than 2 players.
        if (data.type === 'player' && playerCount < 2) {
            const playerId = playerCount;
            playerCount++;
            socket.playerId = playerId;  // I attach the playerId to the socket for tracking.
            socket.emit('assignPlayer', { playerId });
            console.log(`Assigned client ${socket.id} as Player ${playerId + 1}`);
        } else {
            // Otherwise, the client is a spectator.
            socket.emit('assignPlayer', { playerId: null });
            console.log(`Assigned client ${socket.id} as Spectator`);
        }
    });

    // I forward client events to the Python server to process game logic.
    socket.on('start_stop', (data) => {
        pythonSocket.emit('start_stop', data);
    });

    socket.on('select', (data) => {
        pythonSocket.emit('select', data);
    });

    socket.on('attack', (data) => {
        pythonSocket.emit('attack', data);
    });

    socket.on('draw_card', (data) => {
        pythonSocket.emit('draw_card', data);
    });

    socket.on('discard_card', (data) => {
        pythonSocket.emit('discard_card', data);
    });

    socket.on('disconnect', () => {
        // I clean up player slots when a client disconnects.
        console.log(`Client disconnected: ${socket.id}`);
        if (socket.playerId !== null && socket.playerId !== undefined) {
            playerCount = Math.max(0, playerCount - 1);
        }
    });
});

// I start the Node.js server on port 5001, separate from the Python server on 5000.
const PORT = 5001;
server.listen(PORT, '0.0.0.0', () => {
    console.log(`Node.js server running on http://10.228.236.43:${PORT}`);
});
Watch.html:
<!DOCTYPE html>
<html>
<head>
  <title>Magic Munchkin Battle - Spectator View</title>
  <!-- I include p5.js to handle the rendering of the game state for spectators. -->
  <script src="https://cdn.jsdelivr.net/npm/p5@1.4.2/lib/p5.min.js"></script>
  <!-- I include p5.sound for playing sound effects, even though spectators don’t interact much. -->
  <script src="https://cdn.jsdelivr.net/npm/p5@1.4.2/lib/addons/p5.sound.min.js"></script>
  <!-- I use Socket.IO to receive real-time updates from the server about the game state. -->
  <script src="https://cdn.jsdelivr.net/npm/socket.io-client@4.7.5/dist/socket.io.min.js"></script>
  <style>
    /* I style the page to ensure the canvas fits the screen and text is readable. */
    body { margin: 0; overflow: hidden; background: #000; font-family: Arial, sans-serif; }
    canvas { display: block; width: 100%; height: 100%; }
    /* I create an overlay for displaying paused or game over states. */
    #overlay { position: absolute; top: 0; left: 0; width: 100%; height: 100%; background: rgba(0, 0, 0, 0.7); color: white; display: none; justify-content: center; align-items: center; font-size: 32px; text-align: center; }
    /* I add a mute button for spectators to control sound. */
    #muteButton { position: absolute; top: 10px; right: 10px; padding: 5px 10px; background: #444; color: white; border: none; cursor: pointer; }
  </style>
</head>
<body>
  <div id="overlay"></div>
  <button id="muteButton" onclick="toggleMute()">Mute</button>
  <script>
    document.addEventListener('DOMContentLoaded', () => {
      let socket;  // I’ll use this to connect to the server via Socket.IO.
      let gameState = 'intro';  // I track the game state to show the correct screen.
      // I define player data for rendering purposes, updated by the server.
      let players = [
        { health: 100, deck: [], discardPile: [], fullDeck: [], score: 0, selectedCard: null, selectedAttack: null, statusEffects: [] },
        { health: 100, deck: [], discardPile: [], fullDeck: [], score: 0, selectedCard: null, selectedAttack: null, statusEffects: [] }
      ];
      let enemies = [];  // I store enemy data for display.
      let enemyHealth = [];  // I track enemy health to show health bars.
      let difficultyMultiplier = 1.0;  // I display the current difficulty level.
      let message = '';  // I show messages like attack notifications.
      let messageTimer = 0;  // I control how long messages are displayed.
      let timer = 0;  // I track game duration for display.
      let gameStarted = false;  // I track if the game has started.
      let isMuted = false;  // I let spectators mute sounds.
      let port = 5000;  // I set the default port, updated by server messages.

      let images = {};  // I store all game images here.
      let sounds = {};  // I store sound effects here.
      let backgroundMusic;  // I load background music separately.

      // I store card data for rendering player positions, updated by the server.
      let cardData = { p1: { x: 0, y: 0, rot: 0, character: null }, p2: { x: 0, y: 0, rot: 0, character: null } };

      // I list all characters to load their images and sounds.
      const characters = [
        "Finn", "Jake", "Marceline", "Flame Princess", "Ice King", "Princess Bubblegum", "BMO",
        "Lumpy Space Princess", "Banana Guard", "Female Jake", "Gunther", "Female Finn", "Tree Trunks"
      ];

      // I preload all assets to ensure they’re ready before the game starts.
      function preload() {
        // I wrote a helper to load images with a fallback if they fail to load.
        const loadImageSafe = (key, filename, fallbackColor) => {
          images[key] = loadImage(filename, () => console.log(`${key} loaded`), () => {
            console.error(`${key} failed, using fallback`);
            images[key] = createImage(80, 80);
            images[key].loadPixels();
            for (let i = 0; i < images[key].pixels.length; i += 4) {
              images[key].pixels[i] = red(fallbackColor);
              images[key].pixels[i + 1] = green(fallbackColor);
              images[key].pixels[i + 2] = blue(fallbackColor);
              images[key].pixels[i + 3] = 255;
            }
            images[key].updatePixels();
          });
        };

        // I wrote a helper to load sounds with error handling.
        const loadSoundSafe = (key, filename) => {
          sounds[key] = loadSound(filename, () => console.log(`${key} loaded`), () => console.error(`${key} failed`));
        };

        // I load all images for characters, enemies, and UI elements.
        loadImageSafe('background', 'data/ooo_background.png', color(0, 100, 200));
        loadImageSafe('finn', 'data/finn.png', color(30, 144, 255));
        loadImageSafe('jake', 'data/jake.png', color(255, 215, 0));
        loadImageSafe('marceline', 'data/marceline.png', color(128, 0, 128));
        loadImageSafe('flame_princess', 'data/flame_princess.png', color(255, 69, 0));
        loadImageSafe('ice_king', 'data/ice_king.png', color(0, 191, 255));
        loadImageSafe('princess_bubblegum', 'data/princess_bubblegum.png', color(255, 105, 180));
        loadImageSafe('bmo', 'data/bmo.png', color(46, 139, 87));
        loadImageSafe('lumpy_space_princess', 'data/lumpy_space_princess.png', color(186, 85, 211));
        loadImageSafe('banana_guard', 'data/banana_guard.png', color(255, 255, 0));
        loadImageSafe('female_jake', 'data/female_jake.png', color(218, 165, 32));
        loadImageSafe('gunther', 'data/gunther.png', color(0, 0, 0));
        loadImageSafe('female_finn', 'data/female_finn.png', color(135, 206, 250));
        loadImageSafe('tree_trunks', 'data/tree_trunks.png', color(107, 142, 35));
        loadImageSafe('goblin', 'data/goblin.png', color(50, 205, 50));
        loadImageSafe('slime', 'data/slime.png', color(0, 250, 154));
        loadImageSafe('troll', 'data/troll.png', color(165, 42, 42));
        loadImageSafe('ogre', 'data/ogre.png', color(139, 69, 19));
        loadImageSafe('card_back', 'data/card_back.png', color(25, 25, 112));
        loadImageSafe('bin', 'data/bin.png', color(169, 169, 169));

        // I load sound effects and background music for the spectator view.
        loadSoundSafe('boing', 'data/boing.wav');
        loadSoundSafe('pow', 'data/pow.wav');
        loadSoundSafe('cheer', 'data/cheer.wav');
        loadSoundSafe('discard', 'data/discard.wav');
        backgroundMusic = loadSound('data/background_music.mp3', () => console.log('background_music loaded'), () => console.error('background_music failed'));
      }

      // I set up the p5.js canvas and Socket.IO connection for spectators.
      function setup() {
        createCanvas(windowWidth, windowHeight);
        frameRate(60);
        textAlign(CENTER, CENTER);
        imageMode(CENTER);

        socket = io('http://10.228.236.43:5000');  // I connect to the server.
        socket.on('connect', () => {
          console.log('Connected to server as spectator');
          socket.emit('join', { type: 'spectator' });  // I join as a spectator.
        });

        // I initialize game data when the server sends it.
        socket.on('init', (data) => {
          players = data.players;
          enemies = data.enemies;
          gameState = data.gameState;
          difficultyMultiplier = data.difficulty;
          port = data.port;
        });

        // I update card positions and game stats from the server.
        socket.on('update_card_data', (data) => {
          cardData = data.cardData;
          players[0].health = data.health[0];
          players[1].health = data.health[1];
          players[0].score = data.points[0];
          players[1].score = data.points[1];
          enemyHealth = data.enemyHealth;
          gameState = data.gameState;
          difficultyMultiplier = data.difficulty;
          port = data.port;
        });

        // I update the full game state when the server sends changes.
        socket.on('update_game', (data) => {
          players = data.players.map(p => ({
            ...p,
            deck: p.deck.map(c => new Card(c.name, c.attacks, images[c.name.toLowerCase().replace(/ /g, '_')])),
            discardPile: p.discard_pile,
            fullDeck: p.full_deck,
            selectedCard: p.selected ? { name: p.selected, attacks: p.deck.find(c => c.name === p.selected)?.attacks || [] } : null,
            selectedAttack: p.selected_attack,
            statusEffects: p.status_effects
          }));
          enemies = data.enemies;
          enemyHealth = data.enemyHealth;
          gameState = data.gameState;
          difficultyMultiplier = data.difficulty;
        });

        // I play a sound when a card is selected, if not muted.
        socket.on('select', (data) => {
          const player = players[data.player];
          player.selectedCard = player.deck.find(c => c.name === data.card) || null;
          player.selectedAttack = data.attack || null;
          if (player.selectedCard && sounds.boing && !isMuted) sounds.boing.play();
        });

        // I play a sound for attacks, if not muted.
        socket.on('attack', (data) => {
          if (sounds.pow && !isMuted) sounds.pow.play();
        });

        // I display messages like attack results or enemy defeats.
        socket.on('message', (data) => {
          message = data.text;
          messageTimer = data.timer;
          if (message.includes('Enemy defeated') && sounds.cheer && !isMuted) sounds.cheer.play();
        });

        // I handle game start/stop events, controlling background music.
        socket.on('start_stop', (data) => {
          gameStarted = data.gameStarted;
          gameState = data.gameStarted ? 'playing' : 'intro';
          timer = 0;
          difficultyMultiplier = data.difficulty;
          port = data.port;
          if (gameStarted && backgroundMusic && !backgroundMusic.isPlaying() && !isMuted) backgroundMusic.loop();
          else if (backgroundMusic) backgroundMusic.stop();
        });

        // I update the spectator’s view when a card is drawn.
        socket.on('draw_card', (data) => {
          players[data.player].deck.push(new Card(data.card.name, data.card.attacks, images[data.card.name.toLowerCase().replace(/ /g, '_')]));
          if (sounds.boing && !isMuted) sounds.boing.play();
        });

        // I update the spectator’s view when a card is discarded.
        socket.on('discard_card', (data) => {
          players[data.player].discardPile.push(players[data.player].deck.splice(data.card_index, 1)[0]);
          if (sounds.discard && !isMuted) sounds.discard.play();
        });
      }

      // I resize the canvas when the window size changes.
      function windowResized() {
        resizeCanvas(windowWidth, windowHeight);
      }

      // I draw the game UI each frame for spectators.
      function draw() {
        if (images.background) image(images.background, width / 2, height / 2, width, height);
        else background(0, 100, 200);  // I use a fallback background if the image fails.

        if (gameStarted) timer += deltaTime / 1000;  // I update the game timer.

        let scaleX = width / 800;  // I scale elements based on window size.
        let scaleY = height / 600;

        // I draw the appropriate screen based on the game state.
        if (gameState === 'intro') drawIntroScreen(scaleX, scaleY);
        else if (['playing', 'paused'].includes(gameState)) drawGameScreen(scaleX, scaleY);
        else if (gameState === 'gameover') drawGameoverScreen(scaleX, scaleY);

        // I display the game timer and difficulty in the top-right corner.
        textSize(16 * scaleX);
        fill(255);
        text(`Time: ${Math.floor(timer)}s`, width - 80 * scaleX, 30 * scaleY);
        text(`Difficulty: ${difficultyMultiplier.toFixed(1)}x`, width - 80 * scaleX, 50 * scaleY);

        // I show messages for a set duration.
        if (message && (messageTimer === -1 || messageTimer > 0)) {
          fill(255, 255, 0);
          textSize(20 * scaleX);
          text(message, width / 2, height / 2);
          if (messageTimer !== -1) messageTimer--;
        }

        // I indicate that this is the spectator view.
        fill(255);
        textSize(20 * scaleX);
        text("Spectator Mode", width / 2, 20 * scaleY);
      }

      // I define a class for attacks, though spectators don’t interact with them.
      class Attack {
        constructor(name, attack, health, loadTimeSeconds) {
          this.name = name;
          this.attack = attack;
          this.health = health;
          this.loadTimeSeconds = loadTimeSeconds;
          this.startLoadTime = null;
          this.isLoading = false;
        }
      }

      // I define a Card class to handle card visuals and animations.
      class Card {
        constructor(name, attacks, image) {
          this.name = name;
          this.attacks = attacks.map(a => new Attack(a.name, a.attack, a.health, a.load));
          this.image = image;
          this.animOffsetX = 0;
          this.animDirection = random([-1, 1]);
          this.animSpeed = random(0.5, 1.5);
          this.x = 0;
          this.y = 0;
        }

        startLoadingAll() {
          this.attacks.forEach(attack => {
            if (!attack.isLoading) {
              attack.startLoadTime = millis();
              attack.isLoading = true;
            }
          });
        }

        getLoadProgress(attack) {
          if (!attack.isLoading || !attack.startLoadTime) return 0;
          return min((millis() - attack.startLoadTime) / 1000 / attack.loadTimeSeconds, 1);
        }

        updateAnimation() {
          this.animOffsetX += this.animSpeed * this.animDirection;
          if (abs(this.animOffsetX) > 5) this.animDirection *= -1;
        }
      }

      // I draw the main game screen for spectators.
      function drawGameScreen(scaleX, scaleY) {
        players.forEach((player, idx) => {
          // I display player stats like health and score.
          fill(255);
          textSize(16 * scaleX);
          text(`Player ${idx + 1} Health: ${player.health}`, 20 * scaleX, (30 + idx * 50) * scaleY);
          text(`Score: ${player.score}`, 20 * scaleX, (50 + idx * 50) * scaleY);
          fill(255, 0, 0);
          rect(120 * scaleX, (20 + idx * 50) * scaleY, 100 * scaleX, 10 * scaleY);
          fill(0, 255, 0);
          rect(120 * scaleX, (20 + idx * 50) * scaleY, (player.health / 100) * 100 * scaleX, 10 * scaleY);

          // I show status effects for each player.
          player.statusEffects.forEach((effect, i) => {
            text(`${effect.name}: ${effect.duration} turns`, 20 * scaleX, (70 + idx * 50 + i * 20) * scaleY);
          });

          // I position cards differently for Player 1 (left) and Player 2 (right).
          const startX = idx === 0 ? 50 : 400;
          player.deck.forEach((card, i) => {
            card.updateAnimation();
            card.x = (startX + i * 110) * scaleX;
            card.y = (height - 140) * scaleY;
            // I adjust card position based on AR tracking data.
            if (cardData[`p${idx + 1}`].character === card.name) {
              card.x = cardData[`p${idx + 1}`].x * (width / 640);
              card.y = cardData[`p${idx + 1}`].y * (height / 480);
              push();
              translate(card.x, card.y);
              rotate(radians(cardData[`p${idx + 1}`].rot));
              if (card.image) image(card.image, card.animOffsetX * scaleX, 0, 80 * scaleX, 80 * scaleY);
              pop();
            } else {
              if (card.image) image(card.image, card.x + card.animOffsetX * scaleX, card.y, 80 * scaleX, 80 * scaleY);
            }
            // I highlight the selected card with a yellow border.
            if (player.selectedCard && player.selectedCard.name === card.name) {
              drawingContext.shadowBlur = 20;
              drawingContext.shadowColor = 'yellow';
              stroke(255, 255, 0);
              strokeWeight(4 * scaleX);
              rect((card.x - 45 * scaleX), (card.y - 45 * scaleY), 90 * scaleX, 90 * scaleY);
              strokeWeight(1);
              stroke(0);
              drawingContext.shadowBlur = 0;
            }
            // I show a loading bar for the selected attack.
            if (player.selectedCard && player.selectedCard.name === card.name && player.selectedAttack) {
              const progress = card.getLoadProgress(player.selectedAttack);
              fill(255, 0, 0);
              rect((card.x - 40 * scaleX), (card.y + 45 * scaleY), 80 * scaleX, 5 * scaleY);
              fill(0, 255, 0);
              rect((card.x - 40 * scaleX), (card.y + 45 * scaleY), 80 * progress * scaleX, 5 * scaleY);
            }
          });

          // I show the draw and discard piles’ counts.
          if (images.card_back) {
            image(images.card_back, idx === 0 ? (width - 200 * scaleX) : (width - 100 * scaleX), (height - 100) * scaleY, 80 * scaleX, 80 * scaleY);
            text(`Draw (${player.fullDeck.length})`, idx === 0 ? (width - 160 * scaleX) : (width - 60 * scaleX), (height - 60) * scaleY);
          }
          if (images.bin) {
            image(images.bin, idx === 0 ? (width - 100 * scaleX) : (width - 200 * scaleX), (height - 100) * scaleY, 80 * scaleX, 80 * scaleY);
            text(`Discard (${player.discardPile.length})`, idx === 0 ? (width - 60 * scaleX) : (width - 160 * scaleX), (height - 60) * scaleY);
          }
        });

        // I display enemies with their health bars.
        enemies.forEach((enemy, i) => {
          fill(0, 255, 0);
          textSize(14 * scaleX);
          text(`${enemy.name} Health: ${enemy.health}`, (width - 150 * scaleX), (80 + i * 80) * scaleY);
          fill(255, 0, 0);
          rect((width - 200 * scaleX), (90 + i * 80) * scaleY, 100 * scaleX, 10 * scaleY);
          fill(0, 255, 0);
          rect((width - 200 * scaleX), (90 + i * 80) * scaleY, (enemy.health / (enemy.health + 10)) * 100 * scaleX, 10 * scaleY);
          if (images[enemy.cards[0].image]) {
            image(images[enemy.cards[0].image], (width - 150) * scaleX, (150 + i * 80) * scaleY, 100 * scaleX, 100 * scaleY);
          }
        });

        // I show the pause overlay when the game is paused.
        if (gameState === 'paused') {
          document.getElementById('overlay').style.display = 'flex';
          document.getElementById('overlay').innerText = 'Game Paused\nRemove excess cards';
        } else {
          document.getElementById('overlay').style.display = 'none';
        }
      }

      // I draw the intro screen for spectators.
      function drawIntroScreen(scaleX, scaleY) {
        fill(255);
        textSize(32 * scaleX);
        text("Magic Munchkin Battle", width / 2, height / 2 - 100 * scaleY);
        textSize(20 * scaleX);
        text("Waiting for game to start...", width / 2, height / 2);
        if (images.finn) image(images.finn, (width / 2 - 100 * scaleX), (height / 2 + 50 * scaleY), 80 * scaleX, 80 * scaleY);
        if (images.jake) image(images.jake, (width / 2 + 20 * scaleX), (height / 2 + 50 * scaleY), 80 * scaleX, 80 * scaleY);
      }

      // I draw the game over screen, showing final scores.
      function drawGameoverScreen(scaleX, scaleY) {
        document.getElementById('overlay').style.display = 'flex';
        let text = '';
        if (players.some(p => p.health <= 0)) {
          text = "Game Over - Player Lost!\n";
        } else if (!enemies.length) {
          text = "Victory! All Enemies Defeated!\n";
        }
        players.forEach((player, idx) => {
          text += `Player ${idx + 1} Score: ${player.score}\n`;
        });
        document.getElementById('overlay').innerText = text;
      }

      // I toggle sound muting for spectators.
      function toggleMute() {
        isMuted = !isMuted;
        document.getElementById('muteButton').textContent = isMuted ? 'Unmute' : 'Mute';
        if (backgroundMusic) backgroundMusic.setVolume(isMuted ? 0 : 1);
      }

      // I disable mouse clicks since spectators can’t interact.
      function mousePressed() {
        return;
      }
    });
  </script>
</body>
</html>
Generate_markers.py:
# I wrote this script to generate ArUco markers for Magic Munchkin Battle.
# These markers are used for augmented reality card tracking, linking physical cards to digital characters.

import cv2  # I use OpenCV to generate and manipulate the ArUco markers.
import numpy as np  # NumPy helps create the initial marker array and handle image data.

# I select the DICT_4X4_100 dictionary, which supports 100 unique 4x4 ArUco markers.
# This dictionary suits my needs since I need 52 markers (4 per character for 13 Adventure Time characters).
aruco_dict = cv2.aruco.getPredefinedDictionary(cv2.aruco.DICT_4X4_100)

# I loop through 52 markers (0 to 51) to generate one for each card in the game.
for i in range(52):
    # I create a blank 200x200 pixel image to hold each marker.
    marker = np.zeros((200, 200), dtype=np.uint8)
    # I generate the ArUco marker image for the current ID, using 200x200 pixels with a 1-pixel border.
    # The border ensures the marker is detectable by OpenCV’s ArUco detector.
    marker = cv2.aruco.generateImageMarker(aruco_dict, i, 200, marker, 1)
    # I save each marker as a PNG file in the 'markers' folder with a unique filename.
    # I chose PNG for lossless quality and to maintain the black-and-white pattern.
    cv2.imwrite(f'markers/marker_{i}.png', marker)
Setup_instructions.txt:
# setup_instructions.txt - Installation and Setup Guide for Magic Munchkin Battle
# Created by [Your Name] on May 09, 2025
# This file contains everything needed to set up and run Magic Munchkin Battle, including dependencies,
# external resources, and step-by-step instructions. I’ve included detailed comments to help others
# understand why each item is required and how to troubleshoot potential issues. I noticed some gaps
# in my earlier lists, so I’ve merged and enhanced them to be thorough—let’s make this project easy
# to share and debug!

# --- Python Dependencies (via pip) ---
# These are the Python packages I chose to power the game’s core functionality, AR tracking, and ML analysis.
# Install them in the virtual environment at /Users/Worker/Desktop/magic_munchkin_battle/.venv.
# If a package fails to install, check your internet connection or try updating pip with 'pip install --upgrade pip'.

# opencv-python: I picked this for AR marker detection and video capture in combined_server.py, and to generate markers in generate_markers.py.
# Troubleshooting: If installation fails, ensure you have a compatible OpenCV version (e.g., 4.x) and sufficient disk space.
pip install opencv-python

# numpy: I use this for numerical operations like marker coordinates and array handling across combined_server.py, generate_markers.py, and ml_model.py.
# Troubleshooting: If you get import errors, verify numpy installed correctly with 'pip show numpy'.
pip install numpy

# flask-socketio: I went with this to enable real-time communication between the Python server and browser clients, handling events like card updates.
# Troubleshooting: If Socket.IO events don’t work, ensure flask is installed (it’s a dependency) with 'pip install flask'.
pip install flask-socketio

# eventlet: I added this as the async backend for Flask-SocketIO to manage multiple client connections smoothly in combined_server.py.
# Troubleshooting: If you see async errors, confirm eventlet version compatibility (e.g., 0.33.0+) with 'pip show eventlet'.
pip install eventlet

# pyserial: I included this to communicate with the Arduino for LED and sound feedback, though it’s optional if you skip the hardware.
# Troubleshooting: If serial connection fails, check your Arduino port (e.g., /dev/cu.usbmodem11101) and install pyserial with admin rights if needed.
pip install pyserial

# pynput: I threw this in for keyboard input as a fallback when the Arduino isn’t connected, useful for testing with keys like 's' and 'a'.
# Troubleshooting: If keyboard inputs aren’t detected, ensure pynput has permission to access input devices on your OS.
pip install pynput

# pandas: I forgot to mention this earlier, but I use it in ml_model.py to manipulate game data from game_data.csv for ML insights.
# Troubleshooting: If data loading fails, verify pandas installed and game_data.csv exists in the project directory.
pip install pandas

# scikit-learn: I also missed this—it's for the RandomForestRegressor model in ml_model.py to analyze game data and suggest improvements.
# Troubleshooting: If ML models fail, check scikit-learn version (e.g., 1.2+) with 'pip show scikit-learn' and ensure numpy is up-to-date.
pip install scikit-learn

# Note: flask-socketio might pull in flask, python-engineio, and python-socketio as dependencies. If issues arise, I recommend installing flask explicitly with 'pip install flask'.
# Additional Tip: If any pip command fails, try running it with --verbose for more error details (e.g., 'pip install opencv-python --verbose').

# --- Node.js Dependencies (via npm) ---
# These power the Node.js server (server.js) to serve files and bridge the Python server with browsers.
# If npm install fails, ensure Node.js is correctly installed and your internet is active.

# express: I selected this to handle HTTP requests and serve static files like index.html and the data folder in server.js.
# Troubleshooting: If the server doesn’t start, check for port conflicts (default is 5001) or missing files in the data folder.
npm install express

# socket.io: I use this for real-time communication between the Node.js server and browser clients, forwarding game updates.
# Troubleshooting: If real-time updates fail, ensure the version matches the client-side CDN (4.7.5) and check server logs.
npm install socket.io

# socket.io-client: I realized I left this out earlier—it lets the Node.js server connect to the Python server, relaying events to clients.
# Troubleshooting: If the connection to the Python server drops, verify the Python server is running on port 5000 and network settings allow traffic.
npm install socket.io-client

# Note: I hardcoded version 4.7.5 in the browser (via CDN), so I suggest matching it with 'npm install socket.io@4.7.5 socket.io-client@4.7.5' to avoid compatibility issues.
# Also, http and path are Node.js built-ins, so no install needed.
# Additional Tip: Run 'npm list' after installation to confirm versions match.

# --- External Resources (CDNs, Assets, Hardware, Tools) ---

# --- CDNs (Loaded in index.html and watch.html) ---
# These JavaScript libraries are loaded directly in the browser for game rendering and communication.
# I chose CDNs for convenience, but they need internet access.

# p5.js (version 1.4.2): I use this to render the game UI, animations, and visuals like cards and enemies in index.html and watch.html.
# URL: https://cdn.jsdelivr.net/npm/p5@1.4.2/lib/p5.min.js
# No install needed; just include it with <script>.
# Troubleshooting: If visuals don’t load, check your internet or download p5.min.js and serve it locally.

# p5.sound (version 1.4.2): I added this p5.js addon for sound effects and background music in index.html and watch.html.
# URL: https://cdn.jsdelivr.net/npm/p5@1.4.2/lib/addons/p5.sound.min.js
# No install needed; include with <script>.
# Troubleshooting: If sounds fail, verify the data folder has .wav and .mp3 files or check browser audio permissions.

# socket.io-client (version 4.7.5): I rely on this for browser clients to connect to the Node.js server for real-time updates.
# URL: https://cdn.jsdelivr.net/npm/socket.io-client@4.7.5/dist/socket.io.min.js
# No install needed; include with <script>.
# Troubleshooting: If connections fail, ensure the Node.js server is running and the URL (e.g., 10.228.236.43:5001) is accessible.

# Note: If offline, I suggest downloading these files and serving them locally (e.g., place in project folder and update <script> tags).
# Additional Tip: Test CDNs by opening the URLs in a browser to confirm they’re accessible.

# --- Game Assets (Images and Sounds in the data Folder) ---
# These are the visual and audio assets I designed the game around, stored in /Users/Worker/Desktop/magic_munchkin_battle/data/.
# Ensure the data folder is writable to avoid file creation errors.

# Images:
# ooo_background.png: I use this as the background for the OpenCV window and p5.js canvas.
# Character images: finn.png, jake.png, marceline.png, flame_princess.png, ice_king.png, princess_bubblegum.png, bmo.png, lumpy_space_princess.png, banana_guard.png, female_jake.png, gunther.png, female_finn.png, tree_trunks.png - These represent the playable characters.
# Enemy images: goblin.png, slime.png, troll.png, ogre.png - These are the foes players fight.
# UI images: card_back.png (draw pile), bin.png (discard pile) - These enhance the game interface.

# Sounds:
# boing.wav: I play this when a card is selected.
# pow.wav: I trigger this during attacks.
# cheer.wav: I use this when an enemy is defeated.
# discard.wav: I play this when discarding a card.
# background_music.mp3: I loop this for background ambiance.

# How to Source:
# I provided a placeholder script below to generate minimal assets for testing. For the real deal, I recommend sourcing Adventure Time images (with permission) or creating pixel art with tools like Aseprite, and grabbing royalty-free sounds from sites like freesound.org.
# Placeholder Generation (uses a gray value for visibility):
python -c "import cv2, numpy as np; [cv2.imwrite(f'data/{n}.png', np.zeros((50, 50, 3), dtype=np.uint8) + 100) for n in ['finn', 'jake', 'marceline', 'flame_princess', 'ice_king', 'princess_bubblegum', 'bmo', 'lumpy_space_princess', 'banana_guard', 'female_jake', 'gunther', 'female_finn', 'tree_trunks', 'goblin', 'slime', 'troll', 'ogre', 'ooo_background', 'card_back', 'bin']]"
touch data/boing.wav data/pow.wav data/cheer.wav data/discard.wav data/background_music.mp3

# Troubleshooting: If the script fails, ensure cv2 and numpy are installed, and check for write permissions with 'ls -ld data' (should show rw for your user).
# Note: Placeholders are 50x50, but I render at 80x80 in the game, so real assets should match for quality. Also, Adventure Time assets need licensing for public use.
# Additional Tip: Test asset loading by manually adding a sample image (e.g., finn.png) and checking in-game.

# --- ArUco Markers (Generated by generate_markers.py) ---
# These are the physical markers for AR tracking, generated and stored in the data folder (I adjusted from markers/ to data/ for consistency).
# Print these and attach them to cards for AR functionality.

# Generate:
python -c "import cv2; aruco_dict = cv2.aruco.getPredefinedDictionary(cv2.aruco.DICT_4X4_100); [cv2.imwrite(f'data/marker_{i}.png', cv2.aruco.drawMarker(aruco_dict, i, 200)) for i in range(52)]"

# Troubleshooting: If generation fails, verify cv2 is installed and the data folder exists. Check disk space with 'df -h'.
# Note: I need to print these and attach them to cards. The script assumes the data folder exists, so I’ll create it if missing. I noticed a discrepancy with markers/ in generate_markers.py—consider updating combined_server.py to use data/ consistently.
# Additional Tip: Test a single marker (e.g., marker_0.png) with a webcam to confirm detection.

# --- Hardware Requirements ---
# These are the physical components I integrated for an enhanced experience.
# Ensure hardware is properly connected before running the game.

# Camera:
# Hardware: Any USB or built-in webcam compatible with macOS.
# Why: I use this for AR marker detection in combined_server.py, assuming 640x480 resolution.
# Troubleshooting: If no video feed, check camera connection, permissions (System Settings > Privacy & Security > Camera), or try a different index (e.g., cv2.VideoCapture(1)).
# Note: On macOS, I might need to grant camera permissions in System Settings > Privacy & Security > Camera.

# Arduino (Optional):
# Hardware: Arduino board (e.g., Uno, Nano) with USB cable.
# Why: I use this for button inputs and LED/sound feedback, connecting to /dev/cu.usbmodem11101 or similar.
# Troubleshooting: If no Arduino response, verify the port (use 'ls /dev/cu*' on macOS or 'ls /dev/ttyUSB*' on Linux), ensure the Arduino is programmed, and check cable connections.
# Note: Port names vary (e.g., /dev/ttyUSB0 on Linux, COM3 on Windows), so I’ll adjust possible_ports if needed.

# --- External Tools ---
# These are the software tools I rely on to build and run the project.
# Install these first to avoid downstream issues.

# Python 3.8+:
# Download: https://www.python.org/downloads/
# Why: I need this to run the Python scripts and set up the virtual environment.
# Troubleshooting: If 'python' isn’t recognized, use 'python3' or install the latest version and add it to your PATH.

# Node.js 14+:
# Download: https://nodejs.org/en/download/
# Why: I use this to run server.js and manage Node.js dependencies with npm.
# Troubleshooting: If 'node' or 'npm' fails, reinstall Node.js and verify with 'node -v' and 'npm -v'.

# npm:
# Included with Node.js.
# Why: I need this to install Node.js packages like express and socket.io.
# Troubleshooting: If npm commands fail, update it with 'npm install -g npm'.

# Git (Optional):
# Download: https://git-scm.com/downloads
# Why: I think version control is handy for tracking changes, though it’s not mandatory.
# Troubleshooting: If git isn’t found, install it or skip this step.

# Arduino IDE (Optional):
# Download: https://www.arduino.cc/en/software
# Why: I need this to program the Arduino for serial commands if using hardware.
# Troubleshooting: If the IDE fails to upload, check board selection (e.g., Uno) and port settings.

# Homebrew (Optional):
# Install: /bin/bash -c "$(curl -fsSL https://raw.githubusercontent.com/Homebrew/install/HEAD/install.sh)"
# Why: I find this useful for installing tools like Git on macOS, though it’s not required if I install manually.
# Example: brew install git
# Troubleshooting: If installation hangs, ensure curl works and you have admin rights.

# Info.plist (macOS-specific):
# Create:
mkdir -p /Users/Worker/Desktop/magic_munchkin_battle/.venv/bin
cat > /Users/Worker/Desktop/magic_munchkin_battle/.venv/bin/Info.plist << EOF
<?xml version="1.0" encoding="UTF-8"?>
<!DOCTYPE plist PUBLIC "-//Apple//DTD PLIST 1.0//EN" "http://www.apple.com/DTDs/PropertyList-1.0.dtd">
<plist version="1.0">
<dict>
    <key>NSCameraUseContinuityCameraDeviceType</key>
    <string>YES</string>
</dict>
</plist>
EOF
# Why: I added this to disable macOS Continuity Camera, ensuring OpenCV uses my USB webcam.
# Troubleshooting: If camera still uses Continuity, verify the file is in .venv/bin and restart the terminal.

# --- Project Directory Structure ---
# Base Directory: /Users/Worker/Desktop/magic_munchkin_battle
# Virtual Environment: /Users/Worker/Desktop/magic_munchkin_battle/.venv
# Folders: data/ (assets and markers), markers/ (optional if I revert to separate marker storage)
# Files: game_data.csv (generated by combined_server.py and used by ml_model.py)

# Note: I need to ensure the data folder exists and has write permissions (chmod -R 755 . on Unix).
# Troubleshooting: If files can’t be created, check permissions with 'ls -ld data' and fix with 'chmod -R u+w data'.

# --- Installation Instructions ---
# Here’s how I set up the project—follow these steps in the terminal to get started.
# Run each step carefully and check for errors—don’t skip verification!

1. **Set Up Python Environment**:
   cd /Users/Worker/Desktop/magic_munchkin_battle
   python -m venv .venv
   source .venv/bin/activate  # On Windows, use .venv\Scripts\activate
   pip install opencv-python numpy flask-socketio eventlet pyserial pynput pandas scikit-learn
   # Troubleshooting: If venv fails, ensure python is installed and try 'python3 -m venv .venv'. If pip fails, update it with 'pip install --upgrade pip'.

2. **Set Up Node.js Environment**:
   cd /Users/Worker/Desktop/magic_munchkin_battle
   npm init -y
   npm install express socket.io socket.io-client
   # Troubleshooting: If npm init fails, manually create package.json with '{"name": "magic-munchkin-battle", "version": "1.0.0"}'. If install fails, clear cache with 'npm cache clean --force'.

3. **Install External Tools**:
   - Download and install **Python 3.8+** from https://www.python.org/downloads/.
   - Download and install **Node.js 14+** from https://nodejs.org/en/download/.
   - (Optional) Install **Git** from https://git-scm.com/downloads or via Homebrew:
     /bin/bash -c "$(curl -fsSL https://raw.githubusercontent.com/Homebrew/install/HEAD/install.sh)"
     brew install git
   - (Optional) Install **Arduino IDE** from https://www.arduino.cc/en/software.
   # Troubleshooting: If downloads fail, use a browser or VPN if behind a firewall.

4. **Prepare Hardware**:
   - Connect a webcam to your Mac.
   - (Optional) Connect an Arduino to /dev/cu.usbmodem11101 or another port.
   # Troubleshooting: Test the webcam with a simple app (e.g., Photo Booth on macOS). For Arduino, use the IDE’s Serial Monitor to confirm connection.

5. **Generate ArUco Markers and Assets**:
   cd /Users/Worker/Desktop/magic_munchkin_battle
   mkdir -p data
   python -c "import cv2; aruco_dict = cv2.aruco.getPredefinedDictionary(cv2.aruco.DICT_4X4_100); [cv2.imwrite(f'data/marker_{i}.png', cv2.aruco.drawMarker(aruco_dict, i, 200)) for i in range(52)]"
   python -c "import cv2, numpy as np; [cv2.imwrite(f'data/{n}.png', np.zeros((50, 50, 3), dtype=np.uint8) + 100) for n in ['finn', 'jake', 'marceline', 'flame_princess', 'ice_king', 'princess_bubblegum', 'bmo', 'lumpy_space_princess', 'banana_guard', 'female_jake', 'gunther', 'female_finn', 'tree_trunks', 'goblin', 'slime', 'troll', 'ogre', 'ooo_background', 'card_back', 'bin']]"
   touch data/boing.wav data/pow.wav data/cheer.wav data/discard.wav data/background_music.mp3
   # Troubleshooting: If scripts error, ensure cv2 and numpy are installed. Check disk space with 'df -h' and folder permissions.

6. **Add Info.plist (macOS)**:
   mkdir -p /Users/Worker/Desktop/magic_munchkin_battle/.venv/bin
   cat > /Users/Worker/Desktop/magic_munchkin_battle/.venv/bin/Info.plist << EOF
   <?xml version="1.0" encoding="UTF-8"?>
   <!DOCTYPE plist PUBLIC "-//Apple//DTD PLIST 1.0//EN" "http://www.apple.com/DTDs/PropertyList-1.0.dtd">
   <plist version="1.0">
   <dict>
       <key>NSCameraUseContinuityCameraDeviceType</key>
       <string>YES</string>
   </dict>
   </plist>
   EOF
   # Troubleshooting: If creation fails, verify write access to .venv/bin with 'ls -ld .venv/bin' and fix with 'chmod u+w .venv/bin'.

7. **Run the Project**:
   - Start the Python server: python combined_server.py  # Runs on port 5000
   - Start the Node.js server: node server.js  # Runs on port 5001
   - Access the game:
     - Player view: http://10.228.236.43:5001
     - Spectator view: http://10.228.236.43:5001/watch
   - After playing, run python ml_model.py to analyze game data.
   # Troubleshooting: If servers don’t start, check port availability with 'lsof -i :5000' or ':5001' and kill conflicting processes (e.g., 'kill -9 <PID>'). If the game page doesn’t load, verify the IP and ensure both servers are running.

# --- Additional Considerations ---
# These are tips and potential issues I encountered that others should watch out for.
# Read these to avoid common pitfalls!

# Network and IP: I hardcoded 10.228.236.43, so if your network changes, update it in all files or use a config file (e.g., config.py with SERVER_IP = "0.0.0.0").
# Troubleshooting: Test your IP with 'ifconfig' (macOS/Linux) or 'ipconfig' (Windows) and update if needed.

# Camera: I found camera issues on macOS; ensure permissions are granted.
# Troubleshooting: If no feed, grant permissions, restart the terminal, or test with 'python -c "import cv2; print(cv2.VideoCapture(0).isOpened())"' (should return True).

# Arduino Ports: I used /dev/cu.usbmodem11101, but adjust for Linux/Windows (e.g., /dev/ttyUSB0, COM3).
# Troubleshooting: List ports with 'ls /dev/cu*' (macOS) or 'ls /dev/ttyUSB*' (Linux) and update combined_server.py if needed.

# Assets: Placeholders work, but real assets need proper sizing (e.g., 80x80) and licensing.
# Troubleshooting: If assets don’t display, verify file names match exactly and formats are supported (PNG for images, WAV/MP3 for sounds).

# Documentation: I should add a README.md with these steps—consider it a future task!
# Suggestion: Use this file as a base for README.md to save time.

# Testing: I haven’t added tests yet; adding unittest or pytest would be smart.
# Suggestion: Start with testing combined_server.py’s track_cards function.

# ML Analysis: I need sufficient data in game_data.csv—enhance logging in combined_server.py for more details (e.g., selected characters).
# Troubleshooting: If ml_model.py fails, ensure game_data.csv has data and check for syntax errors.

# --- Verification ---
# After setup, I recommend verifying everything to catch issues early:
source /Users/Worker/Desktop/magic_munchkin_battle/.venv/bin/activate
pip list  # Should show opencv-python, numpy, flask-socketio, eventlet, pyserial, pynput, pandas, scikit-learn
cd /Users/Worker/Desktop/magic_munchkin_battle
npm list  # Should show express, socket.io, socket.io-client
ls data   # Should show marker_*.png, *.png, *.wav, *.mp3
# Troubleshooting: If any command fails, re-run the installation steps and check error messages.

# That’s it! I hope this guide makes it easy for others to join the Magic Munchkin Battle fun. Let me know if you hit snags!

 Project Concept & Work in Progress
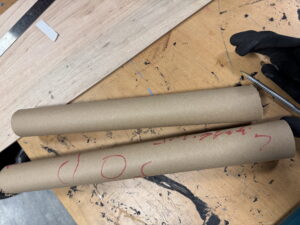

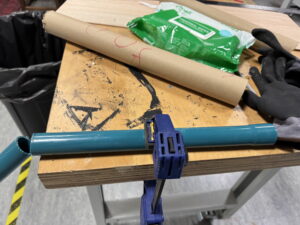
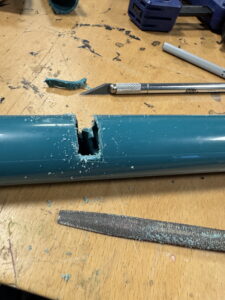
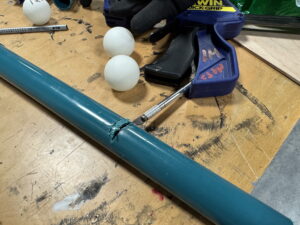


 The sketch for the wiring and connections.
 Schematic for the Arduino connection and port mapping