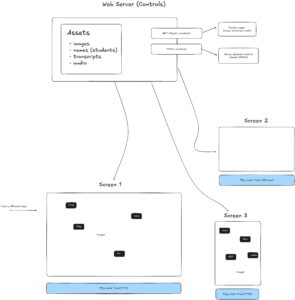
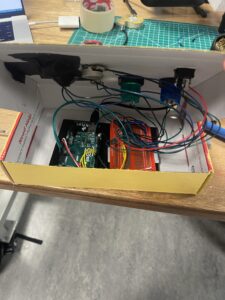
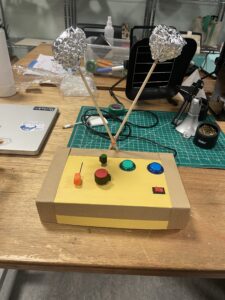
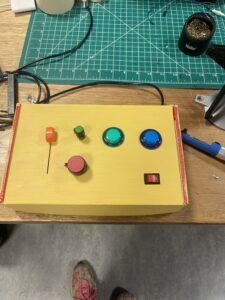
Week 14 – Final Project Blog

Concept and Implementation

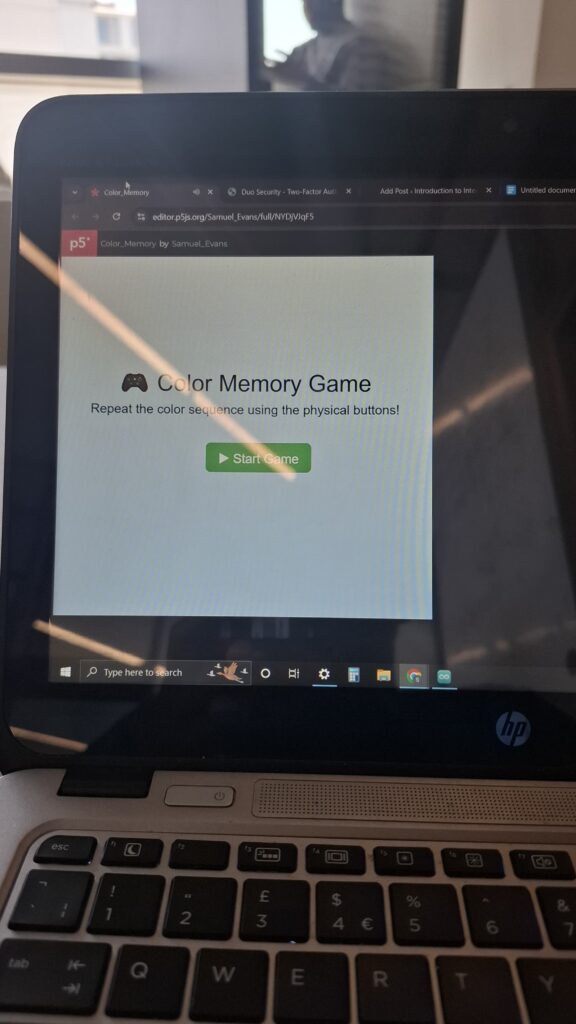
The game begins with a start page where the user gets enough time to read through the instructions.

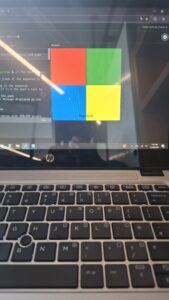
Upon clicking start the game begins with a sequence of one color; say blue. The color is highlighted with a black stroke. The user is supposed to press the same color. If they get it right they proceed to the next round which appends one more color to the sequence say green and now the player sees two colors blue and green. If they had gotten it wrong on the first try the sequence repeats at the expense of one out of the three lives that the player has. This is to say that the player has got only two passes to get it wrong. The game continues until all the colors have been highlighted and well matched by the players. At the side there is a score tracking progress bar that fills depending on the number of colors that the player gets right. When the player successfully fills the bar by getting all the colors right, the game ends and the player wins. If the player gets it wrong three times the game ends and they have the option to restart.

VIDEO/ IMAGES


ARDUINO

The arduino code is less complicated compared to the p5js code. The connections involved 

  • 4 led push buttons
  • Buzzer
  • Jumper wires

SCHEMATIC

For my scematic I used normal push buttons as I could not find the led-push buttons for representation.

ARDUINO CODE

// Pin Definitions
const int redPin = 6;
const int greenPin = 7;
const int bluePin = 8;
const int yellowPin = 9;
const int buzzerPin = 11;

const int buttonPins[] = {2, 3, 4, 5};  // Red, Green, Blue, Yellow
const char* colorNames[] = {"red", "green", "blue", "yellow"};

// Frequencies for different colors (in Hz)
const int tones[] = {262, 330, 390, 494}; // A4, C5, D5, E5

int lastButtonState[4] = {HIGH, HIGH, HIGH, HIGH};  // For edge detection
String colorSequence = "";  // Collects pressed color names

void setup() {
  // LED outputs
  pinMode(redPin, OUTPUT);
  pinMode(greenPin, OUTPUT);
  pinMode(bluePin, OUTPUT);
  pinMode(yellowPin, OUTPUT);
  pinMode(buzzerPin, OUTPUT);

  // Button inputs
  for (int i = 0; i < 4; i++) {
    pinMode(buttonPins[i], INPUT_PULLUP);
  }

  Serial.begin(9600);
}

void loop() {
  for (int i = 0; i < 4; i++) {
    int currentState = digitalRead(buttonPins[i]);

    // Detect new button press (from HIGH to LOW)
    if (lastButtonState[i] == HIGH && currentState == LOW) {
      // Turn on the LED
      if (i == 0) digitalWrite(redPin, HIGH);
      if (i == 1) digitalWrite(greenPin, HIGH);
      if (i == 2) digitalWrite(bluePin, HIGH);
      if (i == 3) digitalWrite(yellowPin, HIGH);

      // Play tone on buzzer
      tone(buzzerPin, tones[i], 150);  // Play for 150 ms

      // Append to sequence and send it
      if (colorSequence.length() > 0) {
        colorSequence += ",";
      }
      colorSequence += colorNames[i];

      Serial.println(colorSequence);  // Send entire sequence
    }

    // Turn off LED if button is released
    if (currentState == HIGH) {
      if (i == 0) digitalWrite(redPin, LOW);
      if (i == 1) digitalWrite(greenPin, LOW);
      if (i == 2) digitalWrite(bluePin, LOW);
      if (i == 3) digitalWrite(yellowPin, LOW);
    }

    lastButtonState[i] = currentState;
  }

  delay(50);  // Short delay for debouncing
}
P5JS 

For my p5js I mainly used functions to help with handling of data and processing from the arduino and to display. In the sketch I had html, a webserial library, music(background, correct and incorrect sounds), and the actual p5js sketch code. Some of the notable portions of the p5js code include music handling, serial communication, game start page, button handling and game over page.

Below are the different code portions.

HTML

<!DOCTYPE html>
<html lang="en">
  <head>
    <script src="https://cdnjs.cloudflare.com/ajax/libs/p5.js/1.4.0/p5.js"></script>
    <script src="https://cdnjs.cloudflare.com/ajax/libs/p5.js/1.4.0/addons/p5.sound.min.js"></script>
    
    <!-- Load the web-serial library -->
    <script src="p5.web-serial.js"></script>
    
    <link rel="stylesheet" type="text/css" href="style.css">
    <meta charset="utf-8" />

  </head>
  <body>
    <main>
    </main>
    <script src="sketch.js"></script>
  </body>
</html>

WEBSERIAL LIBRARY

let port, reader, writer;
let serialActive = false;

async function getPort(baud = 9600) {
  let port = await navigator.serial.requestPort();

  // Wait for the serial port to open.
  await port.open({ baudRate: baud });

  // create read & write streams
  textDecoder = new TextDecoderStream();
  textEncoder = new TextEncoderStream();
  readableStreamClosed = port.readable.pipeTo(textDecoder.writable);
  writableStreamClosed = textEncoder.readable.pipeTo(port.writable);

  reader = textDecoder.readable
    .pipeThrough(new TransformStream(new LineBreakTransformer()))
    .getReader();
  writer = textEncoder.writable.getWriter();

  return { port, reader, writer };
}

class LineBreakTransformer {
  constructor() {
    // A container for holding stream data until a new line.
    this.chunks = "";
  }

  transform(chunk, controller) {
    // Append new chunks to existing chunks.
    this.chunks += chunk;
    // For each line breaks in chunks, send the parsed lines out.
    const lines = this.chunks.split("\r\n");
    this.chunks = lines.pop();
    lines.forEach((line) => controller.enqueue(line));
  }

  flush(controller) {
    // When the stream is closed, flush any remaining chunks out.
    controller.enqueue(this.chunks);
  }
}

async function setUpSerial() {
  noLoop();
  ({ port, reader, writer } = await getPort());
  serialActive = true;
  runSerial();
  loop();
}

async function runSerial() {
  try {
    while (true) {
      if (typeof readSerial === "undefined") {
        console.log("No readSerial() function found.");
        serialActive = false;
        break;
      } else {
        const { value, done } = await reader.read();
        if (done) {
          // Allow the serial port to be closed later.
          reader.releaseLock();
          break;
        }
        readSerial(value);
      }
    }
  } catch (e) {
    console.error(e);
  }
}

async function writeSerial(msg) {
  await writer.write(msg);
}

p5js SKETCH

gridSize = 5;
squareSize = 100;
colors = ['red', 'green', 'blue', 'yellow'];
grid = [];
sequence = [];
playerInput = [];
showingSequence = false;
showIndex = 0;
showTimer = 0;
inputEnabled = false;
currentRound = 1;
gameOver = false;
gameStarted = false;

serialMessage = '';
messageColor = 'black';
confetti = [];
startButton = null;
restartButton = null;

statusTimer = 0;
statusDuration = 2000;

roundStartTime = 0;
timeLimit = 10000;
timeLeft = timeLimit;

let bgMusic, correctSound, incorrectSound;

lives = 3;

function preload() { //loading the music
  soundFormats('mp3', 'wav');
  bgMusic = loadSound('music/background.mp3');
  correctSound = loadSound('music/correct.mp3');
  incorrectSound = loadSound('music/incorrect.mp3');
}

function setup() {
  createCanvas(gridSize * squareSize + 80, gridSize * squareSize + 60);
  noStroke();

  startButton = createButton('▶ Start Game');//start button
  styleButton(startButton, width / 2 - 60, height / 2 + 10, '#4CAF50');
  startButton.mousePressed(async () => {
    await setUpSerial();//using the start button to initiate serial comm
    startGame();
  });

  bgMusic.setLoop(true);
  bgMusic.play();// playing the background music throughout
}

function styleButton(btn, x, y, color) {// styling code function for all the buttons
  btn.position(x, y);
  btn.style('font-size', '20px');
  btn.style('padding', '10px 20px');
  btn.style('background-color', color);
  btn.style('color', 'white');
  btn.style('border', 'none');
  btn.style('border-radius', '8px');
}

function startGame() { //initializing the game
  gameStarted = true;
  startButton.remove();// moving from the start page to the grid
  initGrid();
  nextRound();
}


//game loop
function draw() {
  background(220);

  if (!gameStarted) {
    drawStartScreen(); 
    return;
  }

  if (gameOver) {
    drawEndScreen();
    return;
  }

  drawGrid();
  drawProgressBar();
  drawTimeBar();
  drawSidebar();

  if (showingSequence && millis() - showTimer > 800) {
    showTimer = millis();
    showIndex++;
    if (showIndex >= sequence.length) {
      showingSequence = false;
      inputEnabled = true;
      showIndex = 0;
      roundStartTime = millis();
    }
  }

  if (inputEnabled) {
    timeLeft = timeLimit - (millis() - roundStartTime);
    if (timeLeft <= 0) {
      handleIncorrect('Time Up!');
    }
  }

  clearSerialMessageIfDue();
}

function drawStartScreen() {
  drawBackgroundGradient();
  fill(30);
  textAlign(CENTER, CENTER);
  textFont('Helvetica');
  textSize(36);
  text(' Color Memory Game', width / 2, height / 2 - 80);
  textSize(20);
  text('Repeat the color sequence using the physical buttons!', width / 2, height / 2 - 40);
}


//---------------END SCREEN-------------------------------
function drawEndScreen() {
  drawBackgroundGradient();
  drawConfetti();
  drawGameOverArt();
  textAlign(CENTER, CENTER);
  fill('#2E8B57');
  textFont('Georgia');
  textSize(36);
  text('Game Over!', width / 2, height / 2 - 80);
  fill(50);
  textSize(16);
  text('Press the button to restart', width / 2, height / 2 - 40);
  if (!restartButton) {
    restartButton = createButton(' Restart');
    restartButton.id('restartBtn');
    styleButton(restartButton, width / 2 - 60, height / 2 + 20, '#f44336');
    restartButton.mousePressed(() => {
      restartButton.remove();
      restartButton = null;
      resetGame();
    });
  }
}

//--------------------BOTTOM BAR--------------------------
//Displaying the message
function updateSerialMessage(msg, color) {
  serialMessage = msg;
  messageColor = color;
  statusTimer = millis();
}
//Clearing the message
function clearSerialMessageIfDue() {
  if (millis() - statusTimer > statusDuration && serialMessage !== '') {
    serialMessage = '';
  }
}

//---------------------SIDE BAR---------------------------------
function drawSidebar() {
  let barWidth = 60;
  let barX = width - barWidth;
  fill(240);
  rect(barX, 0, barWidth, height);

  let progress = sequence.length / grid.length;//filling with the progress bar
  fill('#2196F3');
  rect(barX + 10, 20, 40, height * progress);

  textAlign(CENTER, CENTER);
  textSize(20);
  for (let i = 0; i < 3; i++) {
    let y = height - 40 - i * 30;
    fill(i < lives ? 'red' : 'lightgray');
    text(i < lives ? '❤️' : '', barX + barWidth / 2, y);// representing lives with red heart emojis
  }
}

// -------------------TIME BAR---------------------------------------
function drawTimeBar() {
  let barHeight = 10;
  let barY = height - 60;
  let progress = constrain(timeLeft / timeLimit, 0, 1); 

  fill(200);
  rect(0, barY, width - 80, barHeight);

  fill(progress < 0.3 ? '#F44336' : progress < 0.6 ? '#FFC107' : '#4CAF50');
  rect(0, barY, (width - 80) * progress, barHeight);///changing color depending in the time left
}


//-------------------PROGRESS BAR-----------------------------
function drawProgressBar() {
  let barHeight = 30;
  let barY = height - barHeight;
  let progress = sequence.length > 0 ? playerInput.length / sequence.length : 0;

  fill(200);
  rect(0, barY, width - 80, barHeight); // filling the bar proporionally to the progress

  fill(messageColor === 'green' ? '#4CAF50' : messageColor === 'red' ? '#F44336' : '#2196F3');
  rect(0, barY, (width - 80) * progress, barHeight);

  fill(255);
  textAlign(CENTER, CENTER);
  textSize(16);
  text(serialMessage, (width - 80) / 2, barY + barHeight / 2);
}

//-------------------GRID SET UP-------------------------------------
function drawGrid() {
  for (let i = 0; i < grid.length; i++) {
    let sq = grid[i];
    let x = sq.x;
    let y = sq.y;
// highlighting square by a black stroke and appending them to the sequence.
    if (showingSequence && i === sequence[showIndex]) {
      let sw = 6;
      strokeWeight(sw);
      stroke(0);
      let inset = sw / 2;
      fill(sq.color);
      rect(x + inset, y + inset, squareSize - sw, squareSize - sw);//fitting the stroke within the square
    } else {
      noStroke();
      fill(sq.color);
      rect(x, y, squareSize, squareSize);
    }
  }
  noStroke();
}

function initGrid() {
  grid = [];
  for (let row = 0; row < gridSize; row++) {
    for (let col = 0; col < gridSize; col++) {
      let availableColors = colors.slice();
      if (row > 0) { //avoiding the same colors being next to each other in a row
        let aboveColor = grid[(row - 1) * gridSize + col].color;
        availableColors = availableColors.filter(c => c !== aboveColor);
      }
      if (col > 0) {//avoiding the same colors being next to each other in a col
        let leftColor = grid[row * gridSize + (col - 1)].color;
        availableColors = availableColors.filter(c => c !== leftColor);
      }
      grid.push({ x: col * squareSize, y: row * squareSize, color: random(availableColors) });
    }
  }
}

//---------SERIAL COMMUNICATION MANAGEMENT----------------------------
function readSerial(data) {
  if (!inputEnabled || gameOver) return;
  let colorClicked = data.trim().split(',').pop().trim();//reading the serial port for the color pressed and printed out by arduino
  let expectedIndex = sequence[playerInput.length];
  let expectedColor = grid[expectedIndex].color;// checking if the colors match
  if (colorClicked === expectedColor) {
    playerInput.push(expectedIndex);
    correctSound.play();
    updateSerialMessage('Correct', 'green');//updating the message.
    if (playerInput.length === sequence.length) {
      inputEnabled = false;
      setTimeout(nextRound, 1000);
    }
  } else {
    handleIncorrect('Incorrect');
  }
}


// checking if the pattern by the player is incorrect
function handleIncorrect(message) {
  incorrectSound.play();
  updateSerialMessage(message, 'red');
  lives--;
  playerInput = [];
  inputEnabled = false;
  if (lives <= 0) { // they have no more lives end game
    gameOver = true;
    spawnConfetti();
  } else {
    setTimeout(replayRound, 1500);
  }
}


//playing the next round when the player gets it right
function nextRound() {
  currentRound++;
  playerInput = [];
  if (sequence.length >= grid.length) { //checking if all the squares have been matched
    gameOver = true;// end game if true
    spawnConfetti();
    return;
  }
  sequence.push(floor(random(grid.length)));// append one more random square if the game is not over
  showingSequence = true;
  showIndex = 0;
  showTimer = millis();
}
// Repeating the round when the player gets it wrong
function replayRound() {
  playerInput = [];
  showingSequence = true;
  showIndex = 0;
  showTimer = millis();
}

function drawBackgroundGradient() {
  for (let y = 0; y < height; y++) {
    let c = lerpColor(color(255), color(200, 220, 255), map(y, 0, height, 0, 1));
    stroke(c);
    line(0, y, width, y);
  }
}


//-----------------CONFETTI FOR GAME OVER------------------------------------
function spawnConfetti() {
  confetti = [];
  for (let i = 0; i < 100; i++) {
    confetti.push({
      x: random(width),
      y: random(-200, 0),
      speed: random(2, 5),
      size: random(5, 10),
      color: random(colors)
    });
  }
}


function drawConfetti() {
  for (let c of confetti) {
    fill(c.color);
    noStroke();
    ellipse(c.x, c.y, c.size);
    c.y += c.speed;
    if (c.y > height) {
      c.y = random(-100, 0);
      c.x = random(width);
    }
  }
}

function drawGameOverArt() {
  for (let i = 0; i < sequence.length; i++) {
    fill(grid[sequence[i]].color);
    ellipse(50 + (i % 10) * 25, 50 + floor(i / 10) * 25, 20);
  }
}

//-------------- RESETTING THE GAME------------------------------------------
function resetGame() {
  lives = 3;
  sequence = [];
  playerInput = [];
  showingSequence = false;
  showIndex = 0;
  inputEnabled = false;
  currentRound = 1;
  gameOver = false;
  timeLeft = timeLimit;
  serialMessage = '';
  messageColor = 'black';
  initGrid();
  nextRound();
}
Areas I am proud of and areas for future improvement

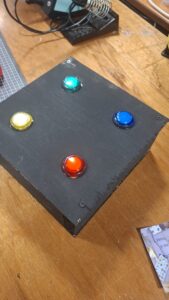
I am really proud about how the game graphics turned out. That is; buttons, score recording and representation, start page, game over page, restart logic, “lives” handling and the game progression loop. On the hardware arduino side, I was proud of the carpentry and design of the wooden platform that held the push-buttons.  However, I think there’s still more that could have been done on the aspect of aesthetics to make my projects more appealing and attractive. I also need to work on communicating instructions more effectively and intuitively. Also it was in my very initial idea to 3D print so that I can automate a robot following the progress of the game. I was limited however because of the high demand of the 3D printers. I hope to one day finish what I have started.

Week 13 – User Testing and Interaction

Video Demo:

note- instructions were provided in this video, after the user was unable to lock the target. In all fairness, such intricacy was bounded to game rules and hence was required to be briefed so that he can continue operating it.

Initial Impression:

The initial Impression of the project was awe-inspiring for most of the audience, especially for the male audience. One can sense the ‘awesomeness’ – quoting my friend by merely looking at the rough-tough built of the design. For the female audience, the lack of color-scheming made it less appealing. This was concluded after asking 8 of my classmates to test out my project.

Haris for instance was thrilled to see the project and idea come to life! The very idea of gamifying putting things back into their place with scoring mechanism was a huge plus point according to him. Overall, the functional and responsive piece of wood, cardboard, and PVC pipe did pique their curiosity. Unlike conventional design mechanism, this was something different. I am grateful to professor for approving and allowing this project. A mix of Cornhole game and concept of  re-racking of equipment after its use. To make it appropriate for the settings, the launcher launches out markers and scotch tape into the pencil holder – with a button attached to the bottom.

Areas with successful interaction:

The major area of success was the button movement and LED correspondence to the game state. The game when in MENU state, turns on the red LED. When start button pressed, it triggers the game to start both in P5.js and inside Arduino program. This turns on the blue LED. This is when the user can control the movement of the canon. The button placement reflects the direction of movement, thus users had no problem interacting with the system.

Confusion and explanation needed:

However, the confusion arose when they were unable to lock and shoot. Provided that instructions were not given regarding game rule, they continued to either move the launcher back and forth, or tried fiddling around with the inner barrel.

Conclusion:

Label the buttons and LED to allow for smoother user interface!

Week 13 – User Testing

People Experience

I had people try out my game without prior instruction. At first people did not understand how to play the game but eventually after two tries people got the hang of it. It was particularly challenging at first because of the push buttons that took really long to read data(must have been faulty). 

Upon getting the hang of it, I could see the excitement as the game is really challenging for the users and therefore very exciting.

Some of the areas of confusion came when the users did not read the basic instructions on the game flow but when they did it became all so easy to understand what is happening between the controls and the experience on the screen 

Effective aspects and areas to improve.

I am particularly proud of the fact that the game did not crash or have an unexpected breakdown. I am also proud that the communication was well mapped at most times between the arduino and p5js. I was able to channel all the data from randomly pressed push-buttons to p5js to match the sequence which I found just amazing. Also the synchronization between the arduino push-buttons and the p5js sounds made when the user gets it right was really challenging but when I got it done it was really fulfilling.

There are still some areas of improvement however. I noticed that after playing for a long time the game began to lag. This was indication that I needed a better way to map the data from arduino to p5js since as the game progressed data being mapped became more and more. Additionally, I needed to make the time more proportional to the number of colors expected to be matched by the player. I thought it would be a great challenge for the players but the limited time made it even more difficult(doable though). I could consider making the timing more lenient so as to have more people try to finish.

Areas the need to explain

Most people started the game without understanding the instructions. Most people thought that they were supposed to press the push-buttons immediately when the colors were displayed on the screen but that was not the case. I therefore had to explain to most people to wait for the sequence to completely finish before they could begin pressing the push buttons. I think to solve this problem for first timers playing the game, the best thing was to make the instructions more clear on the screen rather than printed out as I had planned.

Week 12 – Final Proposal and Progress

Finalized concept for the project;

Even though I was unsettled at first I finally decided to go with the color matching game where the user observes random color patterns on p5js and tries to match them by pressing the same sequence of colors on a set of push buttons embedded on a wooden platform. 

Communication between p5js and arduino;

The communication between p5js and arduino begins with a handshake which is initialized by the library we used in class – p5-web-serial(). The p5js generates random colors in increasing sequence and waits for response from the arduino. Arduino sends feedback in terms of the color that has been pressed if it is green for instance,… the  p5 reads the serial which has the color pressed in arduino printed out. If the color read matches with the expected color then p5js reads it as correct  and proceeds to the next round. If not, the p5js reads it as wrong and repeats the same sequence. For multiple colors in a long sequence the arduino prints out the colors pressed in an array that is matched against that which has been displayed in p5js. And the same logic of checking for correctness is repeated.

 Images of progress

Final Project – together we grow

Concept

For my final project, I created an interactive art that aims to celebrate friendship and togetherness. The main idea of the art is that a tree branch appears from the 2 sides of the screen and grows towards each other; once they connect, a flower blooms. Consistent with the theme of togetherness, the project requires 2 people to hold hands together and the strength of their hold influences how fast the branches grow – force sensitive resistor (FSR) is sewed into a glove, which one person puts on and holds the other person’s hand with. With the free hands, each person puts a finger on the temperature sensor and the resulting reading from each sensor is mapped to a color (darkish pink = warm, light yellow = cool) and lerped together to generate a live color gradient for the background.

Video demonstration

IM showcase user interaction

Implementation

I wanted the user interface to be minimal but pretty, so the homepage, the instructions page and the main sketch are all designed to have minimal text and soft color palette.

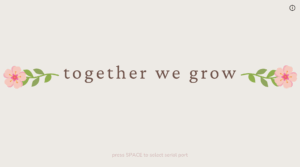
homepage

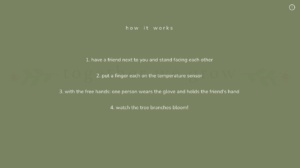
instructions page

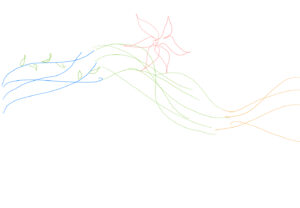
main sketch (after the branches have connected together)

At the end of the sketch after the branches connect, a quote about friendship and togetherness is randomly chosen from a text file and appears at the bottom of the screen.

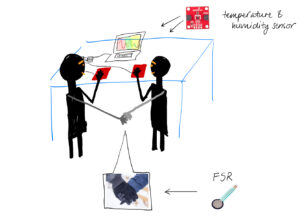
initial hand sketches

Interaction design

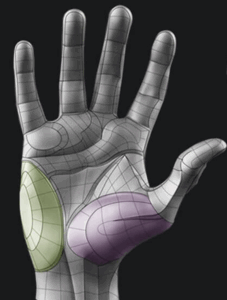
As the project is about friendship and togetherness, the interaction is designed to involve 2 people’s participation. I was initially using alligator clips for connecting the temperature sensors, but they felt very frail to the hands and got disconnected easily, so I soldered wires into both of the temperature sensors and taped them on top of a cardboard to make sure they are in place. As for the FSR, my very first idea was to place it inside a soft thin object so that the users can put it in between their palms and then hold hands. I could not think of a suitable and meaningful object to place the FSR, not to mention realized it would be strange to ask people to put a random object in between their holding hands. The best option seemed to be using a glove and attaching the FSR inside it. I tested different ways of holding hands and figured that the location where the contact point is highest when holding hands with another person is the purple area in the picture below. This is where I placed the FSR and sewed it on with a thread. During the IM showcase, some people held hands very very faintly, so I had to jump in and demonstrate how they should hold hands to ensure that force was being applied to the FSR. It made me realize that it may have been helpful if there was an image depiction of proper hand holds in the instructions page.

  • Arduino code
  • int fsrPin = A0;
    int tempSensorPin = A1;
    int tempSensor2Pin = A2;
    int fsrReading;    // variable to store the FSR reading
    float fsrVoltage;     // variable to store the voltage value
    float tempSensorVoltage;
    float tempSensorReading;
    float temperature;
    float tempSensor2Voltage;
    float tempSensor2Reading;
    float temperature2;
    
    void setup() {
      // Start serial communication so we can send data
      // over the USB connection to our p5js sketch
      Serial.begin(9600);
    
      // We'll use the builtin LED as a status output.
      // We can't use the serial monitor since the serial connection is
      // used to communicate to p5js and only one application on the computer
      // can use a serial port at once.
      pinMode(LED_BUILTIN, OUTPUT);
    }
    
    void loop() {
      // read the FSR value (0–1023)
      fsrReading = analogRead(fsrPin); 
      fsrVoltage = fsrReading * (5.0 / 1023.0);
    
      tempSensorReading = analogRead(tempSensorPin);
      // convert the analog reading to a voltage (0–5V)
      tempSensorVoltage = tempSensorReading * (5.0 / 1023.0);
      temperature = (tempSensorVoltage - 0.5) * 100.0;
    
      tempSensor2Reading = analogRead(tempSensor2Pin);
      // convert the analog reading to a voltage (0–5V)
      tempSensor2Voltage = tempSensor2Reading * (5.0 / 1023.0);
      temperature2 = (tempSensor2Voltage - 0.5) * 100.0;
    
      // send the FSR reading and 2 temperatures to p5.js
      Serial.print(fsrReading);
      Serial.print(","); 
      Serial.print(temperature); 
      Serial.print(","); 
      Serial.println(temperature2); 
    
      // blink the built-in LED to show activity
      digitalWrite(LED_BUILTIN, HIGH);
      delay(100);
      digitalWrite(LED_BUILTIN, LOW);
    
      delay(200);
    }
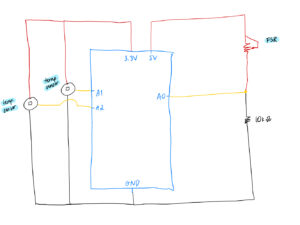
    Circuit
  •  p5.js code

Link to fullscreen sketch

// interface variables
let homepageImg, backButtonImg, infoButtonImg, infoButtonWhiteImg, gloveImg, sensorImg;
let ambienceSound, endingSound;
let backButtonX = 20;
let backButtonY = 20;
let backButtonW = 20;
let backButtonH = 20;
let infoButtonX = 920;
let infoButtonY = 20;
let infoButtonW = 20;
let infoButtonH = 20;
let fontNunito, fontNunitoLight;
// transparency variable for the fading start text
let alphaValue = 0;
// variable used for the fade effect of the start text
let fadeDirection = 1;
let c;
let startMsgColor = "#c27e85";
let titleColor = "#745248";
let instructionsBoxColor = "#738059";
let backgroundColor = "#F0EBE5";
let vizOver = true;
let vizStarted = false;
let instructionsOn = false;
let endingSoundPlayed = false;
let ambienceSoundPlaying = false;
let homePage;
let viz;

// illustration variables
let branchGrowth = 0.1;
let maxGrowth;
let leafGrowth;
// for tracking if the branches have connected at the center
let connected = false;
// for storing the coordinates of left branch points
let leftPoints = [];
// for storing the coordinates of right branch points
let rightPoints = [];
let leafImg;
let leadImgFlipped;
let temperature_1;
let temperature_2;
let quotes = [];
let chosenQuote = "";

// arduino variables
let fsrValue = 0;
let temperature = 0;
let temperature2 = 0;
let arduinoConnected = false;

// map the sensor readings to a different range
function mapVals(sensorType, val) {
  // map temperature to colors
  if (sensorType == "temperature") {
    // lowest reading on the temp sensor was 18
    // highest reading on the temp sensor was 29
    // so these are mapped to a number on a wider scale
    // to ensure that the background color changes are more visible/stronger
    return map(val, 18, 30, 1, 38);
  // map fsr reading to branchGrowth
  } else if (sensorType == "fsr") {
    // bound the branch growth to maximum 0.5 to make sure that
    // the visualization doesn't end too quickly
    return map(val, 0, 1023, 0.1, 0.5);
  }
}

function preload() {
  homepageImg = loadImage("/assets/homepage.png");
  backButtonImg = loadImage("/assets/left.png");
  infoButtonImg = loadImage("/assets/information.png");
  infoButtonWhiteImg = loadImage("/assets/information_white.png");
  fontNunito = loadFont("/fonts/Nunito-Medium.ttf");
  fontNunitoLight = loadFont("/fonts/Nunito-Light.ttf");
  leafImg = loadImage("/assets/nature.png");
  leafImgFlipped = loadImage("/assets/nature_flipped.png");
  flowerImg = loadImage("/assets/flower.png");
  gloveImg = loadImage("/assets/glove.png");
  sensorImg = loadImage("/assets/sensor.png");
  ambienceSound = loadSound("/sounds/ambience_long.mp3");
  endingSound = loadSound("/sounds/ending.mp3");
  quotes = loadStrings("/assets/quotes.txt");
  heartImg = loadImage("/assets/heart.png");
}

function setup() {
  createCanvas(960, 540);
  background(0);

  homePage = new HomePage();
  viz = new Visualization();

  // each branch can only grow for a length that's half of the screen
  maxGrowth = width / 2;
  chosenQuote = random(quotes);
}

class HomePage {
  constructor() {
  }

  display() {
    image(homepageImg, 0, 0, width, height);
    image(infoButtonImg, infoButtonX, infoButtonY, infoButtonW, infoButtonH);
    // fade effect on the "Press Enter to start" text
    // by varying the transparency
    alphaValue += fadeDirection * 3;
    if (alphaValue >= 255 || alphaValue <= 0) {
      fadeDirection *= -1;
    }

    push();
    textAlign(CENTER);
    textFont(fontNunito);
    textSize(16);
    c = color(startMsgColor);
    c.setAlpha(alphaValue);
    fill(c);
    // ask user to select serial port first
    if (!arduinoConnected) {
        text("press SPACE to select serial port", width / 2, 500);
    // once serial port selected, show a different text
    } else {
        text("press ENTER to start", width / 2, 500);
    }
    pop();
  }

  showInstructions() {
    this.display();
    let c = color(instructionsBoxColor);
    c.setAlpha(245);
    fill(c);
    noStroke();
    rect(0, 0, width, height);
    image(
      infoButtonWhiteImg,
      infoButtonX,
      infoButtonY,
      infoButtonW,
      infoButtonH
    );
    
    // instructions text
    push();
    textAlign(CENTER);
    textFont(fontNunito);
    textSize(16);
    fill(color(backgroundColor));
    text("h o w    i t    w o r k s", width / 2, 100);
    text(
      "1. have a friend next to you and stand facing each other",
      width / 2,
      200
    );
    text("2. put a finger each on the temperature sensor", width / 2, 250);
    text(
      "3. with the free hands: one person wears the glove and holds the friend's hand",
      width / 2,
      300
    );
    text("4. watch the tree branches bloom!", width / 2, 350);
    pop();
  }
}

class Visualization {
  constructor() {
  }
  
  start() {
    // play the ambience sound if it's not playing
    if (!ambienceSoundPlaying) {
      ambienceSound.play();
      // use a boolean variable to ensure it's only played once
      ambienceSoundPlaying = true;
    }
    
    // stop the sound if visualization is over
    if (connected || vizOver) {
      ambienceSound.stop();
    }
        
    noStroke();
    
    // map the temp sensor readings
    temperature_1 = mapVals("temperature", temperature);
    temperature_2 = mapVals("temperature", temperature2);
    // map each person's temperature to colors
    let color1 = mapTempToColor(temperature_1);  // color for person 1
    let color2 = mapTempToColor(temperature_2);  // color for person 2

    // smooth gradient blending between the two temperatures
    for (let x = 0; x < width; x++) {
      // lerp factor based on x position (left to right transition)
      let lerpFactor = map(x, 0, width, 0, 0.5);

      // blend between color1 and color2
      let col = lerpColor(color1, color2, lerpFactor);

      // apply the color vertically to the canvas
      stroke(col);
      line(x, 0, x, height);  // vertical lines for smooth gradient
    }

    // go back to homepage button
    image(backButtonImg, backButtonX, backButtonY, backButtonW, backButtonH);
    
    // map fsr reading
    let growthSpeed = mapVals("fsr", fsrValue);
    // use the mapped fsr value to grow the branch
    branchGrowth += growthSpeed;
    
    if (branchGrowth < maxGrowth) {
      // introduce noise to left branch
      let noiseOffsetLeftBranch = branchGrowth * 0.01;
      // introduce noise to right branch
      // slightly change the noise offset so that branches don't grow symmetrically and instead looks different
      let noiseOffsetRightBranch = branchGrowth * 0.01 + 1000;
      
      // generate x, y coordinates for points for both branches
      let yLeft = height / 2 + map(noise(noiseOffsetLeftBranch), 0, 1, -40, 40);
      let yRight =
        height / 2 + map(noise(noiseOffsetRightBranch), 0, 1, -40, 40);
      let xLeft = branchGrowth;
      let xRight = width - branchGrowth;
      
      // once the branches are nearing the center, reduce the noise and make them remain near the horizontal middle of the canvas to ensure they connect everytime
      let easingZone = 30;
      if (branchGrowth > maxGrowth - easingZone) {
        let amt = map(branchGrowth, maxGrowth - easingZone, maxGrowth, 0, 1);
        yLeft = lerp(yLeft, height / 2, amt);
        yRight = lerp(yRight, height / 2, amt);
      }
      
      // add the points to the array
      leftPoints.push({
        pos: createVector(xLeft, yLeft),
        // randomly decide if the leaf will be growing on the top or on the bottom
        flip: int(random(2))
});      
      rightPoints.push({
        pos: createVector(xRight, yRight),
        flip: int(random(2))
});     
    } else if (!connected) {
      connected = true;
      
      // play the ending sound if the branches have connected
      if (!endingSoundPlayed) {
        endingSound.play();
        endingSoundPlayed = true;
      }
    }

    // draw branches
    push();
    strokeWeight(3);
    stroke(110, 70, 40); // brown
    noFill();

    beginShape();
    // draw the left branch
    for (let ptObj of leftPoints) {
      let pt = ptObj.pos;
      vertex(pt.x, pt.y);
      
      // for every 75th x coordinate, draw an image of a leaf
      // position of leaf is stored in the flip attribute
      if (int(pt.x) % 75 == 0) {
        if (ptObj.flip === 0) {
          image(leafImgFlipped, pt.x, pt.y - 2, 40, 40);
        } else {
          image(leafImg, pt.x, pt.y - 37, 40, 40);
        }
      }
    }
    endShape();
    
    // draw the right branch
    beginShape();
    for (let ptObj of rightPoints) {
      let pt = ptObj.pos;
      vertex(pt.x, pt.y);

      if (int(pt.x) % 75 == 0) {
        if (ptObj.flip === 0) {
          image(leafImgFlipped, pt.x, pt.y - 2, 40, 40);
        } else {
          image(leafImg, pt.x, pt.y - 37, 40, 40);
        }
      }
    }
    endShape();
    pop();
    
    let leftEnd = leftPoints[leftPoints.length - 1].pos;
    let rightEnd = rightPoints[rightPoints.length - 1].pos;

    let d = dist(leftEnd.x, leftEnd.y, rightEnd.x, rightEnd.y);
    
    // determine if the branches have connected by finding the distance between the 2 branch end points and checking if it's less than 5
    if (d < 5) {
      push();
      rectMode(CENTER);
      image(flowerImg, leftEnd.x - 15, (leftEnd.y - 30), 80, 80);
      
      // console.log(chosenQuote);
      
      // show the quote
      if (chosenQuote !== "") {
        textAlign(CENTER, CENTER);
        textFont(fontNunito);
        textSize(20);
        fill(titleColor);
        text(chosenQuote, width / 2, height - 80);
      }
      
      // heart image at the bottom of the quote
      image(heartImg, width / 2, height - 60, 40, 40);
      pop();
    }
  }
}

function draw() {
  if (instructionsOn) {
    homePage.showInstructions();
  } else if (!vizStarted || vizOver) {
    homePage.display();
  } else {
    viz.start();
  }
  // print(mouseX + "," + mouseY);
}

// map temperature to color which will be used to control the color of the background
function mapTempToColor(temp) {
  let coolColor = color("#F0EBE5");
  let warmColor = color("#dea0a6"); 
  
  // lerp the light yellow color with the dark pink color based on the temperature
  return lerpColor(coolColor, warmColor, map(temp, 1, 38, 0, 1));
}

function readSerial(data) {
  ////////////////////////////////////
  //READ FROM ARDUINO HERE
  ////////////////////////////////////

  if (data != null) {
    let fromArduino = split(trim(data), ",");
    // if the right length, then proceed
    if (fromArduino.length == 3) {
      fsrValue = int(fromArduino[0]);
      temperature = int(fromArduino[1]);
      temperature2 = int(fromArduino[2]);
    }
    //////////////////////////////////
    //SEND TO ARDUINO HERE (handshake)
    //////////////////////////////////
    // let sendToArduino = left + "," + right + "\n";
    // writeSerial(sendToArduino);
  }
}

function keyPressed() {
  // if the enter key is pressed, reset state and start the visualization
  if (keyCode === ENTER) {
    if (vizOver && !instructionsOn) {
      // reset visualization state
      branchGrowth = 20;
      leftPoints = [];
      rightPoints = [];
      connected = false;
      ambienceSoundPlaying = false;
      endingSoundPlayed = false;
      chosenQuote = random(quotes);
      vizStarted = true;
      vizOver = false;
    }
  }
  
  // if space is pressed, setup serial communication
  if (key == " ") {
    setUpSerial();
    arduinoConnected = true;
  }
}

function mousePressed() {
  // if mouse is pressed on the < button, go back to the homepage
  if (
    mouseX >= backButtonX &&
    mouseX <= backButtonX + backButtonW &&
    mouseY >= backButtonY &&
    mouseY <= backButtonY + backButtonH
  ) {
    vizOver = true;
    ambienceSound.stop();
    vizStarted = false; // Reset visualization state when returning to homepage
    console.log("back button pressed");
  // if mouse if pressed on the information button, show the instructions page
  } else if (
    mouseX >= infoButtonX &&
    mouseX <= infoButtonX + backButtonW &&
    mouseY >= infoButtonY &&
    mouseY <= infoButtonY + backButtonH
  ) {
    instructionsOn = !instructionsOn;
    console.log("info button pressed");
  }
}
  • Communication between Arduino and p5.js

3 readings from Arduino (2 temperature sensors and 1 FSR) are sent in a X,Y,Z format with commas separating them to p5.js using serial communication. The p5.js code then maps these values to their respective values for color and speed. I could not think of meaningful data to send from p5.js to Arduino that doesn’t just send data for the sake of having a two-way communication. I considered using the LCD to show text (names of the users, reading values etc), buzzer to play music, but as professor mentioned in our chat on the initial evaluation day, these things can be done on the screen as well and does specifically require to be implemented on the hardware. Thus, I decided to continue using Arduino as input only and I think it worked well at the end.

Reflection and Proud Moments

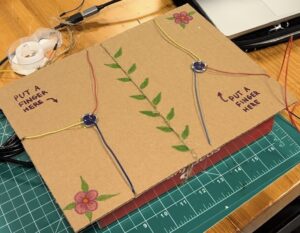
I like how the p5.js interface and the hardware interface ended up looking from a visual standpoint. I put an effort into choosing the visual assets, the fonts and the different colors I used across the sketch to create a coherent visual experience that is simple yet visually pleasing to look at, and I was very happy when people complimented on it! I decorated the cardboard casing covering the Arduino to match the artwork by drawing leaves and flowers, and I think that turned out successfully as well.

For the p5.js artwork, it was tricky to connect the 2 branches every time. The way the drawing of the branches work is that a variable, called branchGrowth, increases every frame, and its speed is determined by the FSR reading. For each new value of branchGrowth, the code calculates a new point for the left and right branches. To ensure that the branches look organic and not like a straight line, Perlin noise (noise(…)) is introduced to create smooth vertical variation in the branches. As each point of the branch is generated randomly (to a certain degree), unless the last segment of each branch was somehow smoothed out and maintained near the horizontal middle, the 2 branches always ended up at different heights. To solve this issue, I eased the y values of both branches toward the center as they approached close each other. This helped to make the branch growth to appear organic but also controlled so that they connected every time.

Overall, I had a lot of fun working on this project and it was a genuinely rewarding experience watching people’s reactions and seeing how they interact with the piece (including finding some loopholes!). I am glad I stuck with the interactive artwork idea and the theme of togetherness, because I got to see some cute interactions of friends who tried out my project <3

Future Improvements

If I were to continue with the project and develop it further, I think I would explore ways of adding more physical components (other than sensors) that people could interact with. One example could be a flower that blooms when the branches meet by using a servo motor. I would also make improvements to the instructions page because it seemed like people didn’t easily see that there was an info button. Even when they did see the button and press on it, there was a tendency for people to take a quick glance at it and head straight into starting the sketch.

Final Project Documentation

Final Project Documentation

Concept:

“Olive Tree Stories” is an interactive storytelling project inspired by the deep cultural roots of olive tree’s in Palestinian heritage. I wanted my project to be meaningful and leave a strong impact on the user, so i drew inspiration from my own culture. The installation uses a plastic olive tree with three symbolic leaves. Each leaf has a hidden touch sensor made of aluminum foil and sponge, which activates when pressed gently on a red mark. When the leaf is pressed, the corresponding olive lights up on the tree, and a short audio (poem or song) starts playing, followed by a visual enlargement of a related image on screen. I was looking for the overall experience to evoke the act of picking an olive and hearing a story passed down through generations. My main goal for this project is to preserve memory and heritage through touch, sound, and visuals.

Interaction Design:
– The user interacts with the leaves of an olive tree.
– Each leaf has a red marking –> made using two layers of aluminum separated by sponge.
– When red marking is pressed:
– A green olive lights up on the tree (via LED).
– One of two audio stories tied to that olive is randomly selected and begins playing.
– A corresponding visual (image) on screen zooms in smoothly.
– After the story ends:
– The screen returns to its main menu.
– The olive light turns off.

I wanted this natural interaction design to draw people in gently, as they literally touch a memory through the leaves of the olive tree.

Link to process photos + Link to extra designs made

Arduino Code:

The Arduino reads input from 3 capacitive touch pins and lights up corresponding LEDs. It also sends a serial message (“1”, “2”, or “3”) to indicate which olive was touched.

#include <Adafruit_NeoPixel.h>

const int touchPin = 6;
const int touchLedPin = 3;

const int touchPin2 = 10;
const int touchLedPin2 = 11;

const int touchPin3 = 7;
const int touchLedPin3 = 12;

const int trigPin = 8;
const int echoPin = 9;

#define STRIP_PIN 5
#define NUMPIXELS 50
Adafruit_NeoPixel strip(NUMPIXELS, STRIP_PIN, NEO_GRB + NEO_KHZ800);

void setup() {
  pinMode(touchPin, INPUT_PULLUP);
  pinMode(touchLedPin, OUTPUT);

  pinMode(touchPin2, INPUT_PULLUP);
  pinMode(touchLedPin2, OUTPUT);

  pinMode(touchPin3, INPUT_PULLUP);
  pinMode(touchLedPin3, OUTPUT);

  pinMode(trigPin, OUTPUT);
  pinMode(echoPin, INPUT);

  strip.begin();
  strip.show();
  Serial.begin(9600);
}

void loop() {
  int touchState = digitalRead(touchPin);
  digitalWrite(touchLedPin, touchState == LOW ? HIGH : LOW);
  if (touchState == LOW) {
    Serial.println("1");
    delay(300);
  }

  int touchState2 = digitalRead(touchPin2);
  digitalWrite(touchLedPin2, touchState2 == LOW ? HIGH : LOW);
  if (touchState2 == LOW) {
    Serial.println("2");
    delay(300);
  }

  int touchState3 = digitalRead(touchPin3);
  digitalWrite(touchLedPin3, touchState3 == LOW ? HIGH : LOW);
  if (touchState3 == LOW) {
    Serial.println("3");
    delay(300);
  }

  digitalWrite(trigPin, LOW);
  delayMicroseconds(2);
  digitalWrite(trigPin, HIGH);
  delayMicroseconds(10);
  digitalWrite(trigPin, LOW);

  long duration = pulseIn(echoPin, HIGH, 30000);
  int distance = (duration == 0) ? 999 : duration * 0.034 / 2;

  if (distance < 100) {
    for (int i = 0; i < NUMPIXELS; i++) {
      strip.setPixelColor(i, strip.Color(60, 90, 30));
    }
  } else {
    for (int i = 0; i < NUMPIXELS; i++) {
      strip.setPixelColor(i, 0);
    }
  }

  strip.show();
  delay(50);
}

p5.js Code: 

– Loads 6 images and 5 audio files
– Maps each box to one audio
– Randomizes which box is triggered per olive
– Communicates with Arduino using Web Serial
– Displays interactive visuals with zoom animation and audio syncing

Arduino – p5.js Communication:
– Serial connection via Web Serial API
– Arduino sends “1”, “2”, or “3” when a sensor is triggered
– p5.js receives the value, randomly selects one of two mapped boxes, and plays audio/image
– Serial connection is opened through a “Connect to Arduino” button


Link to video demonstration 


Highlights / Proud Moments:

I was very proud of my use of leaves as soft sensors because I believe it adds a layer of tactile beauty while blending the installation with poetic significance. i also liked my use of the red markings on each leaf as they serve as subtle visual guide, naturally blending into the overall aesthetic of the tree while inviting interaction. When a user presses on a marked leaf, the seamless synchronisation between light and audio brings the experience to life, creating an emotionally resonant response. I knew that my goal was met when a lot of users commented and told me that they really appreciated the meaningful aspect of my project. Overall, I think that my project connects technology and tradition and turns a symbolic object into a responsive storytelling medium.

Challenges/Future Improvements: 

One of the main challenges I faced was my initial idea to make the olives themselves the touchpoint that triggered the audio.  I struggled to add a reliable sensor inside the small and spherical shape of the olives. However, to overcome this, I problem-solved by shifting the interaction to the leaves, which offered more surface area and flexibility. Also, I learned the importance of saving your code very often and debugging. Looking ahead, future improvements could include integrating haptic feedback into the olives, adding more stories with replay options, and even including narration subtitles for accessibility. Overall, I am extremely proud of how my project turned out and the responses it got from many users.

Final Project Documentation

Concept 

My concept is a semi-thriller game that features two key sensors — the joystick, and the pulse sensor. It was inspired by my siblinghood. Growing up, I would often eat my sister’s snacks, of course, without her permission. This would give me a thrill that was akin to what someone would feel playing hide-and-seek with a murderer (I’m exaggerating here; I actually really love my sister haha). I settle on making it “slime-themed” since I wanted it to be more fun and gender-neutral to be inclusive to all players (possibly people that had older brothers, cousins, etc.). I mean certainly a slime character is non-specific enough I think.

How it works

Well, when you first start the game, you will be greeted with an eery background music and screen image with two options: “how to play” and “start game”. If you press on “how to play” with the joystick, you’ll be shown a very comprehensive manual on how to play the game. Then, if you press start, it’ll take you to the game dialog, and you can click through the dialog through the joystick clicks. After that, the game begins! When it starts, on the top right of the screen there is a icon of slime chips with a number on top, these are the number of chips you need to eat without getting caught and losing all your hearts. The number of hearts you have is on the top left. When the sister turns around and you’re eating your chips (i.e. your hands are touching; you can move the right hand with the chips left and right with the joystick), she gets mad and you lose a heart. Here are the game p5.js visuals:

(startscreen) (how to play) (dialog screen) (game started and sister turned around) (game started and sister caught you!!)(you won!!)

Implementation

1. Interaction Design:

I wanted it to have a flex sensor initially as the pseudo “joystick” but I realized that that wouldn’t really be intuitive or even enjoyable for the average user likely due to its foreign nature in games like these. So I decided to borrow a joystick from the IM lab, alongside a pulse sensor. I wanted to make the game take real-time input from the user and imitate the scenario of my heart racing as a kid when stealing my sister’s food. So, every 1.5 to 2.5 seconds, the game checks if the user’s heartbeat ‘jumps’ by more than 70 (imitating nervousness). If so, or with a 25% random chance, the sister turns around. I did this to simulate the tension of being caught, as the player’s nervousness (heartbeat jump) makes the slime sibling more likely to notice you with a bit of randomness. I added chip-eating sound effects among some other sounds to reflect what is happening on the screen.

2. Arduino Code:

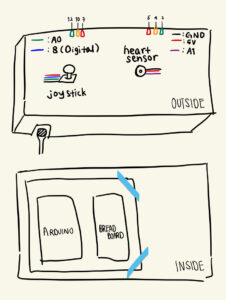
My Arduino code controls three pairs of colored LEDs (red, yellow, green) based on commands received from a computer (via Serial). It also reads a joystick’s X-axis, a pulse sensor, and a joystick button (I put print statements for their values for debugging and monitoring). Only one color is lit at a time, and the code ignores repeated color commands, to make sure a state is reflected clearly for the player. I also added some helper functions to keep all LEDs off at the beginning and another one so that the same color LED is on at both sides of the box. Here is the code:

const int joyXPin   = A0;    // joystick a-axis
const int pulsePin  = A1;    // pulse sensor
const int selPin    = 8;     // joystick “select” button (digital)
const int baudRate  = 9600;

// LED pins
const int RED_L  = 7,  RED_R  = 5;
const int YEL_L  = 10, YEL_R  = 4;
const int GRN_L  = 12, GRN_R  = 2;

const int threshold = 50;    // dead-zone around center (512)

// remembering last LED state
String currentCmd = "";

void setup() {
  Serial.begin(baudRate);
  pinMode(selPin, INPUT_PULLUP);
  
  // LED pins
  pinMode(RED_L, OUTPUT);
  pinMode(RED_R, OUTPUT);
  pinMode(YEL_L, OUTPUT);
  pinMode(YEL_R, OUTPUT);
  pinMode(GRN_L, OUTPUT);
  pinMode(GRN_R, OUTPUT);

  // start with all off
  clearAllLeds();
}

void loop() {
  // checking for new command from p5.js
  if (Serial.available()) {
    String cmd = Serial.readStringUntil('\n');
    cmd.trim();

    // only accept valid colors
    if (cmd == "RED" || cmd == "YELLOW" || cmd == "GREEN") {
      // if different than last, update
      if (cmd != currentCmd) {
        currentCmd = cmd;
        applyLeds(currentCmd);
      }
    }
    // echo back for debugging
    Serial.print("Received: ");
    Serial.println(cmd);
  }

  // existing joystick/pulse prints
  int xRaw    = analogRead(joyXPin);
  int pulseRaw = analogRead(pulsePin);
  bool selPressed = (digitalRead(selPin) == LOW);

  int dirX;
  if (xRaw < 512 - threshold)      dirX = 0;
  else if (xRaw > 512 + threshold) dirX = 1;
  else                              dirX = -1;

  Serial.print("DIRX:");   Serial.print(dirX);
  Serial.print("  PULSE:");Serial.print(pulseRaw);
  Serial.print("  SEL:");  Serial.println(selPressed ? 1 : 0);
}

// helper to turn all LEDs off
void clearAllLeds() {
  digitalWrite(RED_L, LOW); digitalWrite(RED_R, LOW);
  digitalWrite(YEL_L, LOW); digitalWrite(YEL_R, LOW);
  digitalWrite(GRN_L, LOW); digitalWrite(GRN_R, LOW);
}

// helper to set exactly one color on both sides
void applyLeds(const String &cmd) {
  clearAllLeds();
  if (cmd == "RED") {
    digitalWrite(RED_L, HIGH);
    digitalWrite(RED_R, HIGH);
  } 
  else if (cmd == "YELLOW") {
    digitalWrite(YEL_L, HIGH);
    digitalWrite(YEL_R, HIGH);
  } 
  else if (cmd == "GREEN") {
    digitalWrite(GRN_L, HIGH);
    digitalWrite(GRN_R, HIGH);
  }
}

3. Schematic of Project:

4. p5.js Code:

The game features multiple states (start menu, gameplay, how-to-play screen) managed through a state machine architecture. When playing, users control a hand to grab chips while avoiding detection from the sister character who randomly turns around. The sister’s turning behavior is influenced by both randomness and the player’s actual heartbeat measured through a pulse sensor.

Key features in the p5.js include:

  • Dialog system for narrative progression
  • Character animation with multiple emotional states
  • Collision detection between hands
  • Health and scoring systems (hearts and chip counter)
  • Two endings (happy and bad) based on gameplay outcomeThis is the code:
    let gameState = 'start'; // 'start', 'game', or 'howToPlay'
    let startImg;
    let bgImg;
    let howToPlayImg; 
    let bgMusic;
    let angry;
    
    // serial communication variables
    let rightX = 0;
    let pulseValue = 0;  
    let connectButton; // button to initiate serial connection
    
    // hoystick control variables for menu navigation
    let currentSelection = 0; // 0 = start game, 1 = how to play
    let selPressed = false;
    let prevSelPressed = false; // to detect rising edge
    let backButtonSelected = false; // tracking if back button is selected in how to play screen
    
    // hand objects
    let leftHand = {
      img: null,
      x: 0,
      y: 0,
      width: 150,
      height: 150,
      visible: false
    };
    
    let rightHand = {
      img: null,
      x: 0,
      y: 0,
      width: 150,
      height: 150,
      visible: false,
      currentImg: 1, // tracking current hand image (1, 2, or 3)
      animationStarted: false, // tracking if animation has started
      animationTimer: 0, // timer for animation
      lastLedState: "",
      sisterTurned: false, // tracking if sister is turned around
      sisterTurnStart: 0,      // ← when she last flipped to “turned”
      maxTurnDuration: 1700,   // ← max ms she can remain turned (1.7 s)
      lastTurnCheck: 0, // timer for checking sister's state
      heartDeducted: false, // flag to track if heart was deducted in current overlap
      lastSisterState: false, // tracking previous sister state to detect changes
      sisterAngry: false, // flag to track if sister is angry
      lastPulseValue: 0 // tracking last pulse value for heartbeat detection
    };
    
    let chipCounter = {
      img: null,
      x: 0,
      y: 0,
      width: 80,
      height: 80,
      count: 10
    };
    
    let hearts = {
      img: null,
      count: 5, 
      width: 30,
      height: 30,
      spacing: 10,
      x: 20, 
      y: 20 
    };
    
    let gameOver = false;
    let gameEndingType = ''; // 'good' or 'bad' to track which ending to show
    
    let dialogSounds = {};
    
    let startButton = {
      x: 0,
      y: 0,
      width: 150, 
      height: 30,
      text: 'start game',
      isHovered: false
    };
    
    let howToPlayButton = {
      x: 0,
      y: 0,
      width: 180, 
      height: 30,
      text: 'how to play',
      isHovered: false
    };
    
    let backButton = { 
      x: 0,
      y: 0,
      width: 100,
      height: 40,
      text: 'Back',
      isHovered: false
    };
    
    let instrumentSerifFont;
    let currentDialog = null; 
    
    let characters = {};
    
    function preload() {
      startImg = loadImage('Images/start.png');
      bgImg = loadImage('Images/bg.png');
      howToPlayImg = loadImage('Images/howtoplay.png'); 
      instrumentSerifFont = loadFont('InstrumentSerif-Regular.ttf');
      bgMusic = loadSound('Audios/bg.mp3');
      leftHand.img = loadImage('Images/left_hand.png');
      rightHand.img = loadImage('Images/right_hand1.png');
      rightHand.img2 = loadImage('Images/right_hand2.png');
      rightHand.img3 = loadImage('Images/right_hand3.png');
      chipCounter.img = loadImage('Images/slimechips.png');
      hearts.img = loadImage('Images/heart.png');
      happyEndingImg = loadImage('Images/happy_ending.png');
      badEndingImg = loadImage('Images/bad_ending.png');
    
      dialogSounds['chipbag.mp3'] = loadSound('Audios/chipbag.mp3');
      dialogSounds['chip_crunch.mp3'] = loadSound('Audios/chip_crunch.mp3');
      dialogSounds['angry.mp3'] = loadSound('Audios/angry.mp3');
    
      characters['sister_normal'] = new Character('sister_normal', 'Sister', 'Images/sister_normal.png');
      characters['sister_speaking'] = new Character('sister_speaking', 'Sister', 'Images/sister_speaking.png');
      characters['sister_turned'] = new Character('sister_turned', 'Sister', 'Images/sister_turned.png');
      characters['sister_upset'] = new Character('sister_upset', 'Sister', 'Images/sister_upset.png');
      characters['sister_angry'] = new Character('sister_angry', 'Sister', 'Images/sister_angry.png');
      characters['slime'] = new Character('slime', 'me', 'Images/slime.png');
      characters['slime_speaking'] = new Character('slime_speaking', 'me', 'Images/slime_speaking.png');
      for (let key in characters) {
        characters[key].preload();
      }
    }
    
    async function setUpSerialWithErrorHandling() { // handling errors with serial
      try {
        await setUpSerial();
      } catch (error) {
        console.log("Serial connection failed: " + error.message);
      }
    }
    
    function setup() {
      createCanvas(627, 447);
      noCursor(); 
    
      // playing background music
      bgMusic.setVolume(0.5); 
      bgMusic.loop(); 
    
      textFont(instrumentSerifFont);
    
      connectButton = createButton('connect serial');
      connectButton.position(25, 25);
      connectButton.style('font-size', '18px');
      connectButton.style('font-weight', 'bold');
      connectButton.style('color', '#000');
      connectButton.style('background-color', '#fff');
      connectButton.style('border', '2px solid #000');
      connectButton.style('border-radius', '8px');
      connectButton.style('padding', '8px 16px');
      connectButton.style('cursor', 'pointer');
    
        connectButton.mouseOver(() => {
          connectButton.style('background-color', '#000');
          connectButton.style('color', '#fff');
        });
        connectButton.mouseOut(() => {
          connectButton.style('background-color', '#fff');
          connectButton.style('color', '#000');
        });
    
      connectButton.mousePressed(setUpSerialWithErrorHandling); // using setUpSerial from p5.web-serial.js
    
    
      positionStartScreenButtons();
    
      positionBackButton();
    
      rightHand.x = width - 10;
      rightHand.y = height/2 - rightHand.height/2;
    
      chipCounter.x = width - chipCounter.width - 20;
      chipCounter.y = 20;
    
      const sampleDialog = [
        { speaker: 'sister_speaking', line: "Hey! Have you seen my chips?" },
        { speaker: 'slime', line: "Nope, I haven't seen them." , sound: "chipbag.mp3"},
        { speaker: 'sister_upset', line: "Hmmm... are you sure?" },
        { speaker: 'slime_speaking', line: "Yep...! Haven't seen them! I'll let you know if I see them!" },
        { speaker: 'sister_speaking', line: "Grrr! If I catch you with them..I'm going to kill you!" }
      ];
      currentDialog = new Dialog(sampleDialog); // passing the new structure to the Dialog constructor
    }
    
    function readSerial(data) {
      let val = trim(data);
      if (!val) return;
    
      let parts = val.split(" ");
    
      // parsing DIRX for both game movement and menu navigation
      let dirPart = parts.find(p => p.startsWith("DIRX:"));
      if (dirPart) {
        let dir = int(dirPart.split(":")[1]);
    
        // setting rightX for in-game hand movement
        if (dir === 0) {
          rightX = width * 0.25;  // move left
          
          // for menu navigation, select the left button (start game)
          if (gameState === 'start') {
            currentSelection = 0; // selecting start game button
          } 
          // for how to play screen, select the back button when moving left
          else if (gameState === 'howToPlay') {
            backButtonSelected = true;
          }
        } else if (dir === 1) {
          rightX = width * 0.75;  // move right
          
          // for menu navigation, select the right button (how to play)
          if (gameState === 'start') {
            currentSelection = 1; // selecting how to play button
          }
          // for how to play screen, deselect the back button when moving right
          else if (gameState === 'howToPlay') {
            backButtonSelected = false;
          }
        } else if (dir === -1) {
          rightX = width / 2;     // center (neutral)
        }
    
        console.log("Joystick Direction:", dir);
      }
    
      // parsing SEL for button selection
      let selPart = parts.find(p => p.startsWith("SEL:"));
      if (selPart) {
        let sel = int(selPart.split(":")[1]);
        prevSelPressed = selPressed;
        selPressed = (sel === 1);
        
        // if SEL button was just pressed (rising edge detection)
        if (selPressed && !prevSelPressed) {
          // handling button selection based on current screen
          if (gameState === 'start') {
            if (currentSelection === 0) {
              startGame();
            } else if (currentSelection === 1) {
              showHowToPlay();
            }
          } else if (gameState === 'howToPlay') {
            // only going back if the back button is selected
            if (backButtonSelected) {
              goBackToStart();
            }
          } else if (gameState === 'game' && currentDialog && !currentDialog.isComplete) {
            currentDialog.advanceDialog();
          }
        }
      }
    
      // parsing PULSE
      let pulsePart = parts.find(p => p.startsWith("PULSE:"));
      if (pulsePart) {
        pulseValue = int(pulsePart.split(":")[1]);
        console.log("Pulse Reading:", pulseValue);
      }
    }
    
    
    // helper that mirrors mouseClicked() logic but uses joystick coords
    function joystickClick(x,y){
      if(gameState==='start'){
        // is it on the “start” button?
        if(x > startButton.x && x < startButton.x+startButton.width &&
           y > startButton.y && y < startButton.y+startButton.height){
          startGame();
        }
        // how-to-play button?
        else if(x > howToPlayButton.x && x < howToPlayButton.x+howToPlayButton.width &&
                y > howToPlayButton.y && y < howToPlayButton.y+howToPlayButton.height){
          showHowToPlay();
        }
      }
    }
    
    
    function draw() {
      background(255); 
      
      switch (gameState) {
        case 'start':
          drawStartScreen();
          updateButtonHover(startButton);
          updateButtonHover(howToPlayButton);
          break;
        case 'game':
          drawGameScreen();
          updateButtonHover(backButton);
          break;
        case 'howToPlay':
          drawHowToPlayScreen();
          updateButtonHover(backButton);
          break;
      }
    
      if (!gameOver) {
        noCursor();
      }
    }
    
    function drawStartScreen() {
      image(startImg, 0, 0, width, height);
      
      // updating button hover state based on joystick selection instead of mouse
      if (gameState === 'start') {
        // hilighting the currently selected button based on joystick input
        startButton.isHovered = (currentSelection === 0);
        howToPlayButton.isHovered = (currentSelection === 1);
      }
      
      drawButton(startButton);
      drawButton(howToPlayButton);
      
      // hiding back button on start screen
      backButton.x = -backButton.width; // positioning off-screen
    }
    
    function drawGameScreen() {
      image(bgImg, 0, 0, width, height);
      
      // drawing dialog if it exists and isn’t complete
      if (currentDialog && !currentDialog.isComplete) {
        currentDialog.display();
        return;
      }
      
      // if dialog is complete but gameover, show ending
      if (gameOver) {
        drawGameOverScreen();
        return;
      }
    
      // --- sister character ---
      let sisterWidth  = 180;
      let sisterHeight = 200;
      let sisterX = width/2 - sisterWidth/2;
      let sisterY = height/2 - sisterHeight/2 - 30;
      
      let sisterImg = characters['sister_turned'].img;
      if (rightHand.sisterAngry)        sisterImg = characters['sister_angry'].img;
      else if (rightHand.sisterTurned)  sisterImg = characters['sister_upset'].img;
      
      // possibly flip her based on time+random+heartbeat
      if (!rightHand.lastTurnCheck 
          || millis() - rightHand.lastTurnCheck > random(1500, 2500)) {
            
        rightHand.lastTurnCheck = millis();
        let heartbeatTrigger = (rightHand.lastPulseValue 
          && Math.abs(pulseValue - rightHand.lastPulseValue) > 70);
        rightHand.lastPulseValue = pulseValue;
        
        if (random() < 0.25 || heartbeatTrigger) {
          rightHand.sisterTurned = !rightHand.sisterTurned;
          if (rightHand.sisterTurned) {
            rightHand.sisterTurnStart = millis();
          }
          rightHand.sisterAngry   = false;
          rightHand.heartDeducted = false;
        }
      }
      
      image(sisterImg, sisterX, sisterY, sisterWidth, sisterHeight);
    
      // enforcing max “turned” time
      if (rightHand.sisterTurned 
          && millis() - rightHand.sisterTurnStart > rightHand.maxTurnDuration) {
        rightHand.sisterTurned   = false;
        rightHand.sisterAngry    = false;
        rightHand.heartDeducted  = false;
      }
      
      // --- Collision ---
      leftHand.x = width/2 - leftHand.width - 50;
      leftHand.y = height/2 + leftHand.height/2;
      
      // compute & smooth right hand
      let targetX = constrain(rightX, width*0.1, width*0.9);
      rightHand.x += (targetX - rightHand.x)*0.2;
      rightHand.y  = height/2 + rightHand.height/2;
      
      let handsOverlap = checkHandCollision(leftHand, rightHand);
      let ledState = "";
      if (handsOverlap && rightHand.sisterTurned && !rightHand.heartDeducted) {
        // CAUGHT → angry → RED
        hearts.count--;
        rightHand.heartDeducted = true;
        rightHand.sisterAngry   = true;
        ledState = "RED";
        dialogSounds['angry.mp3'].play();
    
        if (hearts.count <= 0) {
          gameOver = true;
          gameEndingType = 'bad';
        }
      }
    
      else if (handsOverlap && rightHand.sisterTurned && rightHand.heartDeducted) {
        ledState = "RED";
      }
      else if (!rightHand.sisterTurned) { // sister is not turned
        // SAFE while she’s turned → GREEN
        ledState = "GREEN";
      }
      else if (rightHand.sisterTurned && !handsOverlap) { // sister is turned but hands are not overlapping
        // NORMAL (not turned) → YELLOW
        ledState = "YELLOW";
      }
    
      if (ledState && ledState !== rightHand.lastLedState) {
        writeSerial(ledState + "\n");
        rightHand.lastLedState = ledState;
      }
      
      // --- Eating Animation & Chips ---
      if (handsOverlap && !rightHand.animationStarted) {
        rightHand.animationStarted = true;
        rightHand.animationTimer   = millis();
        if (rightHand.currentImg === 3 && chipCounter.count > 0) {
          chipCounter.count--;
          if (chipCounter.count <= 0) {
            gameOver = true;
            gameEndingType = 'good';
          }
        }
        rightHand.currentImg = 1;
        dialogSounds['chip_crunch.mp3'].play();
      }
      else if (handsOverlap && rightHand.animationStarted) {
        let t = millis() - rightHand.animationTimer;
        if (rightHand.currentImg === 1 && t > 300) rightHand.currentImg = 2;
        if (rightHand.currentImg === 2 && t > 500) rightHand.currentImg = 3;
        if (rightHand.currentImg === 3 && t > 800) {
          rightHand.animationTimer = millis();
          rightHand.currentImg = 1;
          if (chipCounter.count > 0) {
            chipCounter.count--;
            if (chipCounter.count <= 0) {
              gameOver = true;
              gameEndingType = 'good';
            }
          }
          dialogSounds['chip_crunch.mp3'].play();
        }
      }
      else if (!handsOverlap && rightHand.animationStarted) {
        rightHand.animationStarted = false;
        dialogSounds['chip_crunch.mp3'].stop();
      }
      
      // drawing hands
      let handImg = rightHand.currentImg===1 ? rightHand.img
                  : rightHand.currentImg===2 ? rightHand.img2
                  : rightHand.img3;
      image(handImg, rightHand.x, rightHand.y, rightHand.width, rightHand.height);
      image(leftHand.img, leftHand.x, leftHand.y, leftHand.width, leftHand.height);
    
      image(chipCounter.img, chipCounter.x, chipCounter.y, chipCounter.width, chipCounter.height);
      push();
        fill(255); stroke(0); strokeWeight(2);
        textSize(24); textAlign(CENTER, CENTER);
        text(chipCounter.count, chipCounter.x+chipCounter.width/2, chipCounter.y+chipCounter.height/2);
      pop();
      for (let i=0; i<hearts.count; i++) {
        image(hearts.img, hearts.x+(hearts.width+hearts.spacing)*i, hearts.y, hearts.width, hearts.height);
      }
    }
    
    // function to check collision between hand objects
    function checkHandCollision(hand1, hand2) {
      // rectangular collision detection
      return (
        hand1.x + 10 < hand2.x + hand2.width &&
        hand1.x + hand1.width > hand2.x &&
        hand1.y < hand2.y + hand2.height &&
        hand1.y + hand1.height > hand2.y
      );
    }
    
    function drawHowToPlayScreen() {
        background(50); 
        let imgWidth = width * 0.9; // Use 90% of screen width
        let imgHeight = height * 0.7; // Use 70% of screen height
        image(howToPlayImg, width/2 - imgWidth/2, height/2 - imgHeight/2 + 30, imgWidth, imgHeight);
        
        fill(255);
    
        textSize(35);
        textAlign(CENTER, CENTER);
        text("How to Play", width/2, height/2 - imgHeight/2 - 15);
    
        backButton.isHovered = backButtonSelected;
        
        drawButton(backButton);
        
        startButton.x = -startButton.width; // Position off-screen
        howToPlayButton.x = -howToPlayButton.width; // Position off-screen
    }
    
    
    function startGame() {
      gameState = 'game';
      console.log("Game Started!");
    
      if (bgMusic.isPlaying()) {
        bgMusic.stop();
      }
    
      if (currentDialog) {
          currentDialog.currentLineIndex = 0;
          currentDialog.isComplete = false;
      }
    
      positionBackButton();
    }
    
    function showHowToPlay() {
      gameState = 'howToPlay';
      console.log("Showing How to Play");
       positionBackButton();
    }
    
    function goBackToStart() {
        gameState = 'start';
        console.log("Going back to Start Screen");
        positionStartScreenButtons();
    }
    
    
    // helper function to position buttons on the start screen
    function positionStartScreenButtons() {
        textSize(20); 
        startButton.width = textWidth(startButton.text) + 40; 
        howToPlayButton.width = textWidth(howToPlayButton.text) + 40; 
        startButton.height = 40; 
        howToPlayButton.height = 40; 
    
    
        let buttonY = height * 0.65; // Moved buttons higher (was 0.75)
    
        let buttonSpacing = 20;
        let totalButtonWidth = startButton.width + howToPlayButton.width + buttonSpacing;
        let leftShift = 15; 
        startButton.x = width / 2 - totalButtonWidth / 2 - leftShift;
        howToPlayButton.x = startButton.x + startButton.width + buttonSpacing;
    
        startButton.y = buttonY;
        howToPlayButton.y = buttonY;
    }
    
    function positionBackButton() {
        textSize(20); 
        backButton.width = textWidth(backButton.text) + 40;
        backButton.height = 40; 
        backButton.x = 20; 
        backButton.y = 20; 
    }
    
    
    // function to draw a button
    function drawButton(button) {
         if (button.x + button.width > 0 && button.x < width) {
             push(); // Save current drawing settings
    
            if (button.isHovered) {
                fill(255, 0, 0); 
            } else {
                fill(0); 
            }
    
            rect(button.x, button.y, button.width, button.height, 10); // 10 is corner radius
    
            fill(255);
            textSize(22);
            textAlign(CENTER, CENTER);
    
            text(button.text, button.x + button.width / 2, button.y + button.height / 2 - 5);
    
            pop(); // restoring drawing settings
         }
    }
    
    // helper function to update button hover state
    function updateButtonHover(button) {
        // inly update hover if the button is likely visible on screen
        if (button.x + button.width > 0 && button.x < width) {
            if (mouseX > button.x && mouseX < button.x + button.width &&
                mouseY > button.y && mouseY < button.y + button.height) {
                button.isHovered = true;
                cursor(HAND); // Change cursor on hover
            } else {
                button.isHovered = false;
                // only set cursor back to ARROW if NO button is hovered
                 let anyButtonHovered = false;
                 if (gameState === 'start') {
                     if (startButton.isHovered || howToPlayButton.isHovered) anyButtonHovered = true;
                 } else if (gameState === 'howToPlay' || gameState === 'game') {
                     if (backButton.isHovered) anyButtonHovered = true;
                 }
                 if (!anyButtonHovered) {
                     cursor(ARROW);
                 }
            }
        }
    }
    
    // helper function to update button hover state with joystick
    function updateButtonHoverWithJoystick(button, joyX, joyY) {
      if (button.x + button.width > 0 && button.x < width) {
        if (joyX > button.x && joyX < button.x + button.width &&
            joyY > button.y && joyY < button.y + button.height) {
          button.isHovered = true;
        } else {
          button.isHovered = false;
        }
      }
    }
    
    function mouseClicked() {
      switch (gameState) {
        case 'start':
          // Check for button clicks on the start screen
          if (mouseX > startButton.x && mouseX < startButton.x + startButton.width &&
              mouseY > startButton.y && mouseY < startButton.y + startButton.height) {
            startGame();
          } else if (mouseX > howToPlayButton.x && mouseX < howToPlayButton.x + howToPlayButton.width &&
                     mouseY > howToPlayButton.y && mouseY < howToPlayButton.y + howToPlayButton.height) {
            showHowToPlay();
          }
          break;
        case 'game':
          // handling dialog clicks in the game screen
          if (currentDialog && !currentDialog.isComplete) {
            if (mouseX > currentDialog.boxX && mouseX < currentDialog.boxX + currentDialog.boxWidth &&
                mouseY > currentDialog.boxY && mouseY < currentDialog.boxY + currentDialog.boxHeight) {
              currentDialog.advanceDialog();
            } else if (mouseX > backButton.x && mouseX < backButton.x + backButton.width && 
                       mouseY > backButton.y && mouseY < backButton.y + backButton.height) {
                goBackToStart(); // Go back if back button is clicked
            }
          } else { 
               if (mouseX > backButton.x && mouseX < backButton.x + backButton.width &&
                       mouseY > backButton.y && mouseY < backButton.y + backButton.height) {
                goBackToStart(); // Go back if back button is clicked
               }
          }
          break;
        case 'howToPlay':
            if (mouseX > backButton.x && mouseX < backButton.x + backButton.width &&
                mouseY > backButton.y && mouseY < backButton.y + backButton.height) {
                goBackToStart(); // Go back to start screen
            }
            break;
      }
    }
    
    
    class Character {
      constructor(key, displayName, imagePath) {
        this.key = key;
        this.displayName = displayName;
        this.imagePath = imagePath;
        this.img = null;
      }
      preload() {
        this.img = loadImage(this.imagePath);
      }
    }
    
    class Dialog {
      constructor(dialogLines) {
        // dialogLines: array of strings like 'sister_normal: "Hey!"' or just dialog text
        this.lines = dialogLines.map(lineObj => {
          if (typeof lineObj === 'string') {
            let match = lineObj.match(/^(\w+):\s*"([\s\S]*)"$/);
            if (match) {
              return { speaker: match[1], line: match[2] };
            } else {
              return { speaker: 'sister_normal', line: lineObj };
            }
          } else if (typeof lineObj === 'object') {
            return {
              speaker: lineObj.speaker || 'sister_normal',
              line: lineObj.line || '',
              sound: lineObj.sound || null 
            };
          }
        });
        this.currentLineIndex = 0;
        this.isComplete = false;
        this.boxWidth = width * 0.8;
        this.boxHeight = 100;
        this.boxX = (width - this.boxWidth) / 2;
        this.boxY = height - this.boxHeight - 20;
        this.textSize = 18;
        this.textMargin = 15;
        this.lineHeight = this.textSize * 1.2;
      }
    
      display() {
        if (this.isComplete) {
          return;
        }
        fill(0, 0, 0, 200);
        rect(this.boxX, this.boxY, this.boxWidth, this.boxHeight, 10);
    
        let currentLineObj = this.lines[this.currentLineIndex];
        let charKey = currentLineObj.speaker || 'sister_normal';
        
        let displayedCharKey = charKey; // Either 'me' or one of the sister variants
        
        let charObj = characters[displayedCharKey] || characters['sister_normal'];
        
        let charImgSize = (displayedCharKey === 'me') ? 150 : 220; 
        
        if (charObj && charObj.img) {
          let centerX = width / 2 - charImgSize / 2;
          
          let centerY = (displayedCharKey === 'me') 
            ? height / 2 - charImgSize / 2 - 20  
            : height / 2 - charImgSize / 2 - 45; 
          
          image(charObj.img, centerX, centerY, charImgSize, charImgSize);
          
          fill(255);
          textSize(18);
          textAlign(CENTER, TOP);
          text(charObj.displayName, width / 2, centerY + charImgSize + 5);
        }
    
        fill(255);
        textSize(this.textSize);
        textAlign(LEFT, TOP);
        let textY = this.boxY + this.textMargin;
        text(currentLineObj.line, this.boxX + this.textMargin, textY, this.boxWidth - this.textMargin * 2);
    
        if (this.currentLineIndex < this.lines.length - 1) {
          fill(255, 150);
          textSize(14);
          textAlign(RIGHT, BOTTOM);
          text("Click to continue...", this.boxX + this.boxWidth - this.textMargin, this.boxY + this.boxHeight - 5);
        }
      }
    
      advanceDialog() {
        if (this.isComplete) {
          return;
        }
        
        this.currentLineIndex++;
        
        if (this.currentLineIndex >= this.lines.length) {
          this.isComplete = true;
          console.log("Dialog complete!");
          return;
        }
        
        let currentLineObj = this.lines[this.currentLineIndex];
        if (currentLineObj.sound && dialogSounds[currentLineObj.sound]) {
          dialogSounds[currentLineObj.sound].play();
        }
      }
    }
    
    function drawGameOverScreen() {
      push();
      fill(0, 0, 0, 180); // dark overlay with 70% opacity
      rect(0, 0, width, height);
      
      let endingImg;
      if (gameEndingType === 'good') {
        endingImg = happyEndingImg;
      } else {
        endingImg = badEndingImg;
      }
      
      let imgWidth = 300;
      let imgHeight = 200;
      image(endingImg, width/2 - imgWidth/2, height/2 - 150, imgWidth, imgHeight);
      
      fill(255);
      textSize(40);
      textAlign(CENTER, CENTER);
      if (gameEndingType === 'good') {
        text("YOU WON!", width/2, height/2 - 30);
      }
      else {
        text("YOU LOST!", width/2, height/2 - 30);
      }
      textSize(24);
      text("Press R to restart", width/2, height/2 + 80);
      pop();
    }
    
    function keyPressed() {
      // Check if 'R' key is pressed to restart the game when game over
      if (key === 'r' || key === 'R') {
        if (gameState === 'game' && gameOver) {
          resetGame();
        }
      }
    }
    
    function resetGame() {
      hearts.count = 5;
      chipCounter.count = 10;
      gameOver = false;
      
      handsOverlap = false;
      rightHand.sisterTurned = false;
      rightHand.animationStarted = false;
      rightHand.currentImg = 1;
      rightHand.heartDeducted = false;
    }


5. Communication between Arduino and p5.js:

The Arduino and the p5.js sketch exchange data over a 9600 baud serial link, as we did in the sample homework 2 weeks back. On each loop, the Arduino reads the joystick X‐axis (A0), the pulse sensor (A1) and the select button (pin 8), then emits a line of the form “DIRX:<–1|0|1> PULSE:<0–1023> SEL:<0|1>
” (these were the specific format that I chose as it helped me debug as well). The p5.js sketch listens for these lines, parses out the numeric values for direction, heart rate, and button state, and uses them to drive menu selection, character motion, and game logic. When the sketch determines that the physical LED indicators should change color (based on the game state), it sends right back a single‐word command: “RED\n”, “YELLOW\n” or “GREEN\n” via writeSerial(), and the Arduino responds by calling applyLeds() to set the appropriate digital outputs. I’m glad that I was able to implement a bidirectional serial communication where not only the Arduino sends information to the p5 sketch but also vice versa.

Reflection

I was really proud of how seamlessly the physical box integrated into the game environment; it didn’t feel tacked on, but like a natural extension of the game world I created .  I’m also proud that I soldered the LEDs to the wires because I was really afraid of soldering in the beginning. However, after a couple of tries on a sample, I was able to solder all 12 legs . In the future, I’d look to add a custom cursor that follows the joystick movements and actually wire up the Y-axis input so users can move that cursor freely around the screen. During playtesting, at least two people instinctively pushed the stick up and down—and, of course, nothing happened (since I hadn’t implemented Y at all)—which led to a couple of awkward pauses. Enabling full two-axis control would make the interaction more intuitive and keep the game flow smooth.

Images from Showcase:

THANK YOU PROFESSOR & EVERYONE FOR AN AMAZING CLASS FOR MY LAST SEMESTER!

Week 13 — Final Project Progress

User Testing

So, I tried letting people play the game. I realized that most of them didn’t really look at the instructions. At first, I let them figure it out on their own, and after the first round, they usually managed to understand how to play, which was nice. However, starting with the third user, I started making more of an effort to explain things minimally, answer questions when they came up, or suggest they check the “How to Play” manual.

People really liked the design I was going for, so I kept that aesthetic and focused on making it pop and align with the theme I envisioned. One thing I noticed is that the wires could be better hidden with blue tape (to match the box), so I’ll likely add that along with other cosmetic improvements. I also want to tweak the win conditions, like changing how hearts are deducted or how chips are counted, because I felt it was a little too easy to win. I’d also like to add an LED that reflects the state of the game for clearer feedback.

One issue I noticed was that players didn’t fully understand the joystick controls, especially since there’s no visible cursor. I had to explain to at least two people that the joystick only moves left and right, not up and down. To help with this, I plan to make the “How to Play” manual more detailed so users can understand the controls better from the start.

Video 

(I know the video is after I added the LEDs..imagine them without because those were actually last minute additions + also for some reason I can’t attach the video as media so I’ll add a google drive link :>)

https://drive.google.com/file/d/1lNbEfx_gUZIfRPWL0JcJXUbqzv9c68sE/view?usp=sharing


Week 14: Final Project Documentation

Source

The full source code, and accompanying documentation, is available at on Github.

Concept

This project is an interactive media piece that combines audio, visuals, and interactive elements to share the personal stories of students who faced repercussions for their politics. Using both digital and physical interfaces, users can explore these narratives at their own pace and in thier own manner.

My motivation behind choosing this cause was to highlight the similarity and elicit the empathy of the audience, as fellow international students.

How It Works

The implementation consists of three main components working together:

1. Client Interface: A browser-based application built with p5.js that handles the visualization, audio playback, and user interaction.
2. Server Backend: A FastAPI backend that serves content and manages WebSocket connections for real-time control.
3. Physical Controls: An Arduino-based controller that provides tangible ways to interact with the digital content.

When a user accesses the application, they’re presented with a multimedia canvas that displays images related to a student’s story while playing their audio narrative. As the audio plays, transcribed text appears dynamically on screen, visualizing the spoken words. Users can control the experience either through on-screen interactions or using the physical Arduino controller.

Interaction Design

The interaction design prioritizes intuitive exploration and meaningful engagement:

Starting the Experience: Users simply click anywhere on the screen to begin
Content Navigation: Pressing buttons or clicking on screen transitions to the next story
Playback Controls:
– A physical switch pauses/resumes the audio
– Potentiometers adjust volume and playback speed
– On-screen interactions mirror these controls for users without the physical interface

The design deliberately minimizes explicit instructions, encouraging exploration and discovery. As found during user testing, providing just a small amount of context greatly improved the experience while still allowing for personal discovery. Users who spent more time interacting with the piece often discovered deeper layers of meaning as they engaged with multiple stories.

Arduino Implementation

The Arduino controller serves as a physical interface to the digital content, creating a more tangible connection to the stories. The circuit includes:

– A toggle switch for pausing/resuming content
– Two push buttons for transitioning between stories
– Three potentiometers for adjusting various playback parameters

The Arduino code continuously monitors these inputs and sends structured data to the server whenever a change is detected. The Arduino communicates with the server over a serial connection, sending a compact binary structure containing the state of all controls.

Future Improvements

Based on user testing and reflection, several areas could be enhanced in future iterations:

1. Introductory Context: Adding a brief introduction screen would help orient users.
2. More Intuitive Transitions: Some users were initially uncertain about how to navigate between stories.
3. Additional Narratives: Expanding the collection of stories would create a more comprehensive experience.

Final Project Documentation

Concept

I created this project to introduce the viewers to 4 regions in the Northern Caucasus: Adyghea, Dagestan, Ingushetia, Checnya.

As a physical object, i pivoted and decided to build with four distinct doors, each representing one of the regions. Each door is embedded with a color-coded button, inviting the user to press and explore a region.

  • Red Button – Ingusheita

  • Green Button – Dagestan

  • Blue Button – Chechnya

  • Yellow Button – Adyghea

This interaction was designed to make the user feel like a traveler stepping into a new cultural experience. Upon pressing a door button, users are “teleported” to a selected region. Each region features:

  • Must-See Spots: Highlighted landscapes, canyons and mountains

  • Traditions: Rituals, dances, or cultural practices—some of which are interactive

  • Taste of Region: Food visuals

Code

P5: Link to no arduino version

Arduino code:

const int buttonPin1 = 4;  // Dagestan button
const int buttonPin2 = 2;  // Adyghea button
const int buttonPin3 = 5;  // Checnya button
const int buttonPin4 = 3;  // Ingushetia button

int buttonState1 = 0;
int buttonState2 = 0;
int buttonState3 = 0;
int buttonState4 = 0;

int lastButtonState1 = HIGH;
int lastButtonState2 = HIGH;
int lastButtonState3 = HIGH;
int lastButtonState4 = HIGH;

void setup() {
  Serial.begin(9600);
  pinMode(buttonPin1, INPUT_PULLUP);
  pinMode(buttonPin2, INPUT_PULLUP);
  pinMode(buttonPin3, INPUT_PULLUP);
  pinMode(buttonPin4, INPUT_PULLUP);
}

void loop() {
  // Read button states
  buttonState1 = digitalRead(buttonPin1);
  buttonState2 = digitalRead(buttonPin2);
  buttonState3 = digitalRead(buttonPin3);
  buttonState4 = digitalRead(buttonPin4);

  // Check for button presses and only send once on press
  if (buttonState1 == LOW && lastButtonState1 == HIGH) {
    Serial.println("DAGESTAN");
  }    
  
  if (buttonState2 == LOW && lastButtonState2 == HIGH) {
    Serial.println("ADYGHEA");
  }
  
  if (buttonState3 == LOW && lastButtonState3 == HIGH) {
    Serial.println("CHECNYA");
  }
  
  if (buttonState4 == LOW && lastButtonState4 == HIGH) {
    Serial.println("INGUSHETIA");
  }
  
  // Save current button states for next comparison
  lastButtonState1 = buttonState1;
  lastButtonState2 = buttonState2;
  lastButtonState3 = buttonState3;
  lastButtonState4 = buttonState4;
  
  delay(50); // Debounce delay
}

Reflections:

This project cost me a lot of all nighters, confusion and frustration. At the same time, it taught me so much both in technical and non-technical aspects and became one of the most rewarding learning experiences I’ve had so far.

Originally, my idea was to create a compass-based interaction, but I struggled to get the p5.js and Arduino integration to work properly. After a whole night night of troubleshooting and brainstorming, I pivoted the concept and fully committed to building a physical house. To bring that idea to life, I had to learn Adobe Illustrator from scratch to design the house structure, prepare it for laser cutting, and assemble it manually. I also learned how to solder and wire hardware components, connecting each button to the Arduino and ensuring smooth communication with the p5.js interface.

Even though my project wasn’t a game or something instantly engaging for everyone, I was quite surprised by the positive reactions at the showcase. Many visitors had never heard of the Caucasus before, yet they showed genuine curiosity to learn about its culture through an interactive format. Several people commented on the effort it must have taken to build the physical installation and to research and create the digital content for each region.

Overall, this project and the entire class had its highs and lows, but I truly loved the creative process—from just having an idea to actual execution of it. Even when it seemed impossible at times, the process pulled me into a state of creative flow and i enjoyed it.