
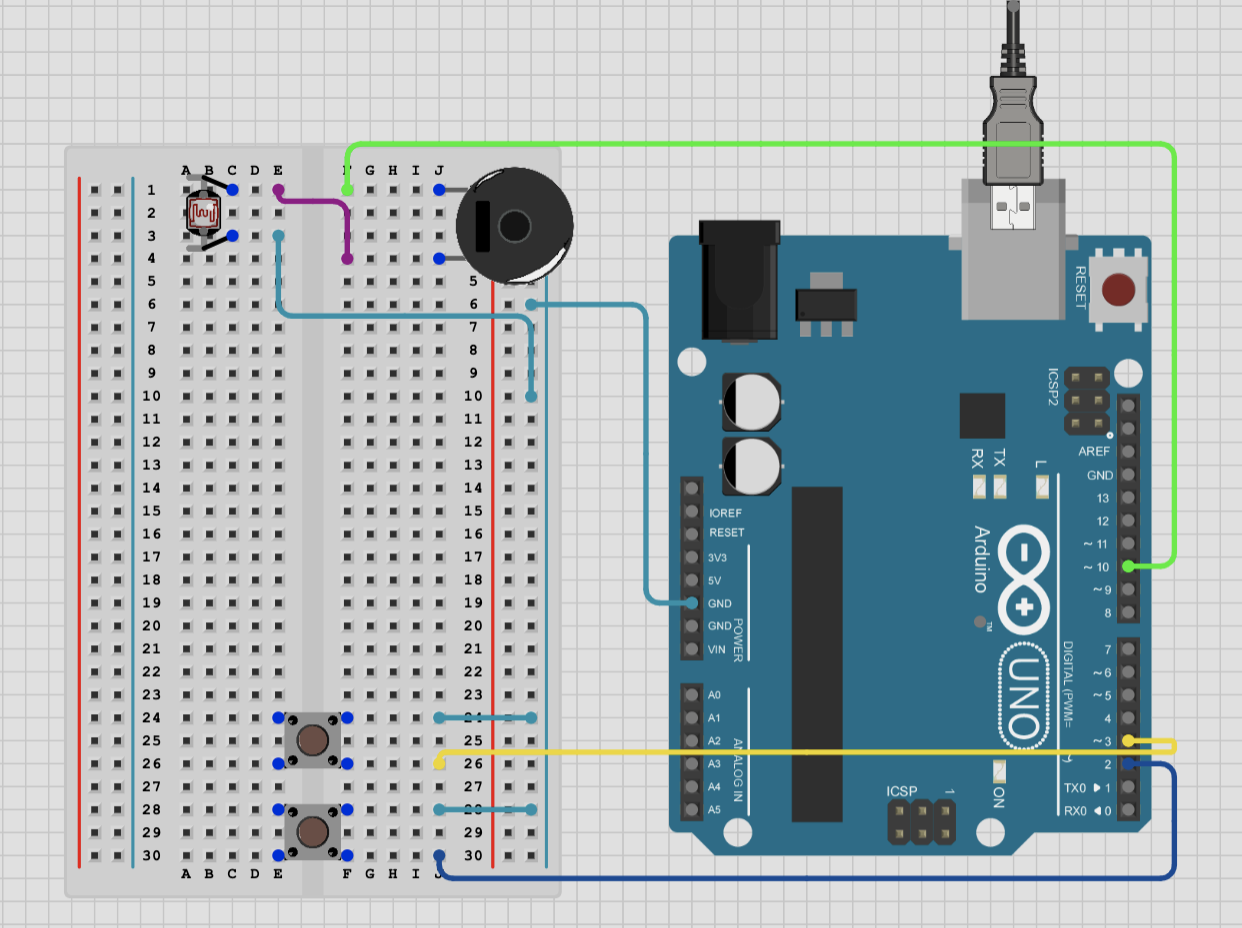
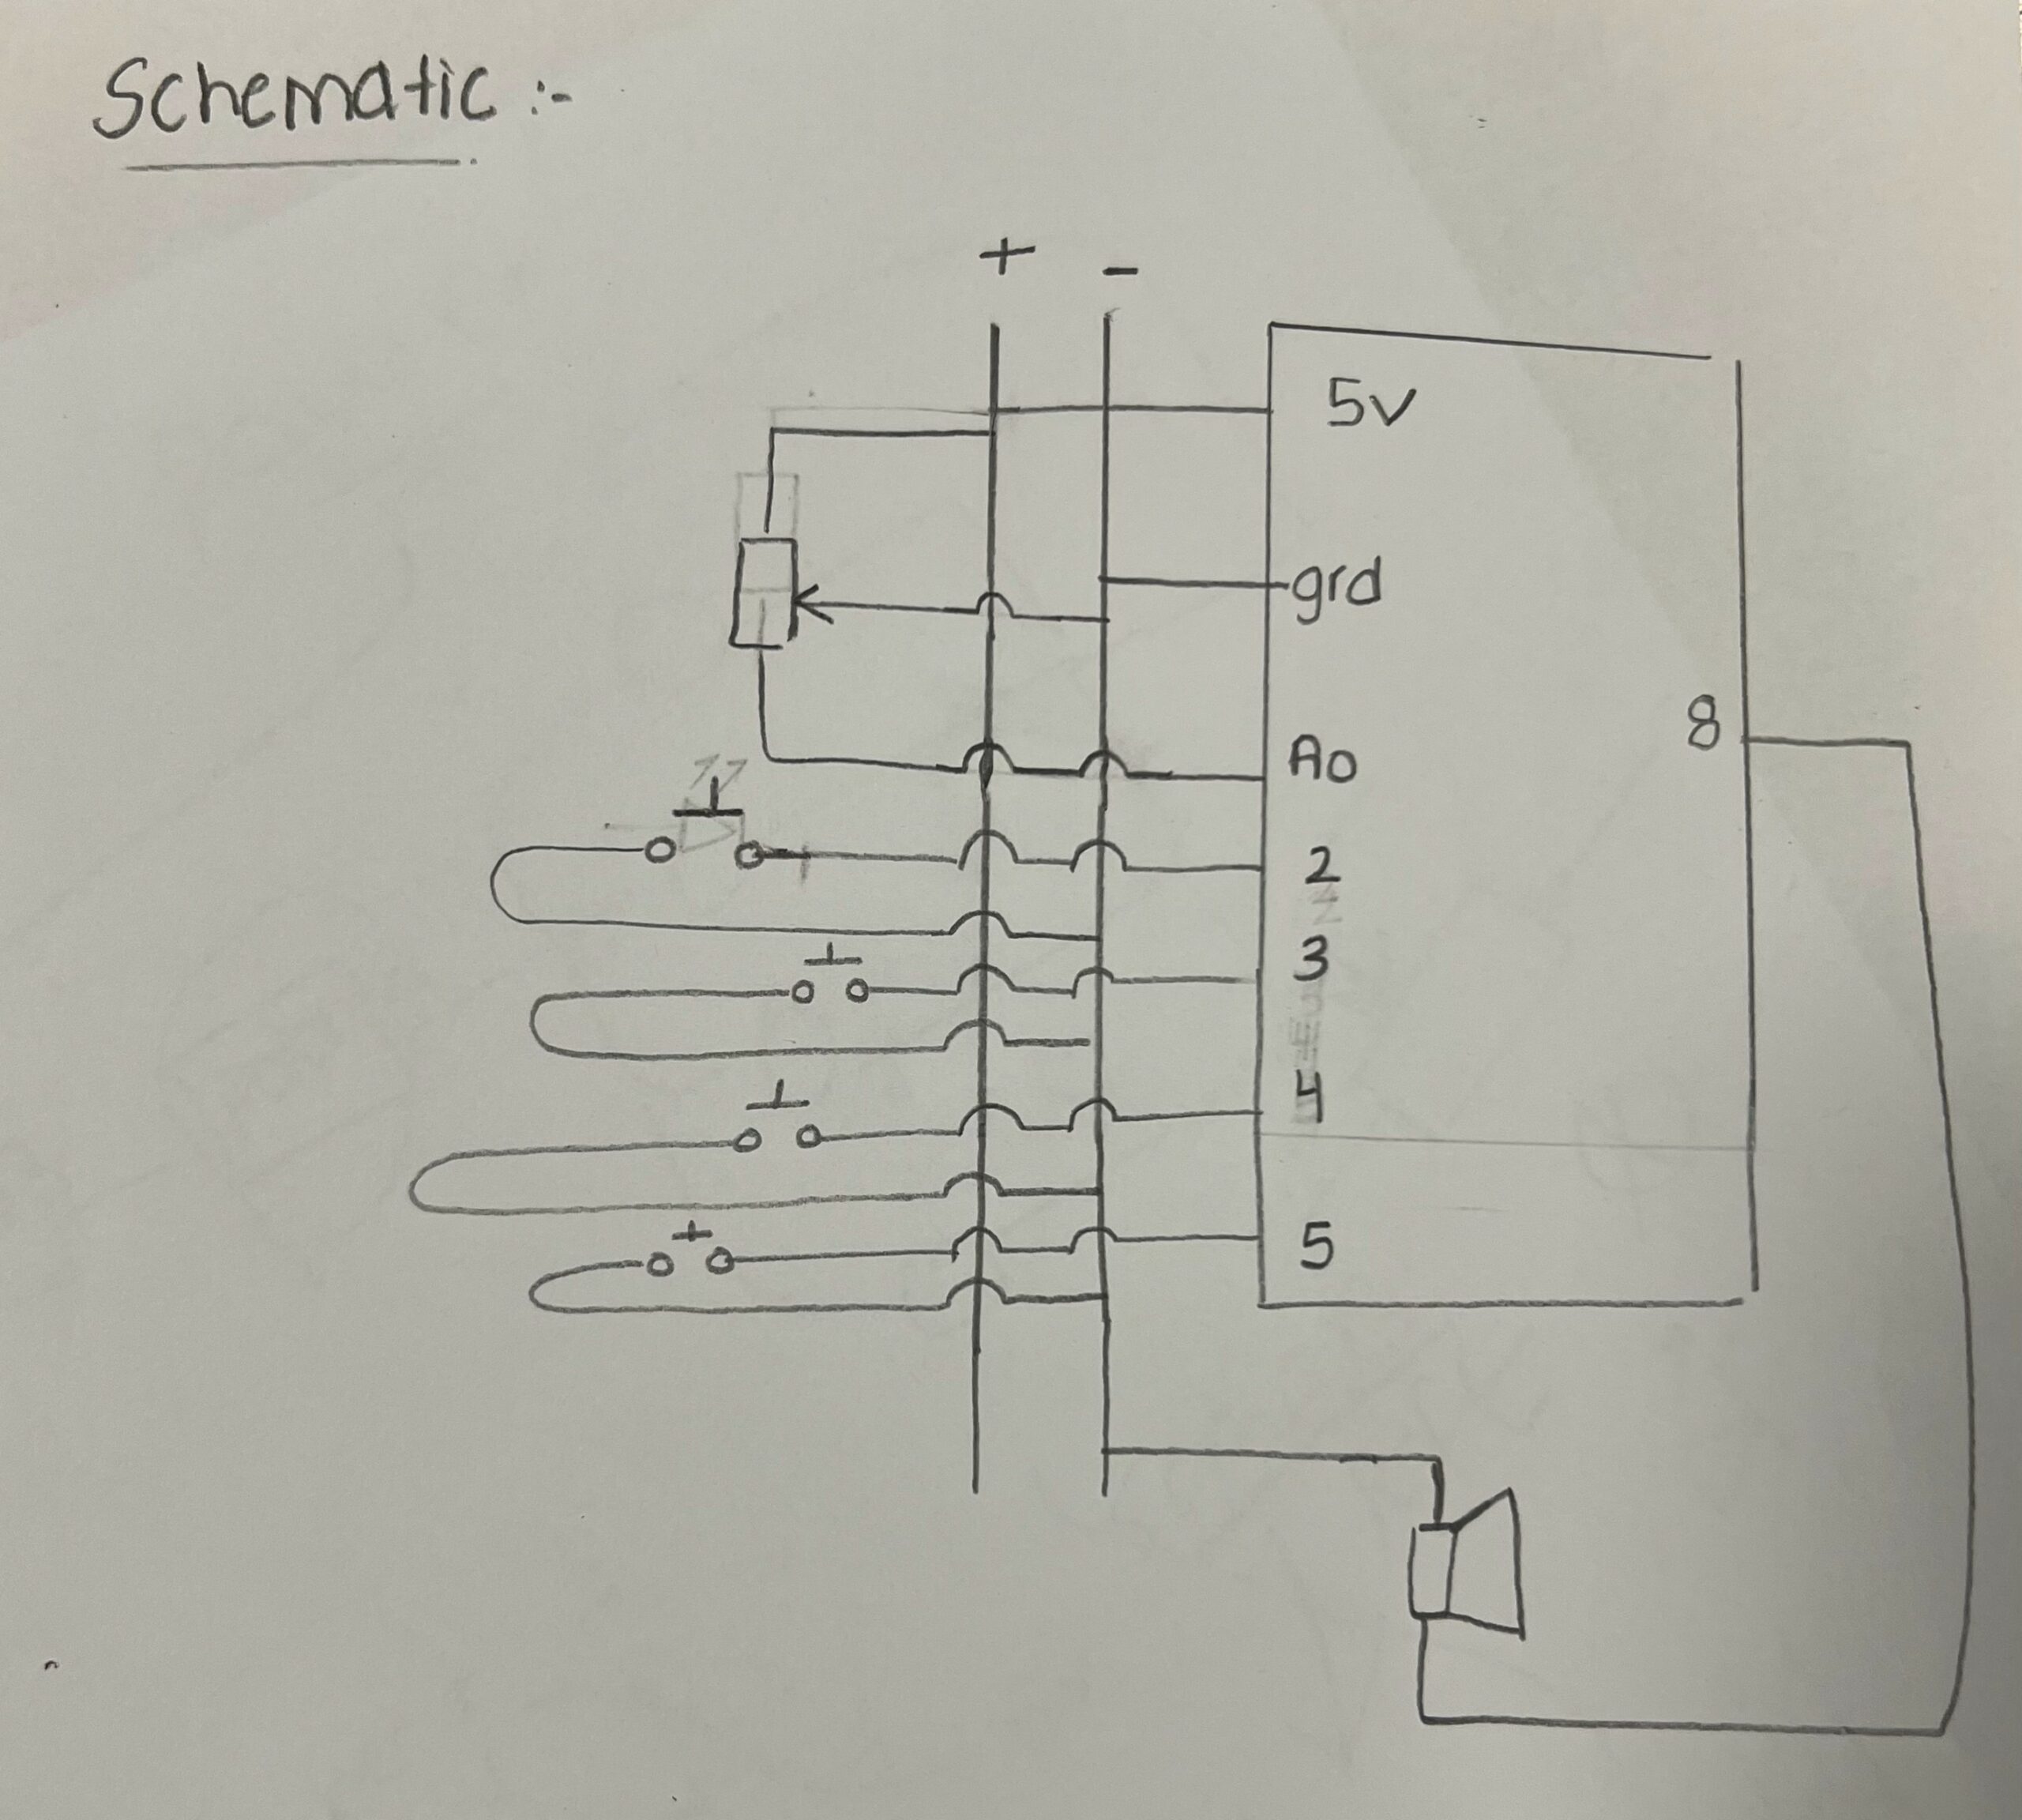
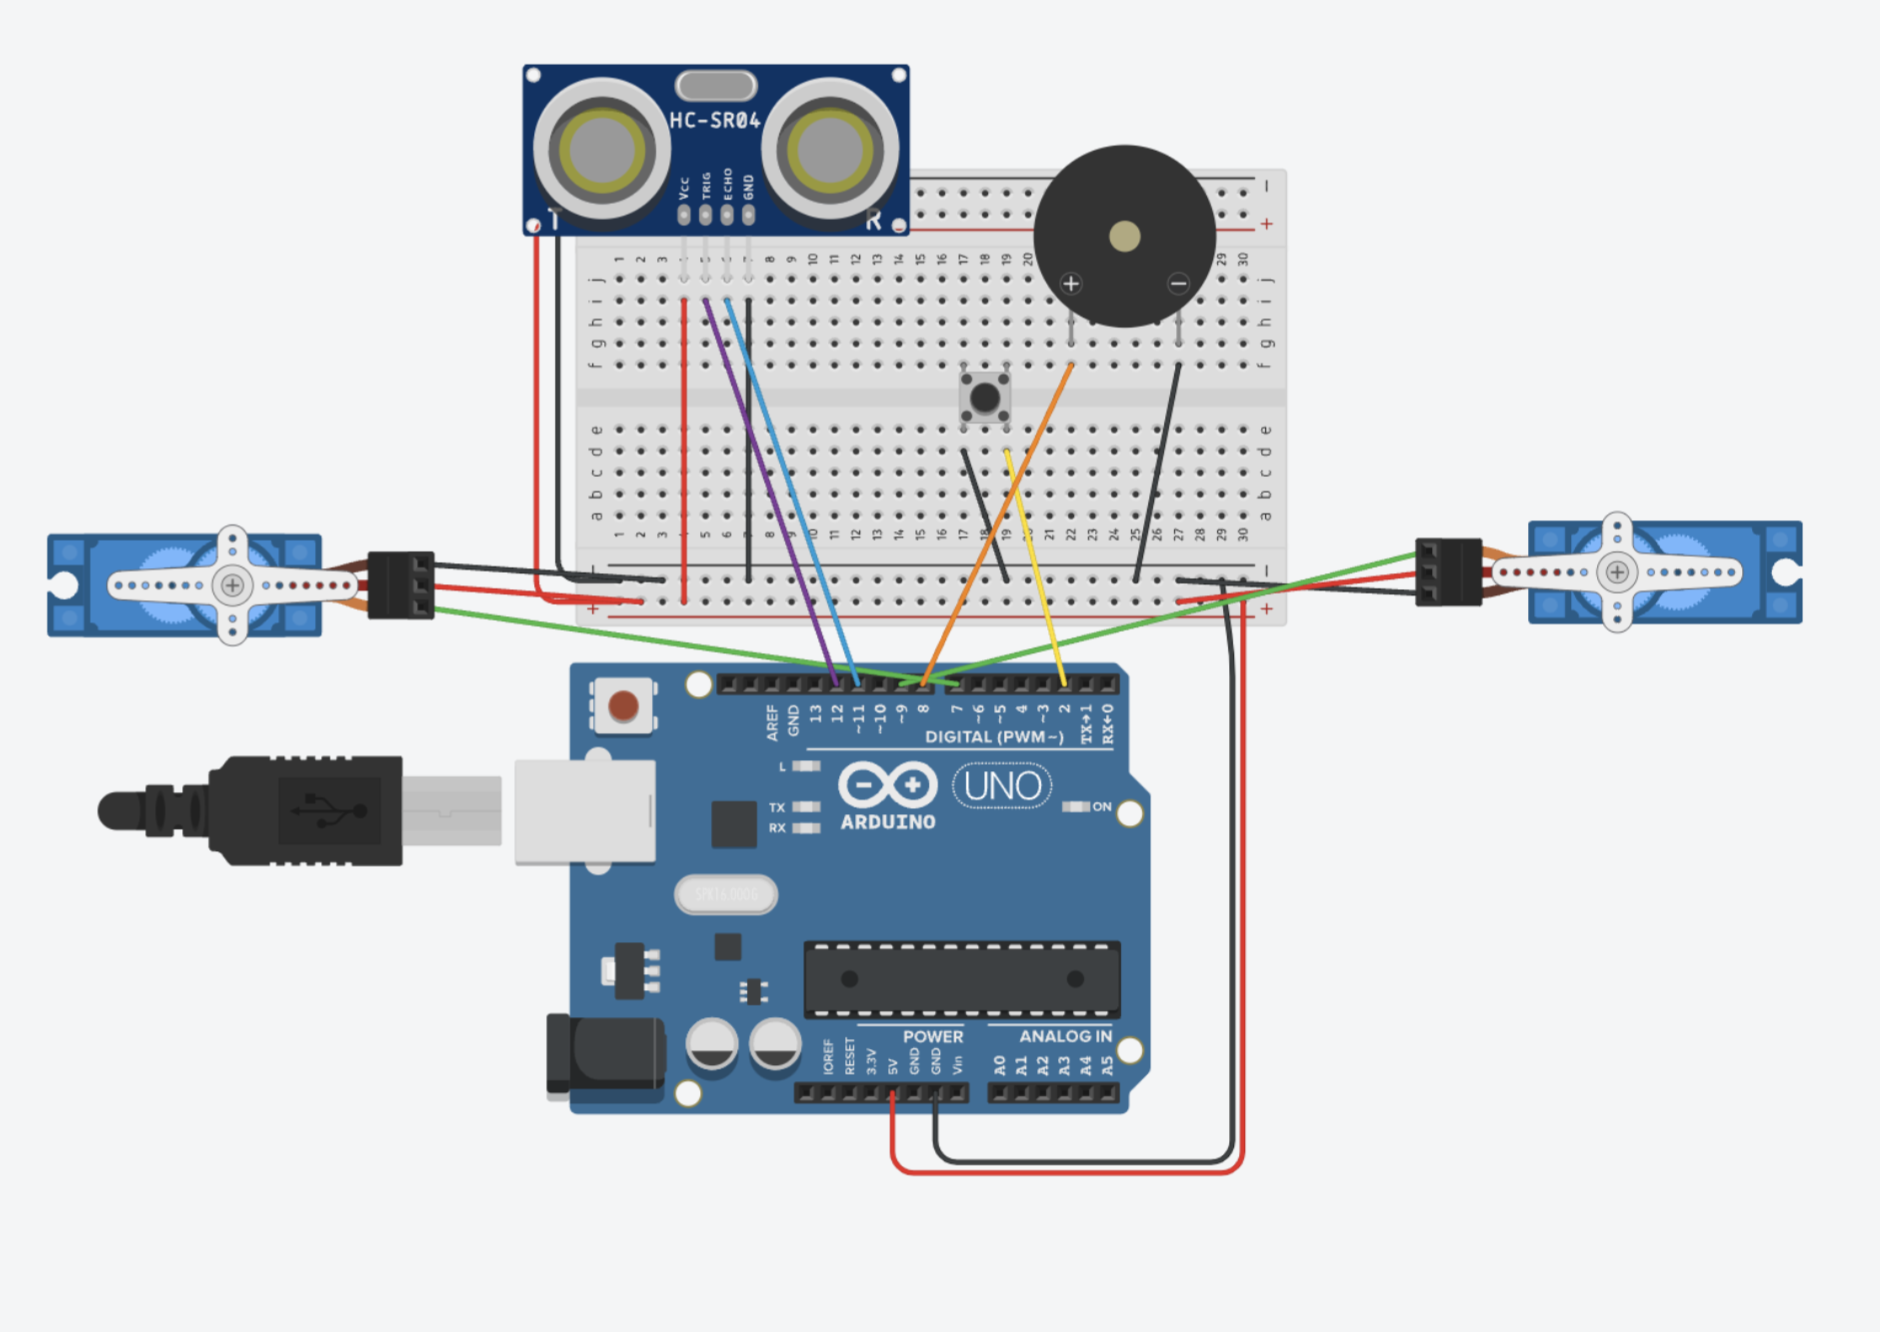
Concept:
We decided to use two digital switches (push switches) to play two different notes, with the LDR effectively acting as an analogue volume adjustment mechanism. The video demonstrates how this feedback from the LDR changes the volume, and if you focus when the light intensity pointed towards the LDR is decreased, there is a very small noise.
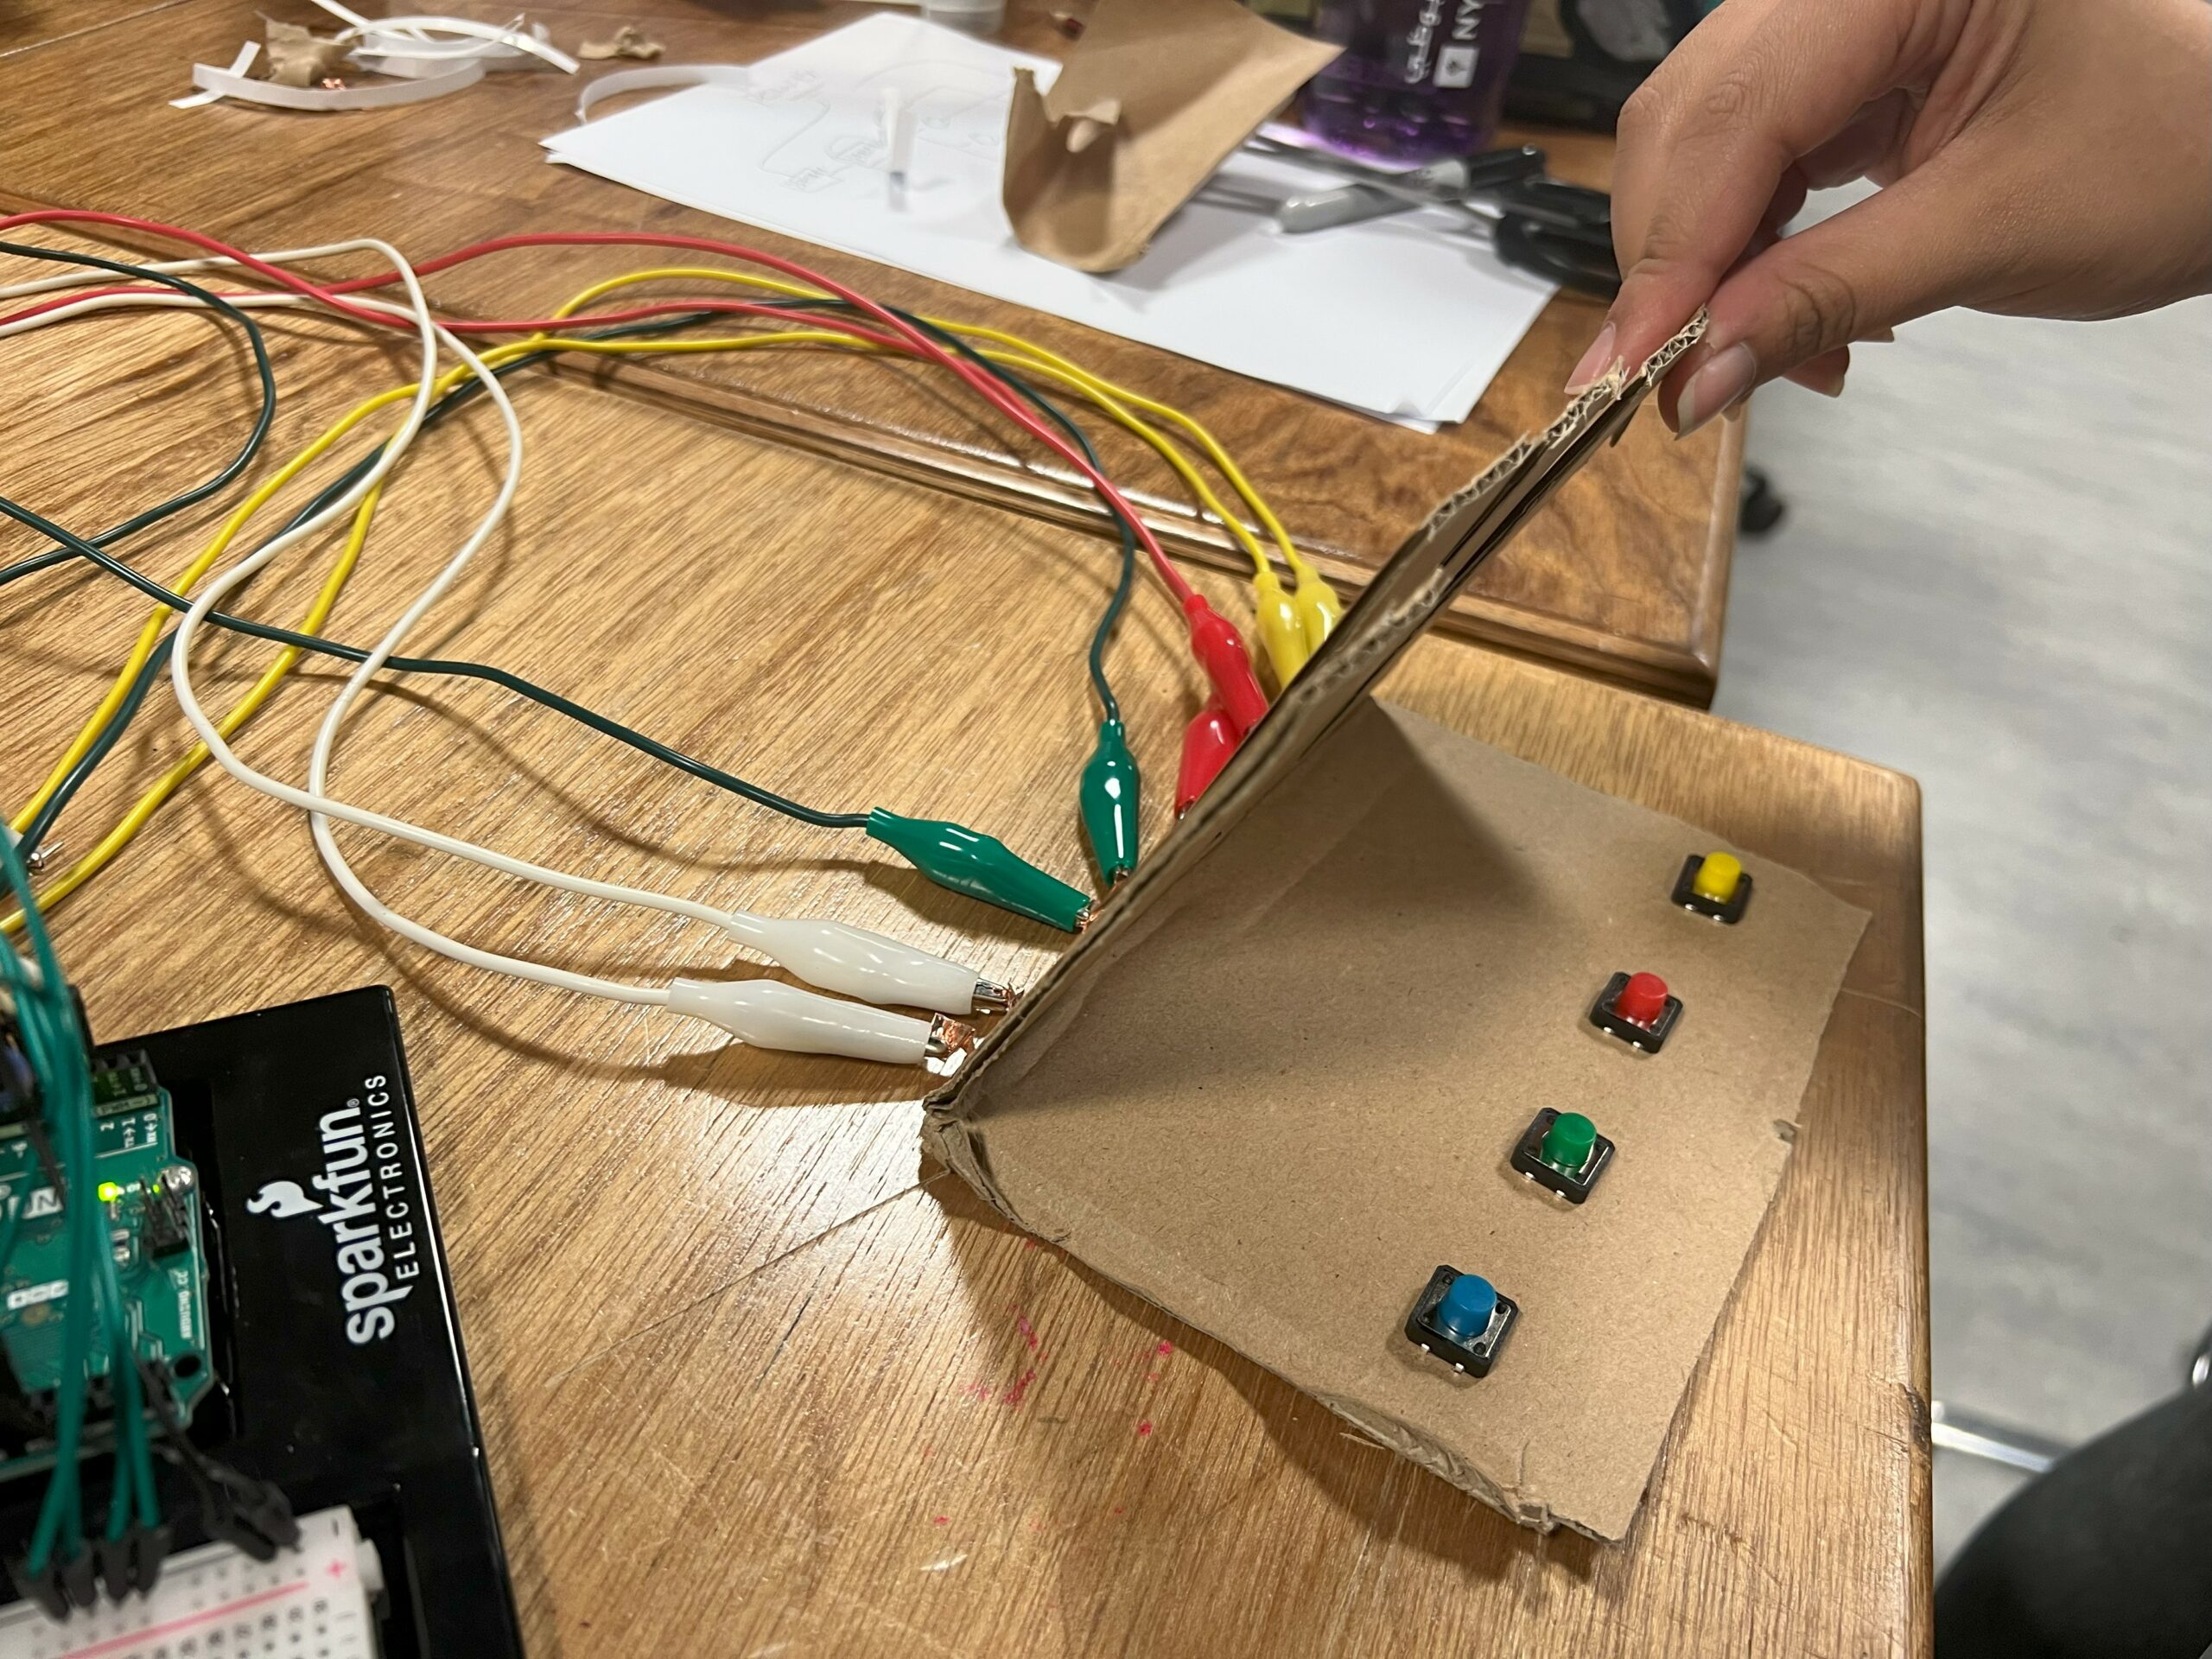
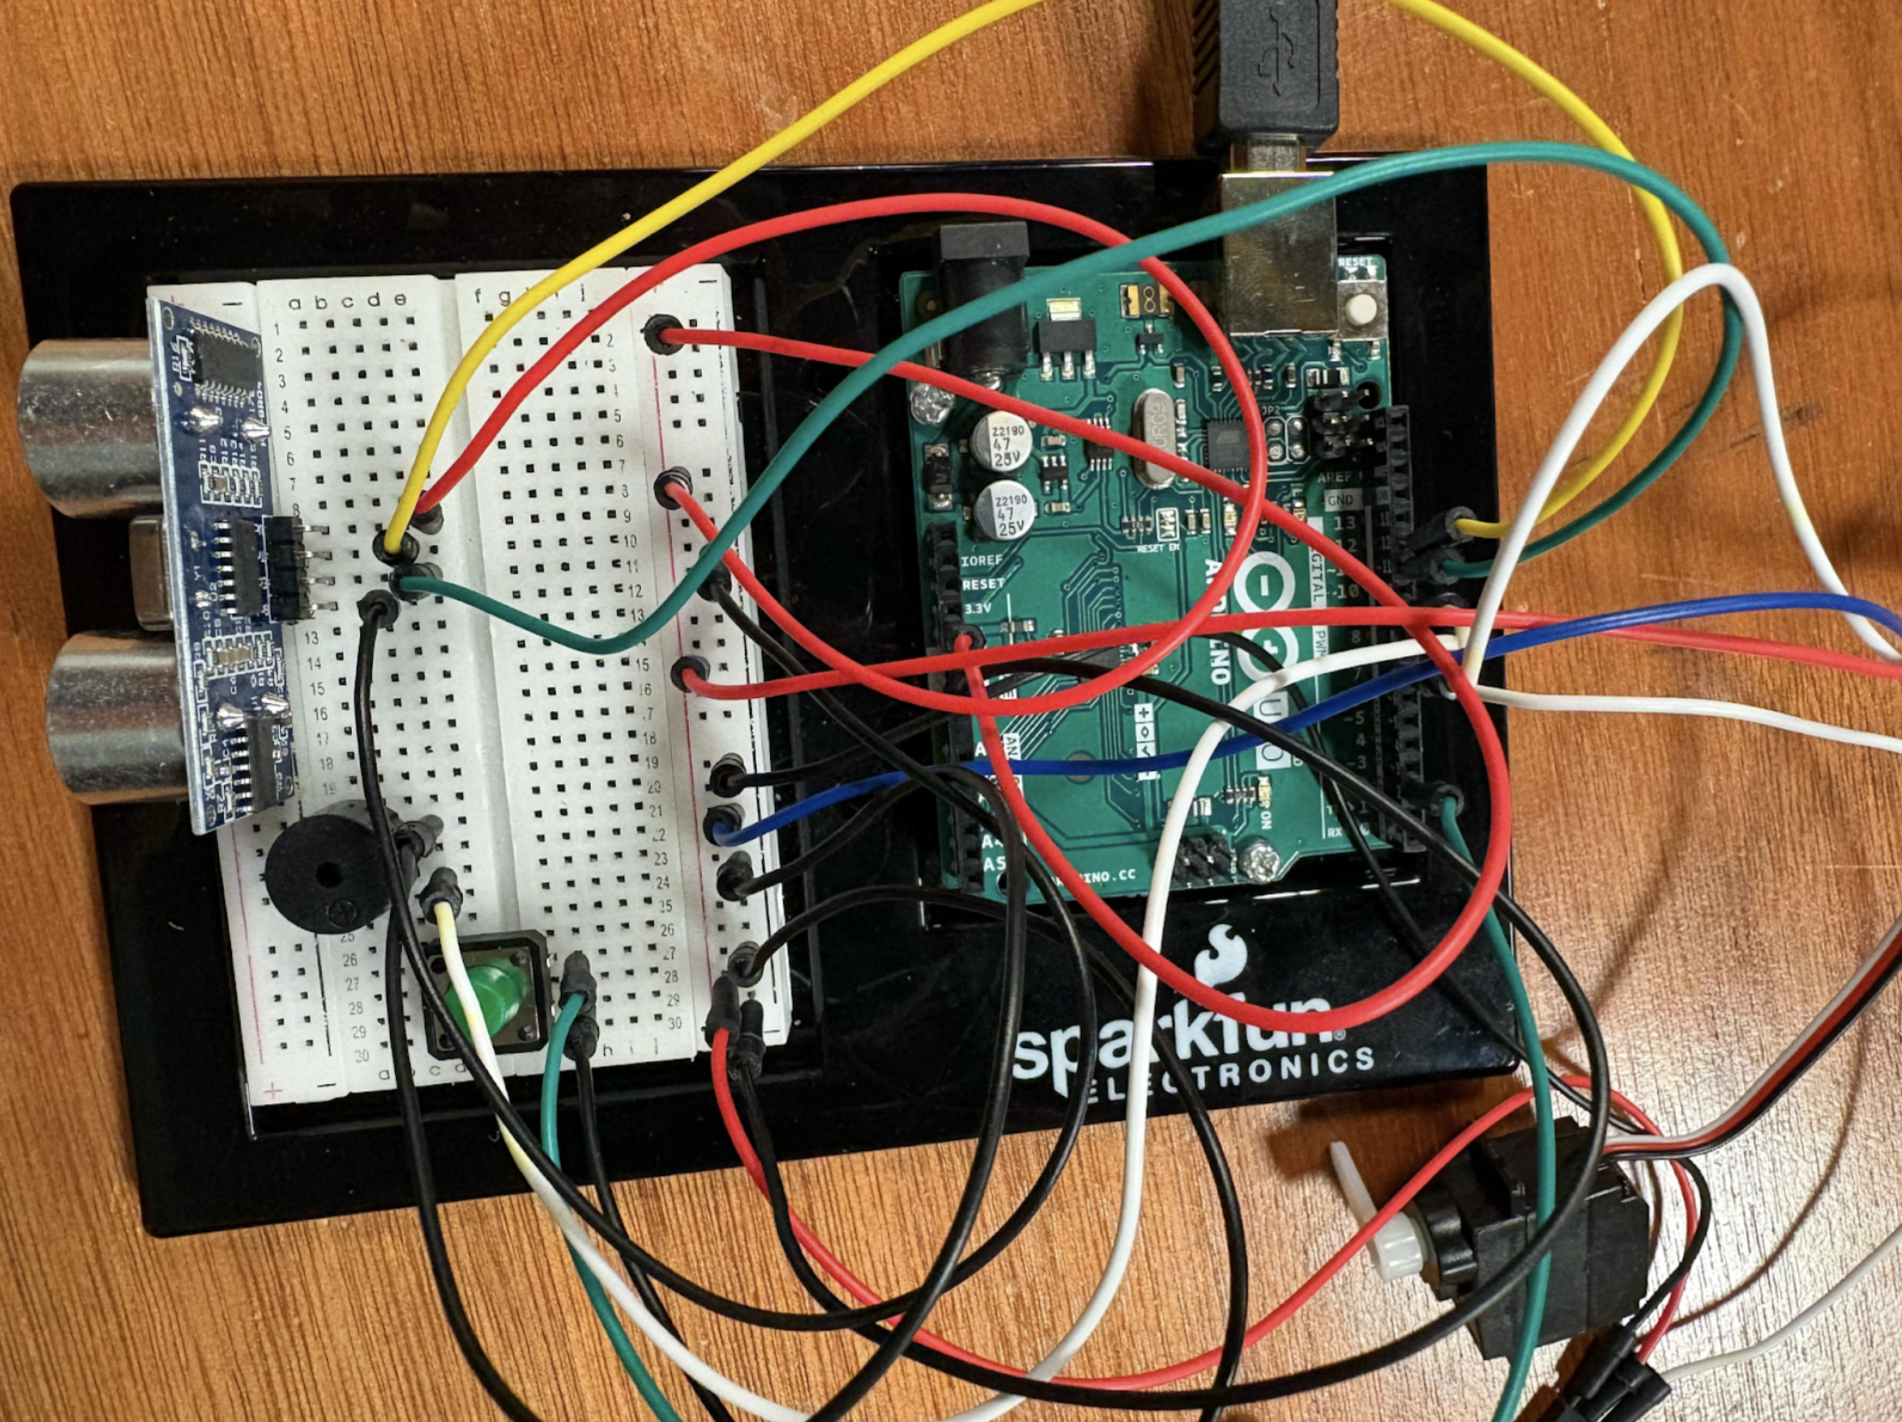
Demo (Circuit):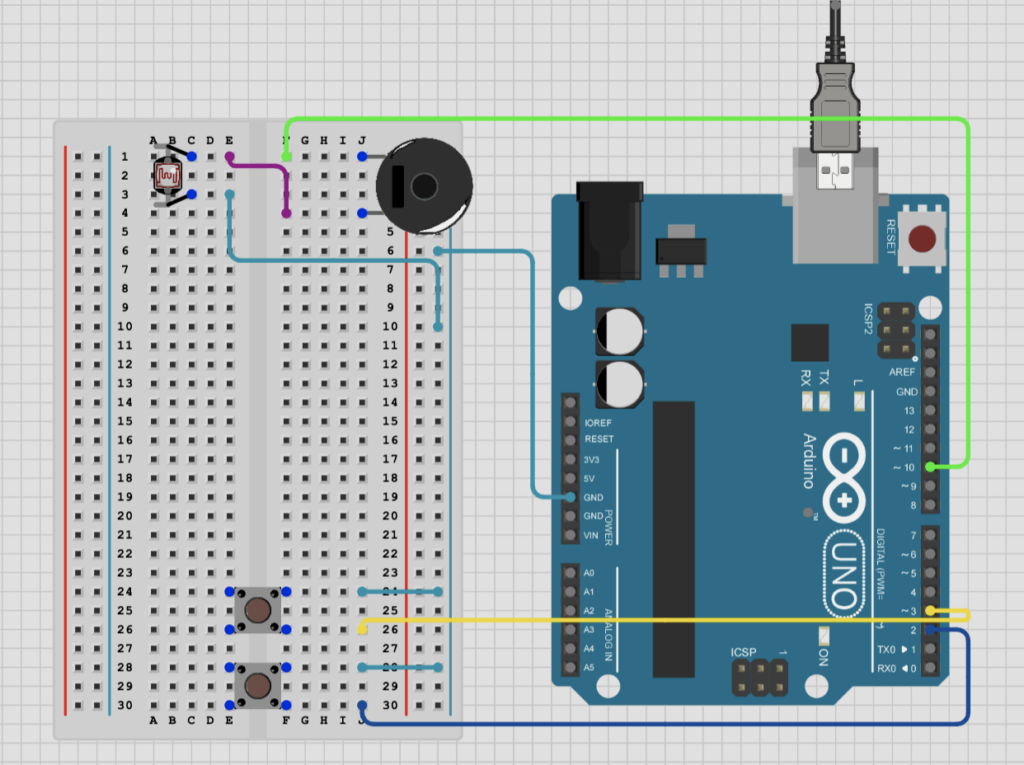
Demo (Video):
Arduino Code:
// Define pins for the buttons and the speaker
int btnOnePin = 2;
int btnTwoPin = 3;
int speakerPin = 10;

void setup() {
// Initialize both button pins as inputs with built-in pull-up resistors
pinMode(btnOnePin, INPUT_PULLUP);
pinMode(btnTwoPin, INPUT_PULLUP);

// Configure the speaker pin as an output
pinMode(speakerPin, OUTPUT);
}

void loop() {
// Check if the first button is pressed
if (digitalRead(btnOnePin) == LOW) {
tone(speakerPin, 262); // Play a tone at 262 Hz
}
// Check if the second button is pressed
else if (digitalRead(btnTwoPin) == LOW) {
tone(speakerPin, 530); // Play a tone at 530 Hz
}
// No button is pressed
else {
noTone(speakerPin); // Turn off the speaker
}
}
Challenges:
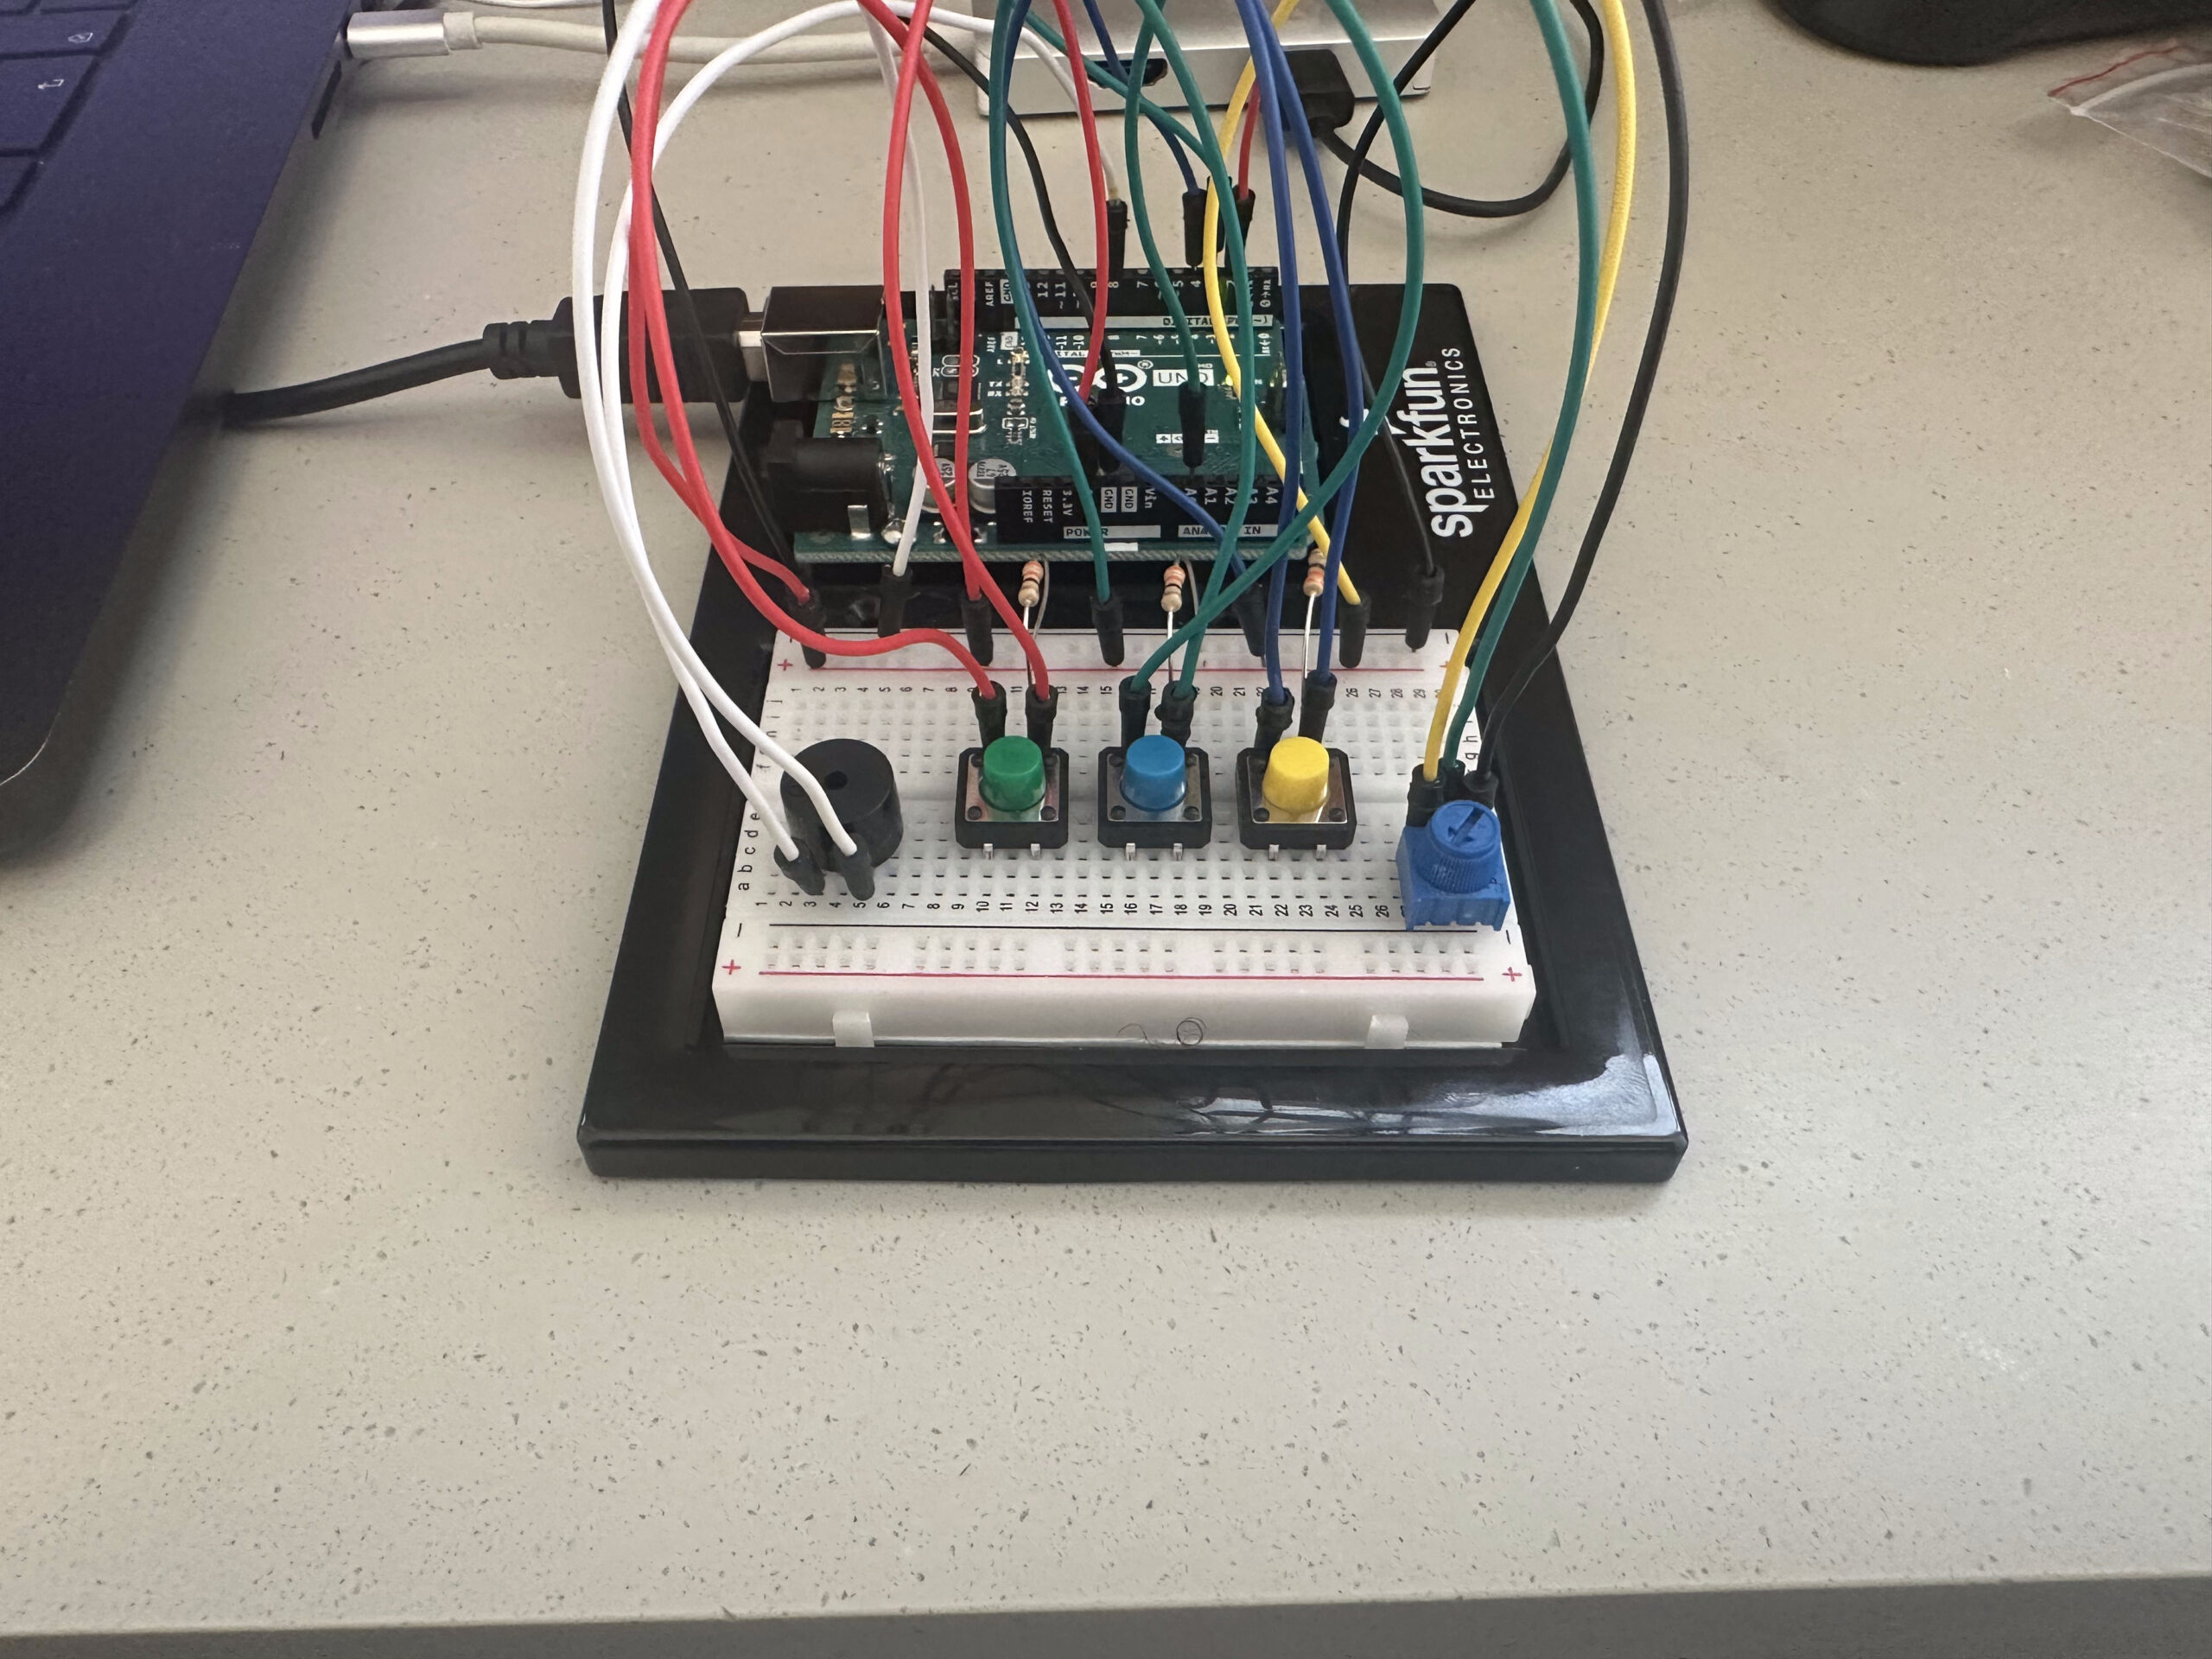
The initial concept started out with a Light Dependent Resistor and the Piezo speaker/buzzer. We faced issues as the readings from the LDR did not behave as expected, there was an issue with the sound produced, and the change in music produced was not adequate.
We also faced challenges with the programming, as the noise production was inconsistent. We fixed this by adjusting the mapping of the notes to produce more distinct frequencies for each independent push button (red vs yellow). for 262 and 540 Hz respectively.
Done by: Zayed Alsuwaidi (za2256) and Zein Mukhanov (zm2199)


 But I wanted to keep things happy and do just that part of mice following him in my preferred aesthetic- a night sky. In my version, a glowing dot represents the Piper, and mice randomly appear and start following it. But they’re not just mindless followers—if you move your mouse, you can actually distract them!