FINAL PROJECT – USER TESTING AND FINAL TESTING


Project Documentation

Project Title:

Traffic Light Game


Project Idea:

The original idea was to use LED lights connected to an Arduino to simulate a traffic light. The lights would signal when a car (controlled by the user) should stop or move. However, I transitioned to using p5.js to create a digital simulation of the traffic light and car movement, while the Arduino controlled the car’s behavior through a physical button.


Concept:

The project combines physical hardware (Arduino) and digital visualization (p5.js) to simulate real-world traffic rules:

  • Traffic Lights: Designed in p5.js to change states (green, yellow, red) at timed intervals.
  • Car Movement: Controlled through an Arduino-connected button. Pressing the button sends “MOVE” signals to the p5.js interface, while releasing it sends “STOP.”
  • Strike System: Violations occur when the car moves during a red light or fails to move during green light. A buzzer (Arduino) provides audible feedback for violations.

Step-by-Step Arduino Connection

Components Required:

  • Arduino Uno
  • Breadboard
  • 1 Push Button (Switch)
  • 1 10kΩ Resistor
  • 1 Buzzer
  • Jumper Wires (Male-to-Male)

Step-by-Step Connection:

  1. Connect the Switch:
    • Place the push button (switch) on the breadboard, bridging the middle gap.
    • Connect one leg of the switch to Digital Pin 2 on the Arduino.
    • Connect the same leg of the switch to 5V on the Arduino.
  2. Connect the Resistor:
    • Attach a 10kΩ resistor from the other leg of the switch to the GND rail on the breadboard.
    • This acts as a pull-down resistor, ensuring the switch reads LOW when not pressed.
  3. Connect the Buzzer:
    • Place the buzzer on the breadboard.
    • Connect the positive leg of the buzzer to Digital Pin 8 on the Arduino.
    • Connect the negative leg of the buzzer to the GND rail on the breadboard.
  4. Power Connections:
    • Connect the 5V pin on the Arduino to the breadboard’s + rail.
    • Connect the GND pin on the Arduino to the breadboard’s – rail.
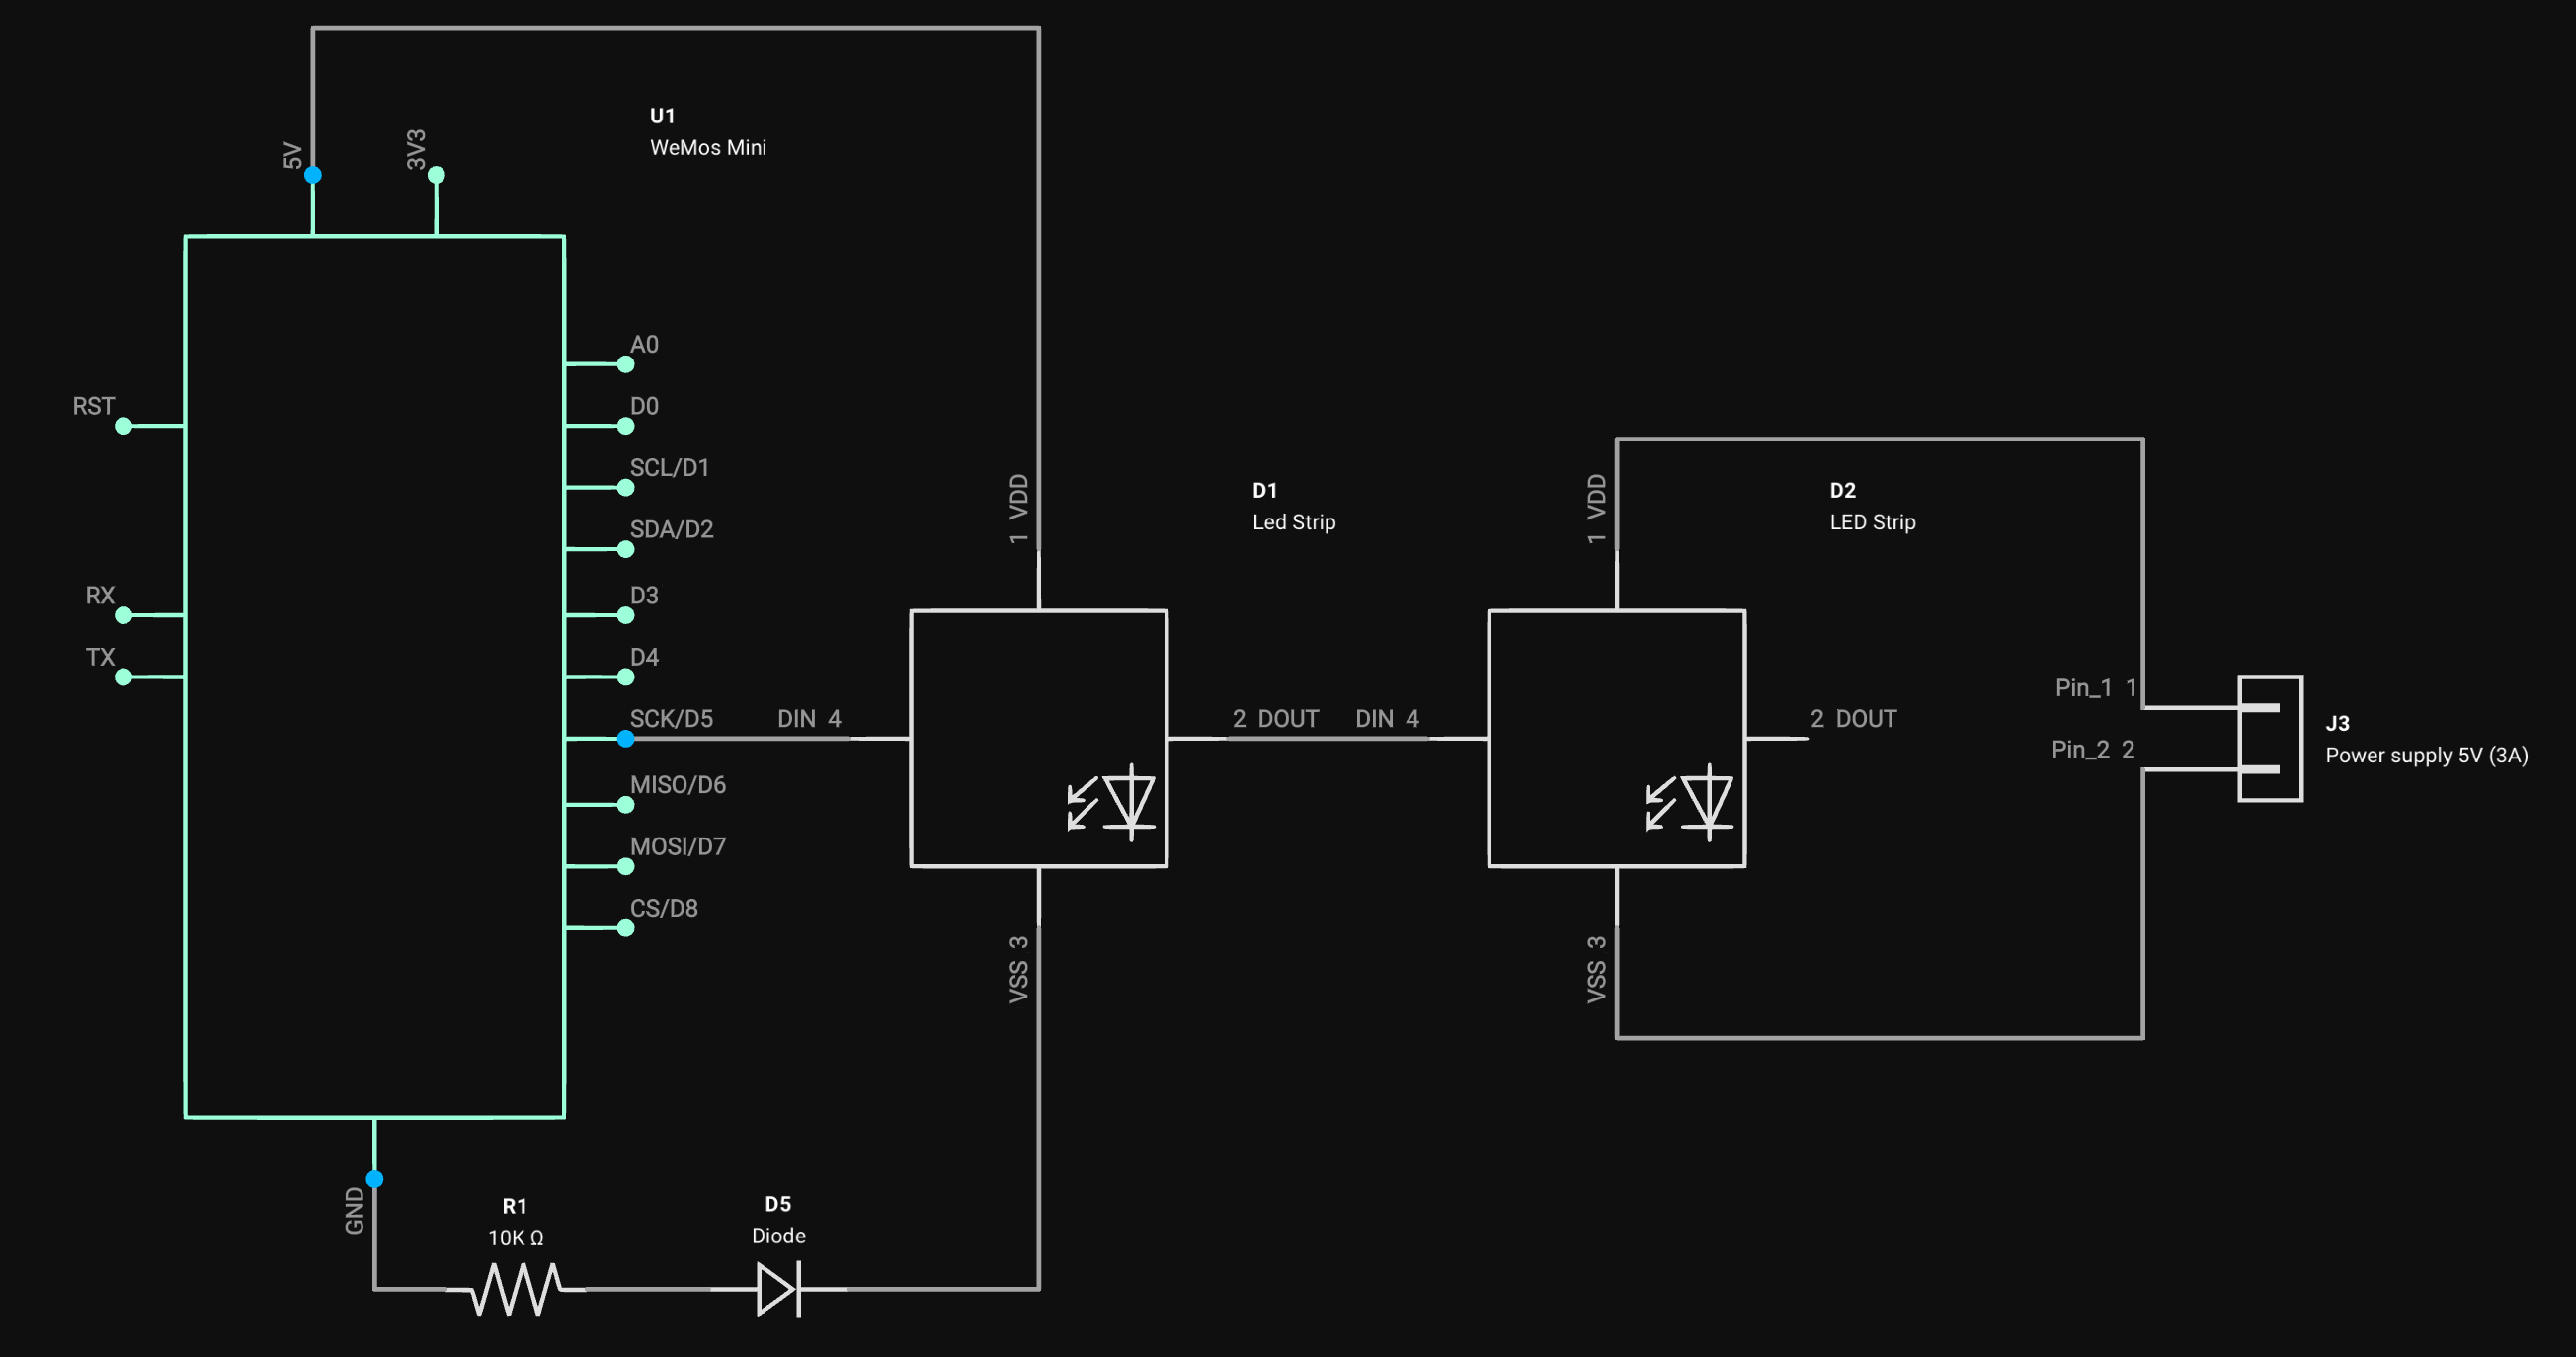
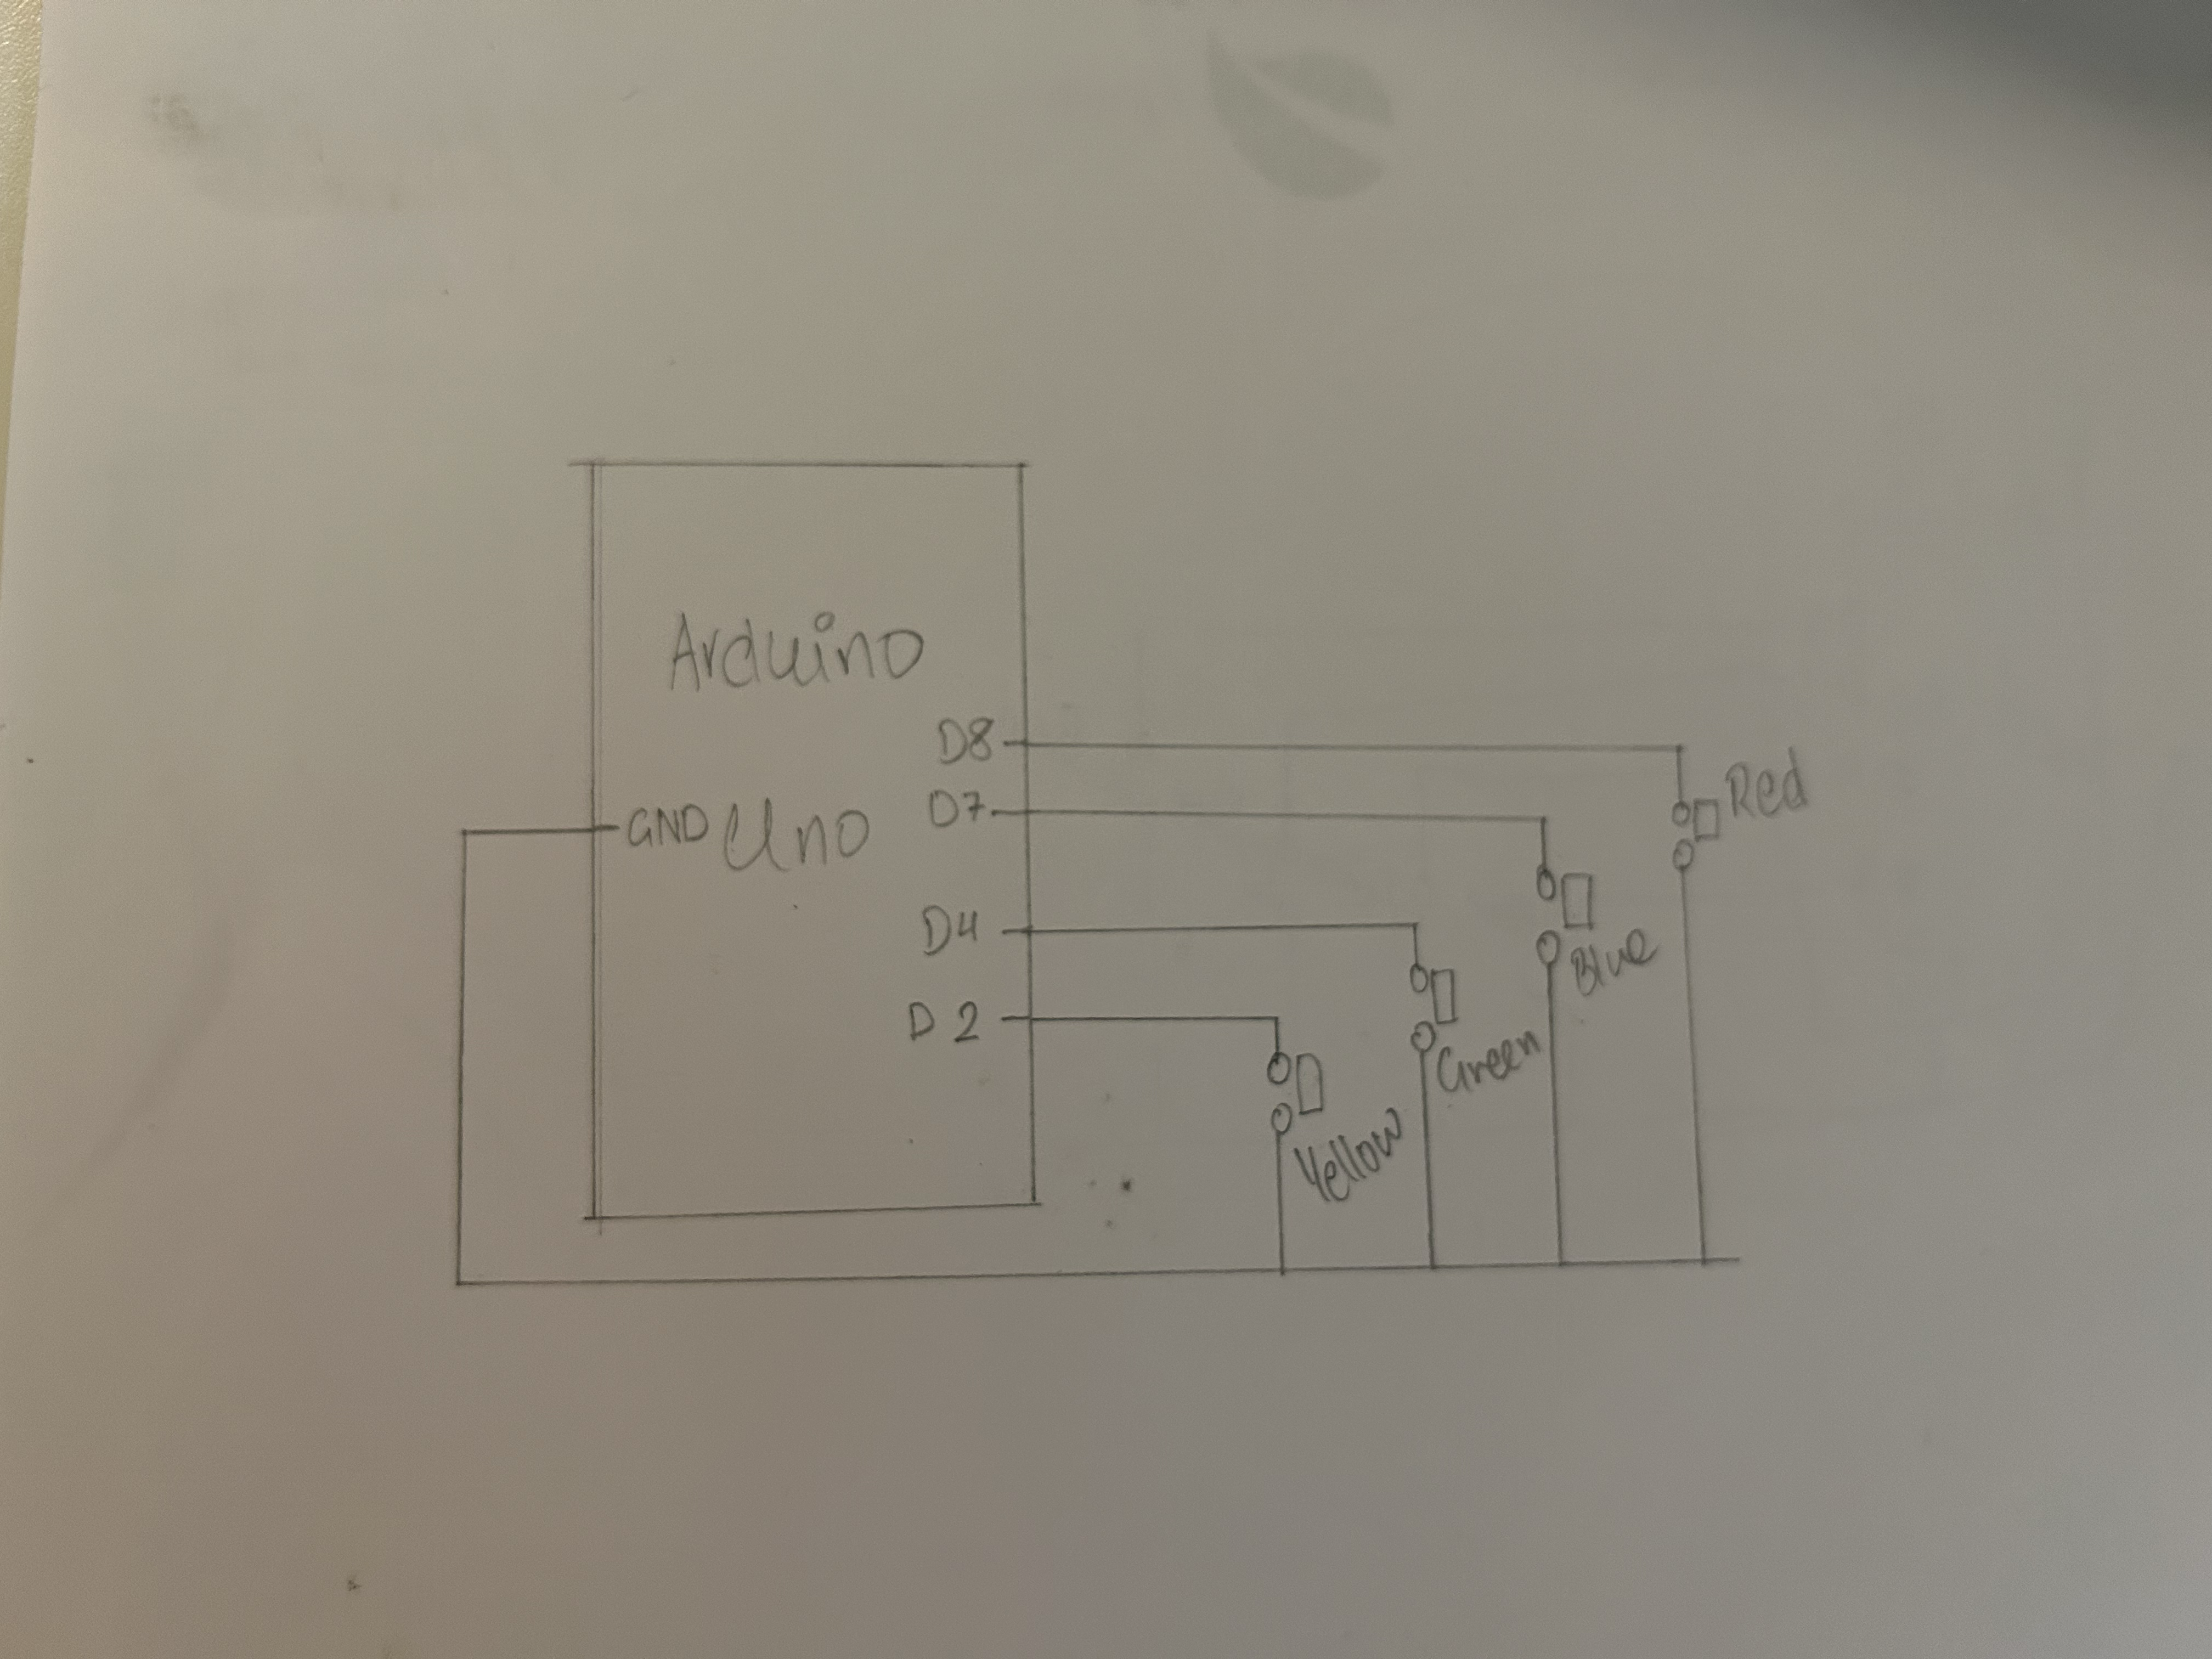
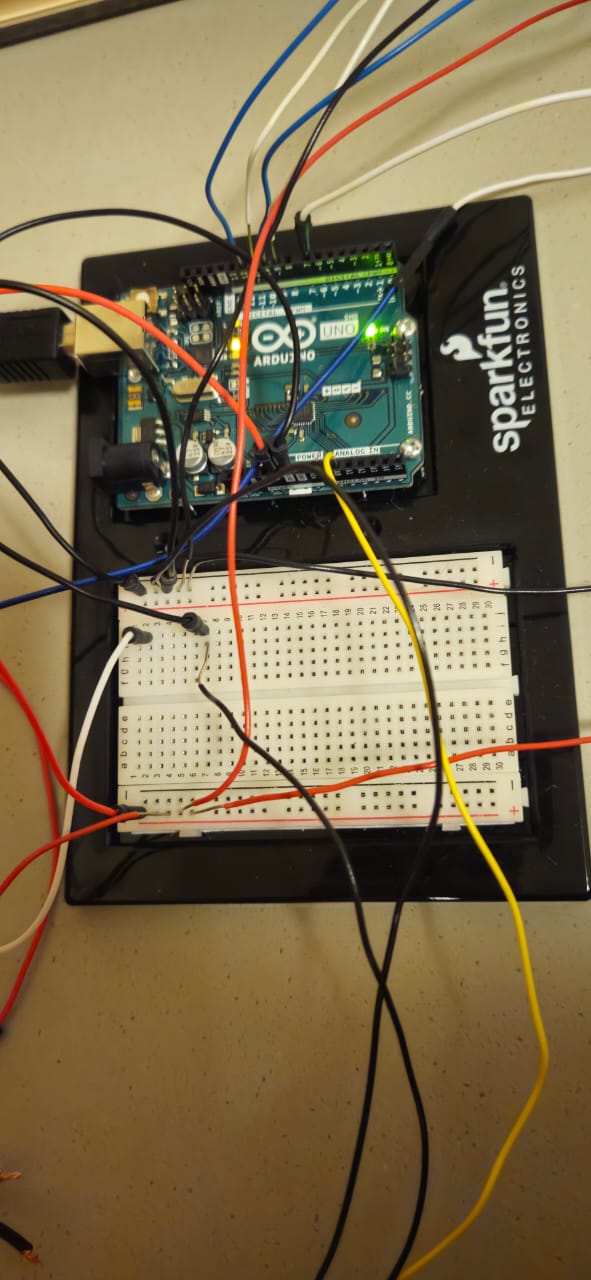
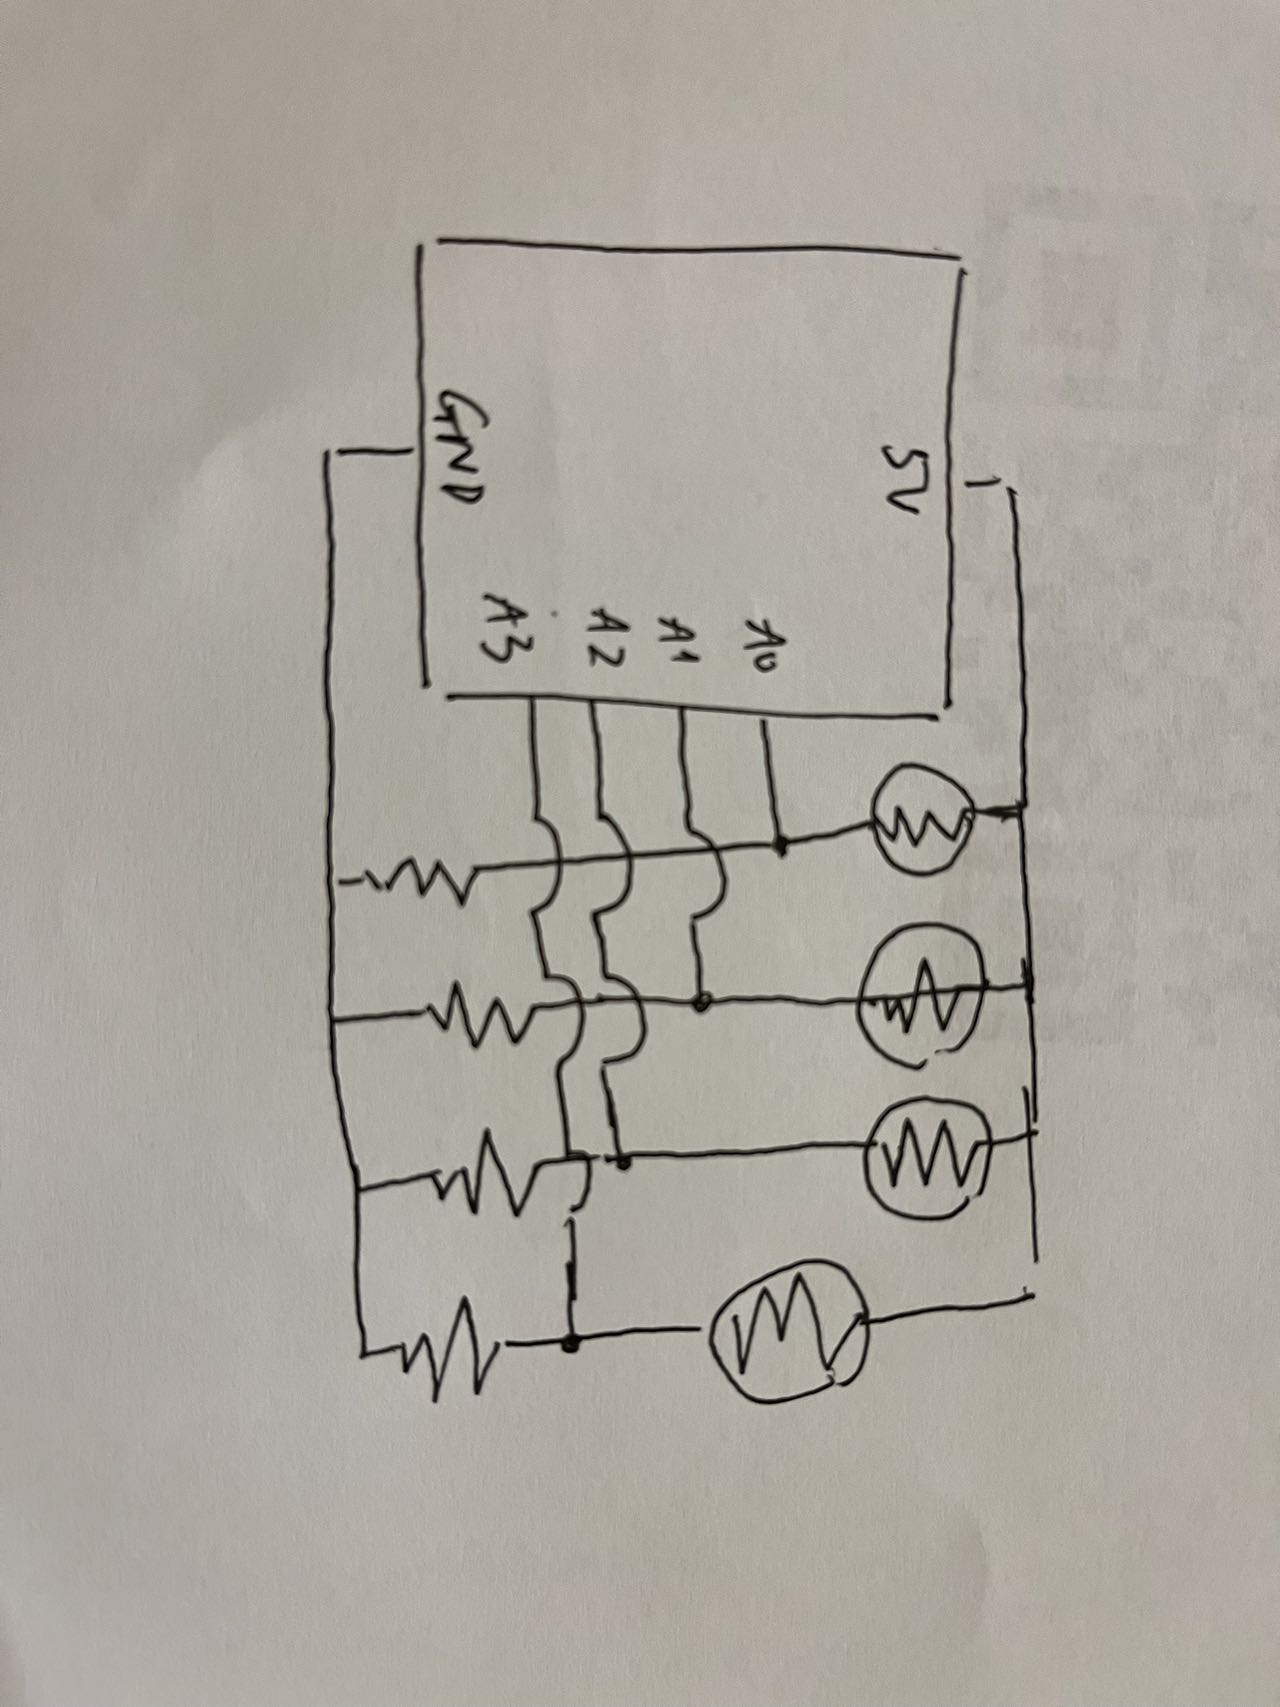
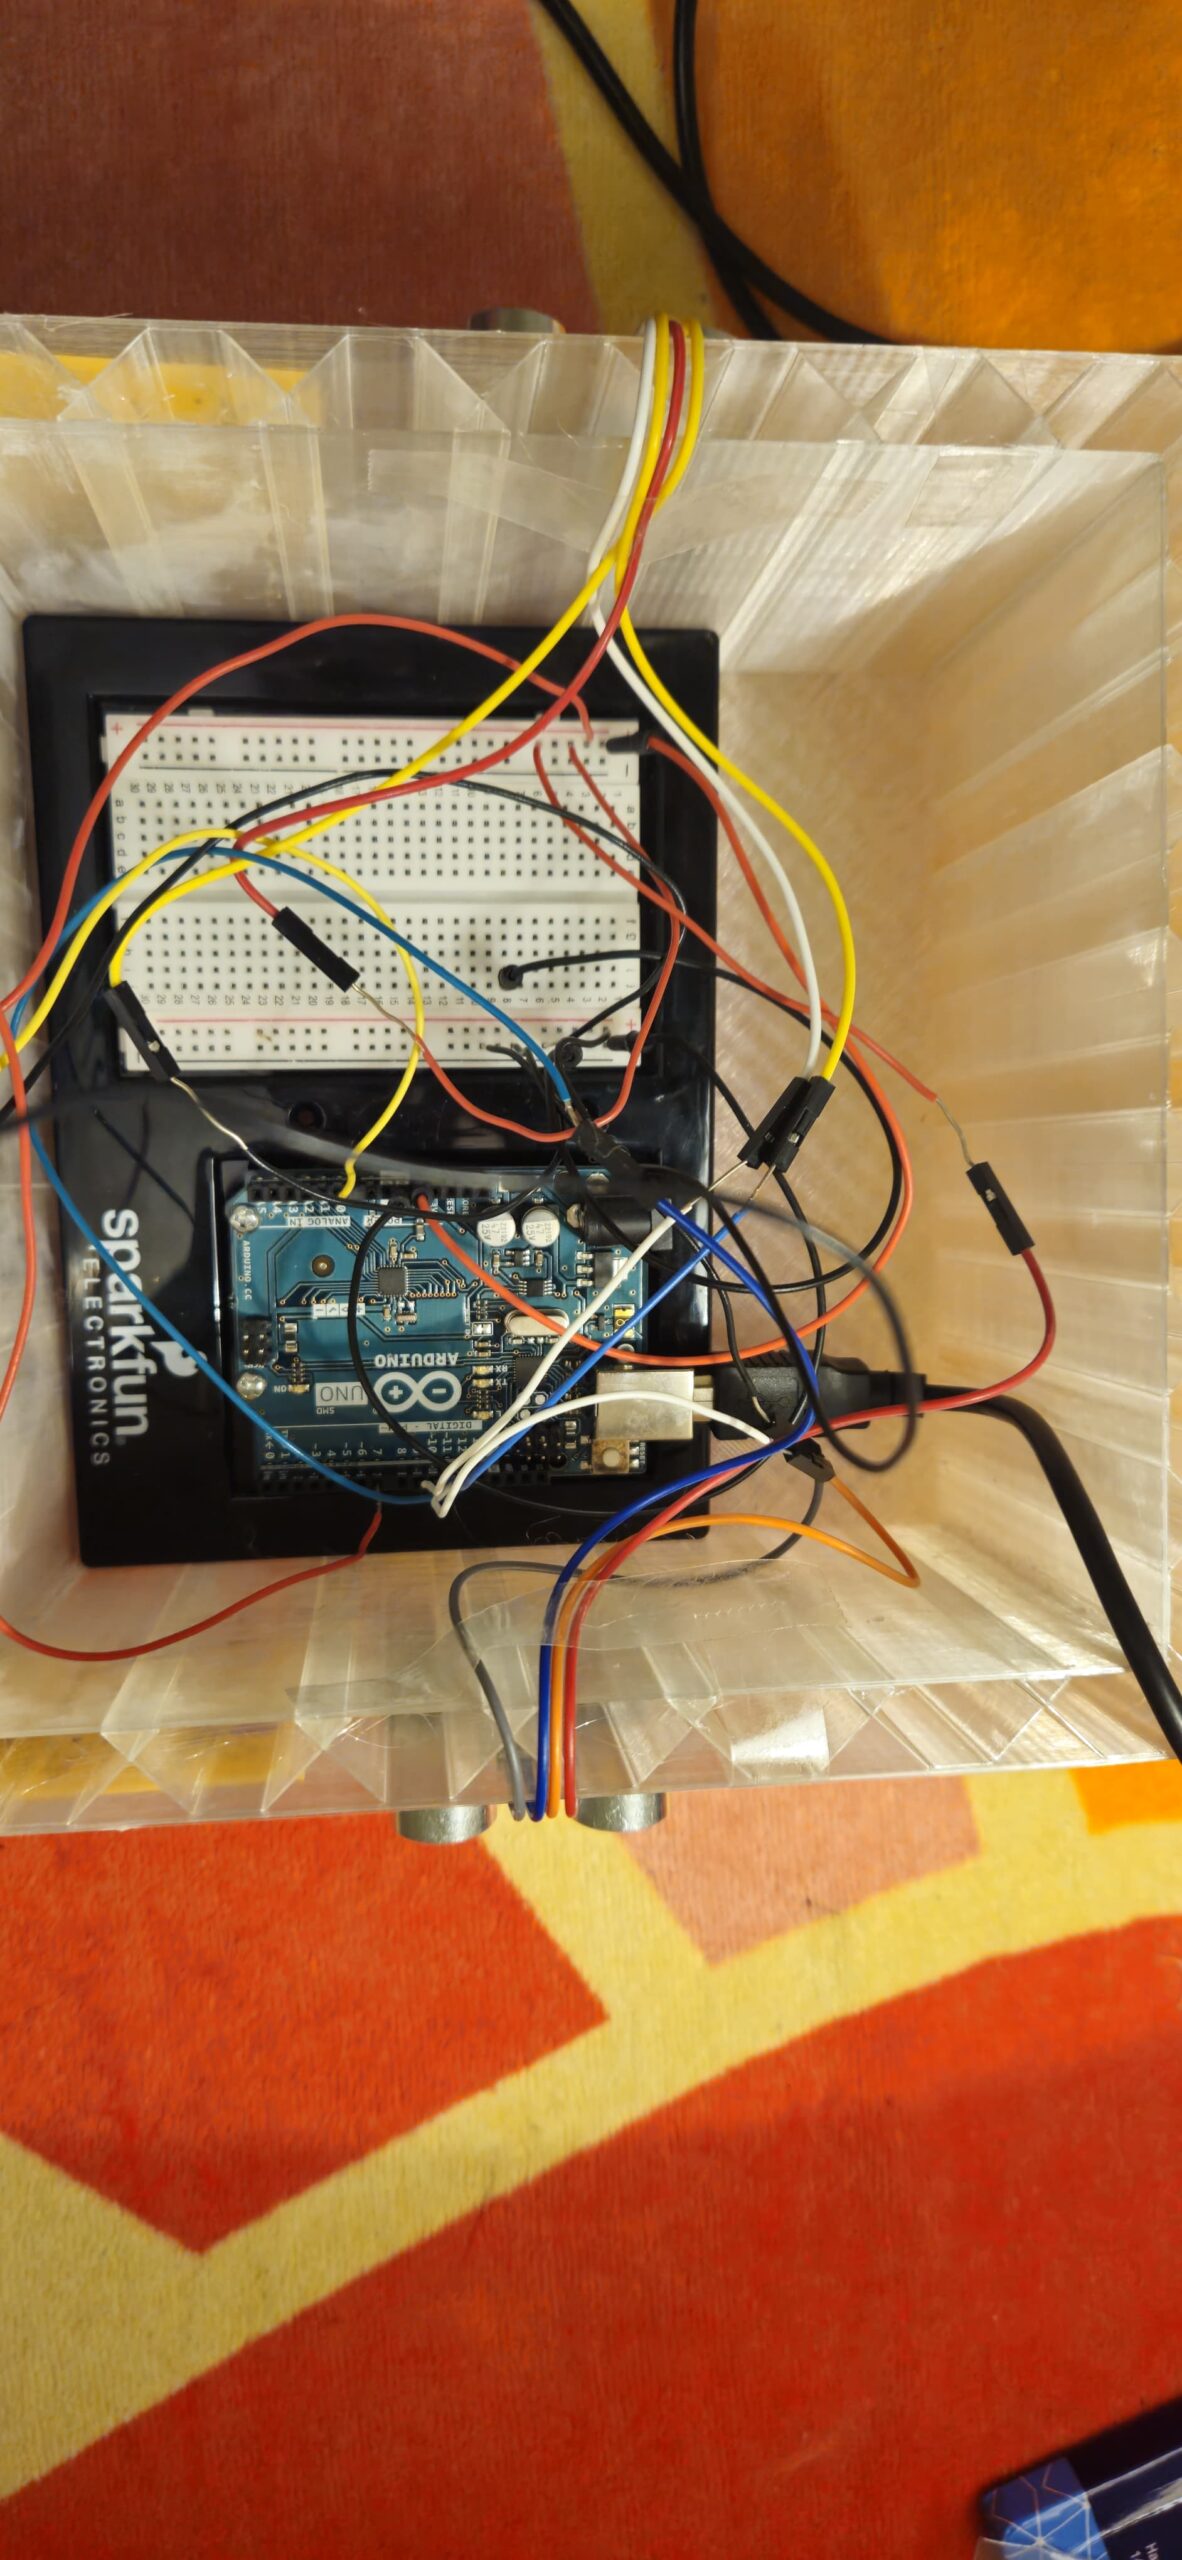
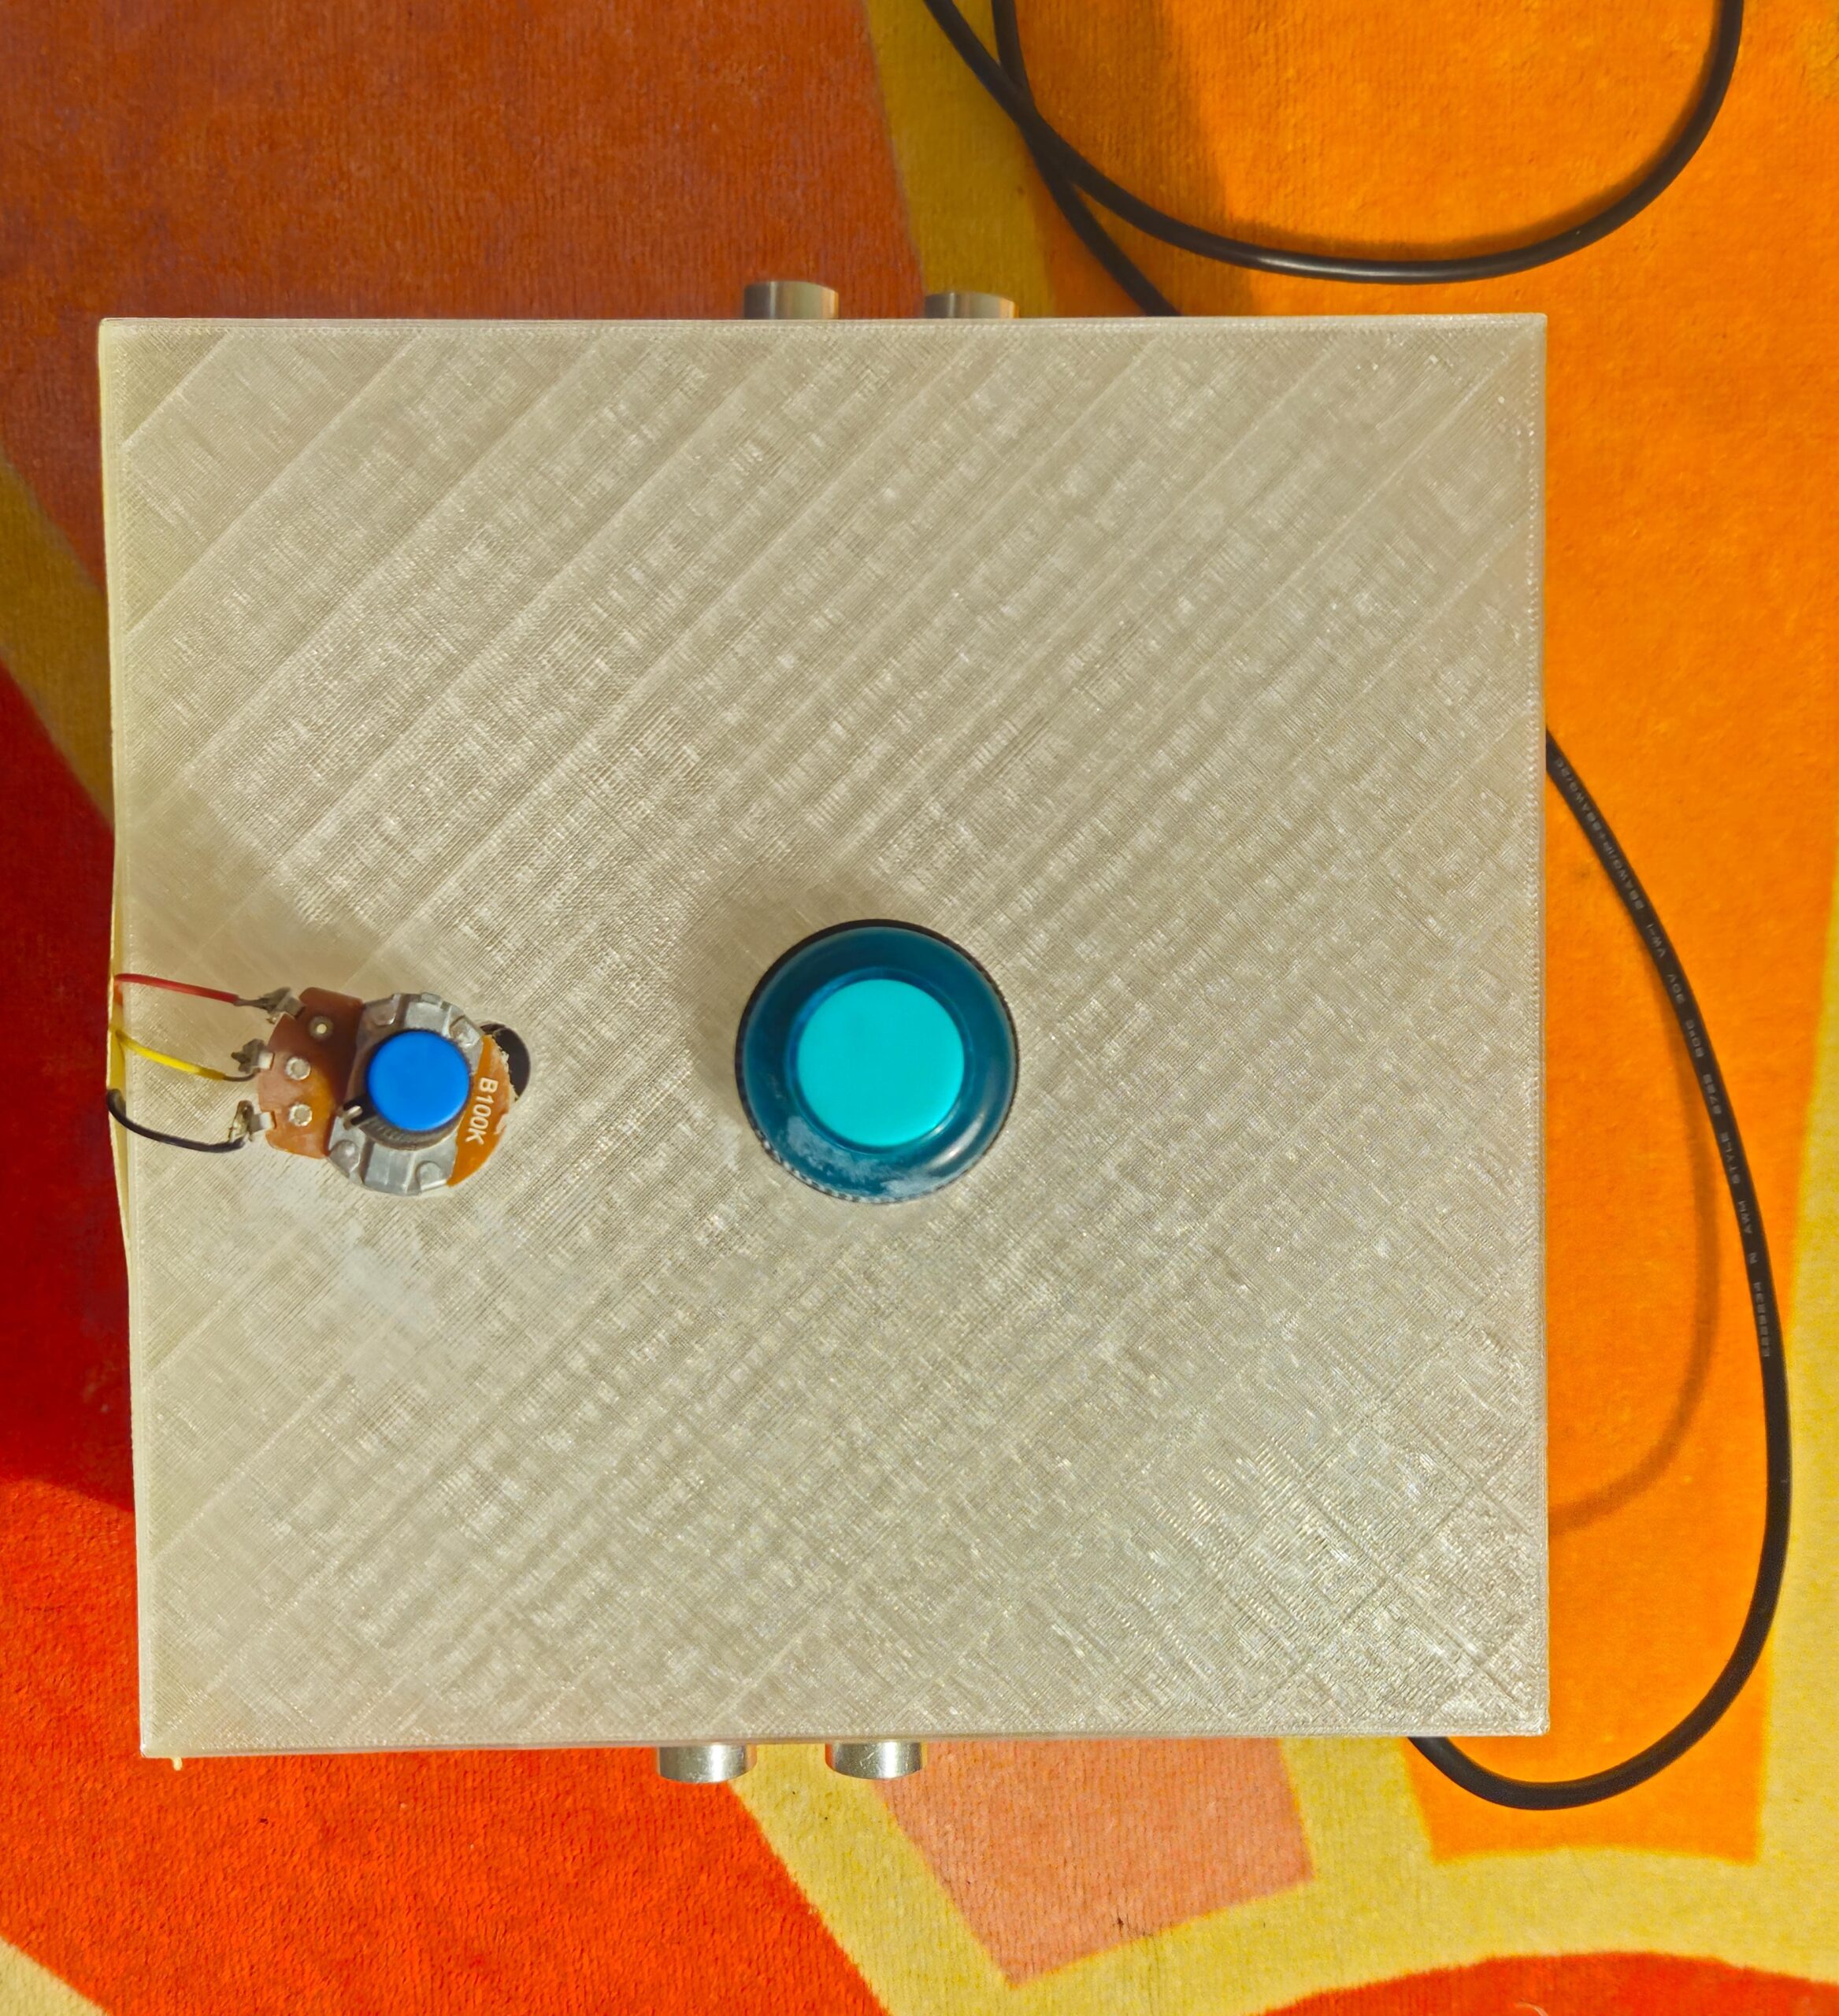
Arduino Connection

The diagram below shows the Arduino and Breadboard connections for the push button and buzzer:

https://drive.google.com/file/d/198DnUSxek9c-3ebID0bJrLljIN0VNa_O/view?usp=drive_link


Code Implementation

1. p5.js Code

The p5.js code handles the simulation of traffic lights, car movement, and strike detection. It also integrates with the Arduino using serial communication to receive “MOVE” and “STOP” signals and send feedback for violations (buzzer activation).

/*
 Course: Introduction to interactive media
 Final Project
 Section: Mang-F2024
 Name: Bismark Buernortey Buer
 Title: Superman Saves
*/

// Declare global variables
let roadY = 0; // Vertical position of the road markings
let gameState = "INSTRUCTIONS"; // Tracks the current state of the game
let carImage, backgroundImage, startSound, gameSound, gameOverSound; // Assets: images and sounds
let gameOverImage, restartImage, quitImage, gameOverBg, startButtonImage; // UI images
let countdownSound; // Countdown sound effect
let carX, carY; // Car position coordinates
let lightState = "green"; // Current state of the traffic light
let strikes = 0; // Counter for traffic violations
let lightTimer = 0; // Timer to track light changes
let isMoving = false; // Boolean flag for car movement (controlled by Arduino)
let violationTimer = 0; // Timer to check violations

let countdown = 3; // Countdown value before the game starts
let countdownStartTime = 0; // Timer start time for countdown
let countdownActive = false; // Flag for countdown state

let serial; // Serial communication object for Arduino
let gracePeriodActive = false; // Flag for grace period after light change
let graceStartTime = 0; // Timer start for grace period

// Preload images and sounds before setup
function preload() {
  carImage = loadImage("car.png");
  backgroundImage = loadImage("background.jpg");
  gameOverImage = loadImage("gameover.png");
  restartImage = loadImage("restart.png");
  quitImage = loadImage("quit.png");
  gameOverBg = loadImage("gameover_bg.jpg");
  startButtonImage = loadImage("start.png");

  startSound = loadSound("start_sound.mp3");
  gameSound = loadSound("gameplay_sound.mp3");
  gameOverSound = loadSound("gameover_sound.mp3");
  countdownSound = loadSound("countdown_go.mp3");
}

// Initial setup for the game
function setup() {
  fullscreen(); // Set fullscreen mode
  createCanvas(windowWidth, windowHeight); // Create a canvas with full window size
  carX = width / 2; // Set car's horizontal position
  carY = height - 200; // Set car's vertical position

  // Initialize serial communication with Arduino
  serial = new p5.SerialPort();
  serial.open("/dev/tty.usbmodem1201"); // serial port
  serial.on("data", serialEvent); // Define event for incoming serial data

  startSound.loop(); // Play start sound on loop
}

// Resize canvas dynamically when the window size changes
function windowResized() {
  resizeCanvas(windowWidth, windowHeight);
}

// Main draw loop: controls the game state
function draw() {
  if (gameState === "INSTRUCTIONS") {
    showInstructions(); // Display instructions screen
  } else if (gameState === "COUNTDOWN") {
    showCountdown(); // Display countdown before game starts
  } else if (gameState === "PLAY") {
    playGame(); // Main game logic
  } else if (gameState === "END") {
    endGame(); // End game screen
  }
}

// Display instructions screen
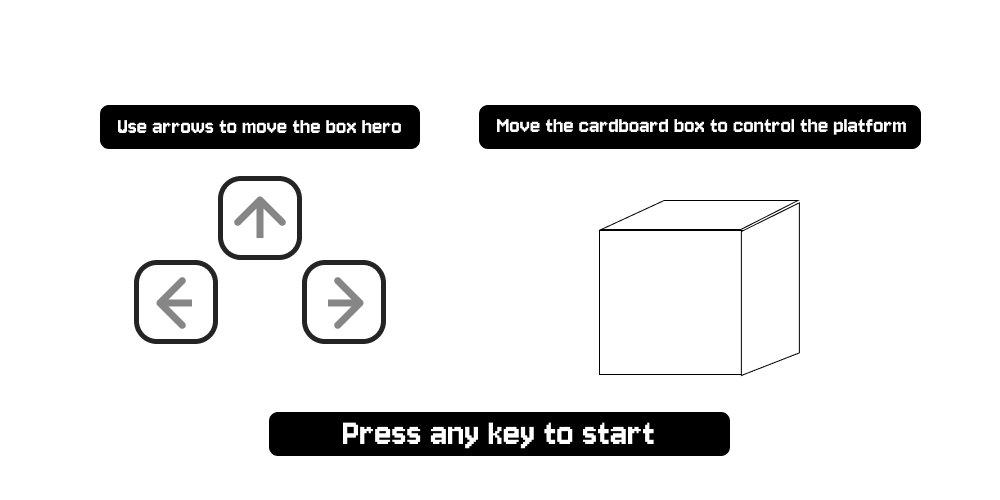
function showInstructions() {
  background(backgroundImage); // Set background
  textAlign(CENTER);
  textSize(32);
  fill("black");
  text("🚦 Traffic Light Game 🚦", width / 2, height / 6); // Title
  textSize(24);
  text("Green: Move | Red: Stop | Yellow: Keep Moving", width / 2, height / 4);
  text("Press and hold the button to stop the car", width / 2, height / 3);
  text("React in time to avoid strikes!", width / 2, height / 2.75);

  image(startButtonImage, width / 2 - 100, height / 2, 200, 100); // Start button

  // Start game on button press
  if (mouseIsPressed && mouseX > width / 2 - 100 && mouseX < width / 2 + 100 && mouseY > height / 2 && mouseY < height / 2 + 100) {
    startSound.stop();
    countdownSound.play();
    countdownStartTime = millis(); // Start countdown timer
    countdownActive = true;
    gameState = "COUNTDOWN";
  }
}

// Show countdown before game starts
function showCountdown() {
  let currentTime = millis();
  let elapsed = Math.floor((currentTime - countdownStartTime) / 1000); // Time passed
  let flashColor = frameCount % 20 < 10 ? color(255, 0, 0) : color(255, 255, 0); // Flashing background effect

  background(flashColor);
  textAlign(CENTER);
  textSize(150);
  fill(255);

  if (elapsed <= 3) {
    countdown = 3 - elapsed;
    text(countdown, width / 2, height / 2); // Show countdown numbers
  } else {
    fill(0, 255, 0);
    text("GO!", width / 2, height / 2); // Show "GO!" when countdown ends

    if (countdownActive) {
      countdownActive = false;
      setTimeout(() => {
        gameSound.loop(); // Start gameplay sound
        gameState = "PLAY";
        lightTimer = millis(); // Start light timer
        violationTimer = millis(); // Start violation timer
        startGracePeriod();
      }, 1000);
    }
  }
}

// Main gameplay logic
function playGame() {
  background("SkyBlue");
  let currentTime = millis();

  updateTrafficLight(currentTime); // Update traffic light state
  updateRoad(); // Draw road
  drawCar(carX, carY); // Draw car
  drawTrafficLight(); // Draw traffic light

  if (isMoving && !gameSound.isPlaying()) gameSound.loop(); // Loop game sound when moving
  else if (!isMoving && gameSound.isPlaying()) gameSound.stop(); // Stop sound if not moving

  // Check for violations every 2 seconds
  if (currentTime - violationTimer >= 2000) {
    checkViolations();
    violationTimer = currentTime;
  }

  fill("black");
  textSize(24);
  text(`Strikes: ${strikes}`, 50, 50); // Display strikes

  // End game after 3 strikes
  if (strikes >= 3) {
    gameSound.stop();
    gameOverSound.play();
    gameState = "END";
  }
}

// Display game over screen
function endGame() {
  background(gameOverBg);
  image(gameOverImage, width / 2 - 150, height / 4, 300, 150);
  image(restartImage, width / 2 - 220, height / 2, 200, 100); // Restart button
  image(quitImage, width / 2 + 20, height / 2, 200, 100); // Quit button

  textAlign(CENTER);
  textSize(24);
  fill("black");
  text("Choose an option:", width / 2, height / 2 - 50);

  // Restart or quit game based on mouse position
  if (mouseIsPressed) {
    if (mouseX > width / 2 - 220 && mouseX < width / 2 - 20 && mouseY > height / 2 && mouseY < height / 2 + 100) {
      restartGame();
    }
    if (mouseX > width / 2 + 20 && mouseX < width / 2 + 220 && mouseY > height / 2 && mouseY < height / 2 + 100) {
      returnToStartPage();
    }
  }
}

// Function to restart the game
function restartGame() {
  gameState = "COUNTDOWN"; // Set game state to countdown
  strikes = 0; // Reset strikes
  lightState = "green"; // Reset traffic light to green
  lightTimer = millis(); // Reset light timer
  violationTimer = millis(); // Reset violation timer
  isMoving = false; // Stop the car movement
  gameOverSound.stop(); // Stop the game over sound
  countdownSound.play(); // Play countdown sound
  countdownStartTime = millis(); // Start countdown timer
  countdownActive = true; // Activate countdown
}

// Function to return to the start page
function returnToStartPage() {
  gameState = "INSTRUCTIONS"; // Return to the instructions screen
  strikes = 0; // Reset strikes
  isMoving = false; // Stop car movement
  lightState = "green"; // Reset traffic light to green
  lightTimer = millis(); // Reset light timer
  violationTimer = millis(); // Reset violation timer
  gameOverSound.stop(); // Stop the game over sound
  startSound.loop(); // Replay the start sound
}

// Function to update the traffic light based on time
function updateTrafficLight(currentTime) {
  if (lightState === "green" && currentTime - lightTimer > 15000) {
    lightState = "yellow"; // Change to yellow after 15 seconds
    lightTimer = millis(); // Reset timer
  } else if (lightState === "yellow" && currentTime - lightTimer > 5000) {
    lightState = "red"; // Change to red after 5 seconds
    lightTimer = millis(); // Reset timer
    startGracePeriod(); // Start grace period for violations
  } else if (lightState === "red" && currentTime - lightTimer > 8000) {
    lightState = "green"; // Change back to green after 8 seconds
    lightTimer = millis(); // Reset timer
    startGracePeriod(); // Start grace period for green light
  }
}

// Function to check for traffic light violations
function checkViolations() {
  let currentTime = millis();
  if (gracePeriodActive && currentTime - graceStartTime < 1000) return; // Skip checks during grace period

  // Add strikes for incorrect actions based on traffic light state
  if (lightState === "green" && !isMoving) addStrike("Didn't move during green!");
  else if (lightState === "red" && isMoving) addStrike("Moved during red!");
  else if (lightState === "yellow" && !isMoving) addStrike("Stopped during yellow!");
}

// Function to handle strikes and send feedback to Arduino
function addStrike(message) {
  strikes++; // Increment strikes count
  console.log(message); // Log the violation message
  serial.write("BUZZER\n"); // Send a buzzer signal to Arduino
}

// Function to draw the traffic light on the screen
function drawTrafficLight() {
  fill("black");
  rect(20, 20, 50, 150, 10); // Draw the traffic light box

  // Draw the red light
  fill(lightState === "red" ? "red" : "gray");
  ellipse(45, 50, 30, 30);

  // Draw the yellow light
  fill(lightState === "yellow" ? "yellow" : "gray");
  ellipse(45, 95, 30, 30);

  // Draw the green light
  fill(lightState === "green" ? "green" : "gray");
  ellipse(45, 140, 30, 30);
}

// Function to draw the car on the screen
function drawCar(x, y) {
  image(carImage, x - 50, y, 100, 150); // Draw the car image centered at (x, y)
}

// Function to update the road movement
function updateRoad() {
  let centerY = height / 2; // Center of the screen vertically
  let centerX = width / 2; // Center of the screen horizontally
  let roadUpOffset = 50; // Width of the road at the top
  let roadDownOffset = 150; // Width of the road at the bottom
  let markingLength = 40; // Length of road markings

  roadY += isMoving ? 5 : 0; // Move road markings downward if car is moving
  if (roadY > markingLength * 2) roadY = 0; // Reset markings position when off-screen

  // Draw the grass background
  noStroke();
  fill("lime");
  rect(0, centerY, width, centerY);

  // Draw the road as a trapezoid
  fill("gray");
  quad(centerX - roadUpOffset, centerY, centerX + roadUpOffset, centerY,
       centerX + roadDownOffset, height, centerX - roadDownOffset, height);

  // Draw dashed road markings
  stroke(255);
  strokeWeight(5);
  for (let i = centerY; i < height; i += markingLength * 2) {
    let y = i + roadY; // Adjust position with road movement
    line(centerX, y, centerX, y + markingLength);
  }
}

// Event function for receiving data from Arduino
function serialEvent() {
  let data = serial.readStringUntil("\n"); // Read serial data line by line
  if (data.trim() === "MOVE") isMoving = true; // Set car to moving if Arduino sends "MOVE"
  if (data.trim() === "STOP") isMoving = false; // Stop car if Arduino sends "STOP"
}

// Function to activate grace period after light changes
function startGracePeriod() {
  gracePeriodActive = true; // Activate grace period
  graceStartTime = millis(); // Set grace period start time
}


2. Arduino Code

The Arduino code reads input from the physical button and sends “MOVE” or “STOP” signals to p5.js via serial communication. Additionally, it listens for the “BUZZER” command from p5.js and activates the buzzer for violations.


const int buttonPin = 2;       // Pin for the switch
const int buzzerPin = 8;       // Pin for the buzzer
int buttonState = HIGH;        // Current state of the switch
int lastState = HIGH;          // Last state of the switch
unsigned long lastDebounceTime = 0; // For debounce timing
const unsigned long debounceDelay = 50; // Debounce delay in milliseconds

void setup() {
  pinMode(buttonPin, INPUT_PULLUP); // Use internal pull-up resistor for the switch
  pinMode(buzzerPin, OUTPUT);       // Set buzzer pin as OUTPUT
  Serial.begin(9600);               // Start serial communication at 9600 baud
}

void loop() {
  int currentButtonState = digitalRead(buttonPin);

  // Debounce the button input
  if (currentButtonState != lastState) {
    lastDebounceTime = millis();
  }

  if ((millis() - lastDebounceTime) > debounceDelay) {
    if (currentButtonState != buttonState) {
      buttonState = currentButtonState;

      // Send "MOVE" or "STOP" signal based on button state
      if (buttonState == LOW) {
        Serial.println("MOVE"); // Button pressed
      } else {
        Serial.println("STOP"); // Button released
      }
    }
  }

  // Check for commands coming from p5.js
  if (Serial.available() > 0) {
    String command = Serial.readStringUntil('\n'); // Read command until newline
    command.trim(); // Remove unnecessary whitespace

    if (command == "BUZZER") {
      activateBuzzer(); // Activate buzzer when "BUZZER" command is received
    }
  }

  lastState = currentButtonState; // Update last state
}

// Function to activate the buzzer for 0.5 seconds
void activateBuzzer() {
  digitalWrite(buzzerPin, HIGH);
  delay(500); // Turn buzzer ON for 500 milliseconds
  digitalWrite(buzzerPin, LOW);
}


User Testing

Objective:
To test the game’s functionality, usability, and interaction between the Arduino hardware and p5.js interface.

Process:
I asked my roommate to play the game:

  1. He interacted with the physical button to control the car and watched how the car responded to the traffic lights on the screen.
  2. He initially found the yellow light behavior confusing but quickly understood the rules after a second try.

Feedback and Observations:

  • Challenge: Understanding the yellow light instructions.
    • Solution: Clarified instructions on the screen.
  • Positive Feedback: He found the buzzer feedback helpful for identifying violations.

Video:


Final Testing

Objective:
To ensure smooth operation of the system after incorporating feedback from user testing.

Testing Checklist:

  1. Traffic Light Changes: Tested timed transitions between green, yellow, and red lights.
  2. Car Movement: Verified car responded immediately to MOVE/STOP signals from Arduino.
  3. Strike System: Checked that violations were detected correctly, and strikes were incremented.
  4. Buzzer Activation: Ensured the buzzer activated for 0.5 seconds during violations.
  5. Game Over Screen: Verified that the game ended and displayed the correct options after 3 strikes.

Results:

  • All functionalities worked as expected without delays or glitches.
  • User feedback was implemented successfully, resulting in an improved experience.

Videos: 


Conclusion:

The project successfully integrates p5.js for visual simulation with Arduino hardware for user interaction. Combining digital visuals with physical inputs created an interactive and engaging experience that simulates real-world traffic rules.

This is the whole game:

Week 14: Final Game Day

Concept:

Growing up, I have heard a lot about the Royal Bengal Tiger of Bangladesh, which is our sigil for being brave and strong and they live in the Sundarban, which is the largest mangrove forest of the world.

In Bangladesh, we have myths related to Sundarban and its history of man-eating tigers and a spirit/deity, named “Bonbibi” who protects the human from the tigers. An amazing fact, I learned while searching for this project is that both Muslims and Hindus in those certain area, believe in Bonbibi which is very conflicting with the concept of Islam. Yet, she is thought to be the daughter of Prophet Abraham. I did not wanted to miss the chance to let people get introduced to “Sundarban” and the legendary myth.

Inspirations:

While working on this project, I listened to the song named “Bonobibi” by Coke Studio Bangladesh, which says the story of her and connects the life of Bangladeshi to a very deep level. Another book, I took as my inspiration, is Amitav Ghosh‘s “Hungry Tide. I am personally inspired and try to treasure these amazing parts of my culture close to my identity and personality. I am not sure, how much I was able to tell the story through my game project but it was a project, not only for IM course but also me  to navigate ways of spreading my culture to a diverse student body and faculties.

Project Interaction Archive:

Project Box:
Inner Circuit
Right Side View
Top View Of the Project Box


Player Interaction: IM Showcase 2024

INTERACTION DESIGN:

Arduino for Physical Interactions
The Arduino serves as the core hardware interface. It reads data from two ultrasonic sensors, a potentiometer, and a physical button. This data is sent to the p5.js sketch via serial communication which to manage gameplay.

The project is divided into two games. To start any of the game player needs to press a physical button. The physical button is connected to Arduino pin 07 which takes the input from the button and allows the p5.js through serial communication to start the game. Pressing the button changes the state (HIGH → LOW or LOW → HIGH) is how Arduino code listens to detect button presses. Using a button is a common practice to start any game, so I used it for my final project as well.

Ultrasonic sensors detect hand proximity for selecting words based on their color. Two sensors were connected to take output for either Yellow or for White Color. I have set the threshold value to 15, so anything that comes below 15cm of distance, the sonar sensors will count them and if the obstacle is detected on the right sensor, the score will go up. To decide which one is dedicated for Yellow and Which one is White, I mapped each ultrasonic sensor to a specific word color in the code. The sensor on the left is dedicated to detecting Yellow, while the one on the right is dedicated to White. This mapping is based on the hardware connection and the logic in the Arduino and p5.js code.

The Arduino identifies which sensor detects an obstacle by reading the distance from the sensors. If the left sensor’s reading goes below the threshold of 15 cm, it corresponds to Yellow, and if the right sensor detects proximity, it corresponds to White. The data is then sent to p5.js via serial communication, which matches the color of the detected word with the respective sensor input to determine if the interaction is correct.

For the second game of collecting flowers, the potentiometer allows players to control the basket horizontally to collect flowers. The potentiometer is connected to an analog pin on the Arduino, which reads its position as a voltage value ranging from 0 to 1023, but I saw in mine it was somewhere around 990 as max value. This raw input is then mapped to the screen width in p5.js, allowing the basket’s movement to correspond seamlessly with the player’s adjustments.  When the basket aligns with a falling flower, the game detects a collision, increasing the score.


arduino code:

 // Arduino Code for Sundarbans Challenge Game

// Define Button Pin
#define BUTTON_PIN 7

// Define Ultrasonic Sensor Pins
const int trigPinYellow = 9;
const int echoPinYellow = 10;
const int trigPinWhite = 11;
const int echoPinWhite = 12;

// Define Potentiometer Pin
const int potPin = A0;

// Variables to track button state
bool buttonPressed = false;

void setup() {
  Serial.begin(9600);
  pinMode(BUTTON_PIN, INPUT_PULLUP);

  // Initialize Ultrasonic Sensor Pins
  pinMode(trigPinYellow, OUTPUT);
  pinMode(echoPinYellow, INPUT);
  pinMode(trigPinWhite, OUTPUT);
  pinMode(echoPinWhite, INPUT);
}

void loop() {
  // Read Button State
  bool currentButtonState = digitalRead(BUTTON_PIN) == LOW; // Button pressed when LOW

  if (currentButtonState && !buttonPressed) {
    buttonPressed = true;
    Serial.println("button:pressed");
  } else if (!currentButtonState && buttonPressed) {
    buttonPressed = false;
    Serial.println("button:released");
  }

  // Read distances from both ultrasonic sensors
  long distanceYellow = readUltrasonicDistance(trigPinYellow, echoPinYellow);
  long distanceWhite = readUltrasonicDistance(trigPinWhite, echoPinWhite);

  // Read potentiometer value
  int potValue = analogRead(potPin); // 0 - 1023

  // Send data in "pot:<value>,ultra1:<value>,ultra2:<value>" format
  Serial.print("pot:");
  Serial.print(potValue);
  Serial.print(",ultra1:");
  Serial.print(distanceYellow);
  Serial.print(",ultra2:");
  Serial.println(distanceWhite);

  delay(100); // Update every 100ms
}

long readUltrasonicDistance(int trigPin, int echoPin) {
  // Clear the Trigger Pin
  digitalWrite(trigPin, LOW);
  delayMicroseconds(2);

  // Send a 10 microsecond HIGH pulse to Trigger
  digitalWrite(trigPin, HIGH);
  delayMicroseconds(10);
  digitalWrite(trigPin, LOW);

  // Read the Echo Pin and calculate the duration
  long duration = pulseIn(echoPin, HIGH, 30000); // Timeout after 30ms

  // Calculate distance in centimeters
  long distance = duration * 0.034 / 2;

  // Handle out-of-range measurements
  if (duration == 0) {
    distance = -1; // Indicate out of range
  }

  return distance;
}

Description of Code:

The button, connected to pin 7, uses an internal pull-up resistor to detect when it’s pressed, sending a signal (button:pressed) to the computer. Two ultrasonic sensors measure distance: one for yellow and one for white. These sensors send a pulse and listen for its echo to calculate how close a hand is, allowing players to interact with words based on their color.

The potentiometer, connected to A0, controls the basket in the flower-collecting game by adjusting its position smoothly. All data — button states, distances, and potentiometer readings — is sent to the computer via serial communication in a structured format given as a file from the professor and it is read as serial data in p5.js.

Schematic Diagram: Tinkercad

P5.js Sketch:

P5.js Code with description commented:
// sketch.js 

// ----------------------
// 1. Global Variable Declarations
// ----------------------
let page = "start"; // Initial page
let howToPlayButton, mythologyButton, connectButton, fullscreenButton, backButton; // Buttons
let timer = 45; // Total game time in seconds
let countdown = timer;
let timerStart = false;
let gameOver = false;
let gameResult = "";
let score = 0;
let getReadyBg;
let endgame;


let gameStartInitiated = false; // Flag for transitioning from gameStart to game

// Typewriter effect variables
let typewriterText = "Press the green button to start your adventure!";
let currentText = ""; 
let textIndex = 0;  
let typewriterSpeed = 50; 


// Word display variables
let words = [
  "The", "Sundarbans", "is", "home", "to", "the",
  "man-eater", "Bengal", "tiger.", "Local", "honey", 
  "hunters,", "the", "Mowallis,", "brave", "its", "dangers",
  "to", "collect", "honey,", "often", "facing", "tiger", 
  "encounters.", "Myths", "surround", "these", "tigers,", 
  "people", "can", "only", "stay", "safe", "if", "they",
  "remember", "Bonbibi,", "the", "spirit."
];


let currentWordIndex = 0;
let wordInterval = 8000; // first 5 words every 4s
let fastInterval = 6000; // subsequent words every 2s
let wordDisplay = "";
let wordColor = "white";

// Basket game variables
let basketX, basketY;
let flowers = [];
let vehicles = []; // Water particles for aesthetic effect in basket game


let textToDisplay = "The Sundarbans, is home to the man-eater Bengal tiger. Local honey hunters, the Mowallis, brave its dangers to collect honey, often facing tiger encounters. Myths surround these tigers, people can only stay safe if they remember Bonbibi, the spirit.";


// Background Text for mythology and gameStart
let backgroundText = "In the Sundarbans myth, Bonbibi, the guardian goddess of the forest, defends the local woodcutters and honey gatherers from the malevolent tiger god, Dakshin Rai. The story highlights a young boy, Dukhey, who becomes a victim of a pact between his greedy employer and Dakshin Rai, aiming to sacrifice him to the tiger god. Bonbibi intervenes, rescuing Dukhey and ensuring his safe return, emphasizing her role as a protector and mediator between the natural world and human interests. This myth underscores the intricate balance between exploitation and conservation of the Sundarbans' resources.";

// Variables for serial communication
let latestData = "waiting for data";

// Images
let startBg, nightBg, bonbibi;

// Typewriter interval ID
let typewriterIntervalID;

// Variable to store the setTimeout ID for word transitions
let wordTimeoutID;

// Debugging Mode
let debugMode = false; // Set to false when using actual sensors

// Feedback Variables
let feedbackMessage = "";
let feedbackColor;
let feedbackTimeout;
let wordTouched = false;

// ----------------------
// 2. Function Declarations
// ----------------------

function setPage(newPage) {
  page = newPage;

  if (page === "start") {
    
    if (!bgMusic.isPlaying()) {
      bgMusic.loop(); // Loop the music
      bgMusic.setVolume(0.5); // Adjust volume (0.0 to 1.0)
    }
    
  
    connectButton.show();
    howToPlayButton.show();
    mythologyButton.show();
    fullscreenButton.show(); // Show fullscreen button on Start page
    backButton.hide(); // Hide Back button on Start page
    
  } else if (page === "howToPlay" || page === "mythology") {
    connectButton.hide();
    howToPlayButton.hide();
    mythologyButton.hide();
    fullscreenButton.hide(); // Hide fullscreen on these pages
    backButton.show(); // Show Back button on these pages
  } else if (page === "gameStart") { 
    console.log("Get Ready! Transitioning to game...");
    setTimeout(() => {
      setPage("game"); // Transition to game page after 15 seconds
    }, 18000);
    
    connectButton.hide();
    howToPlayButton.hide();
    mythologyButton.hide();
    fullscreenButton.hide();
    backButton.hide(); // hide Back button on new page
    
  }  else if (page === "secondGameIntro") {
    connectButton.hide();
    howToPlayButton.hide();
    mythologyButton.hide();
    fullscreenButton.hide();
    backButton.hide();
  } else {
    connectButton.hide();
    howToPlayButton.hide();
    mythologyButton.hide();
    fullscreenButton.hide();
    backButton.hide();
  }
}

function toggleFullscreen() {
  let fs = fullscreen();
  fullscreen(!fs);
  console.log(fs ? "Exited fullscreen mode." : "Entered fullscreen mode.");
}

function styleButtons(buttonColors = {}) {
  const defaults = {
    connect: '#855D08',
    howToPlay: '#B77607',
    mythology: '#8C5506',
    fullscreen: '#E1D8D8',
    back: '#555555'
  };

  const colors = { ...defaults, ...buttonColors };

  let buttonStyles = `
    color: rgb(255,255,255);
    font-size: 15px;
    border: none;
    border-radius: 5px;
    padding: 8px 20px;
    text-align: center;
    text-decoration: none;
    display: inline-block;
    margin: 5px;
    cursor: pointer;
    transition: all 0.3s ease;
    box-shadow: 0 4px 6px rgba(0,0,0,0.1);
  `;

  connectButton.style(buttonStyles + `background-color: ${colors.connect};`);
  howToPlayButton.style(buttonStyles + `background-color: ${colors.howToPlay};`);
  mythologyButton.style(buttonStyles + `background-color: ${colors.mythology};`);
  fullscreenButton.style(buttonStyles + `background-color: ${colors.fullscreen};`);
  backButton.style(buttonStyles + `background-color: ${colors.back};`);

  [connectButton, howToPlayButton, mythologyButton, fullscreenButton, backButton].forEach((btn, index) => {
    const baseColor = Object.values(colors)[index];
    btn.mouseOver(() => {
      btn.style('background-color', shadeColor(baseColor, -10));
      btn.style('transform', 'translateY(-2px)');
      btn.style('box-shadow', '0 6px 8px rgba(0,0,0,0.15)');
    });
    btn.mouseOut(() => {
      btn.style('background-color', baseColor);
      btn.style('transform', 'translateY(0px)');
      btn.style('box-shadow', '0 4px 6px rgba(0,0,0,0.1)');
    });
  });
}

function shadeColor(color, percent) {
  let f = parseInt(color.slice(1),16),t=percent<0?0:255,p=percent<0?percent*-1:percent,
  R=f>>16,G=(f>>8)&0x00FF,B=f&0x0000FF;
  return '#'+(0x1000000+(Math.round((t-R)*p)+R)*0x10000+(Math.round((t-G)*p)+G)*0x100+(Math.round((t-B)*p)+B)).toString(16).slice(1);
}


// All preload
//--------------
function preload() {
  startBg = loadImage('start.png', () => console.log("start.png loaded."), () => console.error("Failed to load start.png."));
  nightBg = loadImage('village.png', () => console.log("night.png loaded."), () => console.error("Failed to load night.png."));
  bonbibi = loadImage('bonbibi.png');
  endgame = loadImage('endgame.png');
  
    bgMusic = loadSound('start.mp3', () => console.log("Music loaded!"), () => console.error("Failed to load music."));

}

// setup
function setup() {
  createCanvas(windowWidth, windowHeight);
  textAlign(CENTER,CENTER);

  backButton = createButton('Back');
  backButton.position(width/2 - backButton.width/2, height-100);
  backButton.mousePressed(() => setPage("start"));
  backButton.hide();

  createButtons();
  styleButtons();
  setPage("start");

  feedbackColor = color(255);

  typewriterIntervalID = setInterval(() => {
    if(textIndex < typewriterText.length) {
      currentText += typewriterText[textIndex];
      textIndex++;
    }
  }, typewriterSpeed);
}

// draw
function draw() 

{
  if (page === "gameStart") {
    handleGameStartPage(); // Render the "Get Ready!" page
  }

{
  if(page === "start" && startBg && startBg.width > 0) {
    imageMode(CORNER);
    image(startBg,0,0,width,height);
  } else if((page === "gameStart"||page==="game"||page==="won"||page==="lost"||page==="secondGameIntro"||page==="basketGame") && nightBg && nightBg.width>0) {
    imageMode(CORNER);
    image(nightBg,0,0,width,height);
  } else {
    background(30);
  }

  switch(page) {
    case "start":
      handleStartPage();
      break;
    case "gameStart":
      handleGameStartPage();
      break;
    case "game":
      handleGamePage();
      break;
    case "basketGame":
      handleBasketGame();
      break;
    case "howToPlay":
      handleHowToPlay();
      break;
    case "mythology":
      drawMythologyPage();
      break;
    case "secondGameIntro":
      handleSecondGameIntro();
      break;
    case "won":
    case "lost":
      handleEndPage();
      break;
    default:
      break;
  }

  if(feedbackMessage!==""){
    push();
    let boxWidth=width*0.3;
    let boxHeight=50;
    let boxX=width/2 - boxWidth/2;
    let boxY=height-80;

    fill('#F2D9A4');
    noStroke();
    rect(boxX,boxY,boxWidth,boxHeight,10);

    fill(feedbackColor);
    textSize(24);
    text(feedbackMessage,width/2,boxY+boxHeight/2);
    pop();
  }
}
}

//------------
// createButtons

function createButtons() {
  connectButton = createButton('Connect to Serial');
  connectButton.position(width/2 - connectButton.width/2, height/2 -220);
  connectButton.mousePressed(()=>{
    setUpSerial();
    connectButton.hide();
    console.log("Serial connection initiated.");
  });

  howToPlayButton = createButton('How to Play');
  howToPlayButton.position(width/2 - howToPlayButton.width/2, height/2 +205);
  howToPlayButton.mousePressed(()=>{
    setPage("howToPlay");
    console.log("Navigated to How to Play page.");
  });

  mythologyButton = createButton('Read the Mythology');
  mythologyButton.position(width/2 - mythologyButton.width/2, height/2 +255);
  mythologyButton.mousePressed(()=>{
    setPage("mythology");
    console.log("Navigated to Mythology page.");
  });

  fullscreenButton = createButton('Fullscreen');
  fullscreenButton.mousePressed(toggleFullscreen);

  positionButtons();

  if(page==="start"){
    connectButton.show();
    howToPlayButton.show();
    mythologyButton.show();
    fullscreenButton.show();
  } else {
    connectButton.hide();
    howToPlayButton.hide();
    mythologyButton.hide();
    fullscreenButton.hide();
  }
}

// positionButtons
function positionButtons(){
  let centerX=width/2;
  connectButton.position(centerX - connectButton.width/2, height/2 -220);
  howToPlayButton.position(centerX - howToPlayButton.width/2, height/2 +225);
  mythologyButton.position(centerX - mythologyButton.width/2, height/2 +265);
  fullscreenButton.position(centerX - fullscreenButton.width/2, height/2 +305);
}


function setupBasketGameElements(){
  basketY=height-50;
  basketX=width/2;
  score=0;
  countdown=timer;
  gameOver=false;

  flowers=[];
  vehicles=[];

  for(let x=0;x<=width;x+=10){
    for(let y=-200;y<height;y+=10){
      let v=new Vehicle(x,y);
      vehicles.push(v);
    }
  }

  noCursor();
}

// Page Handling Functions
function handleStartPage(){
  fill(255);
  textSize(48);
  stroke(0);
  strokeWeight(2);
  text("Myths Of Sundarban", width/2, height/13);

  noStroke();
  drawInstructionBox(currentText);
}

function handleGameStartPage() {
  background(0); // Dark background
  fill('#F7E4BA');
  textSize(36);
  stroke(0);
  strokeWeight(2);
  text("Get Ready To Play Using One Hand!", width / 2, height / 2 - 50);

  fill(255);
  textSize(24);
  text("Words will appear in yellow or white.\n", width / 2, height / 2 + 50);
  
  fill(255);
  textSize(24);
  text("You have two ultrasound sensor: Yellow and White", width / 2, height / 2 + 100);
  
    fill(255);
  textSize(24);
  text("If the word is yellow, place your hand in front of the yellow sensor.\n"+
    "If the word is white, place your hand in front of the white sensor.\n"+
    "Respond Quickly and Accurately to score points.", width / 2, height / 2 + 195);
  
  
  fill(255);
  textSize(24);
  text("IF YOU SCORE 20, YOU WILL JUMP TO THE NEXT LEVEL!.", width / 2, height / 2 + 270);
}


function handleGamePage(){
  displayTimerAndScore();
  displaySensorData();

  if (wordDisplay !== "") {
  push();
  textAlign(CENTER, CENTER);
  textSize(64);

  // Choose a background color that contrasts well with yellow and white text
  let backgroundColor = wordColor === "yellow" ? color(0, 0, 0, 100) : color(0, 0, 0, 150); // Semi-transparent dark background
  
  // Border color to match the glowing effect
  let borderColor = wordColor === "yellow" ? color(255, 204, 0) : color(255); // Yellow border for yellow text, white border for white text
  
  // Calculate the width of the text to adjust the background size
  let textWidthValue = textWidth(wordDisplay);
  
  // Draw background rectangle with a border
  fill(backgroundColor);
  noStroke();
  let padding = 20; // Padding around the text
  rectMode(CENTER);
  rect(width / 2, height / 2, textWidthValue + padding, 80); // Adjust rectangle width based on text width
  
  // Draw the border around the background
  stroke(borderColor);
  strokeWeight(6);
  noFill();
  rect(width / 2, height / 2, textWidthValue + padding, 80); // Same size as the background
  
  // Draw the glowing text on top
  fill(wordColor === "yellow" ? color(255, 255, 0) : color(255)); // Glow color for text
  strokeWeight(4);
  stroke(wordColor === "yellow" ? color(255, 255, 0) : color(255)); // Glow color for text
  text(wordDisplay, width / 2, height / 2);
  pop();
}

}

function handleBasketGame(){
 
  background("#094F6D");
  
  noCursor();

  displayTimerAndScore();
  displaySensorData();

  for(let i=0;i<vehicles.length;i++){
    vehicles[i].update();
    vehicles[i].show();
  }

  for(let i=flowers.length-1;i>=0;i--){
    flowers[i].update();
    flowers[i].show();

    if(dist(flowers[i].pos.x,flowers[i].pos.y,basketX,basketY)<40){
      score++;
      flowers.splice(i,1);
    }

    if(flowers[i] && flowers[i].pos.y>height){
      flowers.splice(i,1);
    }
  }

  if(frameCount%30===0){
    let f=new Flower(random(50,width-50),-50,random(30,60),random(TWO_PI),floor(random(6)));
    flowers.push(f);
  }

  drawBasket();
  
 if (score >= 20 && !gameOver) {
    gameOver = true;
    gameResult = "Congratulations! You Win!";
    setPage("won"); // Transition to the winning page
    console.log("Player reached 20 flowers. Game won!");
    return; // Stop further game logic
  }
}

function handleEndPage() {
    background(50); // Set a dark background or whatever fits your game design
   image(endgame, 0, 0, width, height);
  
    textSize(48);
    textAlign(CENTER, CENTER);

    // Calculate rectangle and text positions
    let rectWidth = 800;
    let rectHeight = 100;
    let rectX = (width / 2);
    let rectY = (height / 2) - (rectHeight / 2);

    // Draw a background rectangle for the message
    fill(255, 204, 0); // Bright yellow color for both win and lose
    rect(rectX, rectY, rectWidth, rectHeight, 20); // Rounded corners with a radius of 20

    // Check the game result and set text and colors accordingly
    if (gameResult === "Congratulations! You Win!") {
        fill(0); // Black text for winning message
        text("Congratulations! You Win!", width / 2, height / 2-30);
    } else if (gameResult === "Time's Up! You Lose!") {
        fill(0); // Black text for losing message
        text("Time's Up! You Lose!", width / 2, height / 2-30);
    }

    // Additional UI elements
    textSize(24);
    fill(255); // White color for secondary text
    text("Press 'R' to Restart", width / 2, rectY + rectHeight + 40);
}


function handleHowToPlay(){
  clear();
  background(34,139,34);
  fill(255);
  textSize(32);
  text("How to Play:",width/2,height/5);

  textSize(24);
  text(
    "Words will appear in yellow or white.\n"+
    "If the word is yellow, use the yellow sensor.\n"+
    "If the word is white, use the white sensor.\n"+
    "Respond quickly and accurately to score points.",
    width/2,height/2
  );

  backButton.show();
}

function drawMythologyPage(){
  clear();
  background(34,139,34);
  fill(255);
  textSize(28);
  textAlign(LEFT,TOP);

  text(backgroundText,50,50,width-100,height-100);

  backButton.show();
  textAlign(CENTER,CENTER);
}

function handleSecondGameIntro() {
  // Change background image for this page
  if (bonbibi && bonbibi.width > 0) {
    imageMode(CORNER);
    image(bonbibi, 0, 0, width, height);
  } else {
    background('#7A3B0C'); // Fallback background color
  }

  // Box styling
  let boxWidth = width * 0.8; // Box width (80% of screen width)
  let boxHeight = height * 0.4; // Box height (40% of screen height)
  let boxX = (width - boxWidth) / 2; // Center horizontally
  let boxY = (height - boxHeight) / 2; // Center vertically

  noStroke();
  fill(0, 150); // Semi-transparent background for the box
  rect(boxX, boxY, boxWidth, boxHeight, 10); // Draw the box with rounded corners

  // Text inside the box
  fill(255);
  textSize(24);
  textAlign(CENTER, CENTER);

  // Split the text into vertical lines and display it
  let instructions = [
    "Collect flowers for Bonobibi."," Move basket by rotating the potentiometer.",
    "Press the button to start the basket game."
  ];
  let lineSpacing = 35; // Space between each line
  let textY = boxY + boxHeight / 2 - (instructions.length * lineSpacing) / 2;

  instructions.forEach((line, index) => {
    text(line, width / 2, textY + index * lineSpacing);
  });

  // Title text at the top
  textSize(36);
  stroke(2);
  strokeWeight(4);
  text("Prepare for the Next Challenge!", width / 2, boxY - 40);

  // Hide the back button
  backButton.hide();
}


// drawInstructionBox
function drawInstructionBox(textContent){
  textSize(18);

  let boxWidth=width*0.4;
  let boxHeight=60;
  let boxX=width/2 - boxWidth/2;
  let boxY=height/1.5 - boxHeight/12;

  noStroke();
  fill('rgb(165,88,8)');
  rect(boxX,boxY,boxWidth,boxHeight,10);

  fill(255);
  text(textContent,width/2,boxY+boxHeight/2);
}

function displayTimerAndScore(){
  push();
  textAlign(CENTER,CENTER);
  textSize(24);
  noStroke();
  fill(0,150);
  rectMode(CENTER);
  rect(width/2,50,220,60,10);
  fill(255);
  text("Time: "+countdown+"s | Score: "+score,width/2,50);
  pop();
}

function displaySensorData(){
  push();
  textAlign(LEFT,CENTER);
  textSize(16);
  noStroke();
  fill(0,150);
  rectMode(CORNER);
  rect(20,height-60,320,40,10);
  fill(255);
  text("Latest Data: "+latestData,40,height-40);
  pop();
}

function setupGameElements(){
  currentWordIndex=0;
  wordDisplay="";
  wordColor="white";
  countdown=timer;
  gameOver=false;
  gameResult="";
  score=0;

  wordInterval= 8000;
  console.log("Game elements reset.");

  gameStartInitiated=false;
}

function setNextWord() {
  if (gameOver) return;

  if (score > 20) {
    gameOver = true;
    gameResult = "Congratulations! You Win the First Game!";
    console.log("Score exceeded 20. Transitioning to second game intro...");
    setPage("secondGameIntro");
    return;
  }
  

  // Set the next word and its color
  wordDisplay = words[currentWordIndex];
  wordColor = random(["yellow", "white"]); // Assign color randomly
  currentWordIndex++;
  wordTouched = false; // Reset interaction flag

  // Schedule the next word transition
  wordTimeoutID = setTimeout(setNextWord, currentWordIndex < 5 ? 8000 : 6000);
}


let timerInterval;

function startTimer() {
  // Prevent multiple intervals
  if (timerStart) return;

  timerStart = true;
  clearInterval(timerInterval); // Clear any existing timer interval

  timerInterval = setInterval(() => {
    if (countdown > 0) {
      countdown--; // Decrement the timer
      console.log(`Timer: ${countdown}s`);
    } else {
      clearInterval(timerInterval); // Stop the timer when it reaches zero
      timerStart = false;
      if (!gameOver) {
        gameOver = true;
        gameResult = "Time's Up! You Lose!";
        setPage("lost"); // Go to the game over page
        console.log("Timer ended. Time's up!");
      }
    }
  }, 1000);
}

//--------------
// Debug with keyboard
//---------------

function keyPressed(){
  if(debugMode){
    if(key==='Y'||key==='y'){
      let simulatedData="5,15";
      console.log("Simulated Yellow Sensor Activation:",simulatedData);
      readSerial(simulatedData);
    }

    if(key==='W'||key==='w'){
      let simulatedData="15,5";
      console.log("Simulated White Sensor Activation:",simulatedData);
      readSerial(simulatedData);
    }

    if(key==='B'||key==='b'){
      let simulatedData="ButtonPressed";
      console.log("Simulated Button Press:",simulatedData);
      readSerial(simulatedData);
    }

    if(key==='P'||key==='p'){
      let simulatedData="600";
      console.log("Simulated Potentiometer Activation:",simulatedData);
      readSerial(simulatedData);
    }
  } else {
    if(key==='r'||key==='R'){
      if(page==="secondGameIntro"||page==="won"){
        setupGameElements();
        setPage("start");
        console.log("Game restarted to Start page.");
        currentText="";
        textIndex=0;

        clearInterval(typewriterIntervalID);

        typewriterIntervalID=setInterval(()=>{
          if(textIndex<typewriterText.length){
            currentText+=typewriterText[textIndex];
            textIndex++;
          }
        },typewriterSpeed);
      } else {
        setupGameElements();
        setPage("start");
        console.log("Game restarted to Start page.");
        currentText="";
        textIndex=0;

        clearInterval(typewriterIntervalID);

        typewriterIntervalID=setInterval(()=>{
          if(textIndex<typewriterText.length){
            currentText+=typewriterText[textIndex];
            textIndex++;
          }
        },typewriterSpeed);
      }
    }
  }
}
//------------


//----------
//Window Resize Code
//------------
function windowResized(){
  resizeCanvas(windowWidth,windowHeight);
  positionButtons();
  backButton.position(width/2 - backButton.width/2, height-100);
}

function calcTextSize(baseSize){
  return min(windowWidth,windowHeight)/800 * baseSize;
}

function updateTextSizes(){
  // Can be expanded if needed
}


// class constrauction for driving particles
//---------------------
class Vehicle {
  constructor(x,y){
    this.pos=createVector(x,y);
    this.vel=createVector(0,random(1,3));
    this.acc=createVector(0,0);
  }

  update(){
    this.vel.add(this.acc);
    this.pos.add(this.vel);
    this.acc.mult(0);

    if(this.pos.y>height){
      this.pos.y=0;
      this.pos.x=random(width);
    }
  }

  show(){
    stroke(173,216,230,150);
    strokeWeight(2);
    point(this.pos.x,this.pos.y);
  }
}

let gameSpeed = 2.8; // Default speed multiplier for the game

class Flower {
  constructor(x, y, size, rotation, type) {
    this.pos = createVector(x, y);
    this.size = size;
    this.rotation = rotation;
    this.type = type;
    this.speed = random(3, 6) * gameSpeed; // Adjust speed with multiplier
  }

  update() {
    this.pos.y += this.speed;
  }

  show() {
    push();
    translate(this.pos.x, this.pos.y);
    rotate(this.rotation);
    drawFlower(0, 0, this.size, this.type);
    pop();
  }
}


function drawFlower(x,y,size,type){
  switch(type){
    case 0:
      drawDaisy(x,y,size);
      break;
    case 1:
      drawTulip(x,y,size);
      break;
    case 2:
      drawRose(x,y,size);
      break;
    case 3:
      drawSunflower(x,y,size);
      break;
    case 4:
      drawLily(x,y,size);
      break;
    case 5:
      drawMarigold(x,y,size);
      break;
    default:
      drawDaisy(x,y,size);
      break;
  }
}

function drawDaisy(x,y,size){
  let petalCount=9;
  let petalLength=size;
  let petalWidth=size/3;

  stroke(0);
  fill('#D9E4E6');
  push();
  translate(x,y);
  for(let i=0;i<petalCount;i++){
    rotate(TWO_PI/petalCount);
    ellipse(0,-size/2,petalWidth,petalLength);
  }
  pop();

  fill('#F2F2F2');
  noStroke();
  ellipse(x,y,size/2);
}

function drawTulip(x,y,size){
  let petalCount=6;
  let petalWidth=size/2;

  stroke(0);
  fill('#AEB7FE');
  push();
  translate(x,y);
  for(let i=0;i<petalCount;i++){
    rotate(TWO_PI/petalCount);
    ellipse(0,-size/2,petalWidth,size);
  }
  pop();

  fill('#EDEAE6');
  noStroke();
  ellipse(x,y,size/3);
}

function drawRose(x,y,size){
  let petalCount=10;
  let petalWidth=size/3;

  stroke(0);
  fill('#D87373');
  push();
  translate(x,y);
  for(let i=0;i<petalCount;i++){
    rotate(TWO_PI/petalCount);
    ellipse(0,-size/2,petalWidth,size/1.5);
  }
  pop();

  fill('#F5E6E8');
  noStroke();
  ellipse(x,y,size/4);
}

function drawSunflower(x,y,size){
  let petalCount=20;
  let petalLength=size*1.5;
  let petalWidth=size/2;

  stroke(0);
  fill('#FACA49');
  push();
  translate(x,y);
  for(let i=0;i<petalCount;i++){
    rotate(TWO_PI/petalCount);
    ellipse(0,-size/2,petalWidth,petalLength);
  }
  pop();

  fill('#6E4B1B');
  noStroke();
  ellipse(x,y,size);
}

function drawLily(x,y,size){
  let petalCount=6;
  let petalWidth=size/2;

  stroke(0);
  fill('#998D30');
  push();
  translate(x,y);
  for(let i=0;i<petalCount;i++){
    rotate(TWO_PI/petalCount);
    ellipse(0,-size/2,petalWidth,size);
  }
  pop();

  fill('#FBE7E7');
  noStroke();
  ellipse(x,y,size/4);
}

function drawMarigold(x,y,size){
  let petalCount=12;
  let petalLength=size;
  let petalWidth=size/2;

  stroke(0);
  fill('#F4A263');
  push();
  translate(x,y);
  for(let i=0;i<petalCount;i++){
    rotate(TWO_PI/petalCount);
    ellipse(0,-size/2,petalWidth,petalLength);
  }
  pop();

  fill('#FFC107');
  noStroke();
  ellipse(x,y,size/3);
}

function drawBasket() {
  fill("#F6DC89"); // Set the fill color to a brown, typical of baskets
  rectMode(CENTER);
  rect(basketX, basketY-10, 60, 20, 5); // Main basket shape
  
  // Adding lines to create a woven effect
  for (let i = -30; i <= 30; i += 6) {
    stroke(139, 69, 19); // Darker brown for the weave lines
    line(basketX + i, basketY - 20, basketX + i, basketY); // Vertical lines
  }
  
  for (let j = -10; j <= 0; j += 5) {
    stroke(160, 82, 45); // Lighter brown for a highlight effect
    line(basketX - 30, basketY + j - 10, basketX + 30, basketY + j - 10); // Horizontal lines
  }
  
  noStroke(); // Resetting stroke to default
}
function handleSerialEvent(event) {
  console.log("Handling Serial Event:", event);

  // Parse sensor data
  let keyValues = event.trim().split(',');
  let data = {};
  keyValues.forEach((kv) => {
    let [key, value] = kv.split(':');
    if (key && value !== undefined) data[key.trim()] = value.trim();
  });

  console.log("Parsed Data:", data);

   // Check for the physical button press
  // Check for physical button press
  if (data.button === "pressed") {
    if (page === "start") {
      console.log("Physical button pressed. Transitioning to gameStart page.");
      setPage("gameStart"); // Transition to 'Get Ready' page

      // Add a 3-second delay before transitioning to the 'game' page
      setTimeout(() => {
        setPage("game");
        setupGameElements();
        setNextWord();
        startTimer();
        console.log("Word game started after 10-second delay.");
      }, 15000);
      return;
    }

    if (page === "secondGameIntro") {
      console.log("Physical button pressed. Transitioning to basketGame page.");
      setPage("basketGame");
      setupBasketGameElements();
      startTimer();
      return;
    }
  }


  // Handle Sensor Data (Ultrasonics) for Game 1
  if (page === "game" && !gameOver && !wordTouched) {
    let distanceYellow = parseFloat(data.ultra1);
    let distanceWhite = parseFloat(data.ultra2);

    if (!isNaN(distanceYellow) && !isNaN(distanceWhite)) {
      console.log(`Sensor Readings - Yellow: ${distanceYellow}cm, White: ${distanceWhite}cm`);
      let touchThreshold = 5; // Proximity threshold

      // Check if the correct sensor is touched
      if (wordColor === "yellow" && distanceYellow < touchThreshold) {
        handleCorrectTouch();
      } else if (wordColor === "white" && distanceWhite < touchThreshold) {
        handleCorrectTouch();
      } else if (
        (wordColor === "yellow" && distanceWhite < touchThreshold) ||
        (wordColor === "white" && distanceYellow < touchThreshold)
      ) {
        handleIncorrectTouch();
      }
    } else {
      console.log("Invalid sensor data received.");
    }
  }

  // Handle Potentiometer for Basket Game (Game 2)
  if (page === "basketGame" && !gameOver) {
    let potValue = parseFloat(data.pot);
    console.log("Potentiometer Reading:", potValue);

    if (!isNaN(potValue)) {
      basketX = map(potValue, 0, 1023, 50, width - 50);
      basketX = constrain(basketX, 50, width - 50);
    } else {
      console.log("Invalid potentiometer value:", potValue);
    }
  }
}

// Helper for correct touch
function handleCorrectTouch() {
  score++;
  wordTouched = true;
  feedbackMessage = "Correct!";
  feedbackColor = color(0, 200, 0);

  // Clear the current word and load the next one
  wordDisplay = "";
  clearTimeout(wordTimeoutID); // Cancel any pending word transitions
  setTimeout(() => {
    feedbackMessage = ""; // Clear feedback after 500ms
    setNextWord(); // Transition to the next word
  }, 500); // Allow brief feedback display
}

// Helper for incorrect touch
function handleIncorrectTouch() {
  feedbackMessage = "Incorrect!";
  feedbackColor = color(200, 0, 0);
  wordTouched = true;

  // Clear feedback and reset touch state after a short delay
  setTimeout(() => {
    feedbackMessage = "";
    wordTouched = false; // Allow interaction again
  }, 500);
}


function readSerial(data){
  if(data.trim().length>0){
    latestData=data.trim();
    handleSerialEvent(latestData);
  }
}

Code Explanation: 

As I had two sensors, potentiometer and button along with two levels, I had to maintain the setPage  very carefully. From here, I structured the game into multiple pages like start, gameStart, game, and basketGame. The setPage() function ensures smooth transitions between these stages. For example, when the button is pressed, the game transitions from start to gameStart with a delay before entering the gameplay. I decided to keep my words that will come with yellow or white color randomly, in an array together. To draw the flowers, I generated different types of them following to the styles of flowers found at Sundarban region.

Two sensors are dedicated to detecting hand proximity for selecting yellow and white words. My code receives distance values as ultra1 (Yellow) and ultra2 (White). If a hand comes within the set threshold (15 cm), the game registers the corresponding selection and updates the score. I also kept them on the console log to monitor how are the sensors working.

Feedback messages like “Correct!” or “Incorrect!” are displayed dynamically based on player interactions. These are managed using helper functions like handleCorrectTouch() and handleIncorrectTouch(). The code also includes a timer and score tracker to keep the gameplay engaging and competitive.

The readSerial() and handleSerialEvent() functions handle all incoming data from the Arduino. I used the P5.web-serial.js file given by the Professor.

Aspects that I’m proud of: 

I felt even though, it does not exactly showcase how I wanted to tell the story to my audience, but it was a satisfying play for the audience. Specially, the flower game was tough to finish with the randomness of flower speed and generation, that it was even tough for me to win my own game. I heard feedback from Professor Aya Riad that the flowing collection using potentiometer was very satisfying to play and collect the flowers while the time is running down. Kids enjoyed this one as they liked the visuals and this was also a part of my class assignments. I am glad that I was able to refine my codes to give it a new look.

For the word touching game, I am proud that the concept was unique in this show and was a bit of psychology side that one needs to pay full attention to the color and to their hand movement as well.  Even though I had tons of problems with sensor calibration, I was able to pull it off nicely.

I also got reviews from players who read the whole mythology and listened to the song and asked me about it. It was the biggest win for me that people were really interested to know what is the story behind.

Future Implementations:

I plan to implement all the levels and make it a full fledged game that  everyone can play while learning about the culture and stories of this region with fun. I want to change the ultrasonic distance sensors to some other sensors as they are tough to maintain when two sensors are kept together. 

Week 14: Final Project Report

Concept
I’ve created a unique digital clock that uses ping pong balls arranged in a hexagonal pattern as a display. Each ball is illuminated by an individually addressable LED, creating a distinctive way to show time. The project combines modern technology with an unconventional display method, making it both functional and visually interesting.

The hexagonal layout adds an extra layer of intrigue to the design. Unlike traditional square or rectangular displays, this arrangement creates a honeycomb-like pattern that challenges the conventional perception of digital time display. The use of ping pong balls as diffusers for the LEDs adds a soft, warm glow to each “pixel,” giving the clock a more organic feel compared to harsh LED matrices.

Demo

The initial setup process is designed to be user-friendly while maintaining security. When first powered on, the Wemos Mini creates its own WiFi network. Users need to connect to this temporary network to provide their home WiFi credentials. Once this information is received, the device reboots itself and connects to the specified WiFi network. To complete the setup, users must then connect their device to the same WiFi network. The clock’s IP address is displayed on the hexagonal LED screen, allowing users to easily access the configuration interface through their web browser.

After the connection stage, the user can proceed directly to configuring the clock.

Description of Interaction Design
The interaction design for this clock project focuses on simplicity and intuitiveness, while still offering deep customization options. Users primarily interact with the clock through a web-based interface. The changes apply instantly to the clock face, allowing immediate visual feedback as settings are adjusted. Key interactions include color pickers for customizing the display, sliders for adjusting brightness and animation speed, and dropdown menus for selecting time fonts and background modes such as perlin and gradient. The interface is designed to be responsive, working well on both desktop and mobile browsers. Physical interaction with the clock itself is minimal by design – once set up, it functions autonomously, with all adjustments made through the web interface. This approach ensures that the clock remains an elegant, standalone piece in a user’s space, while still being highly customizable.

Technical Implementation

1. Overview
The heart of the project is a Wemos Mini D1 microcontroller that connects to ntp server for accurate time synchronization. The system uses 128 addressable LEDs arranged in a hexagonal pattern, each LED placed under a cut-up ping pong ball. The entire configuration interface is hosted directly on the Wemos Mini, accessible through any web browser on the local network.

2. Matrix
The core of the project’s display functionality lies in its matrix handling system. The code manages two different display modes: an XY coordinate system and a diagonal system, allowing for flexible number rendering on the hexagonal display.

Here’s the matrix configuration:

#define MX_LED_AMOUNT 128
#define MX_XY_W 39
#define MX_XY_H 13
#define MX_DIAG_W 20
#define MX_DIAG_H 7

The display uses lookup tables to map logical positions to physical LED numbers. This is crucial for the hexagonal layout:

static const uint8_t xyLEDPos[MX_DIAG_H][MX_XY_W] = {
    {0, 0, 0, 13, 0, 14, 0, 27, 0, 28, 0, 41, 0, 42, 0, 55, 0, 56, 0, 69, 0, 70, 0, 83, 0, 84, 0, 97, 0, 98, 0, 111, 0, 112, 0, 125, 0, 0, 0},
    {0, 0, 2, 0, 12, 0, 15, 0, 26, 0, 29, 0, 40, 0, 43, 0, 54, 0, 57, 0, 68, 0, 71, 0, 82, 0, 85, 0, 96, 0, 99, 0, 110, 0, 113, 0, 124, 0, 0},
    {0, 3, 0, 11, 0, 16, 0, 25, 0, 30, 0, 39, 0, 44, 0, 53, 0, 58, 0, 67, 0, 72, 0, 81, 0, 86, 0, 95, 0, 100, 0, 109, 0, 114, 0, 123, 0, 126, 0},
    {1, 0, 4, 0, 10, 0, 17, 0, 24, 0, 31, 0, 38, 0, 45, 0, 52, 0, 59, 0, 66, 0, 73, 0, 80, 0, 87, 0, 94, 0, 101, 0, 108, 0, 115, 0, 122, 0, 127},
    {0, 5, 0, 9, 0, 18, 0, 23, 0, 32, 0, 37, 0, 46, 0, 51, 0, 60, 0, 65, 0, 74, 0, 79, 0, 88, 0, 93, 0, 102, 0, 107, 0, 116, 0, 121, 0, 128, 0},
    {0, 0, 6, 0, 8, 0, 19, 0, 22, 0, 33, 0, 36, 0, 47, 0, 50, 0, 61, 0, 64, 0, 75, 0, 78, 0, 89, 0, 92, 0, 103, 0, 106, 0, 117, 0, 120, 0, 0},
    {0, 0, 0, 7, 0, 20, 0, 21, 0, 34, 0, 35, 0, 48, 0, 49, 0, 62, 0, 63, 0, 76, 0, 77, 0, 90, 0, 91, 0, 104, 0, 105, 0, 118, 0, 119, 0, 0, 0},
};

static const uint8_t diagonalLEDPos([MX_DIAG_H][MX_DIAG_W] = {
    {13, 14, 27, 28, 41, 42, 55, 56, 69, 70, 83, 84, 97, 98, 111, 112, 125, 0, 0, 0},
    {2, 12, 15, 26, 29, 40, 43, 54, 57, 68, 71, 82, 85, 96, 99, 110, 113, 124, 0, 0},
    {3, 11, 16, 25, 30, 39, 44, 53, 58, 67, 72, 81, 86, 95, 100, 109, 114, 123, 126, 0},
    {1, 4, 10, 17, 24, 31, 38, 45, 52, 59, 66, 73, 80, 87, 94, 101, 108, 115, 122, 127},
    {0, 5, 9, 18, 23, 32, 37, 46, 51, 60, 65, 74, 79, 88, 93, 102, 107, 116, 121, 128},
    {0, 0, 6, 8, 19, 22, 33, 36, 47, 50, 61, 64, 75, 78, 89, 92, 103, 106, 117, 120},
    {0, 0, 0, 7, 20, 21, 34, 35, 48, 49, 62, 63, 76, 77, 90, 91, 104, 105, 118, 119},
};

The code includes helper functions to convert between coordinate systems:

int matrix::ledXY(int x, int y) {
    if (x < 0 || y < 0 || x >= MX_XY_W || y >= MX_XY_H) return -1;
    return ((y & 1) ? 0 : xyLEDPos[y >> 1][x]) - 1;
}

int matrix::ledDiagonal(int x, int y) {
    if (x < 0 || y < 0 || x >= MX_DIAG_W || y >= MX_DIAG_H) return -1;
    return diagonalLEDPos[y][x] - 1;
}

This matrix system allows for efficient control of the LED display while abstracting away the complexity of the physical layout. The code handles the translation between logical positions and physical LED addresses, making it easier to create patterns and display numbers on the hexagonal grid.

3. Fonts
A crucial part of the clock’s functionality is its ability to display numbers clearly on the hexagonal LED matrix. To achieve this, the project uses custom font definitions for both the XY and diagonal coordinate systems. These fonts are optimized for the unique layout of the display.

Here’s the font definition for the XY and diagonal coordinate system:

const uint8_t font_xy[] PROGMEM = {
    0x03, 0x09, 0x12, 0x18,  // 0 (15)
    0x00, 0x03, 0x0c, 0x10,  // 1 (16)
    0x01, 0x0d, 0x16, 0x10,  // 2 (17)
    0x01, 0x05, 0x16, 0x18,  // 3 (18)
    0x03, 0x04, 0x06, 0x18,  // 4 (19)
    0x03, 0x05, 0x14, 0x18,  // 5 (20)
    0x03, 0x0d, 0x14, 0x18,  // 6 (21)
    0x01, 0x01, 0x1e, 0x00,  // 7 (22)
    0x03, 0x0d, 0x16, 0x18,  // 8 (23)
    0x03, 0x05, 0x16, 0x18,  // 9 (24)
};

const uint8_t font_diagonal[] PROGMEM = {
    0x0f, 0x11, 0x1e,  // 0 (15)
    0x00, 0x02, 0x1f,  // 1 (16)
    0x0d, 0x15, 0x16,  // 2 (17)
    0x09, 0x15, 0x1e,  // 3 (18)
    0x03, 0x04, 0x1f,  // 4 (19)
    0x13, 0x15, 0x19,  // 5 (20)
    0x0f, 0x15, 0x18,  // 6 (21)
    0x01, 0x01, 0x1e,  // 7 (22)
    0x0f, 0x15, 0x1e,  // 8 (23)
    0x03, 0x15, 0x1e,  // 9 (24)
};

These font definitions are stored in program memory (PROGMEM) to save RAM. Each number is represented by a series of bytes that define which LEDs should be lit to form the digit. The XY font uses a 4×5 grid, while the diagonal font uses a 3×5 grid, both optimized for the hexagonal layout.

4. Color palette
The visual appeal of the clock comes from its rich color palette system, implemented using FastLED’s gradient palette functionality. These palettes define how colors transition across the LED display, creating dynamic and engaging visual effects.

Here’s how the color palettes are defined:

#include <FastLED.h>

DEFINE_GRADIENT_PALETTE(FireGrad) {
    0, 0, 0, 0,
    128, 255, 0, 0,
    224, 255, 255, 0,
    255, 255, 255, 255
};

DEFINE_GRADIENT_PALETTE(SunsetGrad) {
    0, 120, 0, 0,
    22, 179, 22, 0,
    51, 255, 104, 0,
    85, 167, 22, 18,
    135, 100, 0, 103,
    198, 16, 0, 130,
    255, 0, 0, 160
};

Each palette is defined with specific color points and their positions in the gradient. For example, the Fire gradient transitions from black (0,0,0) through red and yellow to white, creating a realistic flame effect. The numbers represent positions (0-255) and RGB values for each color point.

5. Draw function
The drawClock() function is the core of the clock’s display functionality. It handles the rendering of time on the LED matrix, accommodating different display styles and synchronization states.

static void draw() {
    uint8_t font = db[clock_style].toInt();
    if (!font) return;

    matrix.setModeDiagonal();

The function starts by retrieving the clock style from the database and setting the matrix to diagonal mode.

if (!NTP.synced()) {
    matrix.setFont(font_xy);
    matrix.setCursor(1, 1);
    matrix.print("--");
    matrix.setCursor(12, 1);
    matrix.print("--");
    return;
}

If the clock isn’t synchronized with NTP (Network Time Protocol), it displays dashes instead of numbers.

The main part of the function uses a switch statement to handle different clock styles:

switch (db[clock_style].toInt()) {
    case 1:
        // 3x5 font, standard layout
    case 2:
        // 3x5 diagonal font
    case 3:
        // 4x5 font, split hour and minute digits
}

Each case represents a different display style, using various fonts and layouts. For example:

case 2:
    matrix.setFont(font_3x5_diag);

    matrix.setCursor(1, 1);
    if (dt.hour < 10) matrix.print(' ');
    matrix.print(dt.hour);

    matrix.setCursor(11, 1);
    if (dt.minute < 10) matrix.print(0);
    matrix.print(dt.minute);

    dots(9, 9);
    break;

This case uses a diagonal 3×5 font, positions the cursor for hours and minutes, and adds leading spaces or zeros for single-digit values. The dots() function adds separator dots between hours and minutes.

6. Background effect

Gradient(int x0, int y0, int w, int h, int angle) {
    uint16_t hypot = sqrt(w * w + h * h) / 2;
    cx = x0 + w / 2;
    cy = y0 + h / 2;
    sx = cos(radians(angle)) * hypot;
    sy = sin(radians(angle)) * hypot;
    len = sqrt(sx * sx + sy * sy) * 2;
}

This code defines a constructor for the Gradient class, which calculates parameters needed for creating gradient color effects. It takes initial coordinates (x0, y0), width (w), height (h), and an angle as inputs. The constructor first calculates half the hypotenuse, then determines the center point of the rectangle (cx, cy) and calculates the x and y components (sx, sy) of the gradient vector using trigonometry, where the angle is converted from degrees to radians. The length (len) of the gradient is computed as twice the magnitude of this vector.

for (int y = 0; y < matrix.height(); y++) {
    for (int x = 0; x < matrix.width(); x++) {
        if (matrix.xyLED(x, y) < 0) continue;
        uint32_t col = getPaletteColor(palette, inoise16(x * scale * 64, y * scale * 64, count * 32), bright);
        matrix.setLED(x, y, col);
    }
}

This code snippet controls the visual effects on the LED matrix by creating a dynamic noise-based pattern. It iterates through each position in the matrix using nested loops for x and y coordinates. For each valid LED position (checked using matrix.xyLED(x, y)), it generates a color using Perlin noise (inoise16). The noise function takes the x and y coordinates (scaled by 64) and a time-based count variable to create movement. The getPaletteColor function then maps this noise value to a color from the current palette, taking into account the brightness level (bright). Finally, each LED in the matrix is set to its calculated color, creating a smooth, flowing animation effect across the display. This is what gives the clock its dynamic, animated background patterns.

7. Server parsing

function createURL(endpoint, queryParams = {}) {
    // Get the origin of the current window (protocol + host)
    const origin = window.location.origin;

    // Start building the URL with the endpoint
    let url = origin + "/" + endpoint;
    
    // A flag to determine if the first query parameter is being added
    let isFirstParam = true;

    // Iterate over the query parameters object
    for (let key in queryParams) {
        // Only add parameters that are not null
        if (queryParams[key] !== null) {
            // Append '?' for the first parameter or '&' for subsequent parameters
            url += isFirstParam ? "?" : "&";
            isFirstParam = false; // Set the flag to false after the first parameter
            
            // Append the key-value pair to the URL
            url += key + "=" + queryParams[key];
        }
    }

    // Return the constructed URL
    return url;
}

This code defines a createURL method that constructs a complete URL for API endpoints. It starts by getting the current window’s origin (protocol and host) and builds upon it. The method accepts an endpoint parameter and an optional queryParams object. Then method then constructs the URL by combining the origin with the endpoint, and systematically adds any query parameters from the queryParams object. It handles the proper formatting of query parameters by adding ‘?’ for the first parameter and ‘&’ for subsequent ones, but only includes parameters that aren’t null. This ensures that all URLs are properly formatted with the correct separators between parameters.

8. Send function

async function send(action, id = null, value = null) {
    const TIMEOUT_MS = 2000;
    const BINARY_MARKER = "__BSON_BINARY";

    // Helper function to combine two bytes into a 16-bit unsigned integer
    function combineBytes(byte1, byte2) {
        return ((byte1 << 8) | byte2) >>> 0;
    }

    // Helper function to escape special characters in strings
    function escapeString(str) {
        return str.replaceAll(/([^\\])\\([^\"\\nrt])/gi, "$1\\\\$2")
            .replaceAll(/\t/gi, "\\t")
            .replaceAll(/\n/gi, "\\n")
            .replaceAll(/\r/gi, "\\r")
            .replaceAll(/([^\\])(")/gi, '$1\\"');
    }

    try {
        // Attempt to fetch data with a timeout
        const response = await fetch(this.makeUrl("settings", { action, id, value }), {
            signal: AbortSignal.timeout(TIMEOUT_MS)
        });

        if (!response || !response.ok) return null;

        const data = new Uint8Array(await response.arrayBuffer());
        if (!data.length) return {};

        let jsonString = "";
        let binaryData = [];
        
        // Parse the binary data
        for (let i = 0; i < data.length; i++) {
            const typeBits = 224 & data[i];
            const valueBits = 31 & data[i];

            switch (typeBits) {
                case 192: // Object/Array start/end
                    if (8 & valueBits) {
                        jsonString += 16 & valueBits ? "{" : "[";
                    } else {
                        jsonString = jsonString.replace(/,$/, '');
                        jsonString += (16 & valueBits ? "}" : "]") + ",";
                    }
                    break;

                case 0: // Key (from dictionary)
                case 64: // Value (from dictionary)
                    jsonString += `"${y[combineBytes(valueBits, data[++i])]}"${typeBits == 0 ? ":" : ","}`;
                    break;

                case 32: // Key (string)
                case 96: // Value (string)
                    {
                        const length = combineBytes(valueBits, data[++i]);
                        i++;
                        const str = escapeString(new TextDecoder().decode(data.slice(i, i + length)));
                        jsonString += `"${str}"${typeBits == 32 ? ":" : ","}`;
                        i += length - 1;
                    }
                    break;

                case 128: // Number
                    {
                        const isNegative = 16 & valueBits;
                        const byteCount = 15 & valueBits;
                        let num = BigInt(0);
                        for (let j = 0; j < byteCount; j++) {
                            num |= BigInt(data[++i]) << BigInt(8 * j);
                        }
                        jsonString += `${isNegative ? "-" : ""}${num},`;
                    }
                    break;

                case 160: // Float
                    {
                        let floatBits = 0;
                        for (let j = 0; j < 4; j++) {
                            floatBits |= data[++i] << (8 * j);
                        }
                        const float = new Float32Array(new Uint32Array([floatBits]).buffer)[0];
                        jsonString += isNaN(float) ? '"NaN"' : 
                                      isFinite(float) ? float.toFixed(valueBits) : 
                                      '"Infinity"';
                        jsonString += ",";
                    }
                    break;

                case 224: // Binary data
                    {
                        const length = combineBytes(valueBits, data[++i]);
                        i++;
                        jsonString += `"${BINARY_MARKER}#${binaryData.length}",`;
                        binaryData.push(data.slice(i, i + length));
                        i += length - 1;
                    }
                    break;
            }
        }

        // Remove trailing comma if present
        jsonString = jsonString.replace(/,$/, '');

        // Parse JSON and replace binary placeholders
        const parsedJson = JSON.parse(jsonString);

        function replaceBinaryPlaceholders(obj) {
            if (typeof obj !== 'object' || obj === null) return;
            
            for (const [key, value] of Object.entries(obj)) {
                if (typeof value === 'object') {
                    replaceBinaryPlaceholders(value);
                } else if (typeof value === 'string' && value.startsWith(BINARY_MARKER)) {
                    const index = parseInt(value.split("#")[1]);
                    obj[key] = binaryData[index];
                }
            }
        }

        replaceBinaryPlaceholders(parsedJson);
        return parsedJson;

    } catch (error) {
        console.error("Error in sendAndParse:", error);
        return null;
    }
}

This function is an asynchronous method that sends a request to a server and processes the response using a custom binary format. It begins by making a fetch request with specified action, id, and value parameters, setting a 2-second timeout. Upon receiving the response, the function parses the binary data into a JSON structure, handling various data types such as objects, arrays, strings, numbers, floats, and binary data. This function essentially combines network communication with complex data parsing and transformation in a single, comprehensive operation.

Schematic

Achievements
The most satisfying aspect of this project is how the hexagonal display turned out. Despite challenges with LED spacing, ping pong ball imperfections, and a lot of bugs in the code, the final display creates clear, readable numbers while maintaining an artistic quality. The wireless configuration system also worked better than expected, making the clock truly standalone after initial setup.

Future Improvements
Several areas could be enhanced in future iterations. The initial WiFi setup process could be streamlined, perhaps using WPS or a QR code system. The ping pong ball mounting system could be redesigned to better hide the seam lines and create more uniform light diffusion. Adding additional display modes and animations would also make the clock more versatile or even adding a ticker tape and maybe even some games.

Final Project – Catch That Note!

Concept

The Interactive Fruit Catcher Game combines physical hardware inputs with digital visuals to create an engaging and multisensory experience. The goal of the game is to catch falling fruits of various colors into a basket by pressing the corresponding colored buttons. Each button press generates a musical note, adding an auditory layer to the gameplay. The fruits fall faster as the game progresses, making it increasingly challenging. Players have three lives, and the game tracks both the current score and the highest score, fostering competitiveness.

Design

Interaction Design

The interaction design centers around three key elements:

  1. User Inputs: Physical colored buttons (Red, Yellow, Green, Blue) corresponding to the fruits.
  2. Visual Feedback:
    • Correct button presses result in the fruit being “caught,” and the score increases.
    • Incorrect presses or missed fruits deduct a life and provide visual feedback.
  3. Auditory Feedback:
    • Each button press generates a unique musical note, which adds a playful sound layer.

Implementation

Hardware

  1. Arduino Components:
    • Four Colored Buttons:
      • Red → Strawberries
      • Yellow → Bananas
      • Green → Green Pear
      • Blue → Blueberries
    • Speaker: Plays musical notes tied to each button.
    • Wiring and Connections:
      • Buttons connect to specific digital pins on the Arduino.
      • Power is supplied through a USB cable.
  2. Challenges in Physical Computing:
    • Learning to solder the arcade buttons took time.
    • The wiring was difficult due to loose connections. I tried several approaches like alligator clips and direct connections but ended up using a combination of male-to-male, female-to-female, and male-to-female wires, which I secured using electrical tape.
    • Ensuring stable connections was critical for gameplay.

Schematic

Arduino Code

The Arduino code detects button presses and sends data (letters r, y, g, b) to the p5.js sketch via serial communication. Debouncing logic ensures that a single button press is registered cleanly, and each button press triggers a tone via the buzzer.

Key Features:

  1. Reads input from buttons using digitalRead.
  2. Sends corresponding data to p5.js.
  3. Plays tones through the speaker.

Arduino Code:

// Define button pins
#define BUTTON_R 8
#define BUTTON_Y 2
#define BUTTON_G 4
#define BUTTON_B 7

void setup()
{
  Serial.begin(9600);

  // Configure button pins as INPUT_PULLUP
  pinMode(BUTTON_R, INPUT_PULLUP);
  pinMode(BUTTON_Y, INPUT_PULLUP);
  pinMode(BUTTON_G, INPUT_PULLUP);
  pinMode(BUTTON_B, INPUT_PULLUP);
}

void loop()
{
  // Check each button and print the corresponding letter
  if (digitalRead(BUTTON_R) == LOW) // Button R pressed
  {
    Serial.println("r");
    delay(200); // Debounce delay
  }

  if (digitalRead(BUTTON_Y) == LOW) // Button Y pressed
  {
    Serial.println("y");
    delay(200); // Debounce delay
  }

  if (digitalRead(BUTTON_G) == LOW) // Button G pressed
  {
    Serial.println("g");
    delay(200); // Debounce delay
  }

  if (digitalRead(BUTTON_B) == LOW) // Button B pressed
  {
    Serial.println("b");
    delay(200); // Debounce delay
  }
}

p5.js Sketch

The p5.js sketch manages the game visuals, logic, and interactions. It reads the serial data from Arduino and maps it to fruit colors.

Key Features:

  1. Fruit Animation: Fruits of different colors fall from the top of the screen.
  2. Game Logic:
    • Correct button presses “catch” the fruits and increase the score.
    • Wrong presses or missed fruits deduct lives.
  3. Increasing Difficulty: The fruit speed increases over time.
  4. Audio Feedback: Musical notes are played for each button press.

Communication with Arduino:

  • Data (r, y, g, b) sent from the Arduino is read using readSerial() and processed in the game logic.


Aspects I’m Proud Of

Despite the challenges, I am particularly proud of:

  • The Basket and Overall Theme:
    • The game’s design, with colorful fruits falling into a basket, is cheerful and visually appealing.
    • The integration of physical buttons adds an arcade-like feel, making it more interactive.
  • Completion of the Physical Setup:
    • Learning how to solder and fixing wiring issues was a huge milestone for me. I finally achieved a stable setup by creatively using multiple types of wires and securing them with electrical tape.
  • The Multisensory Experience:
    • The combination of visuals, button presses, and musical notes makes the game engaging and unique.

Challenges and Areas for Improvement

Challenges

  1. Physical Computing:
    • Learning soldering took time.
    • Fixing loose connections between the breadboard and buttons was tedious.
  2. Serial Communication:
    • Connecting the Arduino to p5.js was challenging due to initial errors. Debugging and ensuring a stable connection required significant effort.
  3. Falling Fruit Logic:
    • While the p5.js sketch initially worked, it started bugging out the day before the showcase. Debugging the logic for fruit falling and collision detection caused a lot of stress and worry.

Future Improvements

  1. Musical Notes Based on Songs:
    • I initially planned for the chords to align with a specific song. As the player presses buttons, the chords would play in sequence, creating a recognizable melody. Implementing this would add depth to the auditory feedback.
  2. Improved Visual Feedback:
    • Add animations for missed fruits or incorrect button presses.
  3. Enhanced Stability:
    • Use a more permanent solution for physical wiring, such as a custom PCB or cleaner soldered connections.
  4. Gameplay Features:
    • Introduce power-ups or different types of fruits for variety.
    • Add multiple difficulty levels or a multiplayer mode for added fun.

Conclusion

This project successfully combines hardware and software to deliver an engaging and interactive game. The process of designing the hardware, troubleshooting physical connections, and integrating serial communication has been a valuable learning experience. I am proud of the final output and excited about the potential improvements for future iterations.

IMG_3671

IMG_3682


Week 13: Infinity Trials and Errors

Backstory: Giving Up, Trying Again and Moving Forward

I decided to work on my midterm project as it will be less time consuming, but unfortunately the project did not work according to my plan. I made this, which is a 3D flying game (well, was supposed to be a 3D flying game). I tried without sensors first to see if the graphics works well or not and showed this to my roommate as an user opinion, who said it might not be one of the best choices to add this as my final game. I still spend some more time on it but no luck!

Moving Forward: 

After digging more on the feasibility of finishing a nicely done project and the limitations of sensors, I decided to change my project. As I am a fan of making something impactful (which I also criticise about myself because making something fun and relaxing can be an amazing accomplishment), I decided to take Sundarban Mangrove Forest as my game idea and the mythology of Bengal Region as my game.

Context of the myth:

In the Sundarbans myth, Bonbibi, the guardian goddess of the forest, defends the local woodcutters and honey gatherers from the malevolent tiger god, Dakshin Rai. The story highlights a young boy, Dukhey, who becomes a victim of a pact between his greedy employer and Dakshin Rai, aiming to sacrifice him to the tiger god. Bonbibi intervenes, rescuing Dukhey and ensuring his safe return, playing her role as a protector and mediator between the natural world and human interests.

Game flow:

Game Flow On Paper


User Testing:

Till this point, the game is done only at the initial stage. The design was done and the flex sensor was working correctly to go to first stage of the game. Graphics:


  Start Scene
Game Transition Scene

For the testing, people played only the very beginning part, and they liked it because of the idea and the graphics, which gave me some affirmation that yes, I can move forward with it.

I did second part of the game earlier as my flex sensors were working. This is the link to the second part, Bee, here the sensors were able to connect but calibrating two flex sensors, one for moving the bees and another one to collect honey, was not running smoothly. But, as it was somewhat working at least with keyboards, I kept it as my second part.


The third of the game while player needs to run away from the tiger was the crucial one where I keep two sonar sensors side by side and player needs to simulate steps like running, like when left sensor detects obstacles, the right sensor does not as the right leg is up. Again when the right sensor detects obstacles, left sensor does not because now as part of running the left leg is up and right leg is on the ground.

I created a dummy version first to implement the logic and some basic visuals, this one I liked as my logic worked with keyboard properly. Link to see the initial one.    and the second draft done one. I was not satisfied with any of them.

Sensor connection on Arduino:

The Arduino Connections

Unfortunately, I did not take any video but when my roommate tried to play the game, she was very confused with the sensors as it was not working properly.

Only the storyline of the experience was satisfying for her and also for my fellow classmates on saw my works on Wednesday.

I needed to explain my game that what I am trying to achieve. Moreover, as the sensor calibration was very troubling and the movements were very poor, I decided to make it easier.

Having different sensors for different stages, made it tough for users to understand what is happening and why does the user needs to use different sensors for different games. It was challenging from the circuit building to the end level of user testing as well.

I added clear instructions on how to play, what is the mythology about and what are the end goals. Moving on, I again needed to drop the plan of tiger and player chasing along with the bee but I did keep my plan with boat and two sensors.

To get rid of any risk, I followed simple mechanism and rules to build my final game. One thing I was sure after user testing that whoever heard the story or saw it, they all liked it. The only problem was how to design the game play.


Week 13 User Testing and Final Project

Video:

Drive links:https://drive.google.com/file/d/1tj29Zt4eafPmq3sbn2XQxWIdDe19ptf9/view?usp=sharing
https://drive.google.com/file/d/1iaTtnn3k2h35bS9jtLQnl48PngWvzTUW/view?usp=sharing

User Testing Documentation for the Project
To evaluate the user experience of the game, the following steps were conducted:

Participants: Two users were asked to play the game without prior instructions.
Environment: Each participant was given access to the joystick and mouse, along with the visual display of the game.
Recording: Gameplay sessions were recorded, capturing both screen activity and user interactions with the joystick and mouse.
Feedback: After the session, participants were asked to share their thoughts on the experience, including points of confusion and enjoyment.

Observations from User Testing
Most users instinctively tried to use the joystick to control the player.
Mapping joystick movement to player control was understood quickly.
Dying when hitting the wall was unexpected for both players, but they learned to avoid the walls and play more carefully quickly.

The dual control option (mouse click and joystick button) for starting the game worked well.

Powerups:

Participants found the power-up visuals engaging and intuitive.
Some users struggled to understand the effects of power-ups initially (e.g., what happens when picking up a turtle, or a lightning bolt)
But once they passed through the powerups they understood the effects it had.

Game Objectives:

The goal (reaching the endpoint) was clear to all participants.
Participants appreciated the timer and “Lowest Time” feature as a challenge metric.

What Worked Well
Joystick Integration: Smooth player movement with joystick controls was highly praised.
Visual Feedback: Power-up icons and heart-based life indicators were intuitive.
Engagement: Participants were motivated by the timer and the ability to beat their lowest time.
Obstacle Design: The maze structure was well-received for its balance of challenge and simplicity.

 Areas for Improvement:

Power-up Explanation:

Players were unclear about the effects of power-ups until they experienced them.
I think this part does not need changing as it adds to the puzzling aspect of the game and makes further playthroughs more fun.

Collision Feedback:

When colliding with walls or losing a life, the feedback was clear as they could hear the sound effect and can see the heart lost at the top of the screen.

 Lessons Learned
Need for Minimal Guidance: I like the challenge aspect of playing the game for the first time, with the lack of instructions, players are inspired to explore which increases their intrigue in the game.

Engaging Visuals and Sounds: Participants valued intuitive design elements like heart indicators and unique power-up icons.

Changes Implemented Based on Feedback
The speed was decreased slightly as the high speed was leading to many accidental deaths, The volume for the death feedback was increased to more clearly indicate what happens when a player consumes a death powerup or collide with a wall.


GAME:

Concept
The project is an interactive maze game that integrates an Arduino joystick controller to navigate a player through obstacles while collecting or avoiding power-ups. The objective is to reach the endpoint in the shortest possible time, with features like power-ups that alter gameplay dynamics (speed boosts, slowdowns, life deductions) and a life-tracking system with visual feedback.

  • Player Movement: Controlled via the Arduino joystick.
  • Game Start/Restart: Triggered by a joystick button press or mouse click.
  • Power-Ups: Randomly spawned collectibles that provide advantages or challenges.
  • Objective: Navigate the maze, avoid obstacles, and reach the goal with the least possible time.


The game is implemented using p5.js for rendering visuals and managing game logic, while Arduino provides the physical joystick interface. Serial communication bridges the joystick inputs with the browser-based game.

Design
Joystick Input:

X and Y axes: Control player movement.
Button press: Start or restart the game.

Visuals:

Player represented as a black circle.
Heart icons track lives.
Power-ups visually distinct ( icon-based).

Feedback:

Life loss triggers sound effects and visual feedback.
Timer displays elapsed and lowest times.
Game-over and win screens provide clear prompts.

Arduino Code:

const int buttonPin = 7; // The pin connected to the joystick button
int buttonState = HIGH;  // Assume button is not pressed initially

void setup() {
    Serial.begin(9600);       // Start serial communication
    pinMode(buttonPin, INPUT_PULLUP); // Set the button pin as input with pull-up resistor
}

void loop() {
    int xPos = analogRead(A0); // Joystick X-axis
    int yPos = analogRead(A1); // Joystick Y-axis
    buttonState = digitalRead(buttonPin); // Read the button state

    // Map analog readings (0-1023) to a more usable range if needed
    int mappedX = map(xPos, 0, 1023, 0, 1000); // Normalize to 0-1000
    int mappedY = map(yPos, 0, 1023, 0, 1000); // Normalize to 0-1000

    // Send joystick values and button state as CSV (e.g., "500,750,1")
    Serial.print(mappedX);
    Serial.print(",");
    Serial.print(mappedY);
    Serial.print(",");
    Serial.println(buttonState);

    delay(50); // Adjust delay for data sending frequency
}

The circuit connects the joystick to the Arduino and includes connections for the button and power LEDs (to indicate remaining lives).

  • Joystick:
    • X-axis: A0
    • Y-axis: A1
    • Click (SW) connected to digital pin 7.
    • VCC and GND to power the joystick module.

The p5.js sketch renders the maze, player, and power-ups, while handling game logic and serial communication.

Key features:

  • Player Class: Handles movement, collision detection, and rendering.
  • Power-Up Class: Manages random spawning, effects, and rendering.
  • Obstacles Class: Generates Obstacles, and handles design aspects of them
  • Joystick Input Handling: Updates player movement based on Arduino input.
  • Game Loops: Includes logic for starting, restarting, and completing the game.

Code:

let player; //player variable
let obstacles = []; //list of obstacles
const OBSTACLE_THICKNESS = 18; //thickness of each rectangle
let rectImg, startImg; //maze pattern and start screen
let obstaclesG; // pre rendered obstacle course pattern for performance
let gameStarted = false; //game started flag
let gameEnded = false; //game ended flag
let startTime = 0; //start time 
let elapsedTime = 0; //time passed since start of level
let lowestTime = Infinity; //infinity so the first level completion leads to the new lowest time
let lives = 3; // player starts with 3 lives
let collisionCooldown = false; // Tracks if cooldown is active
let cooldownDuration = 1000; // Cooldown duration in milliseconds
let lastCollisionTime = 0; // Timestamp of the last collision
let heartImg;//live hearts img
let bgMusic;
let lifeLostSound;
let winSound;
let serial; //for arduino connection
let joystickX = 500; // default joystick X position
let joystickY = 500; // default joystick Y position
let powerUps = []; // Array to store power-ups
let powerUpSpawnInterval = 10000; // interval to spawn a new 
let lastPowerUpTime = 0; // time when the last power-up was spawned
let speedUpImg, slowDownImg, loseLifeImg;
let buttonPressed = false;


function preload() {
  rectImg = loadImage('pattern.png'); // Load obstacle pattern
  startImg = loadImage('start.png'); // Load start screen image
  heartImg = loadImage('heart.png');//  load heart image
  bgMusic = loadSound('background_music.mp3'); // background music
  lifeLostSound = loadSound('life_lost.wav');  // Sound for losing a life
  winSound = loadSound('win_sound.wav'); //sound for winning
  speedUpImg = loadImage('speed_up.png'); //icons for powerups
  slowDownImg = loadImage('slow_down.png');
  loseLifeImg = loadImage('lose_life.png');


}

function setup() {
  createCanvas(1450, 900);
  serial = new p5.SerialPort(); // Initialize SerialPort
  serial.open('/dev/tty.usbmodem1101'); //the code for the arduino device being opened
  serial.on('data', handleSerialData);
  player = new Player(30, 220, 15, 5); //maze starting coordinate for player

 //maze background
  obstaclesG = createGraphics(1450, 900);
  obstaclesG.background(220);

  // Add obstacles
  addObstacles(); //adds all the obstacles during setup

  // loops through the list and displays each one
  for (let obs of obstacles) {
    obs.showOnGraphics(obstaclesG);
  }
  bgMusic.loop() //background music starts
}

function spawnPowerUp() {
    let x, y;
    let validPosition = false;

    while (!validPosition) {
        x = random(50, width - 50);
        y = random(50, height - 50);
        //a valid position for a powerup is such that it does not collide with any obstacles
        validPosition = !obstacles.some(obs =>
            collideRectCircle(obs.x, obs.y, obs.w, obs.h, x, y, 30)
        ) && !powerUps.some(pu => dist(pu.x, pu.y, x, y) < 60);
    }

    const types = ["speedUp", "slowDown", "loseLife"];
    const type = random(types); //one random type of powerup

    powerUps.push(new PowerUp(x, y, type)); //adds to powerup array
}


function handlePowerUps() {
  // Spawn a new power-up if the interval has passed
  if (millis() - lastPowerUpTime > powerUpSpawnInterval) {
    spawnPowerUp();
    lastPowerUpTime = millis(); // reset the spawn timer
  }

  // Display and check for player interaction with power-ups
  for (let i = powerUps.length - 1; i >= 0; i--) {
    const powerUp = powerUps[i];
    powerUp.display();
    if (powerUp.collidesWith(player)) {
      powerUp.applyEffect(); // Apply the effect of the power-up
      powerUps.splice(i, 1); // Remove the collected power-up
    }
  }
}

function draw() {
  if (!gameStarted) {
    background(220);
    image(startImg, 0, 0, width, height);
    noFill();
    stroke(0);

    // Start the game with joystick button or mouse click
    if (buttonPressed || (mouseIsPressed && mouseX > 525 && mouseX < 915 && mouseY > 250 && mouseY < 480)) {
      gameStarted = true;
      startTime = millis();
    }
  } else if (!gameEnded) {
    background(220);
    image(obstaclesG, 0, 0);

    player.update(obstacles); // Update player position
    handlePowerUps(); // Manage power-ups
    player.show(); // Display the player

    // Update and display elapsed time, hearts, etc.
    elapsedTime = millis() - startTime;
    serial.write(`L${lives}\n`);
    displayHearts();

    fill(0);
    textSize(22);
    textAlign(LEFT);
    text(`Time: ${(elapsedTime / 1000).toFixed(2)} seconds`, 350, 50);
    textAlign(RIGHT);
    text(
      `Lowest Time: ${lowestTime < Infinity ? (lowestTime / 1000).toFixed(2) : "N/A"}`,
      width - 205,
      50
    );

    if (dist(player.x, player.y, 1440, 674) < player.r) {
      endGame(); // Check if the player reaches the goal
    }
  } else if (gameEnded) {
    // Restart the game with joystick button or mouse click
    if (buttonPressed || mouseIsPressed) {
      restartGame();
    }
  }
}


function handleSerialData() {
    let data = serial.readLine().trim(); // Read and trim incoming data
    if (data.length > 0) {
        let values = data.split(","); // Split data by comma
        if (values.length === 3) {
            joystickX = Number(values[0]); // Update joystick X
            joystickY = Number(values[1]); // Update joystick Y
            buttonPressed = Number(values[2]) === 0; // Update button state (0 = pressed)
        }
    }
}


function displayHearts() { //display lives
  const heartSize = 40; // size of each heart
  const startX = 650; // x position for hearts
  const startY = 40; // y position for hearts
  for (let i = 0; i < lives; i++) { //only displays as many hearts as there are lives left
    image(heartImg, startX + i * (heartSize + 10), startY, heartSize, heartSize);
  }
}

function endGame() {
  gameEnded = true;
  noLoop(); // stop the draw loop
  winSound.play(); //if game ends
  serial.write("END\n");

  // check if the current elapsed time is a new record
  const isNewRecord = elapsedTime < lowestTime;
  if (isNewRecord) {
    lowestTime = elapsedTime; // update lowest time
    
  }

  // Display end screen
  background(220);
  fill(0);
  textSize(36);
  textAlign(CENTER, CENTER);
  text("Congratulations! You reached the goal!", width / 2, height / 2 - 100);
  textSize(24);
  text(`Time: ${(elapsedTime / 1000).toFixed(2)} seconds`, width / 2, height / 2 - 50);

  // Display "New Record!" message if applicable
  if (isNewRecord) {
    textSize(28);
    fill(255, 0, 0); // Red color for emphasis
    text("New Record!", width / 2, height / 2 - 150);
  }

  textSize(24);
  fill(0); // Reset text color
  text("Click anywhere to restart", width / 2, height / 2 + 50);
}


function mouseClicked() {
 
  if (!gameStarted) {
    // start the game if clicked in start button area
    if (mouseX > 525 && mouseX < 915 && mouseY > 250 && mouseY < 480) {
      gameStarted = true;
      startTime = millis();
    }
  } else if (gameEnded) {
    // Restart game
    restartGame();
  }
}
function checkJoystickClick() {
  if (buttonPressed) {
    if (!gameStarted) {
      gameStarted = true;
      startTime = millis();
    } else if (gameEnded) {
      restartGame();
    }
  }
}

function restartGame() {
  gameStarted = true;
  gameEnded = false;
  lives = 3;
  powerUps = []; // Clear all power-ups
  player = new Player(30, 220, 15, 5); // Reset player position
  startTime = millis(); // Reset start time
  loop();
  bgMusic.loop(); // Restart background music
}


function loseGame() {
  gameEnded = true; // End the game
  noLoop(); // Stop the draw loop
  bgMusic.stop();
  serial.write("END\n");

  // Display level lost message
  background(220);
  fill(0);
  textSize(36);
  textAlign(CENTER, CENTER);
  text("Level Lost!", width / 2, height / 2 - 100);
  textSize(24);
  text("You ran out of lives!", width / 2, height / 2 - 50);
  text("Click anywhere to restart", width / 2, height / 2 + 50);
}


function keyPressed() { //key controls
  let k = key.toLowerCase();
  if (k === 'w') player.moveUp(true);
  if (k === 'a') player.moveLeft(true);
  if (k === 's') player.moveDown(true);
  if (k === 'd') player.moveRight(true);
  if (k === 'f') fullscreen(!fullscreen());
}

function keyReleased() { //to stop movement once key is released
  let k = key.toLowerCase();
  if (k === 'w') player.moveUp(false);
  if (k === 'a') player.moveLeft(false);
  if (k === 's') player.moveDown(false);
  if (k === 'd') player.moveRight(false);
}

class Player { //player class
  constructor(x, y, r, speed) {
    this.x = x;
    this.y = y;
    this.r = r;
    this.speed = speed;

    this.movingUp = false;
    this.movingDown = false;
    this.movingLeft = false;
    this.movingRight = false;
  }

update(obsArray) { //update function
  let oldX = this.x;
  let oldY = this.y;

  //joystick-based movement
  if (joystickX < 400) this.x -= this.speed; // move left
  if (joystickX > 600) this.x += this.speed; // move right
  if (joystickY < 400) this.y -= this.speed; // move up
  if (joystickY > 600) this.y += this.speed; // move down

  // constrain to canvas
  this.x = constrain(this.x, this.r, width - this.r);
  this.y = constrain(this.y, this.r, height - this.r);

  //  restrict movement if colliding with obstacles
  if (this.collidesWithObstacles(obsArray)) {
    this.x = oldX; // revert to previous position x and y
    this.y = oldY;

    // Handle life deduction only if not in cooldown to prevent all lives being lost in quick succession
    if (!collisionCooldown) {
      lives--;
      lastCollisionTime = millis(); // record the time of this collision
      collisionCooldown = true; // activate cooldown
      lifeLostSound.play(); // play life lost sound

      if (lives <= 0) {
        loseGame(); // Call loseGame function if lives reach 0
      }
    }
  }

  // Check if cooldown period has elapsed
  if (collisionCooldown && millis() - lastCollisionTime > cooldownDuration) {
    collisionCooldown = false; // reset cooldown
  }
}


  show() { //display function
    fill(0);
    ellipse(this.x, this.y, this.r * 2);
  }

  collidesWithObstacles(obsArray) { //checks collisions in a loop
    for (let obs of obsArray) {
      if (this.collidesWithRect(obs.x, obs.y, obs.w, obs.h)) return true;
    }
    return false;
  }

  collidesWithRect(rx, ry, rw, rh) { //collision detection function checks if distance between player and wall is less than player radius which means a collision occurred
    let closestX = constrain(this.x, rx, rx + rw);
    let closestY = constrain(this.y, ry, ry + rh);
    let distX = this.x - closestX;
    let distY = this.y - closestY;
    return sqrt(distX ** 2 + distY ** 2) < this.r;
  }

  moveUp(state) {
    this.movingUp = state;
  }
  moveDown(state) {
    this.movingDown = state;
  }
  moveLeft(state) {
    this.movingLeft = state;
  }
  moveRight(state) {
    this.movingRight = state;
  }
}

class Obstacle { //obstacle class
  constructor(x, y, length, horizontal) {
    this.x = x;
    this.y = y;
    this.w = horizontal ? length : OBSTACLE_THICKNESS;
    this.h = horizontal ? OBSTACLE_THICKNESS : length;
  }

  showOnGraphics(pg) { //to show the obstacle pattern image repeatedly
    for (let xPos = this.x; xPos < this.x + this.w; xPos += rectImg.width) {
      for (let yPos = this.y; yPos < this.y + this.h; yPos += rectImg.height) {
        pg.image(
          rectImg,
          xPos,
          yPos,
          min(rectImg.width, this.x + this.w - xPos),
          min(rectImg.height, this.y + this.h - yPos)
        );
      }
    }
  }
}

class PowerUp {
    constructor(x, y, type) {
        this.x = x;
        this.y = y;
        this.type = type; // Type of power-up: 'speedUp', 'slowDown', 'loseLife'
        this.size = 30; // Size of the power-up image
    }

    display() {
        let imgToDisplay;
        if (this.type === "speedUp") imgToDisplay = speedUpImg;
        else if (this.type === "slowDown") imgToDisplay = slowDownImg;
        else if (this.type === "loseLife") imgToDisplay = loseLifeImg;

        image(imgToDisplay, this.x - this.size / 2, this.y - this.size / 2, this.size, this.size);
    }

    collidesWith(player) {
        return dist(this.x, this.y, player.x, player.y) < player.r + this.size / 2;
    }

    applyEffect() {
        if (this.type === "speedUp") player.speed += 2;
        else if (this.type === "slowDown") player.speed = max(player.speed - 1, 2);
        else if (this.type === "loseLife") {
            lives--;
            lifeLostSound.play();
            if (lives <= 0) loseGame();
        }
    }
}

function addObstacles() {
  // adding all obstacles so the collision can check all in an array
  
obstacles.push(new Obstacle(0, 0, 1500, true));
obstacles.push(new Obstacle(0, 0, 200, false));
obstacles.push(new Obstacle(0, 250, 600, false));
obstacles.push(new Obstacle(1432, 0, 660, false));
obstacles.push(new Obstacle(1432, 700, 200, false));
obstacles.push(new Obstacle(0, 882, 1500, true));
obstacles.push(new Obstacle(100, 0, 280, false));
obstacles.push(new Obstacle(0, 400, 200, true));
obstacles.push(new Obstacle(200, 90, 328, false));
obstacles.push(new Obstacle(300, 0, 500, false));
obstacles.push(new Obstacle(120, 500, 198, true));
obstacles.push(new Obstacle(0, 590, 220, true));
obstacles.push(new Obstacle(300, 595, 350, false));
obstacles.push(new Obstacle(100, 680, 200, true));
obstacles.push(new Obstacle(0, 770, 220, true));
obstacles.push(new Obstacle(318, 400, 250, true));
obstacles.push(new Obstacle(300, 592, 250, true));
obstacles.push(new Obstacle(420, 510, 85, false));
obstacles.push(new Obstacle(567, 400, 100, false));
obstacles.push(new Obstacle(420, 680, 100, false));
obstacles.push(new Obstacle(567, 750, 150, false));
obstacles.push(new Obstacle(420, 680, 400, true));
obstacles.push(new Obstacle(410, 90, 200, false));
obstacles.push(new Obstacle(410, 90, 110, true));
obstacles.push(new Obstacle(520, 90, 120, false));
obstacles.push(new Obstacle(410, 290, 350, true));
obstacles.push(new Obstacle(660, 90, 710, false));
obstacles.push(new Obstacle(660, 90, 100, true));
obstacles.push(new Obstacle(420, 680, 500, true));
obstacles.push(new Obstacle(410, 290, 315, true));
obstacles.push(new Obstacle(830, 0, 290, false));
obstacles.push(new Obstacle(760, 200, 70, true));
obstacles.push(new Obstacle(742, 200, 90, false));
obstacles.push(new Obstacle(950, 120, 480, false));
obstacles.push(new Obstacle(1050, 0, 200, false));
obstacles.push(new Obstacle(1150, 120, 200, false));
obstacles.push(new Obstacle(1250, 0, 200, false));
obstacles.push(new Obstacle(1350, 120, 200, false));
obstacles.push(new Obstacle(1058, 310, 310, true));
obstacles.push(new Obstacle(760, 390, 300, true));
obstacles.push(new Obstacle(660, 490, 200, true));
obstacles.push(new Obstacle(760, 582, 200, true));
obstacles.push(new Obstacle(920, 680, 130, false));
obstacles.push(new Obstacle(1040, 310, 650, false));
obstacles.push(new Obstacle(790, 760, 200, false));
obstacles.push(new Obstacle(1150, 400, 400, false));
obstacles.push(new Obstacle(1160, 560, 300, true));
obstacles.push(new Obstacle(1325, 440, 200, false));
obstacles.push(new Obstacle(1240, 325, 150, false));
obstacles.push(new Obstacle(1150, 800, 200, true));
obstacles.push(new Obstacle(1432, 850, 130, false));
obstacles.push(new Obstacle(1240, 720, 200, true));

}

What I’m Proud Of
Joystick Integration: Seamless control with physical inputs enhances immersion.
Dynamic Power-Ups: Randomized, interactive power-ups add a strategic layer.
Visual and Auditory Feedback: Engaging effects create a polished gaming experience.
Robust Collision System: Accurate handling of obstacles and player interaction.

Areas for Improvement:

  1. Tutorial/Instructions: Add an in-game tutorial to help new users understand power-ups and controls. This could be a simple maze with all powerups and a wall to check collision.
  2. Level Design: Introduce multiple maze levels with increasing difficulty.
  3. Enhanced Feedback: Add animations for power-up collection and collisions

Conclusion:

I had a lot of fun working on this project, it was a fun experience learning serial communication and especially integrating all the powerup logic. I think with some polishing and more features this could be a project that I could publish one day.


Final Project: Block adventure

Concept

What if instead of moving the hero, you can move the environment instead? In this game, I try to let the user into the environment building process. Where should I put the platform? How high, how low should it be so that the character should jump across? This is a puzzle game, in which player needs to find the right placement for the physical box – representing the in-game platform – to allow the character to jump across. For the design, I decide to use basic shapes to amplify the theme of the game – building the world from the most basic blocks.

Implementation

For the interaction design, I created a simple instruction scene using basic shapes and minimal text, as users often overlook instructions with too many words. For the physical component, I used red tape to clearly indicate the area where the box could be moved. Additionally, I tried to keep the sensors and connecting components inside the cardboard as discreet as possible by using paper clips instead of tape or glue.

Instructions on how to navigate the game

This game project is rather p5js heavy. For the game mechanism, I design one class for the block, and one class for the platforms.

The hero class include:

  • checkGround(): check if the hero is on which platform
  • move(): move the hero
  • display(): display the hero on screen

The box (platform) class include:

  • changeable parameters for x, y, width and height
  • display method

P5js code

Arduino

For the interaction between Arduino and P5js, I use the data read from Arduino photoresistors and send it to P5js.

int right1 = A0;
int right2 = A1; 
int front1 = A2;
int front2 = A3;
int prevFront = 0;
int prevRight = 0;
int front1Read;
int front2Read;
int right1Read;
int right2Read;
int minFront;
int minRight;
void setup() {
  // put your setup code here, to run once:
  Serial.begin(9600);
  pinMode(right1,INPUT);
  pinMode(right2,INPUT);
  pinMode(front1,INPUT);
  pinMode(front2,INPUT);
}

void loop() {

  front1Read = map(analogRead(front1),60,100,750,850); //map this value to front2 sensor range
  front2Read = analogRead(front2);
  minFront = min(front1Read,front2Read); //choose the smaller value (the box is infront of this sensor)

  right1Read = map(analogRead(right1),40,60,700,780);
  right2Read = analogRead(right2);
  minRight = min(right1Read,right2Read);

  if(abs(minFront - prevFront) > 40){
    //only update if the difference is bigger than 40(prevent noise)
    Serial.print(minFront);
      prevFront = minFront;
  }else{
    Serial.print(prevFront);
  }
  Serial.print(',');

  if(abs(minRight - prevRight)>40){
    Serial.println(minRight);
      prevRight = minRight;
  }else{
    Serial.println(prevRight);
  }

}

Schematic for Arduino

User interaction video

Struggle

Due to time constraint, I had to cut a lot of parts during the development process. I initially want to incorporate the moving position of the box, however, due to problems with the photoresistors that I could not resolve, I had to do away with this feature in the end. Using photoresistors also cause me multiple problems, mainly due to the different lightings when moving environment. This lead to my having to fix the parameters every time the lightings change. This is particular problematic and the main issue with my project that I hope to improve in the future.

Reflection

For future project, I think I could have more proper planning, including researching the tools (i.e. Arduino sensors) to know which best fit for the project and avoid significant problems. Other than that, I think the user experience design for this final project has improved from my previous midterm. For this final, I try to make the design as intuitive as possible without using a lot of words. Instead, I try to use symbols and colors (red for stop, do not cross the line). I am also invested in the idea of being able to move the environment although it did not turn out as good as expected due to the implementation. In the future, I would love to work on this idea more, particularly the game mechanism.


Final Project – User Testing

User design

Specifically for the user interaction, I design an instruction at the start of the game. Learning from my midterm project, where user did not know intuitively which button to press, I wrote a small instruction to let user know they could press any button to continue the experience. For the physical component, because the moveable box could not move out of the limits, I put a red tape to signify which area to move and which not to.

Schematic

The project uses 4 photoresistors for sensing position of the box and its size.


User testing video

User testing feedback

After letting my friends try out the game, most of them understood which button to press and that they could only move the box within the red line. However, the enlargement of the box during movement appeared too jittery and abrupt, making it difficult for users to associate their physical movements with the box on the screen. At this part, I need to step in to explain that the box is controlling the platform on the screen. The primary issue to address is the abrupt interaction, which is mainly caused by the photoresistor generating noisy values.


Week 13: User Testing – NYUAD Puzzle Adventure

My game involves solving puzzles of NYU Abu Dhabi images.
The game involves some nice images of the NYU Abu Dhabi campus which are initially is square pieces. I decided to go with square pieces instead of jigsaw pattern because it was easy to  combine move and manipulate square pieces than any other shape.
I invited a friend of mine to test the game and the video can be seen below:

My schematic is as shown here below:

I have four buttons to control game states and actions and the joystick to move image pieces. The speakers are attached to the controller to provide feedback when the pieces move.

Reflection

1. Simplifying Instructions: I realized that users will skip long instructional text. To address this, I need to make my design as intuitive and self-explanatory as possible.

2. Sound Feedback: The sound feedback when pieces attach is effective in making players aware of their actions and creating a sense of progress. This helps avoid confusion or mistaken attachments.

3. Adjusting Final Sound: The final pop-up sound when an image is correctly solved was too loud and needs to be adjusted for a better user experience.

4. Speed of Image Pieces: The speed of the image pieces was too slow, which could make the gameplay feel boring. Increasing the speed would make the experience more engaging.

5. Magnetic Precision: To improve ease of use, I need to reduce the precision required for pieces to attach. Allowing pieces to magnetically snap together would make it easier for players to combine and move them.

6. Background Music: Given that my user testing was quite, and my volunteer was shocked by the celebration sound, I would like to add a background music in order to make the game more interesting.

Week 13: Final Project – User Testing

Hey everyone! 👋

As we’re finishing up our final projects, we also have to conduct user testing to gain valuable feedback and identity potential issues before the showcase.

Here’s one of the short user testing sessions:


As you can see, I did not give any prompt or instructions, and they were able to figure it out nearly instantly (that this is a music synthesizing glove), which is a good sign. They were easily able to play around with it and make music, and understood that bending the fingers was controlling the sound.

However, one piece of feedback I got was that while it was obvious which finger controlled which bar, it wasn’t clear what they were mapped to. I had initially expected that the answer would reveal itself upon the glove being played with for a while (especially with the helpful addressable LEDs even providing hints and feedback on their actions), but clearly this wasn’t the case. Most people were able to somewhat guess the action of the first finger (controlling the pitch (actually the base frequency)), but weren’t able to tell more than that. To be honest though, even I wouldn’t have been able to immediately tell the action of the last 2 fingers. So taking this into account, I added little labels at the bottom of the bars, indicating what each finger controlled.

For some curious enough, I also explained how the sound was actually being synthesized. While this does mean there was something to explain, I think this was more the theory behind the scenes, and so it isn’t vitally important to know. In fact, I think people should be able to play around and enjoy the sound, without knowing the actual technical details behind it, which was the case.

Other than that, I’ll polish up the interface, and although I would also like to improve the music generation, I doubt I’ll be able to change it much between now and the showcase.