Concept
I decided to proceed with my preliminary idea and develop it further. I chose five specific symbols that I will focus on in my project: Mount Ararat, the Armenian rug, lavash (Armenian bread), the duduk (Armenian flute), and the pomegranate.
The project will be divided into five different sections (or elements) that users can explore by clicking the corresponding icon in the p5.js sketch.
Customize Your Armenian Wall Rug:
No Armenian home is complete without a rug on the wall. In this section, users can create their own personalized wall rug by interacting with physical buttons. There will be two buttons: one for switching the patterns and another for fixing them on the rug. When the first button is pressed, patterns will chaotically move and bounce around the rug in the p5.js sketch until the “stop” button is pressed.
Lavash Tonir Simulation:
A tonir is a traditional clay oven used for baking lavash. This section allows users to “bake” their own lavash. By covering the light sensor with their hand, users simulate pulling lavash from the tonir on the digital display. Each time the light sensor is covered, a newly baked lavash piece will be placed on the table, stacking one on top of the other.
Breathing in Ararat:
Everyone in Armenia dreams of having a view of the legendary Mount Ararat from their home. However, even when the view is clear, Ararat is often covered by clouds. In this section, users can clear the clouds by blowing on a 3D-printed mountain. A DHT11 sensor will detect breath through changes in temperature and humidity. This sensor was chosen because, unlike sound-based detection, the DHT11 measures subtle shifts, ensuring precise breath recognition.
Virtual Duduk Experience:
The duduk is an iconic Armenian musical instrument traditionally made from apricot wood. This interaction is heavily based on the p5.js sketch: pressing virtual holes on the duduk triggers sounds from three piezo buzzers connected via Arduino.
Heartbeat-Responsive Pomegranate:
Inspired by Sergei Parajanov’s cinematic masterpiece The Color of Pomegranates (1969), this element allows users to discover their “pomegranate color” based on their heartbeat. Data from a heartbeat sensor will be shown in the p5.js sketch as a color-changing pomegranate, with each heartbeat value generating a unique RGB combination.
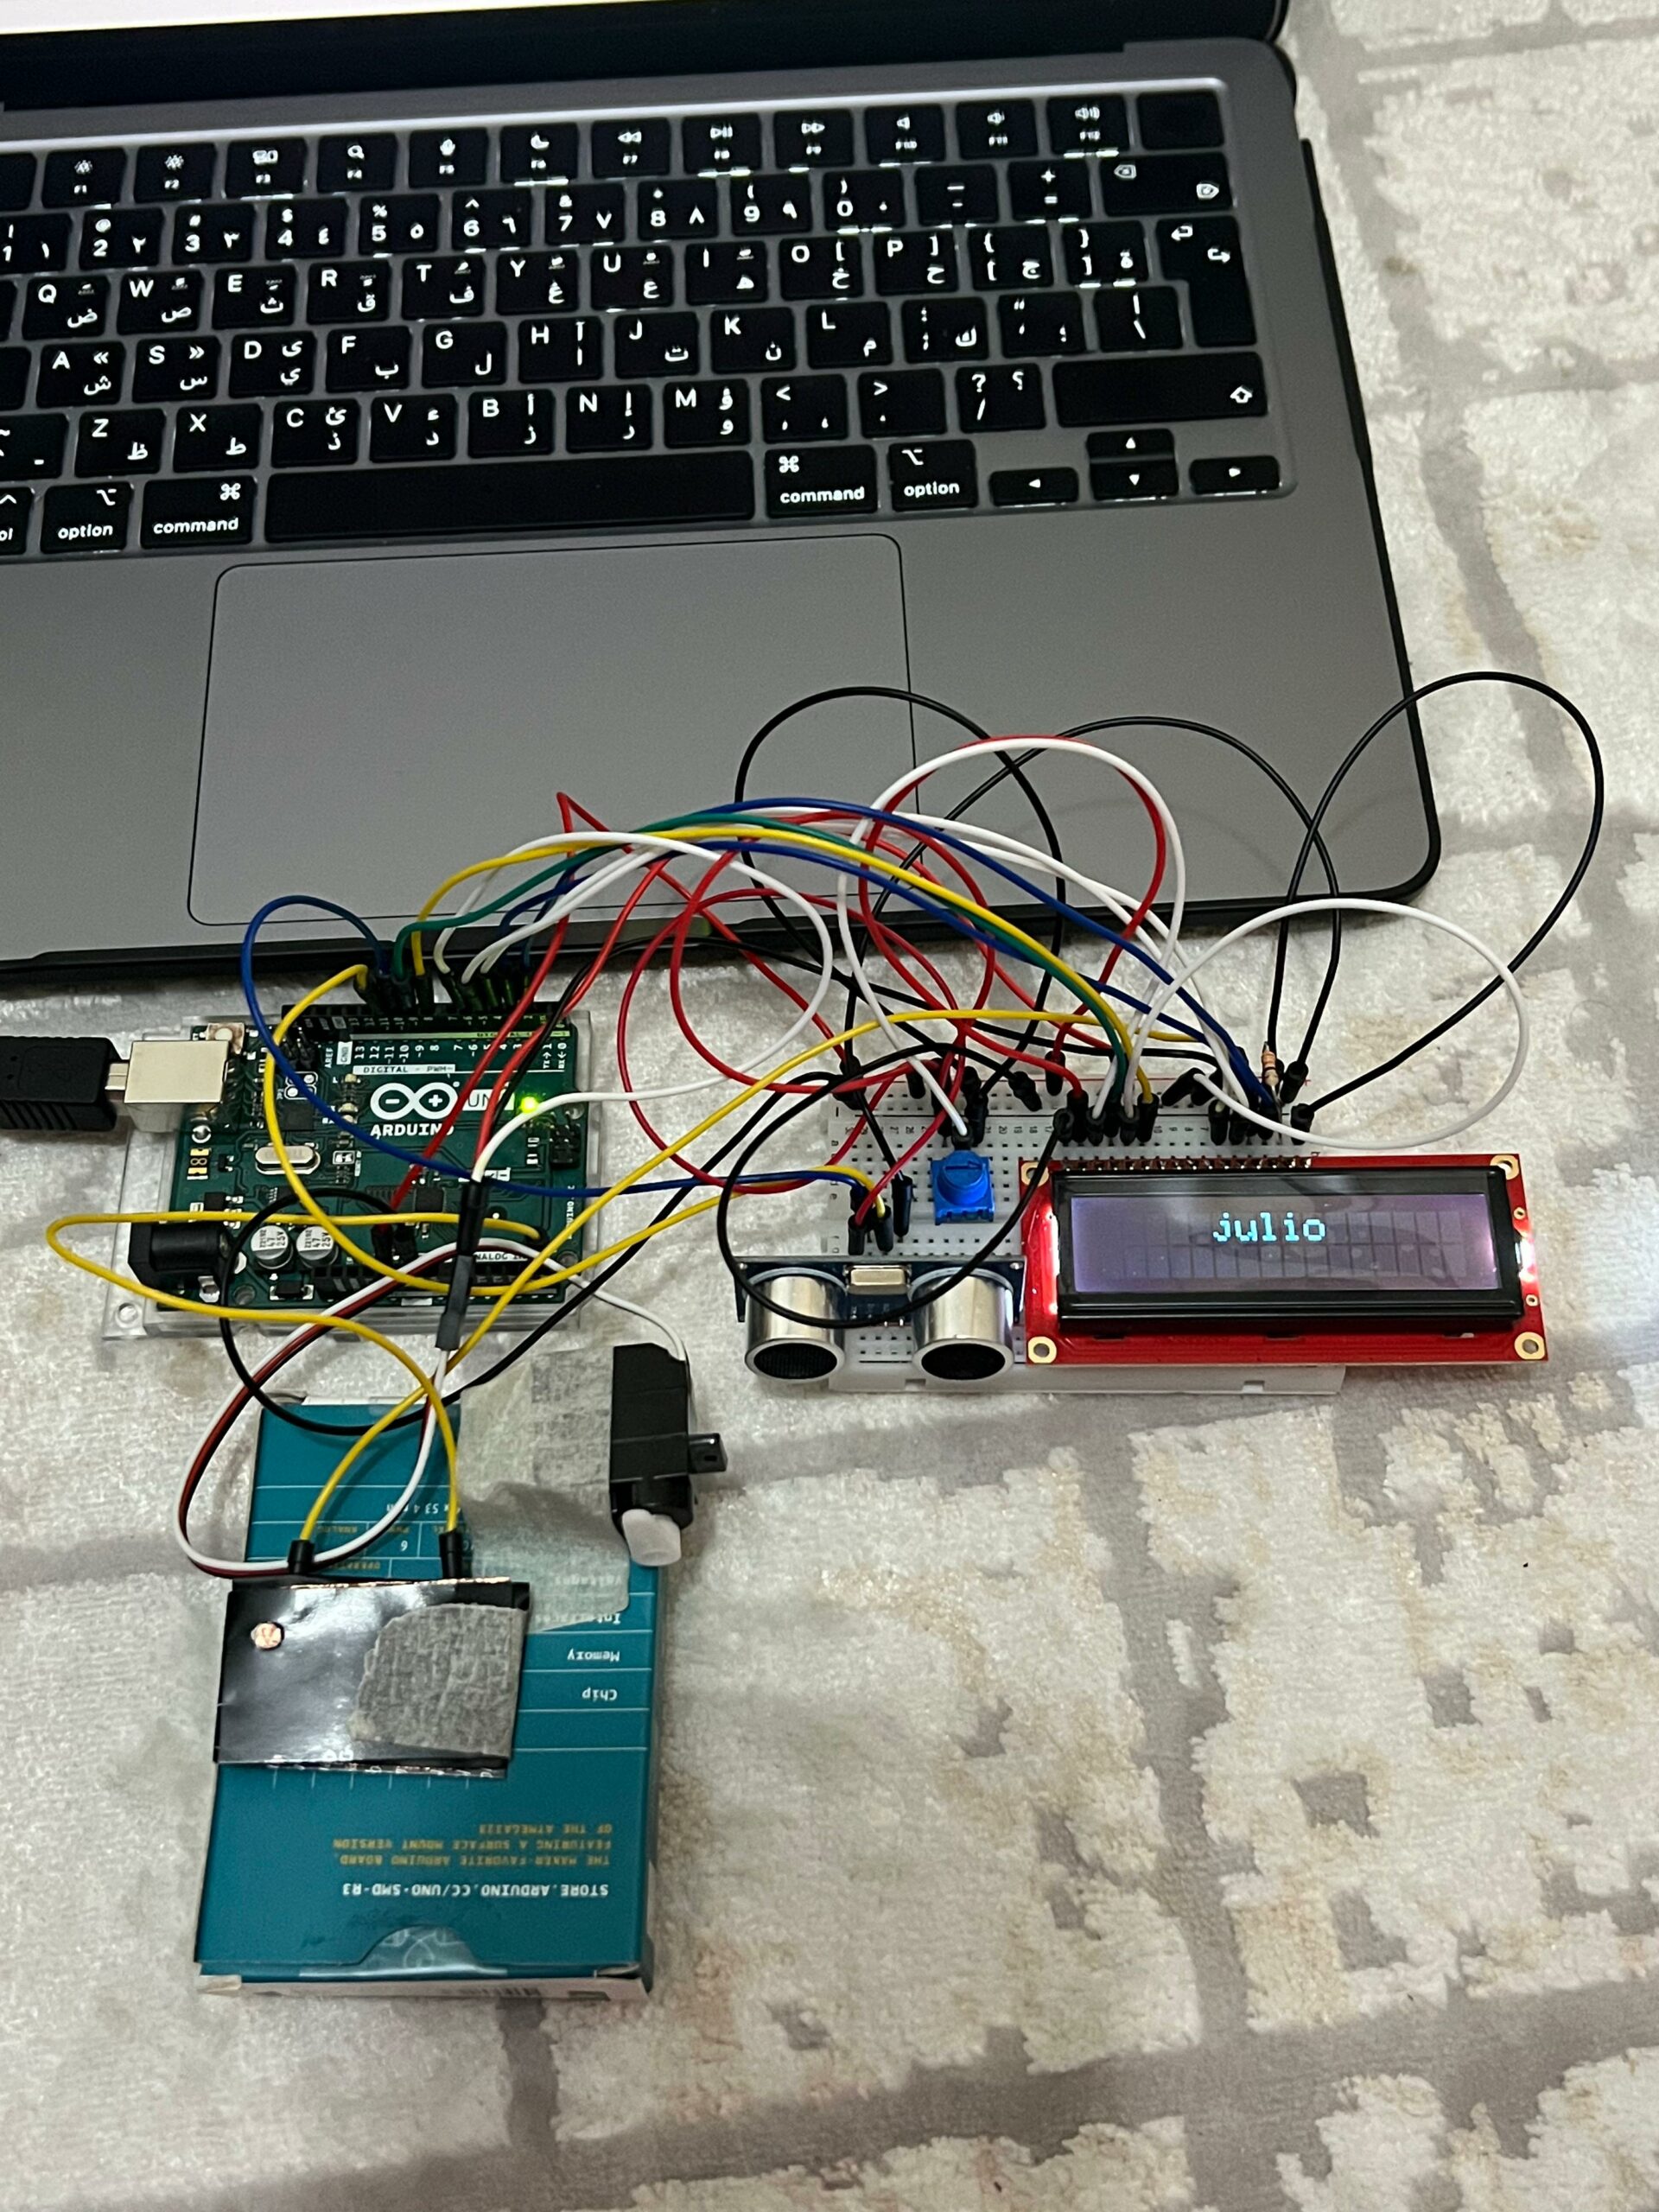
Progress
I have designed a rough sketch of how the project will look both on the Arduino circuit and in the p5.js sketch (see below).
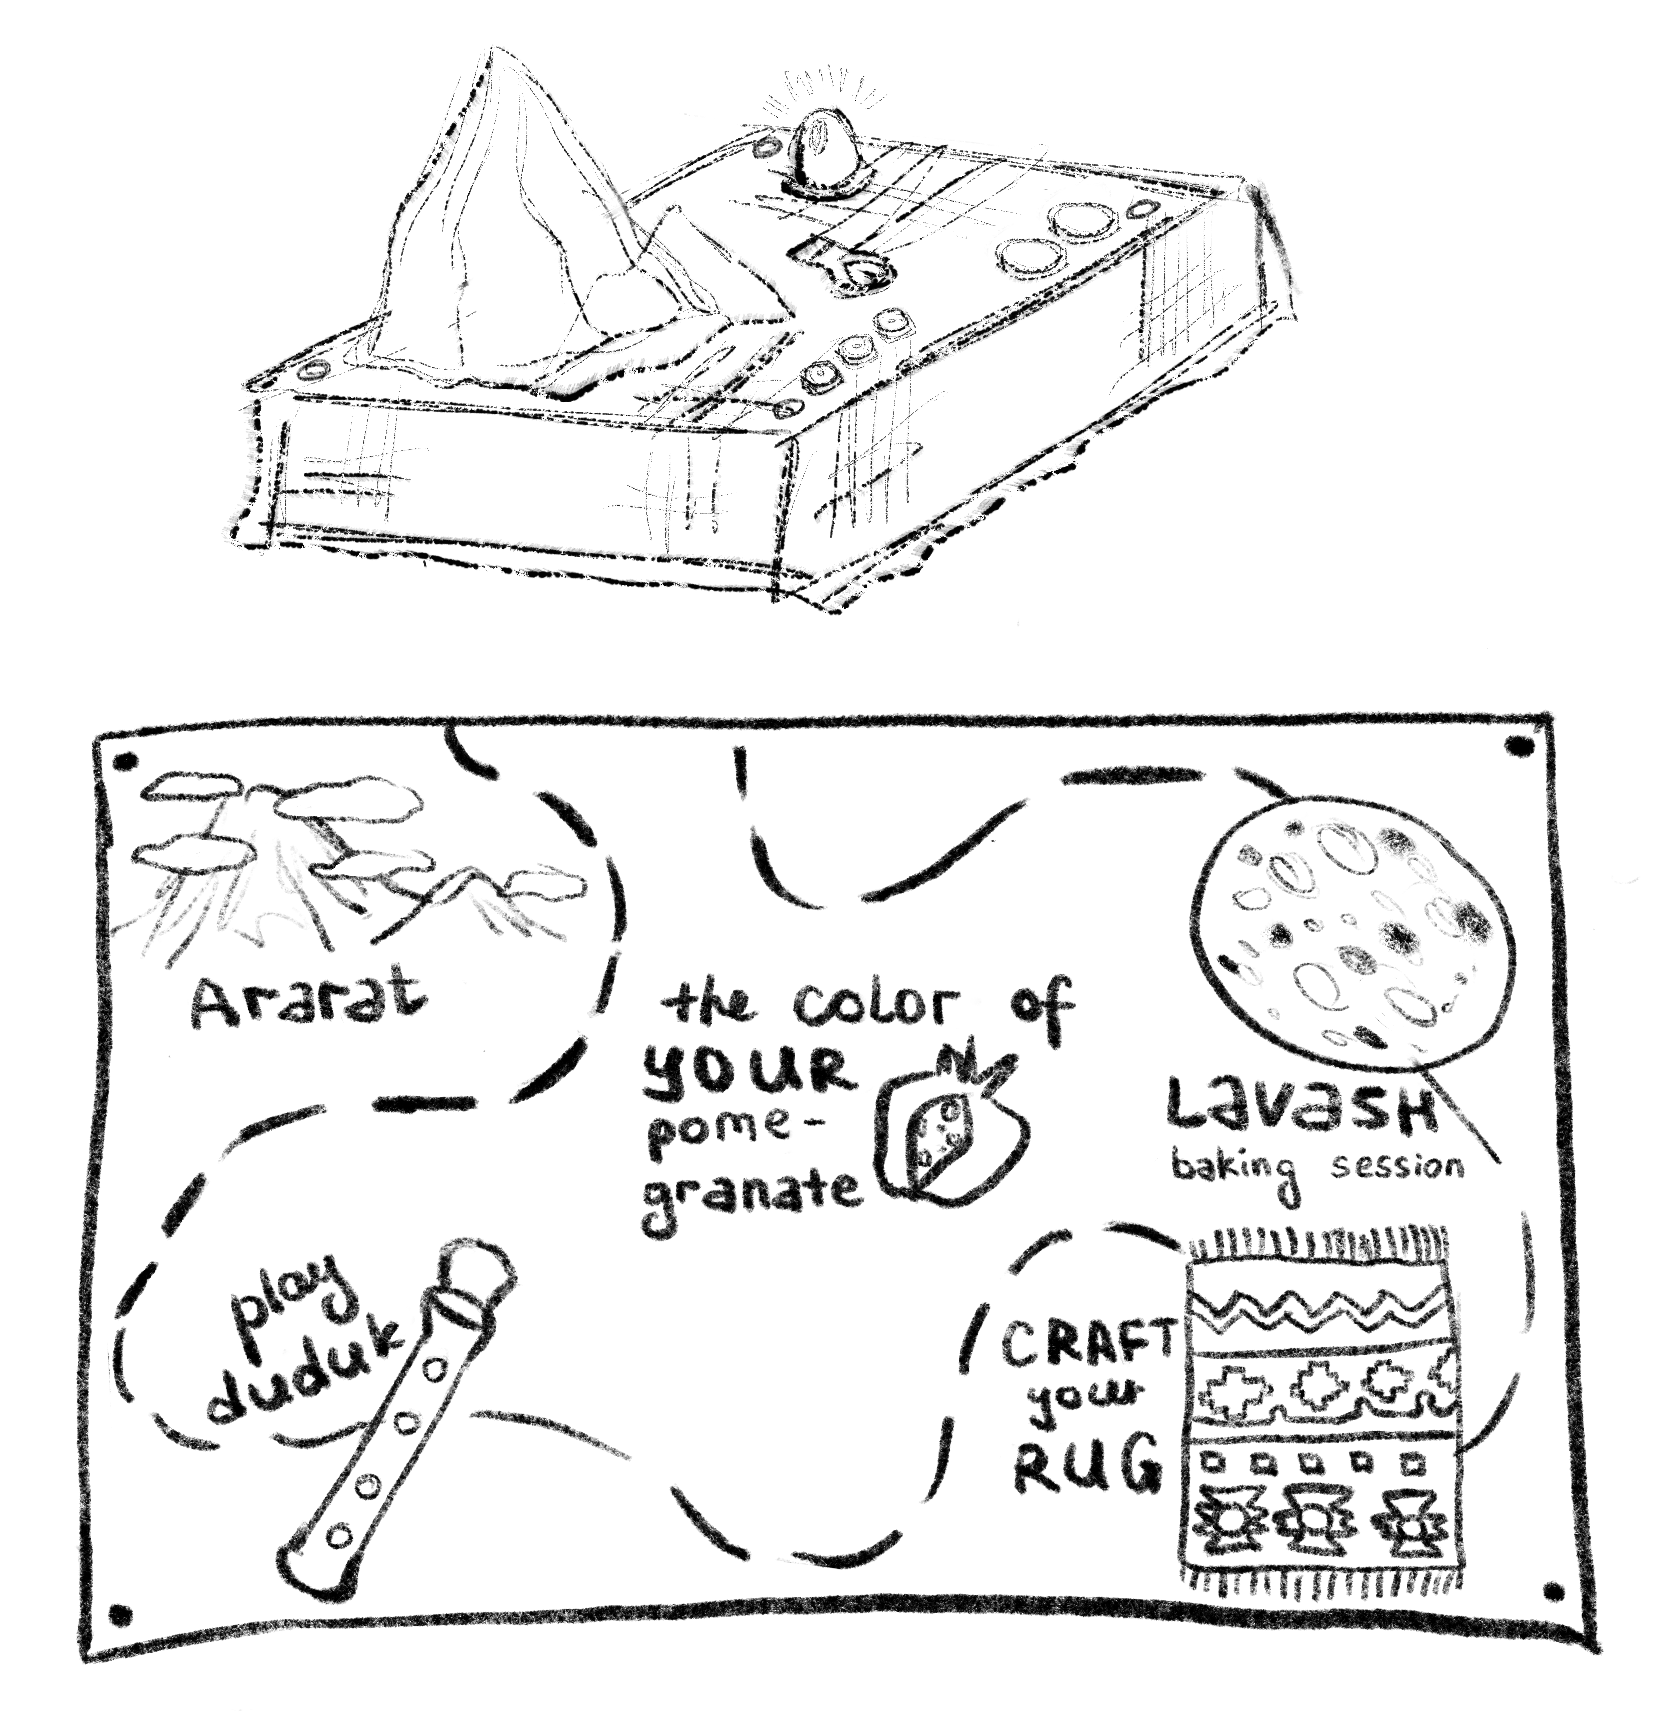
As mentioned in my preliminary idea documentation, I plan to create a map within the p5.js sketch to help users navigate through all five elements. The icons will be clickable only in the p5.js interface, leading users to each element’s page, which will include a brief description with interesting facts about the symbol and interaction guidelines.
The physical layout of the elements on the Arduino side will visually resemble the map in the p5.js sketch. To conceal the circuit and sensors, I will build a wooden box that covers everything except the LEDs and buttons. For aesthetic purposes, I will cover the box with a piece of fabric. Additionally, I will place a 3D-printed mountain on the box (with a small hole at the top for the sensor) to make it more intuitive for users to “blow” on it.