I spent a while refreshing on the coding we learned the other day, and found the part that involves sensors most intriguing. I tried analog input with the potentiometer, flex sensor, and photocell. I also asked Scott about the RGB LED and tried it with switches on my board. But all this review work didn’t really give me an idea what to do for the assignment. So I looked closely at the shelf full of electric parts, and found this magic stuff:
Author: Cynthia Xin Tong
It’s all about patterns
When I thought about the assignment this week, the most obvious way of combining several switches and LEDs seems to be matching them by their colors. But I don’t want to make it boring and just connect components of the same color together. Instead, I created a pattern of lights. What I did was that I placed LEDs and Switches in the opposite order( Red, Yellow, Green, Blue and the reverse) on the breadboard, and made the switches control the blinks of their same-color LEDs, at the same time turn off the adjacent light. Here are the diagram and photo of the layout:
Coin Domino
When I first saw the assignment, I thought about three ways of making a switch that doesn’t require the use of hands:
- Ride a bicycle over two metal panels on the ground and press them together.
- Make light-weighted, conductive material touch by blowing wind to them.
- Flip a coin, make it spin, and when it stopped use it as a conductor between two wires.
I never really tried the first idea primarily because I don’t have a bike. Then it would also be hard trying to find spare, large metal panels. Blowing wind to conductive material seemed more feasible, and I brought my wallet with some coins in it to the lab. I tried with flipping coins and had a lot of fun aiming them at a certain target. But my coins are hardly controllable once they left my hand… oops, does flipping a coin means the use of hand? I realised the third idea doesn’t meet the criteria of the assignment. After some thought, I decided to combine the second and third project by blowing to a Domino set of coins, making them touch to serve as a switch.
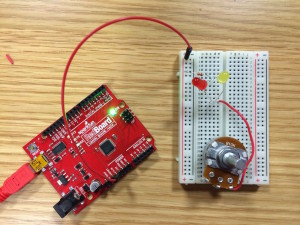
So first I set up the Redboard and breadboard, added a red and a yellow LEDs, and cut off two pieces of wires. Then I soldered one end of a wire to a potentiometer and placed them on the breadboard like this:
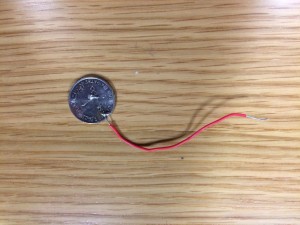
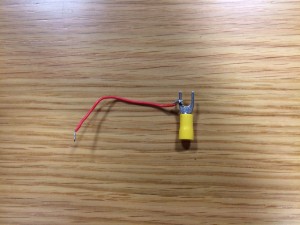
The most difficult part was connecting another wire. I first tried to solder the wire with a coin. However, due to the high melting point of the coin, I couldn’t solder them together tight. Then I tried to solder with another small, light object that I randomly found in the lab. It still didn’t work well.
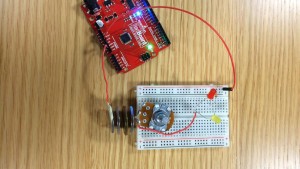
After spending much time on soldering and not nailing it, I decided to simply go with tapes. I taped the end of the other wire to the first coin in my Domino and arranged all four coins.
Finally I experimented a few times blowing wind to the first coin and making all four collapse. They seemed to touch alright, but not always fell to the right place and light up the LEDs. Playing with my coin domino was kind of fun though. Here’s one of the videos I made when the coins did the right job.
There are definitely many ways of making this coin domino switch look and function better. Adding more coins and rearranging them, refining the connection of wire and coin, as well as using stuff other than the potentiometer could all help.
Classroom Controller
In the past few days of class, I observed a few students and professors interacting with their classroom settings. In particular, I paid attention to the “ classroom controller ” ( I haven’t learned its official name), which has a touch screen for people to adjust room light, sound volume, powerpoint screen, curtain slides and set up video conferences.
When I entered a classroom the other day, I walked around in it trying to press some light switches but failed to find the least traits where they might be. So I sat in the dim natural light waiting for another student to come in and do something. But she also had no idea how to light up the room. Then the third, fourth person arrived without looking for the switches. By the time the professor was prepared to begin class, the light was still off. However, after a few seconds, the room was gently filled with brightness. It turns out a guy in that class knew the existence of the controller and easily turned all the light on with it, meanwhile, the professor reacted by joking about how smart the room is. After class, I stayed behind and tried the controller myself. It has a clear display of functions, and controls different devices smoothly. But it took me some time to figure out where the light button is, since it was only displayed when I clicked on the left side arrow on screen, which can be easily overlooked at first by people who’ve never read the controller’s manual.
Then in another class, I watched a couple of other people fumbling with the controller. Though they’ve successfully found the controller, figuring out how to adjust the light took them another minute or so, making them laugh and sigh at the same time.
After these initial observations, I think the classroom controller’s usability can be improved by making it easier to be located, for example, using magnets to stick it on the wall next to the entrance; and visualising some commonly used features, like adding physical light-control buttons on the side of the screen.


