Week 5: Image Processing

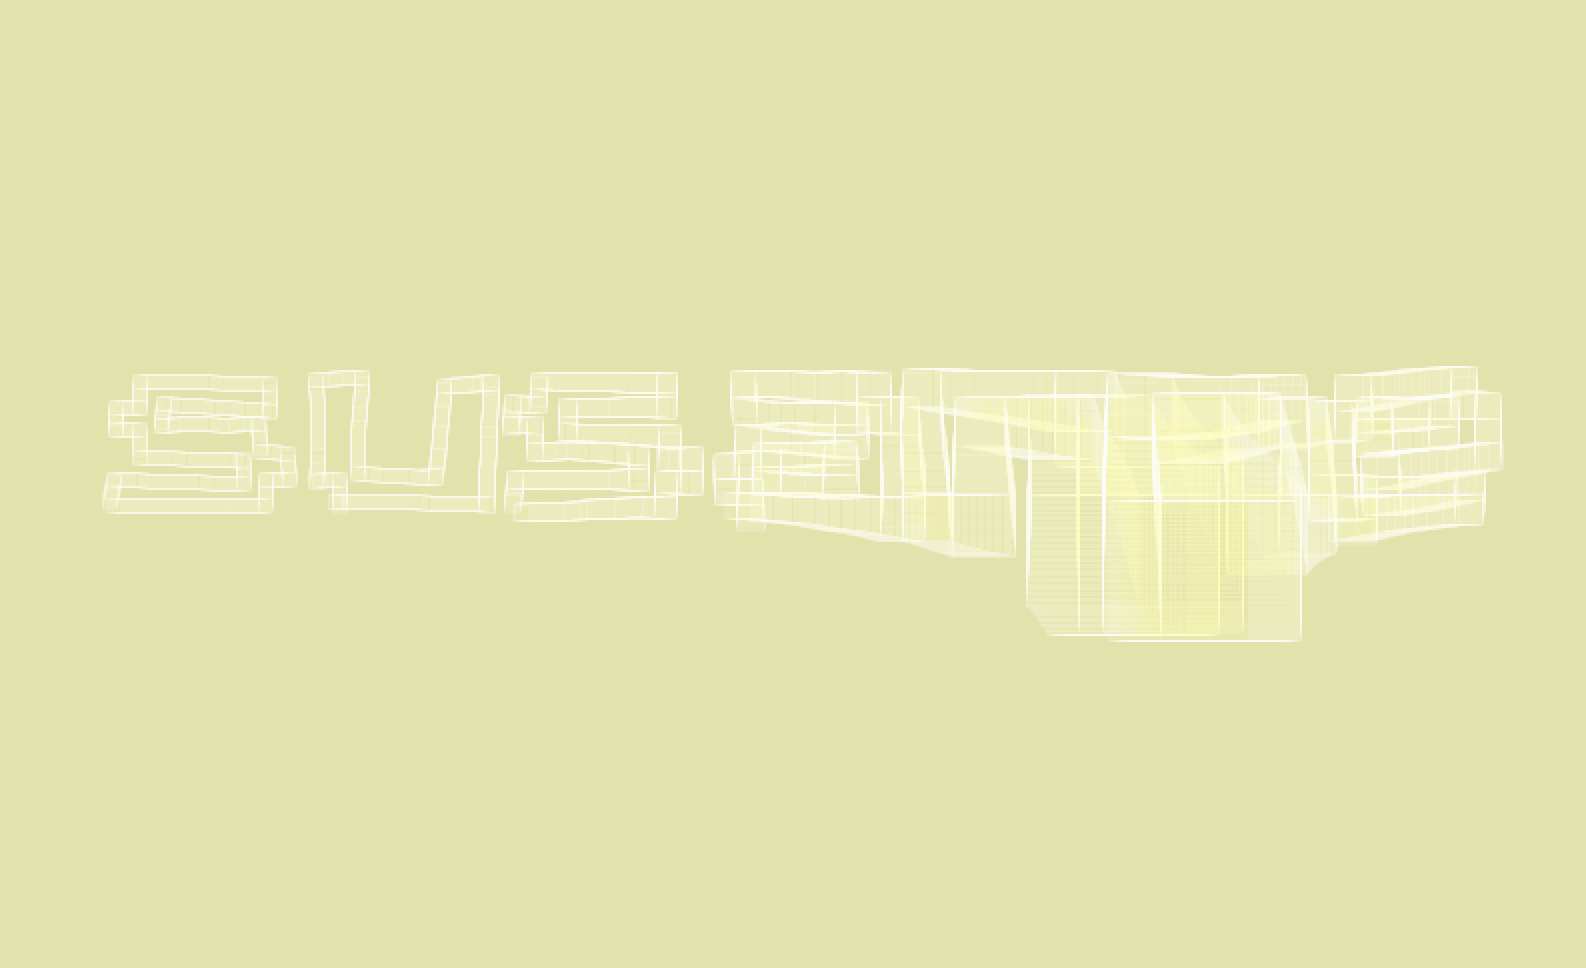
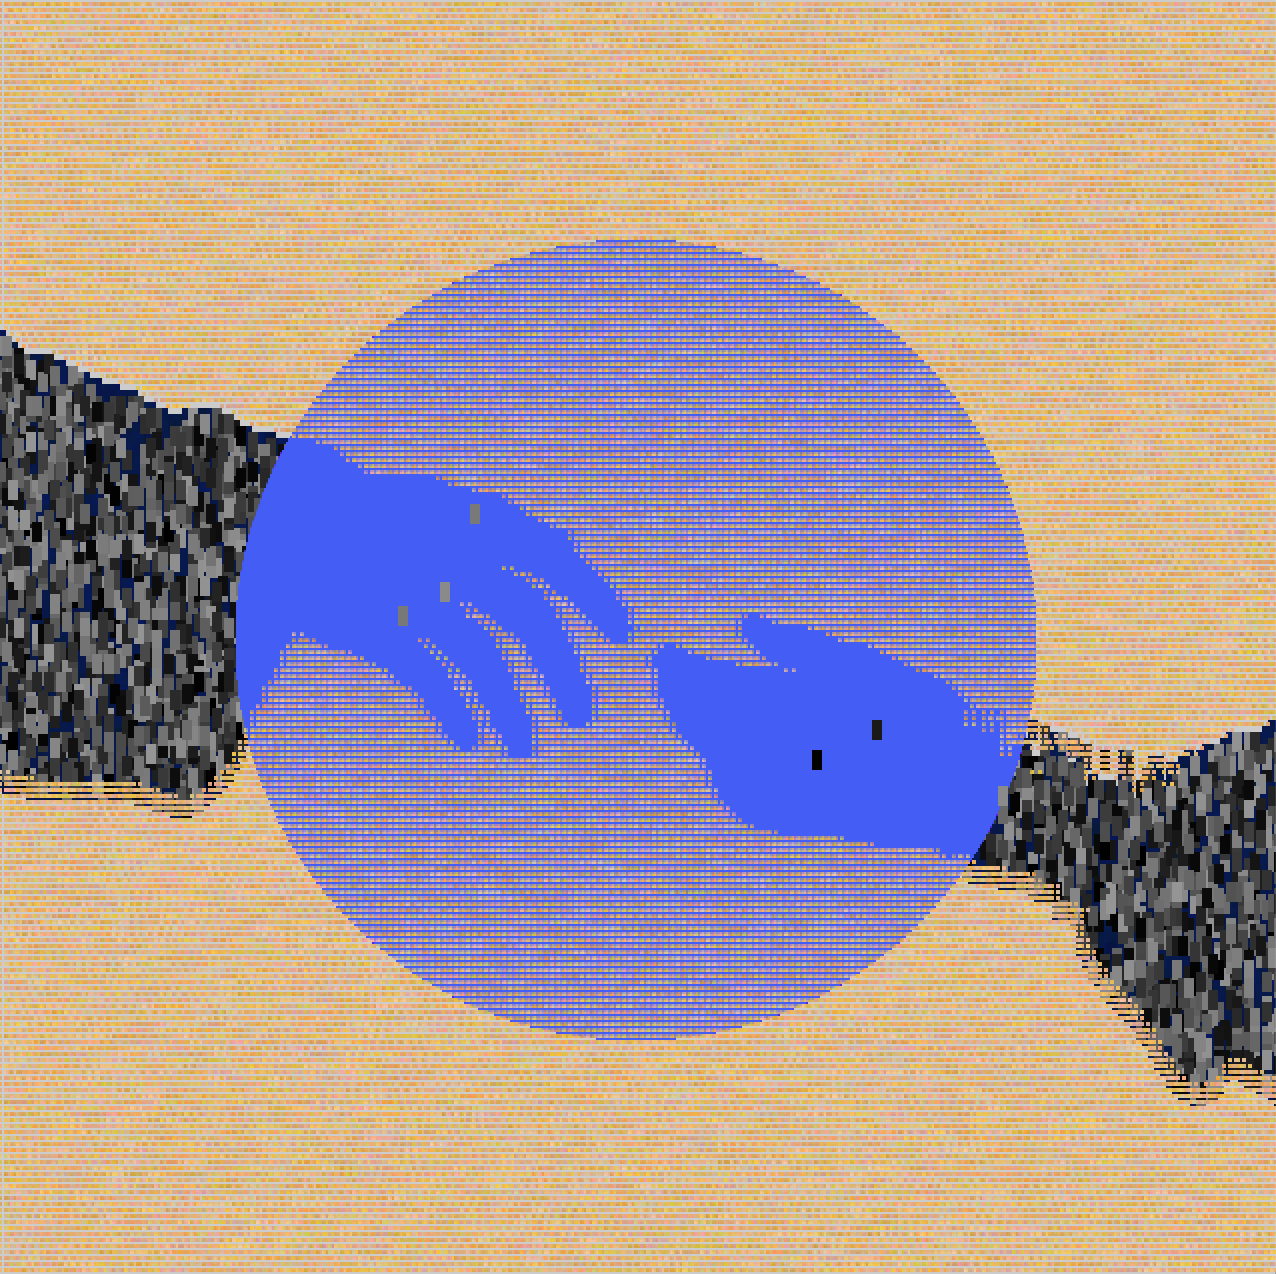
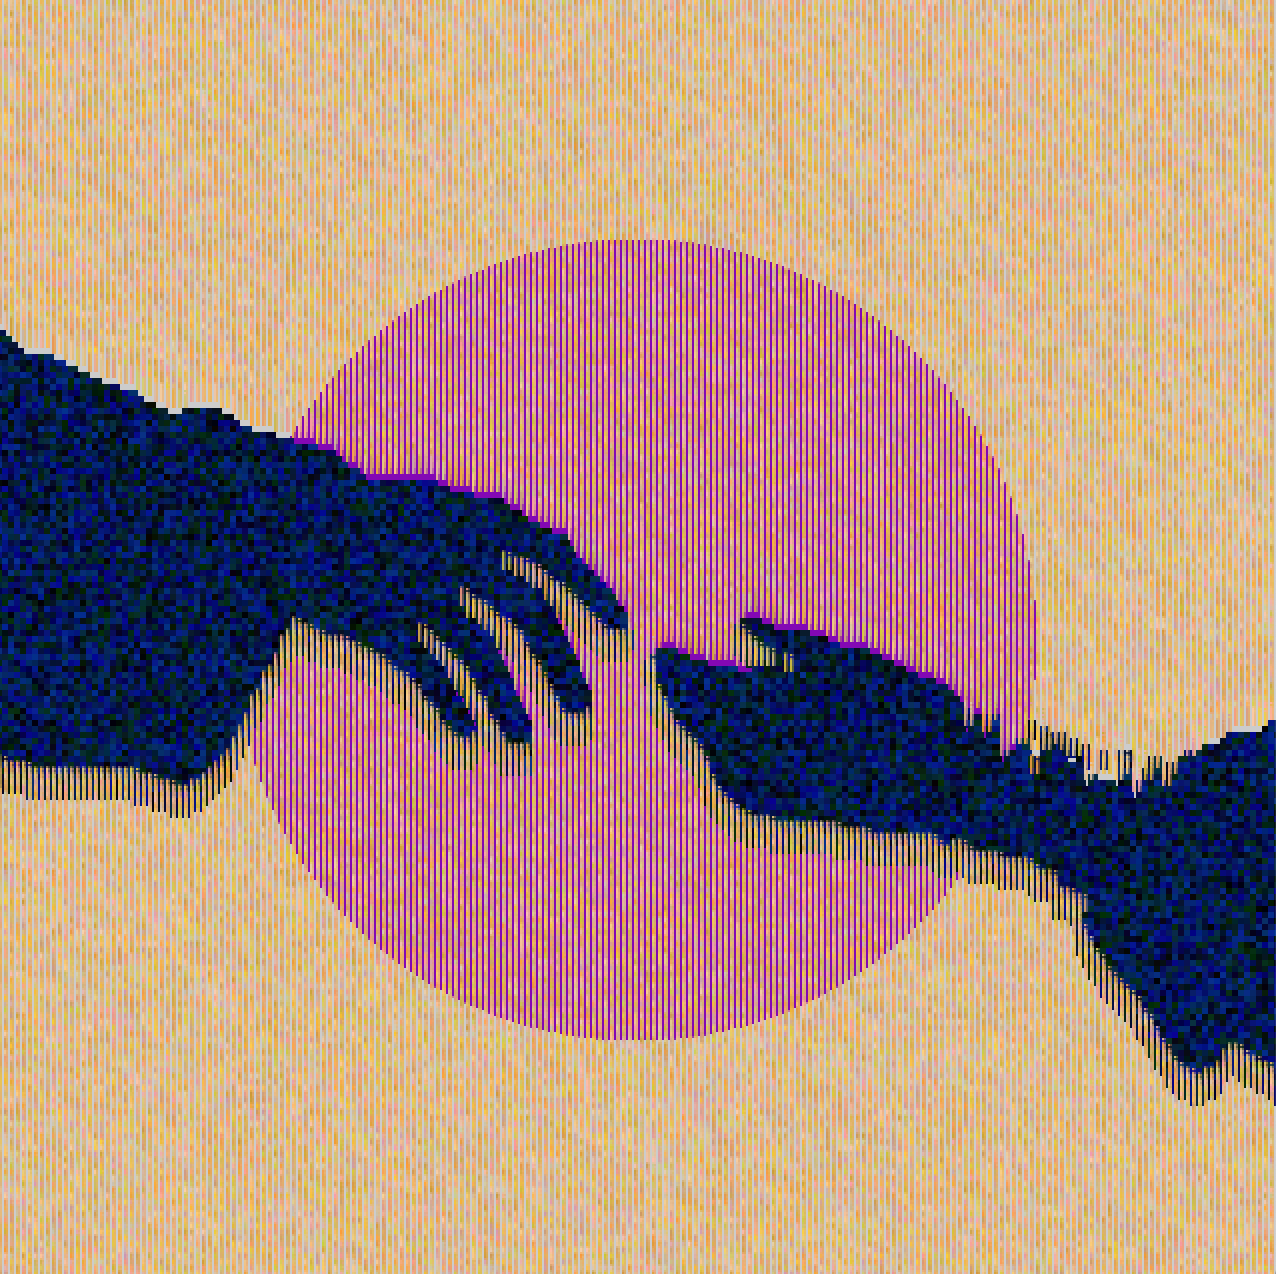
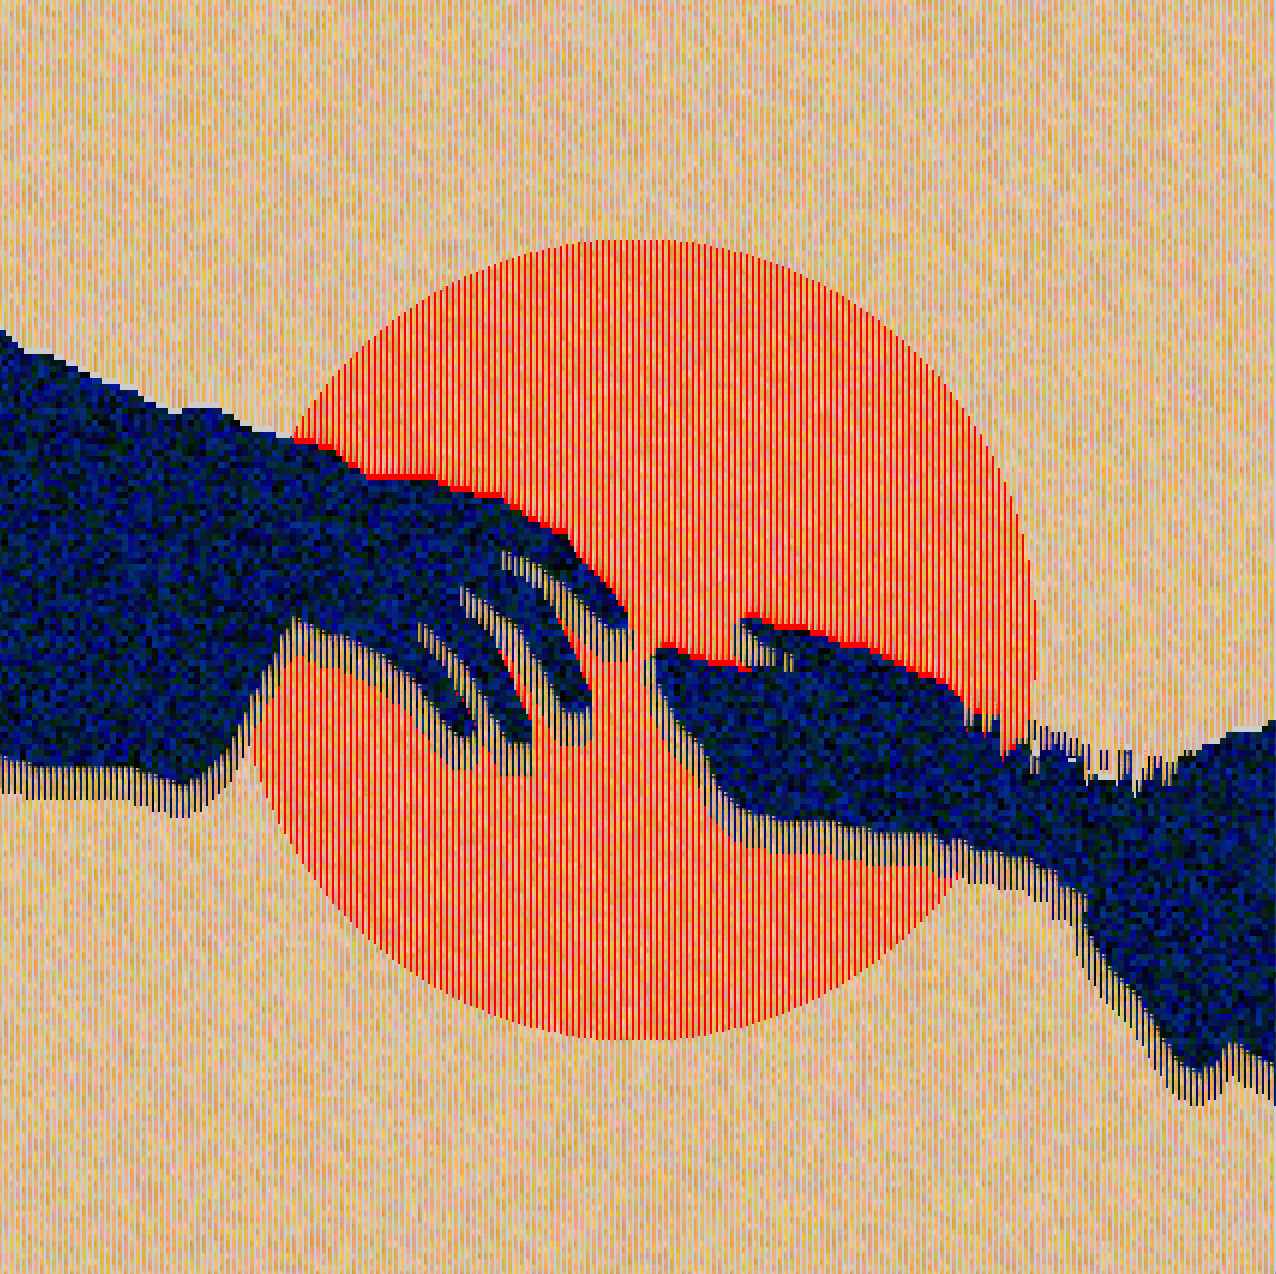
The more I learn about something, the more beauty I find in it. Learning more about images and pixel manipulation in processing allows me to incorporate processes I already enjoyed working with before which sparked my motivation to learn the code needed for what I want to do. This weeks work is inspired by a project of a friend who introduced me to the color fade timer. I incorporated random() and mapped mouseX and mouseY to use their values to manipulate color and opacity. This “filter” is good to use on images with high contrast between lighter and darker areas and the threshold would then need to be adjusted to the specific image. For this work I used an image with white background so I was able to use a relative high threshold to have clear shapes.
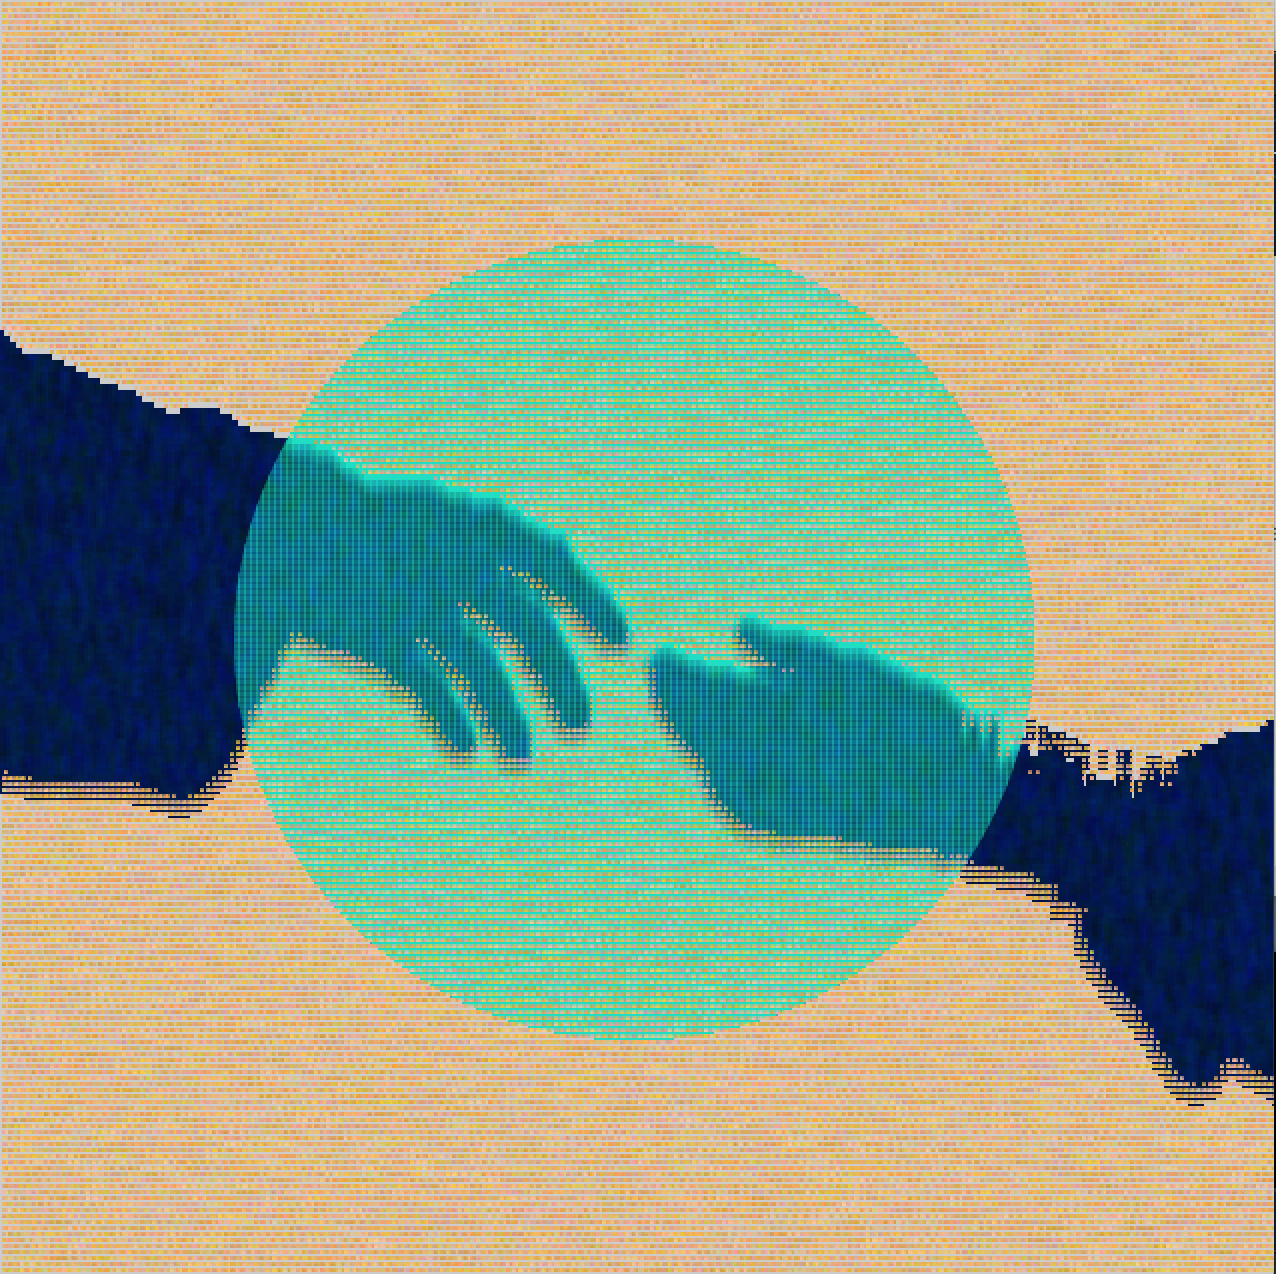
PImage hands;
int threshold = 230; //needed to apply different "filters" to fore- and background
color black = color(0, 0, 0);
FadeColorTimer fc;


void setup() {
  // basic settings
  fc = new FadeColorTimer( color(255, 255, 255), color(255, 0, 0), 4000, 1000); //start from white and fade to red
  size(640, 640);


  // load an image
  hands = loadImage("hands.png");
  // resize
  hands.resize(220, 220);
  // load pixels of source-image
  hands.loadPixels();
}

void draw() {
  //ellipse behind the hands
  fill(fc.c()); // use current color
  noStroke();
  ellipse(width/2, height/2, 400, 400); 

  //two different "filters" for fore/backgroud determined by pixel brightness
  // iterate over image-pixels
  //code informed from https://processing.org/discourse/beta/num_1265567803.html
  for (int i=0; i<hands.pixels.length; i++ ) {
    // get the color
    int col = hands.pixels[i];
    //fill with different, randomly changing colors depending on brightness of the original pixels
    //darker foreground/hands
    if (brightness(col) < threshold) {
      int x = i%hands.width * 3;
      int y = i/hands.width * 3 +3;
      map(mouseX, 0, width, 0, 255);
      map(mouseY, 0, width, 0, 255);
      fill(color(random(0, mouseY), random(0, 50), random (0, 150), mouseX)); //mapping color/opacity to mouseX/mouseY creates different effects here
      rect(x, y, 5, 10); //bigger numbers draw longer "shadow" under hands
    } 
    //lighter background
    else if (brightness(col) >=threshold) {
      int x = i%hands.width * 3;
      int y = i/hands.width * 3 +3;
      fill(color(random(200, 255), random(150, 210), random (50, 180)));
      text("..", x, y); //using differnt numbers/letters here will create a different pattern for the background
    }
  }
  hands.updatePixels();
}

void keyReleased() {
  color cr = color(random(255), random(255), random(255));
  // change the target color to a random color (and restart timer)
  fc.set(cr);
}

//this code is from https://forum.processing.org/two/discussion/20861/change-between-colors-over-time
class FadeColorTimer {
  color c1, c2, c;
  int start, duration;
  FadeColorTimer(color _c1, color _c2, int _start, int _duration) {
    c = _c1;
    c1 = _c1;
    c2 = _c2;
    start = _start;
    duration = _duration;
  }
  void set(color _c2) {
    set(c, _c2, millis(), duration);
  }
  void set(color _c2, int _duration) {
    set(c, _c2, millis(), _duration);
  }
  void set(color _c2, int _start, int _duration) {
    set(c, _c2, _start, _duration);
  }
  void set(color _c1, color _c2, int _start, int _duration) {
    c1 = _c1;
    c2 = _c2;
    start = _start;
    duration = _duration;
  }
  void update() {
    println(c1, c2, map(millis(), start, start+duration, 0.0, 1.0));
    c = lerpColor( c1, c2, map(millis(), start, start+duration, 0.0, 1.0));
  }
  color c() {
    this.update();
    return c;
  }
}


Week 4: Generative text

For this weeks exercise, I liked the ‘Word made of Circles’ example that we looked at in class so I tried out what it could look like with a rectangle instead of ellipses, and to enhance that ‘edgy’ look, I imported a new font with letter composed of little squares. For the colors, I gave the little rectangles that compose the letters a white outline and a yellow, slightly transparent fill that matches the yellow of the background. This creates somewhat of a gradient from the yellow inside of the letters to the white edge that only becomes  visible when hovering over the letters.

This screenshot shows the color gradient from yellow to white inside the letters.

Take a look at the processing code below adapted from the class example.

import geomerative.*;
RFont font;
String phrase = "susanne";
float xOffset = 0;

RPoint[] pnts;

void setup() {
  size(800, 800);
  RG.init(this);
  font = new RFont("PressStart2P-Regular.ttf", 100, RFont.LEFT);

  // load the phrase into geomerative
  // the first line sets how much distance should there by between each point 
  RCommand.setSegmentLength(1);
  //RCommand.setSegmentator(RCommand.UNIFORMLENGTH);
  RCommand.setSegmentator(RCommand.UNIFORMLENGTH );
  RGroup grp;
  grp = font.toGroup(phrase);
  grp = grp.toPolygonGroup();
  pnts = grp.getPoints();

  // to set the word in the middle of the screen
  // get the size of the phrase subtracted from the width of the screen
  // this is the amount left over
  xOffset = width - grp.getBottomRight().x - grp.getBottomLeft().x;
  // divide that by two to center it
  xOffset = xOffset/2;

  fill(251, 252, 163, 5);
  stroke(255, 255, 255, 40);
}

void draw() {
  background(226, 227, 172);

  for (int i=0; i< pnts.length; i++) {
    float moveIt = (noise(frameCount*.01+i*.01)-.5)*10;
    float x = pnts[i].x + moveIt + xOffset;
    float y = pnts[i].y + moveIt + height/2;

    // dividing makes it invert it's action
    float diam = 2500/dist(x, y, mouseX, mouseY);
    diam = constrain(diam, 7, 70);

    rect(x, y, diam, diam);
  }
}


Week 3: Object-oriented Programming

This weeks exercise took a lot of time, or should I rather say, I spend a lot of time playing around and getting to know Processing better? I rewatched and followed along the different video tutorials by The Coding Train which helped a lot but also led to endless possibilities.

I took inspiration from a Ginkgo leaf and the kaleidoscopes I used to like as a child. I wanted to create several layers of ginkgo leaves that rotate in different directions but are layered on top of one another in the center of the screen. However, when I started writing the code, other ideas and possibilities came to my mind so the first challenge was to make decisions. In-between I tried something else and my final version is also not quite what I initially had in mind but I was able to learn along the way.

The second challenge was whether to start with highest part of the code hierarchy that should just look simple and ‘pretty’ at the end or with creating my own objects and functions. As I am still pretty new to processing, I had no ‘best practice’ but after this exercise I think it’s easier to start with the “pretty” part and then build the “background code” depending on how I want the hierarchy to look like.

My code for this exercise is not fully polished and simplified yet because I ran into some difficulties where I will need to check ‘pass by reference’ and ‘pass by copy’ again but enjoy this little Ginkgo leaf inspired kaleidoscope which reacts to the position of the mouse.

This was the first attempt of creating the basic shape.
This is a screenshot from the final effect.

This is the main code, followed by the code on the additional tab for the Leaf class.

float x, y, r;
float a, b;
float angle;

Leaf l1;
Leaf l2;
Leaf l3;

void setup() {
  size(640, 640); //Instagram format
  background(0);
  l1 = new Leaf();
  l2 = new Leaf();
  l3 = new Leaf();
}

void draw() {
  background(0);

  translate(width/2, height/2); //this centers the shape on the screen

  push(); //I am using push() and pop() because otherwise the scale would apply to the previous value. need to solve this.
  
  l1.display(mouseY/250); //this will change the size according to the mouse position
  pop();

  push();
  rotate(angle);
  angle = angle + 0.5;
  l2.display(1.5);
  pop();

  push();
  rotate(-angle);
  angle = angle + 0.3;
  l3.display(mouseX/100); //this will change the size according to the mouse position
  pop();
}
class Leaf {
  float a;
  float r;
  float angle;
  float s;

  Leaf() { //this sets up the parameters that we can later determine when calling the function
  }

  void display(float tempS) { //this is the basic shape of the leaf
    //translate(width/2, height/2);
    

    s = tempS;
    scale(s);


    stroke(255);
    strokeWeight(0.5); //thin stroke weight to make leaf structure finer
    fill(255);
   
    //this is the basic shape of the leaf (somewhat hardcoded still)
    
    //these are the basic two intersecting lines with a stronger strokeWeight than the other lines
    line(-50, -50, +50, +50);
    line(+50, -50, -50, +50);
    
    strokeWeight(0.01); //this makes the extra lines thinner
    line(-50+r, -50, +50-r, +50);
    line(-50, -50+r, +50, +50-r);
    
    line(+50-r, -50, -50+r, +50);
    line(+50, -50+r, -50, +50-r);

    ellipse(-50, -50, r*2, r*2);
    ellipse(+50, +50, r*2, r*2);
    ellipse(+50, -50, r*2, r*2);
    ellipse(-50, +50, r*2, r*2);
    
    //this adds a smaller ellipse into the bigger ellipse
    fill(255);
    
    ellipse(-50, -50, r*1.5, r*1.5);
    ellipse(+50, +50, r*1.5, r*1.5);
    ellipse(+50, -50, r*1.5, r*1.5);
    ellipse(-50, +50, r*1.5, r*1.5);
    
    r=15;
  }
  
  void move() {
    rotate(angle);
    angle = angle + 1;
  }
  
}


Week 2: for() loop artwork

For this exercise I changed some parameters in the for() loop building upon the code we started writing during class. I wanted to experiment more with color and random(). Here, the color of the background is changed on mouse click while the larger ellipses and rectangles change colors randomly. To me, the outcome looks like a whirlwind of confetti. Accidentally, the screen recording captured a song of the RealAD show which I was listening to in the background. This started a new idea for creating a Processing artwork that reacts to sound but this will have to wait until I learn more about Processing and how it can react to different input.

int x = 0;
int ellWidth = 100;
int rectWidth = 20;
color backColor = color(255, 255, 255); // taken from https://forum.processing.org/one/topic/how-can-i-change-background-color-with-mouse-click.html

void setup() {
  size(640, 640);
  rectMode(CENTER);
  ellipseMode(CENTER);
}

void draw () {
  background(backColor);

  for (int x = 0; x<width; x+=ellWidth) {
    float center = height*0.5;
    float amplitude = TWO_PI;
    float speed = 0.01;
    float granular = 0.01;
    float freq = (frameCount*speed) + (x * granular);
    float angle = noise(freq);
    angle *= amplitude;

    pushMatrix();
    translate(x + ellWidth/2, center);
    rotate(angle);
    rotate( map(mouseX, 0, width, 0, TWO_PI));
    noStroke();
    fill(random(255), random(255), random(255));
    ellipse(width/4, height/4, ellWidth, ellWidth);
    popMatrix();
  }

  for (int x = 0; x<width; x+=rectWidth) {
    float center = height;
    float amplitude = TWO_PI;
    float speed = 0.01;
    float granular = .001;
    float freq = (frameCount*speed*2) + (x * granular);
    float angle = noise(freq);
    angle *= amplitude;

    translate(x + rectWidth/2, center);
    rotate(angle);
    rotate( map(mouseX, 0, width, 0, TWO_PI));
    noStroke();
    fill( random(255), random(255), random(255));
    rect(0, 0, rectWidth, 100);
  }
  
  for (int x = 0; x<width; x+=rectWidth) {
    float center = height;
    float amplitude = TWO_PI;
    float speed = 2;
    float granular = .001;
    float freq = (frameCount*speed*2) + (x * granular);
    float angle = noise(freq);
    angle *= amplitude;

    translate(x + 20/2, center);
    rotate(angle);
    rotate( map(mouseX, 0, width, 0, TWO_PI));
    noStroke();
    fill( random(255), random(255), random(255));
    rect(0, 0, rectWidth, 100);
    fill(0);
    ellipse(width/2, height/2, 20, 20);
  }
}

void mousePressed() {
  backColor = color(random(255), random(255), random(255));
}


Week 1: Self portrait

This is my first processing project, a self portrait, and being a rather crafty person it felt just like using different paper cutouts and somehow putting them together to create a portrait of myself – well somewhat. Getting to know how to create different 2D shapes in Processing, I thought about which shapes to use to create a face and how I will take advantage of the fact that I am not limited by paper cutouts but could actually add some movement and interaction. While experimenting in class, at some point the eyes I had created where not static anymore but moving and creating a pattern behind the head which I thought would be a cool repetition of a visual element in the portrait and add some fun. I kept the face, eyes and mouth simple while trying to remember radian values from high school to create a semi-circle for the mouth. When looking for a somewhat realistic blonde tone RGB value I realized that the color would not match with the skin tone I used. That is how my favorite part of the portrait was added, the color changing hair. To make the code work took another reflection because my approach was too narrow minded thinking about our class example where the color of a rectangle would only change when clicking on it. The simple solution was to define mouseX and mouseY within the whole area of my “artwork” so you can click anywhere within the window and the hair color will change. Hope you enjoy!

P.S. I  have not died my hair yet.

Here you can see two confused eyes, no smile, and a portrait in progress.
Here you see two happy eyes, an enthusiastic smile, and hair in NYU violet – the final portrait.
//portrait
//for animated reference
int x; 
int y; 
int xSpeed = 9;
int ySpeed = 9;

//for static reference
int a;
int b;

//to change hair color
float red = 255;
float green = 0;
float blue = 0;
int value = 0;

void setup () {
  size(640, 480);
  x = width/2;
  y = height/2;
  a = width/2;
  b = height/2;
}

void draw () {
  noStroke();

  //eyes background animation
  noFill();
  ellipseMode(CENTER);

  //white part/sclera
  fill(252);
  ellipse(x-35, y-10, 30, 30);
  ellipse(x+35, y-10, 30, 30);

  //black part/iris
  fill(0);
  ellipse(x-35, y-10, 10, 10);
  ellipse(x+35, y-10, 10, 10);

  if (x >= width || x <= 0) {
    xSpeed *= -1;
  }

  if (y >= height || y <= 0) {
    ySpeed *= -1;
  }

  x = x + xSpeed;
  y = y + ySpeed;

  //hair: behind body
  fill(red, green, blue); //hair changes color
  rectMode(CENTER);
  rect(a, b+40, 180, 0.7*b);

  //body shape behind face
  fill(0); //clothes color
  rectMode(CENTER);
  rect(a, 1.5*b, 80, b);

  //face shape
  fill(235, 221, 188);
  ellipse(a, b, 180, 220);

  //static eyes
  //white part/sclera
  fill(252);
  ellipse(a-35, b-10, 30, 30);
  ellipse(a+35, b-10, 30, 30);

  //black part/iris
  fill(0);
  ellipse(a-35, b-10, 10, 10);
  ellipse(a+35, b-10, 10, 10);

  //nose
  fill(209, 156, 50);
  ellipse(a-8, b+20, 6, 6);
  ellipse(a+8, b+20, 6, 6);

  //mouth
  arc(a, b+40, 80, 80, 0, PI, PIE);

  //hair
  //bangs
  fill(red, green, blue); //hair changes color
  arc(a, b-40, 180, 180, PI, 2*PI);
  //sides
  rectMode(CORNER);
  rect(a-90, b-50, 20, 0.7*b);
  rect(a+70, b-50, 20, 0.7*b);

  //arms
  stroke(0);
  strokeWeight(20);
  noFill();
  arc(a, b+100, 300, 180, 0, PI, OPEN);
}

void mousePressed () {
  if (mouseX > 0 && mouseX < width && mouseY > 0 && mouseY < height) {
    red = random(255);
    green = random(255);
    blue = random(255);
  }
}