Final Project – “The Heist”

CONCEPT

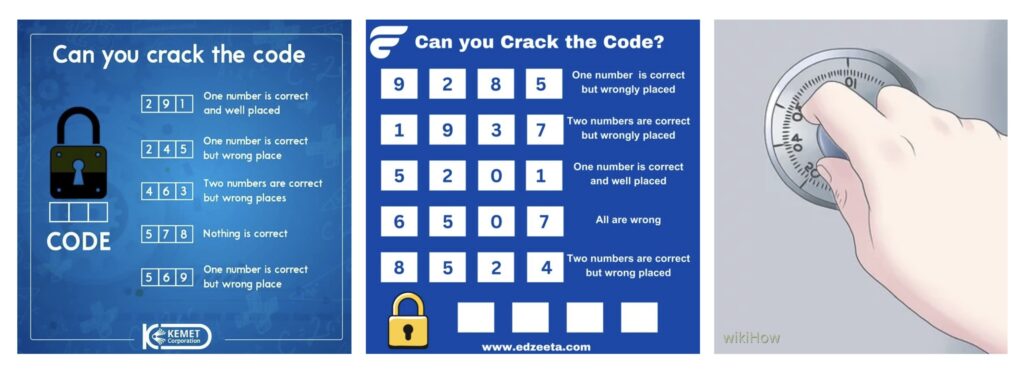
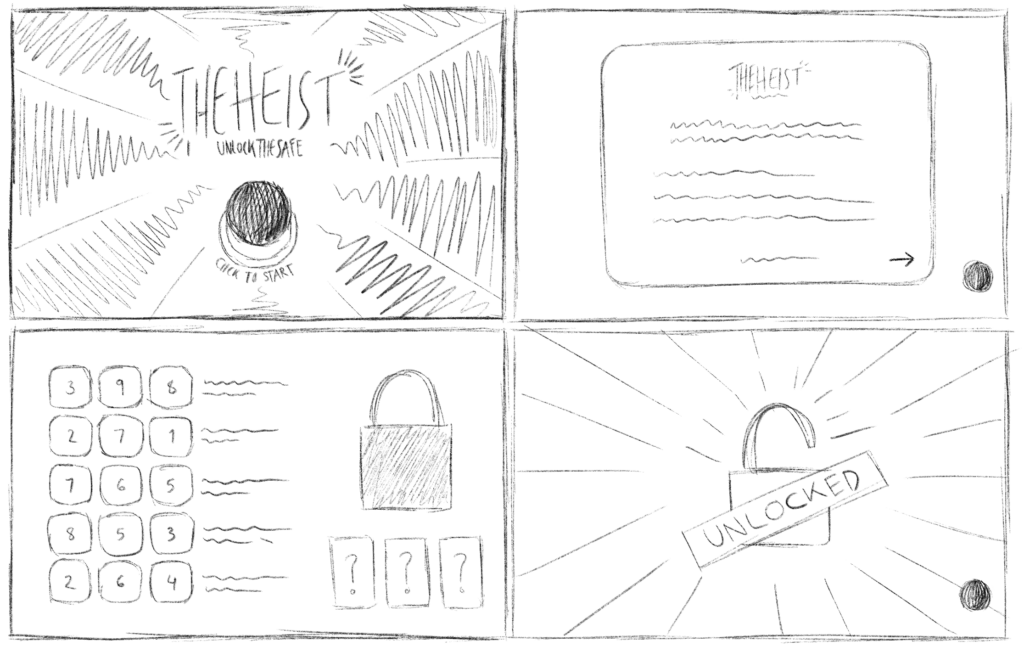
“The Heist: Unlock the Safe” is an exciting puzzle/math game that challenges your mind to decode a sequence of numbers given a few hints, with each of them guiding you in eliminating potential numbers.  It’s pretty simple, the user is provided with instructions which then allows them to use their skills and crack the code. The theme behind it is to provide a sense of thrill of cracking a safe, just like in a bank robbery (not advised) or an escape room!

DOCUMENTATION

1) Teaser Video (pre-showcase)

2) Demo Video (how to play?)

3) Final video (showcase day!)

IMPLEMENTATION

Interaction Design

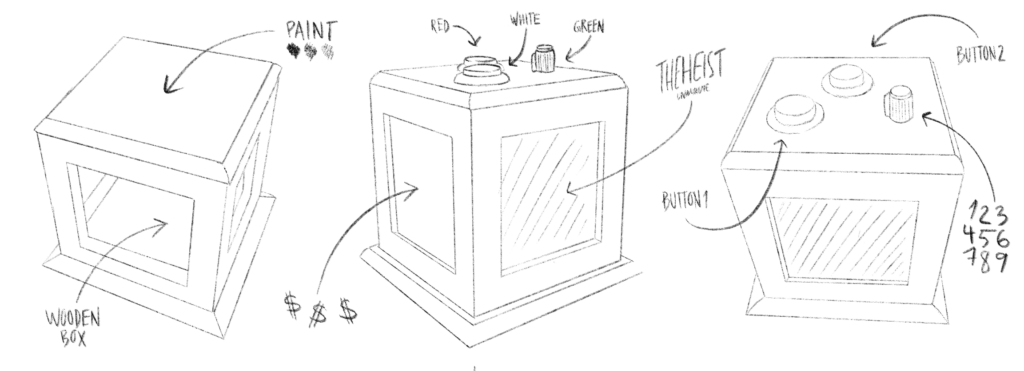
The box I created features two buttons and a potentiometer, positioned for user convenience. The red button, placed farthest from the user, serves as the game initiator and state mover, designed for occasional use. On the other hand, the knob (potentiometer) & white button are situated closer to the player, allowing easy access as they will be frequently used during the game to guess the code. Further, the box was designed to match the game’s theme, in terms of color and aesthetic (materials used: wood, wood paint, sponges, tape, glue, equipment, etc.).

Arduino

The Arduino code sets up the game with a three-digit combination lock (three possible combinations). It initializes variables such as the game state, the entered codes, and the correct combination. The safe can be in the following states: Menu (‘M’), Instruction (‘I’), Play (‘P’), and End (‘E’). Buttons and a potentiometer are used to input digits, and a servo motor controls the lock mechanism. The program continuously checks for button presses, serial input, and the correctness of the entered code. If the correct code is entered, the safe unlocks the servo motor, indicating success. Otherwise, it remains locked, prompting the user to retry. However, it’s worth noting that the initial plan to control the lock mechanism with the servo was later removed from the code. The checkCode() function, verifies if the entered code matches the correct combination when the game state is ‘E’ (End). It iterates through each digit of the entered code, comparing it with the corresponding digit in the correct combination. If any digit doesn’t match, it sets the correct flag to false and breaks out of the loop. If all digits match, meaning a correct code, it unlocks the safe by setting locked to false and open to true. Link to Arduino Sketch.

P5.js

The p5.js code begins by declaring variables such as various image files required for the game. Key components for communicating with an Arduino are included, such as variables to read data from Arduino (digit, button1, button2, locked) and variables to send data to Arduino (open, codes, button1State, button2State, buttonPressCount). The `keyPressed()` and `preload()` functions handle necessary setup tasks, such as loading sound and image files. The `setup()` function initializes the canvas and starts the game by calling the `restart()` function. The `draw()` function renders different game screens based on the current `gameState`, which then displays images accordingly. The `readSerial()` function manages data received from the Arduino, updating game variables accordingly.

Communication

At first, I used one button for both entering digits and moving to different game parts. But p5.js got mixed up with the signals from Arduino. So, I split the tasks between two buttons. Now, one button only enters digits (white button), and the other button (red button) handles moving between game states. In the communication between the Arduino & p5.js, the serial monitor informs p5.js about the status of buttons and the number from the potentiometer. Each line of data received has four parts (initially): two “true/false” statements indicating button states, followed by numbers representing the potentiometer reading. Using this data, p5.js updates variables like `button1`, `button2`, and `digit`, which helps control the game. For instance, if `button1` is true and `button2` is false, it means a certain action from the player, like moving to the next stage or entering a code digit. Dealing with serial communication was certainly one of the challenges I encountered in the process.

PROUD MOMENTS
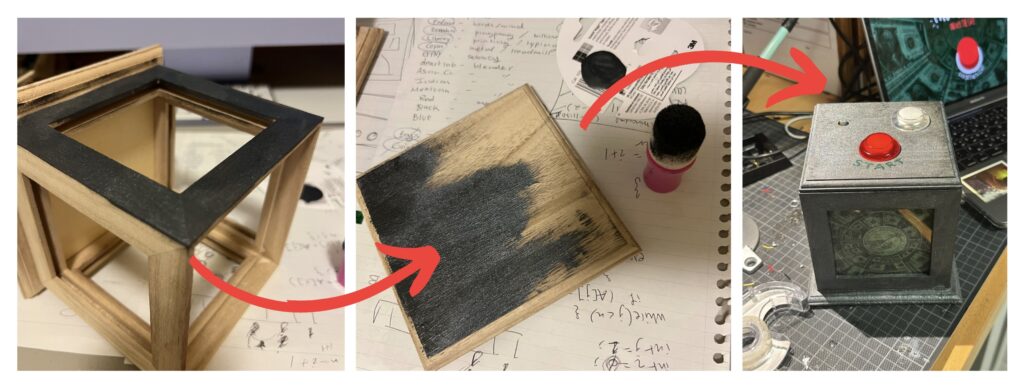
I am particularly proud of how the box turned out in terms of its design matching the game aesthetic. I am also proud of how much I have learned throughout the process and through many many many many mistakes that costed hours of my time, but it was all worth it. Safe to say, I’m almost fluent in Arduino. I was also proud of the short amount of time I had to work on it and pulled through hours on end in the lab, especially given that I had missed the class where soldering was practiced, so I had to figure that out with the help of endless YouTube videos. Surprisingly, I am glad that I did not add a time element to the game because some people were taking less than a minute while others more than 5; a time limit would not have been ideal, I believe. More than anything, I am proud of how this project has brought many of me and my classmates together, and I am happy with how it turned out. If you had told me that I’d do this on the first day of classes, I would not have believed it was possible!

AREAS OF IMPROVEMENT

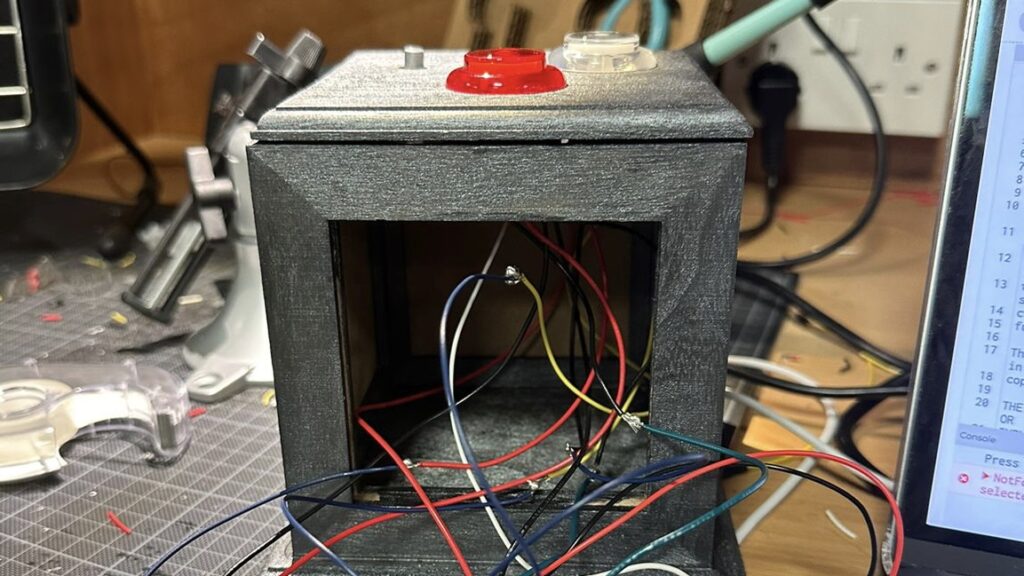
I initially had more in mind, such that the box would unlock and a beam of light would appear, or even better, serve some chocolate! Yet, I was faced with the unexpected measurement issue when the box was too small, and I underestimated how much space the wires would take. Regardless, I attempted to put something inside, and the wires kept moving and unplugging, leading to disaster every time I got close to it. To add to that, halfway through the showcase, the potentiometer stopped reaching the number 9, so I had to quickly edit my code & delete the possibility of a code generating a combination with the number 9. Other than that, it ran very smoothly. Another thing would have been to signify what the white button was, although many instinctively knew, given that the red button was labeled. Learned a lot, to say the least! Thank you!

Reading Reflection – Week 12

Design Meets Disability” was a really eye-opening read (pun intended). As we know, eyesight issues are common throughout the world, including myself. In recent years, there has been an explosion in the number of people wearing glasses. Although sight issues are increasing within the population, this isn’t the only reason why people are wearing glasses. Even with contact lenses or corrective surgery being a possibility for many people, lots of individuals are choosing glasses for fashion and stylistic reasons. To be specific, as of 1991, the design press declared that “eyeglasses have become stylish” (page 17). Even more than just eyesight problems, the book discusses many other physical disabilities such as hearing aids, where the company HearWear invested in its design unlike other companies. As Henrietta Thompson put it, “Over the decades, there has been an amazing amount of technical development of hearing aids, but in that time little or no design investment occurred” (page 25). I believe the reason is that they have focused much more on the technology and developing it more precisely, as they may be more complex than eye lenses.

Moving onto body wear, leg wear, and prosthetics, the book claims that there are only two approaches, which include realism and functionalism (page 35). In an increasingly complex world, we must value, as the author said in page 64, the word design in “designing for disability.” As a matter of fact, when googling “designing for disability,” the first thing that pops up is “To design for disability means giving your users control and options.” See, that’s the misunderstanding; there’s a huge focus on functionality that disregards design. Designing for disability isn’t as inclusive and thoughtful as I had assumed, and looking ahead, I’m hopeful for a future where designing for disability embraces creativity, to hopefully empower individuals of determination not to feel ashamed but to serve as inspirations for us all. I’m not sure if it was mentioned, but I wonder what the author’s take would be when it comes to braces or getting a cast— aspects that aren’t necessarily permanent but rather temporary.

Week 12 Final Project Proposal

Finalized concept

In “The Heist,” players will be on a mission to crack a safe. Initially, I was contemplating a game related to an escape room, but I realized I needed to scale down the idea due to time constraints. Therefore, I opted for an aspect commonly found in escape rooms: a safe. Players will need to guess the correct digits based on hints to unlock the safe. In terms of technicality, when the game begins, Arduino receives a pre-determined three digit code from p5. This code is the key to unlocking the safe. A servo motor locks the safe box…lock function will set the servo to position 0 (lock position) & update locked status to true. Whereas the unlock function will set servo to position 90 (unlock position) and update locked status to false. Players will use a potentiometer to select digits ranging from 0 to 9. After choosing each digit, they press a button to confirm their selection. Further, the safe design will resemble a classic bank safe.

Arduino Program Description

1. Initializing Pins & Variables
– Assign pins for the servo, two buttons, and potentiometer. Specify the potentiometer’s pin and initialize its value, along with a boolean variable set to true and a digit variable to store potentiometer readings.
– Initialize the servo motor.

2. Loop Function
– Check conditions to determine whether to call the unlock or lock function.
– Read the state of the buttons and store it in a variable.
– Read the potentiometer’s value and map it to a digit between 0 and 9.
– Print the digit, button states (true/false), and the locked status (true/false) to the Serial Monitor.

3. Lock Function
– Set the servo to position 0 (locked position).
– Update the locked status to true.

4. Unlock Function
– Set the servo to position 90 (unlocked position).
– Update the locked status to false.

P5 Program Design

Game DESIGN

Reading Reflection – Week 11

The essay, or more accurately a “rant” as described by Bret Victor, mainly focuses on user interaction both presently and in the distant future. Victor argues that the sense of touch, essential to human work for millions of years, is important to understanding his argument. He emphasizes that technology doesn’t simply happen but is rather a result of careful development. In introducing the concept of “Pictures Under Glass,” which represents “an interaction paradigm of permanent numbness,” the author highlights how this denies our hands their natural capabilities. Consequently, he argues against accepting an Interface Of The Future that is less expressive than a when making a sandwich. To avoid that, Victor highlights how we must understand that the future hinges on our choices as people determine which ideas to pursue, which research to support, and how they’ll shape their professional paths. Last but not least, he wraps up with an interesting question: in a world where we control our entire bodies, should our interactions boil down to just a finger?

I understand where the author is coming from; revolutionary technology comes out of long research, but as we can see nowadays, technology is all around us, and what the author seems to be leaning toward is making technology a part of us. Don’t get me wrong, I support technology being improved & people being innovative, but I must fear that there will come a day when the line will be crossed and it will not simply be “pictures under glass,” but rather “pictures under skin. For better or for worse, this is one of my concerns, and I believe it is a concern shared by many, which is why we have remained in an era where interactions have “permanent numbness.  The “glass” referred to in “pictures under glass” should always be there; it is when that barrier is broken that ideas will have no limit, which is a good thing, but it is also when many other things will have no limit, and that’s what’s dangerous. That said, I believe the future shouldn’t be limited to just a single finger, but also not utilized by all of them.

Week 11 Final Project Prompt

I have two potential project ideas/prompts: Plan A involves designing a game that revolves around unlocking a safe. In this game, players will be tasked with guessing the correct digits of a passcode to unlock the safe. The passcode will be generated randomly at the start of the game and transmitted to an Arduino, which will control a servo motor to lock the safe box. Players can input their guesses using either buttons or potentiometers (either limit the digits to 1-5 and use five buttons OR use the potentiometer to choose the digits from 0-9 and press a button to enter  OR use four potentiometers for each digit without a button to enter), depending on the chosen design. The safe itself could be modeled after a traditional bank safe or a more modern safe box.

Alternatively (if plan a didn’t work out), Plan B would involve expanding upon my midterm project, which included the Elevator Rush game. This game was inspired by the frustration of waiting for elevators during busy times, such as the rush between classes. Players control an elevator, picking up students to ensure they reach class on time. I’m considering bringing this game to life by creating a physical model of the elevator/C2 space, which would allow users to interact with it physically.

Reading Reflection – Week 10

Among the various ideas explored in the blogs by Tom Igoe about physical computing, two projects particularly caught my attention: Floor Pads & Scooby-Doo Paintings. Using floor pads seems like a fun & creative way to create interactive experiences that suggest actions without telling users how to feel about those actions; it’s more like a performance, as described in the other reading. I’m curious to learn more about integrating floor pads into future projects, as well as gloves. The second concept, the Scooby-Doo paintings, reminded me of the Mona Lisa’s mysterious gaze, which some claim to be a myth. I wonder how much of a difference it makes to use a camera instead of a distance sensor to detect a face and eyes, and if anyone has attempted to recreate that with a reproduction of the Mona Lisa or another famous ancient painting.

Furthermore, the second essay about “Making Interactive Art” (enjoyed the catchy title) made several solid claims that I completely agree with. What makes art memorable is your experience with it, how it made you feel, which is unique to everyone…I appreciate the author’s emphasis on creating space for users to interpret things freely. Additionally, the idea of actively listening to audience responses & reactions reminded me of “user-testing.” So, I wonder if the author considers this before presenting the artwork and during as well. Is it about always leaving room for improvement and learning through the process? I never considered user-testing at any other stage besides before presenting, but consistently improving seems ideal. Overall, this encouraged me to experiment during the creative process and also while engaging with an audience because that’s when we learn most!

Week 9 – Sara Al Mehairi

CONCEPT

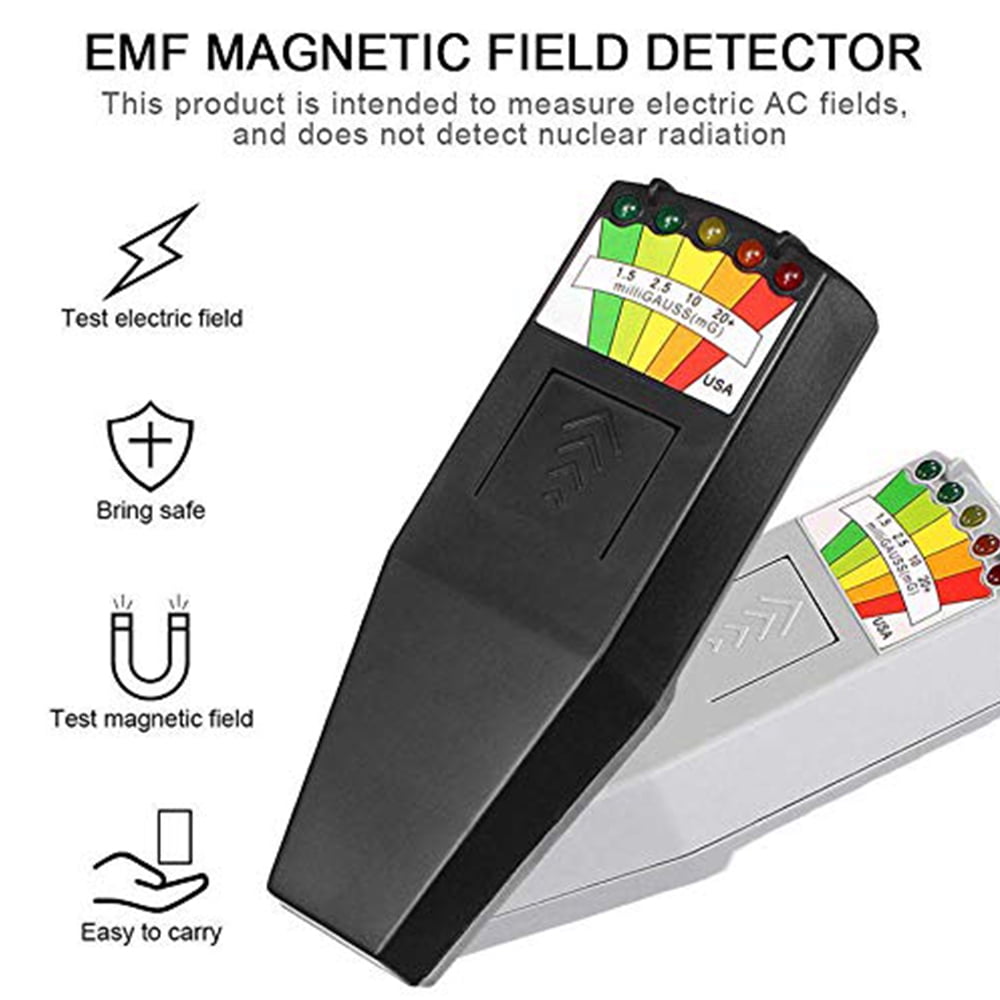
Ghost Detector Real Life Radar - Apps on Google PlayJahyShow 5 LED EMF Meter Magnetic Field Detector Ghost Hunting Paranormal Equipment Tester Counter - Walmart.com

Inspired by the LED EMF Meter Magnetic Field Detector (which helps to measure electromagnetic fields to identify equipment that generates high radiation) used for “ghost hunting,” my goal was to create a device similar to a “ghost detector.” Well, at least that’s the idea! Right now, it’s really good at detecting shadows, brightness, and darkness. Originally, I prototyped it as a device to light up cabinets, drawers, and more. But with some tinkering, it might just find something spooky—spirits! (p.s. this is for last week’s assignment)

OVERVIEW

The prototype is designed to detect changes in light levels using a photoresistor. It consists of a photoresistor connected to analog pin A0 on the Arduino board. The prototype includes four LEDs connected to digital pins 2, 3, 4, and 5, which illuminate in response to different brightness levels read by the photoresistor. Further, based on the brightness level detected, the Arduino activates specific combinations of LEDs to indicate the brightness level or as i would like to say “ghosts”

const int thresholds[] = {600, 500, 400, 300};
  1. If the brightness level exceeds the highest threshold, all four LEDs are illuminated, indicating maximum brightness.
  2. If the brightness level exceeds the second highest threshold, the first three LEDs are illuminated, while the fourth LED remains off.
  3. If the brightness level exceeds the third highest threshold, only the first two LEDs are illuminated, while the remaining LEDs are turned off.
  4. If the brightness level exceeds the lowest threshold, only the first LED is illuminated, while the remaining LEDs are turned off.
  5. If the brightness level falls below all thresholds, all LEDs are turned off.

IMPLEMENTATION

Prototype 1

As explained above, the photoresistor is able to detect the brightness level, to which range it belongs, and then the lights react accordingly. Do ghosts have shadows? Not necessarily… but anything is possible, so “use your imagination”. Perhaps it could even detect people or other moving objects.

Prototype 2

I know. We agreed not to use our hands, but no one mentioned anything about shadows. Here, I’m simply demonstrating the main concept of how it works. You could use your legs, face, or any other object. However, for the sake of a clear demonstration and a decent angle, I chose to use my hand’s shadow…not my hand.

Prototype 3

To further test its practicality, I decided to place it in my drawer. As you can see, it could prove quite useful with improved light adjustments.

CONCLUSION

It was certainly challenging to manage the numerous if-else cases and determine the appropriate ranges for the photoresistor. I invested a considerable amount of time debugging why certain LED lights functioned while others didn’t, only to realize that my else-if statements were not properly ordered, leading to skipped conditions. However, despite the constraint of not using our hands, I discovered a loophole, which allowed me to experiment with several of my ideas. (p.s. this is for last week’s assignment)

Week 10 – Sara Al Mehairi

Concept

Credit: iStock

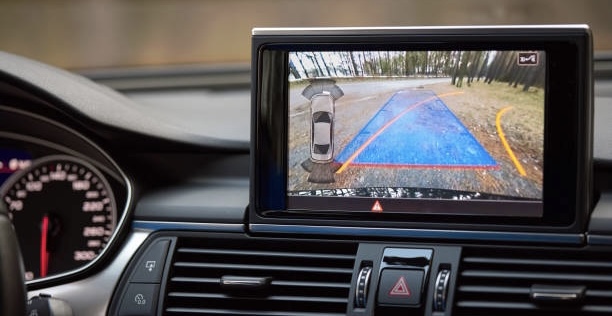
For this assignment, my goal was to create a miniature car sensor system using Arduino. The system uses ultrasonic sensors to detect objects/vehicles and provide feedback to the user using RGB LED, similar to the sensors used in modern cars for reversing or parking assistance. Components used include: Arduino Board, Breadboard, Ultrasonic Sensors, RGB LED, 330Ω Resistors, and Jumper Wires.

Overview

Ultrasonic sensors for linear position and distance measuring
Credit: Texas Instruments
if (distance <= 10) {
    //red
    analogWrite(redPin, 255);
    analogWrite(greenPin, 0);
    analogWrite(bluePin, 0);
  } else if (10 < distance && distance < 20) {
    //orange
    analogWrite(redPin, 255);
    analogWrite(greenPin, 50);
    analogWrite(bluePin, 0);
  } else {
    //green
    analogWrite(redPin, 0);
    analogWrite(greenPin, 255);
    analogWrite(bluePin, 0);
  }
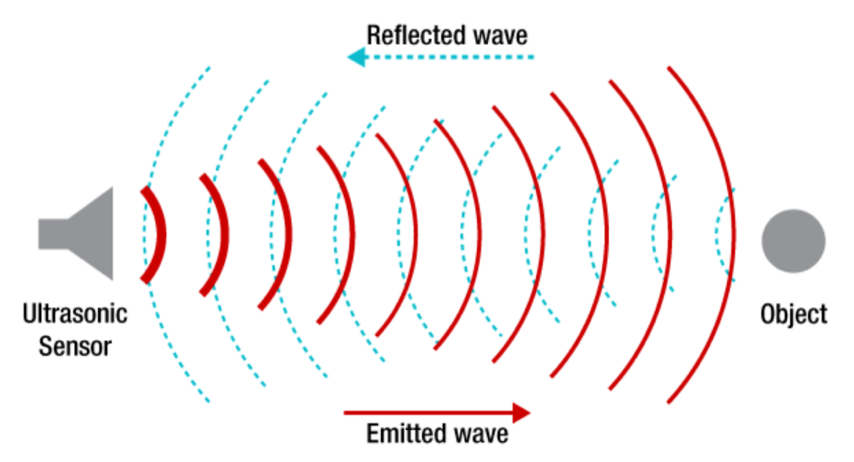
  • Distance Measurement: With some googling, I learned that ultrasonic sensors emit high-frequency sound waves and measure the time it takes for the waves to bounce back after hitting an object. Based on this time measurement, the system calculates the distance to the obstacle.
  • Visual Feedback: The RGB LED is used to provide visual feedback to the user based on the distance readings from the sensors. The LED changes color to indicate the proximity.
  • Consistency: the Arduino continuously monitors the distance readings from the sensors & updates the LED color accordingly. In reality or with the vision I had in mind, this real-time feedback would help the driver to move the vehicle carefully, especially in tight spaces.

IMPLEMENTATION

As the vehicle/object moves, the ultrasonic sensors detect obstacles in the path and passes on distance measurements to the Arduino. The Arduino then processes the distance readings and controls the RGB LED to provide real-time visual feedback to the driver. This is possible thanks to the loop that continuously retrieves distance measurements & adjusts the LED colors accordingly. I also came across echoTime which represents the duration for which the ultrasonic sensor receives an echo signal after emitting a sound wave, pretty cool!
– Red: Stop the vehicle immediately.
– Orange: Proceed with caution, slowing down if necessary.
– Green: Continue driving as the path is clear.

Conclusion

Tiny but mighty, it was quite enjoyable to create this miniature system. Although I may have accidentally followed the description of next week’s assignment and realized it a few minutes ago, I learned a lot. As a driver, I understand the importance sensors play in parallel parking and avoiding hitting a curb. Therefore, I wanted to contribute to improving this aspect in terms of accuracy. After encountering some obstacles, I resorted to Core Electronics on YouTube as a guide for this assignment. Overall, I had hoped to attach the sensors to the front or rear bumper of an actual vehicle and test the accuracy, but step by step, I’ll hopefully create something greater!

Reading Reflection – Week 8a

Design matters, but which design is preferable depends upon the occasion, the context, and above all, upon my mood” (page 2). We can see that Norman starts off by giving us a warning that design is subjective especially when relying on mood. With that, I believe that mood is such an important component in design…is it designed for an emergency situation where everyone is panicking (push/pull door example) or is designed to impress your guests in a calm environment (teapot example)? Designers must consider such aspects when considering usability because “the principles of good human-centered design are especially important in stressful situations” (page 6). The author further discusses color and how color was fulfilling some need, but one we could not measure…he further adds, “Although my reasoning told me that color was unimportant, my emotional reaction told me otherwise” (page 3). This proves that when it comes to design, there shouldn’t be solid reasoning like you would see in Mathematics or the Sciences. The essence of design is intuition, emotions, and ultimately pleasure in completing tasks or perhaps user-feedback. 

At some point during the reading, I believed that attractive things don’t work better; I disagreed with the author if attractive meant minimal, an example would be the Tesla vehicles. When Tesla made their cars too simple (almost no user feedback), it caused confusion & accidents, which shows how minimalism can sometimes make things chaotic. That’s what I initially believed, but upon page 7, I came to terms with the author where he says “to be truly beautiful, wondrous, and pleasurable, the product has to fulfill a useful function, work well, and be usable and understandable.” The author follows and says that good design means that beauty and usability are in balance. That’s where I came to agreement that attractive things work better if and only if beauty does not surpass usability. Unfortunately, not every designer believes that, such that they minimize too much in attempts to make things more modern/appealing, but doing this can make the things harder to use (usability) and understand (intuitive design).

Finally, this brings me to Margaret Hamilton. While reading about her experiences, I couldn’t help but draw parallels to modern design practices and the ongoing designs inspired by minimalism. Hamilton’s role in developing the Apollo computer system proves the importance of prioritizing functionality & reliability over aesthetics, especially in high-stakes environments. In this case, I might agree that beauty and usability mustn’t always be in balance; sometimes, usability can surpass beauty for the sake of safety. In today’s world, minimalist designs often dominate, and Hamilton’s story reminded me of the potential consequences of overlooking usability and prioritizing “the balance” as Norman defined it. With that, I wonder, would Norman still believe that we must balance beauty and usability, or would he make an exception, considering high-stakes environments like the Apollo program?

Midterm – Sara Al Mehairi

Concept oVERVIEW

Amazon
Face in a Book
Teacher Superstore


I couldn’t recall the exact moment of picking up a copy of “Diary of a Wimpy Kid,” but it has simply always been a part of my childhood. First and foremost, allow me to introduce the author of this masterpiece, Jeff Kinney. Kinney’s unique style breaks the norms of traditional literature/books. Unlike typical novels, his books use a diary format with personal writing and illustrations. The use of lined paper, childlike font, and unconventional chapter structure sets his work apart and thats what makes it so memorable. (source)

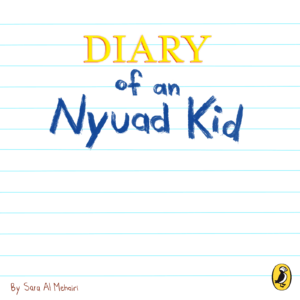
That being said, Inspired by the “Diary of a Wimpy Kid” books, I wanted my project to bring back those nostalgic feelings, with simple drawings and everything in black & white. My goal was to involve the user in the diary and make the project interactive, allowing them to feel like they were part of the story. So, I titled it “Diary of an NYUAD Kid” to grasp that mix of memories & relatable experiences. In creating my project, I initially planned to develop four games inspired by various elements of the “Diary of a Wimpy Kid” series, with an NYUAD twist. However, I narrowed down my focus to three main games: “Elevator Rush,” “Cheese Touch,” and “My Diary.”

Game Details

1. Menu

Despite my initial attempts, I encountered challenges in embedding the menu screen above. At some point, I managed to make it work with a few bugs, but ultimately, it didn’t function as intended (discussed in detail in another section below). Further, the design of the main menu page draws inspiration from the cover page of the “Diary of a Wimpy Kid” books. Clicking the “i” button reveals instructions for each game.

2. Elevator Rush

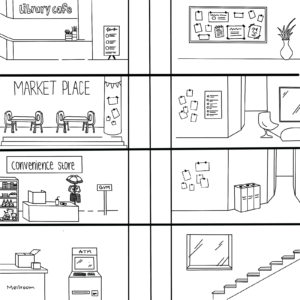
Elevator Rush” is a game born from the frustration of waiting for elevators, especially during busy times like the 10-minute rush between classes in the C2 Building. You know, maybe the delays are intentional to nudge students towards taking the stairs, was this their plan all along? In the game, you control the elevator using the UP & DOWN keys, hurrying to pick up students so they’re not late for class. Every time a passenger gets picked up, a sound plays to signify success. The background music is the classic “elevator music” sourced from YouTube. With every student you pick up, you earn one point, but if you miss a student, you lose a point. To add difficulty, students appear and disappear quickly, and they are NOT patient. The game ends when the time runs out or if your score drops to -3. Upon game over, a screen pops up with the option to click to restart.

3. Cheese Touch

In the “Cheese Touch” game, inspired by the popular game played at Westmore Middle School in “Diary of a Wimpy Kid,” players aim to gather as many candies as possible while avoiding the dreaded Cheese Touch. In the original story, having the Cheese Touch makes someone a social outcast until they pass it on to someone else by touching them (source). Using the LEFT and RIGHT keys, the player must navigate the area while trying to gather candies and avoid the Cheese Touch. Additionally, when a player successfully collects candy, a cheerful audio plays to signify their success (+1 point). Conversely, if a player encounters the Cheese Touch, a sticky audio plays to indicate their loss (-1 point). The game continues until the time runs out or if a player’s score drops to -3, indicating they’ve had too many encounters with the Cheese Touch. Upon game over, a screen pops up with the option to click to restart.

4. My Diary

In the final somewhat game, titled “My Diary,” I wanted to capture the idea of doodling and scribbling found in “Diary of a Wimpy Kid.” This option allows users to paint on a canvas using colors inspired by the books. They can also change the brush size, erase the canvas, and save their artwork as a PNG file. To enhance the experience, each button plays a sound when clicked. Moreover, the save button triggers a different audio to signify that the image has been saved successfully. To further simulate the feel of real paper, I incorporated the sound of scribbles each time the user draws on the canvas. The main idea behind this “game” was to use audio cues to create a realistic experience for the users. Below are some of the images I have saved during the debugging process:

Visuals, Audios, & Resources

1. Menu


Background: by me using Procreate
Penguin Logo source

2. Elevator Rush


Background music source
Remaining audio source
Background: by me using Procreate, inspired by NYUAD
Characters: Diary of a Wimpy Kid

Chatgpt debugging: draw function (passenger spawn interval, passenger spawn, time) & Passenger class

3. Cheese Touch


Audio source
Cheese image source
Candy image source
Face image source
Game over image:
by me using Procreate

Chatgpt debugging: obstacle & candy detection, draw function, audio errors (replay/pause)

4. My Diary


All audio source
Background: by me using Procreate
Colors: inspired by the “Diary of a Wimpy Kid” books

Chatgpt debugging: button effect & draw function

Challenges & Areas of improvement

One of my biggest challenges was attempting to merge all three games into a single JavaScript file, given that I have worked on them separately.  Despite my best attempts, the complexities of combining multiple game modes within one file led to organizational/functional issues that remained unresolved. At some point it functioned with some issues, but my attempts to fix these problems led to further complications.

function draw() {
  if (scene == "main") {
    drawMenu();
  } else if (scene == "game 1") {
    drawGame1();
  } else if (scene == "game 2") {
    drawGame2();
  } else if (scene == "game 3") {
    drawGame3();
  }
}

For “Elevator Rush,” I encountered several challenges, particularly in managing the spawning of passengers at specific intervals and ensuring they appeared on random floors, excluding the floor where the elevator was located (it did not look visually appealing, as if the passenger was already in the elevator, caused some quick flashes). Implementing this required generating random floor numbers while avoiding duplication with the elevator’s current floor. Additionally, I had to adjust the spawn intervals to  balance between keeping the game challenging and preventing overwhelming/underwhelming spawns.

//spawn passengers
  if (millis() - lastSpawnTime > spawnInterval) {
    let floorToSpawn = floor(random(4));
    if (floorToSpawn !== currentFloor) {
      passengers.push(new Passenger(floorToSpawn));
      lastSpawnTime = millis();
    }
  }

Another challenge came about when measuring the game screen and drawing assets in Procreate. Despite using Procreate’s grid assist feature, ensuring the correct proportions for each floor was pretty tricky. Moreover, this caused the elevator to appear either too small or too large on certain floors, hence I adjusted the elevator’s dimensions until it fit within each floor’s layout.

//draw elevator
    let elevatorWidth = 55; 
    let elevatorHeight = floorHeight - 2; 
    let elevatorX = width / 2; 
    image(elevatorImage, elevatorX - elevatorWidth / 2, elevatorY - elevatorHeight / 2, elevatorWidth, elevatorHeight);

As for “Cheese Touch,” one of the challenges was precisely detecting the cheese touch and candy, which relied heavily on precise x and y coordinate calculations, leading to many trials & errors to create accurate collision detection.

collects(candy) {
  return (
    this.x < candy.x + candy.w &&
    this.x + this.w > candy.x &&
    this.y < candy.y + candy.h &&
    this.y + this.h > candy.y
  );
}

hits(obstacle) {
  return (
    this.x < obstacle.x + obstacle.w &&
    this.x + this.w > obstacle.x &&
    this.y < obstacle.y + obstacle.h &&
    this.y + this.h > obstacle.y
  );
}

Additionally, initial attempts to use a notepad background encountered a persistent issue where the screen froze upon game restart attempts, despite multiple efforts to solve the problem through redraws. This issue likely stemmed from an error in managing the background image or memory management concerns. Consequently, I resorted to using a white background instead.


Overall, I faced many challenges and made some mistakes along the way. Looking back, I realize there are ways I could have done better. For example, I worked on each game mode separately, but when I tried to put them all together, they didn’t work well. Perhaps it wasn’t the best idea to start working in separate JavaScript files. In terms of the games, I also could have added extra obstacles to make each game more challenging (due to the simplicity, I resorted to creating more than one game.). For instance, in the “Cheese Touch” game, I could have added bonus elements that had power-ups. And in all the games, I could have included a leaderboard, using CSV files, to track score.

Conclusion

All in all, developing this project based on “Diary of a Wimpy Kid” presented a lot of challenges…integrating the menu screen with other screens was difficult, and attempts to merge all games into one JavaScript file were unfortunately unsuccessful. However, I managed to incorporate at least one shape, one image, one sound, on-screen text, and Object-Oriented Programming into the project. The menu screen initially provided instructions when the “i” button was clicked, but there were issues directing to the games (yet, each game did have a start & restart option). After completing each game experience, a restart option was available by clicking the screen without restarting the sketch, except for the last game, where users needed to click “erase.” Safe to say that I’m proud of my project, the visuals, and the menu design for being accurate & fulfilling my vision, especially in the elevator game, which initially seemed ambitious.