Week 3 : Object Oriented Programming

WEEK 3 : OBJECT ORIENTED CYBER FIBER COMPUTER GRAPHIC

INTRODUCTION :

In week 3, we have to code in a more mature and reusable way. For that we learned object oriented programming. With the help of previous knowledge of 2D shapes, lines, arcs, built in functions, and arrays we must write reusable and managed code for computer graphics. We learned this week how to create classes and implement attributes and methods in it to initiate a class object. We have to implement some objects and make them dynamic to give it an animated look. We have to learn how to call functions.

IDEA FOR COMPUTER GRAPHIC:

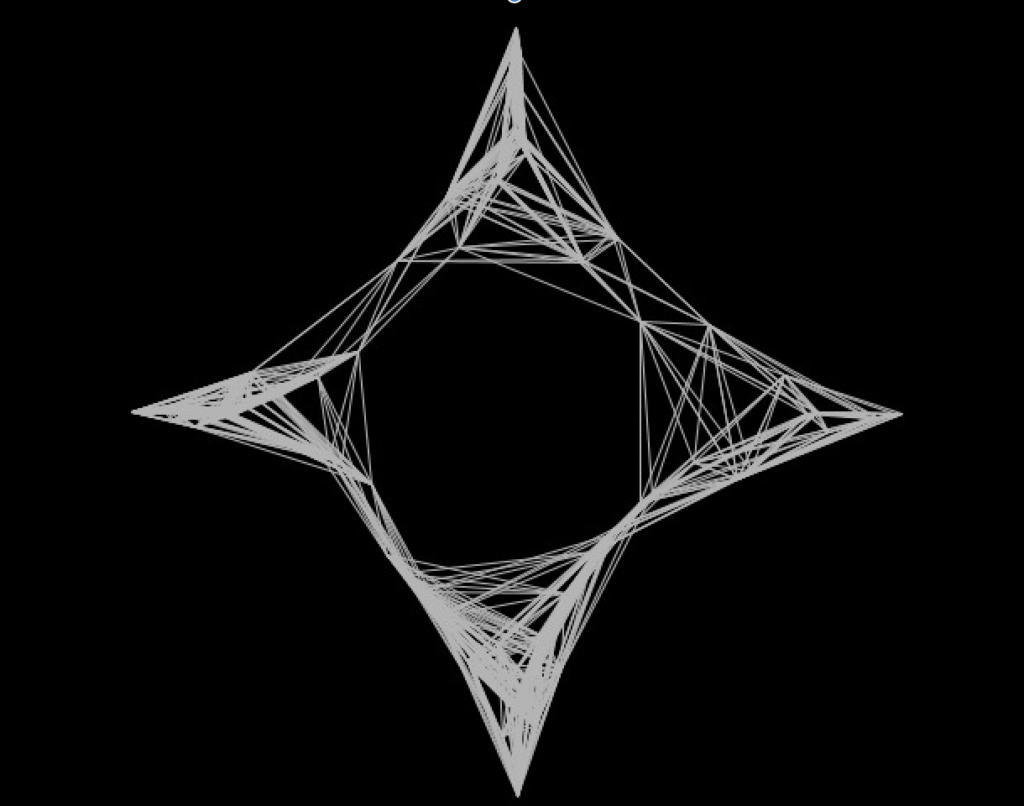
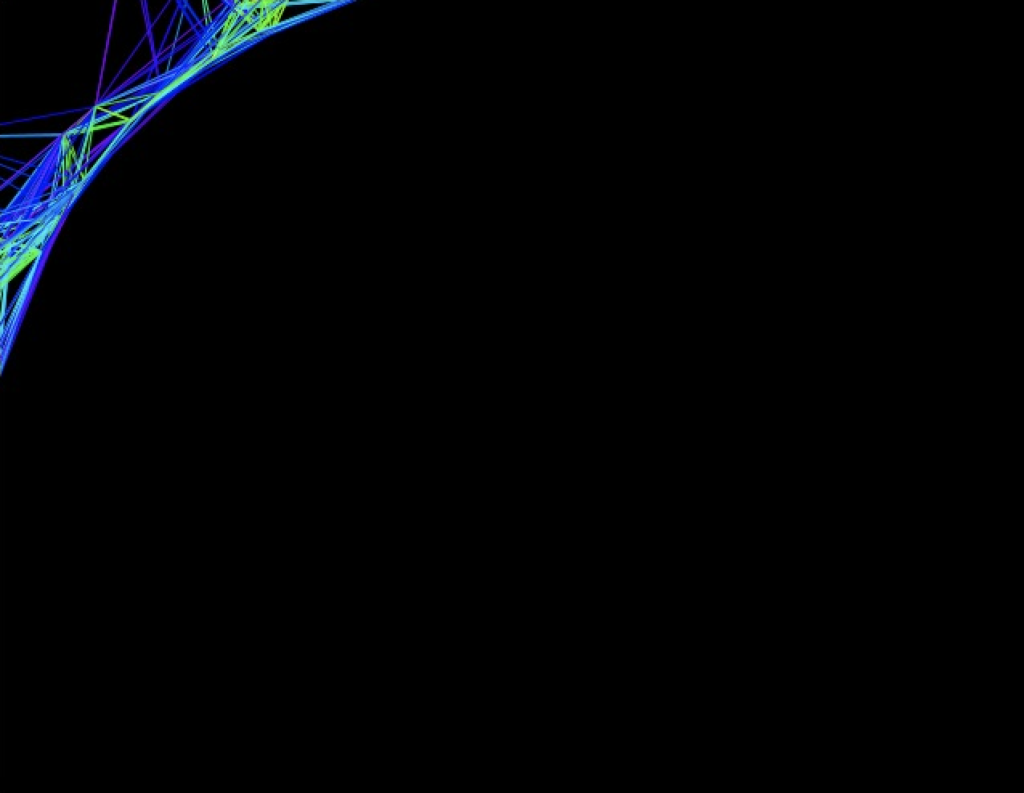
Nowadays everything is connected, and communication is quick and reliable. The communication of devices today on networks is a paradigm similar to the manner in which body muscle fibers flow. The muscle tissues are connected to each other through small fibers that share the same structure as mesh cyber network in which communication is through different routes in some visible pattern.

CHALLENGES & PROBLEMS :

The graphic I decided to code was creative and it was very hard for me to understand and implement math into my code. It was challenging for me to provide random movements to the fibers to keep the flow. I used the hit and trial approach to check if the translation of objects is in the right direction which was quite time consuming. Giving angles to the fibers to keep them in flow was challenging which extended with some random movements. It was also very challenging for me to implement math equations in order to keep up the shape of fibers to randomly move between the four corners.

PROCEDURE:

The first step I took is to implement and initiate the built-in functions to create the screen for my graphics. I used setup () and draw () functions for that. Then I started implementing my Fiber class which shows pure use of object oriented programming. I initialized important attributes inside the fiber class which later changed their values during different function calls. I used PVector to give each fiber some specific directions which is randomly generated during function calls. Then, I implemented the constructor of fiber class which takes one parameter which is the size of the fiber. The size of the fiber is decided during object initialization outside the class. After that I began working on some major behaviors of graphics such as moving the fibers and the specific directions. As the fiber moves randomly it is generating more fibers. I made functions for the get random rotations and random addition of fibers during movement. In the movefiber() function I set the major attributes of the class. To display the fibers movement, I implemented displayfiber() function.


//for the movement of Fiber
  void MoveFibers()
  {
   Fiberrotationorignal=radians(random(360));
   translatingFiberrotation=MakeFiberRotate(0.1,2.0);
   Fiberaddition=GetMoreFibers(10000);
  }
  
  //for rotation of Fibers
  float MakeFiberRotate(float start , float end)
  {
    return radians(random(start,end));
  }
  
  //for addition of more Fibers
  float GetMoreFibers(int howmuch)
  {
    return random(howmuch);
  }

I used map function in it to transform the values from one range to another. I gave audio-like harmonic movements to additional fibers generated during movement by using noise() function. Subsequently, I angled the fiber vectors which are moving along x and y axes by using cosine and sine functions.
//for displaying Fibers
 void DisplayFiber()
 {
  float noi=map(noise(Fiberaddition),0,1,-20,20);
  direction.x=(size+noi)*cos(Fiberrotationorignal)*cos(Fiberrotationorignal)*cos(Fiberrotationorignal); 
  direction.y=(size+noi)*sin(Fiberrotationorignal)*sin(Fiberrotationorignal)*sin(Fiberrotationorignal);
  Fiberrotationorignal+=translatingFiberrotation;
  Fiberaddition+=0.01;
 }
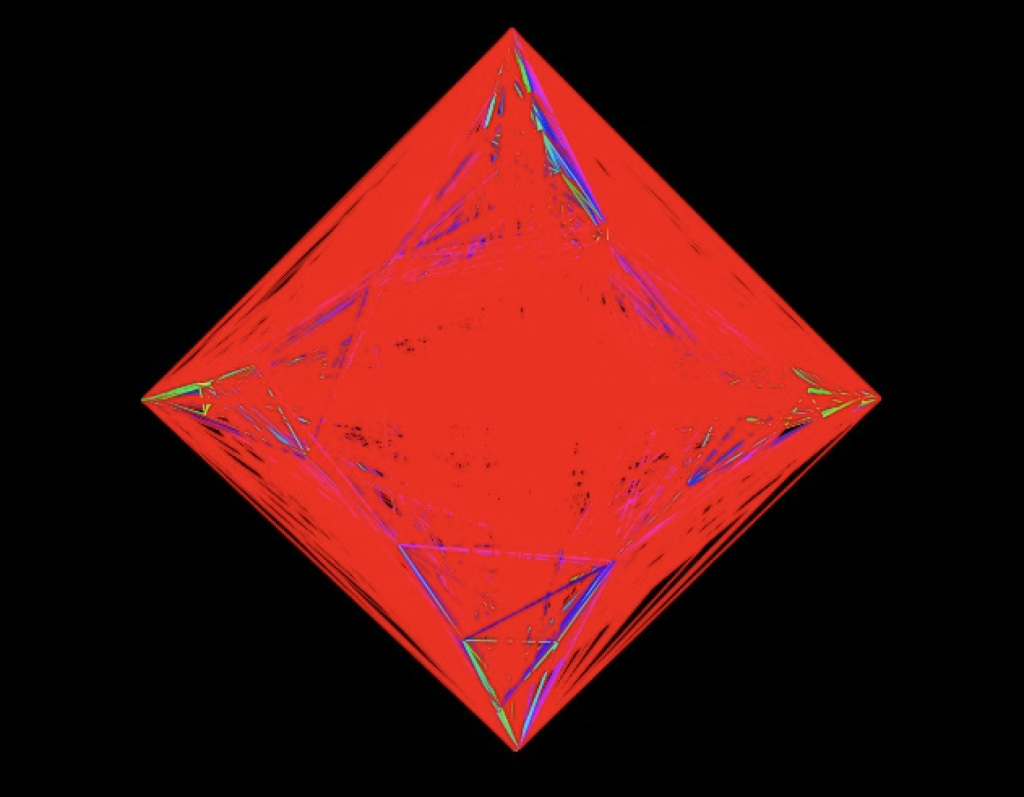
I initialized global variables for the number of fibers to generate and initialized a global array for it. These are the initial fibers which were generated during movement. In setup () function I set the color mode to HSB to give hue, saturation and brightness to fibers strokes. I initiated the fibers in 2 halves with different sizes. We can see this in for () loop in setup function.
// Main setup functions to get screen size
void setup()
{
  //drawing screen width and height
  size(640,500);
 
  colorMode(HSB,360,100,100);
  
  stroke(255);
  
  for(int i=0;i<N;i++)
  {
    if(i<N/2)
    {
      p[i]=new Fiber(180);
    }
    else 
    {
      p[i]=new Fiber(230);
    }
  }
  
}
Then, in draw function I made use of the display function to show the movement of fibers along x and y axis. I used translate function to put my graphics on the center of the screen. To give different strokes to different fibers and initializing of fiber in specific direction, I used stroke and line function in nested for loop which runs for N times as long as all fiber objects displayed on the screen. The draw function is looping unlimited times and every time the fibers are being placed in new angles directions.

// For drawing loop of fibers
void draw()
{
  colorMode(RGB);
  background(0);
  colorMode(HSB,360,100,100);
  translate(width/2,height/2);
  
  for(int i=0;i<N;i++)
  {
   p[i].DisplayFiber(); 
  }
  
  for(int i=0;i<N;i++)
  {
   for(int j=i+1;j<N;j++)
   {
     
    if(p[i].direction.dist(p[j].direction)<120)
    {
      stroke(map(p[i].direction.dist(p[j].direction),0,80,50,200),100,100);
      line(p[i].direction.x,p[i].direction.y,p[j].direction.x,p[j].direction.y); 
    }
    
   }
  
}
  
}

FINAL WORK:

Below IS the code work for my computer graphic:

class Fiber
{
  //size of Fiber
  float size;
  
  //orignal rotation of Fiber cluster
  float Fiberrotationorignal=0;
  
  //for Fiber movement rotation
  float translatingFiberrotation;
  
  //direction of fiber
  PVector direction=new PVector();
  
  //for adding more Fibers in cluster
  float Fiberaddition;

  //constructor for Fiber
  Fiber(float s)
  {
   size=s;
   MoveFibers();
  }
  
  //for the movement of Fiber
  void MoveFibers()
  {
   Fiberrotationorignal=radians(random(360));
   translatingFiberrotation=MakeFiberRotate(0.1,2.0);
   Fiberaddition=GetMoreFibers(10000);
  }
  
  //for rotation of Fibers
  float MakeFiberRotate(float start , float end)
  {
    return radians(random(start,end));
  }
  
  //for addition of more Fibers
  float GetMoreFibers(int howmuch)
  {
    return random(howmuch);
  }
  
  //for displaying Fibers
  void DisplayFiber()
  {
   float noi=map(noise(Fiberaddition),0,1,-20,20);
   direction.x=(size+noi)*cos(Fiberrotationorignal)*cos(Fiberrotationorignal)*cos(Fiberrotationorignal); 
   direction.y=(size+noi)*sin(Fiberrotationorignal)*sin(Fiberrotationorignal)*sin(Fiberrotationorignal);
   Fiberrotationorignal+=translatingFiberrotation;
   Fiberaddition+=0.01;
  }
  
}


//Number of Fibers
int N=100;

//fibers array
Fiber p[]=new Fiber[N];


// Main setup functions to get screen size
void setup()
{
  //drawing screen width and height
  size(640,500);
 
  colorMode(HSB,360,100,100);
  
  stroke(255);
  
  for(int i=0;i<N;i++)
  {
    if(i<N/2)
    {
      p[i]=new Fiber(180);
    }
    else 
    {
      p[i]=new Fiber(230);
    }
  }
  
}

// For drawing loop of fibers
void draw()
{
  colorMode(RGB);
  background(0);
  colorMode(HSB,360,100,100);
  translate(width/2,height/2);
  
  for(int i=0;i<N;i++)
  {
   p[i].DisplayFiber(); 
  }
  
  for(int i=0;i<N;i++)
  {
   for(int j=i+1;j<N;j++)
   {
     
    if(p[i].direction.dist(p[j].direction)<120)
    {
      stroke(map(p[i].direction.dist(p[j].direction),0,80,50,200),100,100);
      line(p[i].direction.x,p[i].direction.y,p[j].direction.x,p[j].direction.y); 
    }
    
   }
  
}
  
}

CONCLUSION:

This assignment gave me the opportunity to learn object-oriented programming, how to define objects, and different ways to use them to sketch different objects. I learned how to manage the complex code and how to enhance the reusability of code during processing programming. I also learned more knowledge of how to give different angles to objects and how to map one range of values to another range to visualize some useful pattern. I also learned how to use arrays and array indexes to display different objects. I benefitted more in terms of knowledge and the learning of new aspects with this assignment by using arrays inside the for loop.


Week 2 Assignment: Beautiful Chaos

Week 2: Draw a Computer Graphic using Loops


Introduction:

As for the week 2 assignment, I must explore more features of processing.org. The hardcoded way of drawing sketches and graphics is time consuming and takes a lot of computer memory. In this assignment, I got the opportunity to explore how to repeat the functionalities to enhance the reusability of code. Furthermore, I explored some new mathematical functions which helped me put some sort of randomization in my graphics. This assignment not only aided in building my logic behind computer graphics, but also how to visualize a genuine look for the shapes.

The inspiration behind computer graphic image:

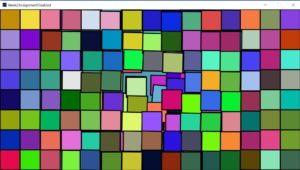
I should draw an old era computer magazines computer graphic via processing. The computer graphic I selected was from Computer Graphics & Art. The main point that drew me into it is its imperfection. The squares are not in perfect order, but it is still colorful and beautiful. It looks pleasing to the eye and its main attraction is its chaotic imperfection. In short, it represents a beautiful yet chaotic work of art. It does not have to be perfect to be beautiful.

Challenges and Problems:

The computer graphic I selected is simple and consistent during visualization on screen but building the back end logic is challenging on its own. I faced issues while attaching each brick to the right place with some movement either in a horizontal or vertical direction which makes the center of image looks like its breaking apart. It was challenging for me to move the square shapes in random directions with random rotation. I worked more on the center of the wall as most of the random movement and rotation of bricks was concentrated at the center. Not only was giving more randomization at the center a challenging task, but also providing less randomization at the corners to give the computer graphic image a sense that it is breaking from the center was not easy either. At a point when I was using loops, I got stuck. Running the code while trying to move the shapes for infinite times made it hard for me to organize the code in a reusable pattern.

Procedure:

First, I read out the official processing built-in functions and their use to try and learn them better. In the very first step, I compiled a list of built-in functions which I thought would be useful later in my code. I took note of those built-in functions signature and parameter for further usage. The most frequent used function is the random () function. However, randomization always requires some initial value. I sketched out the logic and began sketching the graphic from the screen central point. I initialized each brick size and then used each brick central point to place every other brick next to each other. I placed all the bricks next to each other in vertical and horizontal directions by using two loops which iterates continuously in horizontal and vertical directions. This is ongoing until the bricks fill up the whole screen. The whole grid was constructed by the nested for () loop. During the placement of each brick, Brick Position () function is calculating how far the brick is from the screen center. Thus, based on that gap, the rotation and movement of brick is calculated by using the dist () function. The parameters I gave to dist() function was the position of the brick and screen central positions x and y coordinates. Later, I normalized the gap in the bricks, where if the gap is large, then random rotation and movement will be less.
 //Global Varible for Screen Width and height
float ScreenH,ScreenW;

//Global Varible for the size of one brick.
//Assuming width and height of each brick is same
int SizeOfBrick;

//Gobal Variable to calculate how much space between two bricks
float InterSpaceLengthScale;

//To find out Space between Brick and Centeral Screen Area
float BrickPosition(int brickx,int bricky)
{
  return dist(brickx,bricky, ScreenW/2, ScreenH/2);
}
This is achieved by multiplying the random values with the space normalized gap that is between each brick and screen central area. Meanwhile, to give each brick a random color scheme, I picked a random value of red, green, and blue from 0 to 255. Then, when each brick is placed on the right place with the right movement and rotation, I fill the brick with a random RGB value using fill () function.
void setup() {
  
  //Initializing the screen of given demensions
  size(1500, 800);
  strokeWeight(5);
  ScreenW=width;
  ScreenH=height;
  
  SizeOfBrick = 100;
  InterSpaceLengthScale=SizeOfBrick;
  
  // Changing the origin of rectangle shape towards center
  rectMode(CENTER);
  
  background(#519FB2);
 
  DrawBricksGrid();
}
What was interesting to learn was that I can use functions inside any function, unless the function is used as a parameter return value in a required data type. I found out that processing built-in draw () function and for() loop works in the same way. The only difference was that draw () function works for infinite time with non-termination, while in for () loop we give it a termination condition. So, the internal for () loop terminates when the height of screen fills up while the outer for() loop terminates when the screen width fills up.

Bricks Movement:

Inside the nested for loop (), I gave a random movement and rotation to each new brick using translate () and rotation() function. The translate () function moves the brick to a random position from its original position. In the image below, I used Brick Movement() function which is returning some random new position based on the original position of the brick and the gap from the screen center.
//Calculating InterSpace Scale.
void BrickSpan(float InterSpaceLength)
{
  if (InterSpaceLength > SizeOfBrick*6)
  {
        InterSpaceLengthScale = InterSpaceLengthScale * .01;
  }
  else
  {
    InterSpaceLengthScale= 1/InterSpaceLength * 100;
  }
}


//Bricks Movement in 2D place along X and Y axis
float BrickMovement()
{
  return  random(50) * InterSpaceLengthScale;
}


Bricks rotation:

Each brick is rotating to some angle which is calculated based on the original brick position and central screen position. I implemented BrickRotation() function which returns a random angle value by multiplying the new random angle with the normalized gap between brick original position and screen central point. As I drew the graphic on a 2D plane, I made use of pop Matrix() and pushMatrix() when drawing each brick to its current and previous state of the 2D plane coordinate system. The random transformation applies to each and every brick inside the nested for() function.
//Rotation of Brick
float BrickRotation()
{
  return random(PI/60) * InterSpaceLengthScale;
}

void DrawBricksGrid()
{
   for (int i=SizeOfBrick/2; i<ScreenW; i=i+SizeOfBrick) 
  {
    
    for (int j=SizeOfBrick/2; j<ScreenH; j=j+SizeOfBrick)
    {
      
      float gap = BrickPosition(i,j);
      BrickSpan(gap);
      
      float r = random(256);
      float g = random(256);
      float b = random(256);
      fill(r,g,b);
      pushMatrix();
     
      translate(i+BrickMovement(), j+BrickMovement());
      rotate(BrickRotation());
     
      rect(0, 0, SizeOfBrick, SizeOfBrick);
      popMatrix();
    }
  }
}


Final Artwork Images :


Conclusion:

In this assignment, I understood the proper use of for() loops to draw shapes multiple times, how to apply transformation of shapes, how to move objects from one position to another, as well as object rotation. I can better organize my code and enhance its reusability by implementing custom functions. Moreover, I got the knowledge on how to apply randomization in function calling, and on how to draw shapes to give the art piece a consistent look.Thus, I learned how to work on what you see is what you get pattern by calling custom implemented functions and using built in functions. Finally, I can also reserve the 2D plane coordinate system state by using popMatrix() and pushMatrix() functions.

Final Masterpiece:

Full Code Packed All Together:

//Global Varible for Screen Width and height
float ScreenH,ScreenW;

//Global Varible for the size of one brick.
//Assuming width and height of each brick is same
int SizeOfBrick;

//Gobal Variable to calculate how much space between two bricks
float InterSpaceLengthScale;

//To find out Space between Brick and Centeral Screen Area
float BrickPosition(int brickx,int bricky)
{
  return dist(brickx,bricky, ScreenW/2, ScreenH/2);
}

  //Calculating InterSpace Scale.
  void BrickSpan(float InterSpaceLength)
  {
    if (InterSpaceLength > SizeOfBrick*6)
    {
          InterSpaceLengthScale = InterSpaceLengthScale * .01;
    }
    else
    {
      InterSpaceLengthScale= 1/InterSpaceLength * 100;
    }
  }
  
  
  //Bricks Movement in 2D place along X and Y axis
  float BrickMovement()
  {
    return  random(50) * InterSpaceLengthScale;
  }


//Rotation of Brick
float BrickRotation()
{
  return random(PI/60) * InterSpaceLengthScale;
}

void DrawBricksGrid()
{
   for (int i=SizeOfBrick/2; i<ScreenW; i=i+SizeOfBrick) 
  {
    
    for (int j=SizeOfBrick/2; j<ScreenH; j=j+SizeOfBrick)
    {
      
      float gap = BrickPosition(i,j);
      BrickSpan(gap);
      
      float r = random(256);
      float g = random(256);
      float b = random(256);
      fill(r,g,b);
      pushMatrix();
     
      translate(i+BrickMovement(), j+BrickMovement());
      rotate(BrickRotation());
     
      rect(0, 0, SizeOfBrick, SizeOfBrick);
      popMatrix();
    }
  }
}

void setup() {
  
  //Initializing the screen of given demensions
  size(1500, 800);
  strokeWeight(5);
  ScreenW=width;
  ScreenH=height;
  
  SizeOfBrick = 100;
  InterSpaceLengthScale=SizeOfBrick;
  
  // Changing the origin of rectangle shape towards center
  rectMode(CENTER);
  
  background(#519FB2);
 
  
}

void draw()
{
  frameRate(1);
  DrawBricksGrid();
  
  
}

Thank you and hope you enjoyed it 🙂


Week 1 : Self Portrait Assignment

Introduction:

As for the assignment, I played around with basic shapes on processing using java and got to know about coordinate systems and basic drawing functions which support sketching the idea on canvas with specified dimensions. In short, processing takes a long-term step to make life easier for artists. As from my perspective coding and programming with different languages consists of art and processing going hand in hand with programmers and artists to work under the same umbrella.

The inspiration behind MY self-portrait:

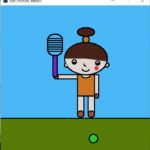
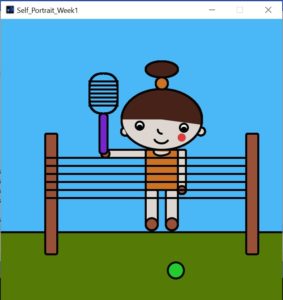
Although I am not a tennis player myself, my sister is a tennis enthusiast and enjoys playing tennis on a weekly basis. Last week, she had a session that I attended with her as a guest to consider signing up with her. She took a video of me as I was messing around in the end of the session, and it gave me an idea to construct this portrait.

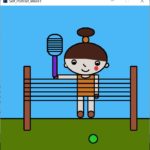
The red dot on my face is used to portray how red I was in the field. I am naturally allergic to the sun and the tennis class consumed my energy which led to me looking like a tomato by the end of the day. My orange shirt and tied ponytail are there to replicate how I looked in the video. The tennis ball is placed on the other side of the field to show that I hit the ball and it fell on the other side of the tennis net , and the purple tennis racket is also inspired from the same video.

Challenges and Problems:

The setup and configuration of the processing software are very easy, and it doesn’t take much time. The problem I faced was during the arc () function and the cutting of ellipse and circle shapes. Understanding the angles and implementation of curves on the right place of both face and body was a challenge on its own. I spent most of my time trying to understand the measurements of the shape and parameters of functions. It was even challenging to spend time learning the functions documentation published on processing. Thus, I did customization on some common shapes like the nose, neck, mouth, and ears by cutting the circular shapes on some angles. Finally, I felt challenged to handle the indentation point as it is not as efficient as other IDEs.

Procedure:

First of all, I worked on the two basic functions of processing which are setup() and draw() functions. Then, with a color selector, I selected relevant colors hex values and initialized global variables for each color with the specified naming convention. I put the colors as a global variable to remember the colors further in code. I researched and understood the 2D coordinate system and began coding global variables for the face and initialized the measurements in setup() functions. By initializing variables in setup() functions, it enhances the reusability of measurements throughout the code and my coding speed.

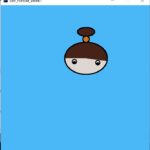
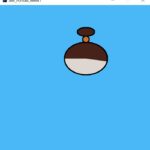
In the draw() function, I drew the face of the girl by using 2D primitive shapes including ellipse, rectangle, circle, arc, and line. I utilized global variables to fill up the shapes function parameters and do some mathematics by adding and subtracting values from the given parameters. For the face sketching, stroke() and fill() functions were used while the arc() function was mostly to draw the face and other body parts. I played with multiple parameters of the same functions to customize the shape accordingly. By joining multiple shapes, I succeeded to sketch out the girl’s body parts. Subsequently, I worked around the background environment for the ground part, the back sky as illustrated, and sketched the tennis net on it. The reason I placed the tennis net in the foreground was to visualize that the girl is standing on the other side of the tennis net. On the other hand, I drew a tennis ball by utilizing a circular shape that is placed on the frontal side of the ground to mimic my idea more accurately.

To draw the tennis bat, I first stored the hand position in terms of x and y coordinates in temporary variables and then used them to act as a placemark for the tennis bat. Moving on, a series of lines with equal distances on the tennis bat was drawn by using nofill() to give the tennis bat a sensible look. For the girl’s arms, two rectangles were drawn with a specified radius by using the body’s central point. The rectangles were later placed on the right and left sides of the body. For the legs, I calculated the distance from the body central point to place the legs under the body. To outline the shapes drawn, I utilized the strokeweight() function. When it comes to the face, I stored its central point x and y values as global variables. I drew the ear, nose, and eyes using the arc() function with extra parameters to customize the arc shape per the face posture.

//Colors
color haircolor,facecolor,shirtcolor,shoescolor, backgroundcolor,groundcolor,tenniscolor;

//BodyParts Measurements
float faceheight;
float facewidth;

float headheight;
float headwidth;

float hairbandheight;
float hairbandwidth;

float facex;
float facey;

void setup()
{
size(700,700);

//Colors
haircolor=#462218;
facecolor=#DDD6D1;
shirtcolor=#CD7324;
shoescolor=#985036;
backgroundcolor=#4AB7F7;
groundcolor=#557A06;
tenniscolor=#7525CB;


background(backgroundcolor);

//BodyParts Measurements
faceheight=150;
facewidth=200;

headheight=100;
headwidth=200;

hairbandheight=30;
hairbandwidth=30;

facex=250;
facey=400;

}


void draw()
{
  
//drawing face
fill(facecolor);
strokeWeight(5);
arc(facey, facex,facewidth,faceheight,radians(0),radians(360));

//drawing head
fill(haircolor);
arc(facey, facex,facewidth,faceheight,radians(180),radians(370));

//drawing hairband
float hairsposy=facey;
float hairposx=facex-125;
fill(shirtcolor);
arc(facey, facex-90,hairbandwidth,hairbandheight,radians(0),radians(360));

//drawing hairs
fill(haircolor);
ellipse(hairsposy, hairposx,80,40);

//drawing eye
fill(#FFFFFF);
ellipse(facey-55, facex+15, 20, 20);
fill(#000000);
ellipse(facey-55, facex+20, 10, 10);

//drawing eye
fill(#FFFFFF);
ellipse(facey+55, facex+20, 20, 20);
fill(#000000);
ellipse(facey+55, facex+25, 10, 10);


//drawing delight smile
fill(facecolor);
arc(facey, facex+40,40,40,radians(40),radians(150));

//drawing nose
fill(facecolor);
arc(facey, facex+25,20,20,radians(90),radians(180));

//drawing blush on cheeks
fill(#DE3C3C);
strokeWeight(0);
arc(facey+50, facex+45,20,20,radians(0),radians(360));


strokeWeight(5);

//drawing ears
fill(facecolor);
arc(facey-90, facex+30,20,20,radians(70),radians(240));
fill(facecolor);
arc(facey+98, facex+30,20,20,radians(270),radians(500));
//drawing body
fill(shirtcolor);
float bodyposy=facey;
float bodyposx=facex+75;
rect(bodyposy-40,bodyposx,80,100,5);

//drawing right arm
fill(facecolor);
rect(bodyposy+40,bodyposx,20,100,5);
//drawing right hand
fill(shoescolor);
arc(bodyposy+50, bodyposx+100,20,20,radians(0),radians(360));


//drawing left  arm
fill(facecolor);
rect(bodyposy-140,bodyposx,100,20,5);

//drawing left hand
fill(shoescolor);
arc(bodyposy-140, bodyposx+10,20,20,radians(0),radians(360));

//Drawing tennis racket
float handposy = bodyposy-140;
float handposx = bodyposx+10;
fill(tenniscolor);
rect(handposy-15,handposx-100,20,100,20);
noFill();
rect(handposy-40,handposx-200,70,100,35);
float nety=handposy-40;
float netx=handposx-200;
line(nety,netx+20, nety+70,netx+20);
line(nety,netx+30, nety+70,netx+30);
line(nety,netx+40, nety+70,netx+40);
line(nety,netx+50, nety+70,netx+50);
line(nety,netx+60, nety+70,netx+60);
line(nety,netx+70, nety+70,netx+70);
line(nety,netx+80, nety+70,netx+80);
//drawing slight showing neck
fill(facecolor);
arc(facey, facex+80,40,20,radians(0),radians(190));

//drawing legs
fill(facecolor);
rect(bodyposy-40,bodyposx+100,30,80,5);
rect(bodyposy+10,bodyposx+100,30,80,5);

//drawing shoes
float footposy=bodyposy-40;
float footposx=bodyposx+100;
fill(shoescolor);
arc(footposy+15, footposx+85,30,30,radians(0),radians(360));
arc(footposy+65, footposx+85,30,30,radians(0),radians(360));

//drawing grassy ground
fill(groundcolor);
float groundx=footposy+170;
float groundy=footposx-500;
rect(groundy,groundx,800,800,5);

//drawing tennis ball
fill(#25CB2E);
arc(footposy+75, footposx+200,40,40,radians(0),radians(360));


//drawing fence
fill(shoescolor);
rect(footposy-250,footposx-140,30,300,5);
fill(shoescolor);
rect(footposy+250,footposx-140,30,300,5);
stroke(5);
line(footposy-250,footposx-80, footposy+250,footposx-80);
line(footposy-250,footposx-60, footposy+250,footposx-60);
line(footposy-250,footposx-40, footposy+250,footposx-40);
line(footposy-250,footposx-20, footposy+250,footposx-20);
line(footposy-250,footposx, footposy+250,footposx);
line(footposy-250,footposx+20, footposy+250,footposx+20);

}


My Self-Portrait Final Edition:
Conclusion:

Working on this assignment allows me to dive into the basics of programming. To understand the basics of computer graphics and math behind the pixels. I learned my way by drawing basic shapes using simple coding on processing. Processing ensures the testing of coding most conveniently and more simply which I like most. There are no debugging configurations in processing. I tested each shape drawing simply by running the code efficiently and reliably.

Â