Week 8: Reading Response by Sihyun Kim

Norman’s text, “Emotion & Design: Attractive things work better,” discusses the importance of aesthetics in design. As the authors say, attractive things work better after all. In the reading, the author makes a connection between affect and cognition, highlighting that our emotions and cognitive processes are intertwined. The author mentions that negative affect makes easy tasks hard while positive affect makes hard tasks seem easy. I agree with the author that attractive things simply work better and that they make hard things seem easy. In fact, just as the author asserts that ‘attractive things work better,’ I also believe that the aesthetic appeal of certain objects can sometimes lead people to perceive the usability of a design more positively than its actual usability.

This text reminded me of the interface of Apple products, especially the iPhone, as a good example of how aesthetics can influence our perception of usability. I believe that one of the main reasons for Apple’s success lies in its ability to seamlessly integrate form and function. The clean and minimalist design of its interface isn’t just visually pleasing, but its aesthetics also enhance the user experience by reducing clutter and cognitive load, making the iPhone seem easy to control. Perhaps the most compelling aspect of Apple’s design philosophy is its ability to evoke positive emotions in users. From the moment one unboxes an iPhone, they are greeted with a sense of delight and anticipation. The smooth, responsive interface only adds to this feeling, making every interaction with the device a pleasure.

In this way, I believe that Apple has mastered the art of using aesthetics to enhance usability. By creating products that are not only functional but also visually appealing and emotionally engaging, they’ve managed to cultivate a loyal fan base all over the world.

Regarding the reading about Hamilton, I was truly inspired by her dedication and passion for her career. Her unwavering dedication to both her career as a programmer and her role as a mother was truly remarkable. Rather than succumbing to societal pressures to prioritize one over the other, she fearlessly pursued both paths with equal fervor. Hamilton’s story is truly inspiring. It shows that with passion and determination, we can overcome any obstacle. She was a pioneer in the tech industry, breaking norms and proving that gender doesn’t limit success. Her legacy reminds us that dedication and passion can make anything possible, no matter what challenges we encounter.


Midterm Project: Space Navigator by Sihyun Kim

Final outcome:

Link to fullscreen:

https://editor.p5js.org/sihyunkim/full/o-b8ZVYnT

Concept of the Game

If someone asks me what my childhood favorite game was, I will say that my favorite game was Flappy Bird without any doubts. As a child, I found avoiding obstacles by controlling the bird up and down along with the increase in speed as the game progressed very intriguing and fun. Hence, for this midterm project, I wanted to create something working with the same logic but in a different style. So, inspired by my childhood favorite game- Flappy Bird, I created a game called “Space Navigator”. As its name suggests, the theme of the game is space exploration. The player is part of an astronaut team sent from Earth to explore Saturn. The mission of the player is simple. All the player has to do is avoid collision with the moving meteoroids on the way to Saturn and follow the path of the stars to arrive on Saturn.  

The images below are the concept image I drew while conceptualizing my project and the transparent images I utilized for my project. I wanted my midterm project to look cute and round. So, I searched for lots of images in the Canva. And ended up using the round-ish images below. Also, I wanted to give people the feeling of childish wonder. So, I intentionally chose a piece of music (video below) from a Nintendo game called Captain Toad: Treasure Tracker. I found this music to be a great fit to be  background music for my game as this music is not too loud but still not boring. Most importantly, this song gave me that feeling of “childish wonder”. So,  I decided to use this. 

Concept Image I drew for my project before working on it:

Images obtained from Canva that I have utilized for the game


The background music for the game:

How the game works: 

The game is quite straightforward. As mentioned above, all what player has to do is to avoid the meteoroids and follow the stars as much as he/ she can. Also, the player has to be careful to not touch the bottom and top boundaries to not lose track of the orbit.  And this is done by controlling the rocket. There are two modes in which the player could choose: Voice mode and key mode. As the modes’ names suggest, the voice mode enables the player to control his/her rocket using his/her voice volume. The voice volume is mapped to the adjustment of the velocity of the meteoroids. The higher the voice volume of the player is, the higher the rocket arises. The key mode is the same as the Voice Mode except that this mode involves controlling the rocket using the keyboard’s space bar instead of the player’s voice volume. The better the player plays the game, the faster the game goes. After “collecting” 15 stars, the game will end with the text that the player arrived at Saturn will appear. 

Explanation of codes for the game:

I have three essential components in my game: rocket, meteoroid, and stars. And I made  Meteoroids(), Rocket(), and Stars() classes for these components of the game. First of all, as the name suggests, the Meteoroids() class is responsible for making the moving meteoroids (obstacles) of the game and checking if they collide with the rocket. Inside this class, there are three functions: update(), show(), and checkCollision(). The update function is responsible to animate the meteoroid while the show function is responsible for depicting the meteoroid itself in the screen. Checkcollision is a function that does check Collision with the rocket. The logic behind the Checkcollision function follows the equation of the circle. Whenever collision with a rocket is detected, the flag named winningState changes to “lost”, indicating that the player lost. 

Next, the Rocket() class is responsible for properties related to the rocket that the player controls. In this class, there are four functions: gravity(), move(), update(), show(), and boundary check(). The gravity function stimulates gravity affecting the rocket. Meaning, that if the player does nothing, the gravity function will let the rocket move down. And move function is responsible for adjusting the velocity of the rocket based on the user’s voice volume or the space bar input. Using an if-else statement and a flag named “keycode”, I made sure that the rocket would only be controlled using the voice volume in voice mode and controlled by pressing the space bar in key mode. The update function is responsible for adding the adjustment from the move function to the y position of the rocket, resulting in the animation of a rocket being moved up or down. And show function is responsible for depicting the rocket in the function. The boundaryCheck() function checks if the rocket touched the top or bottom boundary by checking the position of the rocket and the coordinates of the boundaries. If the rocket touches the boundary, two flags, winningState and touchedBoundary, are changed. 

Thirdly, the Stars() class is the class responsible for generating the stats that will guide the rocket. Like the other two classes, the star function has show() and update() function which allows the stars to be animated and shown. One unique thing about the Stars class is that it has two collision check functions- one with the meteoroids and the other with the star. This is because I had to make sure that the stars did not overlap with the meteoroids and use collision detection with stars to know when to score the player. 

In the main sketch, codes related to ensuring the correct procedure of the game, global variables, and functions such as windowResized(), preload(), setup(), keyPressed(), and mousePressed() are located. Basically, windowResized() is responsible for resizing the game screen for the fullscreen mode, preload() is responsible for loading the images, fonts, and files for the game. In setup() function, I have put some properties of the game that should not be redrawn every time (e.g. background music).  The keyPressed() function is responsible for triggering the boost for the rocket in key mode when the space bar is pressed and letting fullscreen be activated/ deactivated when the “f” or “F” key is pressed. 

The mousePressed() is responsible for all conditions related to the mouse press. All the buttons in the work game work due to flags such as gameState being triggered in this mousePressed() function.  the draw() function handles the procedural aspects of the game, and the game’s state changes based on the value of the gameState variable. The use of if-else statements ensures that different screens are displayed depending on the current state of the game. I think this approach allows seamless transitions between various screens, guiding players through different gameplay stages.

Proud Things from the Project

The part which I am most proud of is also part of the star class. Particularly, I am proud of the code snippets attached below, which are responsible for generating stars. The first code snippet is the code of the checkCollision() method in the Stars class. As the first code snippet shows, the logic of a star’s detecting collision with the meteoroids involves the equation of the circle. It checks if the distance between the meteoroid and the star is greater than the sum of the size of the star and the radius of the meteoroid. The output of checkCollision() inside the star class is a boolean variable. It returns true if there was a collision detected and false if there was no collision. The second code snippet is the code snippet located in the main sketch, which simply ensures that the stars are making sure that stars are not being generated at the same position as the meteoroids. The logic of this code snippet using a while-loop is that it keeps generating new Star objects until the checkCollision() method of the Star object returns false. Then, we add the Star object into the array of the Star object. There will be only one object being pushed into an array at a time as we do not technically “save” the generated Star object in the while loop if it overlaps with the meteoroid object.

Code snippet of checkCollision() inside the Star class:

// method to check for collisions with meteoroids
checkCollision(meteoroids) {
  for (let i = 0; i < meteoroids.length; i++) {
    let distX = this.position.x - meteoroids[i].position.x;
    let distY = this.position.y - meteoroids[i].position.y;
    let distance = sqrt(distX * distX + distY * distY);
    if (distance < this.size + meteoroids[i].radius) {
      return true; // collision detected
    }
  }
  return false; // no collision detected
}
//method to check for collisions with the rocket
checkCollisionRocket(other,music) {
  let distX = this.position.x - other.position.x;
  let distY = this.position.y - other.position.y;
  let distance = sqrt(distX * distX + distY * distY);
  if (distance < this.radius + other.radius) {
    metRocket = true;
    music.play()
  }
}

The while-loop that ensures generated star doesn’t collide with meteoroids:

//checking for collision with stars
while (collision) {
  starX = windowWidth + 100;
  starY = random(windowWidth * 0.125, windowWidth * 0.875);
  newStar = new Stars(starX, starY); // Regenerate star
  collision = newStar.checkCollision(meteoroids);
}
//adding the created new Star object to the array if it does not collide with any meteoroids
stars.push(newStar);

I was just so proud of this part of my project because I felt like this was the hardest part of my project. I think that the collision check that the stars have is way more complicated than the collision check that the meteoroids have, because the stars have to consider where would the meteoroids be placed and make sure that stars are not being generated there. I thought using a while-loop that only exists when a star object does not collide with the meteoroid for this part of coding was a very simple but wise decision.  Visual-wise, I just find my output so cute and gives that sense of childish wonder. So, I am very proud of my intuitions(?) to choose the images and fonts  I have utilized. Also, I am proud of the little details I added to this project such as the sound effects when the buttons are clicked or when the mission failed/succeded. While they are very subtle, I think they altogether enhanced the quality of my work. So, I am very satisfied with my output. 

Areas of improvement and problems that you ran into: 

In the future, I think I can improve the game by adding more features. For instance, I could make the player have multiple “lives” per session of the game to enable the player to easily succeed in the mission. I could maybe also consider enabling a two-player key mode, where two players “race” to reach Saturn first. I think it will be also interesting if I allow the player to choose the level of difficulty in the first place or choose the types of obstacles that the player will encounter (e.g. aliens, meteoroids, or shooting stars).

Other than this, there weren’t lots of problems that I ran into, and I was able to resolve these as well.  One of the biggest problems I encountered was to ensure that stars were generated in a random place that didn’t overlap with the meteoroids. 

However, I was able to solve this problem by using a while loop (further explanation is explained above) and the solution to this problem became my proudest part of the project. Another problem I encountered was a very mysterious problem that I still don’t get why it was solved. I tried to load images but it didn’t work out well. I first thought that I perhaps made some spelling mistakes or syntax errors when writing the code. But, it turns out that I didn’t make one. After a few minutes of debugging, I just duplicated the project itself. The duplicated project just loaded the images properly when I did not do anything after duplicating it. I honestly still don’t get why the problem was caused and how it was resolved only through “duplicating” the project. 

Overall

As usual, I loved working on this project. This project was very fun to create and it improved my coding skills. I am very satisfied with the outcome, but I think it could have been improved by adding more modes or features as I have mentioned above. 

Thank you so much for reading my blog post 🙂 


Week 5 Reading Response by Sihyun Kim

The reading for this week was about what computer vision is and how it is integrated into the field of interactive media. First of all, the book mentions Videoplace, the first interactive artwork of Mysron Krueger to incorporate computer vision, which was also one of the first interactive artworks. This fact made me realize that the development of technology can also fuel the expansion of other fields. Also, looking at different examples of the integration of computer vision and art, I was just amazed at how the development of technology can also enable artists more creative and innovative ways to create artwork or projects.

I particularly found Sorting Daemon (2003) by David Rokeby intriguing among the examples. This artwork was made by capturing and extracting people’s images who are on the street and dividing them according to areas of similar color. While I truly found his idea of creating such artwork very innovative, this artwork made me question the captured people’s portrait rights. To me, this looked like a violation of people’s portrait rights, which is the right of people to oppose the publication of his/her portrait, as we can see the faces of captured people very clearly in the artwork. Looking at the massive number of captured portraits in the artwork and the description of the artwork, it seemed like the artist just placed the camera somewhere without people knowing the existence of the camera in that location. Then, I came to wonder where we should draw the line between “artwork” and “crime” when the theme of the artwork involves such surveillance and release of the captured portraits without the allowance of the captured people.

Another insight I had after finishing the reading is how seemingly very difficult thing is not that difficult and it is something that everyone could do if he/she knows the logic. At first, when the author talked about how computer vision is actually not that hard concept, I doubted the author. However, after reading the entire article, I came to realize that the author was right. Every time I passed by the IM lab, I was amazed at the interactive installation with the changing Chinese characters capturing our moves and thought of it as a result of very complicated programming that only experts could make. While I do not know the “real” logic behind the programming of that installation, I realized that maybe this could be the application of one of the elementary computer vision techniques that the book mentions. I guess that the installation is the application of the detection through brightness thresholding or frame differencing method. I am leaning more toward brightness thresholding because it seems like there is an assigned Chinese character for each level of brightness if you look at the installation closer. Likewise, this book made me think that sometimes, seemingly complicated things could be in fact not that complicated.

Midterm Progress 1(Space Navigators) by Sihyun Kim

Concept

The image shown above is my little brainstorming for the midterm project. Inspired by my childhood favorite game Flappy Bird (image shown below), I decided to create a game that has similar mechanics to Flappy Bird. However, I made my game distinct from Flappy Bird by having a different theme and a different way to play it. The theme of my game would be “Space”. More specifically, the concept of the game is a rocket sent from the Earth to explore space avoiding meteoroids of different sizes in space to prevent the destruction of the rocket.

Recreate Flappy Bird's flight mechanic | Wireframe #29 - Raspberry Pi

Flappy Bird

The user can control the rocket through his or her voice volume. The rocket will be controlled by getting the microphone level of the microphone input. 

Design 

The drawing above is the drawing I drew when conceptualizing this game. This game will consist of two key features: rockets and meteoroids of different sizes. As of now, I am planning to find an image with this kind of illustration. However, if I could not find any of which I could satisfy, I might draw the rocket and the meteoroids for the game by myself. For the background music, I found this playlist (shown below) of background music on YouTube. 

As of now, I am planning to use one of these songs in the game as the background music.


Challenges:

Intentionally, I started working on the parts of the game that I thought would be the most complicated and frightening features to code. Which were: 

Controlling the rocket through the mic input

function setup() {
  createCanvas(400, 400);
  mic = new p5.AudioIn();//initializing microphone input
  mic.start();//starting microphone input
  rocket = new Rocket(50, 200, 200);//creating a new rocket object
}

function draw() {
  background(220);
  //getting microphone input level
  let vol = mic.getLevel();
move(vol) {
  let adjustment = map(vol, 0, 1, 0, -20);// mapping the volume to an adjustment in velocity
  this.vy += adjustment;//// applying the adjustment to the vertical velocity
}

The shown above are the code snippets for implementing the control for the rocket through mic input. Implementing this part was easier than I expected because we have been introduced to how to code such an implementation in p5.js. I have used the p5.AudioIn() and getLevel() to access the microphone input and the volume level of the microphone input. Then, I utilized the map() to map the volume to an adjustment in (vertical) velocity. 


Moving Obstacles: 

After watching some videos of people playing the Flappy Bird, I have noticed that the x position of the bird maintains to be the same. It just looked like it was moving because the obstacles were moving! So, I decided to make my obstacles(meteoroids) move as well. Creating the instances and letting the instances move were not difficult. It was the timing that was challenging. I first tried to use random() for all the parameters. Then, I realized that this would result in overlapping obstacles. 

So, I contemplated How I could make one meteoroid at a time. It was quite challenging to figure out how as I took around 30 minutes. Then, I came out with the idea of using frameCount() and some variables. 

if (frameCount - lastMeteoroidTime >= meteoroidInterval) {
  // creating a new meteoroid
  let x = width; // starting the meteoroid from the right side of the canvas
  let y = random(50,350); // random y-position between 50 and 350
  let size = random(50, 100); // random size between 50 and 100
  //adding the created new Meteoroid object to the array
  meteoroids.push(new Meteoroids(x, y, size));

  // updating the last meteoroid creation time
  lastMeteoroidTime = frameCount;
}


So, what I have done is that I first set the interval to be 60 frame count, and if the time difference of frameCount and the last time that the meteoroid was generated is greater than the interval, then the new meteoroid will be generated.

Collision detection

Collision detection with the boundaries was easy since I just had to check if the y position of the rocket was greater than 400 or less than 0. 

However, letting the collision between any of the meteoroids and the rocket be detectable was essentially the most frightening part of this project (so far). Honestly, I did not think this would be one of the hardest parts as I had similar coding experience in Introduction to Computer Science. However, letting the collisions detectable when both are “circles” was different from letting the collisions detectable when both are “rectangles”. But, after all, I was able to figure out how to code for this as well! 

  //checking collision with the rocket using the equation of the circle 
checkCollision(other) {
    let distX = this.position.x - other.position.x;
    let distY = this.position.y - other.position.y;
    let distance = sqrt((distX * distX) + (distY * distY));
    if (distance <(this.radius + other.radius) ) {
      noLoop();
    }

After all, I was able to figure out how to do collision detection between two circles by utilizing the equation of the circle I learned back in middle school. AND IT WORKED! So, basically, I have gotten the distance between the center of the meteoroid and the rocket, then checked if the calculated distance between the two objects is less than the sum of their radii. If this condition is true, it means the two objects are overlapping or colliding. This is because the sum of their radii represents the distance at which their boundaries touch if they are just barely colliding.

Conclusion

Fortunately, I was able to overcome the challenges I encountered so far. In fact, I was able to resolve the most frightening problem of this project- collision detection. Now, I am done with the main features of the game. I just have to implement the images and sound, create the starting page, implement the scoring system, define game-ending conditions, and enable the restarting of the game. 

Progress so far…

!! It just stops if it is on the ground or if it is touching the ceiling for now because I have put noLoop() for all the if -statements involving collision check. 😊

Week 4: Reading Response by Sihyun Kim

After reading chapter one of the book entitled “The Design of Everyday Things”, I found myself agreeing with the main argument that the author makes in his book. In this book, the author talks about what makes a good design. I think the most important argument he makes is that the two of the most important characteristics of good design are discoverability and understanding. Discoverability indicates that the user should be able to figure out what actions are possible and how to perform them and understanding indicates what all functions mean and how the product is supposed to be used. I agree with him that discoverability and understanding are the key features of what makes a good design. I also believe that a design is called “good” when it is intuitive whereas we could figure out how to use the object and all the purpose of it at first glance. 

I agree with the author in his argument about how we are so “machine-centered” instead of being “human-centered”.When the user is not able to use a machine properly, we often tend to blame the user for not being able to figure out how to use the machine instead of thinking about the machine as “poorly designed.”  This machine-centered mindset is something that I also noticed in my surroundings. I also believe that this is the mindset of the engineers who build and design the machines. I find some machines very complicated to use even with the user’s guide. Sometimes, I think the machines are too focused on the “technical requirements” that they forget to consider human behavior. I find it quite ironic that machines that are built for people fail to consider the “people”. 

Then, I came to think that this might be the paradox of technology- as it is more developed to offer more technological benefits to the users, the more it becomes difficult to use. Technology can simplify yet complicate our lives. This idea made me think that one of the most concerning challenges to the designers would be how they should balance the desire for more developed technologies and functions with the need for simple and human-centered design. As the author argues, the more the technology develops and the machines become multifunctional, the more the machine is prone to make the users become overwhelmed and frustrated. In a way, I think that it is the job of the designers to make complicated things look “simple and easy” to use.

Also, I thought that a “good design” that satisfies everyone  becomes harder to achieve as the machines add more functions. And I thought that a good design might be something “subjective”  instead of  “objective”. As the author says, what a person finds intuitive is based on that person’s experience. To someone who is used to technology and machines, a newly-built machine might seem to be very intuitive and user-friendly even without reading the user’s guide, but the machine might seem to be “poorly designed” for someone who is not familiar with the machines. Perhaps, to the engineers who are so used to all that logic and orders of machines, the machines that the public perceived to be “poorly designed” might have been intuitive. Likewise, when the machines get more complicated, while there might be a design that the “majority” can satisfy, I think there might not be a design that “everyone” can satisfy. 

Overall, I truly found the reading very interesting and engaging. Also, the reading made me reconsider what a good design is. After all, this reading made me think that a good design is a design that is intuitive and that a good design is subjective based on the experience of the users as what a person thinks of as intuitive differs from the person’s prior knowledge and experience. 


Assignment 4: A Sincere Letter Generator by Sihyun Kim :)

Concept:

As soon as the professor introduced us to the “poetry generator” and its code, I wanted to apply this concept and code that we learned in class. Then, I came up with the idea of creating a “random letter generator” by applying the concept and code we learned in class. To make it resemble a real letter, I downloaded some “letter background” templates from Canva and obtained some handwritten-style fonts from https://www.1001fonts.com/handwritten-fonts.html to make the letter appear as if it were genuinely written by someone. Additionally, to make my output more interesting, I allowed the background image and font to be randomly generated.

Highlight of the Code:

There are three functions I intentionally created: generateLetter(), getRandomWord(), and mouseClicked(). generateLetter() is responsible for generating the random content, getRandomWord() retrieves a random word from the string array based on the given index, and mouseClicked() generates “new letters” when the mouse is clicked.

I am proud of all the code I have written for this project. However, I am most proud of the code I created for the generateLetter() function.

//function to generate the letter content using random words
function generateLetter() {
  //constructing the letter content involving template literal and getRandomWord() function
  let letterContent = `Dear ${getRandomWord(RECIPIENT)},

I wanted to take a moment to ${getRandomWord(VERB)} my ${getRandomWord(ADJECTIVE)} ${getRandomWord(NOUN)} for your ${getRandomWord(NOUN)}.Your ${getRandomWord(NOUN)} means a lot to me, and I am truly ${getRandomWord(ADJECTIVE)} to have you in my life. From the ${getRandomWord(ADJECTIVE)} ${getRandomWord(NOUN)} we've shared to the ${getRandomWord(ADJECTIVE)} ${getRandomWord(NOUN)} we've ${getRandomWord(VERB)} together, every ${getRandomWord(NOUN)} with you is a ${getRandomWord(ADJECTIVE)} ${getRandomWord(NOUN)} I hold dear to my heart. As we continue on our journey together, I look forward to creating many more ${getRandomWord(ADJECTIVE)} memories with you.With ${getRandomWord(EMOTION)}, ${getRandomWord(EMOTION)}, and ${getRandomWord(EMOTION)}, I want to express how much you ${getRandomWord(VERB)} and ${getRandomWord(VERB)} to me. Wishing you ${getRandomWord(ADJECTIVE)} days ahead and ${getRandomWord(ADJECTIVE)} adventures.

With ${getRandomWord(EMOTION)},
${getRandomWord(NAME)}`;

  textAlign(LEFT); //aligning text to center
  text(letterContent, 130, 250, width - 250, height); //displaying the letter content on the canvas
}


The attached code above is what I created for the generateLetter() function. I am proud of this code primarily because of the utilization of template literals. Initially, I considered adopting the same approach as our professor did when generating poetry. However, I realized that my code would become too lengthy if I followed the exact same method. So, I began contemplating how to make my code more concise. Eventually, I came up with the idea of utilizing template literals in my code. Template literals, a feature in JavaScript, allow you to embed expressions within strings. This feature enabled me to directly integrate the getRandomWord() function into my base letter content, making my code more concise. Although I was aware of the existence of template literals before, I had never used them. Thus, it was initially challenging for me to figure out how to apply them and understand the syntax. I felt a sense of pride in myself for successfully incorporating template literals to make my code more concise.

Final Output:

**Click the mouse t0 randomly generate a new letter! 

Reflection:

Overall, I am very satisfied with my project. Although it was initially challenging for me to grasp the syntax of template literals, I thoroughly enjoyed working on this project. As for areas of improvement for next time, I believe adding animation where the letter’s content is being written or implementing a feature where the viewer can change particular words one by one when clicked would be intriguing.

Assignment 3: UP! House by Sihyun Kim

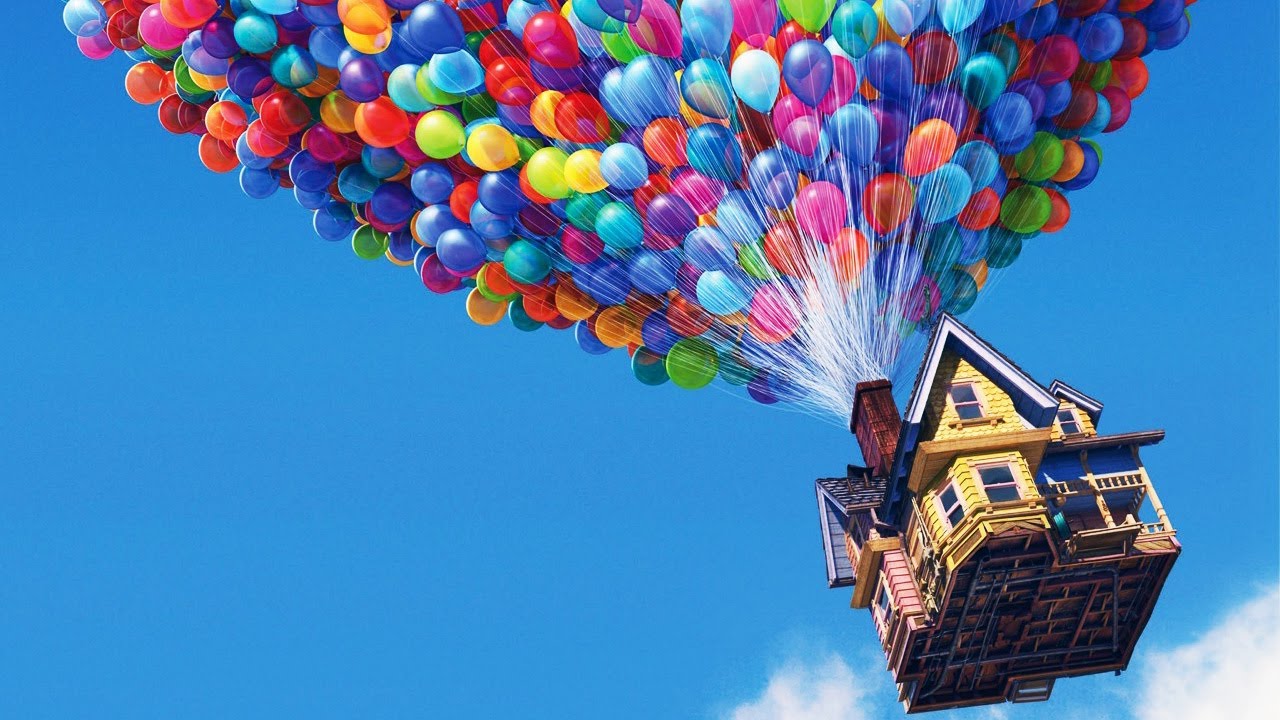
As soon as I saw the instructions for this assignment that I have to utilize object-oriented programming and arrays, I thought of depicting balloons. More specifically, I reminded myself of the flying house of the Pixar movie called “Up” released in 2009. So, inspired by the flying house in this movie, I decided to recreate the flying house in this assignment. Attached below is the image of a flying house from “Up” which I was inspired by. 

For this assignment, I have created 3 classes, which were Balloon, House, and Cloud class. Each class contains attributes and functions needed for each object to be created.  

Balloon Class

class Balloon {
  constructor(x, y, height, colors) {
    this.balloonPosition = createVector(x, y); //position of the balloon saved as a vector for convinience
    
    this.balloonHeight = height; // height of the balloon
    
    this.balloonWidth = height * 0.8; //width of hte balloon; maintaining the balloon shape through making height is greater than the width
    
    this.balloonLift = createVector(0, -random(0.5, 1.5)); // random variable in between 0.5 to 1.5 for lifting the balloon
    
    this.balloonColor = random(colors); //picking the color of the balloon randomly from the color array
    
//determining the tilt factor of the ballon based on the x position of the balloon
    if (x < 180) {
      this.tilt = random(-PI / 8, -PI / 18); // tilting towards left
    } else if (x > 200) {
      this.tilt = random(PI / 18, PI / 8); //tilting towards right
    } else {
      this.tilt = 0;// does not tilt
    }
  }
  
  drawString(chimneyY){
    stroke(220);// color of the balloon string
    strokeWeight(1); //thickness of the string
    
    //setting up a reference point for rotation (bottom center)
    let x0=0; //x-coordinate of the bottom center relative to the (not tilted)balloon's center
    let y0=this.balloonHeight/2;// y-coordinate of the bottom center below the (not tilted) balloon's center
    
    //getting the rotated x and y coordinates of the center of the tilted balloon by applying the rotate formula 
    let rotatedX = x0 * cos(this.tilt) - y0 * sin(this.tilt);
    let rotatedY = x0 * sin(this.tilt) + y0 * cos(this.tilt);
    
    //Adding the rotatedX value to the original position of the balloon to obtain where to start the balloon's string
    let stringStartX= this.balloonPosition.x+rotatedX
    let stringStartY= this. balloonPosition.y+rotatedY
    
    //drawing the string
      line(stringStartX, stringStartY, 174,chimneyY-100)// the end of the string will be the same to show that the string is connected to the chimney 
    
    //  variables for drawing the knots(triangle)
    
    let baseSize= 50 // base size for the largest balloon
    let adjustment = (this.balloonHeight/baseSize)*5// changing the adjustments based on the size of the relative size of the balloon
    
    //calculating the triangle vertices by the balloon size 
    let vertexX1 = stringStartX - adjustment;
    let vertexY1 = stringStartY + adjustment;
    let vertexX2 = stringStartX + adjustment;
    let vertexY2 = stringStartY + adjustment;
    let vertexX0 = stringStartX; // Top vertex (string start point)
    let vertexY0 = stringStartY;

    // rotating vertices around the top vertex
    let rotatedVertexX1 = vertexX0 + (vertexX1 - vertexX0) * cos(this.tilt) - (vertexY1 - vertexY0) * sin(this.tilt);
    let rotatedVertexY1 = vertexY0 + (vertexX1 - vertexX0) * sin(this.tilt) + (vertexY1 - vertexY0) * cos(this.tilt);
    let rotatedVertexX2 = vertexX0 + (vertexX2 - vertexX0) * cos(this.tilt) - (vertexY2 - vertexY0) * sin(this.tilt);
    let rotatedVertexY2 = vertexY0 + (vertexX2 - vertexX0) * sin(this.tilt) + (vertexY2 - vertexY0) * cos(this.tilt);

    // drawing the rotated triangle (knot)
  noStroke();
  fill(this.balloonColor); // setting fill same color with the balloon for the triangle 
    triangle(rotatedVertexX1, rotatedVertexY1, rotatedVertexX2, rotatedVertexY2, vertexX0, vertexY0-3);
  }
  drawBalloon() {
    push();//saving the current drawinf style settings and transformations
    translate(this.balloonPosition.x,this.balloonPosition.y);// moving the origin to the balloon's position
    rotate(this.tilt);//rotating the canvas by the balloon's tilt angle
    fill(this.balloonColor);//setting the color to fill the balloon
    ellipse(0,0,this.balloonWidth,this.balloonHeight)//drawing the balloon at the new origin
    pop(); //restoring the previous drawing style settings and transformations
  }
  
update(){this.balloonPosition.add(this.balloonLift);// adding the lift vector to the balloon's position vector
}

}

As attached above, within the Balloon class, there are three functions: drawString(), drawBalloon(), and update(). The drawString() and drawBalloon() functions are functions that are responsible for drawing the string attached to the balloon and the balloon itself. I originally planned to draw a string within the drawBalloon() function as well. However, whenever I tried to do so, due to the order of the execution, the code’s output was not what I expected to see. Hence. I made the drawString to draw the string and the know of the balloon separately. 

For the drawBalloon() function, it was not particularly hard for me to code this part, as I just had to implement the ideas of rotating a shape and drawing a shape which we learned during one of our first lectures to code. 

However, for the drawString() function, it was quite challenging. It took me quite a while to figure out to ensure that the string and the knot of the balloon were located correctly on the bottom center of the balloon even after tilting the balloon itself. After struggling for a few minutes, I realized that I could use the sin() function and cos() function, which are built-in functions of p5, to figure out the “changed” bottom center of the balloon. More specifically, I was reminded of the coordination rotation formula, which I learned back in high school. Since we know the angle of rotation, through implementing coordination rotation formulas, I was able to easily figure out what is the changed x and y positions of the bottom center of the rotated balloon.  

For the update() function, which is responsible for raising the balloons, I have simply added the balloon lift vector to the balloon’s position vector. The update() function was one of the reasons why I decided to utilize the createVector() in the first part of the code. I wanted to make mine as concise as possible. Hence, to prevent making repetitive lengthy code, I decided to create the createVector(). As shown in the code snippet above, the lift factor is determined randomly between 0.5 and 1.5. I made the lift factor to be randomized because I wanted the balloons to have different speeds so that it would look more natural and it would help look like the balloons dragging the house above.

Cloud Class

drawCloud(){
  fill(255);//white color for the cloud
  noStroke();
  //creating several ellipses to form a cloud shape
  ellipse(this.cloudPosition.x, this.cloudPosition.y-10,70,50);
  ellipse(this.cloudPosition.x, this.cloudPosition.y-10, 70, 50);
  ellipse(this.cloudPosition.x + 10, this.cloudPosition.y + 10, 70, 50);
  ellipse(this.cloudPosition.x - 20, this.cloudPosition.y + 10, 70, 50);
  ellipse(this.cloudPosition.x+40, this.cloudPosition.y+10, 70,50);    
}


Within the cloud class, I have created the drawCloud() function to draw a cloud. As shown in the snippet above, I have illustrated the cloud by combining 4 ellipses. I have made the ellipse’s position to be random. So, every time we replay the code, the position of the cloud changes. 

House Class

update() {
  this.houseY -= 0.5; //liftingthe house
}

drawHouse() {
  
  // house body
  fill("#64b9dd")
  rectMode(CENTER);
  rect(this.houseX, this.houseY, 120, 60);

  // roof and other details
  fill("#84797b")
  quad(140, this.houseY - 90, 257, this.houseY - 90, 278, this.houseY - 30, 119, this.houseY - 30);
  fill("#fccc65")
  triangle(215, this.houseY - 110, 185, this.houseY- 30, 255, this.houseY - 30);

  // mini house body
  rectMode(CORNER);
  fill("#f3a07f")
  rect(200, this.houseY - 30, 40, 60);
  
  //door 
  fill(255)
  rect(154, this.houseY-10,30,40)
  stroke("#84797b")
  strokeWeight(8)
  point(175,this.houseY+10)
  strokeWeight(4)

  // windows
  noStroke()
  fill(255)
  rect(208,this.houseY-70,20,25)
  rect(207, this.houseY - 20, 25, 35);
  stroke( "#84797b")
  line(209,this.houseY-60,227,this.houseY-60)
  line(219, this.houseY - 19, 219, this.houseY + 14);
  line(207, this.houseY - 3, 232, this.houseY - 3);

  // chimney
  noStroke()
  fill("#84797b")
  rect(166, this.houseY-100, 20, 10);
}


There are 2 functions: drawHouse() and update(). As the names of the functions suggest, the drawHouse() function is responsible for drawing the house itself while the update() function is responsible for moving the house upward. For drawHouse(), I have utilized simple shape functions such as quad(), triangle(), rect(), and line() to draw the house. For the update() function, similar to the mechanism I used for the update() function of the Balloon class. I have deducted the lift factor of 0.5 to the y position of the instance of this class. 

In Main Sketch

In the main sketch, I have created the objects of the Balloon class, House class, and Cloud class. For Cloud class and Balloon Class, in which I had to create multiple objects, I created empty arrays and stored each object of the class to the respective array using the for loops. For the Balloon objects, I randomized the x and y positions of the object, the size of the balloon, and also the color of the balloon. But I’ve set a range when randomizing the x and y positions to ensure that the balloon is always created above the house. Also, for the Cloud class, I have randomized the x and y positions of the object and the size of the balloon. 

//function adding a new balloon when the mouse is pressed
function mousePressed() {
  //Checking if the mouse is pressed above a certain height relative to the house
  if (mouseY < house.houseY - 110) {
  // Add a new balloon at the mouse position with a random size and color
    balloons.push(new Balloon(mouseX, mouseY, random(20, 50), colors));
  }

One of the key parts of the main sketch-which I am particularly proud of- is the mousePressed. I have let a new Balloon be generated when the mouse is clicked. However, a new Balloon will be generated if and only if the y position of the mouse is above the house. I have set the initial number of balloons generated when the code is played to 90 balloons. After a few clicks of the mouse, when the number of balloons is more than 100, then the balloon and house will start rising. 

The Final Output

Mouse click above the house to add more balloons! Once there are more than 100 balloons, the house and balloons start rising 🙂

Reflection and Areas of Improvement.

Overall, I enjoyed working on this assignment. Although it was quite challenging to code as there were lots of things that I had to consider, it was very fun and interesting to apply arrays and classes together to create objects. I also loved how the usage of classes and arrays could make the code way simpler and more concise. For the areas of improvement, I think I can perhaps make the balloons pop when they reach the end and make the house fall when the number of balloons decreases. Also, I could make the house and balloons not only move up but also left and right using the keyboard arrows. 


Reading Response to “The Art of Interactive Design”

Chris Crawford’s definition of interactivity in his book, “The Art of Interactive Design,” led me to rethink what is considered “interactive.” In the very first pages, Crawford mentions that he believes the term “interactive” has been overused and that “we’ve lost track of the word’s true meaning.” I very much agree with Crawford, as I also found myself frequently using the word “interactive” without a clear understanding of what interactivity really is. At the start of the reading, I realized that I had utilized the word “interactive” everywhere without having a clear idea of its meaning, as I could barely define “interactivity” by myself. Moreover, the reading’s mention of printed books and movies as instances where the term “interactivity” is misapplied made me think that the term is often oversimplified and misused in various domains. I questioned why the term “interactivity” had been so misapplied and oversimplified in various domains. Then, I thought that the reason behind these misapplications and oversimplifications was perhaps because “interactivity” was poorly defined in the first place. So, this reading also made me reflect on the importance of having a clearly structured definition.

In this reading, Crawford defines interactivity by making an analogy to a two-way conversation in which two actors alternately listen, think, and speak. I think the essence of his definition is the presence of giving back and forth. It should not be only one entity that is “reacting” to something or someone, but rather, there should be a reciprocal reaction. This made me think that the most important aspect of interactivity is the presence of a reciprocal process of listening, thinking, and speaking.

This reading also made me think about the key difference between user interface design and interactivity design. I believe that both are similar as they are both user-centric designs. However, I think it is the approach that makes them different. While user interface design is focused on “optimization” for efficiency, interactivity design focuses on the creation of a holistic interactive experience that incorporates both form and function. Also, one of the key aspects that makes interactivity design differ from user interface design is the “thinking” element that Crawford mentions while explaining his definition of interactivity. I think interactive design focuses on having an approach that considers the user’s cognitive engagement.

Assignment 2: Chaos and Creativity- Reading Response to Casey Reas’ Eyeo Talk on Chance Operations

At the start of the video, when Casey Reas said that chaos was thought to exist before creation and order was thought to be brought by god or gods, I found his statement very interesting. I was thinking of the fact that artworks focused on the beauty of structured, rational, and ordered things for centuries before randomness, chaos, and unplanned things started to be the themes of the artworks. Then, I realized that randomness, chaos, and unplanned things started to be the themes of artworks after the age of the god-centered community slowly lost its focus on ‘god’ and ‘gods,’ while the focus on ‘science’ increased. This fact made me think that perhaps the reason for the focus on structured and ordered things might be related to the god-centered focus of that time. Here, I felt like the reason why unstructured things were not the theme of artworks was that they were not considered worth drawing, as ordered things – thought to be of god – were considered beautiful. And this made me think that, in a sense, the artwork reflects society’s beliefs.

The video made me realize that chance operation essentially involves adding a touch of randomness to the set of rules governing the generation of colors, shapes, or patterns. When I think of programming, I always associate it with a rational process of structured and ordered code, as it requires precise and logical input of rules to be executed. Using programming—which is typically associated with structured and ordered things—as a medium for creating seemingly unstructured artwork was particularly fascinating. I think the beauty of chance operation lies in creating something seemingly unstructured and irrational through a structured and ordered medium. Moreover, I think the best term to describe chance operation is ‘planned randomness.’ While watching the video, I understood that this process of making artwork is not based on blind randomness, where everything is unknown and based purely on luck. Instead, it is a type of planned randomness, carefully calculated and determined, offering several choices, yet the output remains unpredictable.

After learning about the chance operation through the video, I perceived it as a method of creating artwork in collaboration with the computer. Adding a touch of ‘randomness’ to ordered codes felt like giving the computer free will to choose what to draw independently. By incorporating randomness into the process, the artist and the computer engage in a unique collaboration. I found this aspect very intriguing, as the computer, typically seen as a tool for precise and predictable outcomes, becomes an active participant in the creative process. It was like giving the machine a degree of ‘creative freedom’ within the boundaries set by the artist.

Assignment 2: City of Stars by Sihyun Kim

Concept

In this assignment, I used for loops, if-statements, and some basic functions to depict the busy and vibrant nightlife of a city and starry night. I wanted to express something that cannot coexist yet imaginable. Then I thought of a starry night in the city, Sometimes, even a single star is hard to find in the city, because of the brightness of a vibrant city.

First of all, for the starry night background, I was inspired by the photo attached below which was taken by Ryan Hutton. When I first saw this image I was amazed at the tons of stars in different sizes that were twinking in the sky. So, in my artwork, which is also attached below, I decided to depict tons of twinkling stars in different sizes too.

The Photo Taken by Ryan Hutton that I Was Inspired by


The Output

For the depiction of a city in the foreground, I do not have a specific image that I was inspired by. I just wanted to express the “busy city” by changing the light color of the windows continually. I have let the color of the windows change randomly between 4 neon colors. The reason why I chose to let the window change by 4 neon colors was that I wanted to express vibrance through the neon colors.

Highlight of Code

I am particularly proud of the code attached below. This section of the code is responsible for the generation of the stars. As shown in the snippet of the code, I have utilized for loops to create the stars. The for loop iterates 50 times to create 50 stars at random positions on the canvas with random sizes. I am particularly proud of this code because of the way I have coded it to give the “twinkling effect”. I was contemplating of a way to give a twinkling effect to the stars by giving the fade-out effect. Then, I realized that I could perhaps adjust the transparency of the background to give that twinkling effect. By letting the stars drawn previously fade out progressively as the backgrounds with adjusted transparency overlap, I have achieved the twinkling effect that I wanted. I was just so proud of myself for coming up with this idea of adjusting the transparency of the background to make the stars twinkle.

function draw() {
  background(0, 25); //transparency for the "twinkling" effect

  for (let i = 0;
    i < 50;
    i++ //50 == number of stars to be generated
  ) {
    let starX = random(0, width); // randomizing x position of the generated star
    let starY = random(0, height); // randomizing y position of the generated star
    let star_size = random(1, 3); //randomizing size of the generated star
    stroke(255);
    strokeWeight(star_size);
    point(starX, starY);
  }

Reflection and Ideas for Future Work

Overall I am very satisfied with the output of my codes. I honestly found my artwork visually pleasing. While some parts of the codes, such as the creation of the windows, were challenging. I genuinely enjoyed doing this assignment. I think I could further improve my artwork in several ways. For example, I could add some animation of buildings moving up and down to further express the “busy and vibrant city”. Also, I could add more complex shapes of buildings. Next time, I think I would also add some interactions, such as buildings changing when the mouse is pressed, to make my artwork more interesting.