Week 8 – Response – Emotion & Attractive , Margret Hamiltion story

Norman’s reading made sense to me. I totally agree that emotions play a role in what tools or elements we use daily, and it could be as simple as a pot. We design things with purpose in mind, but making them appealing is as important. I really liked the part about the transformation from black and white screens to colors, and his argument that the inspiration of colors does not have a scientific effect but rather have an emotional one. It made me think of colors a painter would use to emphasize certain moods. For example, if an artist wants to emphasize loneliness or sad emotions they would use blues, and if they are emphasizing hope and love they would use worm colors like yellow and orange. I believe appealing design is as important as affordance, and having a balance between functionality and appearance is what good design is about.

Margret Hamiltion was an inspiring read. Her work did not only transform technology and software but opened possibilities for the developments we see today. It is a success story that proves a quote I read once: when there is a well, there is a way. We design what we want to be, but we can always re-design anything that does not fit into our plan. Similar to Hamilton who did not limit herself, we push our borders higher and higher every time we reach something. In a way, we push our lives the same way designers re-design objects and ideas. What made her different is that she had a vision that best suited her passion and inspiration. It is good to be inspired; nevertheless, everyone is inspired to aspire.

Midterm- Life Under the Sea

Concept:

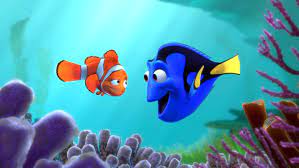
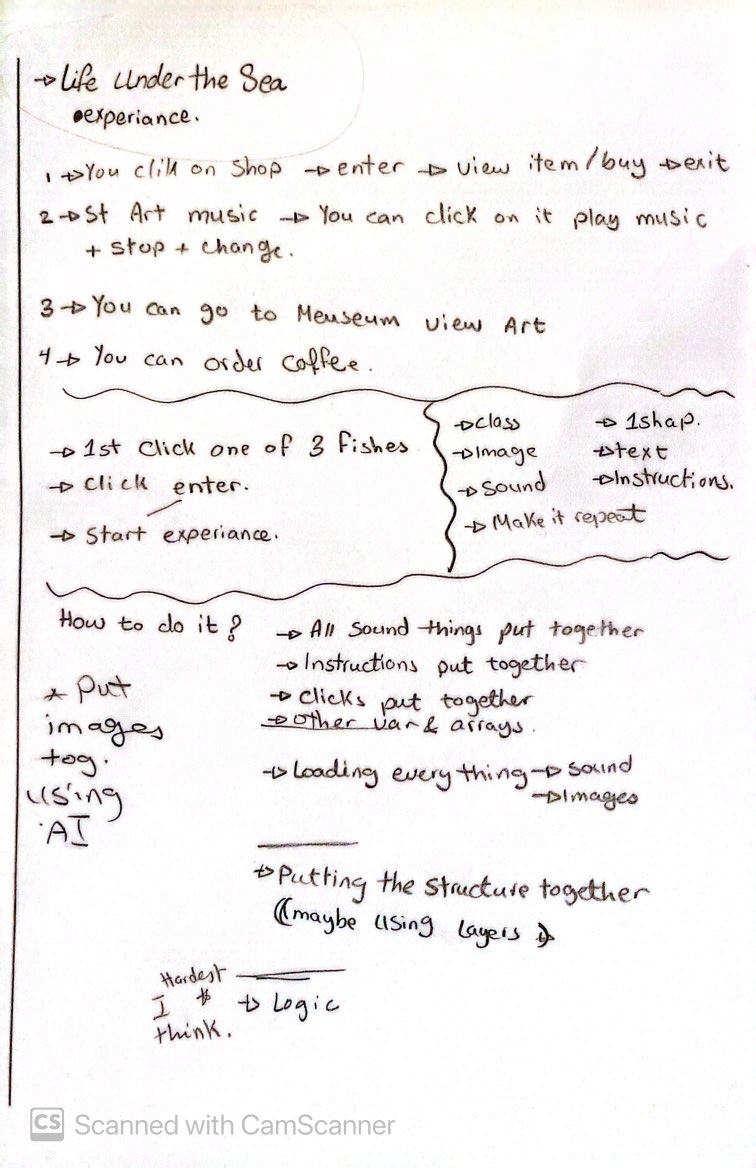
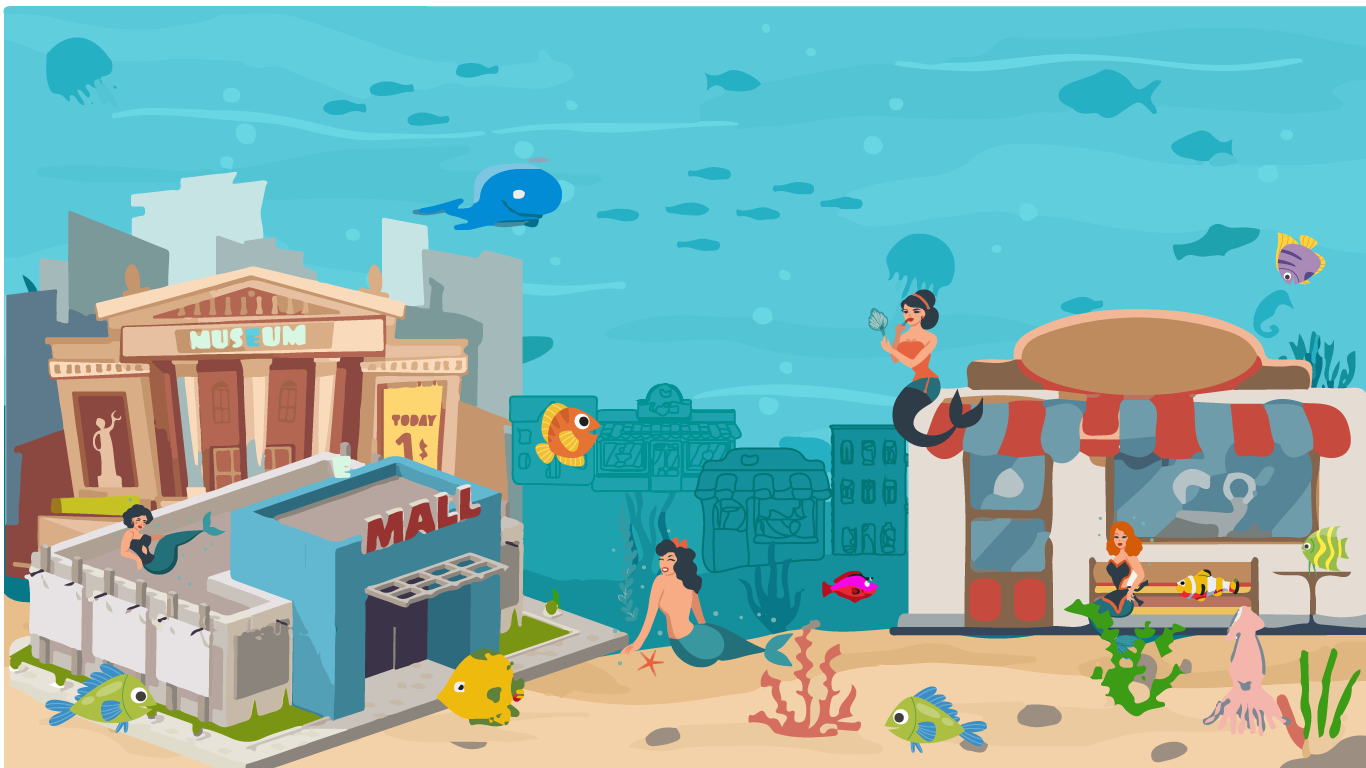
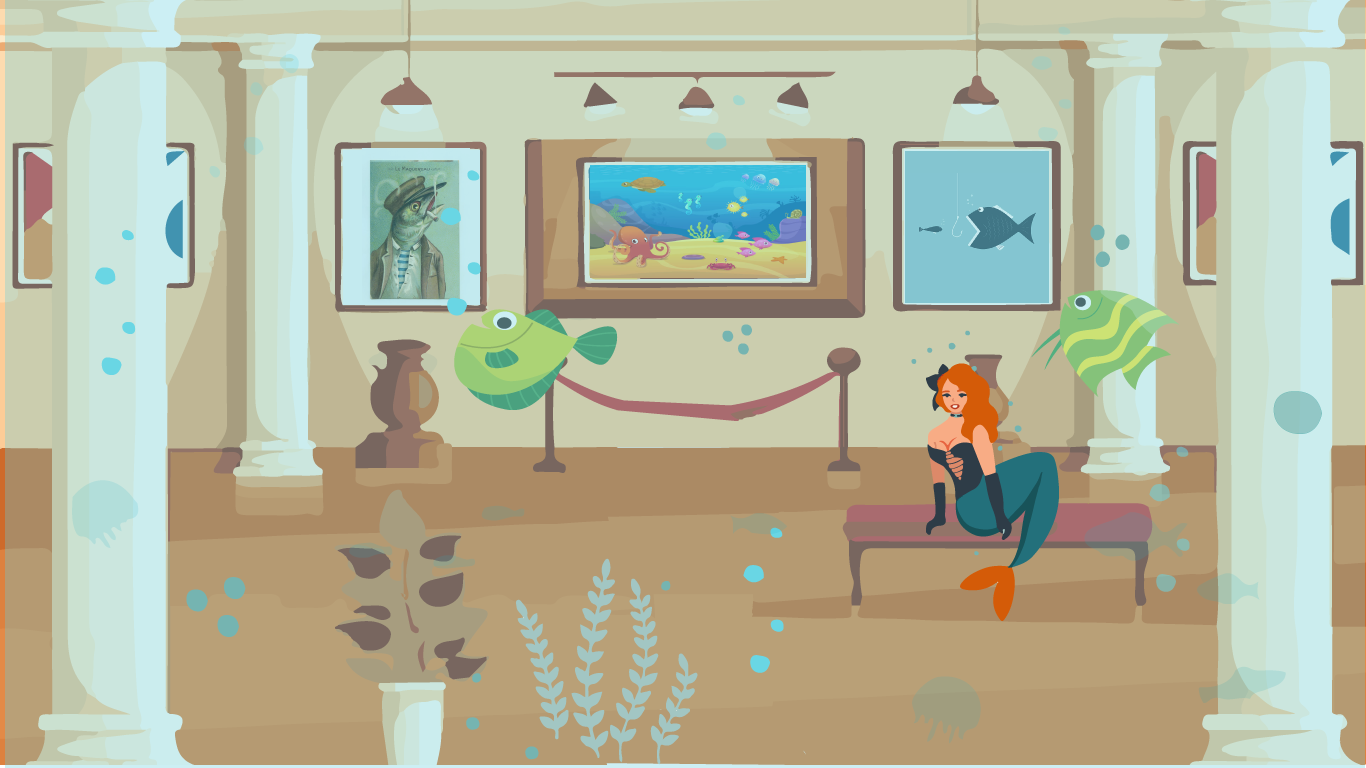
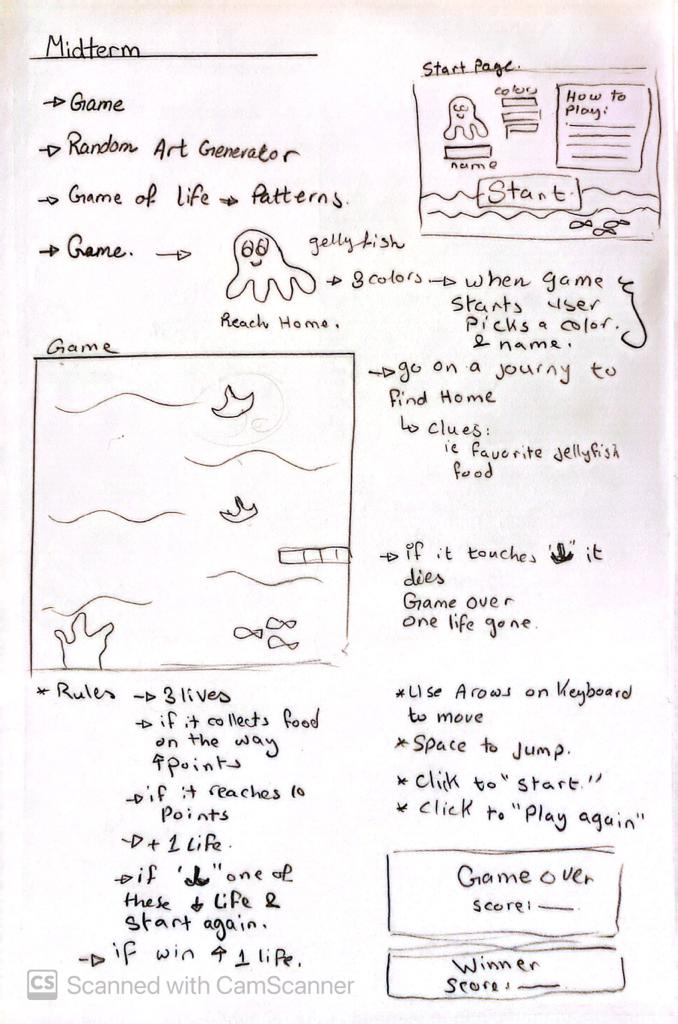
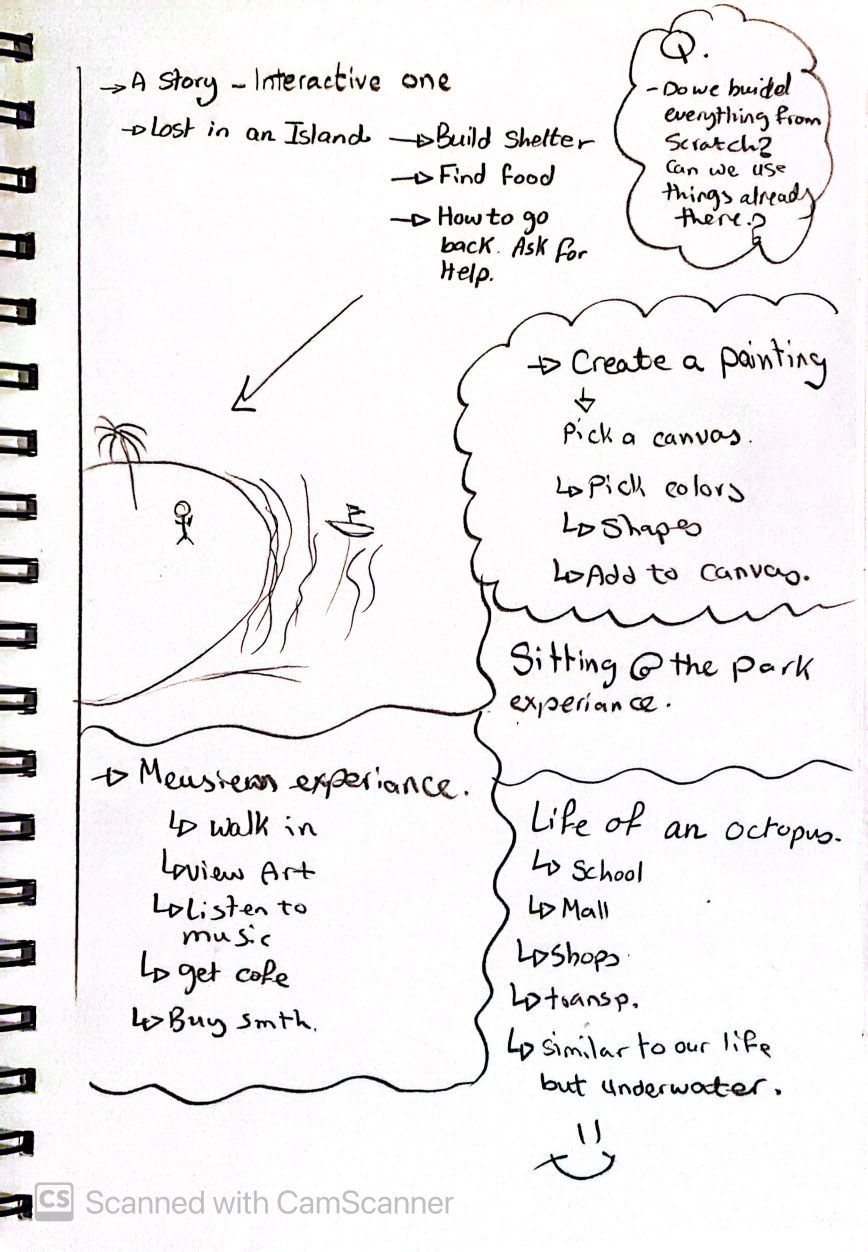
For my midterm, I envisioned creating an immersive underwater experience, inspired by my childhood favorite movie “Finding Nemo.” The whole idea is to bring human interaction to the fish world. As a result, I wanted to create a street feel life but under the sea. There fish can go shopping and view artworks in a museum.

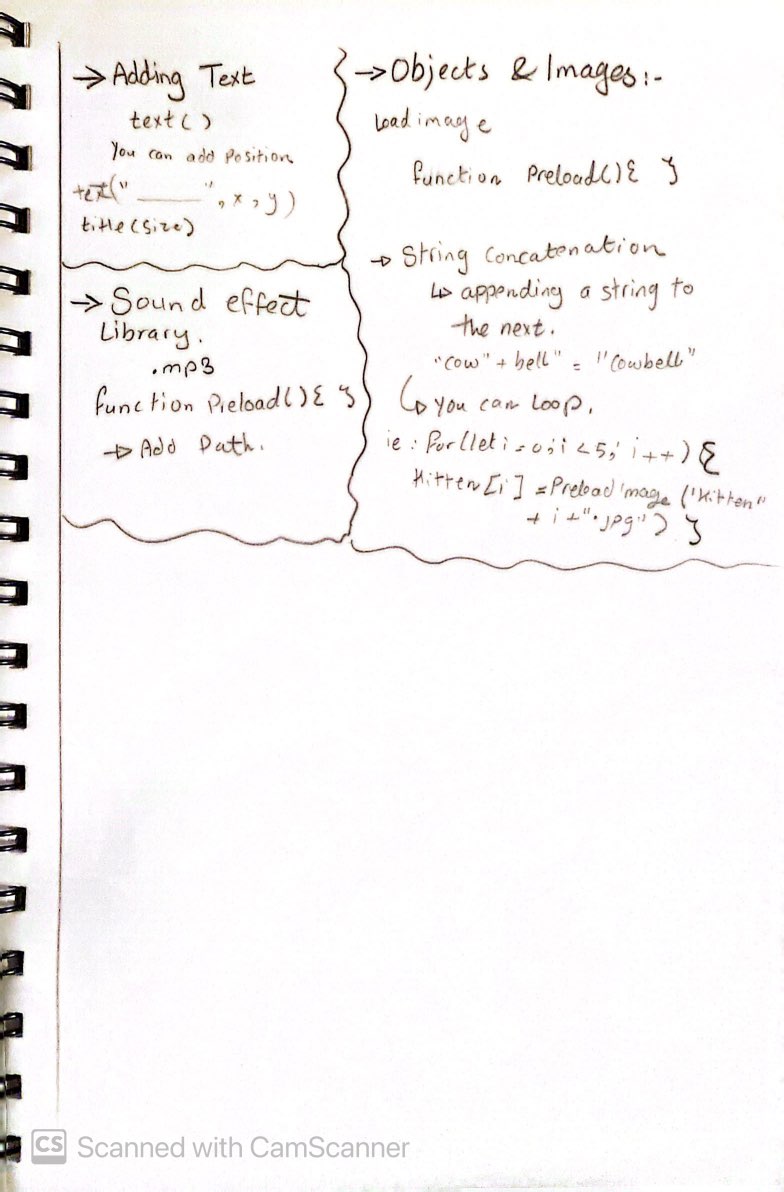
I created the whole atmosphere from scratch. I combined vector-based images for the background and other objects using Illustrator. I saved the files as PNG and then added them to P5JS.

Highlight:

The code was the most challenging part mainly for creating layers and buttons to click on. I started the process of implementation by trying to figure out all the variables I needed for each part. Then I loaded all the images and audio I wanted to use for the project. After that, I began to find the logic for moving from one scene to the next. I created a class called experience manager where I give instructions on what to display in the layers when a specific button is clicked. This class is a boolean. As a result, when a specific variable is set to be true it will be visible on the screen: the sound, the images, and the buttons.

// class to manage which slide to display.
class ExperienceManager {
  constructor() {
    this.onHome = true;
    this.onStreet = false;
    this.onMall = false;
    this.onMuseum = false;
  }
  display() {
    if (this.onHome) {
      image(HomeImg, 0, 0, 500, 500);
      SoundWaves.play();
      SoundMall.stop();
      SoundMuseum.stop();
      fishObj = new ClickedObj(fish, 215, 320, 90, 90);
      // Call the textGraphics function
      Title("Life Under the Sea", width / 2, 90, 30);
      // Call the instruction box function
      drawInstructionBox(110, 130, 280, 180, 23);
      this.onStreet = false;
      this.onMall = false;
      this.onMuseum = false;
    } else if (this.onStreet) {
      SoundWaves.play();
      SoundMall.stop();
      SoundMuseum.stop();
      image(seaSt, 0, 0, 500, 500);
      arrowStObj = new ClickedObj(arrow, 10, 20, 25, 25);
      mallObj = new ClickedObj(malltrn, 25, 320, 150, 150);
      museumObj = new ClickedObj(museumtrn, 38, 190, 110, 110);
      this.onHome = false;
      this.onMall = false;
      this.onMuseum = false;
    } else if (this.onMall) {
      //     hide clicks
      SoundMall.play();
      SoundMuseum.stop();
      SoundWaves.stop();
      fishObj.x = -100;
      museumObj.x = -100;
      // bags on click display
      image(mall, 0, 0, 500, 500);
      arrowMallObj = new ClickedObj(arrow, 10, 20, 25, 25);

      this.onStreet = false;
      this.onHome = false;
      this.onMuseum = false;
    } else if (this.onMuseum) {
      image(museum, 0, 0, 500, 500);
      SoundWaves.stop();
      SoundMall.stop();
      SoundMuseum.play();
      arrowMuseumObj = new ClickedObj(arrow, 10, 20, 25, 25);
      this.onHome = false;
      this.onMall = false;
      this.onStreet = false;
    }
  }
}

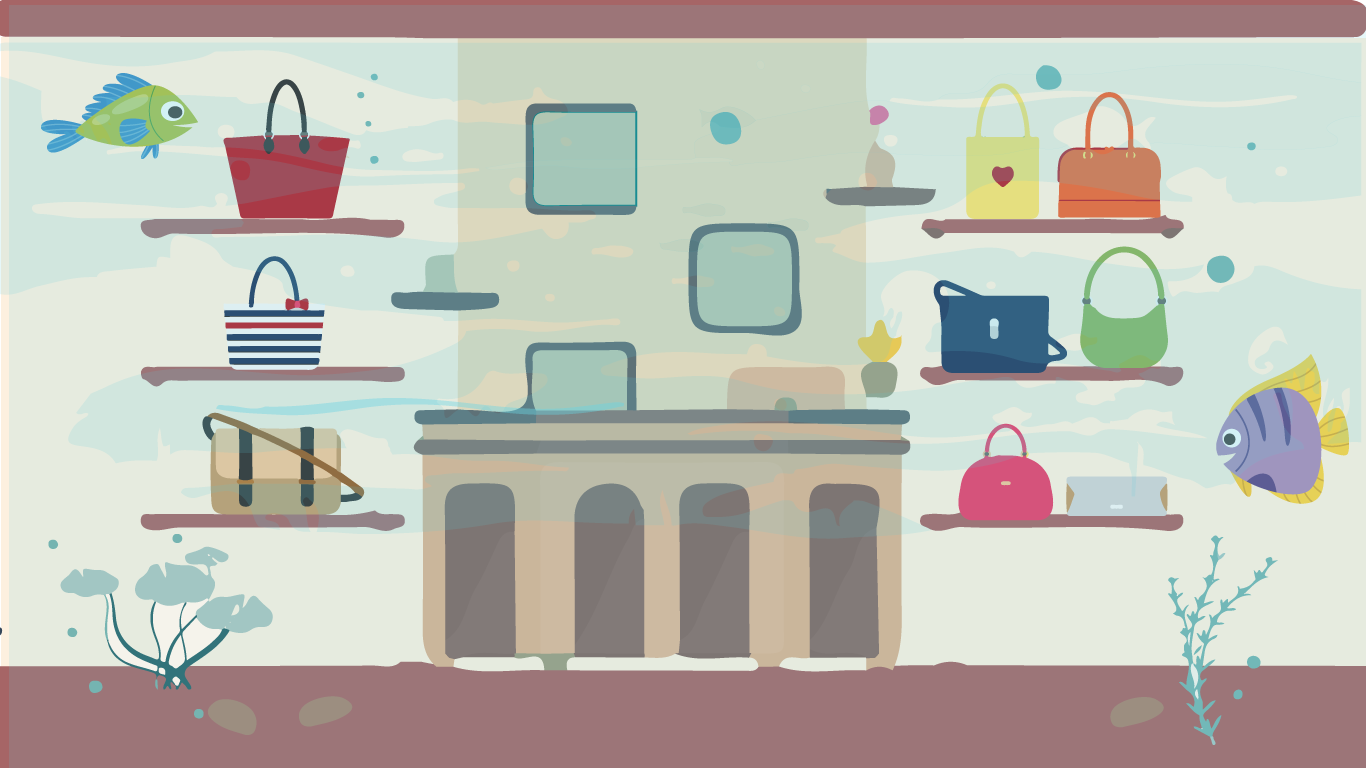
I also created a class for clickable objects like the fish, and arrows that go to the previous layer, the mall, the museum, the bags, and artworks. This class has a lot of conditionals in it. For some, I made clickable images but for the bags and artwork, I felt it’s better to have curser values that refer to a specific bag of artwork and then display an image for that. Then I created a function for the home screen instructions and passed the text through an array of strings. And added a rectangle behind it. Finally, I added the title of the interaction set a color, and a font in the title function.

// this class helps because it removes alot of hard coding so when I change the coordinates of an inage the program will recognise and so i dont need to change it everywhere.
class ClickedObj {
  constructor(imgFileName, x, y, imgWidth, imgHeight) {
    this.imgFileName = imgFileName;
    this.x = x;
    this.y = y;
    this.imgWidth = imgWidth;
    this.imgHeight = imgHeight;
    this.drawObjct();
  }
  drawObjct() {
    if (this.imgFileName) {
      image(this.imgFileName, this.x, this.y, this.imgWidth, this.imgHeight);
      // print("image draw sucessfull");
    }
  }
  isSelected() {
    if (
      mouseX > this.x &&
      mouseX < this.x + this.imgWidth &&
      mouseY > this.y &&
      mouseY < this.y + this.imgHeight
    ) {
      return true;
    } else return false;
  }
}

// to go to the next layer of the street so all clickable objects are here.
function mouseClicked() {
  //  to go  back to the home layer and instructions and click other objects like the fish etc.
  if (expMgr.onHome) {
    if (fishObj.isSelected()) {
      // print("fish 1 is clicked");
      expMgr.onHome = false;
      expMgr.onStreet = true;
      expMgr.onMall = false;
      expMgr.onMuseum = false;
      expMgr.display();
      //print("done")
    }
  } else if (expMgr.onStreet) {
    if (mallObj.isSelected()) {
      // print("mall is clicked");
      expMgr.onHome = false;
      expMgr.onStreet = false;
      expMgr.onMall = true;
      expMgr.onMuseum = false;
      expMgr.display();
    } else if (museumObj.isSelected()) {
      // print("museum is clicked");
      expMgr.onHome = false;
      expMgr.onStreet = false;
      expMgr.onMall = false;
      expMgr.onMuseum = true;
      expMgr.display();
    } else if (arrowStObj.isSelected()) {
      // print("arrow is clicked");
      expMgr.onHome = true;
      expMgr.onStreet = false;
      expMgr.onMall = false;
      expMgr.onMuseum = false;
      expMgr.display();
    }
  } else if (expMgr.onMall) {
    if (arrowMallObj.isSelected()) {
      // print("arrow is clicked");
      expMgr.onHome = false;
      expMgr.onStreet = true;
      expMgr.onMall = false;
      expMgr.onMuseum = false;
      expMgr.display();
    } else if (mouseX >= 83 && mouseX <= 124 && mouseY >= 90 && mouseY <= 135) {
      image(rdBag, width / 4, height / 4, 210, 210);
    } else if (
      mouseX >= 83 &&
      mouseX <= 120 &&
      mouseY >= 200 &&
      mouseY <= 236
    ) {
      image(LneBag, width / 4, height / 4, 210, 210);
    } else if (
      mouseX >= 83 &&
      mouseX <= 121 &&
      mouseY >= 220 &&
      mouseY <= 331
    ) {
      image(BrwnBag, width / 4, height / 4, 210, 210);
    } else if (
      mouseX >= 353 &&
      mouseX <= 379 &&
      mouseY >= 91 &&
      mouseY <= 140
    ) {
      image(YlwBag, width / 4, height / 4, 210, 210);
    } else if (
      mouseX >= 391 &&
      mouseX <= 422 &&
      mouseY >= 96 &&
      mouseY <= 141
    ) {
      image(OrngBag, width / 4, height / 4, 210, 210);
    } else if (
      mouseX >= 345 &&
      mouseX <= 381 &&
      mouseY >= 192 &&
      mouseY <= 238
    ) {
      image(bluBag, width / 4, height / 4, 210, 210);
    } else if (
      mouseX >= 397 &&
      mouseX <= 423 &&
      mouseY >= 202 &&
      mouseY <= 235
    ) {
      image(GrnBg, width / 4, height / 4, 210, 210);
    } else if (
      mouseX >= 355 &&
      mouseX <= 381 &&
      mouseY >= 297 &&
      mouseY <= 336
    ) {
      image(pnkBag, width / 4, height / 4, 210, 210);
    } else if (
      mouseX >= 391 &&
      mouseX <= 427 &&
      mouseY >= 312 &&
      mouseY <= 332
    ) {
      image(whtBag, width / 4, height / 4, 210, 210);
    }
  } else if (expMgr.onMuseum) {
    if (arrowMuseumObj.isSelected()) {
      // print("arrow is clicked");
      expMgr.onHome = false;
      expMgr.onStreet = true;
      expMgr.onMall = false;
      expMgr.onMuseum = false;
      expMgr.display();
    } else if (
      mouseX >= 126 &&
      mouseX <= 177 &&
      mouseY >= 96 &&
      mouseY <= 199
    ) {
      image(art1, width / 3, height / 3, 250, 300);
    } else if (
      mouseX >= 212 &&
      mouseX <= 293 &&
      mouseY >= 102 &&
      mouseY <= 179
    ) {
      image(art3, width / 3, height / 3, 250, 300);
    } else if (
      mouseX >= 330 &&
      mouseX <= 384 &&
      mouseY >= 97 &&
      mouseY <= 191
    ) {
      image(art2, width / 3, height / 3, 250, 300);
    }
  }
}

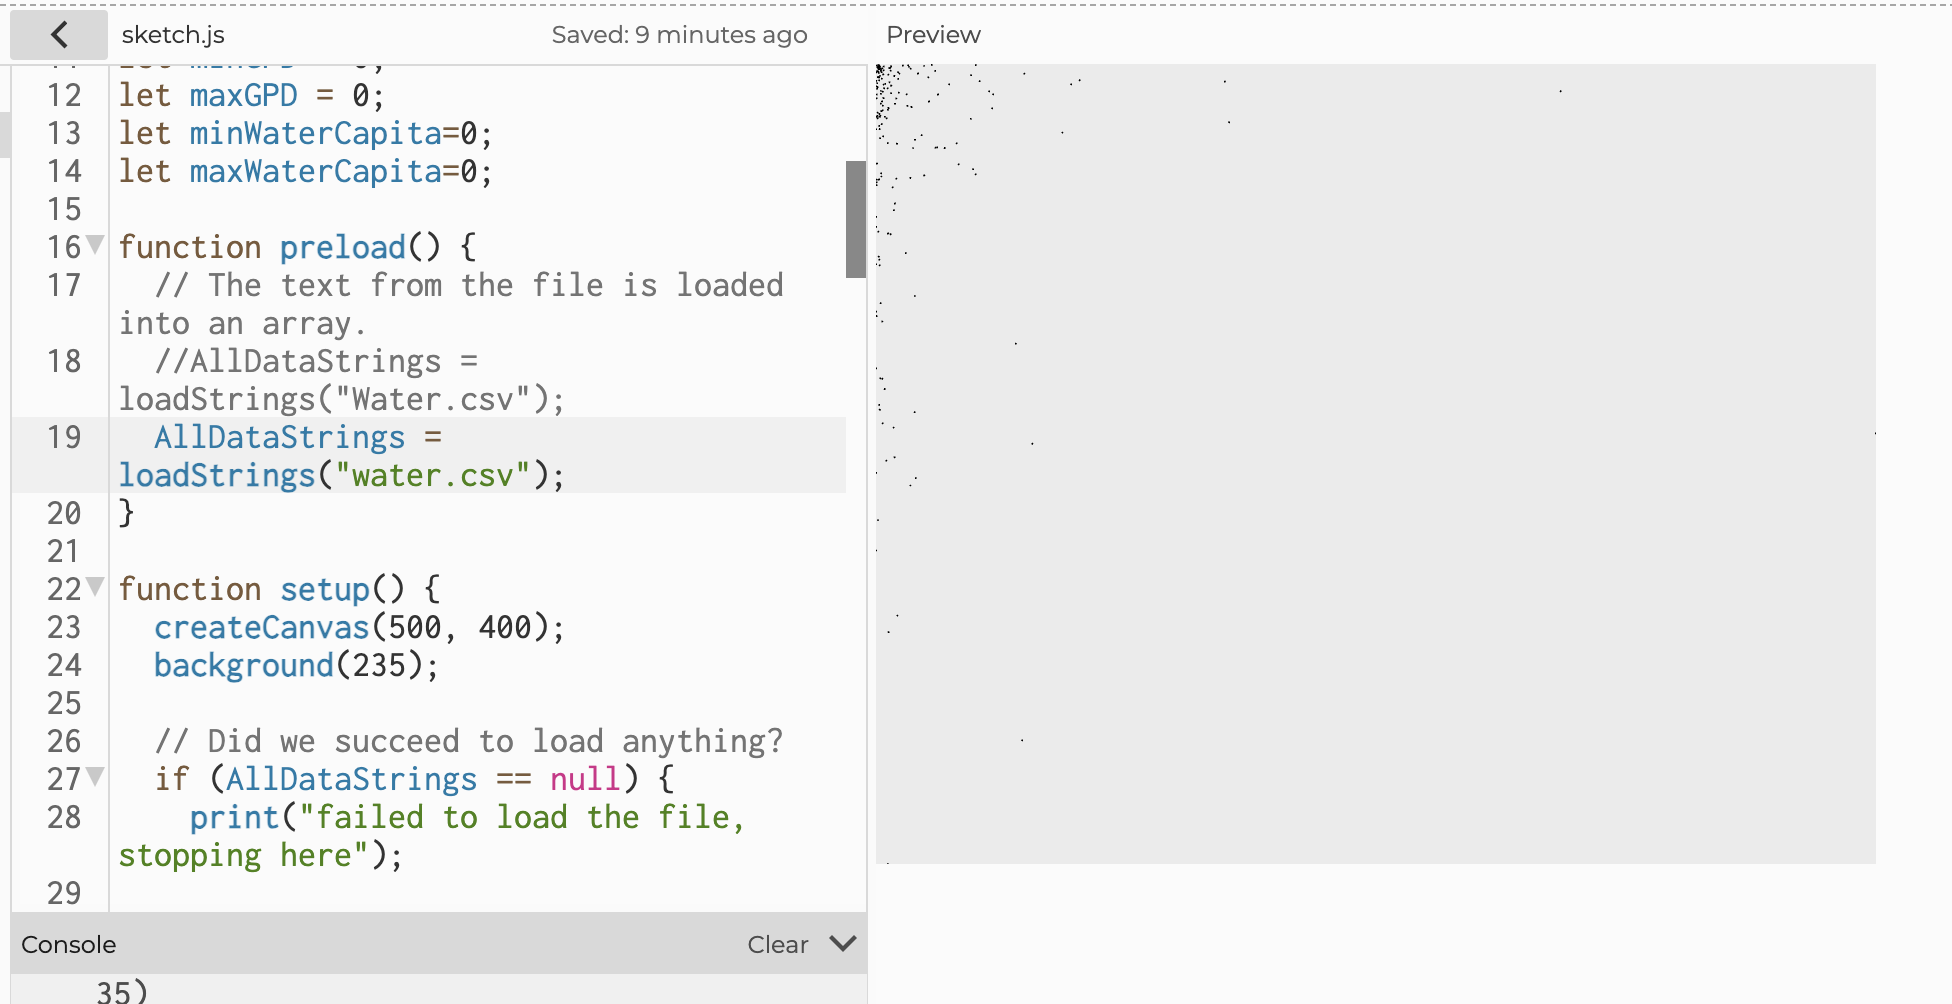
To be honest the hardest part was the clickable objects class because at the beginning the objects would layer on one another and would still be clickable even if they were not visible. However, I fixed it by passing the clicks to the specific experience they fit in. I also faced a lot of bugs because P5js is case-sensitive, and it would take me hours to realize that but now I know, and it is the first thing I look for if I have a bug.


Reflection and ideas for future work or improvements:

I am satisfied with the overall result of the project. For the future, I would add more places to visit and add some motion to the website. Maybe a fish moving, some submarine. I would also want to add a music icon where users can pick a song and pause it if they want. I also want the home page to be more interactive, maybe create graphics with text or water bubbles that move around the canvas.

Resources:

https://itch.io/games/made-with-p5js

https://www.youtube.com/watch?v=MzD7W6Vt6LA

https://www.youtube.com/results?search_query=p5js+object+orianted+

https://p5js.org/reference/#/p5/REMOVE

https://p5js.org/examples/sound-load-and-play-sound.html

https://www.rapidtables.com/web/color/blue-color.html

https://p5js.org/examples/interaction-snake-game.html

https://stackoverflow.com/questions/58477636/transitioning-from-one-scene-to-the-next-with-p5-js


Midterm Progress – Life Under the Sea


For the midterm, I initially had many ideas some were games, and others were experiences, However, the overarching concept that resonated with me the most was the idea of exploring the underwater world, as it has always been a significant source of inspiration for me. I envisioned creating an immersive underwater experience, inspired by my childhood favorite movie “Finding Nemo.”

The whole idea is to bring human experience to the fish world. As a result, I wanted to create a street feel life but under the sea. There fish can go shopping and view artworks in a museum.

I initially was trying to find a picture of already made imagined under the sea life, but I could not, so I had to create my own. Using vector-based images I created different layers of sea life and buildings to seem they are under the ocean using Adobe Illustrator.

More details on the midterm

I first created all the main layers I wanted. Then I tried to figure out the best way to implement it. I was initially worried about how I would figure the logic out but after I while I organized it so I had different functions and classes doing different things.

IMG_8096

Loading the images and sound was challenging because the P5js is case-sensitive. I honestly was struggling through the whole process of coding but I wanted it to work. The code has some bugs but the feel is there. I still have to figure out why the sound in P5js sounds different from when I play it on my computer, and how will the user view the artwork and the bags in the mall. There is still a lot of layers to be added and improved to make it even more interactive.

Assignment 4 – Minimalist Water

Concept: In this assignment, I wanted to do minimalist artwork inspired by my visit to Louver Abu Dhabi. I looked into many ideas before I settled into my final one. I researched L-systems in the p5js examples where one can create automated drawings based on the growth of biological structures, but I did not know what data I could use to implement it. Eventually, I decided to look into the Water Security Dashboard because it is an important issue nowadays. I got some data from the World Bank that was published in 2021. My goal was to transform this data into a simplistic art piece, leading me to the realm of minimalist art.

This type of art says “the most with the least “ (Bob Newhart).

Highlight:

This is how the data is initially. looked like

 My journey began with the task of making the code functional, which needed a lot of time, focus, and dedication. I got a lot of errors at first and I had to deal with each one separately. First, the code was not reading the file properly because some names within the files had commas within them. I decided to remove the commas that were not necessary in the file. It is not the best solution though especially if the csv file is big. After that, I had to figure out how to get the minimum and maximum values of GPD and Water per Capita which took some time. Finally, I had to think of the aesthetics of it all. First, I added the results into a circle and mapped them into random positions within the circle constraints but that was not a good representation of the data because of the randomness. Consequently, I switched to a square format, mapping the data relative to the square’s dimensions while incorporating a central circle.

Random mapping

Throughout the experimentation process, I generated interesting results and different shapes and forms. Finally, I settled on the result below. Although I explored creative coding, gradients, and glitch shaders through video tutorials, these elements, while captivating, did not align with the minimalist vision I had in mind.

Reflection and Future Improvements:

For future improvements, I would want to think of other ways to use data in art without losing the representation of the data. I want to start working with 3D and maybe do something with the L-systems and Glitch Shader. I also want to start thinking of the interactivity of what I do and in which ways I want users to interact and feel when incorporating these interactive concepts.

 Resources: 

https://www.youtube.com/watch?v=r5YkU5Xu4_E

https://www.youtube.com/watch?v=rTqvf0BkTNE&list=PLyRZnpOSgMj3K8AV2I6UldnvTj6d_Zrf0

https://wbwaterdata.org/dataset/water-security-dashboard

Week 5 Reading

The reading sounded technical to me. It had a lot of insightful new information about interactive designs using computer vision.  The author talked about Low-level computer vision algorithms and three techniques: frame differencing, background subtraction, and brightness thresholding, detecting motion using frame differencing, and differentiating pixels. ­­Detection through brightness thresholding makes desired objects darker or lighter than their surroundings using illumination. Object tracking is related to finding injects based on the brightness of pixels. Basic interaction locating body pixels and the information can be used in graphical responses in interactive systems. He also highlights problems that come with these algorithms for instance, if people are too close or if the physical circumstances are not good enough. Using IR (infrared) helps in these situations. He also talks about how the use of a “telecentric” lens can significantly improve the performance of certain kinds of shape-based or size-based object recognition algorithms.

I liked the quote: “But even the most sophisticated algorithms and highest-quality hardware cannot help us find meaning where there is none or track an object which cannot be described in code” mainly because it emphasizes the limited capabilities of computers and highlights that without human beings and their logic the computer can do nothing because it only understands zeros and ones. I think computer vision algorithm in interactive and computer-based artworks adds more to the user’s experience, and from the reading, it is not as hard or overwhelming as it sounds. I am not a technical person, but I think that the reading provides a good overview of the potential of computer vision in interactive art. It made me think of codes or the digital world as tools with which Art can be empowered and improved and not just something that is solely technical or logical.


Week 4 – Reading: The Design of Everything


The reading offered a general idea of good design and what components it should have. The author talked about the demands new technology expects from design, why engineers fail to make the design of things more affordable and accessible, the importance of human-centered design, fundamental principles of designs, the image users have from reading and searching about a product versus the designers and the paradox of technology. I honestly could not agree more with the author’s approach to good design. This reading reminded me of some books I read about design like “The Universal Principles of Design”, where the author simply explains different design principles. Attached below is his definition of affordance.

I agree that signifiers are more important than affordance, but I also believe that a well-designed object does not need a lot of signifiers. If its affordance is good enough. I also think that a good understanding of the psychology of humans helps in making good designs. One important concept I believe when understood would affect a design. These are abidance to authority by Milgram, confirmative bias by Asch, and situation of power by Zimbardo. Abidance to authority was briefly based on psychological experiments that discovered that humans would obey instructions even if these instructions harm other people because they ‘had orders to do them’. Asch in the Confirmative bias experiment discovered that humans by their mere nature tend to follow the group even if the group is wrong just to fit in. Finally, Zimbardo, in his Stanford prison experiment, puts forth that if someone is given power, they gradually become bad. He argues that people will conform to their assigned roles and take advantage of stereotypes and power.


Week 3 – Inspired

Concept:

As I was looking for inspiration for my third assignment, I came across a YouTube page named Barney Codes in particular his video on Parlin Noise. He did a simple function where particles move across the canvas to create shapes. However, for this assignment, I wanted to use arrays and classes to do a similar version of what he was doing. It was so hard to decode the logic behind his project and turn it into a class format. A lot of trial and error took form, and I ended up doing multiple p5js codes to get what I wanted. Also, his project reminded me of Starry Nights by Vincent Van Gogh, one of my favorite paintings. As a result, for this assignment, I wanted to play with Barney’s code but also add a sense of darkness and beauty to it.

Highlight on Code:

 I started with some videos about functions, arrays, classes, and Perlin noise. As I was searching and looking I came across a simple function on the Parlin noise graph that I found online. I manipulated the code a little so that I see the different results. I also played with the colors and aesthetics of the image. It was interesting and I realized that every number you add, and every sign makes the image different. However, I did not use this for the final project I wanted. You can see below the code.

let x = 0;
let rectWidth = 1;

function setup() {
    createCanvas(500, 400);
    background(0);
}

function draw() {
    noise1D();
}

function noise1D() {
    while (x < width/rectWidth) {
        // Add randomness to x and freq for shaky movement
        let xOffset = random(-1, 2);
        let freqOffset = random(0.1, 0.09);

        let n = noise((x + xOffset) * (0.001 + freqOffset));
        n = map(n*4, 0, random(10), width/3, 0);
      
        stroke(random(150,220),random(150,220),random(150,220));
      
        rect((x - xOffset) * rectWidth, height = n, rectWidth/6,n);
        x++;
      
    }
}

Then I decided to look at the exercise of the bouncing ball in class. I knew it had a different logic from what I had in mind, but I wanted to start slow. First, instead of a circle, I drew a particle. I gave x and y random values from 0 to 500, my canvas dimensions. Then I started changing the numbers within the code to see what each represents. Then I added color to the project and used the sin and cos because I was hoping they would give some curve to the image, but they did not. I also did not want to use this as my final project for the assignment because I wanted to use Perlin noise.  However, doing this gave me a sense of what can be done to get the image I want. I know that a point is like a pixel so it’s technically zero-dimensional, so I wondered what the variables represent in this code and what are they doing to the point. I added the explanation within the code below, I hope it’s correct.

I stopped for a little to see what colors I wanted my generative art to have. The numbers I chose were a range of what I wanted the most dominant colors to be and whatnot. I found RGB color code tables helpful in this because I picked the colors from there. Then I tried to figure the logic out and write the code.

Reflection:

It was an assignment of exploration. I realized that I love using randoms in my codes because they add to the piece something unexpected. It was a challenge for me to figure out how to create the class, but I did it. One thing that I did not figure out is how to keep the particles within the boundaries of the canvas while the mouse is pressed because they tend to leave. However, I can say it was a choice. There are a lot of possibilities in p5js that I still want to discover in the upcoming assignments. One important thing that I always tell myself is that when you read hard codes or watch hard examples it is okay that you do not understand them because with time you will, so be patient.

A link of me exploring the concept: https://youtu.be/BQlmNmS3-Os

Resources:

https://editor.p5js.org/shn202/sketches/w04RNd0li

https://www.youtube.com/watch?v=sZBfLgfsvSk

https://www.rapidtables.com/web/color/RGB_Color.html

https://happycoding.io/tutorials/p5js/creating-classes


‘Week 3 – Reading Reflection’


I find Chris Crawford’s argument regarding the definition of interactivity to be somewhat rational. He argues that there are many things that people consider interactive, but they are not. I enjoyed the difference he made between interactivity and responding to something because it is a crucial difference. I do not fully agree that computers are not interactive. If we think of his definition of interactivity and its three aspects: listening, thinking, and speaking, individuals can engage in these aspects with computers, often simultaneously. Crawford’s distinction between the user interface and interactivity design was interesting, for interactivity design has a thinking aspect to it, and it considers form and function.


I tend to view interactivity in degrees of a spectrum. In that spectrum, some things are highly interactive, on the other they are not, and in between are different degrees. Not everything requires full interactivity some things like reading, and painting in a sense require a degree of interactivity. From Crawford’s argument, I got the sense that he was talking about things whose mere purpose is interactivity, which means they are at one end of the spectrum and cannot be between (i.e. interactive design). I honestly thought of PC  and VR games where people do the 3 components of his definition.

Then I realized that he was talking about interactivity in the digital world, especially when he made the distinction between user interface design and interactive design. If we think of interactive design, one must make it engage because that is the mere purpose of it. As a result, the three components of his definition must apply.

I agree that interactivity requires a back-and-forth interaction and that if one of the conditions is broken the experience won’t be as memorable; however, I think it still has some form of interactivity. This leads me to question whether interactivity means the experience should be positive. In the reading, I sensed this was the case, especially when he compared interactivity with conversations we won’t forget. In contrast, maybe the whole purpose of a project is for it to not be good.

I think the idea of interactivity is way more complex than what Crawford argues and encompasses a wider scope and purposes.


Assignment 2 _Beauty in Randomness

Concept:

Creating interactive and artistic pieces of digital art seemed interesting to me. I cannot even imagine the endless possibilities when art and technology are mixed. In this assignment, I wanted to explore the P5JS tools and functions. I did not have a specific idea of what I wanted the outcome to be, instead, I sought to embrace the concept of randomness and let it guide my exploration. It was a challenge for me to start coding without having a specific idea, but when I started the code, I began to visualize and unwind the concept of this assignment.


I found inspiration in the work of the artist Piet Mondrian, who is a pioneer in modern art. However, I wanted to create an interactive element to it. I wanted to recreate the feel I get when I look at his art, in the sense that it can be interpreted and connected within a more individualized sense.

Highlight:

Before settling on one final idea, I tried many others one of which is to create random shapes using the startShape and endShape functions. They were fun and all but I did not know how I could embed for loops and conditionals into the code. As a result, I tried another approach, instead of focusing on the shapes I focused on the loops and conditionals and then added the shapes that fit best.

I began with colors. I declared some variables and gave them some random values. Then I decided to set a size for the rectangles. I also created my function for the line on the left. For it, I had to declare some variables too for its speed, direction, and position. What was challenging was drawing the colorful rectangles because I had to experiment a lot and use the push and poll, rotate, keyTyoed, and translate functions. Of course, I learned about those by watching a lot of videos and reading the reference page. I used nested loops to create the rectangles with random colors. I wanted the rectangles to appear when the mouse is pressed so I also created a conditional.

for (x = width; x > -size * 4; x = -x - size) {
    for (
      y = height;
      y > -size * 4;
      y = y - size
    ) //   when I add the + the code was cracking so I decided to add the - sign instead and it worked! Here y starts at the height of the canvas and with each iter,ation it decreases the size. the same happens to tvaluevlaue (width)
    {
      fill(random(R, R + 190), random(G, G + 190), random(B, B + 190));
      // the lines sets the colors for the rectangles in random values up to 190
      push();
      //       the push and pull temporarily changing the effecting the rest of the piece.

      if (mouseIsPressed) {
        translate(x, y);
        rotate(random(0, 45));
        rect(0, 0, size * random(1, 4), size * random(1, 4));
      }
      //       here the x and y values are randomly original their origional position
      pop();


The stars were a last touch to the image, and I liked the texture they gave. I also used this part of the code in my previous assignment because it is so pretty. This time I made it move.

Reflection and ideas for future work or improvements:

Getting the idea was a little challenging. It took me some time to figure out the logic for the x and y values in the loops. As a beginner in coding, I think I was able to learn a lot of things with this assignment, especially with the previous failed attempts. I hope that for future assignments I will have improved my coding abilities to do something better than this.

Resources:

https://www.youtube.com/watch?v=ig0q6vfpD38


Week 2 _ “Eyeo2012 – Casey Reas”.

When Science and Art become one, unexpected things happen. This thought came into my mind while watching Eyeo2012 – Casey Reas”. At first, I was confused, as the speaker was talking in a metaphorical tone. However, what followed was a journey of great exploration, where the realms of science and art intersected to yield breathtaking results. Casey Reas revealed a world where technology and creativity came together, leading to interesting concepts and expressions.

Through the lecture, a couple of concepts inspired me. I hope that I will explore even further during this course. Some of these were the phenomena of emergence, the conceptional vehicles project, emotions in Art, and the use of randomness to create art pieces.

The phenomena of emergence:

In this part of the lecture, he touches upon the idea that in coding behavior and forms become elements that create the fundamentals of the images he creates. I understood that these generative properties took a lot of precise geometry and calculations to take form. It was interesting how ideas in physics, biology, chemistry, or day-to-day interactions could be transformed into coding logic and then into generative art. In this part, I realized that understanding the underlying fundamentals is key to boosting creativity and decision-making.


The conceptional vehicles project:

 This part was focused on the concept of hypothetical vehicles based on the animal nervous system. What I like the most about this part is how it gradually transforms into Art. I have realized that when we only see the final product of a project we do not understand or appreciate the underlying process or story behind it. If I only saw the final piece, I would have never thought it was based on this specific concept or any concept at all. I would have thought it was a form of expression and that is it. I have realized that often the story behind something along with its representation gives beauty and a stronger connection between the viewer and the piece.

Emotions in Art:

Human connections between one another and between the surroundings are vital characteristics in my opinion. In the lecture, Casey Reas showed some forms of Art that were far from human connection. These pieces were interesting but are not something I would want to explore. I believe that when Art has a humanitarian dimension it is far stronger than when it lacks it.

 The use of randomness to create art pieces:

 In this part of the lecture, Reas showed how some artists like Marcel Duchamp. His idea that through Art you “make your reality” made me think of how filmmakers, performances, and illustrations put individuals into a new place where they can explore a new logic alienated from reality.

Then he explored the idea of random numbers. When he showed the demos, I realized the infinite possibilities of creating different forms of art with the same logic. Here I understood the importance of exploring different things and taking risks because in this part, if one does not try so many ways, one would not realize the possibilities or discover what one wants to present.

Finally, during his lecture, I realized that there are limitless opportunities to bring in my thoughts, logic, and creativity to create Art. In a world where science and art intersect, a lot of unexpected possibilities take form.