Week 9: Creative Switch

For this assignment, I made a water-based switch. Thinking of a switch that does not use your hands is really tricky so I started thinking of conductors that could be easily placed and removed with a part of the human body that isn’t the hands. My mind immediately went to water – or well, technically, spit (essentially using your mouth to connect the circuit with water as a conductor).

Implementation

My circuit is based on the circuit we built in class with a switch whose state controls the action of an LED light. The Arduino code is simple, reading the state of the water switch and illuminating the LED if water is detected.

const int waterSwitchPin = 2;  // water switch digital pin 
const int ledPin = 13;         // LED digital pin 

void setup() {
  pinMode(waterSwitchPin, INPUT); // set water switch pin as input
  pinMode(ledPin, OUTPUT);        // set LED pin as output
  Serial.begin(9600);
}

void loop() {
  int waterSwitchPinState = digitalRead(waterSwitchPin); // read the state of water switch
  Serial.println(waterSwitchPinState);
  if (waterSwitchPinState == HIGH) { // water detected
    digitalWrite(ledPin, HIGH); // turn on LED
  } else { // no water detected
    digitalWrite(ledPin, LOW); // turn off LED
  }
  
}

To make the switch, I place two jumper wires in an empty bottle cap such that they are separated. I initially thought of just spitting water into the cap to create conductivity between the wires and turn the switch state to HIGH. However, Darko (thank you, Darko) rightfully pointed out that a true switch should also be switched off and suggested the use of a straw to lower the level of water in the cap and break the circuit. It was difficult to make sure the straw remained stable without using my hands but I managed to pull it off. I also had to use salt to make sure the water was ionized enough to conduct (thank you, Professor Aaron, for the trick!).


Week 8a: Attractive Things Work Better and Her Code Got Humans on the Moon

I remember when I first pledged my allegiance to the iOS subsystem, denouncing Android once and for all. I recall my uncle, a staunch supporter of Android, berating me for my lack of evidence supporting the superiority of iOS. All I had to say to defend myself was that iOS displays simply looked better. I was 13 at the time and I pondered whether I simply wasn’t tech-savvy enough. 10 years later, I still hold the same opinion and have never considered leaving the iOS cult. Aesthetics are, indeed, an important complement to usability, as Norman says. I am less likely to yell at my iPhone when it lags than I am at an Android. Its seamless design is enticing enough to suppress the negative affect of the anxiety of working through the occasional lags and confusion of working with technology.

This also reminded me of the invention of a GUI in place of the regular terminal. There is no inherent usability or advantage of using a GUI as an interface over the terminal. In fact, I would argue that for certain needs, the terminal may provide faster access to data and processes on the user’s computer in addition to greater control. To be fair, terminal commands do require a bit of learning but they could be easily learned by beginners. I would argue the attractiveness of the GUI makes the experience of interacting with a computer more pleasant, more seamless, and less stressful, potentially contributing to more productivity and, perhaps even, enhanced usability.

GUI Terminal Interface

I, especially, loved the second reading on the story of Margaret Hamilton’s contributions to the Apollo mission to the moon. What was exceptional about the story, in addition to highlighting an important female figure who has made critical contributions to one of the most important human achievements – all while being a mother, but also the meta-process of coding and creating code. To learn that the bare bones of what software is was formulated with the help of a powerful woman is also a great testament to the valuable contributions of women to technology and innovation – an insight to be considered in a time and age where the technology field is male-dominated and could oftentimes be hostile to women.

Week 6: Midterm Project – Save the Butterfly

Concept 

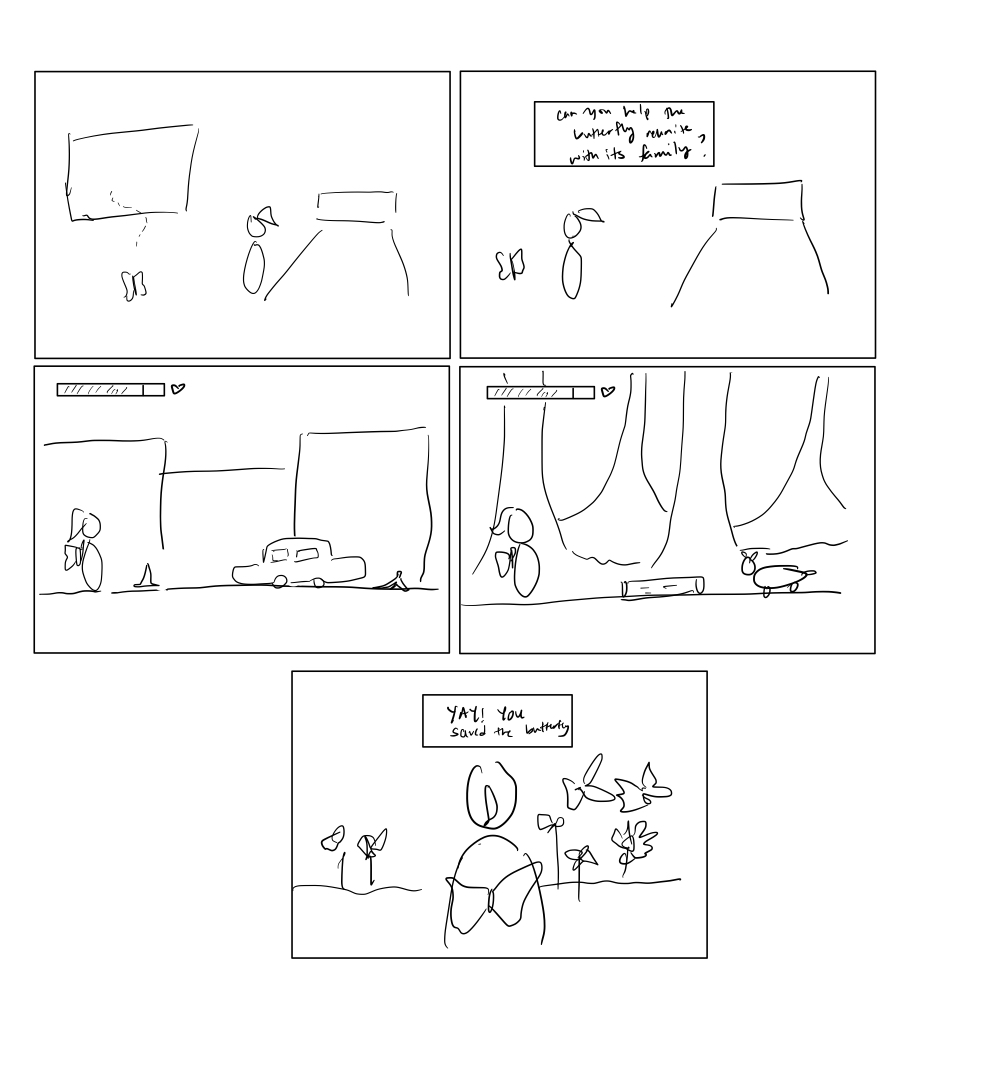
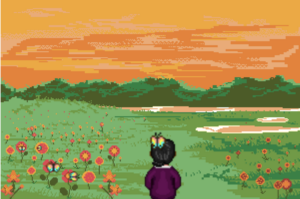
As I shared in last week’s blog post, I wanted my project to be a gamified story. I also wanted to center it around a butterfly, an extension of a theme I have been committed to for the past few weeks. Additionally, the narrative created would convey my own desire to reunite with my family – a goal that I hope to achieve eventually in my lifetime. This could be seen in the final scene unlocked if the player passes the levels successfully. The butterfly returns to her family of four, which is the number of members in my own family. The storyline and flow of the game go like this:

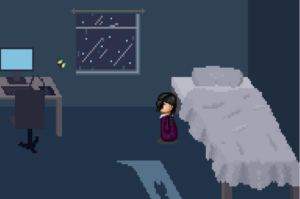
    1. A butterfly finds herself lost in the city on a rainy day. She flutters through the window of the main player’s room.
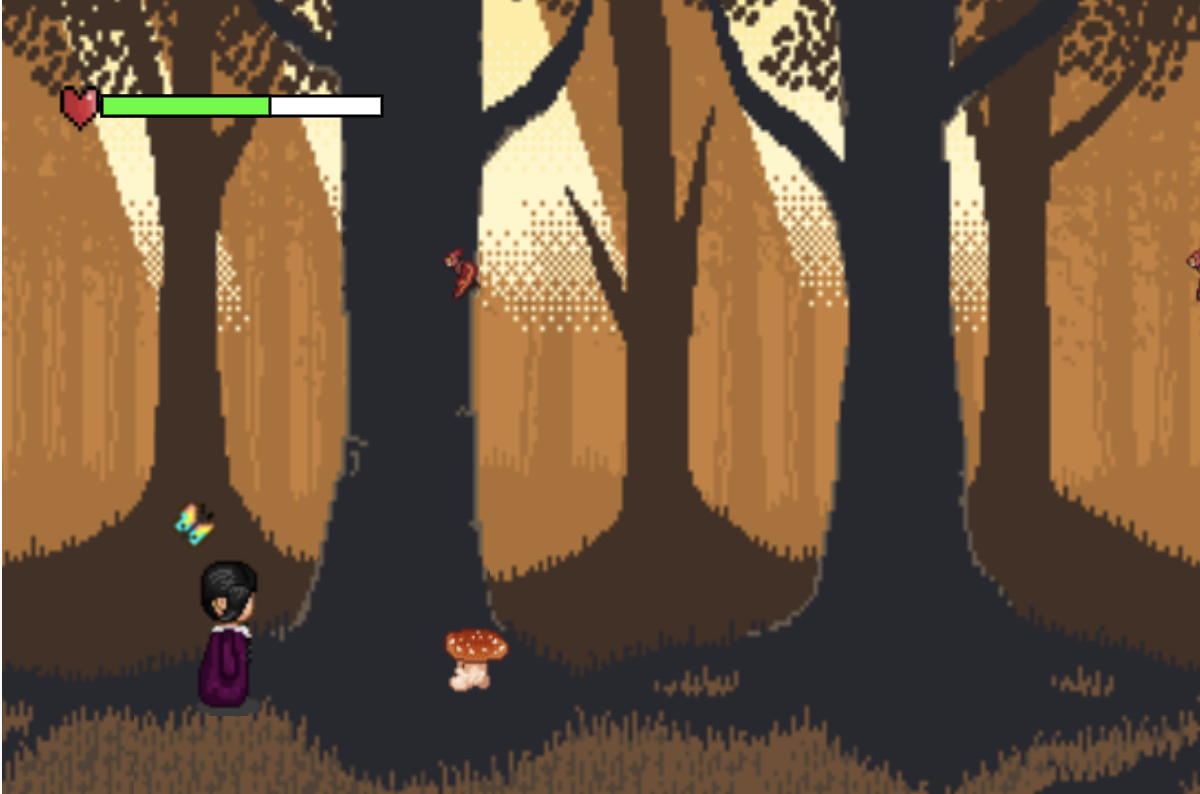
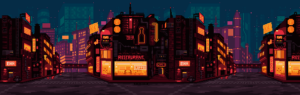
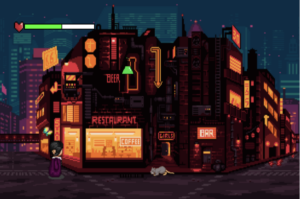
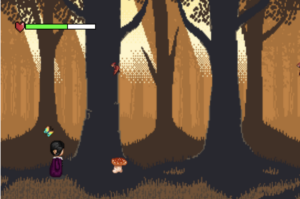
    2. the player is prompted to help the butterfly find her way back to her home and family, going through game levels in the city and forest and avoiding (jumping over) obstacles to preserve their health. Here the player has a chance to replenish their health by collecting potions.
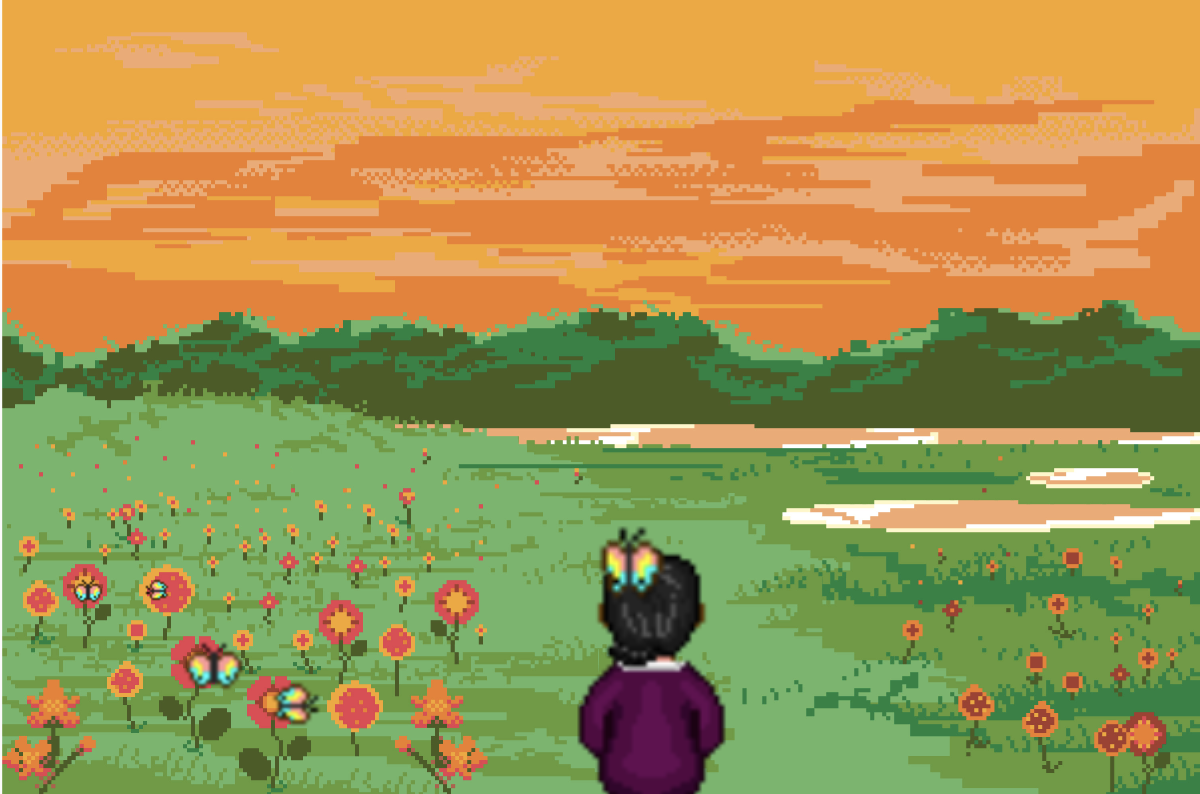
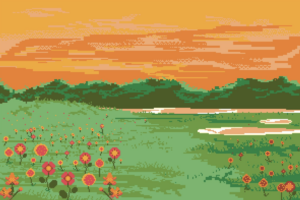
    3. If the player manages to successfully complete the mission, they unlock the final scene, in which the butterfly is finally reunited with her family.
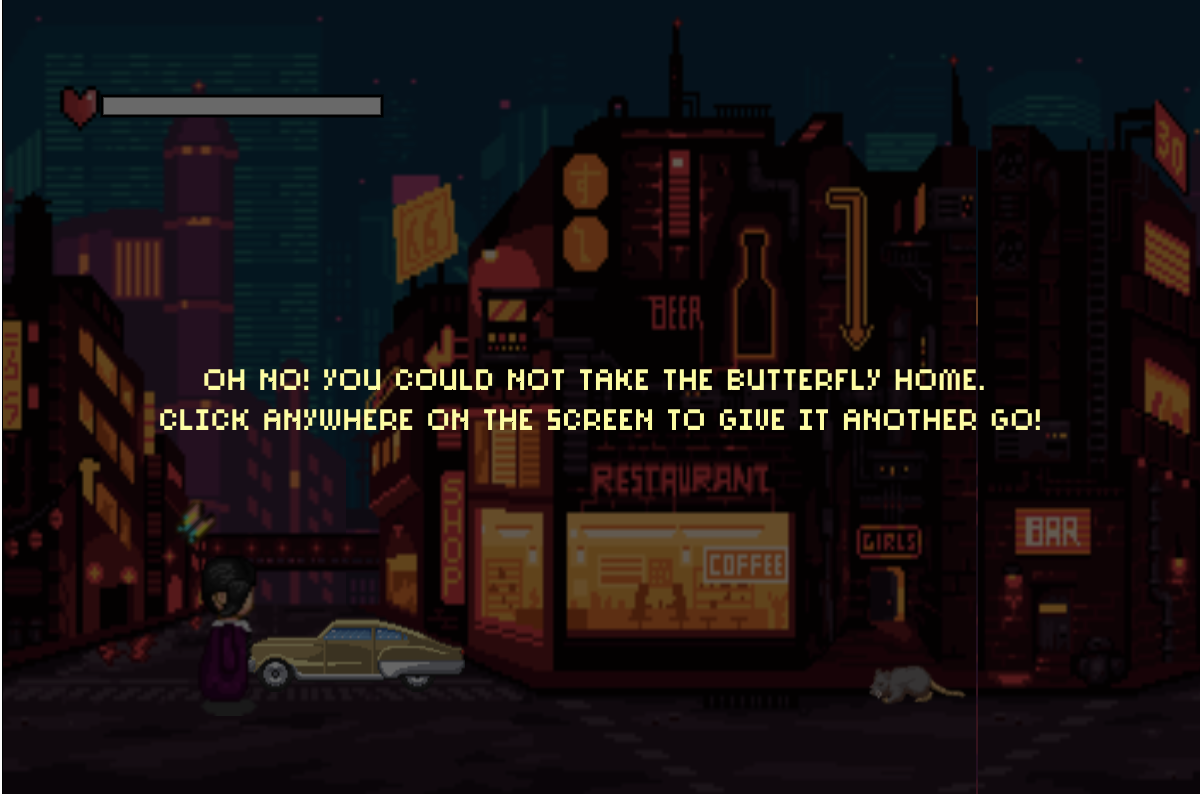
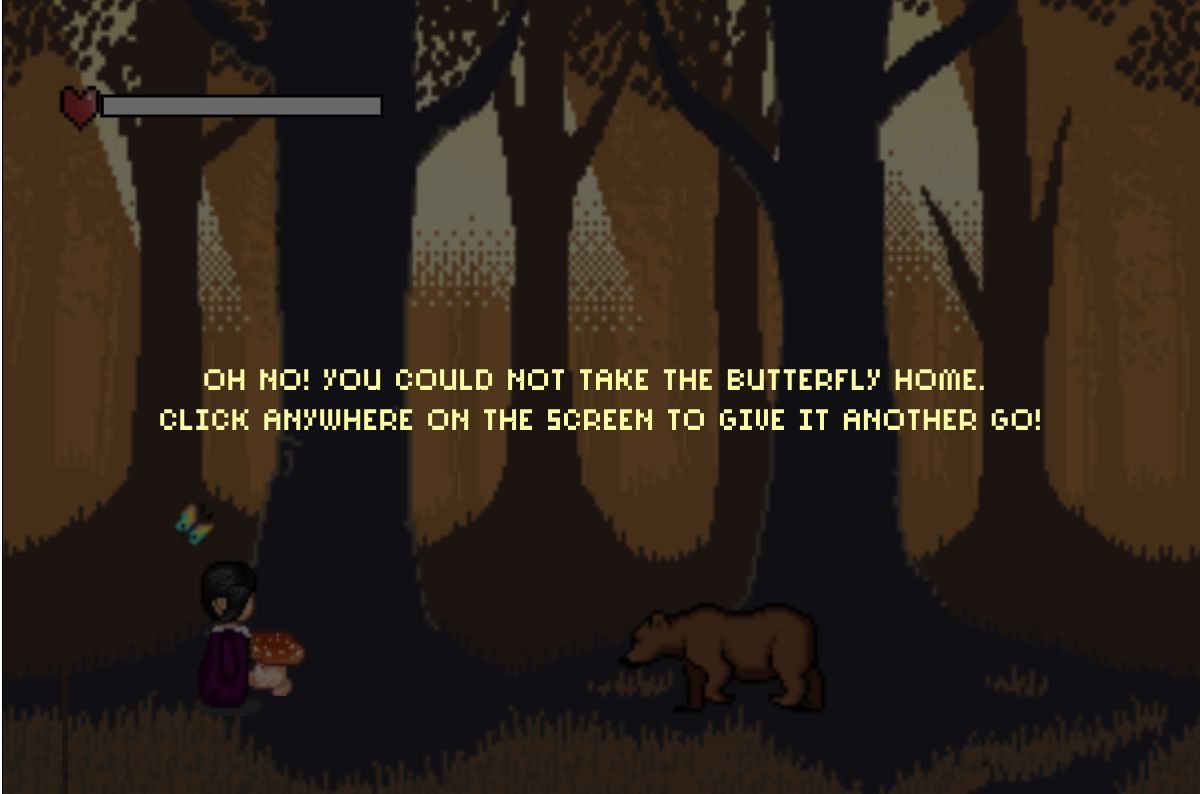
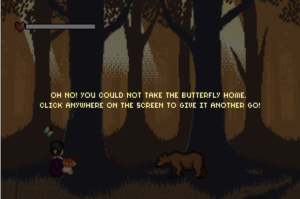
    4. If the player loses, they are prompted to restart the game.

In the making of this, I emphasized the animations for an increased focus on the narrative component over the game one. I spent a lot of time playing with different parameters and finding ways to control time and the movement of sprites in response to changes in their environment. The storyboarding I had done last week greatly aided in visualizing how I wanted the animations to eventually look.

Implementation and Parts I am Most Proud of

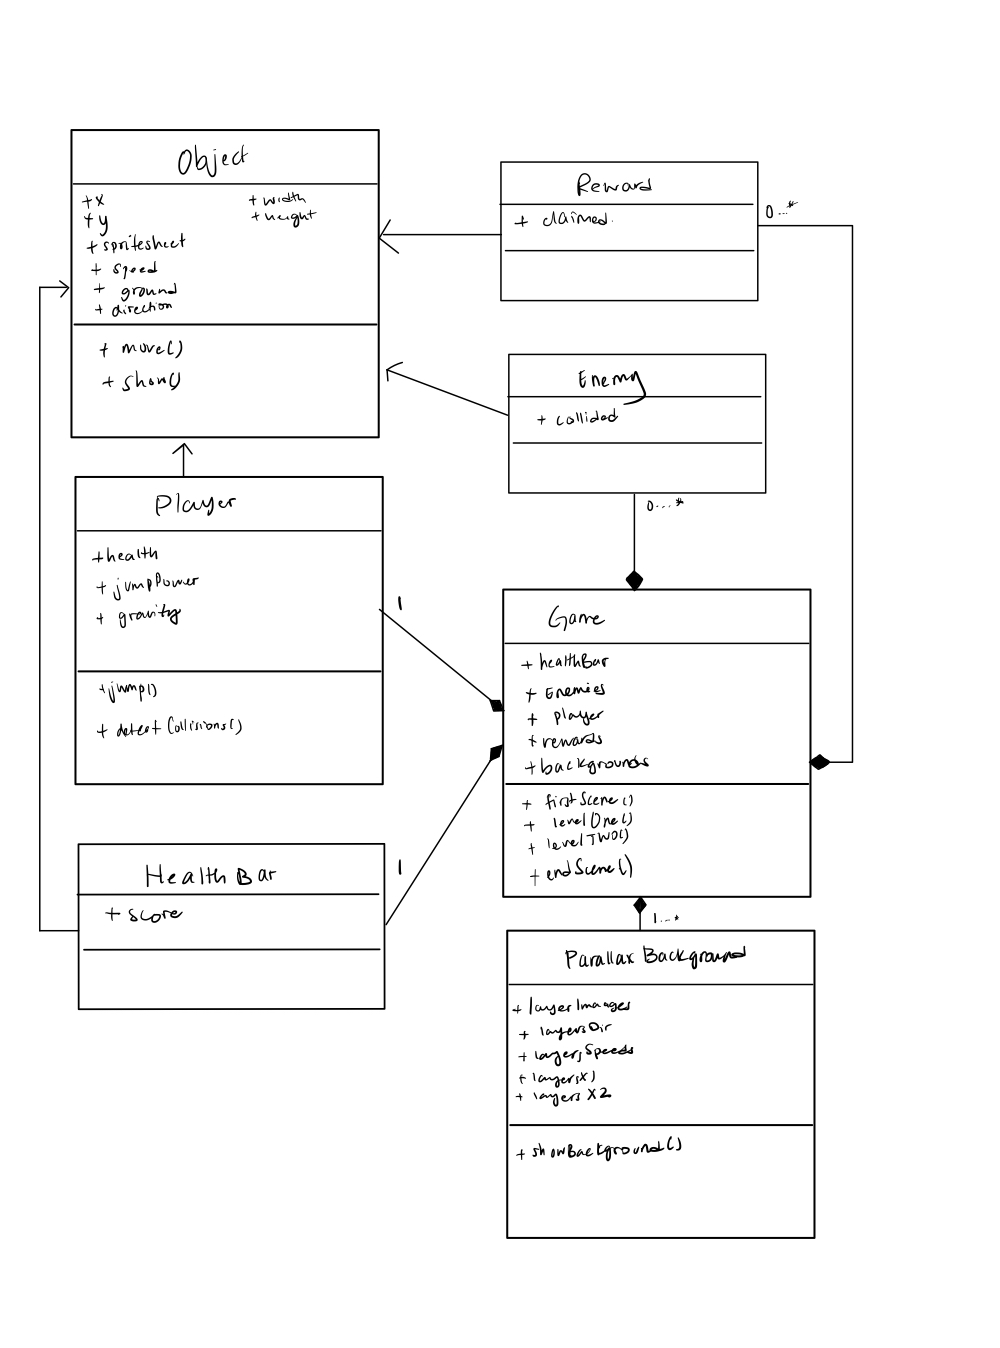
In terms of execution, I implemented everything as a class based on the rough UML structure I sketched out in my last blog. The main Gameclass had methods for each level and its attributes were objects instantiated from the Player, Butterfly, EnemyPotion, and HealthBar classes. Certain classes were also abstracted from parent classes using inheritance (such as the Playerclass inheriting from a parent Sprite class that has basic attributes and methods shared between all its child classes). Each level/scene is separated by overlays, where the user is prompted to click anywhere on the screen to continue to the next stage of the experience. In terms of assets, all sounds, images, and fonts were sourced from the following open-source community/free platforms:

  1. https://freesound.org/
  2. https://opengameart.org/
  3. https://www.free-stock-music.com/
  4. https://www.dafont.com/

For the mechanics of the game, the Player sprite is placed at the lower left corner of the screen. Its main movement, jumping, is only triggered when the player presses the Space bar. Jumping occurs by setting the vertical velocity to a certain jump power attribute. As the player falls down, the player’s velocity is incremented by an acceleration due to gravity attribute. The player also has the ability to double jump once while in air, which comes in handy if a flock of enemies is headed its way. In terms of the collision detection mechanism, a collision occurs when the distance between the center of the player and that of an enemy object is less than the sum of their respective radii (minus a certain amount to account for the free pixels in the sprite images). Below is the code for the collision detection mechanism, which is a Player class method:

  detectCollision(obj, offset=30) {
    if (!obj.collided) {
      // get distance between the center of the character and that of the enemy object
      let objHeight = obj.h;
      let objWidth = obj.w;
      let playerWidth = this.w;
      let playerHeight = this.h;
      
      // update height and width based on resized parameters if the player/object was resized 
      if (obj.resize) {
        objHeight = obj.resize_y;
        objWidth = obj.resize_x;
      }

      if (this.resize) {
        playerWidth = this.resize_x;
        playerHeight = this.resize_y;
      }
      let centerX = this.x + playerWidth / 2;
      let centerY = this.y + playerHeight / 2;

      let d = dist(
        centerX,
        centerY,
        obj.x + objWidth / 2,
        obj.y + objHeight / 2
      );
      
      // collision detected
      // distance is less than the sum of objects' radii
      // minus a distance to account for free pixels in the sprite images

      if (d < playerWidth / 2 + objWidth / 2 - offset) {
        if (!obj.potion) { // lose health if the object is an enemy
          loseHealth.play();
          this.currHealth -= obj.damage; 
          
        } else if (obj.potion && this.currHealth < game.healthBar.maxHealth) { // regain health if the object is a potion 
          gainHealth.play();
          this.currHealth += 1;
        }
        obj.collided = true; // set object collided to true
        return true; // return true if collision is detected 
      }
    } else {
      return false; // return false if collision is not detected 
    }
  }
}

An implementation highlight that I think is worth noting is the use of the smoothing algorithm in simulating the butterfly’s movement in the first scene as she makes her way from the window to the desk. This was implemented as part of the Butterfly class.

move(targetX, targetY) {
   // move butterfly toward destination -- smoothing algorithm
   if (this.moving) {
     this.x += (targetX - this.x) * 0.009;
     this.y += (targetY - this.y) * 0.007;
   }

There are quite a few things that I am proud of in the implementation of this project. The first is the emotional feel of the overall experience. I made sure that the combination of animations created, the sounds chosen, the font, and the color palettes – going from night to day and from city to nature – created a wholesome backdrop to the game engulfed within. I also am proud that I made sure to bring to life the storyboard from last week’s blog. Finally, more than anything, I loved working on the animated start and final scenes (code shown below) and how the flow from animation to instructions to game and then to animation again (with transition overlays in between) turned out to be quite seamless.

  firstScene() {
    // show background of the scene 
    image(room[this.firstSceneAnimationStep], 0, 0, width, height);
    // change the background based on frameCount to show animated changes in the player's room
    if (frameCount % 7 == 0) {
      this.firstSceneAnimationStep = (this.firstSceneAnimationStep + 1) % 6;
    }
    // show player
    this.player.show();
    // show butterfly, passing in rotation paramaters 
    this.butterfly.show(100, 170);
    
    // player faces the butterfly once it is 40 pixels from the point (100, 170)
    if (dist(this.butterfly.x, this.butterfly.y, 100, 170) < 40) {
      this.player.dir = 1; 
      // move player toward butterfly once it lands on the desk
      if (
        dist(this.player.x, this.player.y, this.butterfly.x, this.butterfly.y) >
        50
      )
        this.player.x -= 0.6;
      else { // once the player is close to the butterfly, display instructions overlay 
        this.gameMode = 1;
        let text = `This poor butterfly seems to be far away from home! 
You have to help her find her way back to her family!

The first step on your journey is to go through the city. 
Beware the obstacles on your way. 

Press the Space bar to jump. 
Collect potions to replenish your health. 

Click anywhere on the screen if you are 
ready to embark on the journey!`;
        twinkleSound.play(); // play twinkle sound
        this.overlay(text);
      }
    }
  }

  finalScene() {
    // display the flower field background
    image(flowerField, 0, 0, width, height);
    this.player.dir = 3; // change direction so that the player' front side is facing the flower field
    this.levelButterfly.dir = 3;

    // resize the butterfly and player to show advancing movement 
    if (frameCount % 10 == 0) {
      this.player.resize_x -= 4;
      this.player.resize_y = this.player.resize_x / 0.75;
    }
    if (frameCount % 15 == 0) {
      this.levelButterfly.resize_x -= 1.5;
      this.levelButterfly.resize_y = this.levelButterfly.resize_x * 2;
    }


    this.resizeObject(this.player);
    this.resizeObject(this.levelButterfly);
    
    // show background butterflies 
    for (let i = 0; i < 4; i++) {
      this.butterflyFamily[i].show();
    }
    
    // stop the animation once the player's y position is less than 
    // 255 pixels 
    if (this.player.y <= 225) {
      this.player.moving = false;
      this.levelButterfly.moving = false;
      // change into overlay, prompting the player to restart the game
      this.gameMode = 5;
      let text = `Click anywhere to restart the game!`;
      twinkleSound.play();
      this.overlay(text);
      noLoop();
    }
    
    // move player and butterfly diagonally across the screen to move 
    // upward through the field 
    this.player.moveDiagonally();
    this.levelButterfly.moveDiagonally();
  }
Challenges Encountered and Proposed Improvements

One of the challenges I encountered was during the implementation of the final scene animation, where the main player and the butterfly had to be iteratively resized to create the animation of moving into the distance. I found that using the resize() method consecutively blurred the images and I, thus, had to find another way to resize them. After some googling, I found a way to resize the image by creating a resized image object and copying the pixels into the resized image as a way to avoid calling the resize() method:

resizeObject(obj) {
  // scale with copy -- 
https://stackoverflow.com/questions/72368646/images-blur-with-resize-with-p5-js
  
  // create an image object with the resized parameters
  let resizedImg = createImage(int(obj.resize_x), int(obj.resize_y));
  
  // get the image to resize from the object's sprites array 
  let srcImg = obj.sprites[obj.dir][obj.step];
  
  // copy the pixels from the source image to the resized image 
  resizedImg.copy(
    srcImg,
    0,
    0,
    srcImg.width,
    srcImg.height,
    0,
    0,
    obj.resize_x,
    obj.resize_y
  );
  
  // rotate object if needed and display the resized image
  if (obj.rotated) {
    push();
    translate(obj.x, obj.y);
    rotate(radians(obj.rotationAngle));
    image(resizedImg, 0, 0);
    pop();
  } else { 
    image(resizedImg, obj.x, obj.y);
  }
}

Another challenge was the length of the Enemy arrays created in the constructor() of the game class for each level as it modulated the duration of each level. The more enemies there are in a level, the longer its duration, as the condition for termination was when a particular level Enemy array became empty. However, I found that the more enemies there were in a level, the more slow and laggy the movements became, possibly due to the number of objects that had to be drawn on the screen. I attempted to fix this by ensuring that objects are only drawn when they are within the screen bounds as their locations are initialized randomly off-screen. While this helped a little, the problem remained. So a future improvement could be to look into this further and perhaps choose lighter/smaller sprites to display or have a different initialization mechanism.

Additionally, here are a few other ideas to elevate the current version a little more:

  • Add some more levels, perhaps in between the city and the forest (e.g. a suburban in-between area/ or a highway).
  • Add different types of potions with varying degrees of health replenishment (the stronger the potion, the rarer it is). This should be accompanied by an increase in the difficulty of the game, e.g. more enemy sprites, faster enemy sprite movements, or an increase in the damage attribute of certain sprites.
  • Add some feedback, such as a jitter, when a collision occurs with an enemy object. An extension of this would be the possibility of annihilating an enemy if the Player sprite jumps on its head (the same way Gombas are annihilated in Super Mario).
Final Sketch

Week 5: Midterm Progress

For my midterm project, I wanted to create something that had a defined storyline as the main component pulling the user in. After struggling to decide on whether to go for an interactive experience or a game, I went for the latter. My hope is to create a gamified storyline that takes the user through a beginning, middle, and end. Seeing as I have remained faithful to the butterfly motif for quite some time now, I decided it would be a shame to break the streak with this assignment.

Design and Concept

For the main design of the game, I was inspired by games like Super Mario, the offline Chrome Dinosaur Game, and also the feel of a retro game design in this work by Arshiya Khattak. The main storyline is to help a butterfly find her way home in the open fields after getting lost in a city full of high-rise skyscrapers, with no flowers in sight. The game starts with the scene of a butterfly fluttering through the main character’s window. After the scene ends, a prompt is displayed with directions on how to play the forthcoming game. For now, there will be two main levels, the first being easier than the second. The character, carrying the butterfly on her back, would have to jump over obstacles or enemy objects to maintain her health status. She would also be presented with the opportunity to regain some of her health back by collecting rewards on the way. If the character manages to reach the end without losing all of her health, the ending game scene is played in which the butterfly is reunited with her family in a field of flowers and a prompt is displayed congratulating the player with instructions on how to repeat the game. In the process of visualizing this, I sketched out the following storyboard:

Code Design

To make my code easier to design and scale up, I plan to encapsulate everything, including the game experience itself in a class. Therefore, it was helpful to sketch out class diagrams in a UML-ish fashion as follows:

Anticipated Complexities/Challenges and Risk Mitigation

My strategy for mitigating risk was to implement the basic skeleton of the game levels to allow me to seamlessly scale up complexity later on. I also wanted to get the most time-consuming aspects of the game design, like collecting assets, out of the way so that I could focus on the game functionality this upcoming week.

Asset Collection

I knew one of the things I would struggle with was finding unified assets that were consistent with the feel of the game I was looking for. Thus, I dedicated some time to collecting spritesheets and level/scene backgrounds as I wanted to minimize having to design most components myself. After some digging, I collated the following:

Sprites:

(https://opengameart.org/content/oracles) 
(https://opengameart.org/content/butterfly)

Backgrounds:

(https://opengameart.org/content/forest-background)

(https://opengameart.org/content/cyberpunk-street-environment)

(https://www.deviantart.com/watashi-sensei/art/Bedroom-Pixel-628248413)

(https://www.freepik.com/free-vector/pixel-art-rural-landscape-background_49685498.htm#from_view=detail_serie)

Parallax Background Implementation

For the background of the levels, I wanted to incorporate a parallax effect to add dynamism to the backdrop of the experience. It has been some time since I have implemented this and I had forgotten the basic principles, so I wanted to get this part out of the way first. Each background is composed of multiple layers and the basic idea is to have each layer loop back into the screen at varying speeds to create a continuous animation with different depth components.

class ParallaxBackground {
  constructor(layersImages, layersSpeeds, layersDir) {
    this.layersImages = layersImages;
    this.layersDir = layersDir;
    this.layersSpeeds = layersSpeeds;
    this.layersX1 = [];
    this.layersX2 = [];
    for (let i = 0; i < this.layersImages.length; i++) {
      this.layersX1.push(0);
      this.layersX2.push(width);
    }
    print(this.layersSpeeds);
  }

  showBackground() {
    for (let i = 0; i < this.layersImages.length; i++) {
      image(this.layersImages[i], this.layersX1[i], 0, width, height);
      image(this.layersImages[i], this.layersX2[i], 0, width, height);
      if (this.layersDir[i] == 1) {
        this.layersX1[i] -= this.layersSpeeds[i];
        this.layersX2[i] -= this.layersSpeeds[i];
        if (this.layersX1[i] < -width) {
          this.layersX1[i] = width;
        }
        if (this.layersX2[i] < -width) {
          this.layersX2[i] = width;
        }
      }
    }
  }
}


Sprite Movements and Collisions

I also wanted to simulate the movement of objects on the screen to get a headstart. I used placeholder ellipses for this process, which I will later replace with actual images. I utilized principles of velocity and acceleration to simulate the player’s vertical jumps upon the space bar key press and the movement of enemies in the horizontal direction across the screen:

class Player {
  constructor(x, y, ground) {
    this.x = x;
    this.y = y;
    this.vy = 0;
    this.ground = ground;
    this.gravity = 1;
    this.jumpPower = 20;
    this.collisions = 0;
    this.collidedEnemy = [];
  }
  move() {
    this.y += this.vy;
    // player is not on ground
    if (this.y < this.ground) {
      this.vy += this.gravity;
    } else {
      this.vy = 0;
      this.y = this.ground;
    }
  }

  jump() {
    if (this.y >= this.ground) {
      this.vy = -this.jumpPower;
    }
  }
  show() {
    ellipse(this.x, this.y, 50, 100);
    this.move();
  }
}
class Enemy {
  constructor(x, y) {
    this.x = x;
    this.y = y;
    this.vx = -5;
    this.collided = false;
  }
  move() {
    this.x += this.vx;
  }

  show() {
    ellipse(this.x, this.y, 50, 50);
    this.move();
  }
}

I also wanted to implement the collision mechanism by essentially detecting when the boundary of the player touches the boundary of an object and classifying it as a collision:

detectCollision(enemy) {
  let radius = 10;
  if (!enemy.collided) {
    // get distance betweem the center of the character and that of the enemy object
    let d = dist(this.x, this.y, enemy.x, enemy.y);
    // collision detected
    // distance is less than the sum of objects' radii
    // and the radius for collisioon
    if (d < radius + 25 + 25) {
      this.collisions += 1;
      enemy.collided = true;
      return true;
    }
  }
  else{
    return false;
  }
}
Current Progress

Week 5: Reading Response – Computer Vision for Artists and Designers

It is really hard to outdo interactions that map the objects existing in our physical reality onto our screens for us to warp and play around with, so it was not surprising to me that computer vision techniques would be popular in the production of interactive art. One of the things that surprised me, however, was how early the adoption of computer vision principles – as early as the late 1960s– occurred. In addition to introducing a brief history of computer vision in interactive art, the reading also delineates simple computer vision algorithms that can be exploited by digital creators. Moreover, while the article acknowledges the complexity of the field of computer vision, it introduces the audience to a wide range of multimedia tools that make computer vision more accessible to beginners who are not familiar with machine vision.

Given the power that computer vision grants creators in being able to recreate, manipulate, and reshape physical reality, artworks created with computer vision techniques have the potential to represent the multiple layers of complexity that exist in the world around us. It was interesting – and shocking at times – to see how different sociopolitical themes can be expressed using the power of computer vision. This is demonstrated best by the pieces created on surveillance that the article mentions. The idea of using belts controlled by a tracking system that rotates according to the motion of the audience to highlight surveillance by an “empty crowd” in Rafael Lozano-Hemmer’s installation, Standards and Double Standards, exemplifies how well computer vision can “metaphorize” our physical reality. However, additional considerations, and potentially greater risks, come with more capability. An example of this is the Suicide Box,  which captured video footage of suicide jumpers from the Golden Gate Bridge. It was jarring for me to see a tragic phenomenon turned into a piece of “art” and was a testimony to how computer vision technology, like any tool with great computational power, must be accompanied by a recognition of the ethical implications of its use.

I also enjoyed how the reading emphasized the importance of using computer vision techniques that are compatible with the surrounding physical environment as no particular algorithm will be truly generalizable to all video/image formats. This may take the form of making the physical environment conducive to optimizing the workings particular algorithm or choosing an algorithm that is best suited for a given environment. I loved learning about the different techniques that designers employ to achieve this as it effectively extends the idea of Human-Centered Interaction to Environment-Centered Interaction and truly captures the unleashing of interactivity potential that computer vision affords digital creators.

Week 4: Reading Response – The Design of Everday Things by Don Norman

The underlying assumption of anything artificial is that it operates based on a set of logical rules and assumptions. Engineers verify their designs by checking their conformity to logical principles, deeming their work reliable only once it passes a set base of logical benchmarks. Norman Don argues that while engineers prioritize logic as the central guide in their design of new technology, the consumers of these designs, on the other hand, seldom operate based on logical principles when interacting with new devices. Indeed, we humans pride ourselves on being logical beings, but struggle with fundamental logic puzzles or, as Norman illustrates, actions as simple as opening doors. Instead, we rely on our accumulated experiences and previous interactions to inform our ability to use new designs.

Hence, Norman outlines the two most important characteristics of good design: 1) Discoverability and 2) Understanding. Indeed, the usage of a well-designed product needs to be understandable or at the very least discoverable with minimal effort and/or resources. I found myself surprised when I reflected on how many devices I use frequently that lack these basic properties. For years on end, for instance, I wondered why my clothes were still wet after multiple hours in the dryer on the highest heat setting. Only by watching another person drain the water in the cartridge on the upper left side of the dryer, a signifier to the affordance of emptying the cartridge, was I able to get my clothes dry in the first cycle. It is, thus, important to center the human user, not abstract logical frameworks, in the process of designing interactions and experiences involving technology via human-centered design principles and techniques.

The degree to which Norman was able to predict the current complexity of modern technology back in 2013 when he revised this text is astonishing. He hypothesized that we would get to a point where different technological devices, such as smartphones and watches, would merge into one, tapping into the complexity of designing gadgets that combine internet access and smart displays and making them intuitive for the user. Reflecting upon this now that such gadgets have become a part of our reality revealed to me certain insights that seem a little unexpected. While traditional wristwatches with a standard rotating knob were intuitive back in the day, I would argue that a child in our day and age would be more capable of navigating how to set up an Apple Watch over discovering that the knob of a wristwatch needs to be pulled first and then rotated to set the hands. Personally speaking, I am puzzled every time I have to find a particular station on an old radio but can do it within seconds on my smartphone. My grandmother, however, would probably be able to perform the former much more easily than the latter. With evolving technologies and cultural/generational differences, how can we ensure that our standardization of conceptual models of devices that perform similar functionalities provides “understandable, and enjoyable products” for everyone? Does standardization make sense as we innovate our understanding of effective design principles? If not, what would methodologies of comparing different design frameworks look like?

Week 4 Assignment: Generative Text

Inspiration

For this assignment, I aimed to build on my previous projects and utilize the concepts from class to create a generative piece of text. I felt a strong urge to extrapolate the design from my previous butterfly animated sketch in creating the outline of a text made by a set of moving butterflies. I also wanted to use my last name, Al-Towaity, as opposed to my first name. The reason for this is twofold: 1) it is amusing to use butterflies to represent an Arab, tribal name, and 2) I am using the number “280” [two-eighty], which, if read fast enough, approximates the pronunciation of my name. These two reasons bring in an additional layer of personalization to the sketch that extends beyond the design itself.

Process and Implementation

As for the technical implementation, I exported the Butterflyclass from my previous assignment into this sketch. I, then, modified the hyperparameters of the parametric function to scale it down and adjusted the rate of drawing the curves of each butterfly to give the illusion of moving butterfly wings. I also made sure to include replaying the drawing of each butterfly once the curves have spanned a given angle (4pi in this case).

// source: Sarah Al-Towaity-Intro to IM- Assignment 3.1 https://editor.p5js.org/sarah-altowaity1/sketches/YqvekMK43 

class Butterfly {
....
  drawButterfly() {
    push(); // save the current drawing state 
    translate(this.x, this.y); // move the origin to the object's position
    stroke(this.color); // set the stroke color based on the chosen color 
    rotate((this.angleRot * PI) / 4); // rotate the object 
    noFill(); 
    strokeWeight(1);
    beginShape();
    // draw the curve 
    for (let i = 0; i <= this.theta; i += 0.06) {
      // calculate the radius based on the parameteric equation for the butterfly curve 
      let r =
        exp(sin(i)) -
         this.a * cos(4 * i) +
        pow(sin((1 / this.b) * 12 * (2 * i - PI)), 5);
      // calculate x and y position of the curve 
      let x = r * cos(i) * 1.5 * noise(i, frameCount*0.01);
      let y = r * sin(i) * 1.5 * noise(i, frameCount*0.01);
      // draw circle 
      curveVertex(x, y, r);
    }
    endShape();
    if (this.theta < 2 * TWO_PI){
      this.theta += 0.09; // increment theta for animation 
    }
    else{ // reset theta to 0 once its value reach 4*pi to create the effect of flying effect
      this.theta = 0; 
    }
    pop(); // restore original sketch state 
  }
}

I also used the method of extracting points from text from Professor Aaron’s Circle word example to create butterflies centered around each extracted point.

function setup() {
  createCanvas(500, 500);
  // set background 
  background(148, 69, 71);
  
  // create a bounding box around the text 
  let boundingBox = font.textBounds(textString, 0, 0, textSize);

  // convert texts to an array of points 
  // sampleFactor and simplifyThreshold control the smoothness and quantity 
  // of generated points 
  points = font.textToPoints(
    textString,
    width / 2 - boundingBox.w / 2,
    height / 2 + boundingBox.h / 2,
    textSize,
    {
      sampleFactor: 0.07,
      simplifyThreshold: 0,
    }
  );
  
  // populate butterflies array with generated butterfly objects using the points
  // obtained above 
  for (let i = 0; i < points.length; i++) {
    let x = points[i].x;
    let y = points[i].y;
    butterflies.push(new Butterfly(x, y));
  }
}

For an added touch of animation, I added a resizing factor attribute to the Butterfly class that changes when the mouse is within a particular distance of the butterfly. This way, the butterflies enlarge when the mouse is over them and return to their normal size once the mouse moves further away.

function mouseMoved() {
  // resize butterflies that are within 40 pixels from the 
  for (let i = 0; i < butterflies.length; i++) {
    let distance = dist(mouseX, mouseY, butterflies[i].x, butterflies[i].y);
    if (distance < resizeDistance) {
      butterflies[i].resizeFactor = random([-1, 1]) * random(2,3);
    } else {
      butterflies[i].resizeFactor = 1; // restore normal size when the mouse is moved away
    }
  }
}


Embedded Sketch

Reflections and Ideas for the Future

One thing I struggled with was minimizing lags and delays while drawing. I would have loved for the sketch to be bigger and to have more sample points (and butterflies) for a fuller, more vibrant look. However, I noticed that the editor would get stuck and the animation would lag with more components. I attributed this to the many butterfly objects being drawn, a process that involved multiple looping iterations. Hence, as a future improvement, I would like to find ways to optimize the memory and space requirements of this sketch so that it can be seamlessly scaled up without issues.


Week 3 Reading Response: Chapter 1 of The Art of Interactive Design by Chris Crawford

In “What Exactly Is Interactivity?”, the first Chapter of Chris Crawford’s book, “The Art of Interactive Design,” Crawford attempts to lay down a definition of what interactivity entails from which certain guidelines for interactive design could be extrapolated. He essentially posits that interactivity is a cyclic process of listening, thinking, and speaking that involves two or more actors – much like the process of conversating with other human beings. Going off this definition, Crawford weeds out certain activities as “non-interactive,” from reading books and watching movies to dancing and attending theatrical performances. By arguing that participation in these activities involves a “strong reaction,” which is qualitatively different from strong interaction, he excludes these forms of activities which may be labeled by some as interactive as strictly devoid of the necessary back-and-forth between actors that characterizes high levels of interactivity.

One of the things I appreciated about Crawford’s discursive thought process as he distills what makes things interactive, in addition to his humor and the use of examples to illustrate his points, was the idea that interactivity does not have to be an exclusive binary, but could be assigned a value on a spectrum from low to high. Based on this approach, people subjectively assign degrees of interactivity to certain activities. It did, however, strike me as a little contradictory to go on to adjudicate that some activities were definitively non-interactive, even though some may experientially feel like they were. It also begs the question of whether different people were unified in their understanding of what interactivity is when assigning values to the degree of interactivity they experienced.

Crawford then goes on to theorize the differences between user interface and interactivity designers. While the former mainly considers structure and form, the latter is more concerned with how a given target function is best served by one form over the other. He also makes the observation that interactivity designers come from a less technical background and are often underserved by their inability to match the more established knowledge,  frameworks, and technical expertise employed by their counterparts in the user interface domain.

The definition of interactivity as a recurring process of listening, thinking, and speaking stuck with me as I contemplated the forms of interactivity that people claim to have incorporated into their work when making web applications or digital artworks. While conversations are dynamic, forward-moving, and seldom repeating, many of the interactive elements embedded in digital creations are rarely so. In conversation, actors have a large space of sentences to choose from when speaking and an almost infinite thought space from which a thought could form. This leads to conversations that are new and fresh every time. In the digital space, this is less likely as user interaction is restricted to a small set of defined actions (e.g. clicks or movements) that are mapped to algorithmically consistent behaviors. How do we then emulate the full range of fluidity that true interactivity entails, given that we are sometimes restricted by computational resources? I think the rise in generative AI tools is definitely getting us closer to actualizing Crawford’s interactivity. I am, however, left wondering if Crawford’s definition of interactivity is restrictive. It seems to place high expectations on designers to equip themselves with higher-end technologies to satisfy Crawford’s interactivity guidelines, which may counteractively act as a deterrent.

Week 3: OOP and Generative Art

Concept

For this assignment, I wanted to build on top of ideas I thought of last week, particularly leveraging organic shapes in nature to produce generative, and *somewhat* interactive art. I especially wanted to dabble with mathematics and its ability to generate aesthetic abstractions and animations. To that latter point, my mind immediately shifted to the complex and patterned loops defined by parametric equations. I came across Re-generate, a work by Akshan Ish, that utilizes shapes governed by parametric relations, and was immediately inspired to adopt the concept. As I thought about possible shapes I wanted to recreate, I thought of butterfly shapes, and just as I hoped, I found a parametric curve that modeled them. With the mathematics by my side, I was now ready to translate it into a p5.js  animated, generative sketch.

Process, Challenges, and Implementation

I created a butterfly class from which butterfly objects would be instantiated. The main attributes specified the starting point coordinates, the angle from the x-axis in the Cartesian plane used to control the drawing of the wings, the parameters that control the magnitude of the radius, the color of the stroke (which is randomized from a given color palette, and the angle that controls the rotation of the Cartesian plane so that different objects will be drawn from a different starting point. Having the explicit equations for the x and the y parameters facilitated things for me as I would have had to derive them myself otherwise. One thing I had struggled with a little bit here was making the curve draw incrementally over time. After realizing that the angle determines how much of the curve is drawn, it became evident that incrementing the angle in every frame by a little bit and drawing up to that point would essentially produce that effect.

class Butterfly {
  constructor(x, y) {
    this.x = x; // starting x location 
    this.y = y; // starting y location 
    this.theta = 0; // current drawing angle 
    // choose a random color from the color palette for the butterfly animation
    this.color = random([
      color("#7c9eb7"),
      color("#c5d6db"),
      color("#ffd3d7"),
      color("#ffc20c"),
    ]);
    // controlling hyperparameters for the butterfly shape 
    this.b = random(3, 6);
    this.a = random([4, 6]); 
    // variable controlling the rotation of the object 
    this.angleRot = random([-1, 1]) * random([0, 1, 2, 3, 4]);
  }

  drawButterfly() {
    push(); // save the current drawing state 
    translate(this.x, this.y); // move the origin to the object's position
    stroke(this.color); // set the stroke color based on the chosen color 
    rotate((this.angleRot * PI) / 4); // rotate the object 
    noFill(); 
    strokeWeight(1);
    beginShape();
    // draw the curve 
    for (let i = 0; i <= this.theta; i += 0.1) {
      // calculate the radius based on the parameteric equation for the butterfly curve 
      let r =
        exp(sin(i)) -
         this.a * cos(4 * i) +
        pow(sin((1 / this.b) * 12 * (2 * i - PI)), 5);
      // calculate x and y position of the curve 
      let x = r * cos(i) * random(10, 20);
      let y = r * sin(i) * random(10, 20);
      // draw circle 
      curveVertex(x, y, r);
    }
    endShape();
    this.theta += 0.01; // increment theta for animation 

    pop(); // restore original sketch state 
  }

  finished() {
    return this.theta > TWO_PI; // to indicate that the drawing of the shape has ended 
  }
}

When the sketch is played, a Butterfly object is inserted into a global array of butterflies. The user can add objects to the sketch at any location by pressing the mouse. Once a butterfly object is drawn in full, it is deleted and another object is instantiated in its place at a random location. One issue I encountered was that the more objects I created by pressing the mouse, the more overcrowded the sketch became. I tackled the issue by placing bounds on the length of the butterfly array so that objects are only re-instantiated only if the array size does not hit a certain maximum size.

Admittedly, I had a lot of fun playing with different shapes and introducing randomness and Perlin noise into the sketch. I found that different methods produced different emergent qualities. For instance, curves with randomness were akin to children’s drawings on a blackboard, but with Perlin noise, they were more seamless and refined. Circles with randomness had a glowing radiance that reminded me of fireworks or diamonds. The use of circles with Perlin noise, however, elicited a more abstract effect and almost had a level of depth to it that I liked. Here are images from the four experiments below.

3.1 – Lines with Perlin noise 3.2 – Circles with randomness3.3 – Lines with randomness3.4 – Cirlces with Perlin noise 

Embedded Sketch

I am embedding the sketch that I liked the most. The p5.js sketch for each of these can be found by clicking the URL linked with the caption below each one of the images above.

Reflections and Ideas for the Future

What I loved about the process of creating these sketches was how it naturally flowed from my earlier projects and how it amalgamated the power of mathematics to create something generative and abstract yet still organic and nature-inspired. I want to continue experimenting with different polar curves and to continue abstracting my work and learning more advanced animation strategies.

Assignment 2: Emergent Flowers

Inspiration and Concept

I was looking through some of the works in ProgrammInformation21_PI21 when I came across the sketch below. I immediately thought about the curves I used in last week’s assignment and how noise could be introduced to create this effect of slightly vibrating circles. Essentially, if I drew a circle with curves and then introduced controlled deviations in the vertices’ x and y-coordinates away from the perfect circular path, I would then be able to recreate this piece. In the process of conceptualizing the animation, I also imagined that drawing a curve in each frame would give the illusion of a blossoming flower and add some character and movement to the work. That latter thought effectively lingered in my mind and I found myself experimenting with symmetry, eventually creating an expanding flower animation.


Embedded Sketch

Implementation and Code Highlights

The animation was created by a for loop that creates the curves, nested within another that symmetrically partitions the curve lines to generate petal shapes. I used the Perlin noise() function to allow the curves to wiggle a bit utilizing the iterating variable in the nested for loop and an auxiliary control variable to set the x and y-coordinates in the noise space. This elicited the pattern of organic folds of a flower existing in nature. I referred to the way I created my hair in the last assignment and the examples of using Perlin noise in this article to create the curves. The number of partitions (petals) of the flower is determined by a number that is randomly generated from a finite set of integers. Additionally, the stroke color of each curve is also randomly generated. When set against a black backdrop, the eccentric fluctuations in stroke color produce a glowing effect, which I loved. The animation is replayed when the flower expands to the width of the canvas. Additionally, the animation is repeated with a different number of petals when the mouse is clicked for added interactivity.

// partition the circle based on the variable, petal_partitions_control, to create flower petal effect 
for (var j = 0; j < petal_partitions_control; j += 1 / petal_partitions_control) {
  beginShape(); // draw curves 
  for (var i = 0; i < 30; i++) {
    // map angle based on current partition iteration
    // inner loop implementation inspiration: https://genekogan.com/code/p5js-perlin-noise/
    var ang = map(i, 0, 30, j * PI, j * PI + PI / petal_partitions_control);
    // generate x and y coordinates using noise for organic shapes
    var x = radius * cos(ang) * noise(i * 0.1,  perlin_noise_control * 0.05);
    var y = radius * sin(ang) * noise(i * 0.1,  perlin_noise_control * 0.05);
    
    // draw curve
    curveVertex(x, y);
  }
  endShape();
}

The outer for loop, I would say, is the one I am most proud of as it creates the emergent pattern of flower petals. Admittedly, I do owe Casey Reas and his talk some credit for helping me get inspired to add the symmetry needed to pull this animation together.

Reflection and ideas for future work or improvements

I really enjoyed the process of expanding upon my earlier work and integrating the concepts we discussed in class in the making of this piece. I also loved the process of experimenting with different noise values and stumbling upon the often happy surprises that come with working with randomness and geometry. In the future, I would like to perhaps add more of these flower shapes and give the user some more control in defining the parameters that control the randomness behind the shape (by adding a slider, for example). Additionally, I would love to exploit the same concept to recreate other symmetric shapes – like butterflies – in nature.