Concept
It took me some time to come up with the idea for my final project. I could not decide for sure because while most of my peers were either expanding their midterm project or creating a game that would use Arduino as a user-control input, I wanted to create something that correlated with my interests and would be more unique for my developer experience. Thanks to the assignment where we needed to find out the way to control music with the Arduino sensor, and my love for music, I decided to do something associated with music, particularly enhancing its experience.
Since childhood, I have always liked to play with music controls. At some point, I even wanted to become a DJ. While such a dream never came true, a couple of weeks ago I realized that I could utilize Arduino to create something similar to the DJ panel (a simplified version of it). Moreover, I can make images on the computer to interact with the music and visualize it. After thorough research, I found out that there is a built-in p5.js library that allows to work with the sounds. This is exactly what I needed.
My project now consists of the physical part – the box powered by Arduino controls and sensors that allow a user to interact with music and the p5.js, and a digital visualization that is based both on the user actions and the music characteristics (which can also be changed by the user to the certain extent).
Project Demonstration
Implementation
Interaction Design:
A user interacts with the Arduino through box that has a number of input controls.
– 3 buttons on the right side turn on 3 different songs
– 3 buttons on the top provide control over the visualization of music style and effects on the digital screen
The red button in the top left corner is a play/pause button
– White and Black buttons on the left increase and decrease the pitch speed of the music
– Potentiometer controls the volume
– Ultrasonic Distance Sensor controls the High Pass and Low Pass filters
The input from Arduino through Serial Communication allows to influence the music as well as the image that is generated inside p5.js.
Code:
p5.js: Using the p5.FFT the music characteristics are converted into the image. My code analyses the music, e.g. frequencies, and creates a dynamic visualization. There are 3 main music visualizers that I created – Circle (set by default), Sunburst (can be turned on/off using the button), and Particles (set by default, can be switched off). All of those patterns are based on the same idea of synchronizing with music amplitude. Function fft.getEnergy() measures the bass range in Hz. The value then passed further and is used to control the waveform of the Circle, length of lines of Sunburst, and speed of Particles.
Additionally, I leveraged the knowledge from the previous projects to equip Sense of Music with features like a fullscreen toggle or Rotation effect that can also be activated by pressing the corresponding button. Moreover, as a bonus, I decided to incorporate one of my favorite projects of this semester into Sense of Music. The Lines’ visual effect, although is not influenced by music, can be activated using one of the buttons as a substitute for Particles. Personally, I enjoy combining the Lines with the Rotating effect.
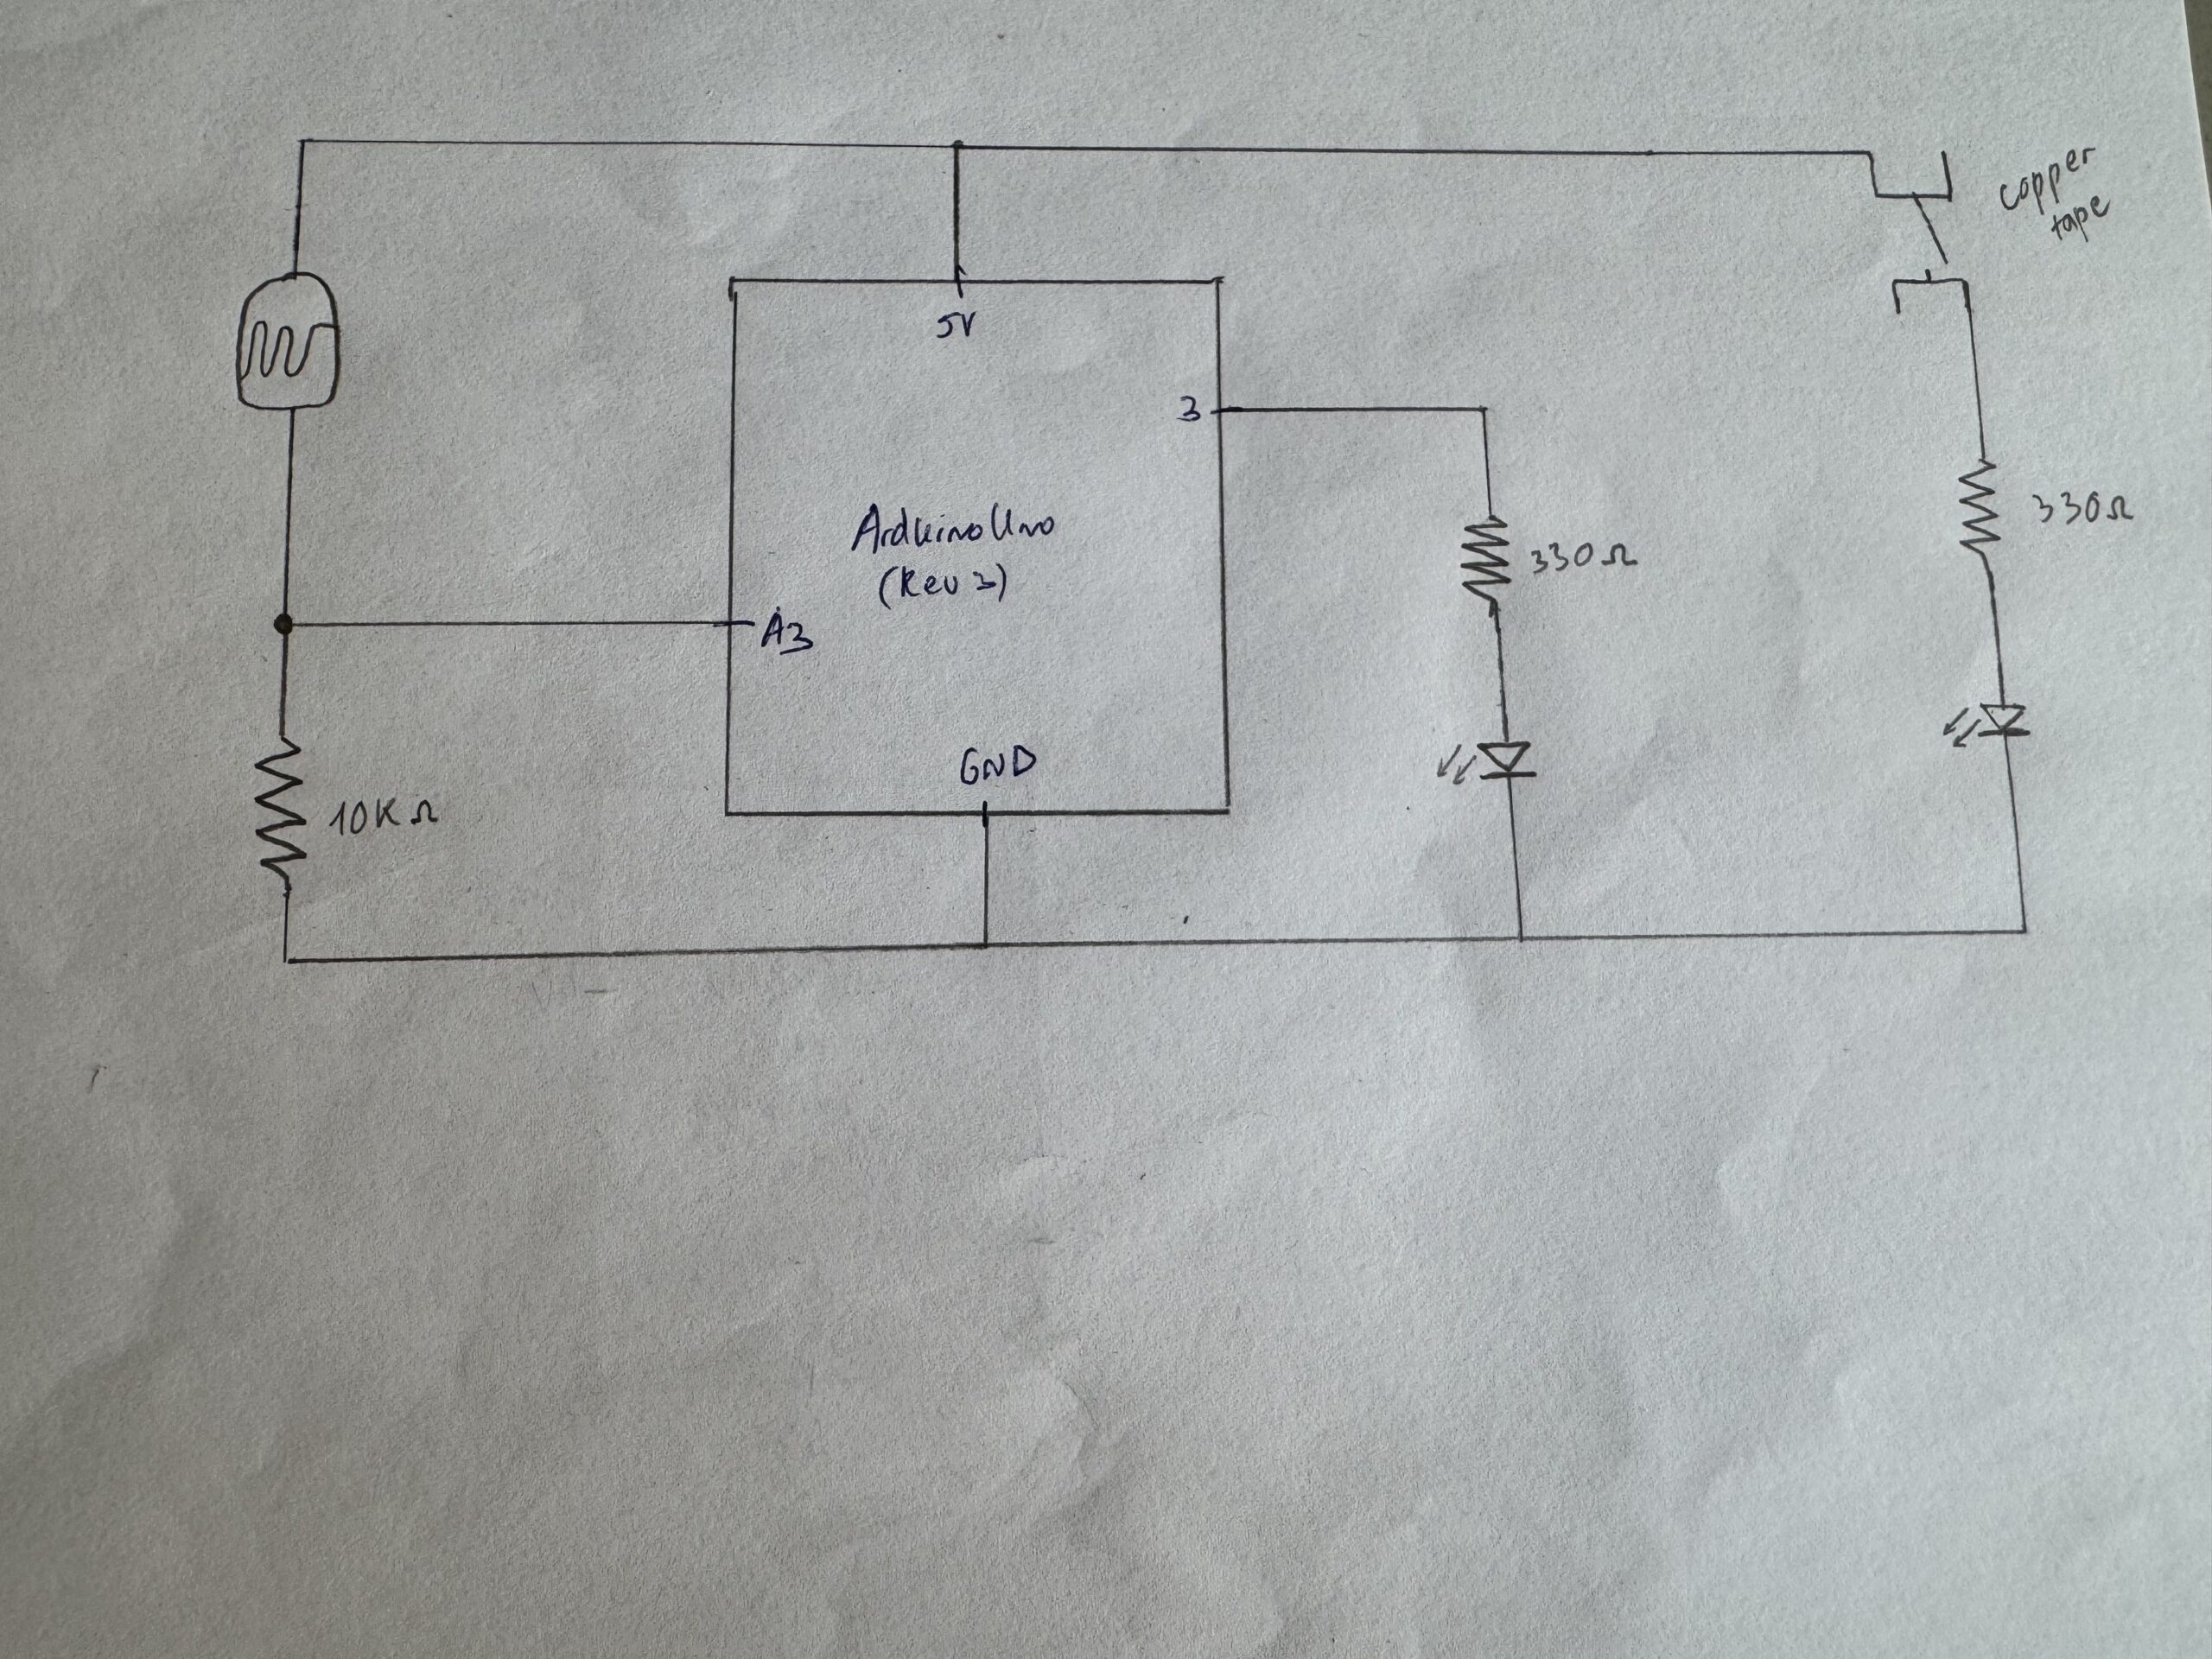
Arduino: Code for Arduino is quite straightforward as well as the connections on the board (see the schematic below). I am really glad I learned how to use and connect potentiometers and ultrasonic distance sensors in class, so I had no problem with intuitively using them for my project.
Link for p5.js code with Arduino code as a comment on the bottom:
https://editor.p5js.org/rbashokov/sketches/SwAigPMVa

Thoughts and Conclusion
I am extremely happy with the final project that I have created. More than that, I am happy and thankful for the Intro to IM class and professor Mang for helping and assisting me through the whole semester. I learned a lot in this class. More specifically, I, in some way, stepped out of the environment I got used to by constantly making myself think outside the box and create something unique, something that can be called interactive art. Other than that, the most difficult part for me was creating the physical box and setting up the buttons and sensors on it. The last time I did something similar was in middle school, so I had literally 0 knowledge of how to approach it. However, I managed to figure out a way to create schematics of the box and print them using the laser cut and connect the wires and buttons using glue. I am still very far away from being close to the results I would like to achieve, but for now, I feel like I made progress and reached the goals I set for this class at the beginning of the semester.
Speaking of my final project, Sense of Music was a great idea, and its implementation was good but not perfect. While the code was not a problem, there is still a lot to build on top of what I have for now to further enhance the user experience. The same goes for the physical parts – the box and the DJ panel. I could make them look more aesthetic and pleasant by using different styles of buttons, perhaps adding more colors to the box, etc. Unfortunately, the time was very limited, especially considering my trip to Shanghai that took the whole National Holiday break. Nevertheless, I am satisfied with the results, and as I see it, the fact that there is a lot of room for project improvement shows that the idea is actually great.
 Thank you!