This week, we learned to work with text and visualizing data on p5js. We had the choice of working with either data visualization or text effects. I have always been fascinated by typography and so I decided to work with text effects.
Implementing Perlin Noise with Text:
I like how the Perlin noise function helps create random distortions and it’s something I wanted to integrate with the assignment. I also dug a bit into the various text effects in the Reference section of p5js.
I learned more about text to point from this Coding Train tutorial:
Although the Coding Train’s video covered a lot more than using text to point, I used just this one functionality since I found it easier to grasp and thought it would create an interesting visual.
In the final result, the text ‘IM QM’ is formed by tiny rectangles tracing around a custom font (which I uploaded) and the rectangles move and change color with the movement of the mouse using the noise() function.
Going Forward:
Typographies are fascinating and creating typography with code is something I find very powerful because we are no longer limited to hands-on skills for creating something beautiful. Beyond this assignment, I wish to keep experimenting with various other text effects and create something more interactive.
For our second assignment we were tasked to create a generative art piece using loops in p5js. For me, art has always been a creative expression which is not strictly restricted to visual perception. One of my favorite art forms (and the one I spend the most time indulging in) happens to be music. So I wanted to incorporate music into this assignment from the get go. This is what I ended up creating after long hours of working this weekend. A simple click and it comes to life!
The process:
I started by looking up the Coding Train‘s videos (of course!) for incorporating music into my p5js file. I found about the preLoad() function which helped me upload and play one of my favorite tracks, ‘La Cuidad’ by Odezsa right inside the browser.
Next I knew I wanted to create something that would respond to the music. After a bit of searching Dan Shiffman from the Coding Train came to the rescue again. I spent an entire day learning about Fourier Transforms and the built in FFT object from this video and the reference page on p5js’s site:
This taught me how to display waves based on amplitude, frequency of the music. To make it more visually appealing I used for loops and played around with trigonometric functions (sine and cosine) to transform the straight line of waves into a circle. This gave me a half circle and I had to repeat the for loop with a negative value of sine to get a full circle. I’m sure there must be a more efficient way to do this, but this is how far my brain cells could go. I also used map() function with help from the reference page (and a lot of trial and error) to keep the waves within the bounds of the canvas. You’ll notice most of the values are hard-coded so this of course is an area I could improve on.
When I listen to music, it almost transports me to a different realm; I feel lost and immersed but in a good way. With a day to go till the deadline, I wanted to incorporate some of that feeling into this piece. And what better than getting lost in a star field in space?! As a form of habit I searched up ‘Star Field Coding Train’ on YouTube (God bless Dan Shiffman). I watched this video but it was full of advanced functions and most it flew past my ears. I do, however, know how to create classes (I did that for my first assignment too). So, I created a class for the stars and since I am familiar with vectors, velocity, and acceleration from high-school Physics, I read into the reference pages in p5js and figured out how to make stars fly towards the screen from the resting circumference of the circle. Here’s a code snippet of the class:
class Star {
  constructor() {
    //a fixed scalar multiple for uniform visual effect
    this.start = p5.Vector.random2D().mult(150);
    //vector for initial velocity
    this.velocity = createVector(0, 0);
    this.acceleration = this.start.copy().mult(random(0.001, 0.00001));
  }

  move(check) {
    this.velocity.add(this.acceleration);
    this.start.add(this.velocity);
    if (check) {
      // adding more speed if the .getEnergy method returns higher frequencies, by just adding more of the same method
  this.start.add(this.velocity).add(this.velocity).add(this.velocity);
      // this.start.add(this.velocity);
      // this.start.add(this.velocity);
    }
  }
  //stars i.e. ellipses of random sizes
  display() {
    noStroke();
    fill(255, 255, 255);
    ellipseMode(CENTER);
    ellipse(this.start.x, this.start.y, random(2, 5));
    // console.log(this.start.x, this.start.y);
    // line(this.start.x,this.start.y,(this.start.x + 1),(this.start.y + 1));
  }
}
Another part of the code which I like is using the .getEnergy() method of the FFT object to increase the velocity of the stars depending on the frequency of the track. I created a boolean statement to return True or False if the music crossed a certain frequency. If True, I increased the velocity by repeating the velocity method.
//FFT methods
let waves = fft.waveform();
fft.analyze();
//star speed responding to beats
let bounce = fft.getEnergy(20, 200);
let p = new Star();
stars.push(p);

  for (i = 0; i < stars.length; i += 1) {
    stars[i].move(bounce > 230);
    stars[i].display();
  }
Things to improve on:
The star field Dan Shiffman demonstrated was more beautiful, and stars had a trailing and fading effect to them. I think I can spend more time trying to learn all those functions for future projects. Also, a lot of the conditions in the for loops are hard coded, which I will try to improve on for future projects.
Outro:
For finishing touches, I randomized the R,G,B values of the stroke color and the stroke weight to create a vibrant sense of chaos. I think when the piece comes to life, this will give the audience a sense of rhythm within chaos, which music brings to my life every single day.
In our very first week of Intro to IM, we covered the basic concepts of programming and got a peek into the creative potential of computation as we were shown famous and popular digital arts from around the world. We also learned about this wonderful platform p5js.org where creative coding can be done and executed right inside the browser! (powerful, right?)
For our very first assignment of Intro to IM, we were asked to construct a self-portrait using code on p5.js. We were demonstrated how to construct primitive shapes in class. What I found most useful on this platform was the in-site Reference page, which contained documentation of different built in functions and libraries (which I referenced to countless times during this assignment). This is the result of a weekend of experimentation and countless trials and errors:
I decided to start with the face first. Instead of going for an ellipse for the face, I googled to find out how to make custom shapes and stumbled upon the use of Bezier curves. This short video on YouTube intrigued me:
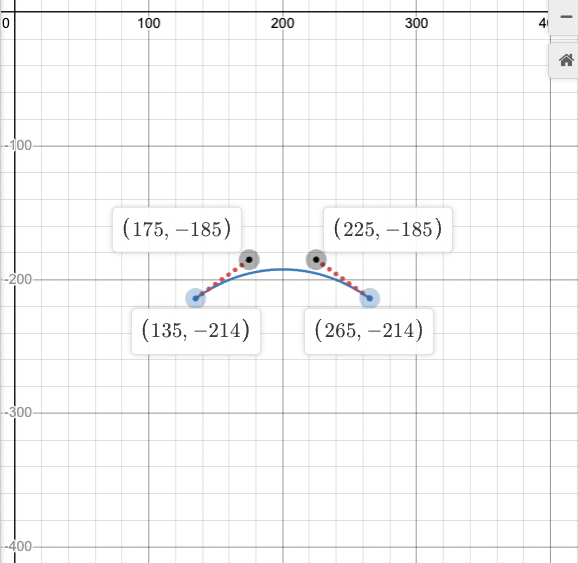
This video explained every question I had in mind about custom shapes. The only challenge now was determining the anchor points for the exact type of curve I wanted. For that I used Desmos Cubic Bezier Curve visualizer, and I plotted the points in reference to a 400 X 400 px canvas. Then I was able to use the Bezier function on p5.js. Here’s a demo of what that looked like:
Bezier functions seemed so powerful and fun, I got kind of hooked to it and it was hard to stop myself from using them at times. I also used beginShape() and endShape() to create closed bezier shapes, using guide from the above YouTube video. The face, the cap, the lips, and the ears were all created using closed Bezier forms. For all the colors, I used the RGB color chart from RapidTables.
I did, however, use plenty of primitive shapes. The glasses, for instance, were created using the built in ellipse() and line() functions. The nose was also easy to create using the triangle() function. For the syntax of these functions I took help from the Reference page. For the t-shirt, I created a closed polygon by calculating vertices from the center and using the vertex() function.
Now that I had a basic self portrait with a clear blue sky as background, I had this urge to add more to make the portrait interesting. Down I went again into my Googling rabbit-hole and discovered that I could use custom function and classes similar to Python! I have coded in Python before, so these concepts were known to me. I went to w3Schools JavaScript Tutorial and read the documentation for classes and functions in JavaScript (it was mostly similar to Python which helped). Using my newfound power, I went back to my p5.js code and created a simple function to make the left eye blink randomly. The function has a basic if statement and when executed, instead of the eyeball, I simply printed a line across the eye to make it look like the eyelid shut. Else, the function just printed an eyeball (an ellipse). But then I faced the challenge of how to show the motion. I googled a bit and learned about the frameRate() function from References and that was perfect to make idea work. Here’s the code snippet showing the custom eye(x,y) function:
// custom eye function

function eye(x, y) {
  fill(255, 255, 255);
  ellipse(x, y, 20, 20);

  //winking motion
  if (random(1000) > 20) {
    fill(0, 0, 0);
    ellipse(x, y, 7, 7);
  }
  else {
    stroke(0, 0, 0);
    line(x - 10, y, x + 10, y);
  }
}
Next, the background looked really empty. Back in my home country we have plenty of cloudy days which I love so I decided to put clouds using ellipses(). Then I realized I was already using the frameRate() function, so why not try moving the clouds as well. Thankfully, the frameRate() reference page had the exact example to moving an object across the screen. I only needed to increment the X or Y coordinate in one direction to make it seem they are moving. I decided using Javascript classes so I could easily produce multiple moving clouds since I was already familiar with classes in Python. I was able to create my own Cloud class with two methods– one for incrementing the X coordinates of the clouds so they seem to be moving, and one to display the created clouds. And voila! After some experimentation, I achieved my desired result. Here’s the code snippet of the Cloud class:
// Cloud JS Class

class Clouds {
  constructor(x, y) {
    this.x = x;
    this.y = y;
  }

  //method for horizontal cloud motion
  moveCloud() {
    this.x += 1;
    if (this.x > width) {
      this.x = 0;
    }
  }

  //method to show the cloud
  displayCloud() {
    noStroke();
    fill(255, 255, 255);
    ellipse(this.x, this.y, 70, 60);
    ellipse(this.x + 50, this.y + 10, 70, 40);
    ellipse(this.x - 50, this.y + 10, 80, 50);
  }
}
Now I had to put the finishing touches. I added a sun behind the clouds (because what’s better than a nice sunny day?), the letters Q and M of my name on the cap using ellipses and lines and finally for the t-shirt color I had to go with NYU’s trademark shade of violet (manifesting Violet Pride haha).
I called this portrait “Carefree” because this reflects my persona. Nothing makes me more happy than getting to relax on a nice green field on a breezy day with a clear blue sky and floating clouds, carefree and in peace.