NYUAD Puzzle Adventure
My final project was inspired by the beauty of the NYU Abu Dhabi campus. I designed a simple game that involved beautiful images of the campus some taken by myself and some from online sources. Initially the game begins with images in 4 square pieces and a player can move and arrange the pieces to make the image whole. The control can be done entirely through a simple controller that I designed. The game keeps track of time in each chapter as the player solves a specific image and the game intentionally designed to loop, Increasing in level of difficulty every time. The level of difficulty increases by increasing need for precision and increasing number of image pieces.
Video Demonstration
Demonstration 01: Mr. Godbless Osei
Demonstration 02: Mr Aimable Tuyisenge
Demonstration 03: Screen Recording
Implementation
Interaction
Interaction being key in any game design, NYUAD puzzle adventure integrates interaction through a custom controller that is used to move and arrange the image pieces. The controller can be seen below:

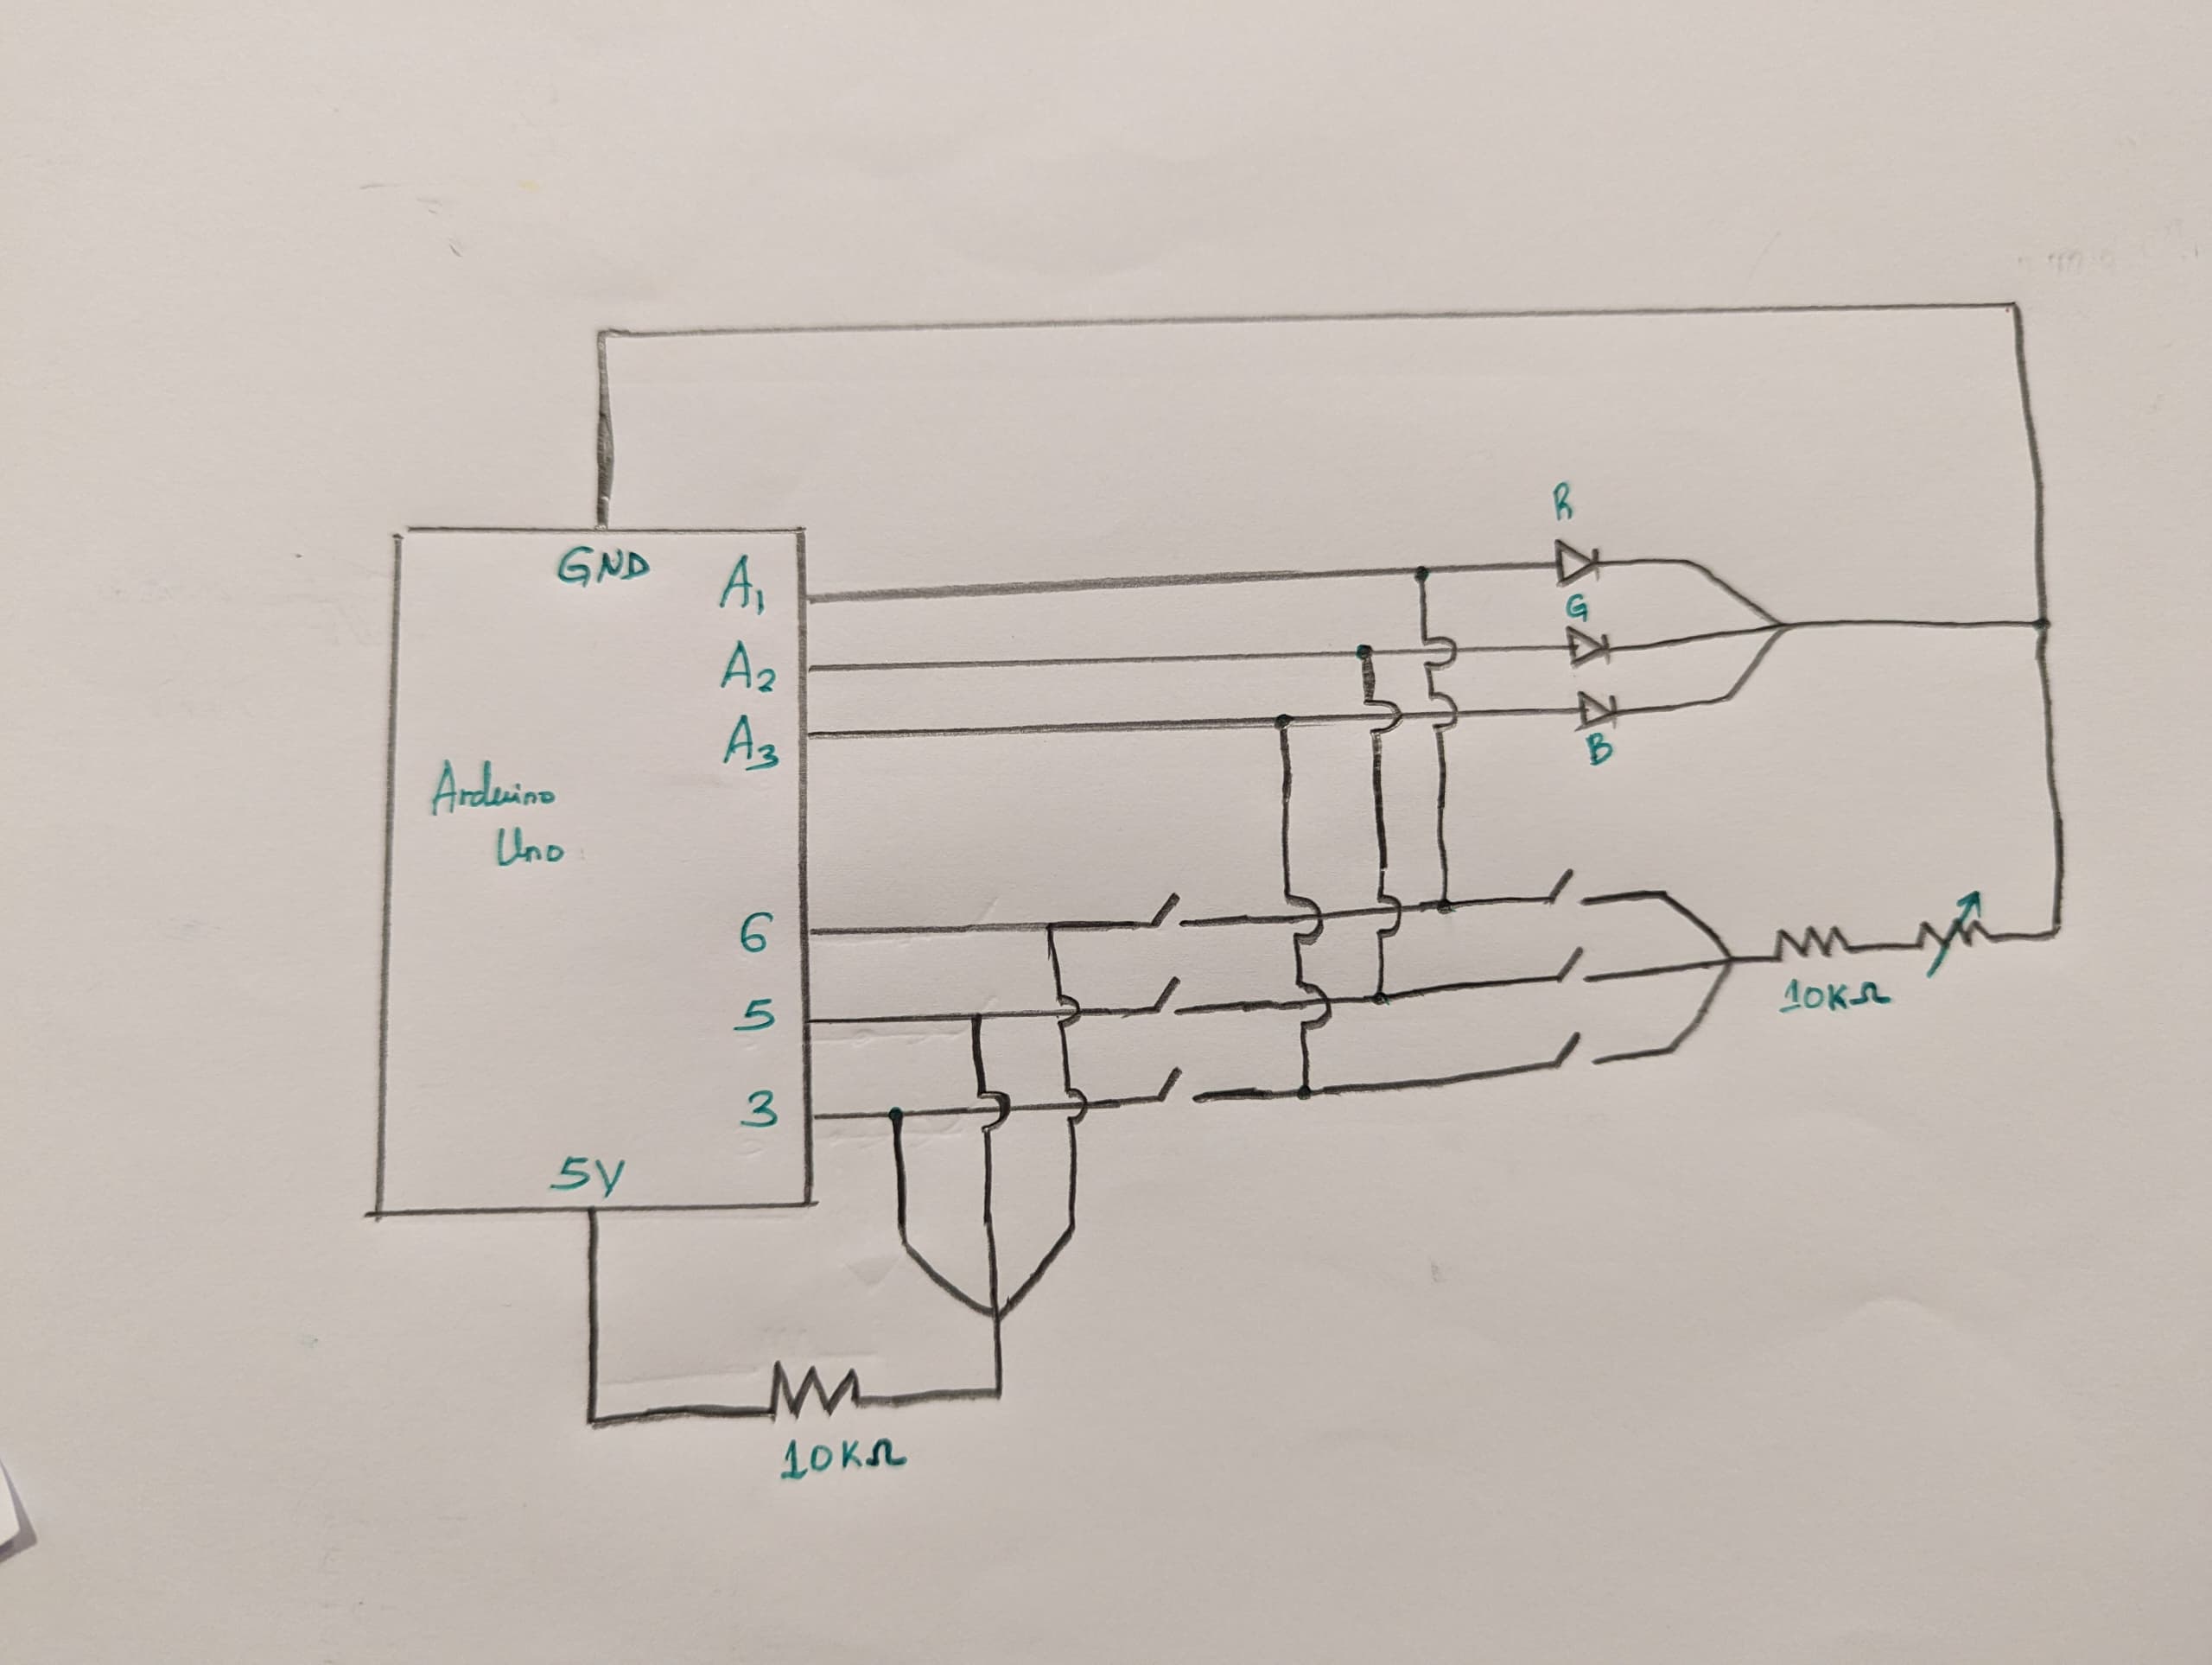
Given my game design, I wanted to make a simple controller, So I used four Switches and a Joystick . I used the switches to change between game states in my game and the joystick to control movement of pieces. The electrical connections the controller can be seen on a schematic below:

In addition to interaction through the hardware design, I also used sounds that significantly provided cues. One such was a sound that notifies player that two pieces are already attached together. And a celebration rewarding player when an image is completed.
Arduino code
My Arduino code, which was was the heart of the controller involved the following :
1. Reading data from the buttons and the joystick
2. Sending data to P5.js via serial connection.
3. Receiving data from P5.js for the speakers in the controller.
My Arduino code can be see here:
// ------------Buttons pins-------------------------------
int changePin = 3;
int playPin = 5;
int instructionsPin = 2;
int nextPin = 11;
// ------------Joystick X and Y pins-----------------------
const int xPin = A2;
const int yPin = A1;
// ------------Speaker Pin---------------------------------
const int speaker1Pin = 1;
const int speaker2Pin = 4;
// ------------Control Speaker------------------------------
int playOrNot = 0;
const int play1 = 440;
const int play2 = 39;

int xValue = 0;
int yValue = 0;

void setup()
{
  pinMode(changePin, INPUT);
  pinMode(instructionsPin, INPUT);
  pinMode(playPin, INPUT);
  pinMode(nextPin, INPUT);
  pinMode(speaker1Pin, OUTPUT);
  pinMode(speaker2Pin, OUTPUT);
  Serial.begin(9600);
}

void loop()
{
  xValue = analogRead(xPin);
  yValue = analogRead(yPin);
  int changeState = digitalRead(changePin);
  int playState = digitalRead(playPin);
  int instructionsState = digitalRead(instructionsPin);
  int nextState = digitalRead(nextPin);

  // Serial output in order -> Instructions, Next, Change, Play, X, Y
  Serial.print(instructionsState == HIGH ? "HIGH," : "LOW,");
  Serial.print(nextState == HIGH ? "HIGH," : "LOW,");
  Serial.print(changeState == HIGH ? "HIGH," : "LOW,");
  Serial.print(playState == HIGH ? "HIGH," : "LOW,");
  Serial.print(xValue);
  Serial.print(",");
  Serial.println(yValue);

  if (Serial.available())
  {
    playOrNot = Serial.parseInt();
  }
  if (playOrNot == 1)
  {
    tone(speaker1Pin, play1);
  }
  else if (playOrNot == 2)
  {
    tone(speaker2Pin, play2);
  }
  else
  {
    noTone(speaker1Pin);
    noTone(speaker2Pin);
  }
}
P5.js sketch
My P5.js sketch manages multiple states such as “WELCOME,” “INSTRUCTIONS,” “PLAY” and uses a serial connection for controller inputs. Some key features includes
1. Welcome screen: Displays an introductory screen and a short game summary.
2. Controller Integration: Reads serial data for buttons and joystick inputs to navigate states and interact with puzzle pieces.
3. Dynamic Screens and Feedback: Provides visual and audio feedback, including fading hints, a timer, and celebration effects when puzzles are solved.
4. State Management: Transition between screens based on button presses and game progress.
In my code, I also integrated keyboard controls to facilitate debugging.
The P5j.s Sketch can be seen here: -> Fullscreen
Communication
Data is sent between Arduino and p5.js through a serial connection. Arduino sends data as a string, in a particular order e.g playButton, value1, value2,…. p5.js listens for this data, splits it into individual pieces, and uses those pieces to control the game states and actions, such as pressing buttons or moving the joystick.
Things I am Proud of
I am proud with how the whole game has turned out. However, some things that really stood out to me are as follows:
1. The controller design:
Designing this controller has helped me understand how complex controllers like those for the Xbox or PS5 work. I could envision my design integrated with many other elements to and become just as complex as those in market today.
2. The graphics
The graphics used were quite simple, but very appealing in my opinion.
Reflections for Future
Several areas could be improved in this project. Some of them includes:
1. Using different shapes, like jigsaw patterns, instead of simple rectangles. While I initially wanted to use such complex shapes and pattens for my pieces, I failed due to complexity in wrapping images, managing positioning and many other challenges.
2. The controller design could also be improved by adding sensors like sensors such as touch sensors and adding to make the controller more interactive. Adding vibration motors would give players a better feel during gameplay.