Final Project Documentation

I can’t believe how fast this semester went, and especially with this class. I came in to enter to IM as a senior with legal studies as my major and no idea on coding. I ended this semester with presenting a project that involved code on both P5JS and Arduino that I was able to present too many people and have them ask me and me able to explain how code and circuits work. if you asked me prior to this if I would have been able to do something like this, I would have probably said there is no chance but now thanks to this class I was able to present something that I’m proud of and something that I was able to put my heart into.

Concept & Design 

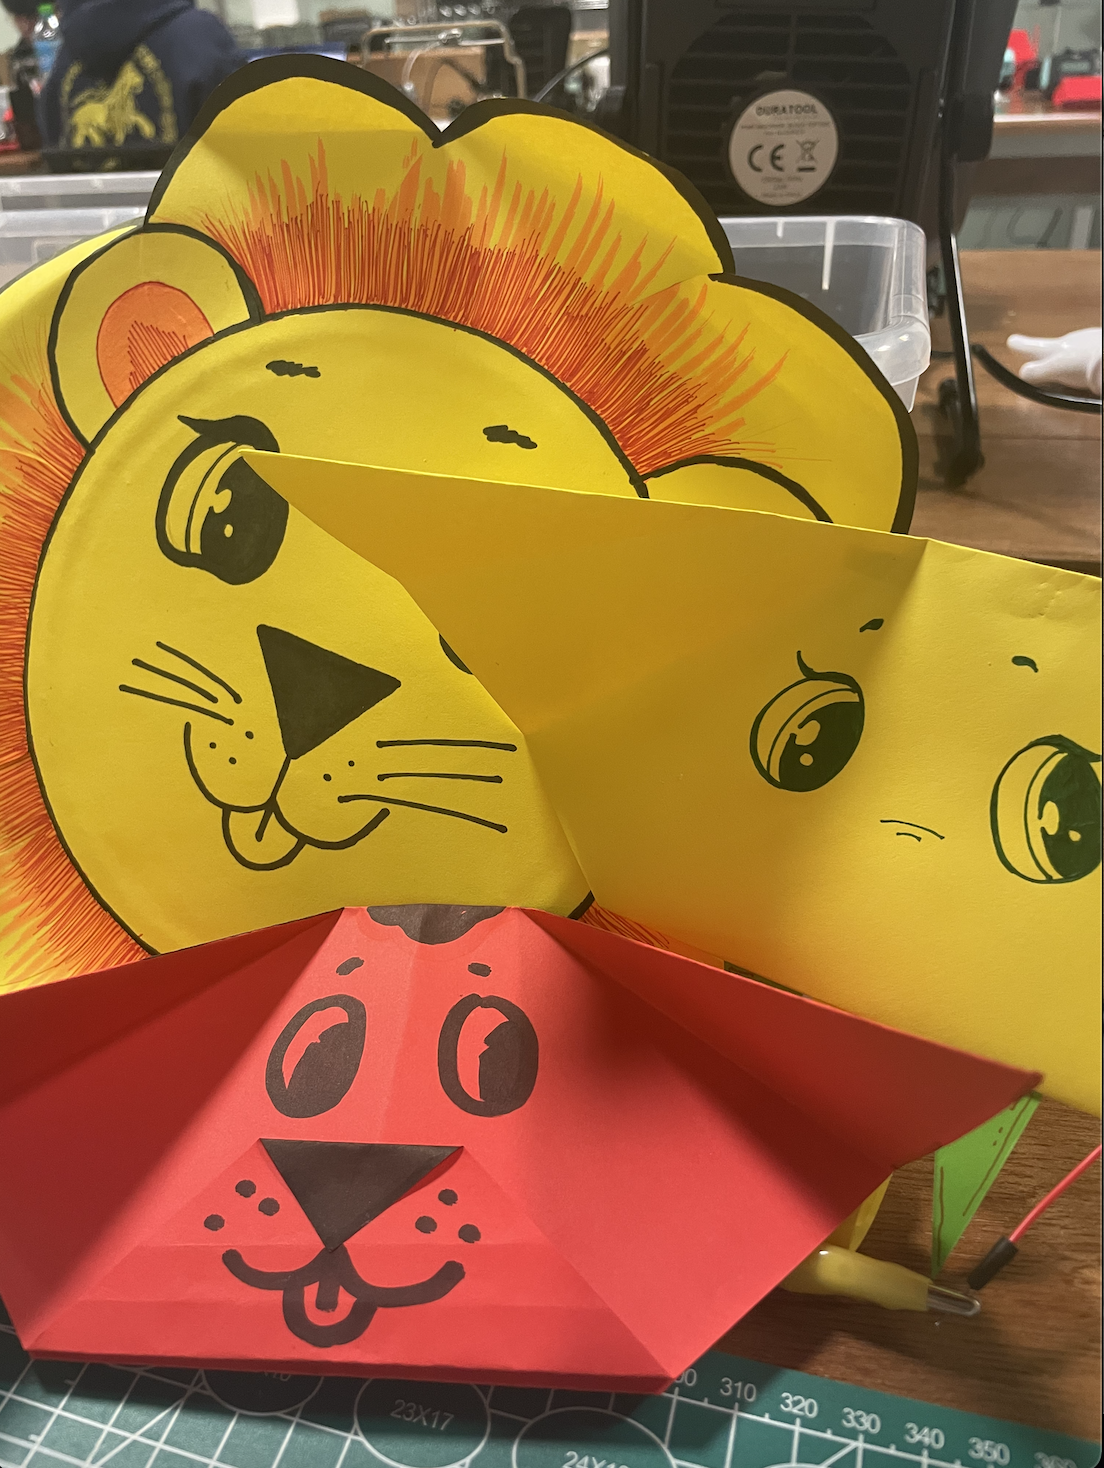
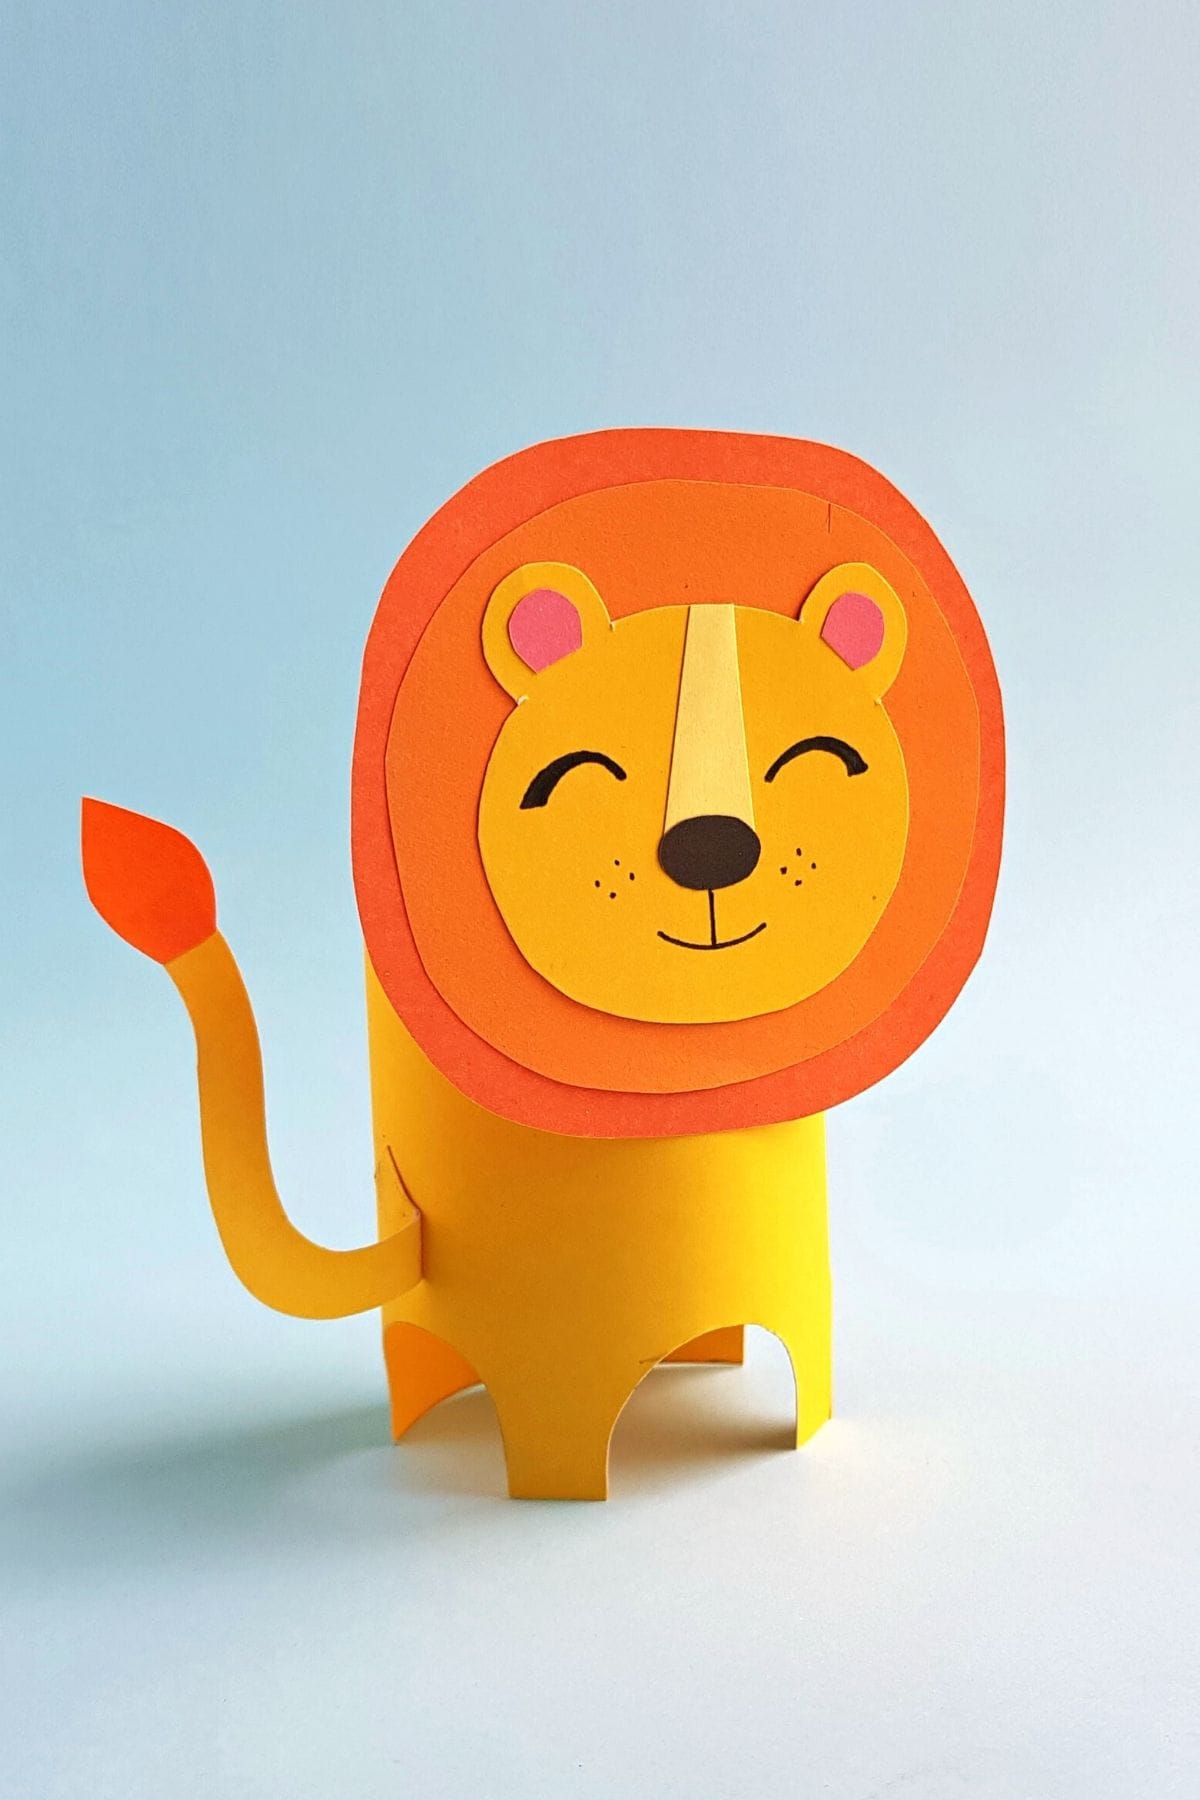
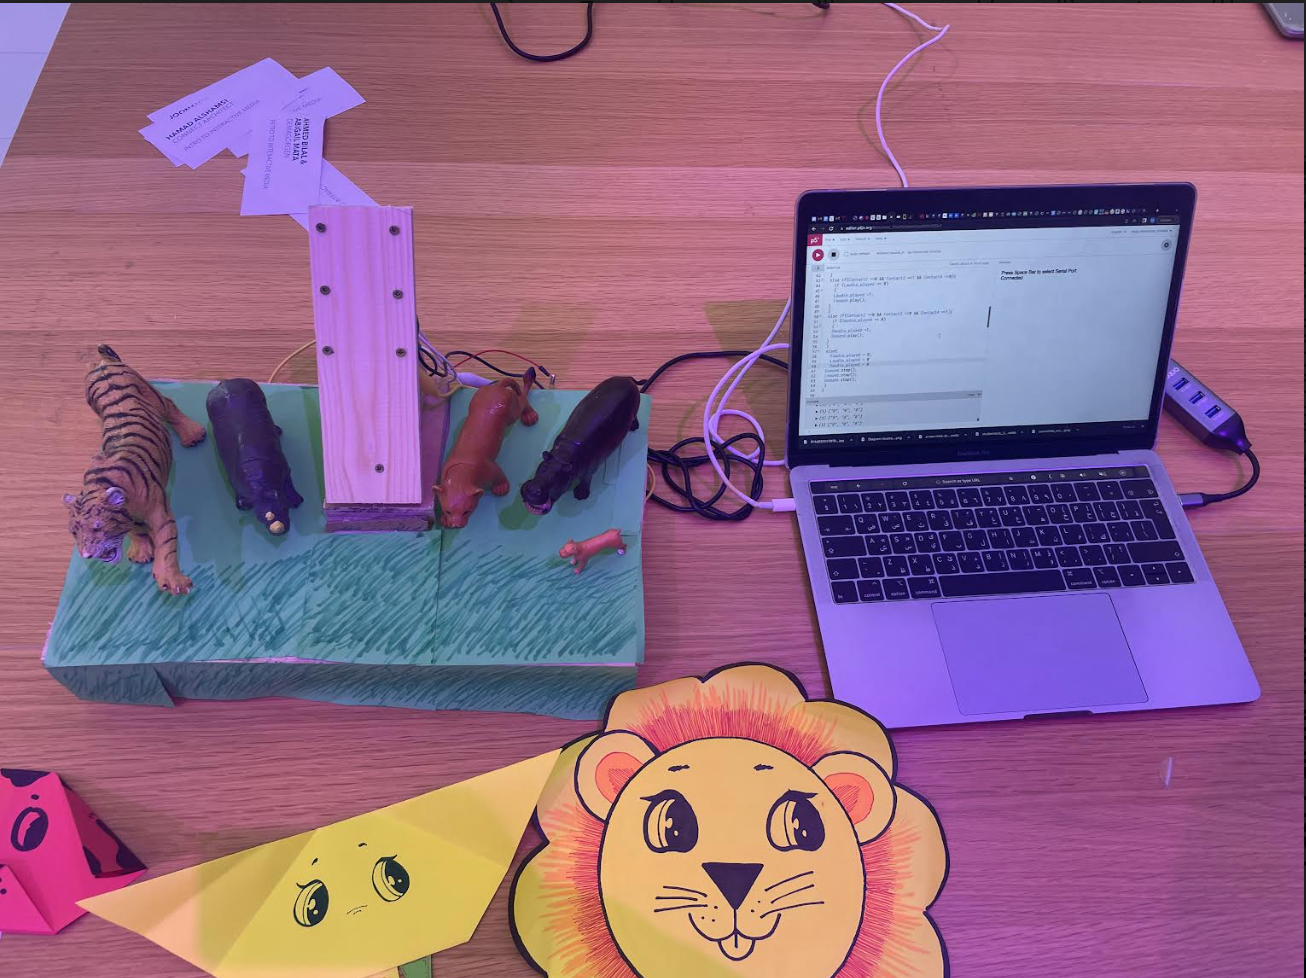
the concept of my game came from seeing my nephew who was two years old playing with my niece who was six months old. he was showing her different animals and making their noises, I then thought to myself I could probably make this into my final project, and it would be fun and educational. I used P5 to communicate the sound that I wanted to portray and Arduino to know when the circuits complete and to play my sound. My design was a stage that had the different photos of the animal’s on top of a rock. the inspiration behind it was the pride rock from 9 king where the different animals surrounding would see them raise Simba. I implemented that idea with the different animals in the field looking over the animal that the that player would place and play the animal sound.

Code P5js

The code was my toughest challenge, although we have been working on it for the entire semester, I felt like there was a lot that I struggled with bugs and parts that I didn’t understand. I used some of the examples that we learned in class and switched out the light bulbs with the sound that I wanted the circuit to play. I had the very complicated time with creating event else statement for each individual sound that I had to then connect. I then ran into a big problem once that started to work which was being unable to stop the sound from being repeated again and again and i really did not know how to fix it.

let Contact2;
let Contact3;
let Contact4; 
let Eaudio_played = 0
let Laudio_played = 0
let Daudio_played = 0
  
  
function preload() {
  soundFormats("mp3", "ogg");
  Esound = loadSound("Esound.mp3");
  Lsound = loadSound("Lsound.mp3");
  Dsound = loadSound("Dsound.mp3");
}
 if (Contact2 ==1 && Contact3 ==0 && Contact4 ==0){
    if (Eaudio_played == 0)
      {
        Eaudio_played = 1
         Esound.play();  
      }
 }
 else if(Contact2 ==0 && Contact3 ==1 && Contact4 ==0){
   if (Laudio_played == 0)
   {
   Laudio_played =1;
   Lsound.play();
 }
 }
 else if(Contact2 ==0 && Contact3 ==0 && Contact4 ==1){
   if (Daudio_played == 0)
   {
   Daudio_played =1;
   Dsound.play();
 }
 }
 else{
   Eaudio_played = 0;
   Laudio_played = 0
   Daudio_played = 0
 Esound.stop();
 Lsound.stop();
 Dsound.stop();
 }
}

With help from Nouf I tried to create a stop sound feature which worked if I added another I’ll statement to every other line which I did. I had to then communicate Arduino 2P5 and set every single code since I was using three different outputs and one for when nothing would be happening.

if (data != null) {
    // make sure there is actually a message
    // split the message
    let fromArduino = split(trim(data), ",");
    // if the right length, then proceed
    if (fromArduino.length == 3) {
      
      // only store values here
      print(fromArduino)
      Contact2 = fromArduino[0];
      Contact3 = fromArduino[1];
      Contact4 = fromArduino[2];

Arduino 

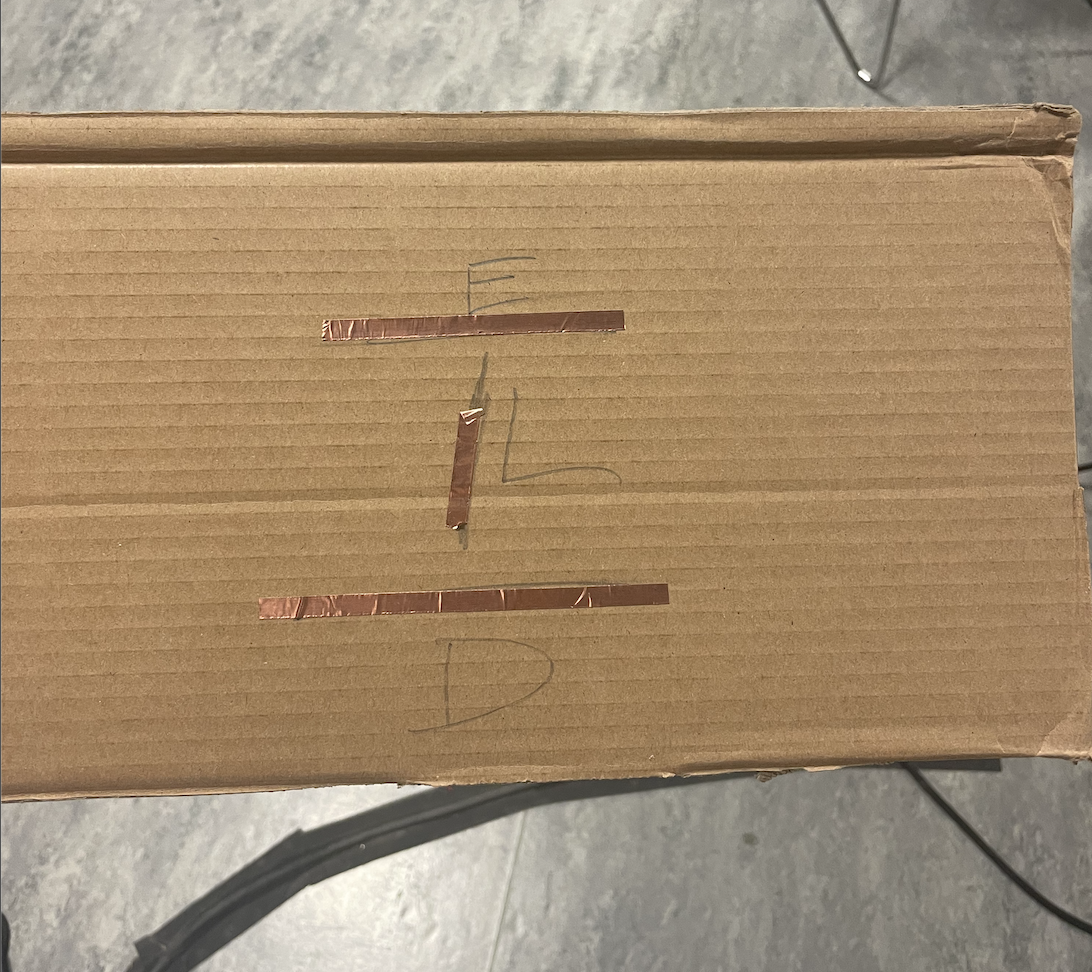
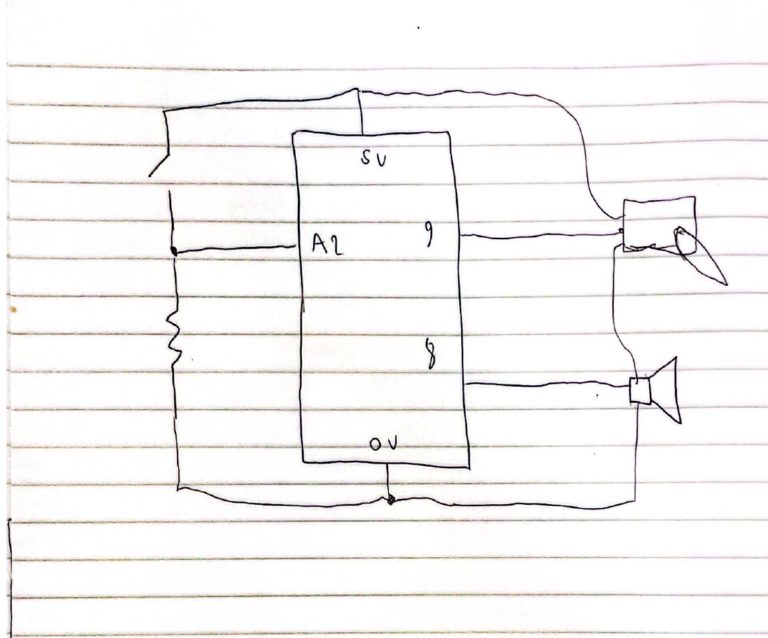
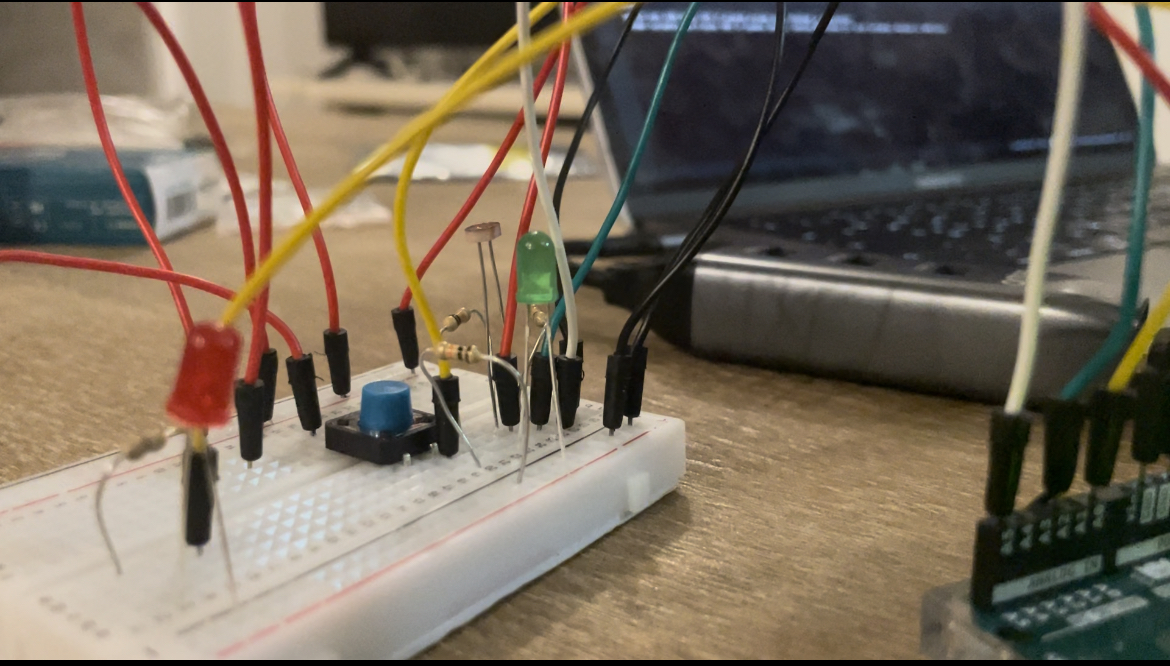
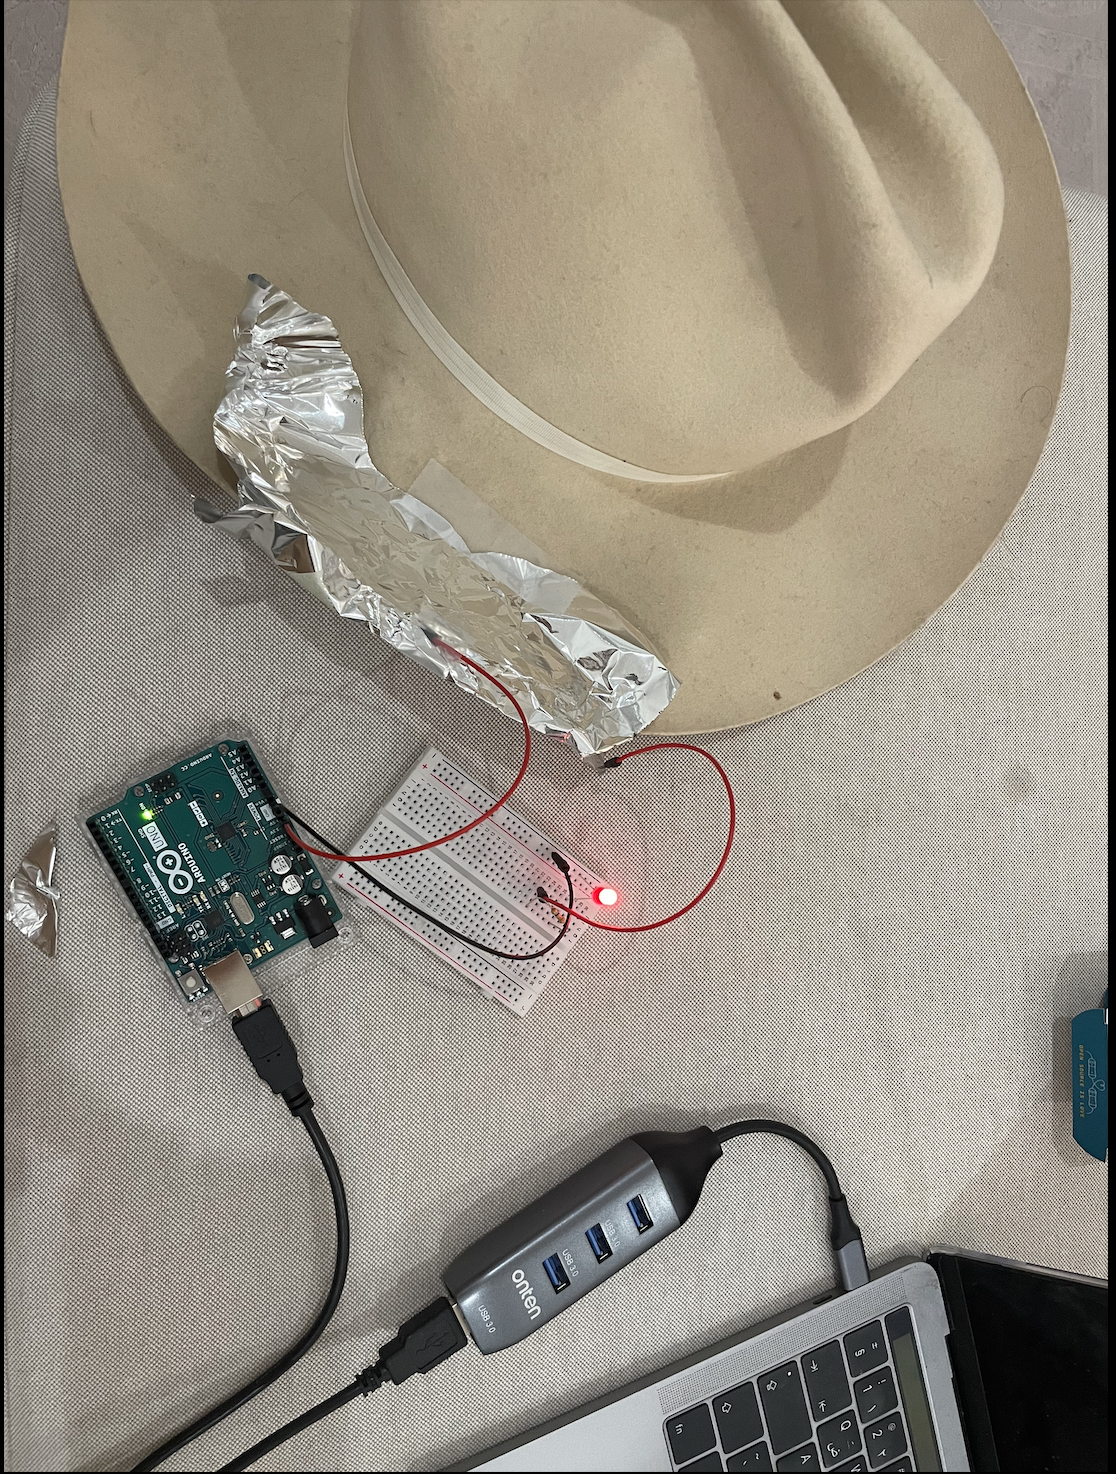
My Arduino code was used to describe three different circuits each of these circuits would be continuously running and my different animal sounds would act like a switch to connect the circuit. Once each of these switches is connected the laptop is able to create a sound that was uploaded to the P5 software. A big issue that I was having was that the animal sounds kept playing randomly and I didn’t know why I then decided to print out what was going on and I decided that I would read the values without anything happening a couple of times. I thought that the problem was with the resistor but I later found out that it was due to me not having an actual button I had to connect to wires one to the pin and one to the back into each resistor and another one to the five volts and another one to the ground. I was then able to use crocodile wires to connect the five faults wire to the near that I screwed to the back of my board and the other crocodile wire to the back of the other nail and use copper wire to create to connect the circuit on the back of the photo. I would create a going circuit with each animal having a different placement for the tape one in the top one in the bottom and one in the middle.

void setup() {
  Serial.begin(9600);
  pinMode(2, INPUT);
  pinMode(5, INPUT);
  pinMode(8, INPUT);
  // start the handshake
  while (Serial.available() <= 0) {
    Serial.println("0,0"); // send a starting message
    delay(300);            // wait 1/3 second
  }
}

void loop() {
  // wait for data from p5 before doing something
  while (Serial.available()) {
    int Contact2 = Serial.parseInt();
    int Contact3 = Serial.parseInt();
    if (Serial.read() == '\n') {
      digitalRead(2);
      digitalRead(3);
      int lion = digitalRead(2);
      delay(1);
      int elephent = digitalRead(3);
      delay(1);
      int dog = digitalRead(4);
      delay(1);
      Serial.print(digitalRead(2));;
      Serial.print(',');
      Serial.print(digitalRead(5));
      Serial.print(',');
      Serial.println(digitalRead(8));
    }
  }
}


What I’m proud of 

the thing I’m most proud of in this project is my code. From someone who started this course thinking that I’ll just be able to understand a bit I think I exceeded my own expectations of myself. By step-by-step learning and practicing I was able to then think of how to use if statements and how to create functions and arrays which is something that i didn’t even know of before I started this.  I really like the creativity that the class and the professor kept continuously pushing throughout the semester and I think that atmosphere pushed me and I’m also proud of my creativity and how I was able to use that in a different medium than I’m used to.

Something else that I really liked, and I was so happy to see at the showcase was a family with kids that would come and the little boy told me that he liked animals and that he wanted to play my game. after playing my game and hearing the lion roar, he really had a smile across his face and his sister wanted to try the dog which once she heard she felt very astonished by. after 15 minutes I took a 5-minute break and came back to see the little kids playing with my game again. their parents came in and told me that they liked it so much that they told them that they wanted to come to my station again. that was my highlight of the showcase since my game was loved by its intended audience more than I expected

Future 

I really wanted to make the animal sounds play louder and play more consistently. I would have some bugs sometimes when the copper tape wasn’t placed exactly right on both screws it would not play the sound. you had to move it a couple of times for it to work. I could have tried using another thing with wood pieces that would connect every time because they would fit into place instead of copper tapes that you would have to push. Someone also gave me the idea of having a barcode that would read whenever the animal was placed into the area so it would make one spot for all the animals and that spot would play the animal sound.

Final Progress Almost there!!

My final is going Really well. I have finally been able to find the right balance of code that i needed thank to the help of Nouf and Jack. i had to add a stop command after every sound to make it not repeat itself

if (!serialActive) {
    text("Press Space Bar to select Serial Port", 20, 30);
  } else {
    text("Connected", 20, 50);
  }
  

   if (Contact2 ==1 && Contact3 ==0 && Contact4 ==0){
     if (Eaudio_played == 0)
       {
         Eaudio_played = 1
          Esound.play();  
       }
  }
  else if(Contact2 ==0 && Contact3 ==1 && Contact4 ==0){
    if (Laudio_played == 0)
    {
    Laudio_played =1;
    Lsound.play();
  }
  }
  else if(Contact2 ==0 && Contact3 ==0 && Contact4 ==1){
    if (Daudio_played == 0)
    {
    Daudio_played =1;
    Dsound.play();
  }
  }
  else{
    Eaudio_played = 0;
    Laudio_played = 0
    Daudio_played = 0
  Esound.stop();
  Lsound.stop();
  Dsound.stop();
  }
 }


All that i have left is building the actual  project which as the professor said was not as easy as i had expected. I started off with a base of cardboard like shown.

I then tested it out with the animals i build

I then spent the whole day on the lab working on my build( special thank to Ahmed the lab assistant) where i made a stage and a platform from my animals to go on. I was unfortunately too focused and forgot to take pictures. I had crocodile clips hanging from the stage but the professor told me to switch it to using nails and have copper tape to complete the circuit.

Work left    

I am yet to add the screws and add some design aspect after that i will hopefully be ready to present

Final Progress

Code

I am finally making progress with my code but it took too long to process and figure  out the bugs. it has been specifically tricky to get my full code on Arduino to understand my p5 code since i had to try many thing and innovate from things that we haven’t learned in class.

if (!serialActive) {
    text("Press Space Bar to select Serial Port", 20, 30);
  } else {
    text("Connected", 20, 30);
  }
  
   if (Contact2 ==1 && Contact3 ==0 && Contact4 ==0){
    Esound.play();
  }
      else if(Contact2 ==0 && Contact3 ==1 && Contact4 ==0){
        Lsound.play();
      }
      else if(Contact2 ==0 && Contact3 ==0 && Contact4 ==1){
        Dsound.play();
      }
 }
if (data != null) {
    // make sure there is actually a message
    // split the message
    let fromArduino = split(trim(data), ",");
    // if the right length, then proceed
    if (fromArduino.length == 3) {
      // only store values here
      Contact2 = fromArduino[0];
      Contact3 = fromArduino[1];
      Contact4 = fromArduino[2];
      // do everything with those values in the main draw loop
    }
hile (Serial.available()) {
    int Contact2 = Serial.parseInt();
    int Contact3 = Serial.parseInt();
    if (Serial.read() == '\n') {
      digitalWrite(2, Contact2);
      digitalWrite(5, Contact3);
      int lion = digitalRead(2);
      delay(1);
      int elephent = digitalread(3);
      delay(1);
      Serial.print(sensor);
      Serial.print(',');
      Serial.println(sensor2);
    }

Exterior 

I initially wanted to use wood to build the animals since it would have been easier but after having a talk with the professor i switched to a board that would have diffrent wires to connect the animal heads to. i went with origami animals after experimenting since they looked the cutest.

Future 

I just need to fully fix my code since i cant seem to find the right balance that is needed for the project

Serial Communication Assignments

This was my hardest project yet. i spent a lot of time with my code and having a bunch of errors that I didn’t understand. after i tried to get some help from the internet i got a bit of a better understanding. what really helped is when I remembered what the professor said about old students records being on the WordPress site. this is my best attempt that kind of worked.

Task 1    

For the first task we were instructed to use a sensor on Arduino to make an ellipse in p5 move horizontally. And to have nothing on Arduino being controlled by p5.

After looking thru projects i decided to use a potentiometer to control the axis of the ellipse.

This was my p5 code.

function setup() {
  createCanvas(640, 480);
  textSize(18);
}

function draw() {
  background(54);
  map(100,0,1023,0,width);
  ellipse(100,height/2,100,37);


  if (!serialActive) {
    text("Press Space Bar to select Serial Port", 20, 30);
  } else {
    text("Connected", 20, 30);
  }

  
}

function keyPressed() {
  if (key == " ") {
    // important to have in order to start the serial connection!!
    setUpSerial();
  }
}

function readSerial(data) {
  ////////////////////////////////////
  //READ FROM ARDUINO HERE
  ////////////////////////////////////

  if (data != null) {
    ellipseXPos=data;
    }

  
}

My Arduino code:

I used it to just connect the sensor to the p5 sketch

void setup() {
  Serial.begin(9600);
}

void loop() {
  // wait for data from p5 before doing something


      int sensor = analogRead(A0);
      delay(1);
      Serial.println(sensor);
    
  
}

Task 2

For the second task we were initially asked to control the LED brightness. When i first took a stab at it i had no idea how to start. I initially tried to do it with mouse press but after looking at others projects  For inspiration I saw people used diffrent keys to control the brightness so i decided to do the same.

I was initially trying to use the B key for brightness and D for dull. for some reason i got an error. but after i tried the arrow keys like one of my colleges it seemed to work.  This is part of my code

let brightness = 0; 
let value=50;


function setup() {
  createCanvas(600, 600);

 
}

function draw() {
  background(255);
  
  if(value>255){
    value=255;
  }
  if(value<0){
    value=0;
  }
 
  
  brightness = value;

Arduino code:

int LED = 11;
void setup() {
 Serial.begin(9600);
 pinMode(LED, OUTPUT);
 while (Serial.available() <= 0) {
  Serial.println("Wait");  // send a starting message
   delay(300);               // wait 1/3 second
  }
 }
 void loop() {
  // wait for data from p5 before doing something
 while (Serial.available()) {
   int brightness = Serial.parseInt(); 
    if (Serial.read() == '\n') {
     analogWrite(LED, brightness); // turn on LED and adjusts brightness
     Serial.println("LIT"); 
    }
  }
 }

Task 3

This task started off as the easiest one but ended up being the most confusing.  I started of by looking at others projects like i did previously and i saw people using  the gravity wind example  so i took a look at that. I created. a p5 Code and didn’t get an error but when i hooked it up to Arduino it didn’t work.

 if (!serial Active) {
    text("Press Space Bar to select Serial Port", 20, 30);
  } else {
    text("Connected", 20, 30);
  }
  
  
  ellipse(position.x,position.y,mass);
  if (position.y > height-mass/2) {
      velocity.y *= -0.9;  // A little dampening when hitting the bottom
      position.y = height-mass/2;
      LEDbrightness=1;
      
    
    }
  else{
  LEDbrightness=0;
  }
  if(windSpeed<500){
  wind.x =-1;
  }
  else if(windSpeed>600){
    wind.x=1;
  }
  else{
    wind.x=0;
  }
  print(windSpeed);
  
  
}

Arduino

void setup() {
  Serial.begin(9600);
  pinMode(2, OUTPUT);
  // start the handshake
  while (Serial.available() <= 0) {
    Serial.println("0,0"); // send a starting message
    delay(300);            // wait 1/3 second
  }
}

void loop() {
  // wait for data from p5 before doing something
  while (Serial.available()) {
    int LEDstate = Serial.parseInt();
      
    
      digitalWrite(2, LEDstate);
      int sensor=analogRead(A0);
      
      
      Serial.println(sensor);
      
    
  }
}

Conclusion 

Although i spent a bunch of time with this project and it wasn’t perfect in the end I think I learned a lot out of it. This really helped me get coding on another level. Especially when it comes to Interactive Media. It humbled the level that i thought i was at( in a good way)


Music Assignment

I worked with Ahmed and his post is here: https://intro.nyuadim.com/2022/11/17/musical-instrument-9/

Concept

In this assignment I worked with Mohamed to design a musical instrument using the arduino and breadboard. We used two main devices which are the piezo speaker and the servo motor. We decided to play the song “We will we will rock you” on the piezo buzzer, and then provide sound effects after that using the servo motor, by rotating it clockwise and counter-clockwise. The code to do this is shown below. Here is a schematic for our implementation.


#include "pitches.h"
#include <Servo.h>
// notes in the melody:
int melody[] = {
  NOTE_C4, NOTE_A3, NOTE_C4, NOTE_A3, 0, NOTE_G3, NOTE_G3,NOTE_G3
};
// note durations: 4 = quarter note, 8 = eighth note, etc.:
int noteDurations[] = {
  2, 2, 2, 2, 4, 4,4
};
Servo myservo; 
int pos = 0; 
void setup() {
  // iterate over the notes of the melody:
  
}
void loop() {
  bool switchState=digitalRead(A3);
  if(switchState){
  for (int thisNote = 0; thisNote < 8; thisNote++) {
    int noteDuration = 1000 / noteDurations[thisNote];
    tone(8, melody[thisNote], noteDuration);
    myservo.attach(9);
    int pauseBetweenNotes = noteDuration * 1.30;
    delay(pauseBetweenNotes);
    // stop the tone playing:
    noTone(8);
  }
    myservo.write(180);              // tell servo to go to position in variable 'pos'
    delay(1000*1.3);                       // waits 15ms for the servo to reach the position
    myservo.write(0);              // tell servo to go to position in variable 'pos'
    delay(1000*1.3);                       // waits 15ms for the servo to reach the position
}
}

As seen in the above code, we tried to make the sound effects that come from the servo motor sound better, by making the delay time between the rotations equal to the pause time between the notes. To control the musical instrument, we used a digital input which is a switch that should be pressed each time to play the sounds again

We really liked how the output looked like, but we believe that we can improve on it by making the servo motor be controlling an object like a drum stick when it is rotating to make it sound as a better musical instrument. Here is a video that shows our implementation.


Final Project

Proposal 

I want to Create a game for kids in my final project. My idea came from watching my little nephew playing with my niece when he showed her her toy animals and made the sounds of the animals. so i want to create a toy were when to connect the head of the animal to the right body it makes the animals sound.

This is how the idea kind of works.

Code(hopefully)

I hope i will be able to use ardino to detect the right head to the right body and use the P5j.s code to be able to detect the and make the sound. I am making this look easy but I am very worried about the code and am not sure how I will figure it out!

Digital & Analog Switch

Concept 

I have inputed both an analog and digital switch to control two LEDs to the same bread board and using the same code. i wanted the digital switch to have a pattern with the red LED and that worked! i also wanted the light detector to turn on when it was dark and I was able to do that! IT was definitely a challenge working with the light detector since i had to rewrite my code a couple of times.

My code  

int buttonState = digitalRead(pushButton);

  if (buttonState == HIGH) {
    digitalWrite(redLEDPin, HIGH);
    delay(20);
    digitalWrite(redLEDPin, LOW);
    delay(300);
    digitalWrite(redLEDPin, HIGH);
    delay(20);
    digitalWrite(redLEDPin, LOW);
    delay(300);
    digitalWrite(redLEDPin, HIGH);
    delay(700);
  }
  allOff();
  delay(1000);

   analogValue = analogRead(LIGHT_SENSOR_PIN); // read the input on analog pin
 
  if(analogValue < ANALOG_THRESHOLD)
    digitalWrite(greenLEDPin, HIGH); // turn on LED
  else
    digitalWrite(greenLEDPin, LOW);
}

This is the main part of my code that controls both LEDs functions.

I tried to draw a circuit, Its not perfect but i enjoyed it

Arduino 

Improvement 

I would like to be able to use the analog switch better since I believe that I am not that a-custom to it yet. I also really want to tidy my breadboard for it to be more organized since I got lost with the wires sometimes


Switch Assignment

Concept 

I wanted to create something that is creative and also has some historical influence. so i thought about a bunch of diffrent ideas. and then it clicked like the light bulb that shows up on top of your heads in cartoons. why don’t i use hats? so i decided to do something unique with the old custom of tipping your hat. tipping your hat is used as a symbol of greeting in cultures in the past, some people still use it to this day!

My Circuit 

So i created a simple circuit the allows the LED to turn on when you tip your hat.

IMG_3691

Thing to improve 

SO i really wanted to wear the hat and be able to tip it but unfortunately the wires were too short. i tried to create a bridge with the foil but it kept failing. i also wanted to create a less obvious piece of foil. but overall i am really happy with how it turned out!

Midterm

Concept

So, my game did not turn out exactly like I wanted it to be which I think is OK. the concept was to have a much more complicated game with different levels, but I don’t think I was able to achieve that. However, I was able to produce a game that I was really proud of I had a maze where the character had to walk through it and I was able to create a character which was able to walk and give the animation of it walking right to left and back and forward which is something I didn’t think was possible prior to this class. I was also able to have a game that is based on luck which was my initial idea the coin is what decides whether you wins or loses and the whole game depends on it so there is no skill involved which was something that I wanted to do with the game since the project was announced.

Inspiration

My inspiration came from the idea of randomness that we talked about during our first couple of classes. being a social science student, my background is in legal studies and in the law everything is relatively a fact so you have to prove the events and you have to make the assumption that nothing is really random. computer languages however depend a lot on randomness especially in the field of I.M. we see a lot of interesting artworks that have created been created from randomness and they all look beautiful in their own sense. And my game I wanted to create the idea of winning being incorporated with such randomness.

code

var Mazeb;
var x1 = 0;
var x2;
var scrollSpeed = 2;

let gameState = "start";
let spritesheet;
let sprites = [];
let direction = 1; // 0 up
let step = 0;
let x;
let y;
let speedx = 3;
let spritesheetintialx = 20;
let spritesheetintialy = 70;

function preload() {
  soundFormats("mp3", "ogg");
  spritesheet = loadImage("walking.png");
  Mazeb = loadImage("Mazebackground.png");
  castle= loadImage("castle.jpeg");
  Flip = loadSound("Coin flip.mp3");
}

function setup() {
  //fullscreen(true);
  // print(Mazeb.width, Mazeb.height);
  createCanvas(700, 600);
  restartGame();
  x2 = width;
  // 12 images across, 4 down, in the spritesheet

  let w = int(spritesheet.width / 12);
  let h = int(spritesheet.height / 4);

  for (let y = 0; y < 4; y++) {
    sprites[y] = [];
    for (let x = 0; x < 12; x++) {
      sprites[y][x] = spritesheet.get(x * w, y * h, w, h);
    } // iterate over rows
  } // iterate over columns

  x = 20;
  y = 70;

  imageMode(CENTER);

  // Display first sprite
  image(sprites[direction][step], x, y);

  //Flip.play()
}

function restartGame() {
  print("Welcome to the dungon");
  print("help me escape");
  y = spritesheetintialy;
  x = spritesheetintialx;
  wonGame = false;
  gameState = "start";
  
}

function draw() {
  if (gameState == "start") {
    drawInstructions();
  } else if (gameState == "playing") {
    drawGame();
  } else if (gameState == "end") {
    drawEndScreen();

  }
  //print(mouseX, mouseY);
}
function drawInstructions() {
  //print('drawing instructions');
  background('#95a8b0');
  // white
  text("Welcome to my dugon", 300, 300);
  text("you have to escape", 300, 320);
  text("Press any key to start", 300, 340);
}

// nothing to do here because all the action
// happens in the keyPressed() callback
//coin
var Coinx = 430;
var Coiny = 380;
var Coinwidth = 70;
var Coinheight = 80;
// rectangle 1
var rect1x = 100;
var rect1y = 0;
var rect1width = 90;
var rect1height = 250;
// rectangle 2
var rect2x = 100;
var rect2y = 250;
var rect2width = 250;
var rect2height = 60;

function drawGame() {
  fill(255,0,0)
 text("Press the space bar",589,200);
  
  text("GO",370,381)
  text("Press L", 420,560 )
  noFill()


  fill("#d8572a");
  // Maze
  rect(rect1x, rect1y, rect1width, rect1height);
  rect(rect2x, rect2y, rect2width, rect2height);
  rect(100, 450, 90, 600);
  rect(100, 450, 250, 60);
  rect(500, 250, 200, 600);
  rect(260, 115, 90, 136);
  rect(260, 75, 600, 40);
  noFill();
  
  
text("GO",430,380)
  // coin
  fill("#fdc500");
  ellipse(Coinx, Coiny, Coinwidth, Coinheight);
  noFill();
  
   if (y > height) {
    // Lost the game!
    wonGame = false;
    // Change to end game state
    gameState = "end";
  }
}
function drawEndScreen() {
  if (wonGame) {
    background("#4cc9f0");
    fill('#ffd60a')
    text("You have escaped", 300, 300);
    text("Press any key to restart", 300, 320);
    noFill()
  } 
  if (lostGame){
    background("#d90429");
    fill('#000814')
    text("You have not made it out.", 300, 300);
    text("Press any key to restart", 300, 320);
    noFill()
  }
}

function mouseClicked() {
  if (
    mouseX > Coinx &&
    mouseX < Coinx + Coinwidth &&
    mouseY > Coiny &&
    mouseY < Coiny + Coinheight
  ) {
    Flip.play();
  }
 if (random() < 0.5){
    print("up");
  } else {
    print("down");
  }
}

//function frameDifference(){
//  capture.loadPixels(255);
//}

function keyPressed() {
  imageMode(CORNER);
  image(Mazeb, x1, 0, width, height);
  image(Mazeb, x2, 0, width, height);

  x1 -= scrollSpeed;
  x2 -= scrollSpeed;

  if (x1 < -width) {
    x1 = width;
  }
  if (x2 < -width) {
    x2 = width;
  }

  // look at sprite sheet to determine
  // which direction is which row
  // if (
  //   mouseX > Coinx &&
  //   mouseX < Coinx + Coinwidth &&
  //   mouseY > Coiny &&
  //   mouseY < Coiny + Coinheight
  // ) {
  //   Flip.play();
  // }
  if (keyCode === DOWN_ARROW) {
    direction = 0;
    y += speedx;
  }

  if (keyCode === LEFT_ARROW) {
    direction = 1;
    x -= speedx;
  }

  if (keyCode === RIGHT_ARROW) {
    direction = 2;
    x += speedx;
    // if(x=>100){
    //   x=45
    // }
    // if(y=rect1height){
    //   x+= speedx
    // }
  }

  if (keyCode === UP_ARROW) {
    direction = 3;
    y -= speedx;
  }

  // Every so often
  // advance to the next sprite
  if (frameCount % speedx == 0) {
    step = (step + 1) % 12;
  }

  // Finally draw paint the sprite

  image(sprites[direction][step], x, y);

  if (gameState == 'start') {
    // Start the game
    gameState = 'playing';
    
  } else if (gameState == 'playing') {
    
    if (key == ' ') {
      // Won game!
      wonGame = true;
      gameState = 'end';
    }
    
  } if (key == 'l') {
      // lost game!
      lostGame = true;
      gameState = 'end';
  }
  return false;
}

At least one shape.  

I created multiple shapes through the rectangles that create the maze and the coin that I made by using an ellipse.

At least one image

I use this sprite sheet with the different images to create The Walking character that goes through the maze. And I create the background with an image of a dungeon that moves along with the advancement of the game

At least one sound

I create a sound that you hear once you click on the coin to simulate the coin flip that decides on random whether you should go up or down

At least one on-screen text

I had many on screen text that had the instructions and the winning and ending commands while I also had the commands that tell you what actions to make once you win or lose

Object Oriented Programming

I created this game to simulate the maze with his story where you should escape from the dungeon


Problems 

Why writing my code I run into many problems that I had to adapt with throughout the way. I wasn’t able to make the borders set so that the character would bump into them and not be able to go through them I try to use either color dedicated blocking, but I wasn’t able to figure out how that worked 100% and I was able to block the character at a certain point but it would go through the whole X axis. anyway, I also had issues with creating the instructions page that I later found out solutions to once I kept rereading my code over 20 times. we just I would have liked the character to either win or lose once they go through either screen instead of having a press command check but I came up with that idea later when I in my project and I didn’t have enough time to write about and implement the code.

TEXT Generator

Concept

i wanted to keep going with the idea of being trapped. so i decided  to make a text that signifies that. The point of the project that i made was it being a cry for help that only shows for flashes of time as if the ball is trying to tell people its message but it’s not that clear so can only see it if you focus. it is clearly in prison since we can see the prison bars around it.

Process 

I made a code creating diffrent variables for mu prisoner ( the ball) and the x and y.

I then used the pre load to input the font i wanted to use which i downloaded for the web

I then imputed the text to the code.

I used my past project in order to create the prison cell .

I then created a class for my bouncing ball.

let myBouncingBall;
let x= 0
let y=0
let spacing = 20;

function preload() {
  font = loadFont("3D.TTF");
}


function setup() {
  createCanvas(400, 400);
  myBouncingBall = new BouncingBall();
  text ("FREE ME PLEASE!!!", 30,100)
  
}


function draw() {
  background(54);
   textFont(font);
  textSize(50);
  noStroke();
  text("FREE ME PLEASE!!!", 30, 100)
   stroke(56);
  if (random(7) < 0.9) {
    noStroke();
    (x, y, random(8, 12));
    fill(random(255), random(0), random(170));
  } else {
    stroke('#6cd8eb');
    line(x + spacing, y + spacing, x, y);
  }
  x = x + spacing; 
  if (x > width) { 
    x = 0;
    y = y + spacing;
  }
   for (let lineX = 0; lineX <= 600; lineX += 9) {
    line(lineX, 0, lineX, height);
  }
  ellipse (width/2, height/2, 154, 154)
  myBouncingBall.move();
  myBouncingBall.collision();
  myBouncingBall.draw();
   
  
}


class BouncingBall {
  constructor() {
    this.xPos = width / 2;
    this.yPos = random(100, 300);
    this.xSpeed = 4;
    this.ySpeed = 7;
  }

  move() {
    this.xPos += this.xSpeed;
    this.yPos += this.ySpeed;
  }
  collision() {
    if (this.xPos <= 150 || this.xPos >= (width - 150)) {
      this.xSpeed = -this.xSpeed;
    }
    if (this.yPos <= 150 || this.yPos >= (height - 150)) {
      this.ySpeed = -this.ySpeed;
    }
  }
  draw() {
    circle(this.xPos, this.yPos, 30);
    
  }
}


Improvements 

this project could have been easier on the eyes since it kind of hurts if you look at it for a long period of time. i would have liked the ball not to lag when you click it sometimes.